AE4400 - Broom UFESA - Free user manual and instructions
Find the device manual for free AE4400 UFESA in PDF.
User questions about AE4400 UFESA
0 question about this device. Answer the ones you know or ask your own.
Ask a new question about this device
Download the instructions for your Broom in PDF format for free! Find your manual AE4400 - UFESA and take your electronic device back in hand. On this page are published all the documents necessary for the use of your device. AE4400 by UFESA.
USER MANUAL AE4400 UFESA
natural_image
Black and white photo of a vacuum cleaner with adjustable arm and handle (no text or symbols visible)AE4400
INSTRUCCIONES DE USO
OPERATING INSTRUCTIONS
MODE D'EMPLOI
INSTRUÇÕES DE USO
GEBRAUCHSANLEITUNG
HASZNÁLATI UTASÍTÁS
NÁVOD K POUŽITÍ
INSTRUCTIUNI DE FOLOSIRE
إرشادات التشفيل
B
O
text_image
Exploded view diagram of a cleaning device with labeled components and internal views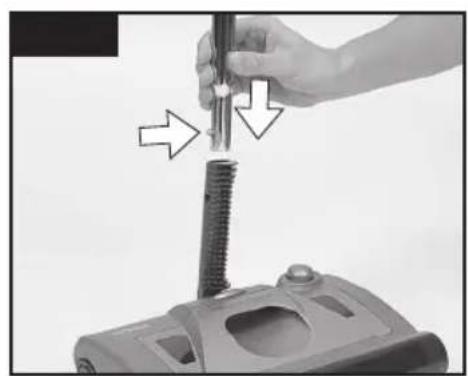
natural_image
Close-up of a hand using a screwdriver to press down a mechanical component (no text or symbols visible)
natural_image
Close-up of hands holding a cylindrical mechanical component with directional arrows indicating movement or force (no text or symbols)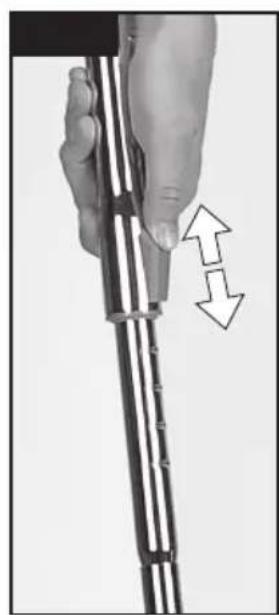
natural_image
Close-up of a hand holding a metal rod with two arrows indicating movement or force direction (no text or symbols)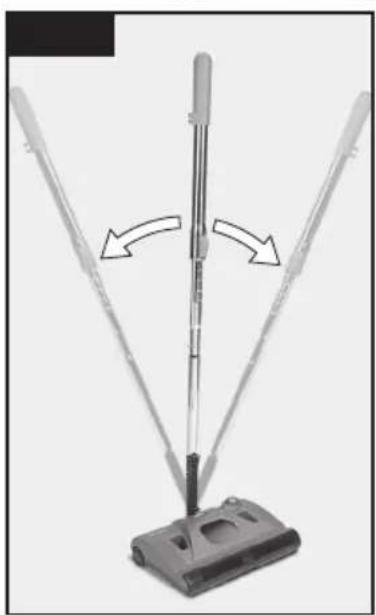
natural_image
Diagram of a vacuum cleaner with directional arrows indicating motion (no text or symbols)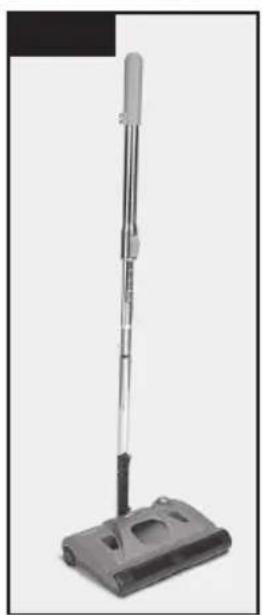
natural_image
Black vacuum cleaner with adjustable arm and base (no text or symbols visible)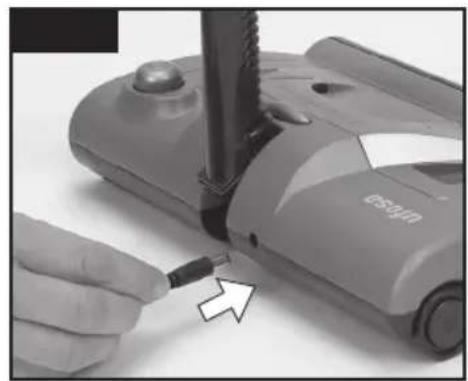
natural_image
Close-up of a hand using a screwdriver to adjust or install a small electronic device (no visible text or symbols)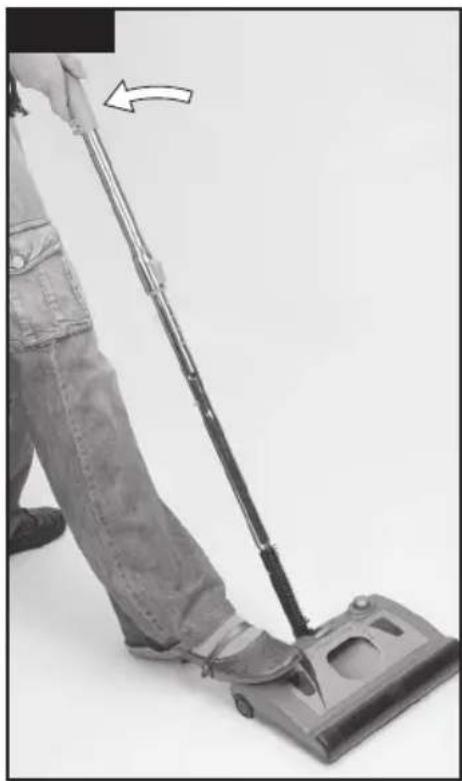
natural_image
Person using a vacuum cleaner with a hand pointing to the handle (no text or symbols visible)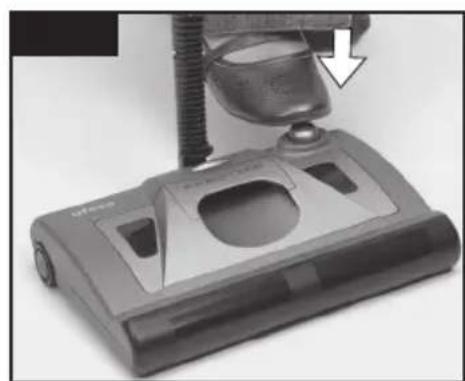
natural_image
Close-up of a vacuum cleaner's base with a mechanical component and a downward arrow indicating motion (no visible text or symbols)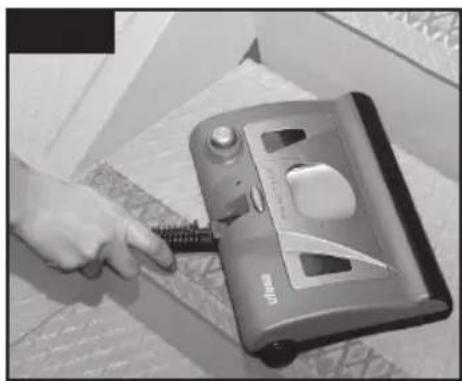
natural_image
Hand using a screwdriver to press down a mechanical device (no visible text or symbols)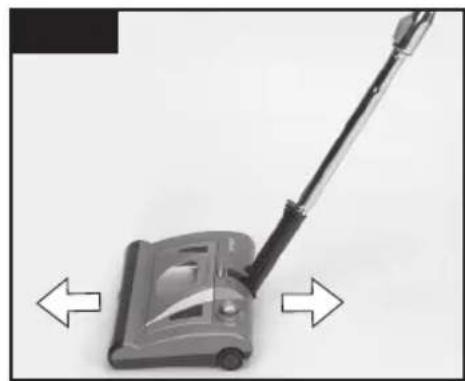
natural_image
Close-up of a vacuum cleaner with directional arrows indicating left and right motion (no text or symbols)
natural_image
Hand pouring liquid into a potted plant with a container, no visible text or symbols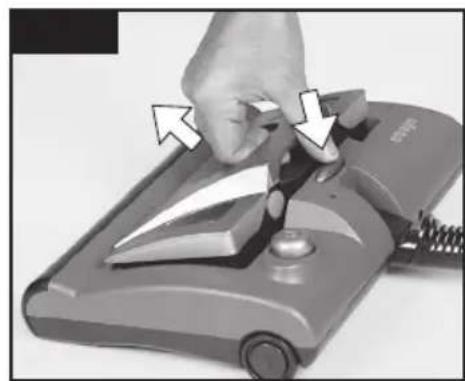
natural_image
Close-up of a hand using a power tool to press down a mechanical component (no visible text or symbols)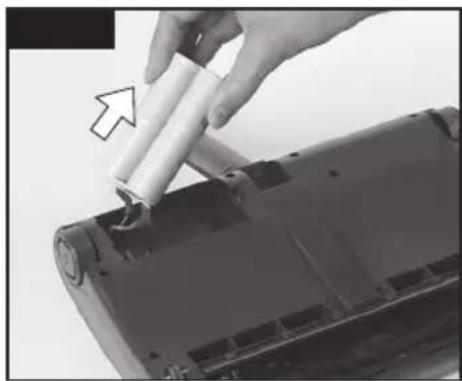
natural_image
Close-up of a hand holding a cylindrical battery component inserted into a device casing (no visible text or symbols)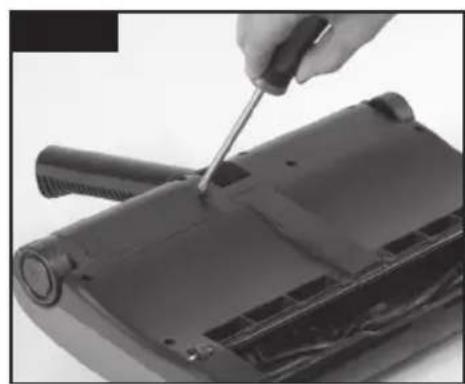
natural_image
Close-up of a hand using a screwdriver to adjust or repair a black electronic device component (no visible text or symbols)- Never use the appliance t mmable liquids or anythin
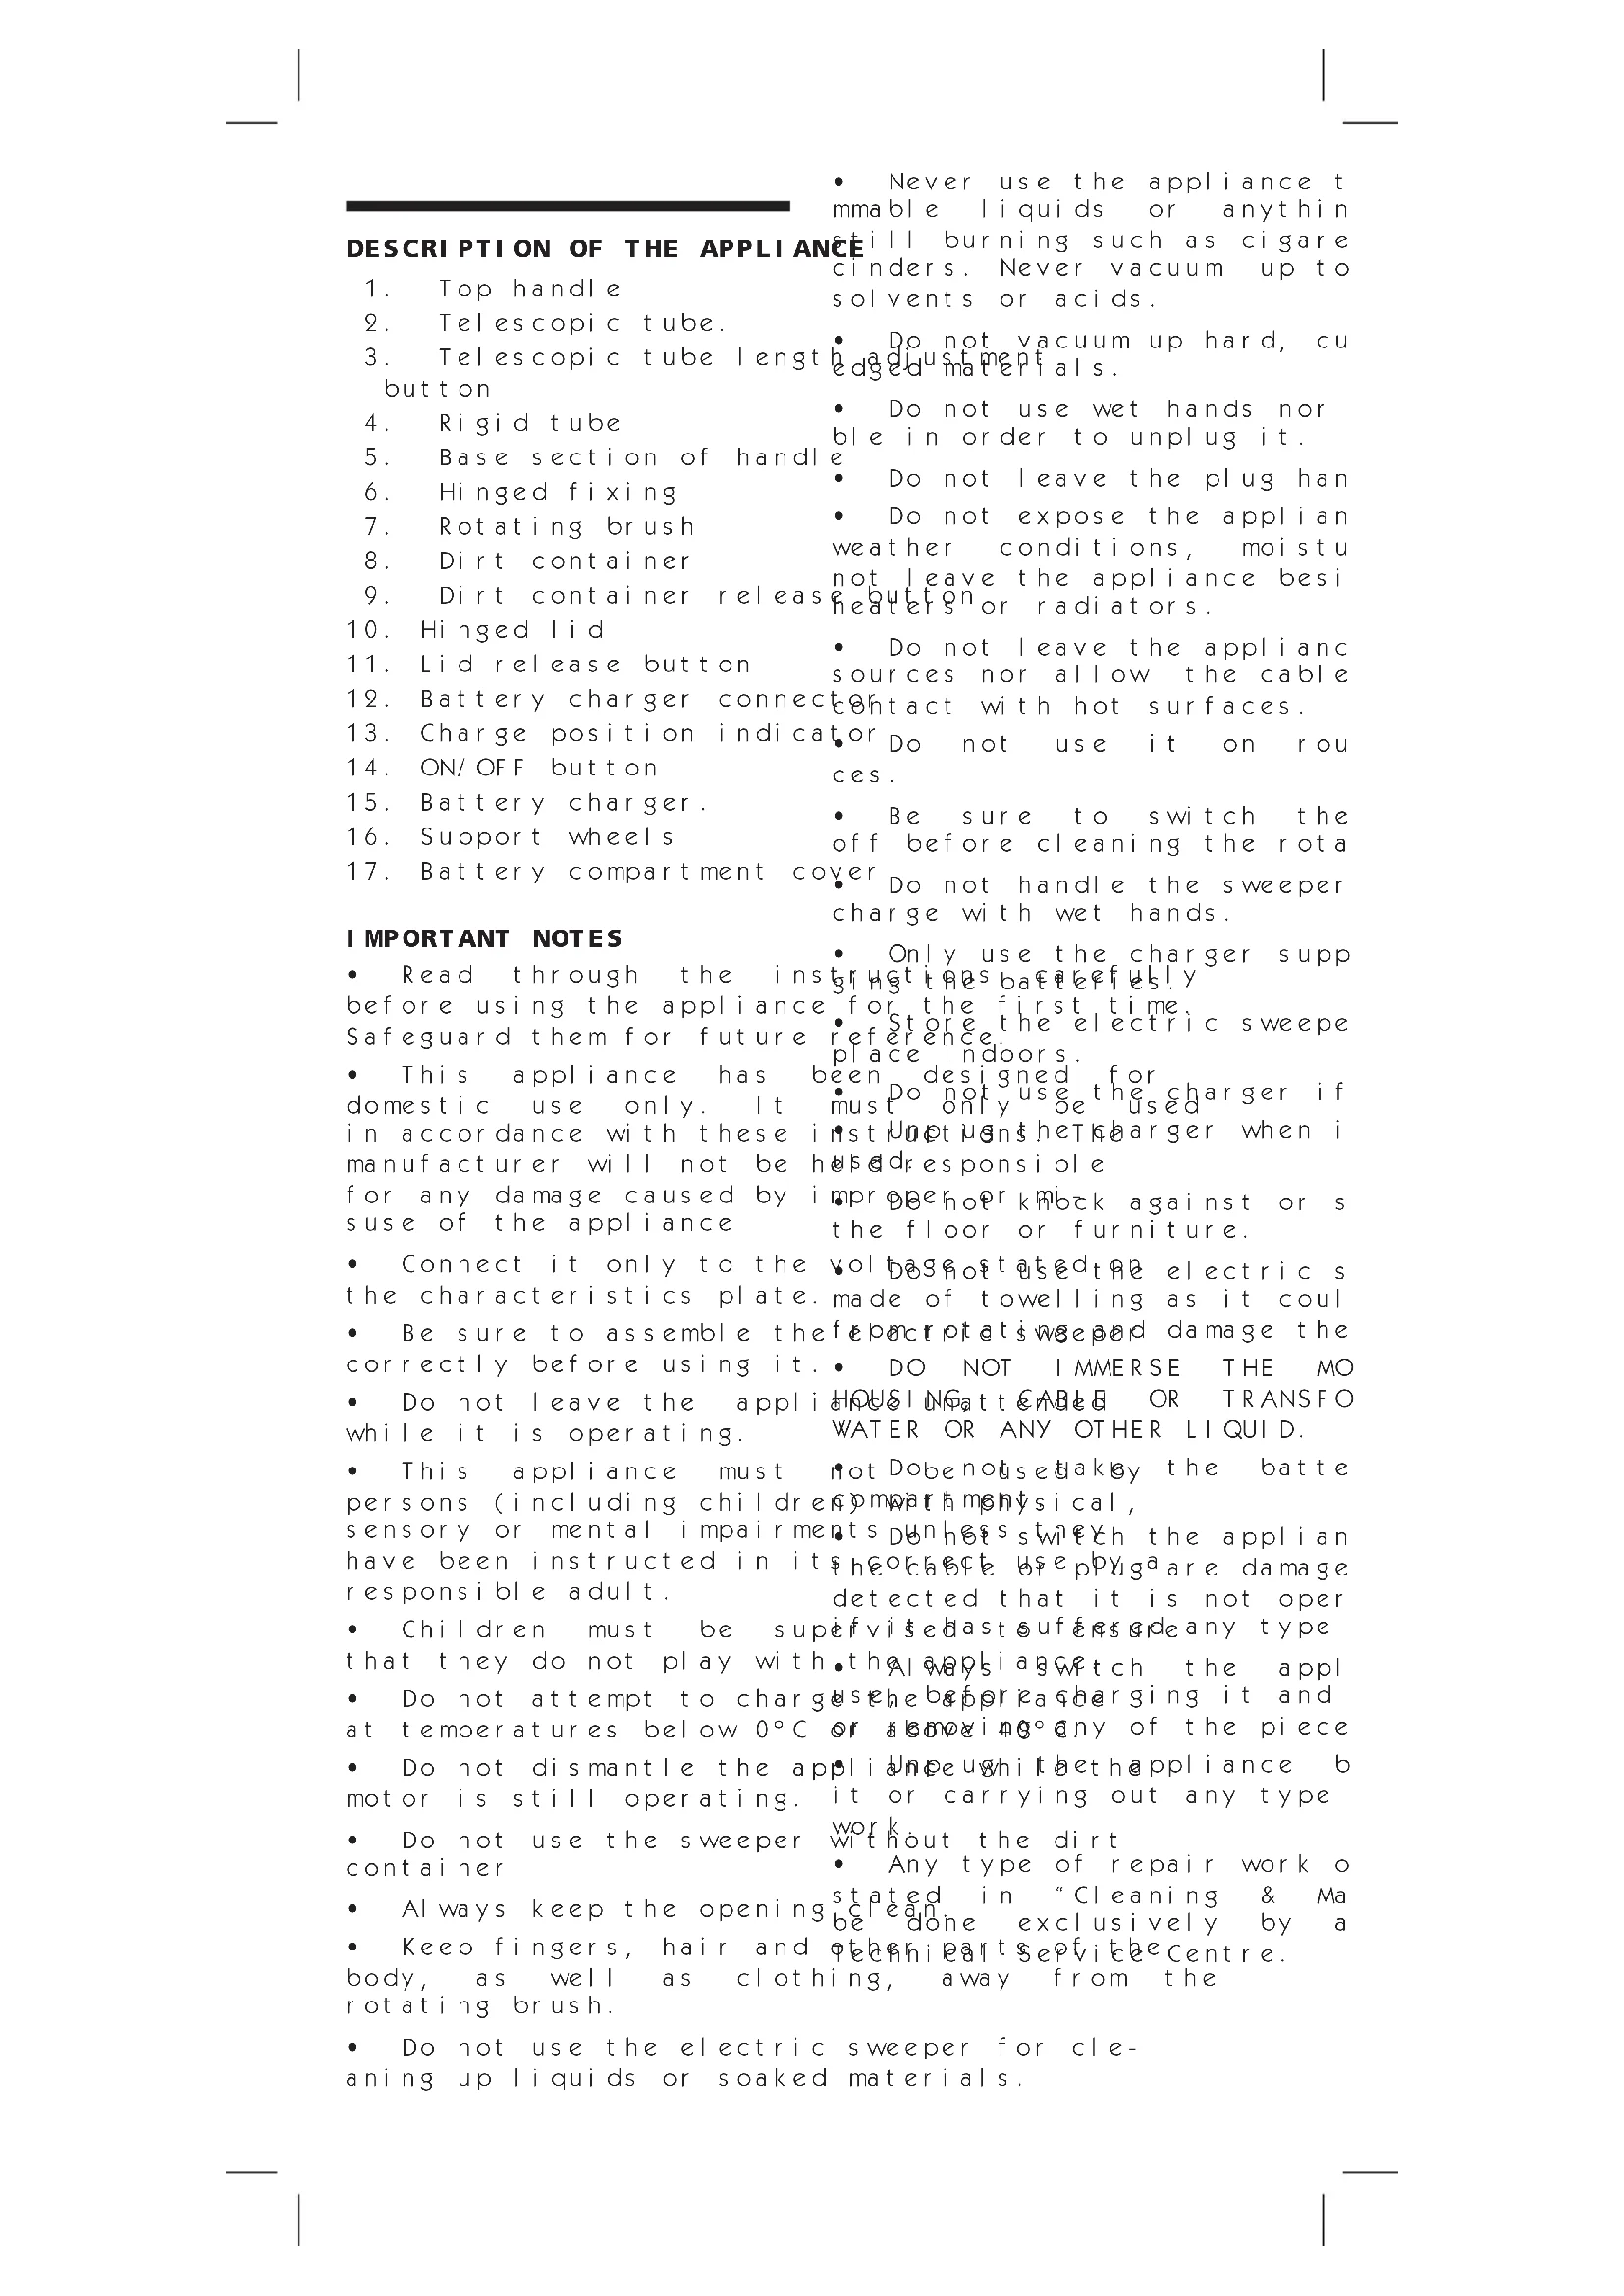
DESCRIPTION OF THE APPLIANCE
it will burning such as cigarette cinders. Never vacuum up to solvents or acids.
-
Top handle
-
Telescopic tube.
-
Telescopic tube length button
• Do not vacuum up hard, cu h a adjustment edged materials.
-
Rigid tube
-
Base section of handl
- Do not use wet hands nor ble in order to unplug it.
-
Hinged fixing
-
Rotating brush
• Do not leave the plug han
-
Dirt container
-
Dirt container releas
- Do not expose the applian weather conditions, moistu not leave the appliance besi button or radiators.
-
Hinged Lid
-
Lid release button
- Do not leave the appliance sources nor allow the cable
- Battery charger connec
contact with hot surfaces.
- Charge position indica
• or Do not use it on rou ces.
- ON/OFF button
- Be sure to switch the off before cleaning the rota
-
Battery charger.
-
Support wheels
• Ver Do not handle the sweeper charge with wet hands.
- Battery compartment co
IMPORTANT NOTES
- Only use the charger supp gr hgt t h e s b a c t e r f i e l y for the first time. - Store the electric sweepe reference indoor.
- Read through the insting the batteries. Before using the appliance for the first time, Safeguard them for future reference. Store the electric sweepe place indoors.
- This appliance has been designed for domestic use only. It must only be used in accordance with these instructions the charger when i manufacturer will not be helped responsible for any damage caused by improper knock against or s use of the appliance the floor or furniture.
- Connect it only to the voltage that used the electric s the characteristics plate. made of towelling as it coul
- Be sure to assemble the effect of a time and damage the correctly before using it. DO NOT IMMERSE THE MO
- Do not leave the appli HOUSINGATT CABLE OR TRANSFO while it is operating. WATER OR ANY OTHER LIQUID.
- This appliance must not dobenously by the batte persons (including children with physical, sensory or mental impairments) unless which the applian have been instructed in its electrical use plug are damage responsible adult. detected that it is not oper
- Children must be supervised last suffer from any type that they do not play with the always switch the appl - Do not attempt to charge the before charging it and at temperatures below 0^ or above any of the piece - Do not dismantle the appliance with the appliance b motor is still operating. it or carrying out any type
- Do not use the sweeper work without the dirt container - Any type of repair work o - Always keep the opening stated in "Cleaning & Ma be done exclusively by a - Keep fingers, hair and other parts of the centre. body, as well as clothing, away from the rotating brush.
- Do not use the electric sweeper for cleaning up liquids or soaked materials.
ASSEMBLING THE APPLIANCE Assembling the handle fo per:
Recharge the batteries af do not wait the batterie drained. See section refe Charging".
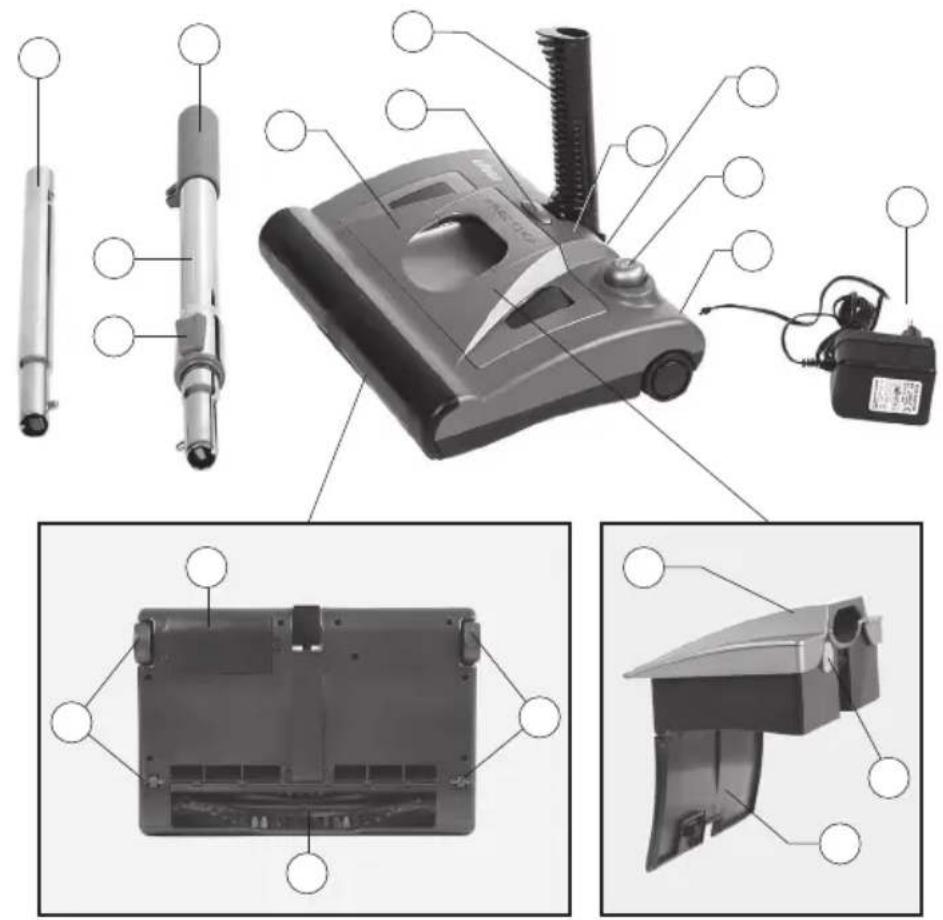
Figure 1. Attach the rigid tube (4) to the base section of the handle (5).
Figure 2. Attach the telescopic tube (2) to the rigid tube (4). If the appliance is being the appliance before cleaning moving the adjustment button (3) and sliding it out to the desired length.
Figure 4. Once the handle for the electric appliance sweeper has been assembled, places it can be running water folded back to the upright washer position, even allowing the sweeper to clean the appliance with a s the left and right. th.
Figure 5. The handle on the Dosweepesecabrasive products be locked into the upright application. For use on walls and when storing it. To remove the dirt container
CHARGING THE BATTERY
Empty the dirt container aft
Charge up the vacuum cleaner, the battery release button for approximately 16 hours contar news upward. for the first time.
Figure 6. Insert the charge dirtj a c o n t a h e r o v t o a d u the battery charger (12) on the p e l a s b o t t o n (11) to o The charge indicator (13) w i d l o h i g h e b o s e T h i s i n d i c a t o r w i l l r e m a i n l i t a s l o n g t h e c o n t a n e r b a c k v a t o c u m c l e a n e r i s p l u g g e d y o u n f i n d e v i t d i f f i c u t t o s l o b a t t y i s f u l l y c h a r g e d. T h e v e v e h u m a g r e a n o s m a l l p i e c n e r w i l l b e c o m e w a r m w h i l e a s t i s p a c h i n g. p a p e r c l i p T h i s i s q u i t e n o r m a l d w i l l n o t t i n f e r f e r e o r, w with t h e a p p l i a n c e ' s saf e t y o n o t h e p e r a t e r g n d e o f t h e b a s e T h e v a c u m c l e a n e r c a n a l w a y c a b e t h e m t o f o and t r y t o f i c h a r g e w h i n t i t i s n o t i n u s e T h i s w i l l e n s u r e t h a t t h e b a t t y i s a l w a y s f u l l y c h a r g e d a n d r e a d y f o r u s e.
IMPORTANT: Please make sure that the wheels or rotati cuum cleaner must be switched before charging it. After each use, dirt may have checked to the wheels or rotati thread and for other such part to become caught up in these
OPERATING INSTRUCTIONS
Carefully clean the brush an necessary use scissors to cu
Figure 7. Unlock the handl bafromandet hroads, rage position by placing your foot on the base of the sweeper to stop it from moving and then pull the handle back.
Figure 8. Press the On/Off button (14) with your foot.
Figure 9. Move the sweeper backwards and forwards at normal speed.
When finished, switch off the sweeper by pressing the On/Off button (14) again.
Figure 10. The sweeper can also be used as a hand-held appliance, to do this remove the handle and hold the sweeper by the base section of the handle.
After each use, empty the dirt container (8), see section entitled "Cleaning and maintenance".
METHOD FOR REMOVING THE BATTERIES:
ADVICE ON DI SPOSAL:

Our goods come in op

To protect the environmentpackaging. This basically put this product in winton-choonaeminating mater hold rubbish at the ho### bef hainted over to the useful life. disposal service as secon
This appliance contains ^r NP ^a _i MH batteries
that must be taken out of the appli a product complies recycling. Directive 2002/96/CE.
Do the following to remove
wheelie bin symbol shown appliance indicates th
Figure 13. Using a small screwdriver to remove the voltage the battery cover (17) at the back of the included appliance.
On the inside you will find that the pothe-for electri ries are fixed into the appliances or returned to
Figure 14. Pull them out and remove the similar connectors attached to them. Under current refuse disp users who fail to take disca Deposit the batteries in the special contact collection ners provided by your local authorities penalized correct disposa Similarly, to dispose of the public encement that the end of its useful life, your card and processed ecologi authorised technical service environment and allow
used in the product to be re information on available schemes contact your local r or the shop where the p chased. Manufacturers and responsible for ecological cessing and disposal of prod directly or via a public sys
Your local town council with information about how to obsolete appliances.
TROUBLESHOOTING GUI DE
| Problem Possible cause Possible | remedy |
| It does not operate 1. Batteries charge from 2. Rotating brush blocked the brush | is charged |
| Floor brush does the tray is full Empty the tray pick up dirt The unit needs Recchange it | 2. The unit needs |
| The rotating stops but may be blocked by dirt 1. Cl | 2. The unit is ti |
| Dust escapes from that tray is full Empty it electric sweeper The unit is ti BedStand the sweep | 2. The unit is ti |
ean
DESCRIPTION DE L'APPAREIL
Para as extrair, realize

The Ground Truth image displays a single, solid horizontal line, which is a stylistic or background element (like a ruled paper line). According to Rule 2, such lines must be ignored by the OCR result. The provided OCR content is "____", which consists of underscores. Underscores are not equivalent to a solid line and are not permitted under the “Stylistic/Background Lines (Ignore)” rule. Outputting underscores for a stylistic line is incorrect because it misinterprets the line as a placeholder fill-in-the-blank area. Since the OCR output incorrectly rendered a stylistic line as underscores (which should be ignored), this violates the rule. Therefore, the OCR result is inconsistent with the Ground Truth.
[Non-Text]
[Non-Text]
[Non-Text]
[Non-Text]
[Non-Text]
[Non-Text]
[Non-Text]
[Non-Text]
[Non-Text]
[Non-Text]
[Non-Text]
[Non-Text]
[Non-Text]
[Non-Text]
[Non-Text]
[Non-Text]
[Non-Text]
[Non-Text]
[Non-Text]
[Non-Text]
[Non-Text]
[Non-Text]
[Non-Text]
[Non-Text]
[Non-Text]
[Non-Text]
[Non-Text]
[Non-Text]
[Non-Text]
[Non-Text]
[Non-Text]
[Non-Text]
[Non-Text]
[Non-Text]
[Non-Text]
[Non-Text]
[Non-Text]
[Non-Text]
The Ground Truth image displays a single, solid horizontal line, which is a stylistic or background element (like a ruled paper line or separator), not a placeholder for text. According to Rule 2, such stylistic/background lines must be ignored by the OCR result. The OCR content provided is "", which consists of no characters. This correctly represents the line in the GT by ignoring it entirely. Since the OCR output includes no underscores for this line, this complies with the “Stylistic/Background Lines (Ignore)” rule. Therefore, the OCR result is consistent with the Ground Truth.
[Non-Text]
[Non-Text]
[Non-Text]
[Non-Text]
[Non-Text]
[Non-Text]
[Non-Text]
[Non-Text]
[Non-Text]
[Non-Text]
[Non-Text]
[Non-Text]
[Non-Text]
[Non-Text]
[Non-Text]
[Non-Text]
[Non-Text]
[Non-Text]
[Non-Text]
[Non-Text]
[Non-Text]
[Non-Text]
[Non-Text]
[Non-Text]
[Non-Text]
[Non-Text]
[Non-Text]
[Non-Text]
[Non-Text]
[Non-Text]
[Non-Text]
[Non-Text]
[Non-Text]
[Non-Text]
[Non-Text]
[Non-Text]
[Non-Text]
[Non-Text]
The Ground Truth image displays a single, solid horizontal line, which is a stylistic or background element (like a ruled paper line). According to Rule 2, such lines must be ignored by the OCR result. The provided OCR content is "____", which consists of underscores. Underscores are not equivalent to a solid line and are not permitted under the “Stylistic/Background Lines (Ignore)” rule. Outputting underscores for a stylistic line is incorrect because it misinterprets the line as a placeholder fill-in-the-blank area. Since the OCR output incorrectly rendered a stylistic line as underscores (which should be ignored), this violates the rule. Therefore, the OCR result is inconsistent with the Ground Truth.
[Non-Text]
[Non-Text]
[Non-Text]
[Non-Text]
[Non-Text]
[Non-Text]
[Non-Text]
[Non-Text]
[Non-Text]
[Non-Text]
[Non-Text]
[Non-Text]
[Non-Text]
[Non-Text]
[Non-Text]
[Non-Text]
[Non-Text]
[Non-Text]
[Non-Text]
[Non-Text]
[Non-Text]
[Non-Text]
[Non-Text]
[Non-Text]
[Non-Text]
[Non-Text]
[Non-Text]
[Non-Text]
[Non-Text]
[Non-Text]
[Non-Text]
[Non-Text]
[Non-Text]
[Non-Text]
[Non-Text]
[Non-Text]
[Non-Text]
[Non-Text]