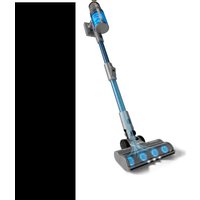
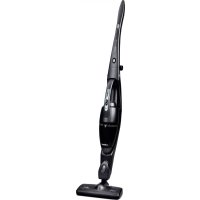
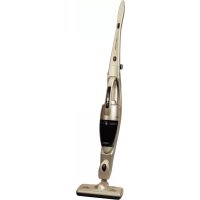
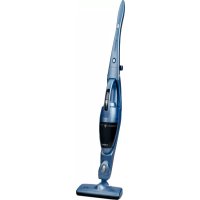
Inspire U5 Digital - Broom UFESA - Free user manual and instructions
Find the device manual for free Inspire U5 Digital UFESA in PDF.

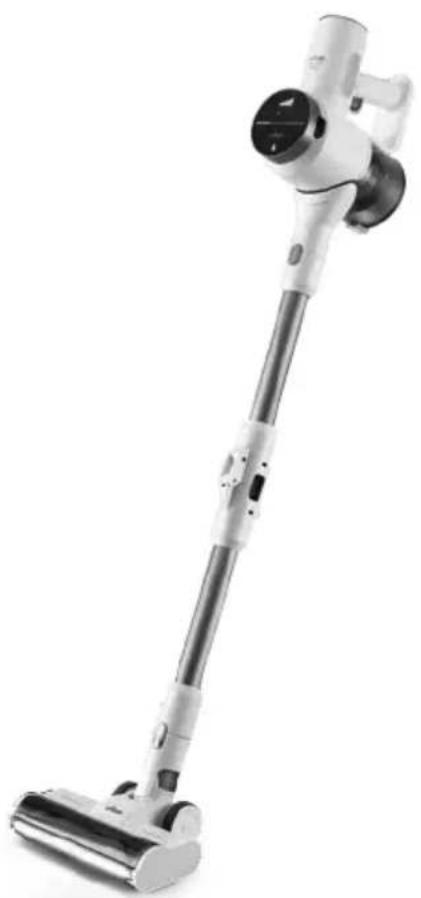
| Product type | Cordless stick vacuum |
| Brand | UFESA |
| Model | Inspire U5 Digital |
| Power supply | Built-in rechargeable battery, mains adapter (mains voltage according to rating label) |
| Suction power | 3 adjustable levels (ECO, MID, MAX) via touch screen |
| Display | Digital screen showing battery level and selected power |
| Main brush | Motorized rotating brush with high brightness front LED |
| Extension tube | Yes, telescopic with lock |
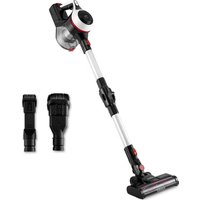
| Included accessories | Mini 2-in-1 brush for corners and furniture, long crevice nozzle, wall mount |
| Filters | Sponge filter and high efficiency washable filters |
| Dust tank capacity | Approximately 0.5 L (estimate) |
| Runtime | Up to 40 minutes (estimate depending on power) |
| Charging time | Approximately 4-5 hours (estimate) |
| Use | Convertible to handheld vacuum by removing the tube |
| Safety | Automatic shutdown in case of overheating, obstruction protection |
| Maintenance | Regular cleaning of the tank, filters and roller brush |
| Battery | Removable, removal required before disposal |
| Repairability | Authorized technical service by B&B TRENDS, S.L. |
| Warranty | In accordance with current legislation (Directive 1999/44/EC) |
| Weight | Approximately 2.5 kg (estimate) |
Frequently Asked Questions - Inspire U5 Digital UFESA
User questions about Inspire U5 Digital UFESA
0 question about this device. Answer the ones you know or ask your own.
Ask a new question about this device
Download the instructions for your Broom in PDF format for free! Find your manual Inspire U5 Digital - UFESA and take your electronic device back in hand. On this page are published all the documents necessary for the use of your device. Inspire U5 Digital by UFESA.
USER MANUAL Inspire U5 Digital UFESA
AE INSPIRE U5 DIGITAL AE INSPIRE Z5 DIGITAL
Aspirador escoba
natural_image
White and silver compact vacuum cleaner with handleless shaft and black circular head (no text or symbols visible)
natural_image
Black vacuum cleaner with extended handle and black plastic body (no text or symbols visible)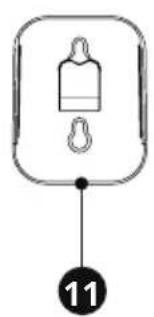
natural_image
Simple line drawing of a bottle with a hook and number 11 below (no text or symbols)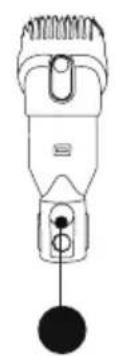
natural_image
Line drawing of a handheld electric shaver with a black circular base and adjustment knob (no text or symbols)

natural_image
Simple line drawing of a mechanical device with a spring and hanging weight (no text or symbols)
natural_image
Technical line drawing of a vacuum cleaner assembly (no text or symbols)Fig.2

natural_image
Diagram showing a mechanical device before and after transformation, with no visible text or symbols.Fig.3
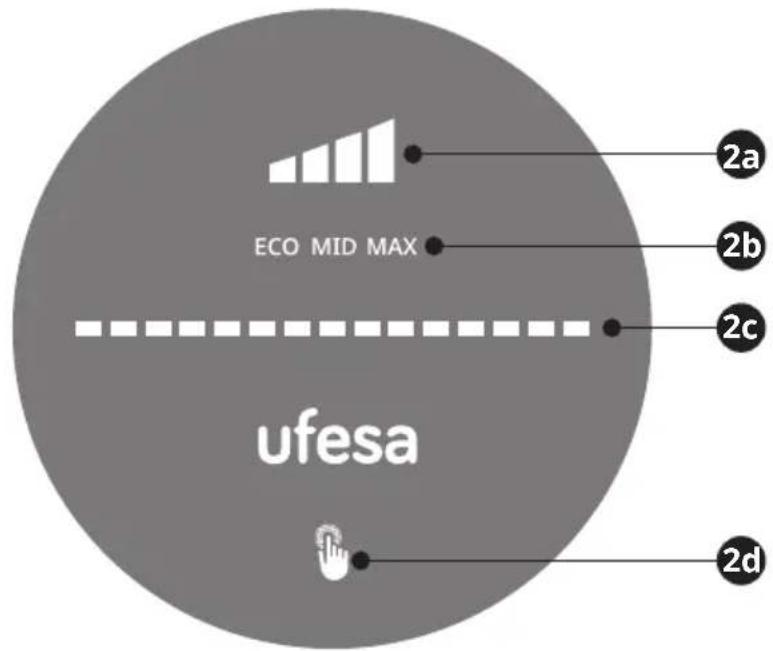
Fig.4
flowchart
graph LR
    A["Hand turning"] --> B["Tool positioning"]
    B --> C["Final pile disposal"]
Fig.5

flowchart
graph LR
    A["Hand with device"] --> B["Step 1: Hand positioning"]
    B --> C["Step 2: Tool handling"]
    C --> D["Step 3: Hand holding"]
    D --> E["Step 4: Tool handling with tool"]
    E --> F["Step 5: Hand holding with tool"]
Fig.6

flowchart
graph LR
    A["Hand Tool Application"] --> B["Device Scan"]
    B --> C["Camera Setup"]
    C --> D["Tool Usage"]
ESPAÑOL
GRACIAS POR HABER ELEGIDO UN PRODUCTO UFESA. ESPERAMOS
QUE SE AJUSTE A SUS NECESIDADES Y SEA DE SU AGRADO.
ADVERTENCIA
WE WOULD LIKE TO THANK YOU FOR CHOOSING UFESA. WE WISH THE PRODUCT PERFORMS TO YOUR SATISFACTION AND PLEASURE.
WARNING
PLEASE READ THE INSTRUCTIONS FOR USE CAREFULLY PRIOR TO USING THE PRODUCT. STORE THESE IN A SAFE PLACE FOR FUTURE REFERENCE.
DESCRIPTION
- Power On/Off button
- Digital screen
2a. Battery indicator light
2b. Suction power levels
2c. Power adjustment bar
2d. Touch button - Dust container
- Battery pack release buttons
- Dust container release button
- Main unit
- Extension tube lock
- Extension tube
- Brush release button
- Motorized power brush
- Wall mount
- 2 in 1 mini corner and furniture brush
- Long crevice nozzle
- Adaptor
SAFETY INSTRUCTIONS
This appliance can be used by children aged from 8 years and above and persons with reduced physical, sensory or mental capabilities or lack of experience and knowledge if they have been given supervision or instruction concerning use of the appliance in a safe way and understand the hazards involved.
Children shall not play with the appliance.
Cleaning and user maintenance shall not be made by children without supervision. The adaptor cable cannot be replaced. If the cable is damaged, the adaptor will be discarded. Plug must be removed from socket-outlet before cleaning or maintaining the appliance.
WARNING: This device can only be used with the adapter model supplied with the device and powered at the safety voltage indicated on the appliance specifications plate. Follow the DEVICE CHARGE instructions in order to charge it. Follow the device BATTERY REMO-VAL instructions for removal of the batteries from the device.
This appliance is intended for use at a maximum altitude of 2000m above sea level.
This symbol means that the appliance is intended to be supplied from a detachable supply unit. Due to the plastic housing of the vacuum cleaner, keep the appliance away from all the heat sources (radiators, stoves, etc). Do not block the vacuum cleaner inlet and outlet openings! Turn off the vacuum cleaner before replacing equipment.
Warning: Risk of entrapment. Do not touch the rotating parts without stopping the appliance.
BATTERY REMOVAL
PLEASE REMOVE THE BATTERY BEFORE DISCARDING IT. The appliance must be disconnected from the supply mains when removing the battery.
Make sure the battery pack is fully discharged.
Press the battery removal button and remove the battery from the product.
PLEASE ENSURE THE BATTERY IS DISPOSED OF SAFELY.
IMPORTANT WARNINGS
Prior to plugging in the product, check that your mains voltage is the same as the one indicated on the product label. The mains connection cable must not be tangled or wrapped around the product during use. Do not pull on the mains connection cable in order to unplug it. Do not use, connect or disconnect the device to the mains with your hands or feet wet. Proceed according to the conservation and cleaning section of this manual for cleaning. Unplug the product immediately from the mains in the event of any breakdown or damage and contact an authorized technical support service. In order to prevent any risk of danger, do not open the device. Only qualified technical personnel from the brand's Official Technical support service may carry out repairs or procedures on the device. Any incorrect use or improper handling of the product shall render the warranty null and void. Only an authorized technical support service center may carry out repairs on this product. This appliance is designed exclusively for domestic use, in no case should be put in commercial or industrial use. In case of misuse or tampering with the product, it will be out of warranty. Do not use the appliance to vacuum liquids (water, etc), sharp objects (pins, pins, nails, glass, etc), incandescent objects (matches, cigarettes). Never use the turbobrush to: Polish floors, suck (Liquids, wet or damp dust, hot ash, burning objects, such as cigarettes, matches, sharp and hard items, such us: razors, pins, thumbtacks, pieces of glass, etc), flour, cement, plaster, printer or photocopier toner, etc.
B&B Trends, S.L. disclaims all liability for damages that may occur to people, animals or objects, for the non-observance of these warnings.
MAIN UNIT ASSEMBLY
Install the battery pack into the appropriate slot of the main unit. It will “click” into place. Insert the connector of the motorized floor head into the base of the extension tube by clicking it into place. Attach the extension tube into the motorized power brush, it will “click” into place. Connect the main unit with the extension tube, you will hear the “click” when it is correctly assembled (Fig. 1)
Extension Tube: Use this for extended reach when using as an upright unit or for those hard-to-reach places.
Motorized power brush: High speed rotation of large roller brush, fast dust removal. Front high bright LED light helps to clean hard floors, tiles and carpets and other dark corners and dead ends. Easily pick up dirt, dust and small debris.
ACCESSORIES ASSEMBLY
Firstly, with the appliance OFF, insert the desired accessory into the main unit via the connector. It will "click" into place. Switch on the appliance and vacuum.
Long crevice nozzle:
Suitable for cleaning all kinds of household joints and narrow locations in the car.
Features a narrow nozzle that makes quick work of vacuuming tight spaces such as corners and hard to reach areas.
Deep clean sofa seams, brackets, window corners, car interiors and other hard-to-teach seams and other dead spots at home.
2 in 1 mini corner and furniture brush:
Use this for vacuuming fabric furnishings such as sofas, armchairs, curtains, car interiors, air conditioners and other areas that require brushing. One touch retractable brush, simultaneous vacuuming and sweeping, efficient dust removal. Slim and soft brushes for deep cleaning of fibers and soft home decorations such as curtains and sofas. Fine bristle brush for deep cleaning of keyboards, door cracks and other small crevices.
BEFORE FIRST USE
- Put the unit to the wall mount.
- Ensure that the air vent and suction pipe are free from blockages and dust. Should they suddenly clogged, switch off the appliance immediately and clear the blockage before attempting to use the vacuum again.
- Remove any sharp or large objects from the path before using this vacuum as these may damage the appliance irreparably.
Battery charging:
Important: The handheld vacuum cleaner will not work when it's charging.
- Place the unit near an electrical power outlet.
- Connect the power adaptor to the charging connector located at the battery pack or at the bottom part on the main unit.
- Connect the charger to the charging socket. There is a progress bar while charging on the LCD screen.
- When it is fully charged, the screen is off. When the appliance is on after fully charged, the progress bar is full.
Disassembly of battery pack:
Press the battery pack release buttons and pull it upwards (Fig. 2).
INSTRUCTIONS OF USE
CAUTION: The vacuum must be fully charged before using for the first time.
- Remove the vacuum cleaner from the wall mount. If using as a handheld unit, disassemble the tube and attach the desired accessory. 2. Use the power ON/OFF button to turn on the appliance.
- Select the proper operation and function through the digital display.
- For a stronger suction, press the power adjustment key to increase the strength, ideal when you are cleaning carpets with a high pile.
- To turn off the vacuum, press the power ON/OFF button again.
DIGITAL DISPLAY FUNCTIONS (Fig. 3)
| 2a | Battery indicator light | Shows the remaining battery level, divided into 4 levels. When it is fully charged, the progress bar is full |
| 2b | Suction power adjustment | Touch the screen to adjust the three suction power (ECO-MID-MAX) |
| 2c | Power adjustment bar | The colour is green for ECO, blue for Medium and red for Max level |
| 2d | Touch button Touch this button for setting the desired suction power | |
MAINTAINING & CLEANING
All the maintenance must be performed after the unit is shut off. Clean the dust cup regularly to avoid any problems. It is recommended to store in a dry place and not to put heavy things on the unit.
Cleaning the dust container: (Fig. 4)
Press the dust container release button to open the dust container and expel trash. Wipe to clean the dust container, do not immerse in water.
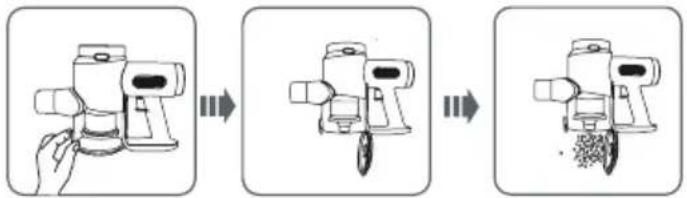
Cleaning the filter: (Fig. 5)
- Open the dust container and dump the dust. Use a tool or dry cloth to clean it.
- Hold the filter and pull it out upwards from the dust container.
- Turn clockwise to remove the sponge filter and the high-efficient filter.
- Rinse the filters thoroughly under the running cold water. Do not use soap or other cleaning solvents.
- COMPLETELY air dry the filters before reassembling. Do not use hair dryer to dry the filter. This may cause the filter to warp.
Important: Make sure the filters assembled properly, otherwise, the fine dust will come into the motor and destroy it.
Cleaning the roller brush: (Fig. 6)
- Remove the motorized power brush from the main unit.
- Press the brush release button and, without releasing it, lift the flap in an upward direction.
- Release the button and remove the brush.
- Carefully clean and remove the hairs and debris from the brush roller. Wipe to clean only, do not use any soap or harsh cleaning solvents. If roller brush becomes damp, allow to dry naturally before replacing.
- For installation, please install in the reverse order of disassembly.
TROUBLESHOOTING
| PROBLEM POSSIBLE CAUSES SOLUTION | ||
| Appliance is not powered on | This can occur if the appliance has been used or stored for an extended period of time | Connect the vacuum to the charger and allow for a full charging cycle to complete |
| Vacuum is stopped suddenly | This will occur if the safety cut-out device has been activated. This device is designed to prevent your appliance from overheating | Ensure the vacuum is turned off, disconnect all accessories and leave to cool down for at least half an hour before attempting to operate again. Try to identify the source of the overheat by checking for blockages in the extension tube motor-drive floor head and accessories. Empty the dust container and clean or replace the filter |
| Suction of the vacuum is reduced | This is probably caused by dust blockages | Turn the vacuum off. Disconnect the floor head, extension tube and any accessories. Check for and remove any blockages from the dustbin filter, air duct, extension tube floor head and accessories |
| Motorized power brush is not rotating | This tends to occur when there are too many fibers wrapped around the brush roll, restricting the movement | Check the maintenance section of this manual for instructions on how to appropriately clean the brush roll |
| Charging indicator light does not flash up | There may be no power reaching the vacuum from the charger | Ensure that power is being supplied to the mains socket and that the charger is turned on.Ensure the charging cable is securely connected to the vacuum.Ensure the mains socket is switched off before checking the charging cable itself. Do not attempt to use if the cable is split, frayed or otherwise damaged.Instead, seek a replacement charger |
| Operation time of the vacuum is less than it used to be | An insufficient charging cycle will result in reduced operation time | Ensure the battery has completed a full charging cycle. There may be reduced energy discharge in the battery. This is normal and gradually occurs in all batteries over time |
PRODUCT DISPOSAL
This product complies with European Directive 2012/19/EU on electrical and electronic devices, known as WEEE (Waste Electrical and Electronic Equipment) and provides the legal framework applicable in the European Union for the disposal and reuse of waste electronic and electrical devices. Do not dispose of this product in the bin, instead deliver it to the electrical and electronic waste collection centre closest to your home.

The product may contain batteries. Remove them before disposing of the product and dispose in special containers approved for this purpose.
FRANÇAIS
NOUS VOUS REMERCIONS D'AVOIR CHOISI UFESA. NOUS ESPÉRONS QUE CE PRODUIT RÉPOND À VOS BESOINS ET À VOS GOÛTS.
AVERTISSEMENT
VEUILLEZ LIRE ATTENTIVEMENT LE MODE D'EMPLOI AVANT D'UTILISER LE PRODUIT. CONSERVEZ-LE DANS UN ENDROIT SÛR POUR POUVOIR LE CONSULTER ULTÉRIEUREMENT.
DESCRIPTION
MUNTATGE DELS ACCESSORIS
B&B TRENDS, SL. guarantees compliance of this product, for the use for which it is, during the period established by the legislation in force in the country of sale. In the case of breakdown during the term of this warranty, users are entitled to repair or else the replacement of the product at no charge if the former is unavailable, unless one of these options proves impossible to fulfil or is disproportionate. In this case, you can then opt for a reduction in price or cancellation of the sale, which must be dealt with directly with the sales vendor. This also covers replacement of spare parts provided that the product has been used according to the recommendations specified in this manual for both cases, and has not been tampered with by any third party that is not authorised by B & B TRENDS, SL. The warranty will not cover any parts subject to wear and tear. This warranty does not affect your rights as a consumer in accordance with the provisions in Directive 1999/44/EC for member states of the European Union.
USE OF WARRANTY
Customers must contact a B&B TRENDS, SL., authorised Technical Service for repair of the product. Since any tampering of the same by anyone not authorised by B&B TRENDS, SL., or the careless or improper use of the same shall render this warranty null and void. You must keep the purchase invoice, receipt or delivery docket in order to exercise your warranty rights. For technical service and after-sales care outside the Spanish territory, please submit your query to the point of sale where you purchased the item.
BON DE GARANTIE
Check out your nearest service station at https://sat.ufesa.com/
ufesa
B&B TRENDS, S.L. · C.I.F. B-86880473