
AE4408 - Broom UFESA - Free user manual and instructions
Find the device manual for free AE4408 UFESA in PDF.

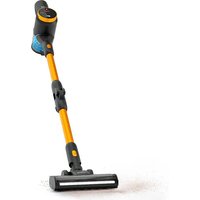
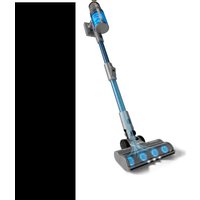
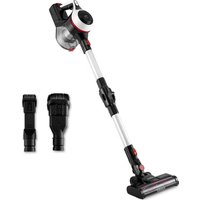
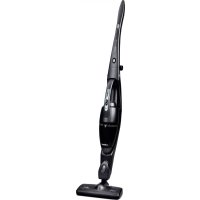
| Product type | Cordless stick vacuum |
| Brand | Ufesa |
| Model | AE4408 |
| Usage | Household |
| Power supply | Rechargeable Ni-MH battery |
| Charger input voltage | 100-240 V ~ 50/60 Hz |
| Estimated runtime | Approximately 20 minutes |
| Charging time | 16 hours |
| Battery type | Built-in Ni-MH |
| Dust container capacity | Approximately 0.5 L |
| Filtration system | Washable cloth filter + nylon filter |
| Motorized brush | Rotating brush for hard floors |
| Manual suction function | Yes, detachable handheld vacuum |
| Approximate weight | 2.5 kg |
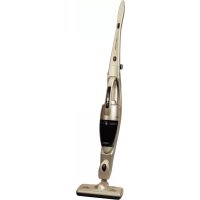
| Total length | Approximately 110 cm |
| Charging stand | Wall or floor mount |
| Charging indicator | LED indicator |
| Maintenance | Empty and wash filters after each use |
| Spare parts available | Filters, battery, brush (at technical service) |
| Safety standards | CE / 2002/96 (WEEE) |
| Color | White and gray |
Frequently Asked Questions - AE4408 UFESA
User questions about AE4408 UFESA
0 question about this device. Answer the ones you know or ask your own.
Ask a new question about this device
Download the instructions for your Broom in PDF format for free! Find your manual AE4408 - UFESA and take your electronic device back in hand. On this page are published all the documents necessary for the use of your device. AE4408 by UFESA.
USER MANUAL AE4408 UFESA
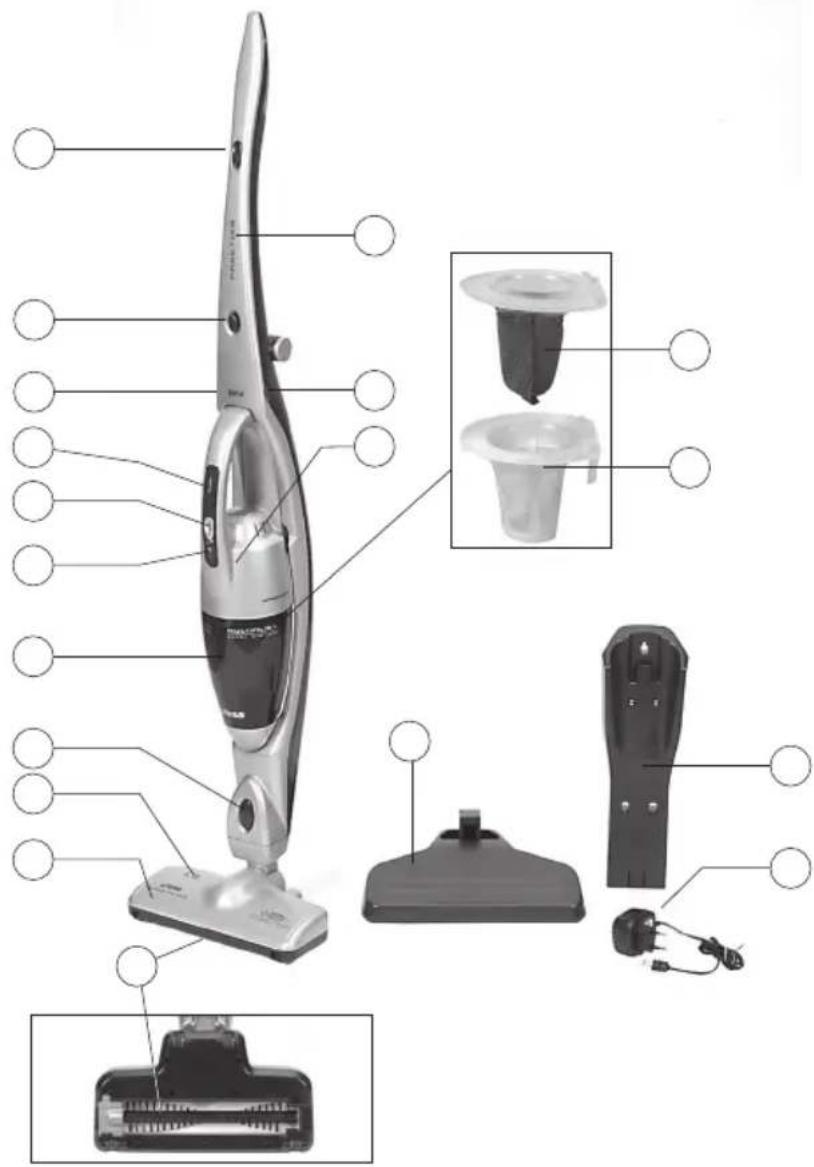
natural_image
Two identical electric vacuum cleaner units displayed side by side (no visible text or symbols)AE4408
AE4413
AE4414
INSTRUCCIONES DE USO
OPERATING INSTRUCTIONS
MODE D'EMPLOI
INSTRUÇÕES DE USO
GEBRAUCHSANLEITUNG
HASZNÁLATI UTASÍTÁS
NÁVOD K POUŽITÍ
INSTRUCTIUNI DE FOLOSIRE
إرشادات التشفيل
B
O

natural_image
Close-up of hands using a tool to lift a curved object, with an arrow indicating motion (no text or symbols visible)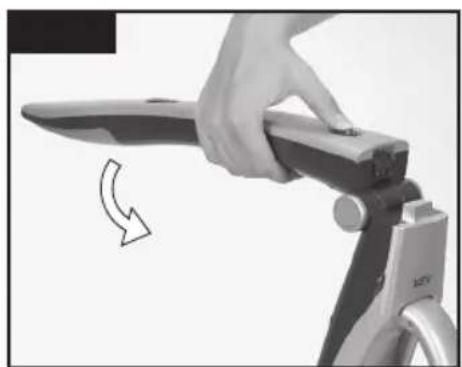
natural_image
Close-up of a hand using a tool to lift a flat blade, with a curved arrow indicating rotation (no text or symbols visible)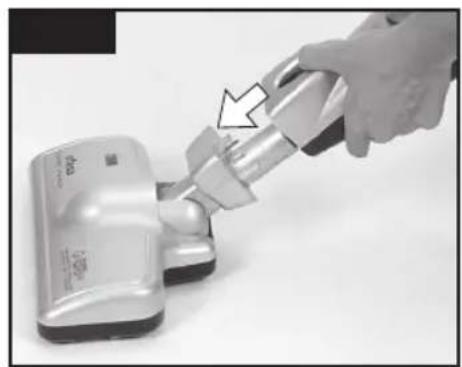
natural_image
Hand using a handheld vacuum cleaner to lift a white plastic component (no visible text or symbols)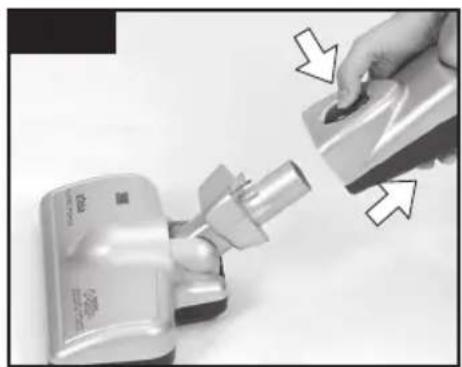
natural_image
Close-up of a hand pressing down on a small electronic device with arrows indicating action (no visible text or symbols)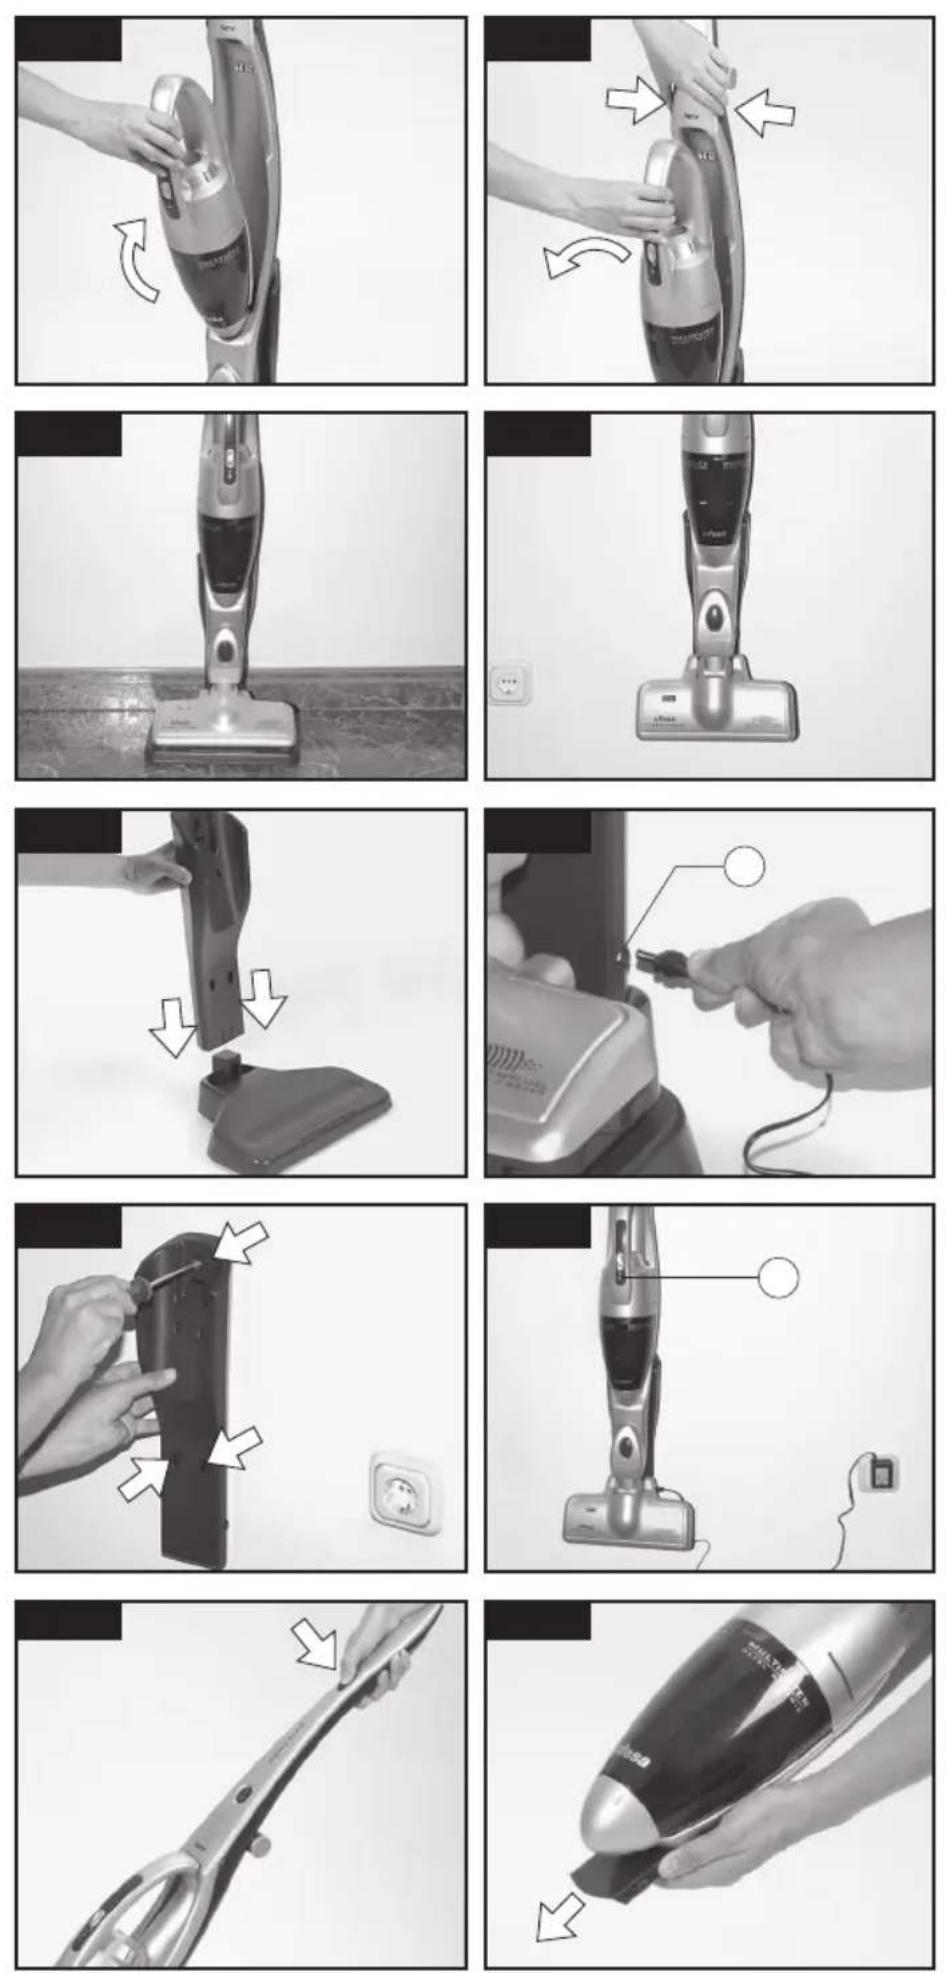
natural_image
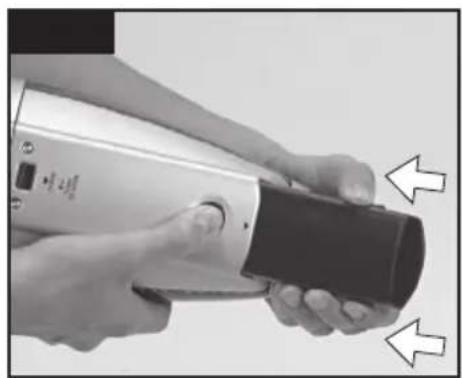
Close-up of hands holding a handheld device with a black handle and directional arrows indicating movement (no text or symbols visible)
natural_image
Close-up of hands holding a metallic cylindrical device with a curved arrow indicating rotation (no text or symbols visible)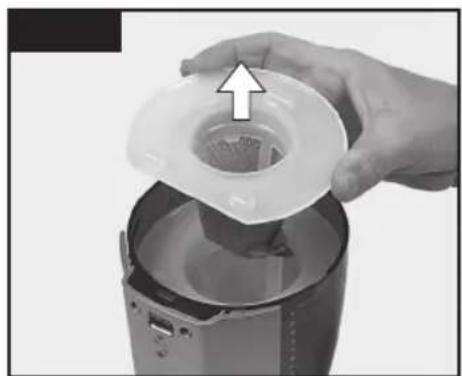
natural_image
Hand pouring liquid into a blender jar with an arrow indicating the process (no text or symbols visible)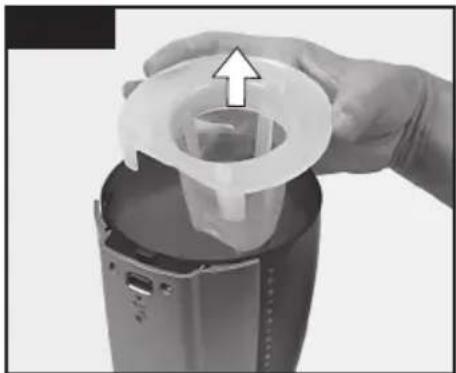
natural_image
Close-up of hands holding a plastic bag with an arrow indicating upward motion (no text or symbols visible)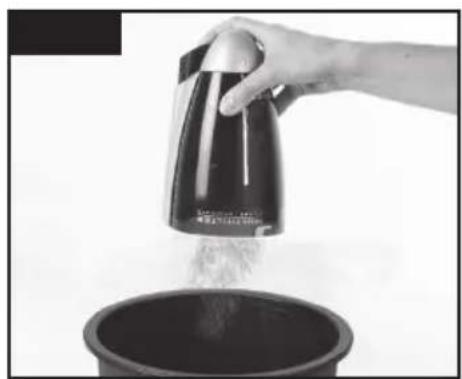
natural_image
Hand pouring liquid from a metal kettle into a dark bowl (no text or symbols visible)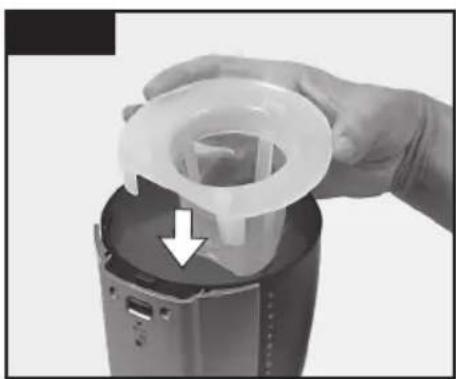
natural_image
Close-up of hands holding a plastic filter component with an arrow indicating a downward motion (no text or symbols visible)
natural_image
Hand pouring liquid into a digital kitchen appliance (no text or symbols visible)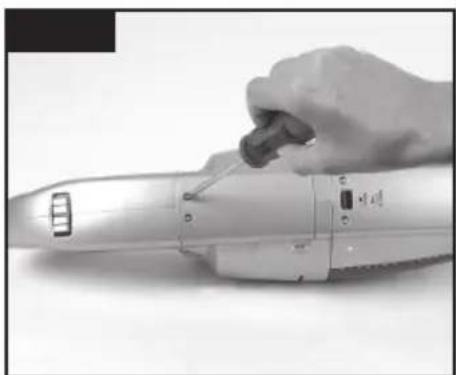
natural_image
Hand using a handheld electric tool to press or install a cylindrical device (no visible text or symbols)
natural_image
Close-up of hands using scissors to cut a mechanical component with wire (no visible text or symbols)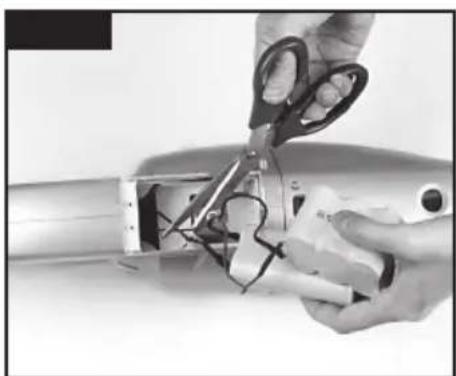
natural_image
Close-up of hands using scissors to cut a mechanical component with wires (no visible text or symbols)The Ground Truth image displays a single, solid horizontal line, which is a stylistic or background element (like a ruled paper line). According to Rule 2, such lines must be ignored by the OCR result. The provided OCR content is "____", which consists of underscores. Underscores are not equivalent to a solid line and are not permitted under the “Stylistic/Background Lines (Ignore)” rule. Outputting underscores for a stylistic line is incorrect because it misinterprets the line as a placeholder fill-in-the-blank area. Since the OCR output incorrectly rendered a stylistic line as underscores (which should be ignored), this violates the rule. Therefore, the OCR result is inconsistent with the Ground Truth.
[Non-Text]
[Non-Text]
[Non-Text]
[Non-Text]
[Non-Text]
[Non-Text]
[Non-Text]
[Non-Text]
[Non-Text]
[Non-Text]
[Non-Text]
[Non-Text]
[Non-Text]
[Non-Text]
[Non-Text]
[Non-Text]
[Non-Text]
[Non-Text]
[Non-Text]
[Non-Text]
[Non-Text]
[Non-Text]
[Non-Text]
[Non-Text]
[Non-Text]
[Non-Text]
[Non-Text]
[Non-Text]
[Non-Text]
[Non-Text]
[Non-Text]
[Non-Text]
[Non-Text]
[Non-Text]
[Non-Text]
[Non-Text]
[Non-Text]
[Non-Text]
The Ground Truth image displays a single, solid horizontal line, which is a stylistic or background element (like a ruled paper line or separator), not a placeholder for text. According to Rule 2, such stylistic/background lines must be ignored by the OCR result. The OCR content provided is "", which consists of no characters. This correctly represents the line in the GT by ignoring it entirely. Since the OCR output includes no underscores for this line, this complies with the “Stylistic/Background Lines (Ignore)” rule. Therefore, the OCR result is consistent with the Ground Truth.
[Non-Text]
[Non-Text]
[Non-Text]
[Non-Text]
[Non-Text]
[Non-Text]
[Non-Text]
[Non-Text]
[Non-Text]
[Non-Text]
[Non-Text]
[Non-Text]
[Non-Text]
[Non-Text]
[Non-Text]
[Non-Text]
[Non-Text]
[Non-Text]
[Non-Text]
[Non-Text]
[Non-Text]
[Non-Text]
[Non-Text]
[Non-Text]
[Non-Text]
[Non-Text]
[Non-Text]
[Non-Text]
[Non-Text]
[Non-Text]
[Non-Text]
[Non-Text]
[Non-Text]
[Non-Text]
[Non-Text]
[Non-Text]
[Non-Text]
[Non-Text]
The Ground Truth image displays a single, solid horizontal line, which is a stylistic or background element (like a ruled paper line). According to Rule 2, such lines must be ignored by the OCR result. The provided OCR content is "____", which consists of underscores. Underscores are not equivalent to a solid line and are not permitted under the “Stylistic/Background Lines (Ignore)” rule. Outputting underscores for a stylistic line is incorrect because it misinterprets the line as a placeholder fill-in-the-blank area. Since the OCR output incorrectly rendered a stylistic line as underscores (which should be ignored), this violates the rule. Therefore, the OCR result is inconsistent with the Ground Truth.
[Non-Text]
[Non-Text]
[Non-Text]
[Non-Text]
[Non-Text]
[Non-Text]
[Non-Text]
[Non-Text]
[Non-Text]
[Non-Text]
[Non-Text]
[Non-Text]
[Non-Text]
[Non-Text]
[Non-Text]
[Non-Text]
[Non-Text]
[Non-Text]
[Non-Text]
[Non-Text]
[Non-Text]
[Non-Text]
[Non-Text]
[Non-Text]
[Non-Text]
[Non-Text]
[Non-Text]
[Non-Text]
[Non-Text]
[Non-Text]
[Non-Text]
[Non-Text]
[Non-Text]
[Non-Text]
[Non-Text]
[Non-Text]
[Non-Text]
[Non-Text]
The Ground Truth image displays a single, solid horizontal line, which is a stylistic or background element (like a ruled paper line or separator), not a placeholder for text. According to Rule 2, such stylistic/background lines must be ignored by the OCR result. The OCR content provided is "", which consists of no characters. This correctly represents the line in the GT by ignoring it entirely. Since the OCR output includes no underscores for this line, this complies with the “Stylistic/Background Lines (Ignore)” rule. Therefore, the OCR result is consistent with the Ground Truth.
[Non-Text]
[Non-Text]
[Non-Text]
[Non-Text]
[Non-Text]
[Non-Text]
[Non-Text]
[Non-Text]
[Non-Text]
[Non-Text]
[Non-Text]
[Non-Text]
[Non-Text]
[Non-Text]
[Non-Text]
[Non-Text]
[Non-Text]
[Non-Text]
[Non-Text]
[Non-Text]
[Non-Text]
[Non-Text]
[Non-Text]
[Non-Text]
[Non-Text]
[Non-Text]
[Non-Text]
[Non-Text]
[Non-Text]
[Non-Text]
[Non-Text]
[Non-Text]
[Non-Text]
[Non-Text]
[Non-Text]
[Non-Text]
[Non-Text]
[Non-Text]
The Ground Truth image displays a single, solid horizontal line, which is a stylistic or background element (like a ruled paper line). According to Rule 2, such lines must be ignored by the OCR result. The provided OCR content is "____", which consists of underscores. Underscores are not equivalent to a solid line and are not permitted under the “Stylistic/Background Lines (Ignore)” rule. Outputting underscores for a stylistic line is incorrect because it misinterprets the line as a placeholder fill-in-the-blank area. Since the OCR output incorrectly rendered a stylistic line as underscores (which should be ignored), this violates the rule. Therefore, the OCR result is inconsistent with the Ground Truth.
[Non-Text]
[Non-Text]
[Non-Text]
[Non-Text]
[Non-Text]
[Non-Text]
[Non-Text]
[Non-Text]
[Non-Text]
[Non-Text]
[Non-Text]
[Non-Text]
[Non-Text]
[Non-Text]
[Non-Text]
[Non-Text]
[Non-Text]
[Non-Text]
[Non-Text]
[Non-Text]
[Non-Text]
[Non-Text]
[Non-Text]
[Non-Text]
[Non-Text]
[Non-Text]
[Non-Text]
[Non-Text]
[Non-Text]
[Non-Text]
[Non-Text]
[Non-Text]
[Non-Text]
[Non-Text]
[Non-Text]
[Non-Text]
[Non-Text]
[Non-Text]
The Ground Truth image displays a single, solid horizontal line, which is a stylistic or background element (like a ruled paper line or separator), not a placeholder for text. According to Rule 2, such stylistic/background lines must be ignored by the OCR result. The OCR content provided is "", which consists of no characters. This correctly represents the line in the GT by ignoring it entirely. Since the OCR output includes no underscores for this line, this complies with the “Stylistic/Background Lines (Ignore)” rule. Therefore, the OCR result is consistent with the Ground Truth.
[Non-Text]
[Non-Text]
[Non-Text]
[Non-Text]
[Non-Text]
[Non-Text]
[Non-Text]
[Non-Text]
[Non-Text]
[Non-Text]
[Non-Text]
[Non-Text]
[Non-Text]
[Non-Text]
[Non-Text]
[Non-Text]
[Non-Text]
[Non-Text]
[Non-Text]
[Non-Text]
[Non-Text]
[Non-Text]
[Non-Text]
[Non-Text]
[Non-Text]
[Non-Text]
[Non-Text]
[Non-Text]
[Non-Text]
[Non-Text]
[Non-Text]
[Non-Text]
[Non-Text]
[Non-Text]
[Non-Text]
[Non-Text]
[Non-Text]
[Non-Text]
bar
| Category | Value | |---|---| | Category 1 | 0.0 | | Category 2 | 0.0 | | Category 3 | 0.0 | | Category 4 | 0.0 | | Category 5 | 0.0 | | Category 6 | 0.0 | | Category 7 | 0.0 | | Category 8 | 0.0 | | Category 9 | 0.0 | | Category 10 | 0.0 | | Category 11 | 0.0 | | Category 12 | 0.0 | | Category 13 | 0.0 | | Category 14 | 0.0 | | Category 15 | 0.0 | | Category 16 | 0.0 | | Category 17 | 0.0 | | Category 18 | 0.0 | | Category 19 | 0.0 | | Category 20 | 0.0 | | Category 21 | 0.0 | | Category 22 | 0.0 | | Category 23 | 0.0 | | Category 24 | 0.0 | | Category 25 | 0.0 | | Category 26 | 0.0 | | Category 27 | 0.0 | | Category 28 | 0.0 | | Category 29 | 0.0 | | Category 30 | 0.0 | | Category 31 | 0.0 | | Category 32 | 0.0 | | Category 33 | 0.0 | | Category 34 | 0.0 | | Category 35 | 0.0 | | Category 36 | 0.0 | | Category 37 | 0.0 | | Category 38 | 0.0 | | Category 39 | 0.0 | | Category 40 | 0.0 | | Category 41 | 0.0 | | Category 42 | 0.0 | | Category 43 | 0.0 | | Category 44 | 0.0 | | Category 45 | 0.0 | | Category 46 | 0.0 | | Category 47 | 0.0 | | Category 48 | 0.0 | | Category 49 | 0.0 | | Category 50 | 0.0 | | Category 51 | 0.0 | | Category 52 | 0.0 | | Category 53 | 0.0 | | Category 54 | 0.0 | | Category 55 | 0.0 | | Category 56 | 0.0 | | Category 57 | 0.0 | | Category 58 | 0.0 | | Category 59 | 0.0 | | Category 60 | 0.0 | | Category 61 | 0.0 | | Category 62 | 0.0 | | Category 63 | 0.0 | | Category 64 | 0.0 | | Category 65 | 0.0 | | Category 66 | 0.0 | | Category 67 | 0.0 | | Category 68 | 0.0 | | Category 69 | 0.0 | | Category 70 | 0.0 | | Category 71 | 0.0 | | Category 72 | 0.0 | | Category 73 | 0.0 | | Category 74 | 0.0 | | Category 75 | 0.0 | | Category 76 | 0.0 | | Category 77 | 0.0 | | Category 78 | 0.0 | | Category 79 | 0.0 | | Category 80 | 0.0 | | Category 81 | -1.5 | | Category 82 | -1.5 | | Category 83 | -1.5 | | Category 84 | -1.5 | | Category 85 | -1.5 | | Category 86 | -1.5 | | Category 87 | -1.5 | | Category 88 | -1.5 | | Category 89 | -1.5 | | Category 90 | -1.5 | | Category 91 | -1.5 | | Category 92 | -1.5 | | Category 93 | -1.5 | | Category 94 | -1.5 | | Category 95 | -1.5 | | Category 96 | -1.5 | | Category 97 | -1.5 | | Category 98 | -1.5 | | Category 99 | -1.5 | | Total (Total) = [sum of individual bars] / [sum of bars for each category] * (sum of bars for each category). The sum of all bars is calculated as [sum of bars for each category].

.17. شاحنprobability.
Brand : UFESA
Model : AE4408
Category : Broom