44320 - Microscope CELESTRON - Free user manual and instructions
Find the device manual for free 44320 CELESTRON in PDF.

User questions about 44320 CELESTRON
0 question about this device. Answer the ones you know or ask your own.
Ask a new question about this device
Download the instructions for your Microscope in PDF format for free! Find your manual 44320 - CELESTRON and take your electronic device back in hand. On this page are published all the documents necessary for the use of your device. 44320 by CELESTRON.
USER MANUAL 44320 CELESTRON
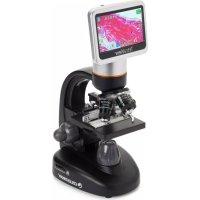
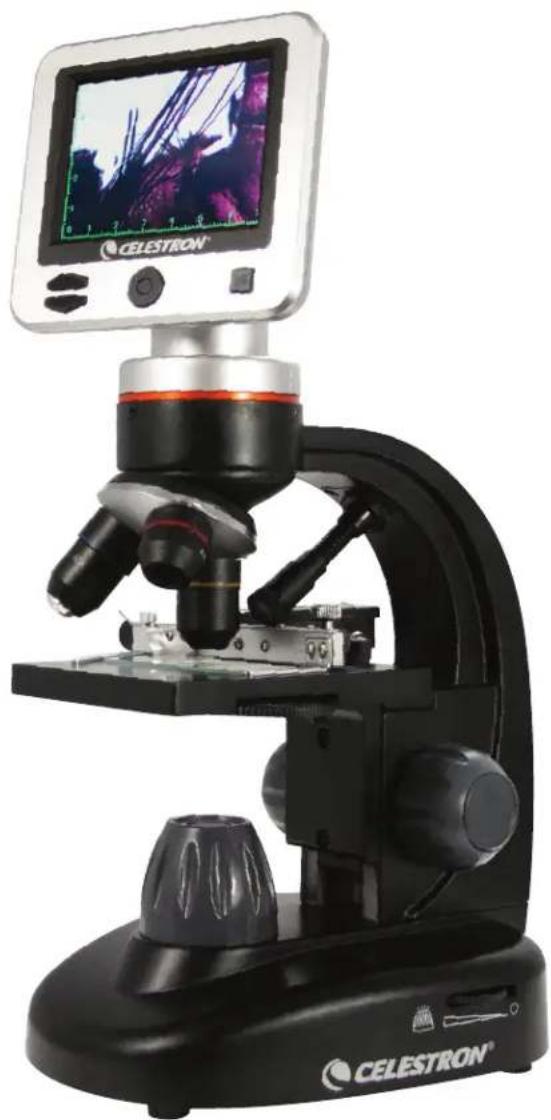
LCD Digital Microscope II
natural_image
CELESTRON® microcomputer with mounted microscope and display screen (no visible text or symbols on main subject)INSTRUCTION MANUAL
MODEL #44341
ENGLISH
Thank you for purchasing the Celestron LCD Digital Microscope II with a 3.5" monitor. Your microscope is a precision optical instrument, made of the highest quality materials to ensure durability and long life. It is designed to give you a lifetime of enjoyment with a minimal amount of maintenance.
Before attempting to use your microscope, please read through the instructions to familiarize yourself with its functions and operations. Refer to the microscope diagrams to locate the parts discussed in this manual. If you run into any problems, see the trouble shooting section later in this manual.
This microscope provides high powers from 40x up to 400x (up to 1600x with digital zoom), ideally suited for examining specimen slides of all kinds. You will view specimens or objects on the LCD monitor instead of through an eyepiece. Specimens are easier to see on the LCD screen compared to a traditional microscope eyepiece. It's also easier to share the view with others. Best of all, you can take snapshots or short videos with the built-in digital camera.
text_image
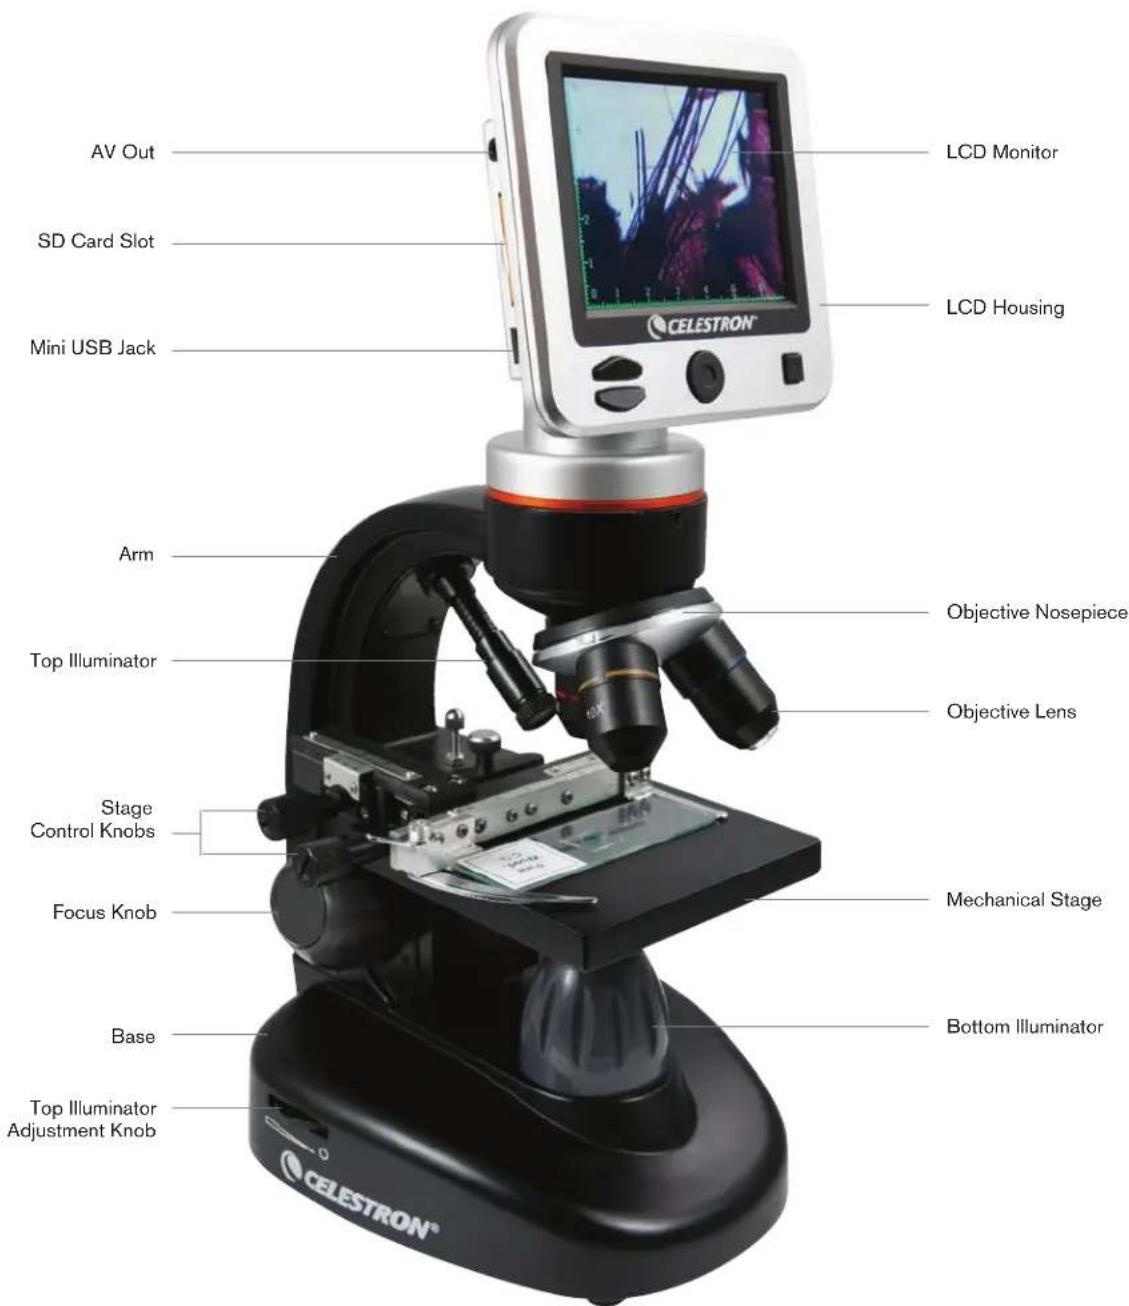
LCD Monitor LCD Housing AV Out SD Card Slot Mini USB Jack Arm Top Illuminator Objective Nosepiece Objective Lens Stage Control Knobs Focus Knob Mechanical Stage Base Bottom Illuminator Top Illuminator Adjustment Knob CELESTRON®FEATURES
| 5MP Built-in Digital Camera3.5" Color LCD Screen4x Objective Lens10x Objective Lens | 40x Objective LensAdjustable Top and Bottom Illuminators2GB SD CardBuilt-in 6-position Filter Wheel | USB 2.0 Cable5 Prepared SlidesDust CoverCarrying Case |
SPECIFICATIONS
| Mechanical Stage 3.5" x 3.5" (88mm x 88mm) | |
| Digital Camera 5 MP CMOS; 10x Magnification in lieu of an eyepiece; 3072 x 1728 pixel array | |
| LCD Monitor | 3.5" with 4x Digital Zoom - High definition digital TFT displayResolution - 320 x 240 pixels, Contrast ratio - 350,Color Support - 262K colors, Brightness/Luminance - 400cd/m2 |
| Focuser Smooth, single motion | |
| Memory | SD card slot, supports up to 32GB card - 2GB SD card included (1,250 snapshots at 5MP, 40 minutes of SD video) |
| USB Cable 1.5m long, 2.0 USB | |
| Filter Wheel 6 Position- Red, Blue, Green | and 1, 3, 6mm DIA aperture |
| Nosepiece 3 Position with click stop | |
| Illumination | Upper and lower, built-in adjustable LEDs |
| Condenser N.A. 0.65 | |
| AC Adapter | Input Universal 100 to 240Volt 50/60HZ |
| Weight/Dimensions | 56.44 oz/1600 g |
| Batteries | 4AA (User supplied- up to 3 hours of use) |
MAGNIFICATION (POWER)
Use the following table to determine the magnification power combinations you can achieve with the LCD Digital Microscope II.
| OBJECTIVE LENS | 4x | 10x | 40x |
| Magnification of image on screen | 40x | 100x | 400x |
| Maximum, using 4x digital zoom feature | 160x | 400x | 1600x |
SETTING UP YOUR MICROSCOPE
- Remove the carrying case from the shipping box.
- Unzip the case, and carefully remove the microscope and other parts and set them on a flat surface.
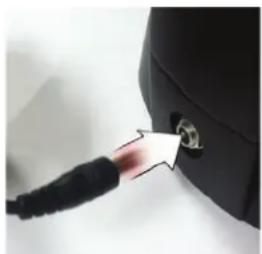
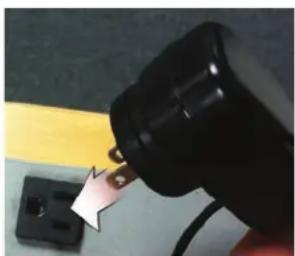
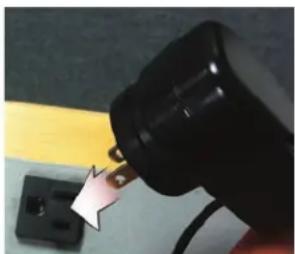
- Insert the cylindrical plug on the end of the AC adapter into the socket on the back of the microscope (Figure 1) and then connect the plug end of the AC adapter into a proper power outlet as shown in Figure 2.
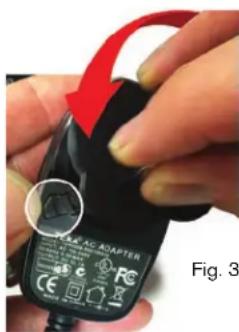
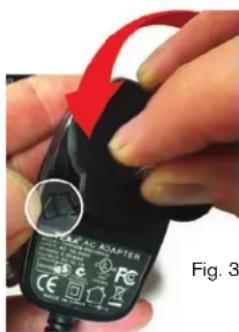
Note: The AC Adapter's plug is interchangeable for use around the world. You can choose among a USA-, UK-, or EU-style plug.
A. To change the plug, push down and hold the small button release (circled in Figure 3). Grasp the plug prongs with your free hand and rotate the plug head counter clockwise 90° to release. Reverse the procedure with your chosen plug head. When the new plug head is secured in place, you will hear a click.
Battery Operation – You can use your microscope without AC power if you choose. This gives you the freedom to operate the microscope outdoors or indoors—anywhere you please. You'll need 4 AA batteries (user supplied). Open the battery door on the bottom of the microscope and insert the batteries according to the battery polarity shown in the battery compartment. After the batteries are installed, close the battery door. Battery life will typically be three hours.
natural_image
Close-up of a black cable being inserted into a small black connector (no text or symbols visible)Fig. 1

natural_image
Close-up of a black electrical plug with a white plastic clip inserted, placed on a surface with a yellow stripe (no text or symbols visible)Fig. 2

text_image
PAP-AC ADAPTER Fig. 3ENGLISH I 2
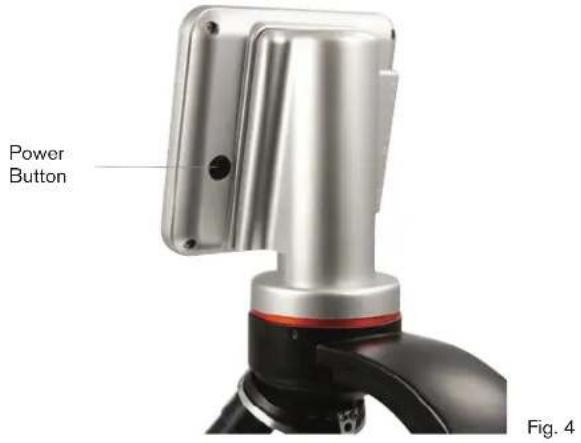
Turn the microscope on by pressing and holding the POWER button on back of the LCD housing, as shown in Figure 4. Once the Celestron logo appears, you can release the POWER button.
text_image
Power Button Fig. 4LCD Monitor
Your microscope's LCD screen replaces the traditional eyepiece, enhancing the user experience. Whatever you are observing is displayed on the screen for easier viewing, reducing eyestrain and allowing you to easily share the view with others.
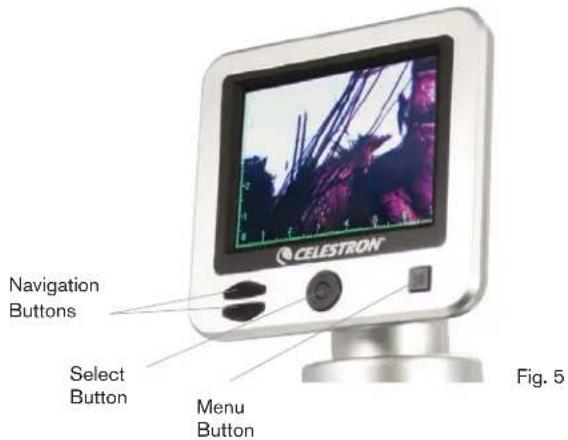
The interface is simple. There are 3 main buttons (as shown in figure 5 below):
MENU button
- Press and hold to access the settings menu
- Press once to switch between camera and video mode
- When in SETTINGS menu, this becomes the BACK button
SELECT button
- Select when in the SETTINGS menu
- TRIGGER snapshots
- START and STOP video
NAVIGATION buttons
- Arrow UP button
- Arrow DOWN button
- When in the MAIN window, this becomes the digital zoom control
ILLUMINATION
text_image
CELESTRON Navigation Buttons Select Button Menu Button Fig. 5Proper illumination is key to ensure a quality image.
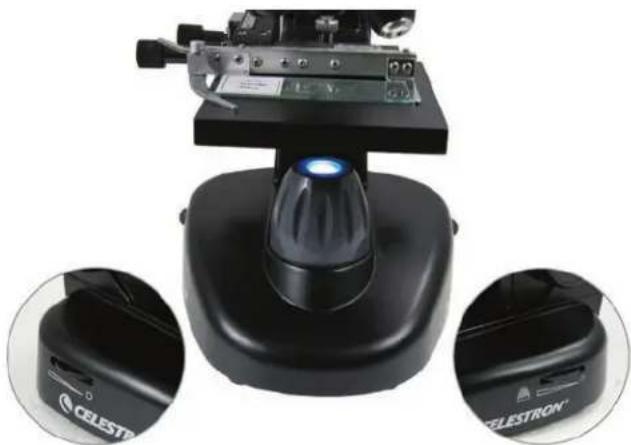
Your digital microscope is equipped both a TOP and BOTTOM adjustable illuminator. Each illuminator has an adjustment wheel located on either side of the base (see Figure 6).
The LCD Digital Microscope II is designed to work with specimens on slides. You will use the BOTTOM illuminator the most. It works by shining light up through the hole in the stage and through a specimen slide.
The TOP illuminator can be used with the BOTTOM illuminator when a slide specimen is thicker than normal. The lowest power for the LCD Digital Microscope II is 40x. Although it is not ideal, 40x can be used for viewing 3D objects, like coins or paper.
natural_image
Close-up of a black scientific instrument with a blue light bulb and control panel, shown in two close-up views (no text or symbols visible on the device itself)Fig. 6
Bottom IlluminatorTop Illuminator
Digital Light Adjustment
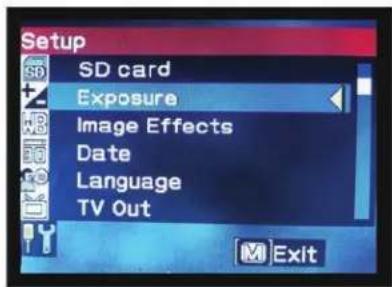
The LCD Digital Microscope adjusts to the light digitally through the EV (Exposure Value) adjustment, similar to a digital camera.
Press and hold the MENU button to access the SETTINGS menu. Scroll to the EXPOSURE tab and press SELECT. In the EXPOSURE window, adjust the EXPOSURE UP (brighter) or DOWN (darker) using the NAVIGATION buttons (see Figure 7).
Tip: Viewing a specimen that is very dark in color decreases the amount of light that can shine through it from the BOTTOM illuminator. To correct this, you will need to increase the exposure setting by adjusting the illuminators to their highest settings.
text_image
Setup SD card Exposure Image Effects Date Language TV Out Exit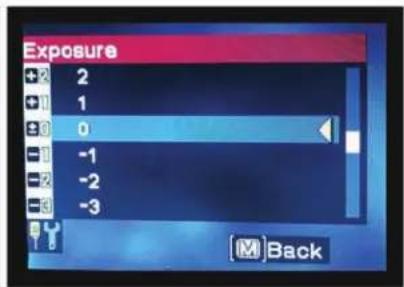
text_image
Exposure + 2 1 0 -1 -2 -3 BackFig. 7
Viewing a Specimen
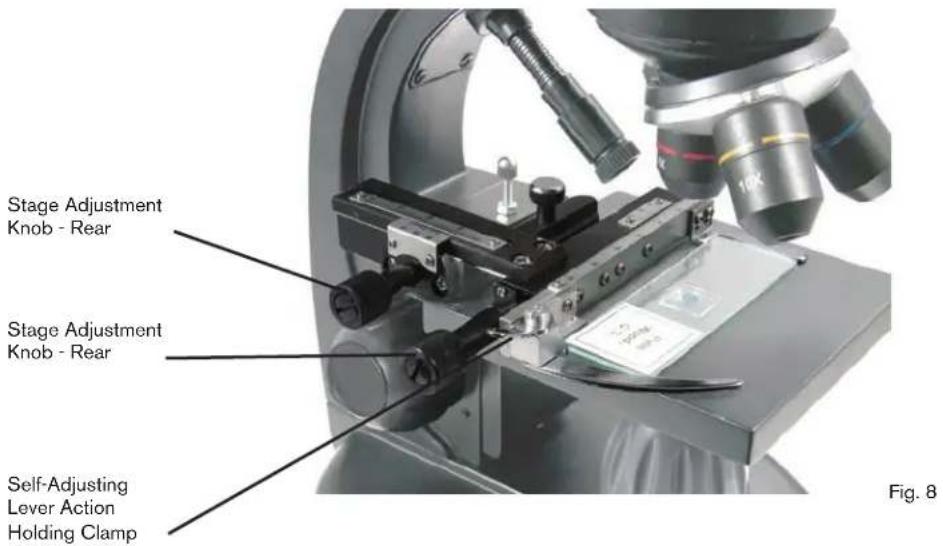
Your digital microscope is equipped with a mechanical stage with adjustment knobs and a self-adjusting lever-action holding clamp (see Figure 8 below).
- Use the thumb arm on the self-adjusting lever action holding clamp to open the clamp.
- Place a specimen slide (3" x 1" / 76.2 x 25.4mm size) inside the holder and release the clamping arm, securing the slide in place.
- Use the stage adjustment knobs to position the specimen over the opening in the stage. The rear stage adjustment knob moves the Y-axis (forward and backward), while the front stage adjustment knob moves the X-axis (side to side).
Note: A vernier scale on both axes allows the exact marking and replication of an object in the field of view.
text_image
Stage Adjustment Knob - Rear Stage Adjustment Knob - Rear Self-Adjusting Lever Action Holding Clamp Fig. 8- Use the objective nosepiece to rotate the objective lenses until the 4x objective lens is directly over the specimen and clicks into place. Always start with the lowest power objective-4x with this microscope, which gives you 40x power-and work your way up to higher powers. At 40x power, you will have the widest field of view and the brightest image.
- Look at the LCD screen while turning the focus knob until the specimen comes into view. You may need to adjust the stage adjustment knobs (See Figure 8 above) to center the specimen.
- With the 4x objective lens, you can vary the power anywhere from 40x to 160x by using the digital zoom. To do this, use the navigation buttons on the LCD. Press UP once and the zoom will adjust to 2x. Each additional press of the button will adjust the zoom by 1x, until it is at 4x. If you press UP again from 4x, it will go back to 1x. Press DOWN (from 1x) and the zoom will adjust to 4x, then 3x, 2x and back to 1x.
- To view in higher powers, rotate the objective nosepiece to the 10x or 40x objective. You will need to refocus after this change.
Tip: When changing objective lenses, lower the stage to ensure there is no contact between any objective lens and the stage surface, which may result damage.
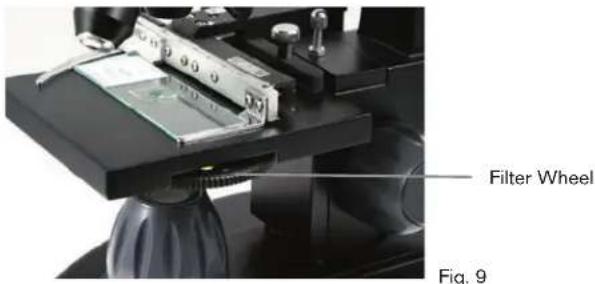
Using Filters
To change the filter settings, rotate the filter wheel (see Figure 9 below). The filter wheel choices are as follows:
Color: Red, Green, Blue
Clear: 1mm, 3mm and 6mm apertures.
Color filters work well with bright transparent specimens. The different diameter apertures (1mm, 3mm, 6mm) can help focus light on a section of a specimen, providing a more detailed image.
text_image
Filter Wheel Fig. 9DIGITAL IMAGING
The LCD Digital Microscope II allows you to take snapshots and take short video clips, without the need to connect to a PC.
Note: Do NOT connect your microscope via USB while shooting images. Doing so may cause damage to your microscope and/or computer.
The included 2GB SD card allows for saving up to 1,250 still images (at highest resolution) or 40 minutes of video.
Settings
Adjusting the settings is a good idea before recording images with your LCD microscope. Take note of your current settings by looking at the main screen.
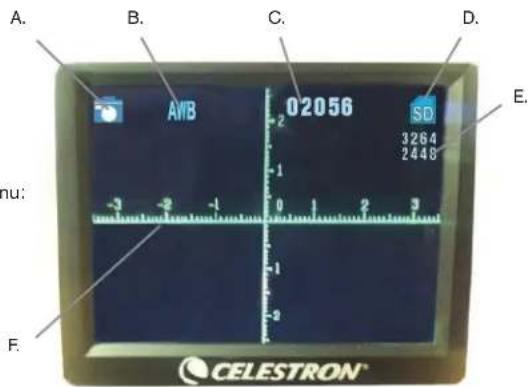
There are a few icons on the screen that give you some valuable information. They are as follows (and as shown in Figure 10):
A. MODE: Video or Still Image

B. DIGITAL FILTER SETTING: The icon shown

Other icons are Monochrome ,Magenta


C. Images remaining on memory
D. SD CARD ICON: Shows card is present
E. IMAGE SIZE: Based on the pixel ratio
F. MEASURING RETICLE: If you see the measuring reticle, that means that feature is turned on
To change the settings, press and hold the MENU button. Here's the breakdown of the Settings menu:
- SD CARD: Select this menu item to format the SD card or View Images on the SD card
- EXPOSURE: Select this menu item to change the EV settings
- IMAGE EFFECTS: Select this menu item to choose between digital filters:

Normal mode-no filter

Monochrome

Magenta

Blue

Green
text_image
A. B. C. D. 02056 SD 3264 2448 E. hu: -3 -2 -1 0 1 2 3 -2 F. CELESTRON®Fig. 10
- DATE: Select this menu item to set the Date and Time and to have the time stamp show up in the video or still image
- LANGUAGE: Select this menu item to choose between 11 languages for the user interface. Choose among, English, Traditional Chinese, Simple Chinese, German, Spanish, Portuguese, Italian, French, Japanese, Korean and Russian
- TV OUT: Choose between the NTSC and PAL settings.
• NTSC (National Television System Committee) is used in Canada, Chile, Costa Rica, Cuba, Dominican Republic, Ecuador, Japan, Mexico Nicaragua, Panama, Peru, Philippines, Puerto Rico, South Korea, Taiwan and U.S.A.
- PAL (Phase Alternating Line) is used in Afghanistan, Algeria, Argentina, Austria, Australia, Bangladesh, Belgium, Brazil, Bulgaria, China, Denmark, Finland, Germany, Hong Kong, Iceland, India, Indonesia, Iraq, Ireland, Israel, Italy, Jordan, Kenya, Kuwait, Liberia, Malaysia, Netherlands, Nigeria, Norway, New Guinea, Pakistan, Singapore, South Africa, South W. Africa, Sudan, Sweden, Switzerland, Thailand, Turkey, Uganda, United Kingdom, United Arab Emirates, Yugoslavia, Zambia and Zimbabwe.
-
IMAGE SIZE: Choose pixel ratios for still shots and video here
-
TIME LAPSE: Select this menu item to take time lapse photos and to set the interval between the photos
-
MEASURE: Select this menu item to turn the measuring reticle on and choose between two styles and 3 display colors
-
DEFAULT SETTING: Returns all settings to their default values, which are as follows.
Mode: Camera or Still Shot Imaging
Exposure: +0
Image Effects: Normal
Date: Off
Language: English
TV Out: NTSC
Image Size: 2560 x 1920
Time Lapse: Off
Measure: Off
Taking Images
- STILL IMAGES: To take a still image, make sure you first install your included 2GB SD card (or your own SD card, maximum. size 32G) into the SD card Slot on the LCD housing. Make sure you are in camera mode by confirming the camera icon is displayed on the LCD screen. When ready, press the SELECT button and the image will be saved to the SD card.
- VIDEO: Make sure you are in the VIDEO mode and the icon is displayed on the main screen. Begin recording by pressing the SELECTION button. When video is recording the recording icon REC will appear on screen and blink. To stop recording, press SELECTION button again. Note: Inserting or removing an SD card while the LCD is on may cause the LCD to shut down and/or could damage the SD card.
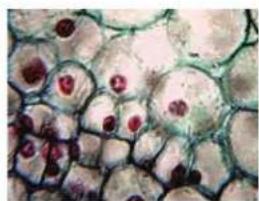
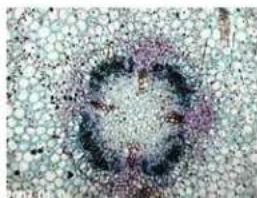
Sample Images
The following specimen images left to right below were taken at 40x, 100x, 400x of Vicia Faba Young Root C.S.
natural_image
Microscopic view of a circular biological structure with dark and light regions, possibly a cell or tissue sample (no text or symbols visible)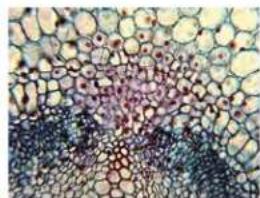
natural_image
Microscopic view of plant tissue showing cellular structures (no text or labels)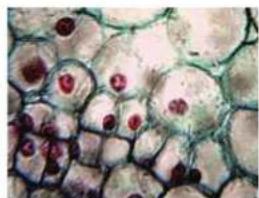
natural_image
Microscopic view of biological cells with visible nuclei and cytoplasmic structures (no text or labels)Reviewing and Managing Your Images
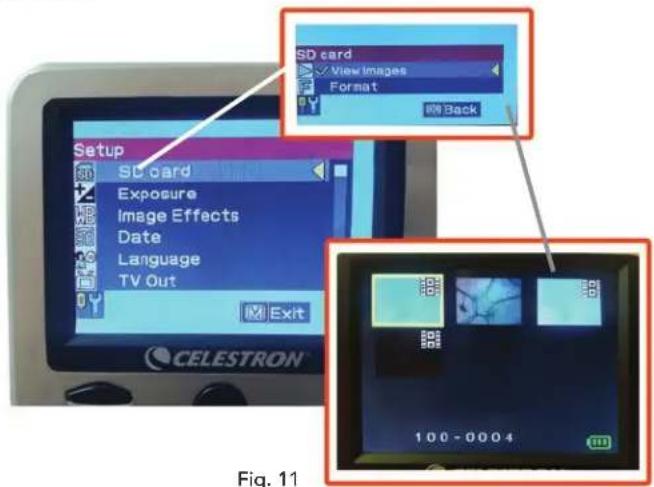
You can review and manage your snapshots and videos that are saved on the SD card.
- Press and hold the MENU button until the SETTINGS menu opens. Press the SELECTION button when the SD CARD menu item is highlighted (see Figure 11).
- Select the VIEW IMAGES menu item. Then scroll using the NAVIGATION buttons to the image you want to see. Press SELECT and the image will fill the screen. When you press the NAVIGATION buttons in this screen, the microscope will scroll through all the images you have stored on the SD card. The process is the same for video. To review the video, use the SELECTION button.
text_image
Setup SD card Exposure Image Effects Date Language TV Out Exit SD card View Images Format Back CELESTRON Fig. 11Transferring Your Images
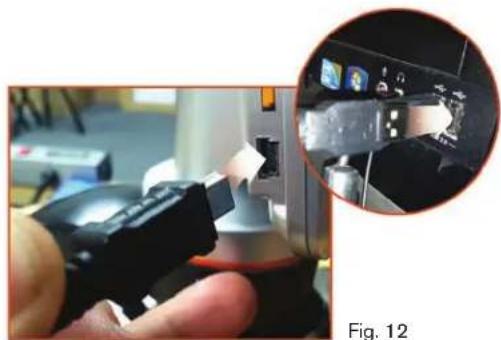
To transfer images to a PC or Mac, you need to have a free USB port on your computer.
Note: Do not disconnect the USB cable while transferring images or damage may occur.
- Simply plug the cable into the USB port on the microscope (located on the left side of the LCD screen housing) and the other end in an available USB port on your computer as shown in Figure 12. The microscope will be recognized as an external drive (much like a digital camera). You can drag and drop, open from a program, or double click a file to open and then save to your computer.
- Because all the memory is on the SD card, you can also remove the card form the SD slot and download using a card reader.
natural_image
Close-up of a hand using a device to interact with a control panel, showing a close-up inset (no visible text or symbols)TROUBLE SHOOTING
If the image quality does not look right or there is no image, try the following:
- Make sure the AC adapter is plugged in to an AC power source and attached to the microscope securely and correctly.
- Make sure you have the illuminators turned on with maximum brightness adjustment. (This is the normal position).
- Make sure the objective lens you have chosen is set correctly and it has clicked in the right position.
- Make sure that the filter wheel is set correctly at a click position so that the illuminated light comes up properly.
- Make sure the specimen slide is correctly fit into the clamp on the mechanical stage and that it is properly centered.
- If the stage is wobbly or erratic in movement, make sure all screws on the top and side of the stage are tight, especially the two very small screws to the left of the long stage knob (see Figure 8).
CARE, MAINTENANCE, AND WARRANTY
Your Celestron microscope is a precision optical instrument and should be treated with care at all times. Follow these care and maintenance suggestions and your microscope will need very little maintenance throughout its lifetime.
- When you are done using your microscope, remove any specimens left on the stage.
- Turn off the illuminator switch.
- Turn off the LCD monitor.
- Unplug the power cord.
• Always place the plastic bag or dust cover over the microscope when not in use or when being stored. - Store the microscope in a dry and clean place.
- Be very careful if using your microscope in direct sunlight to prevent damage to the microscope or your eyes.
- When moving your microscope, carry it by the "arm" with one hand and not by the focuser knob, LCD monitor, etc. Then, put your other hand under the base for support.
- Clean the outside surfaces (metal and plastics) with a moist cloth.
• Always unplug any cords before cleaning.
- Never clean optical surfaces with cloth or paper towels as they can scratch optical surfaces easily.
- Blow off dust with a camel's hair brush or an air blower from optical surfaces.
- To clean fingerprints off of optical surfaces, use a lens cleaning agent and lens tissue available at most photo outlets. When cleaning, do not rub in circles, as this may cause streaks and scratches to occur.
- Never disassemble or clean internal optical surfaces. This should be done by qualified technicians at the factory or other authorized repair facilities.
- When handling glass specimen slides, use care as the edges can be sharp.
WARRANTY
Your microscope has a two year limited warranty. Please see the Celestron website for detailed information at www.celestron.com/support/warranties. EEC: This product complies with EEC guidelines in EN61558-2-6:1997 and EN61558-1:1997+A1
CE FC RoHS
FCC Note: This equipment has been tested and found to comply with the limits for a Class B digital device, pursuant to part 15 of the FCC Rules. These limits are designed to provide reasonable protection against harmful interference in a residential installation. This equipment generates, uses, and can radiate radio frequency energy and, if not installed and used in accordance with the instructions, may cause harmful interference to radio communications. However, there is no guarantee that interference will not occur in a particular installation. If this equipment does cause harmful interference to radio or television reception, which can be determined by turning the equipment off and on, the user is encouraged to try to correct the interference by one or more of the following measures:
• Reorient or relocate the receiving antenna.
- Increase the separation between the equipment and receiver.
- Connect the equipment into an outlet on a circuit different from that to which the receiver is connected.
- Consult the dealer or an experienced radio/TV technician for help.
This product is designed and intended for use by those 14 years of age and older. Product design and specifications are subject to change without prior notification.

CELESTRON
©2019 Celestron • All rights reserved • 10-19
celestron.com/pages/technical-support
2835 Columbia Street • Torrance, CA 90503 USA
LCD Digital Microscope II

natural_image
CELESTRON® microcomputer with mounted microscope and display screen (no visible text or symbols on main subject)MODE D'EMPLOI
MODÈLE #44341
FRANÇAIS
natural_image
Close-up of a hand inserting a small white object into a black container (no text or symbols visible)Fig. 1
natural_image
Close-up of a black electrical plug inserted into a small black socket, with a white arrow pointing to the socket (no text or symbols visible)Fig. 2

text_image
PUB-ACI Adapter Fig. 3natural_image
Close-up of a black scientific instrument with a blue light bulb and control panel, shown in two circular insets (no text or symbols visible on the device itself)text_image
Setup SD card Exposure Image Effects Date Language TV Out Exit
text_image
Exposure + 2 1 0 -1 -2 -3 BackFig. 7
natural_image
Microscopic view of a circular, dark-stained structure on a granular background (no text or symbols visible)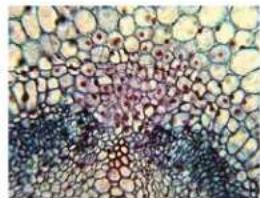
natural_image
Microscopic view of plant tissue showing cellular structures (no text or labels)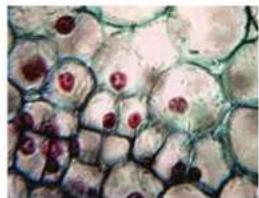
natural_image
Microscopic view of plant cells with visible nuclei and cytoplasm (no text or labels)natural_image
Close-up of a hand holding a small electronic device with a magnified inset showing a close-up of its internal components (no visible text or symbols)DÉPANNAGE
natural_image
CELESTRON® microcomputer with mounted microscope and display screen (no visible text or symbols on main subject)BEDIENUNGSANLEITUNG
MODELL-NR. 44341
DEUTSCH
EINLEITUNG
natural_image
Close-up of a black industrial robotic device with a blue light source, shown in two circular insets (no text or symbols visible on the device itself)text_image
Setup SD card Exposure Image Effects Date Language TV Out Exit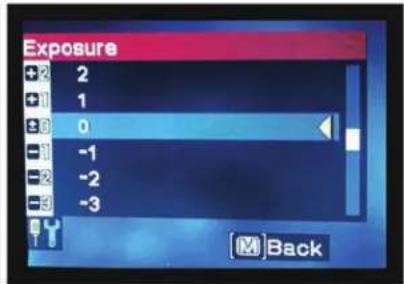
text_image
Exposure + 2 2 + 1 1 + 8 0 - 1 - 2 - 3 M BackAbb 7
natural_image
Microscopic view of a circular biological structure with dark and light regions, possibly a cell or tissue sample (no text or symbols visible)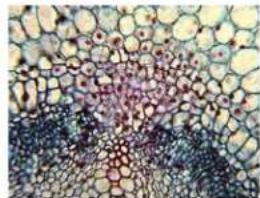
natural_image
Microscopic view of plant tissue showing cellular structures (no text or labels)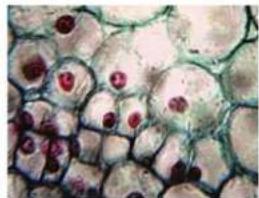
natural_image
Microscopic view of biological cells with visible nuclei and cytoplasm (no text or labels)text_image
SD card View images Format Back Setup SD card Exposure Image Effects Date Language TV Out Exit CELESTRON® 100 - 0004 Abb 11Bilder übertragen
natural_image
Close-up of a hand inserting a device into a device, with an inset showing the internal components (no visible text or symbols)FEHLERBEHEBUNG
natural_image
Black CELESTRON microscope with mounted eyepiece and display screen (no visible text or symbols on main subject)natural_image
Close-up of a black plastic device with a cable inserted, showing a small metallic component (no text or symbols visible)Fig. 1

natural_image
Close-up of a black electrical plug with a white paper clip inserted, next to a small black socket (no text or symbols visible)Fig. 2
text_image
PAP-AC ADAPTER Fig. 3natural_image
Close-up of a black scientific instrument with a light bulb and control panel, shown in two views (no text or symbols visible on the device itself)text_image
Setup SD card Exposure Image Effects Date Language TV Out Exit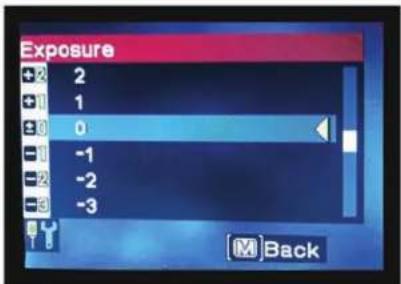
text_image
Exposure + 2 2 + 1 1 ± 3 0 - 1 - 2 - 3 M BackFig. 7
natural_image
Close-up of a microscope with optical components and a green circuit board (no visible text or symbols)Rotella filtri
Fig. 9
IMMAGINI DIGITALI
natural_image
Microscopic view of a circular biological structure with dark and light regions, possibly a cell or tissue sample (no text or symbols visible)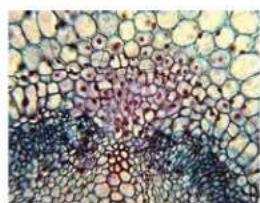
natural_image
Microscopic view of plant tissue showing cellular structures (no text or labels)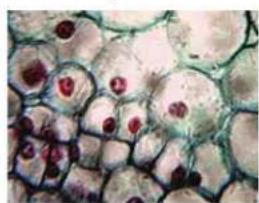
natural_image
Microscopic view of plant cells with visible nuclei and cytoplasm (no text or labels)text_image
SD card View Images Format Back Setup SD card Exposure Image Effects Date Language TV Out Exit CELESTRON Fig. 11 100 - 0004natural_image
Close-up of a hand holding a black mechanical component, with an inset close-up showing a control panel (no visible text or symbols)natural_image
CELESTRON® microcomputer with mounted microscope and display screen (no visible text or symbols on main subject)natural_image
Close-up of a black cable being inserted into a small black connector (no text or symbols visible)Fig. 1
natural_image
Close-up of a black electrical plug inserted into a small black socket, with a white arrow pointing to the socket (no text or symbols visible)Fig. 2
text_image
PAPAC ADAPTER Fig. 3natural_image
Close-up of a black scientific instrument with a light bulb and control panel, shown in two views (no text or symbols visible on the device itself)text_image
Setup SD card Exposure Image Effects Date Language TV Out M Exit Exposure +2 2 +1 1 +3 0 -1 -1 -2 -2 -3 -3 M BackFig. 7
natural_image
Close-up of a microscope objective with optical components and a metallic component (no visible text or symbols)Rueda de filtro
Fig. 9
CÁMARA DIGITAL
natural_image
Microscopic view of a circular cellular structure with dark granular regions (no text or symbols visible)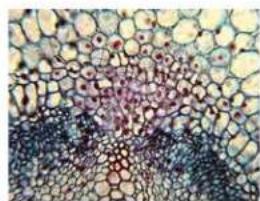
natural_image
Microscopic view of plant tissue showing cellular structures (no text or labels)