
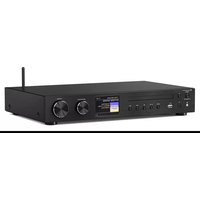
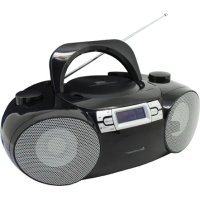
SCD7900SW - Cd player/recorder Soundmaster - Free user manual and instructions
Find the device manual for free SCD7900SW Soundmaster in PDF.
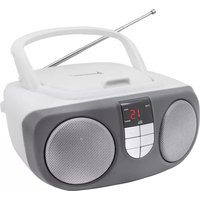
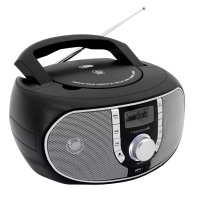
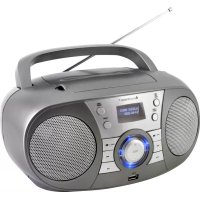
| Product type | CD player/recorder |
| Brand | Soundmaster |
| Model | SCD7900SW |
| Mains power | 230 V AC ~ 50 Hz, 16 W |
| Battery power | 9 V DC (6 R14 type C batteries) |
| Output power | 2 x 1.2 W |
| DAB frequency range | 174.928 to 239.200 MHz |
| FM frequency range | 87.5 to 108 MHz |
| Compatible CD audio formats | Audio CD, CD-R, CD-RW, MP3 |
| USB port | Up to 32 GB (USB 1.1/2.0 compatible) |
| Cassette player | Yes |
| Headphone jack | Yes, 3.5 mm |
| Auxiliary input | AUX 3.5 mm jack |
| Antenna | Telescopic DAB/FM antenna |
| Display | LCD screen |
| Functions | Clock (auto/manual setting), 20 presets, programmed playback (60 tracks), repeat, random |
| Safety | Class 1 laser, do not open, disconnect during thunderstorms |
| Maintenance and cleaning | Dry cloth, no detergents or abrasive products |
| Repairability | Repair only by authorized center, no user-accessible parts |
| Operating temperature | Indoor, dry place |
Frequently Asked Questions - SCD7900SW Soundmaster
User questions about SCD7900SW Soundmaster
0 question about this device. Answer the ones you know or ask your own.
Ask a new question about this device
Download the instructions for your Cd player/recorder in PDF format for free! Find your manual SCD7900SW - Soundmaster and take your electronic device back in hand. On this page are published all the documents necessary for the use of your device. SCD7900SW by Soundmaster.
USER MANUAL SCD7900SW Soundmaster
CD-WIEDERGABE, PAUSE:
Copyright by Woerlein GmbH, 90556 Cadolzburg, www.soundmaster.de
Do not dispose of this product with the normal household waste at the end of its life cycle. Return it to a collection point for the recycling of electrical and electronic devices. This is indicated by the symbol on the product, user manual or packaging.

The materials are reusable according to their markings. By reusing, recycling or other forms of utilization of old devices you make an important contribution to the protection of our environment.
Please contact your local authorities for details about collection points.

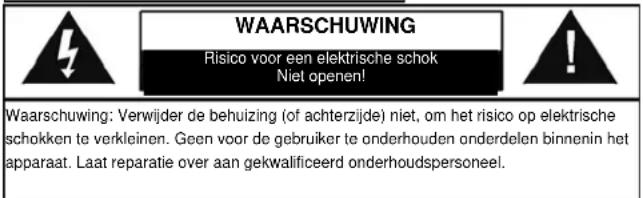
CAUTION - INVISIBLE LASER RADIATION WHEN OPENING THE COVER OR PRESSING THE SAFETY INTERLOCK. AVOID EXPOSURE TO THE LASER BEAM.
WARNING
Risk of electric shock
Do not open

Caution: To reduce the risk of electric shock, do not remove the cover (or back). There are no user serviceable parts inside. Refer servicing to qualified service personnel.

This symbol indicates the presence of dangerous voltage inside the enclosure, sufficient enough to cause electric shock.

This symbol indicates the presence of important operating and maintenance instructions for the device.
Safety, Environmental and Setup Instructions
- Use the device in dry indoor environments only.
- Protect the device from humidity.
Do not open the device. RISK OF ELECTRIC SHOCK! Refer opening and servicing to qualified personnel. - Connect this device to a properly installed and earthed wall outlet only. Make sure the mains voltage corresponds with the specifications on the rating plate.
Make sure the mains cable stays dry during operation. Do not pinch or damage the mains cable in any way. - Disconnect device warning: Main plug is used as the connection, so it should always remain ready operate.
The mains plug is used as the disconnect device, the disconnect device shall remain readily operable. - A damaged mains cable or plug must immediately be replaced by an authorized service center.
- In case of lightning, immediately disconnect the device from the mains supply.
Children should be supervised by parents when using the device. - Clean the device with a dry cloth only. Do NOT use CLEANING AGENTS or ABRASIVE CLOTHS!
- Do not expose the device to direct sunlight or other heat sources.
Install the device at a location with sufficient ventilation in order to prevent heat accumulation. - Do not cover the ventilation openings!
The ventilation should not be impeded by covering the ventilation openings with items, such as newspaper, table-cloths, curtains, etc.
It shall be not be exposed to dripping or splashing and that no objects filled with liquids, such as vases, shall be placed on the apparatus.
The unit should not be exposed to direct sunlight, very high or low temperature, moisture, vibrations or placed in dusty environment. - Never attempt to insert wires, pins or other such objects into the vents or opening of the unit.
- Install the device at a safe and vibration-free location.
- No naked flame sources, such as lighted candles, should be placed on the apparatus.
Install the device as far away as possible from computers and microwave units; otherwise radio reception may be disturbed. - Do not open or repair the enclosure. It is not safe to do so and will void your warranty. Repairs only by authorized service/ customer center.
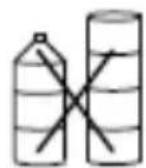
The device is equipped with a "Class 1 Laser". Avoid exposure to the laser beam as this could cause eye injuries. - Only use mercury and cadmium-free batteries.
- Batteries shall not be exposed to excessive heat such as sunshine, fire or the like.
Used batteries are hazardous waste and NOT to be disposed of with the household waste!! Return the batteries to your dealer or to collection points in your community. - Keep batteries away from children. Children might swallow batteries. Contact a physician immediately if a battery was swallowed.
- Check your batteries regularly to avoid battery leakage.

Used batteries are hazardous waste and NOT to be disposed of with the household waste! As a consumer you are legally obligated to return all batteries for environmentally responsible recycling - no matter whether or not the batteries contain harmful substances*).
Return batteries free of charge to public collection points in your community or to shops selling batteries of the respective kind.
Only return fully discharged batteries.
*) marked Cd = cadmium, Hg = mercury, Pb = lead
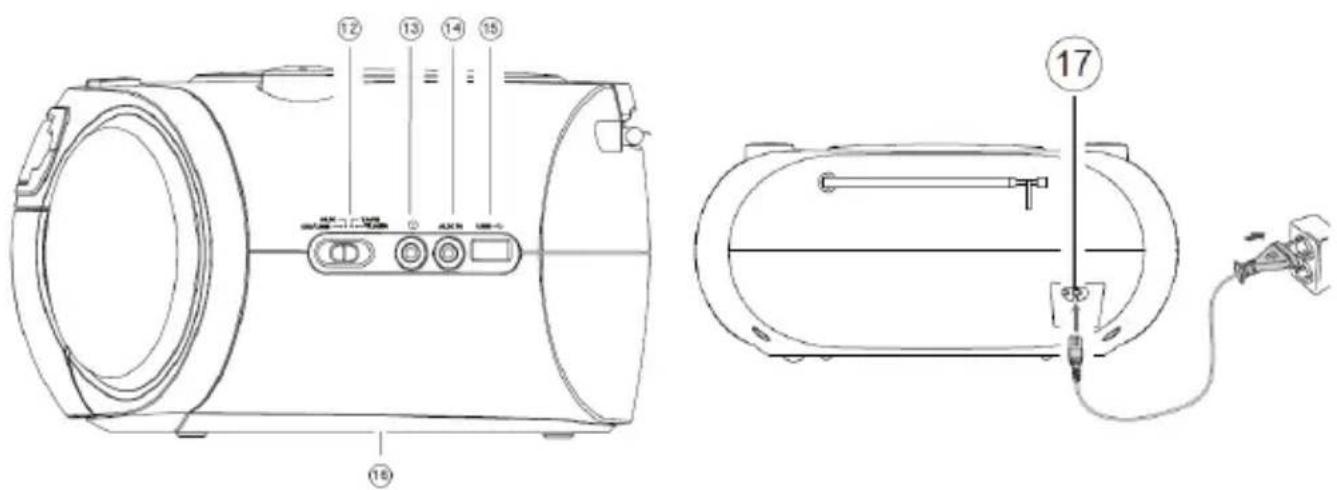
CONTROLS & CONNECTIONS

SIDE AND BACK

-
Volume knob
-
Scan/Play pause button
2.Mode button
-
Menu button
-
Standby button
-
Info/ Stop button
-
Preset/Prog button
-
Tuning/ Select,
-
LCD Display
-
Function selector
-
Cassette button
-
Headphone jack
-
Cassette door
-
Aux-in jack
-
USB jack
- Battery compartment
- AC socket
GETTING STARTED
DAB/FMAERIAL
Before using your radio for DAB or FM reception, pull out the telescopic antenna. You may need to adjust the position of the telescopic antenna for maxing signal strength.
CONNECTING POWER
Before connecting the power, check that the mains voltage on the rating plate is the same as the voltage in your area.
- Plug the AC cord into the AC socket at the back of the unit.
- Plug the VDE plug into the wall socket.
- Set the Function selector to desired position then press Standby button.
The unit is now ready for use.
NOTE:
When first connected to the power, the clock display will show "zeros".

SETTING THE CLOCK
The clock on your radio is automatically set when first used from the time signal broadcast with DAB radio stations.
If a DAB station is not available, the clock may be set manually via the MENU system. (Please refer to CLOCK SET page).
POWER CONTROL
STANDBY CONTROL
To turn the unit on:
- Press the STANDBY button on the top panel.
The display will light and the unit will switch on. To
turn the unit in STNADBY mode:
- Press the STANDBY button on the front panel briefly.
This unit will switch off. The clock will continue to run whilst mains power is connected.

ENERGY SAVING/ERP2 REGULATION
This device is equipped with an AUTOMATIC SWITCH OFF / STANDBY SYSTEM for energy-saving requirements. This is regulated by an EU-standard and is NOT A MALFUNCTION.
INTIAL SCAN
When this unit is switched on for the first time at TUNER mode, then press MODE button switching to DAB, the scanning display will be shown while the scanning process takes place:

The radio scans all usable stations (full scan) and stores them alphanumericly -1 Radio, 2 Radio, AA Radio, AB Radio... The initial scan will take a few minutes. After the scan, the clock will be set and the radio will play the name of the first station in the sequence. To browse for another station, refer to the next section.
BROWSING FOR A STATION
To browse for another DAB station from the top panel controls:
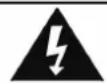
- Turn the TUNING knob.
Press the TUNING/ SELEC T knob to select the station d isplayed.
After shortdelay, the radio will tune to the station
ADJUSTING THE VOLUME
To adjust the volume from the front panel controls: Turn the VOLUME knob to increase or decrease the volume level.
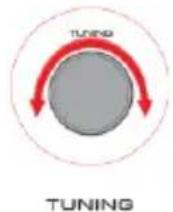

CLOCK SET
SET TIME/DATE: This main option enables the clock to be set manually if these is no available DAB transmission.
To set the time and data manuall y:
- When unit during Standby mode, press MENU button then turn the TUNING knob to select Set Clock. Press TUNING/SELECT knob to confirm.
- Set the clock mode 12/24 Hour, turn the TUNING/SELECT knob to choose 12 or 24 time format then press again to next setting.
- Set Hour, turn the TUNING / SELECT knob to set the hour, then press again to confirm
- Set Min, turn the TUNING / SELECT knob to set the minute, then press again to confirm
SW VERSION: This option will display the version number of the control software currently installed in your radio.
This will be helpful to a technician who is servicing this product
When unit during Standby mode, press MENU button then turn the TUNING knob to select SW Version.
Press TUNING/ SELECT knob to confirm.
Display will show the current software version.
SELECTING A SOURCE
SOUND SOURCES
·You can choose to listen to following sources
TUNER:DAB+ radio/ FM radio
CD/MP3 playback
- USB MP3 playback
- Tape playback
- Aux source (when connected via the AUX jack on the right side of unit).
Selecting asource:
Set the function selector to desired function.
TUNER: press MODE button to select DAB or FM radio
CD/USB: Press MODE button to select CD playback or USB playback
DAB SCANNING
RE-SCANNING
FOR
DAB
STATIONS
When first used, your radio scanned the DAB band for available stations. The station services found were then stored in your system's memory.
You can re-scan the band at any time if you move to a different area or just to refresh the s to red list of available stations.
To scan for DAB stations manually:
-
Set the function selector to TUNER, then press MODE button to select DAB mode.
-
Press the SCAN button on the front p panel.
The scanning process will take a few minutes. Then number of services found during the scan will be shown at the right side of the display.
After the scan, the radio will re -tune to the first station in the station list to play if it is available To select this station, you can continue to browse for another station as described on the previous page.
FULL SCAN: Press SCAN button to enable Auto scan
MANUAL TUNING: Press and Hold the TUNING knob in few seconds until display show "Manual tuning". Right now enables you to search the band manually, stepping through the ensemble numbers to check if any have usable signal strength.
Manual tuning is not necessary in normal operation where scanning will have automatically established a station list of all useable stations.
DAB DISPLAY MODES
DISPLAY MODE OPTIONS
The bottom line of the display can be switched to show different items of information that may be transmitted with a DAB station.
Choosing the information d i sp a y:
Press the INFO button on the front panel repeatedly to change the information displayed while playing aDAB radio station.
The full range of display options are shown below. Somestations may not broadcast all of these options.
DLS Scrolling Text > Program Type > Ensemble name> Ensemble Frequency > Audio Bit Rate> Signal Strength > Time/ Date
DLS (Dynamic Label Segment): This is a scrolling message giving real-time information-song titles, news headlines, etc.
PROGRAMME TYPE: This describes the style of the program being b roadcast.
ENSEMBLE NAME: DAB Digital radio stations are broadcast in multiplexes. Each multiplex is a bundle of radio stations transmitted in a signal frequency. There are national and local multiplexes; local ones contain stations specific to your area. This option displays the name of the ensemble name that contains the station you are listening to
SIGNAL STRENGTH: This setting will display a signal strength bargraph. The longer bargraph means the stronger signal. Setting the display to show signal strength is useful when setting up the aerial for the strongest signal.
TIME/DATE: Time and date are updated by broadcasted information.
ENSEMBLE FREQ: This option will display the multiplex number and frequency that contains the station you are listening to.
AUDIO BIT RATE: DAB allows broadcasters to vary the BIT RATE (or the amount by which an audio signal can be compressed) depending on the type of broadcast. This enables the amount of stations on a multiplex to be maximized. Speech and News are often broadcast at a lower Bit Rate; music needs a higher Bit Rate for good fidelity.
STATION PRESETS
To store any preset 1-20 either DAB or FM radio.
Tune to the station you want to store as a preset.
- Press and hold the PRESET button.
Preset empty 1 "will be displayed.
- Turn the TUNING knob repeatedly to find the preset number you want to store. For each preset number the preset station currently stored will be displayed o r "Empty" if none is stored.
- Press the SELECT button to confirm if you want to store the station in the displayed preset number.
To recall any preset 1-20
- Press the PRESET button briefly.
- Turn the TUNING knob repeatedly to find the preset number you want to play.
- Press the TUNING / SELECT T knob briefly to play the preset
FACTORY RESET: This option will restore all settings to 'fa d α y original'. All clock, station lists and stored preset stations will be cleared. After fa c t o r y reset the radio will automatically re - scan the DAB band.
- During DAB mode, press and hold INFO button 2 seconds until display show "Press ENTER key to reset"
- Press SELECT - (ENTER) knob to confirm.
LISTENING TO FM RADIO
This unit can also receive FM band radio stations and display RDS data (where broadcast).
To change to the FM band
- Set the function selector to TUNERpress MODE button to select FM mode.
Tune to FM stations - Press the SCANbutton to search for the next station in the band.
- Turn the TUNING knob for manual tune.
The radio will search and the tuning frequency will be displayed whilst se arching.
When a usable station is detected the radio will stop tuning and play the station. If RDS data is present, the station name and scrolling radio text will be displayed. If RDS data is not present, the tuned frequency will be displayed.
DISPLAY MODE OPTIONS
The bottom line of the display can be switched to show different items of information that may be transmitted with a FM station.
Choosing the information d isplay:
Press the INFO button on the front panel repeatedly to change the information displayed while playing a FM radio station.
The full range of display options are shown below. Some stations may not broadcast all of these options.
Audio mode > Radio Text > Program Type > Signal Strength > Time/ Date > Frequency
FM MONO/STEREO/AUTO OPTIONS
During FM mode, press the TUNING/ SELECT knob repeatedly to set Audio mode in AUTO or MONO.
AUDIO SET TINGS: This option enables you to set the radio to receive FM in Auto mode (Mono/Stereo) or in Mono only. This may be useful if the signal is weak and the broadcast is noisy.
LISTENING TO A CD
LOADING DISCS
This player can playback CD and MP3 audio format.
To select CD operation:
- Set the function selector to CD/USB position, press the MODE button to select CD mode.
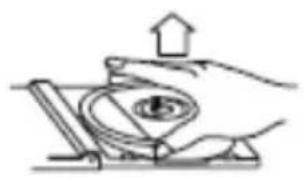
Loading a disc:
- Lift up the CD Door on top of the unit slowly.
Gently place a disc on the center spindle with the label side upward. - Once in place, press the center of the disc until it clicks into place on the turntable.
- Close the CD door. After a few seconds the disc will read and the disc data.
Unloading a disc:
- If the disc is playing, press the STOP button and wait a few seconds for the disc to stop.
- Lift up the CD door s bwy. Grip the disc at the sides and lift it out of the disc co mpartment .
CD PLAYBACK, PAUSE:
- Load the CD.
- Press the SCAN II button to start the CD playing
- When a CD is playing, pressing the SCAN / II button at any time will pause playback.
Press the button again to re-start play.
Selecting tracks:
- Turn the TUNING knob 一 , briefly to select the previous or next track from the disc.
CD REPEAT AND RANDOM
REPEAT AND SHUFFLE FUNCTIONS
You can repeat a single track, the whole disc or select random to play the tracks in a random sequence.
To set a repeat or random mode:
Press the MENU button to cycle through the options of "Rep A" (repeat current track), "Rep1
ALL" (Repeat the disc) or "Rand" (play tracks in a random sequence).
The Repeat, Repeat All or Random symbol will be displayed.
PROGRAM PLAY
REPEAT AND RANDOM FUNCTIONS
When playing a CD, you can store a random sequence of up to 60 tracks to play in your preferred order.
To store a CDprogram:
-
In CD Stop mode, press the PRESET/PROG button.
-
Turn the TUNING knob to select the track number for the first track you want to program. Displays showing T000 ("000" means your desired track number)
-
Press the PRESET/PROG button to store this track into the program memory. The track will be stored and the program counter will increase to "P02".
-
Repeat the above two steps to store the next and subsequent tracks in your program sequence.
-
When you have finished entering all tracks in your program, press the SCAN/ button to start the program playing.
To clear a program
- During program playing, press the STOP button twice.
- Open the CD door.
LISTENING TO AN USB
- Set the FUNCTION selector to CD/USB.
- Press the MODE button until display show USB.
- Press button to playback the music.
- The operation procedures are the same as CD playback. Refer to general control for details.
NOTE:
- Compatible storage device (up to 32GB)
- Please do NOT use a USB extension cable to connect your USB flash drive. Such cable can pick up additional interference which can corrupt the data flow.
- Always connect your USB flash drive directly to the USB port without USB extension cable.
- Due to some USB drive manufacturer's non-compliance with the full USB 1.1/2.0 standard. A small percentage (about 5% ) of USB flash drive might not be compatible
CASSETTE PLAY
- PAUSE BUTTON
Pauses playback
- STOP/EJECT Button
Stops playback
Opens the cassette door
- F.FED Button
Fast forwards playback
- REW Button
Fast reverses playback
- PLAY button
Plays back cassette

Cassette Playback
- Set the FUNCTION selector to TAPE position.
- Press the button to open the cassette compartment door, and insert a cassette and close the cassette compartment door.
- Press the button to start playback.
- To pause playback, press the button. To resume, press the button again.
- To stop the tape, press the button.
Fast Forwarding/Rewinding
- Press the button until you reach your desired passage.
-
Press the button to stop fast forwarding/rewinding.
-
The buttons automatically release at the end of a cassette and the unit isswitched off (unless the button is pressed.)
- During fast forwarding/rewinding, the buttons will not be released at the end of a cassette. To switch off the unit, make sure the cassette buttons are all released by pressing the
To play music from an external Audio player
Connected to the AUX IN jack
- Set the function selector taux position.
- Set the volume level on your Personal Audio player up
To about half level.
- Set the volume on your audio system to the level you require. If the volume will not set high
enough you may need to increase the volume setting on the player.
NOTE: - I t is not possible to navigate the menu system from your external audio device with this player if it is connected via the AUX IN jack.
There is a headphone output jack at the side of the unit. If headphones are connected to this socket for private listening, the speakers will cut out automatically.
CARE AND MAINTENANCE
CARE AND CLEANING
All care and cleaning operations should be carried out with the unit unplugged from the mains power.
The surface of the unit can be cleaned with a barely damp cloth and then dried carefully. Never
use abrasives, abrasive cloths or chemical solvents.
Cleaning the Tape Deck
Use a cotton bud slightly moistened with alcohol or a special head cleaning fluid to clean the deck.
- Press the button to open the cassette compartment.
- Press the button and clean the rubber pressure rollers (A).
- Press the button and clean magnetic heads (C) and Capstan (B).
- After cleaning, press the button.

Note: Cleaning of the heads can also be done by playing a cleaning cassette through once.
Care and maintenance
Compact Disc Care
To remove a disc from its storage case, press down on the center of the case and lift the disc out, holding it carefully by the edges.

Finger prints and dust should be carefully wiped off the disc's recorded surface with a soft cloth. Unlike conventional records, compact discs have no grooves to collect dust and microscopic debris, so gently wiping with a soft cloth should remove most particles. Wipe in a straight line from the inside to the outside of the disc. Small dust particles and light stains will have absolutely no effect on reproduction quality.


Clean the disc periodically with a soft, lint-free, dry cloth. Never use detergents or abrasive cleaners to clean the disc. If necessary, use a CD cleaning kit. Never write on or stick any labels to the surface of compact discs.
Care of the cabinet
If the cabinet becomes dusty, wipe it with a soft dry dust cloth. Do not use any wax, polish sprays or abrasive cleaners on the cabinet.
Caution
Never allow any water or other liquids to get inside the unit while cleaning.
TROUBLESHOOTING
Poor quality radio reception
The aerial signal may not be adequate. Try repositioning the aerial while watching the signal
strength. Signal strength can be displayed by tuning to a DAB station. Press the INFO button then turn the TUNING knob,
| PROBLEM | CAUSE / |
| No sound / power | Volume not adjusted. Adjust the volume. Mains cable not securely connected. Connect the mains cable properly. Batteries dead/incorrectly inserted. Insert (fresh) batteries correctly. CD contains non-audio/ Mp3 files. Turn the TUNING knob repeatedly to skip to a CD or MP3 audio track, instead of the data file. Ensure the function selector isswitched to the correct work. Ensure the current MODE is correctly selected. |
| CD display does not function properly / No reaction to operation of any of the controls | Electrostatic discharge. Switch off and unplug the unit. Reconnect after a few seconds. No CD inserted. Insert a CD. CD badly scratched or dirty. Replace or clean the CD, see Maintenance. Laser lens steamed up. Wait until lens has cleared. CD-R / CD-RW is blank or not finalized. Use afinalized CD-R / CD-RW or a suitable CD Audio disc only. Make sure the CD is not encoded with Copyright protection technologies, as some do not conform to the Compact Disc standard. Set the FUNCTION selector to CD/USB position, then Press MODE button switching to CD mode. |
| The CD skips tracks | CD damaged or dirty. Replace or clean CD. Program is active. Quit program mode. A CD badly scratched or dirty may result in improper operation. |
| Poor Cassette Sound Quality | Dust and dirt on the heads, etc. Clean deck parts, see Maintenance. Use of incompatible cassette types (METAL or CHROME). |
| Poor DAB/ FM reception | Make sure FM aerial wire is fully extended. Electrical interference in your home can cause poor reception. Move the unit away from them (especially those with motors and transformers). |
WARRANTY & SPECIFICATIONS
SPECIFICATIONS
Supply voltage, current: AC 230V ~ 50Hz
Power consumption 16W
Battery supply. DC = = 9V (6 x"C" SIZE R14).
Output power. 2x1.2W
Frequency range. 174.928-239.200 MHz (DAB)
87.5-108 MHz (FM)
Dimensions (WxDxH) 300 x 295 x 134 mm
Weight. : 1.29kg

This symbol on the product or in the Instructions means that your electrical and electronic equipment should be disposed at the end of its life separately from your household waste. There are separate collection systems for recycling in the EU. For more information, please contact the local authority or your retailer where you purchased the product.
PROTECTION DE L'ENVIRONNEMENT

CLASS 1 LASER PRODUCT
KLASSE 1 LASER PRODUKT
LUOKAN 1 LASER LAITE
KCLASS 1 LASER APPARAT
PRODUCTO LASER CLASE 1
ATTENTION - RADIATION LASER INVISIBLE LORSQUE VOUS OUVREZ LE COUVERCLE OU APPUYEZ SUR L'ENCLENCHEMENT DE SECURITE. EVITEZ Toute EXPOSITION AU RAYON LASER

ATTENTION
OPTIONS FM MONO/STÉRÉO/AUTO
CLASS 1 LASER PRODUCT
KLASSE 1 LASER PRODUKT
LUOKAN 1 LASER LAITE
KCLASS 1 LASER APPARAT
PRODUCTO LASER CLASE 1
WAARSCHUWING - ONZICHTBARE LASERSTRALING WANNEER DE BEHUIZING GEOPEND WORDT OF DE INTERNE BEVEILIGING UITGESCHAKELD. VERMIJD BLOOTSTELLING AAN DE LASERSTRAAL.

WEERGAVEOPTIES SCHERM
Batterijvoeding. . : DC = 9 V (6 x "C" MAAT R14).
Uitgangsvermogen: 2 × 1,2W
Frequentiebereik. : 174,928 - 239,200 MHz (DAB)
87,5 - 108 MHz (FM)
Afmetingen (BxDxH): 300 × 295 × 134 ~mm
Gewicht. : 1,29kg
DE SPECIFICATIES KUNNEN ZONDER KENNISGEVING VOORAF AANGEPAST WORDEN.

AVVERTENZA
PERICOLO DISCOSSE ELETTRICHE, NON APRIRE

ATTENZIONE: AL FINE DI RIDURRE IL PERICOLO DI SCOSSE ELETTRICHE, NON RIMUOVERE IL COPERCHIO (O LA PARTE POSTERIORE). NON CI SONO PARTI RIPARABILI DALL 'UTENTE ALL'INTERNO. PER ASSISTENZA RIVOLGERSI A PERSONALE DI ASSISTENZA QUALIFICATO.

*) markerade Cd = kadmium, Hg = kvicksilver, Pb = bly
KONTROLLER OCH KOPPLINGAR

SIDAN OCH BAK
-
USB-uttag
-
Batterifack
-
AC-uttag
-
Volymreglage
- Knappen Scan/spela
- Knappen Mode
pausa - Standbyknapp
- Knappen Menu
- Knappen Preset/Prog
- Knappen Info/Stopp
- LCD-display
- Stationsinställning/valj
- Kassettknapp
- Funktionsknapp
- Kassettlucka
- Hörlursuttag
- Aux-in ingang

KOMMA IGÄNG
DAB-/FM-ANTENN
Innan du anvander din radio for DAB-ller FM-mottagning, dra ut teeskopantennen helt. Du kan behova stalla in teeskopantennens riktning for att forbättra signalstyrkan.
ANSLUT STRÖMMEN
NY SKANNING FÖR DAB-STATIONER
D 90556 Cadolzburg, Germany
Tel: +49 9103 71 67 0
Fax: +49 9103 71 67 12
E-Mail: info@soundmaster.de
Internet: www.soundmaster.de
Hereby, Worlein GmbH declares that this device is in compliance with the essential requirements and other relevant provisions of Directive 2014/53/EU.
A copy of the declaration of conformity can be obtained from the above address.
- CD-WIEDERGABE, PAUSE:
- CAUTION - INVISIBLE LASER RADIATION WHEN OPENING THE COVER OR PRESSING THE SAFETY INTERLOCK. AVOID EXPOSURE TO THE LASER BEAM.
- WARNING
- Safety, Environmental and Setup Instructions
- CONTROLS & CONNECTIONS
- SIDE AND BACK
- GETTING STARTED
- DAB/FMAERIAL
- CONNECTING POWER
- SETTING THE CLOCK
- POWER CONTROL
- STANDBY CONTROL
- ENERGY SAVING/ERP2 REGULATION
- INTIAL SCAN
- BROWSING FOR A STATION
- ADJUSTING THE VOLUME
- CLOCK SET
- SELECTING A SOURCE
- SOUND SOURCES
- DAB SCANNING
- RE-SCANNING
- FOR
- DAB
- STATIONS
- DAB DISPLAY MODES
- DISPLAY MODE OPTIONS
- STATION PRESETS
- LISTENING TO FM RADIO
- FM MONO/STEREO/AUTO OPTIONS
- LISTENING TO A CD
- LOADING DISCS
- This player can playback CD and MP3 audio format.
- CD PLAYBACK, PAUSE:
- CD REPEAT AND RANDOM
- REPEAT AND SHUFFLE FUNCTIONS
- PROGRAM PLAY
- REPEAT AND RANDOM FUNCTIONS
- LISTENING TO AN USB
- NOTE:
- CASSETTE PLAY
- Cassette Playback
- Fast Forwarding/Rewinding
- CARE AND MAINTENANCE
- CARE AND CLEANING
- Cleaning the Tape Deck
- Compact Disc Care
- Care of the cabinet
- Caution
- TROUBLESHOOTING
- WARRANTY & SPECIFICATIONS
- SPECIFICATIONS
- PROTECTION DE L'ENVIRONNEMENT
- ATTENTION - RADIATION LASER INVISIBLE LORSQUE VOUS OUVREZ LE COUVERCLE OU APPUYEZ SUR L'ENCLENCHEMENT DE SECURITE. EVITEZ Toute EXPOSITION AU RAYON LASER
- ATTENTION
- OPTIONS FM MONO/STÉRÉO/AUTO
- WAARSCHUWING - ONZICHTBARE LASERSTRALING WANNEER DE BEHUIZING GEOPEND WORDT OF DE INTERNE BEVEILIGING UITGESCHAKELD. VERMIJD BLOOTSTELLING AAN DE LASERSTRAAL.
- WEERGAVEOPTIES SCHERM
- AVVERTENZA
- PERICOLO DISCOSSE ELETTRICHE, NON APRIRE
- KONTROLLER OCH KOPPLINGAR
- SIDAN OCH BAK
- KOMMA IGÄNG
- DAB-/FM-ANTENN
- ANSLUT STRÖMMEN
- NY SKANNING FÖR DAB-STATIONER
Brand : Soundmaster
Model : SCD7900SW
Category : Cd player/recorder