
TS25350 - Iron SIEMENS - Free user manual and instructions
Find the device manual for free TS25350 SIEMENS in PDF.

| Product type | Steam generator (iron with station) |
| Brand | Siemens |
| Model | TS25350 |
| Power supply | 220-240 V ~ 50/60 Hz |
| Power | 2400 W |
| Water tank capacity | 1.2 L (removable tank) |
| Weight | Approx. 2.5 kg |
| Dimensions (L x W x H) | 30 x 25 x 20 cm |
| Soleplate material | Stainless steel |
| Temperature setting | Yes, by dial (synthetic, silk/wool, cotton/linen positions) |
| Variable steam control | Yes (depending on model) |
| Vertical steam | Yes |
| Auto shut-off function | Yes (after approx. 8 minutes of inactivity) |
| Intelligent steam function | Yes (depending on model) |
| Anti-scale system | Yes, with Calc'n Clean function and steam chamber rinse |
| Cleaning and maintenance | Clean boiler every 50 hours, rinse steam chamber every 2 weeks in hard water areas |
| Included accessories | Textile protection soleplate (depending on model), removable iron rest |
| Spare parts | Available from after-sales service and specialized stores (ref. TZ25100, TZ25200, TZ20450) |
| Repairability | Repairs by authorized technical service center only |
| Safety | Auto shut-off, grounding, burn protection, use on stable surface |
Frequently Asked Questions - TS25350 SIEMENS
User questions about TS25350 SIEMENS
0 question about this device. Answer the ones you know or ask your own.
Ask a new question about this device
Download the instructions for your Iron in PDF format for free! Find your manual TS25350 - SIEMENS and take your electronic device back in hand. On this page are published all the documents necessary for the use of your device. TS25350 by SIEMENS.
USER MANUAL TS25350 SIEMENS
Operating instructions
Thank you for buying the SL25 steam station, the new steam-ironing system from Siemens.
Carefully read through the operating instructions for the appliance and safeguard them for future reference.
Introduction
These instructions for use contain valuable information about the unique features of this system and some hints to make ironing easier for you.
This powerful system produces non-stop steam for an ideal ironing performance. It has a large detachable water tank that can be refilled at any time without switching off the system.
We hope that you enjoy ironing with this steam station.
Important
Open out the first page of the booklet, this will help you to understand how the appliance works.
This appliance complies with international safety standards. This appliance has been designed exclusively for domestic use and must not be used for industrial purposes.
This appliance must only be used only for the purposes for which it was designed, i.e. as an iron. Any other use will be considered improper and consequently dangerous. The manufacturer will not be held responsible for any damage arising from misuse or improper use.
General safety instructions
- This appliance is to be connected and used in accordance with the information stated on its characteristics plate.
- This appliance must be connected to an earthed socket. If it is absolutely necessary to use an extension cable, make sure that it is suitable for 16A and has a socket with an earth connection.
- The iron should not be used if it has been dropped, if there are visible signs of damage or if it is leaking water. It must be checked by an authorized Technical Service Centre before it can be used again.
- If the safety fuse fitted in the appliance blows, the appliance will be rendered inoperative. To restore normal operation the appliance will have to be taken to an authorised Technical Service Centre.
- In order to avoid that, under unfavourable mains conditions, phenomena like transient voltage drops or lighting fluctuations can happen, it is recommended that the iron is connected to a power supply system with a maximum impedance of 0.27 . If necessary, the user can ask the public power supply company for the system impedance at the interface point.
- This appliance is not intended to be used by persons (including children) with reduced physical, sensory or mental capacities, or lack of experience and knowledge, unless they have been given supervision or instruction concerning the use of the appliance by a person responsible for their safety.
- Children should be supervised to ensure that they do not play with the appliance.
- Remove the plug from the socket before filling the appliance with water or before pouring out the remaining water after use.
- The appliance must never be placed directly under the tap to fill the water tank.
-
The appliance must be used and placed on a stable surface.
-
When placed on its stand, make sure that the surface on which the stand is placed is stable.
- The iron must not be left unattended while it is connected to the supply mains.
- Unplug the appliance from the mains supply after each use, or if a fault is suspected.
- The electrical plug must not be removed from the socket by pulling the cable.
- Never immerse the iron or steam tank in water or any other fluid.
- Do not leave the appliance exposed to weather conditions (rain, sun, frost, etc.).
- With the aim of avoiding dangerous situations, any work or repair that the appliance may need, e.g. replacing a faulty mains cable, must only be carried out by qualified personnel from an Authorised Technical Service Centre.
Important :
- This appliance reaches high temperatures and produces steam during use, this could cause scalds or burns in case of improper use.
- The steam hose, base station and in particular the iron can get hot when used.
- Never aim the steam at people or animals.
- Do not allow the power cable to come into contact with the soleplate when it is hot.
- Be aware that the system can keep on steaming a short additional time after releasing the steam trigger. This is a normal function.
Description
- Removable water tank
- Removable iron pad
- "Water empty" / "Clean warning" pilot light
- Variable steam control*
- Steam hose
- Illuminated main power 0/1 button
- "Steam ready" / "Auto shut-off" pilot light
- Housing with internal steam generator
-
Mains plug
-
Temperature dial
-
Iron's steam release button
- Iron pilot light
- Soleplate
- Cord clip*
* Model dependent
Preparations (A)
- Remove any label or protective covering from the soleplate.
- Place the appliance horizontally on a solid, stable surface. You may remove the iron pad from the appliance and place the iron on it on another solid, stable, horizontal surface.
- Remove the detachable water tank (1) and fill it, making sure not to pass the level mark.
- Fit the water tank back onto the steam tank.
- Unwind the mains cable fully and plug it into an earthed socket.
-
Set the main power (6) button to the "I" position.
-
The "Steam ready" indicator lamp (7) will light up after several minutes, indicating that the appliance is ready to use.
The steam generator will take more time to reach "Steam ready" state only upon the initial heating up, or after performing the de-scaling operation (Calc'n clean).
When water is already present in the steam generator during regular use, heat up time to reach the operating temperature will be faster. - This appliance has a built-in water level sensor. The "refill water tank" indicator (3) will light when the water tank is empty.
Important:
Normal tap water can be used.
To prolong the optimum steam function, mix tap water with distilled water 1:1. If the tap water in your district is very hard, mix tap water with distilled water 1:2.
You can inquire about the water hardness with your local water supplier.
- The water tank can be filled at any time while using the appliance.
- To avoid damage and/or contamination of the water tank and the boiler, do not put perfume, vinegar, starch, descaling agents, additives or any other type of chemical product into the water tank.
Any damage caused by the use of the aforementioned products, will make the guarantee void.
- The iron is not designed to rest on its heal. Please always position it horizontally on the iron pad (2).
- The iron pad can be placed into the specially designed recess on the appliance or somewhere suitable alongside the ironing area.
Never rest the iron on the appliance without the iron pad!.
- During it first use the iron may produce certain vapours and odours, along with white particles on the soleplate, this is normal and it will stop after a few minutes
- While the steam release button is pressed, the water tank may produce a pumping sound, this is normal, indicating that water is being pumped to the steam tank.
Setting the temperature
- Check the ironing instruction label on the garment to determine the correct ironing temperature.
- Select the temperature (10)
"Synthetics
"Silk - Wool
...Cotton-Linen
- The indicator lamp (12) will remain lit while the iron is heating and go out as soon as the iron has reached the selected temperature.
Tips:
- Sort your garments out based on their cleaning symbol labels, always starting with clothes that have to be ironed at the lowest temperatures.
- If you are not sure what the garment is made of then begin ironing at a low temperature and decide on the correct temperature by ironing a small section not usually seen when worn
Ironing with steam (B)
- Turn the temperature selector (10) to the required setting.
- Set the amount of steam to suit your needs, using the variable steam control (4) (depending on the model).
For normal use, please choose one of the following recommended settings:
| Temperature Steam setting | |
| • | 1 |
| •• | 5 |
| *** 10 | |
- Press the steam release button to release steam.
Attention:
-
When ironing on a lower temperature setting
-
If the appliance has variable steam control (4), set the variable steam control to its lowest position ("1").
- If the appliance does not have variable steam control, press the steam release button only for a few seconds at a time when ironing at lower temperatures.
In both cases, if you find that water is dripping out of the soleplate, set the temperature selector (10) to a higher position (take care that the garment can be ironed on this heat temperature setting).
- At the beginning of each use, it is possible that drops of water will be dispensed alongside steam. Therefore, it is advisable to try the iron on the ironing board or a piece of cloth to start with.
Ironing without steam
- Begin ironing but without pressing the steam release button (11).
Vertical steam (C)
- Set the temperature control to the "…” or "max" position.
- You can steam iron curtains and hanging garments (jackets, suits, coats...) by placing the iron in a vertical position and pressing the steam release button (11).
Never direct the steam jet at garments that are being worn.
Never aim the steam at people or animals.
Intelligent steam
(dependently on model)
This system has intelligent steam control, which, after releasing the steam release button (11), provides a small amount of additional steam.
The additional steam can always be stopped by briefly pressing the steam release button once again.
Auto shut-off
(dependently on the model)
If during ironing the steam release button (11) on the handle of the iron is not pressed for a certain length of time (8 minutes), the steam station will automatically switch off.
The "Auto shut-off" pilot lamp (7) will flash when auto shut-off has been activated.
To switch the steam station back on, press the steam release button again, and wait until the "Auto shut-off" pilot lamp remains lit continuously.
en
Cleaning & Maintenance
Always unplug the appliance from the mains supply before carrying out any cleaning or maintenance operation on it.
- After ironing, pull out the plug and allow the appliance to cool down before cleaning.
- Wipe the housing, handle and iron body with a damp cloth.
- If the soleplate is soiled with dirt or scale, clean it with a damp cloth.
- Never use abrasive products or solvents.
Storing the appliance (D)
- Always allow the appliance to cool down before storing it.
- Set the main power to the "0" position and disconnect the mains cable.
- Place the iron on the iron pad, standing on the soleplate.
-
Empty the water tank and store the mains cable on the cord rewind facility. Tidy the steam hose on the handle of the iron using the cord clip provided (14^*) . Do not wrap the cords too tight.
-
Depending on the model.
Fabric protection soleplate cover (E)
depending on the model)
The fabric-protection soleplate cover is used for steam-ironing delicate garments at maximum temperature without damaging them. Use of the soleplate cover also does away with the need for a cloth to prevent shine on dark materials.
It is advisable to first iron a small section on the inside of the garment to see if it is suitable.
To attach the soleplate cover to the iron, place the tip of the iron into the end of the soleplate cover and pull the elastic strap over the lower rear of the iron until it fits tightly. To release the soleplate cover, pull the elastic strap and remove the iron.
The fabric-protection soleplate cover may be purchased from the customer service or specialist shops:
| Accessory code (After-sales) | Name of accessory (Specialist outlets) |
| 464847 TZ25100 | |
| 464848* TZ25200* | |
| 571510** TZ20450* |
- Cork handle iron
** Only for model TS25430
"Calc'n clean" (F)
Cleaning the Boiler
To extend the life of your steam generator and to avoid any build up of scale, it is essential that you rinse out the boiler after several hours of use (approximately after 50 hours). If the water is hard, increase the frequency.
Do not use descending agents for rinsing out the boiler, as they could damage it.
- Check that the appliance is cold and unplugged for more than 2 hours, and that the removable water tank (1) is empty.
- Place your appliance on the edge of your kitchen sink.
- Remove the plastic cover located on the bottom of the appliance by turning it to the position.
- Unscrew the boiler drainage plug located on the bottom of the appliance using a coin.
- Holding your steam generator in upside down position, and using a jug, fill the boiler (in the base unit) with 1/4 litre of water.
- Shake the base unit for a few moments and then empty it completely over a sink or bucket. To obtain the best result, we recommend that this operation is done twice.
Important: before re-closing, make sure no water remains in the boiler.
- Replace and tighten up the boiler drainage plug with a coin.
- Insert and close the plastic cover by turning it to the position
Automatic clean warning
(dependently on model)
Pilot light (3) will flash indicating that boiler must be rinsed. To do this, follow the procedure described in the section above.
To reset "Calc'n clean" pilot light and counter, switch the station off twice, keeping it off during at least 30 seconds each time
Rinsing the iron steam chamber (G)
This procedure helps to remove scale particles out of the steam chamber.
Carry it out approximately every 2 weeks, if the water in your area is very hard.
a) Ensure that the iron is cooled down.
b) Set the temperature selector (10) of the iron to the "min" position.
c) Fill the tank with tap water.
d) Plug in the mains cable and set the main power switch (6) to the "I" position.
e) Wait until the "steam ready" indicator lamp (7) lights up.
f) If the steam station has steam regulator (4), set it to the maximum position ("10").
g) Hold the iron over the sink or a container to collect the water.
h) Press the steam release button (11) and gently shake the iron. Boiling water and steam will come out, carrying scale and or deposits that might be there. This could take approximately 5 minutes.
i) Set the temperature selector (10) of the iron to the "max" position, without pressing the steam release button (11). The water in the steam chamber will start evaporating. Wait until all the water inside the chamber has been evaporated.
j) To clean the soleplate, immediately rub off any residue by running the hot iron over dry cotton cloth.
Trouble shooting
| Problem Possible causes Solution | ||
| The steam generator does not come on. | ·There is a connection problem. ·The main power button is not switched on. | ·Check the mains cable, the plug and the socket. ·Set the main power (6) button to the "I" position. |
| The iron does not heat up. | ·The main power button is not switched on. ·The temperature control knob is set to the "min" position. | ·Set the main power (6) button to the "I" position. ·Set the temperature control knob (10) to the desired position. |
| The iron begins to smoke when switched on. | ·During first use: Certain components on the appliance have been lightly greased at the factory and may produce a little smoke when initially heated. ·During later use: the soleplate may be soiled. | ·This is completely normal and will stop after a short while. ·Clean the soleplate according to the cleaning instructions in this manual. |
| Water flows through the holes on the sole plate. | ·The steam function is being used before it has reached temperature. ·The water is condensing inside the pipes because steam is being used for the first time or has not been used for a long time. | ·Reduce the steam flow when ironing at low temperatures (Variable steam control (4)). ·Point the iron away from the ironing area and press the steam release button (11) until steam is produced. |
| Dirt comes out through the sole plate. | ·There is a build-up of scale or minerals in the steam tank. ·Chemical products or additives have been used. | ·Use tap water mixed 50% with distilled or demineralised water. If the tap water in your district is very hard, mix tap water with distilled water 1:2. ·Clean the sole plate with a damp cloth. ·Never add products to the boiler water. |
| The iron does not produce any steam. | ·The boiler is not switched on or the water tank is empty. ·The water tank is not fitted onto the housing correctly. ·The steam regulator is set to the minimum position. | ·Set the main power (6) button to the "I" position and/or fill the water tank. ·Fit the water tank back onto the housing correctly (you will hear a click). ·Increase the steam flow by turning the steam contr (4). |
| The ironed garment turns dark and/or sticks to the soleplate. | ·The selected temperature is too high and has damaged the garment. | ·Select a suitable temperature for the material being and clean the sole plate with a damp cloth. |
| The soleplate turns brown. | ·This is a regular consequence of usage. | ·Clean the soleplate regularly with a damp cloth. |
| The iron does not stop steaming after placing it on the pad. | ·"Intelligent steam" function activated. ·Just press the trigger once again and the iron will stop steaming at once. | |
| The appliance makes a pumping sound. | ·Water is being pumped into the steam tank. ·The sound will not stop. | ·This is normal. ·If the sound will not stop, do not use the steam generator and contact an authorised technical service centre. |
en
| Problem Possible causes Solution | ||
| Loss of pressure during ironing. | Steam release button activated during a long period of time. | Use the steam release button (11) with intervals. This improves the ironing result as the textiles will be dried and stay smooth better. |
| Water leakage from the boiler | Drainage plug located at the bottom of the appliance is loose. | Tighten up boiler drainage plug with a coin |
If the above does not solve the problem, get in touch with authorized technical service.
Advice on disposal
Our goods come in optimised packaging. This basically consists in using non-contaminating materials which should be handed over to the local waste disposal service as secondary raw materials. Your local town council can give you information about how to dispose of obsolete appliances.
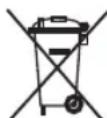
This appliance is labelled in accordance with European Directive 2002/96/EG concerning used electrical and electronic appliances (waste electrical and electronic equipment - WEEE).

The guideline determines the framework for the return and recycling of used appliances
as applicable throughout the EU.
You can download this manual from the local homepages of Siemens.
fr
Vapore verticale (C)
Loddrett dampstryking (C)
Hikonn He cTaBTe npacky Ha Kopnyc npncptpo 6e3 ndknndkn dnn npackn!
- Pid qac nepworo BnKOpncTAnHn npackn 3 Hea MoKytb itn CneunphiHi 3anaxn Ta napa, a 3 NiDoWBn MoKyb CnPaTcra 6iNi npoounHKn. Lc e HopMaIbHm Ta npinnHtbcra 3a KInbka XBnNH.
KoHnHaTncHeHO KhONKy Bnnycky nap, Bu MoKeTe NouyTN 3Byk NOMN y cepeHH npCtpoIO. Lc HopMaIbHo Ta O3Haaye, IIO BOa NepeKaUyETbcrdo baky naporehepatopa.
PerylIOBaHHaTeMnepaTpyn
- POnuBItbcnHctpyKJzIoo npacyBaHHn 6iIN3nHa Jra eTKeTci, 0o6 BuHaHTn npaBnIbHy TempepaTyp npacyBaHHn.
2.Obepitb TemnepaTypa 3a donomoroOp perynrTopa (10)
HacaKaIJaJeIkaTHnxTKaHN (E) (Y deKix moDenx)
Дан_Hасада ВИКОпСТОВЕТБСС ДЯ 6e3neHOrO npacyванн DeIiKAТнIX TKAHH Ha MaKcMamblH TeMnepaTpyi 3 BИKOPNCTAHHМ nap. BИKOPNCTAHн Hacadkn Dny DeIiKAТнIX TKAHH TAKOX 3HIMae NOTpe6y KОпСТУВATиС RAчIPKOIO ДЯ yHINKHeHH 6bNcKу HA TemHnx TKAHNAX.
PekomeHnycBcra po3noaT npacybaHHHa HeBeNikomy mMaTky BHyTpiiHbOIO nobepxHi OJrAry Ta nepeBipnTu pe3yIbTaT.
Ioo6 OJrHn HacaKny Ha npacky, yctahOBitb Hic npackn B KHeueb HacaKn Dnna DeNikatTHNX TkaHH Ta npotraHtB eJactuHcy CTpHKy NOHAD 3aDHbOIO HxKbHOO qactuHOIO npackn, 0o6 HacaKa 3akpinnaac. 1oo3Hrtn HacaKy dnn DenikaTnx TKAHH, NotarHtB 3a enactuHcy CTpHKy Ta cTARHtB HacaKny 3 npackn.
Hacaiky IJn DeIiKaTHX TKAHH MOKHa npu6aTu y HaOmy cepBic-ueHTpi a6o y cneuaian3OBaHnx Mara3nHex.
HnKoIa He HapBaJrTe nap Ha IIOe nn JKNBOTHbIX.
«yMhbln» nap
(B 3aBnCHMOCTN OT MoDeJIH)
DaHHa CnCTMa HMeet YMhBm MExaHm3M KOHTpOJa napa, KToPbI Nocne OTnyckAHN KHOJKN BblNycka napa n3 nooBbl (11), nOaET HeboJbOe DOnONHtEnbHoe KOnuheCTBO napa.
IOnonHnntBHyIO npaCy npa MoKHO B INo6oM OMeHT octaHOBt b KopoTkIM HaKaTHeM Ha KHONky BblNycka npa n3 NOOWBbl.
ABTomatnueckoe OTKIOUeHne (B 3aBNCMOCTN OT MOdJIIN)
EcIn B npoucece rnaKeHn KhONKa BbInycka napa (11) Hpyke yTiora He HaxmaeTcB TeueHne onpeDenenHoroBpeMeHH (8 MnHyT), NapOBa CTaHzra ABTomatueckNOTKIOUaTeC.
Iocne abTomatueckoro OTKIOUOHeHn CBETOBn HndkaTOp «ABtOMaTueckoe OTKIOUOHeHn"73amraet.
YTo6bI CHOBA BKNIOHTb napOByIO CTaHcHIO, HaxMnTe Ha KHOlyKyBaNpyKa napa N NOdoXdNte, NOKa CBeTOBoi INDnKATOp «ABTomAtNuYeckoe OTKnHoyeHne" 3acBETnTc He Mmra.
UncTka n yxOa
Ipeep npoBeHnem IIO6bIX DeiCTBn No qNCTKe I yXOy 3a 3NeKtpponpOpom, cJeDyET 06raTeJbHo OTKnIOuHTberoOT 3NeKtpocetn.
- Nocne rnaKeHxOJa BbIKNHOHTe np6Op n3 cETn INdoKNTecb ocTbBaHnnoDoWbby yTHora, npexKe Yem YnCTnTB np6Op.
- IpoTpnte Kopnyc, pyky n NOBepxHocTb yTHora BnaXHOI TkaHbIO.
3.Ecnnoooba yTHora ncauKaHa nn Ha He noBnncb TBepDble OTNOKeHnO uNCTnTe ee BnaXHO TKAHbIO.
4. HnKorda He noIb3yITeCb abpa3nBbIMn cpeIcTBAMN nIpaCTBOpNTeJIaMn.
XpaheHne npn6opa (D)
- Ipepe y6opko np6opa Ha xpaheHne Doxntecb eroc octbIBAHNA.
2.YCTaHOBNTeIJIABHbI BbIKIOHTeJIb NTaHnB NNoOKeHne 0"N BbIKIOHTe IpN6Op n3 cTeN. - NomeCTte yTHor Ha ero noCTaBky, nocTaBnB ero Ha noDoWBy.
-
CneIte BcIO Body n3 pe3epByapa n yloXnTe shHpynIITaHmC nOMOuBIO yCTPOINCTBA dNRAxPAHeHnUHypa. 3akpenIte napBOoB IuNAHr Ha pyueyTOra c NOMOuBIO npnnaeraMoro 3azKMa (14^*) . He cmatbBaHTe UHypbCJNUKOM TYRO.
-
B HeKoTOpbIx MoJeIaX.
3aunTHa TKeCTnIbHa nOdoBa (E)
(B HeKoToPbIX MoDeIaX)
3Ta NDOoBa NCNoB3yeTc4 DnI NaKeHbC napOM DeNkKatbIX Beuei npMakCmAbHoN TempeaType, He NOBpejdaix. NcNoB3ObaHae 3aunTHoN TcKtINbHO NoDooBbl TaKke NCKIOuHaET Heo6XoDMocTb NcNOB3oBaTb TpKny dnnpeoTbpAeHg6NeCa HA TmHbIX TKAHx.
Mbl pekomehnyem Bam nepeH hauJom rnaXeHb nonpoobabr IaIbHb Ha He6oJbWOM yAcTKe Ha ByTpHenHe CTOpOHe BcU, nNoHa6nIpaTb pe3yNbTaTbI.
YTO6bI yCTaHOBnTb 3aUNTHyIO NOOuBy, NOMeCTInTe OCTpbI KOHNK YTOrA B KOHeC 3aUNTHoN NOOuBBH IN NOTAHNTe 3aJACTHUHy JOENTY BDOJI HNXHEI 3aDHNe JAcTn YTOHa Do TEX NOP, NOKa OHa He 6yDet ODTa. YTO6bI CHRTb 3aUNTHyIO NOOuBY, NOTARHTe 3aJACTHUHy JOENTY, YTO6bI OTDeJIHTb NOOuBY OT YTOHa.
3aunTHyU TeKCTnHbHyU NOOuBMy MoXHO npno6peCTN B CnyxBe NoCTnpoDaX INN B CneuaIIN3npoBaHHbx MaRa3INax.
DahHoe pyKOBOCTBO MOXHO cKaHaTb C Be6-CTpaHnCbI Siemens nla Baewc TpaHbl.
Vä multümim ca ati cumparat statia de calcat cu abur SL25, noul systemd de calcat de la Siemens.
a a a a a a a a a a a a a a a a a a a a a
45 6 21
a a a a a a a a a a a a a a a a a a a a a a a a a
all clal jall slal (C
aee eae ee eae ae eae aee
"1n 6 (6)
(7) jalj jil, jil jai a jai jai jai (e
(4)
.("10")
G
(11)
oogoo
5 10 all jj 8.0 all
Gg 10
eilllll lllllllllllllllll
Aeall aaiy
a a a a a a a a a a a a a a a a a a
y
J 1
y
al lal alal alal
aaii iiaaa aiee
aaiiaai ai jaii iaiai
| Jasalpaul JasaIpaJ | |
| 464847 TZ25100 | |
| 464848* TZ25200* | |
| 571510** TZ20450** | |
i#
TS25430 8
"Calc'n clean" (F)
J 1
aill 1
ccll plssu 1s s y aal l baae jy
(50)
aill 100
1
1
jlll l j j j j j j j j j j j j j j j j j j j j j j j j j j j j j j j j j
总分(1)
Juaal 10a Jaua 2
e 3
e jll g a gall lal g a e la g y a d 4
Aaiaaa Jaii. jaiii
Jra Jal o aabu y gao 5
1/4 1
1
()
aJ 11) jj j j j j j j j j j j j j j j j j j j j j j j j j j j
()
"." aiaia 14. (4) jaiyao sai jaiyoi saai 11 . ("1") alg yjaiyaiyaiyaiyaiyaiyaiyaiyaiyaiyaiyaiyaiyaiyaiyaiyaiyaiyaiyaiyaiyaiyaiyaiyaiyaiyaiyaiyaiyaiyaiyaiyaiyaiyaiyaiyaiyaiyaiyaiyaiyaiyaiyaiyaiyaiyaiyaiyai
sall sclg jzjgllll 10) 11111111111111111111111111111111111111111111111
1
(11) 1
(C)
max" 1
(11)
1 1
ar
:pL
aiiaiae la Jaxiu JSey
10,1:1 qial all co ayiaill cfo jal, jaiy s
elal yaiiell elo jol, siaiae iell eall jue
1:2
aall aell iie ie all jaa jaa
"sioljaiyaiyajb/“jaiyaiyaiyaiyaiyaiyaiyaiyaiyaiyaiyaiyaiyaiyaiyaiyaiyaiyaiyaiyaiyaiyaiyaiyaiyaiyaiyaiyaiyaiyaiyaiyaiyaiyaiyaiyaiyaiyaiyaiyaiyaiyai
8
y 9
iJ 10
11
A. a_1 = a_2 = = a_n - 1 = a_n 12
sall 13
*j11 j 14
()
(A)
sall sclal ay, cIaL ay 1y j
1sall 0jssr jll jSoy.0jg,aa s2c3 g jzll 1.2
a 1
aai
jLjJyssall gA aai yai all jjI JgJgJ.3
a
aJy)1gss Jj jgsclll jgs 4
()
5.
(7)
Jaeoo
jlll l l jolal jilai
a a a a a a a a a a a a a a a a a a a a
.(Calc'n clean)
j 1
J 1
elal joll jll 1o o 00
Juaa 1
hll l 1000 1000 1000
y 1
y 1234567890123456789012345678901234567890123456789012345678901234567890123456789012345678901234567890123456789
jglal gllai ciL 1 Jaei jia jia jai iall gali .
Jauaia gi aay ay j Iaai yaiy ai yaiy Jia.
:
1 1
aiaaa aiee ae baae eae
sall slll jll gjg jn Jn jy y
aill sall sall aollae y
a aaii i 1
jglal ciaolgo
all jyj 1
S OBC = S COD + S BOC - S BOC
aal jgj 3
"zil
Ss S25 1. Siemens no
#
i 10000000000000000000000000000000000000000000000000000000000000
#
JyIySsOgOoAe yIgauu uai
aayjpeal Scluunl 12001 1001 1001 1001
aal aal alal
J 1 J 1 1 1 1 1 1 1 1 1 1 1 1
y 1000000000000000000000000000000000000000000000000000000000
aalll aale caij
e 105
16 16
Clele cie 1514 aegw all g jgll lia pssu w .
Aaee, yag, Aia eall jywl alg jyjul ggsal
Aaiaril oale! jaaeia aae i
jie jie jie jie jie jie jie jie jie jie jie jie jie jie jie jie jie jie jie jie jie jie jie jie jie jie jie jie jie jie jie jie jie jie jie jie jie jie
i 0.27 a 121 121 121 121 121 121 121 121