
Dressman TJ10100 - Iron SIEMENS - Free user manual and instructions
Find the device manual for free Dressman TJ10100 SIEMENS in PDF.


| Product type | Steam iron |
| Brand | Siemens |
| Model | Dressman TJ10100 |
| Dimensions (L x W x H) | 30 x 15 x 20 cm |
| Weight | 1.5 kg |
| Power supply | 220-240 V ~ 50/60 Hz |
| Power | 2400 W |
| Water tank capacity | 300 ml |
| Anti-scale system | Integrated scale collector |
| Continuous steam function | Yes, adjustable |
| Vertical steam function | Yes |
| Auto shut-off | Yes, after 8 min of inactivity |
| Soleplate | Ceramic soleplate |
| Cord length | 2 m |
| Filling type | Wide opening |
| Care and cleaning | Regular cleaning of the scale collector and soleplate with a damp cloth |
| Safety | Auto shut-off, thermal fuse |
| Spare parts and reparability | Tank, soleplate, scale collector available as spare parts |
| Box contents | Iron, user manual, warranty card |
Frequently Asked Questions - Dressman TJ10100 SIEMENS
User questions about Dressman TJ10100 SIEMENS
0 question about this device. Answer the ones you know or ask your own.
Ask a new question about this device
Download the instructions for your Iron in PDF format for free! Find your manual Dressman TJ10100 - SIEMENS and take your electronic device back in hand. On this page are published all the documents necessary for the use of your device. Dressman TJ10100 by SIEMENS.
USER MANUAL Dressman TJ10100 SIEMENS
Environmental protection
Recommendations for the disposal of packaging....21
Recommendations for the disposal of your old appliance ....21
Safety warnings
If there are children in the home .....22
Be careful! 22
Your new appliance
Control panel 23
Shirt ironer 23
Before using your shirt ironer
Installing your shirt ironer....23
Setting up your shirt ironer....23
Selecting the connection current ....23
Adjusting the signal 24
Adjusting the indicator light 24
Adjusting the size....24
Use
Preparing your garments ....24
Ironing 24
Ironing / Airing 25
Turning off the shirt ironer 28
Cleaning, maintenance
Control panel and body of the appliance......29
Cleaning the ironing dummy 29
Cleaning the air filter ....31
Before calling the Technical Service ....31
Technical service / Warranty....33
Technical Data 33
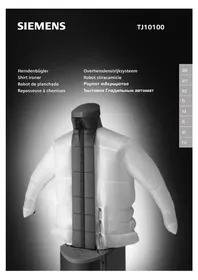
The shirt ironer makes ironing shirts, blouses, etc. at home easier and provides better results. Now you can automatically iron/air shirts, blouses and even jackets at home.
Each and every one of the shirt ironers leaving our factory is carefully checked to ensure that it is in perfect condition and optimum working order.
Our FamilyLine is available for any query that you may have.
Please read these instructions for use carefully before using the appliance for the first time. The instructions contain important information not only about how the appliance should be used, but also concerning your own personal safety and maintenance of the appliance.
Please keep all the documents that come with the appliance in a safe place for future consultation and/or other users. If you pass the appliance on to another user, then provide him/her with the instructions manual.
Environmental protection
Recommendations for the disposal of packaging
☐ Respect the environment when disposing of the packaging your appliance comes packed in. ☐ Our products are carefully packed for transportation. All of the material used in our packaging is environmentally friendly (the cardboard is manufactured from used paper) and may be recycled. ☐ Recycling packaging helps conserve raw materials and reduces the amount of waste produced in the world. ☐ Actively help protect the environment by disposing of packaging properly. Take it to your nearest local council disposal point or it may be possible to return it to your supplier.
Recommendations for the disposal of your old appliance
☐ Unplug your appliance from the mains electricity supply and cut the power cable. ☐ Appliances of this kind include both recyclable material, which may be used again, and hazardous products (such as heavy metals and liquid refrigerants), which may pollute the soil or the atmosphere. Actively help protect the environment by ensuring that your old appliance is disposed of in accordance with environmentally friendly practices. Dispose of your appliance at an official disposal or recycling point (ask your local council where the nearest disposal point is). Appliances of this kind contain refrigerants which must be disposed of in accordance with current regulations.
☐ This appliance is labelled in accordance with European Directive 2002/96/EG concerning used electrical and electronic

appliances (waste electrical and electronic equipment - WEEE). The guideline determines the framework for the return and recycling of used appliances as applicable throughout the EU.
Safety warnings
Your shirt ironer is intended:
☐ For domestic use only. Not intended for industrial use. ☐ For ironing garments which do not contain elasticated fabric. ☐ For ironing garments no larger than the ironing dummy. ☐ For airing suit jackets, sports jackets, sports coats and all types of jacket made from textile.
Warning!
Do not connect your shirt ironer to the mains electricity supply if you observe any visible damage. Connect the shirt ironer to an earthed AC socket. Do not insert or extract the plug when your hands are damp. Unplug the appliance by pulling on the plug itself. Never pull on the cable. Make sure that the appliance has been properly unplugged before carrying out any kind of maintenance or cleaning operations. The shirt ironer must be fully lowered for transportation! The shirt ironer weighs approximately 24 kg. Be careful when transporting your appliance! When ironing, the temperature on the surface of the ironing dummy may rise to a maximum of 90°C. Allow the short press to cool down before removing the ironing dummy.
If there are children in the home
Keep the ironing dummy out of the reach of children. The material that the ironing dummy is made of is airtight-danger of suffocation! Do not allow unattended children near to the shirt ironer.
Be careful!
Do not damage your shirt ironer.
Do not lean on it. Do not climb on it. Make sure that all the flaps are closed before fitting the ironing dummy. The shirt ironer cannot be guaranteed to work properly if the ironing dummy is damaged in any way.
Do not damage the material the ironing dummy is made of:
- With sharp objects. Do not allow your pets to scratch the ironing dummy.
- With fire.
- When raising the upper frame, make sure that the ironing dummy does not snag.
Solvents are dangerous. Do not dry shirts if they have previously been treated with solvents.
Your new appliance
Before reading these instructions for use, unfold the page at the back of this manual showing illustrations of the control panel and the appliance itself.
Control panel, Fig. 1
1.- Button to unlock upper frame. To raise and lower the upper frame. 2.- button with indicator light. To turn the shirt press on and off. 3.- Start/stop with indicator light. To start and stop/pause the ironing airing processes. 4.- programme selector switch. To select the ironing and/or airing programme.
Shirt ironer, Fig. 2
5.- Head section unlocking clip. 6.- Collar adjuster knob. 7.- Button band adjuster. 8.- Control panel. 9.- Transportation handle. 10.- Upper head section. 11- Collar adjuster. 12.- Collar support. 13.- Inflatable ironing dummy. 14.- Cuff adjuster. 15.- Size adjustment cords. 16.- Cable compartment. 17.- Characteristics plate. 18.- Filter cover and air filter. 19.- Wheels.
Before using your shirt ironer
Your shirt ironer is supplied fully assembled and packed to protect it during transportation. There is a rubber tightener stitched onto the cover appliance which fits onto a guide on the shirt ironer to hold the cover appliance in place.
☐ Remove the cover appliance. ☐ Cover the shirt ironer with the cover appliance when not in use.
Installing your shirt ironer
Warning!
The shirt ironer must be fully lowered for transportation!
The shirt ironer is fitted with two wheels. There is a handle on the front 9, Fig. 2 of the appliance to help move it more easily.
Tilt the shirt ironer by lifting the handle on the front and wheel it to the desired work location.
Work area
The work area needs to measure approximately 2.50 m x 1.00 m.
Setting up your shirt ironer
The cable is rolled up on the cable supports on the back of the shirt ironer, 16, Fig. 2.
Unroll the required length of cable and plug it in.
Selecting the connection current
The ironer can work at 10 or 16 Amps depending on the power of the mains electricity supply available. The appliance is supplied in the 16-Amp version (see characteristics plate, 17, Fig. 2). If you wish to use the shirt ironer at 10A, then you need to change the connection current as follows:
Adjusting the connection current:
The appliance is plugged in. The shirt ironer is off and the programme selector switch 4, Fig. 1, is set to "0". The button band is fully lifted.
☐ Press the Ⓘ and the start/stop buttons in at the same time and keep them pressed in. ☐ Three sound signals are emitted to confirm the operation.
The indicator lights on the appliance indicate the connection current setting in accordance with the following table:
Indicator light 10 A 16
①
On On
Start/ Stop Off On
Changing the connection current:
The connection current is set by pressing the "Start/stop" button. Each time the button is pressed the connection current switches over and three sound signals are emitted as confirmation.
☐ When the appliance is set to 10 amps the ironing process takes longer. ☐ We recommend that the shirt ironer be set to 16 amps for enhanced performance.
Adjusting the signal
Sound signals are emitted to indicate that a specific circumstance has taken place in the programme.
☐ Change in the connection current setting. ☐ End of ironing and airing cycle
Adjusting the indicator light
☐ The Ⓘ light lights up when the appliance is working. ☐ The start/stop light and the Ⓘ light light up when the appliance is blowing air, in any cycle. ☐ The start/stop light flashes during the last minute of each cycle to indicate that cold air is being blown and that the ironing cycle is about to come to an end. ☐ When the appliance is on pause, the start/stop light flashes for the 30 seconds that this function lasts
Adjusting size
The size of the ironing dummy is based on European shirt sizes. The size can be adjusted between sizes 35 and 50. These sizes coincide with American sizes XS and 4XL. In the case of blouses, sizes 36/38 to 50/52 (S to XXL) can be used.
The ironing dummy can be adapted to different cuts (e.g. tapering, blouse cuts) by adjusting the size. This is done by adjusting the 3 adjustment cords 15, Fig. 2. To adjust the size, start by adjusting the top cord. The volume of the ironing dummy cannot be reduced when inflated.
Attention:
Please make sure that both upper cords that adjust the dressman to the individual shirt sizes are never fully tightened.
To do so ensures that the internal air flow is not interrupted and therefore assures a perfect ironing result.
For an optimum ironing result please always adjust all cords to the individual cut and size of the shirt/blouse.
2 button arm straps are supplied for ironing short-sleeved shirts, Fig. 3.
Use
Preparing your garments
The appliance is only intended for ironing shirts and blouses made with non-elasticated fabric. Garments must be spin-dried prior to ironing.
Warning!
Do not iron knitwear or garments made with elasticated fabric! They may lose shape.
Ironing
In order to get the best results from ironing:
☐ Spin dry the garment at 800 revolutions/minute after washing. ☐ Shirts and blouses can be spin-dried at lower speeds if your washing-machine does not have an 800 revolution/minute spin-dry programme. Ironing will take longer. ☐ Thick, soft material, such as brushed cotton or denim, can be spin-dried at higher speeds.
☐ All fabrics are ironed at the same temperature. There is no risk of overheating. The only factor that varies according to the fabric being ironed is the ironing time. ☐ The ironing time depends on the quality of the fabric being ironed, its weight, the dampness remaining after being washed and dried and the size of the shirt/blouse. ☐ In the case of an average-quality, cotton shirt, the ironing/drying process takes about 9 min, of which one minute is set aside for airing with cold air. ☐ The shirt is totally ironed when it is dry. ☐ Be sure to note the type of fabric being ironed.
Ironing / Airing
The Ironing/Airing programme airs the garment with cold or warm air.
The ironing/airing programme is ideal for suit jackets, sports jackets, sports coats and all types of jacket made from textile.
There are two different airing programmes.
Use “cold” (cold airing) to air garments that have not been worn very much.
Use “✗ hot” (hot airing)
☐ To dry damp jackets
☐ To iron jackets, as long as the manufacturer endorses damp garments. Jackets need to be slightly damp in order to be ironed.
☐ To complete the drying of thick fabrics that were not entirely dried out during ironing.
The table below shows approximate airing times.
Programme Airing time in min
cold 5
hot 1st level 5 + 1
hot 2nd level 10 + 1
Warning!
Foreign objects (e.g. pens, clips) may damage the garment and/or the ironing dummy. Empty all pockets on the garment.
Warning!
The Ironer must be fully lowered for transportation!
☐ Put the shirt ironer in position. ☐ Turn lifting knob 1, Fig. 1, anti-clockwise while gripping the button band, 7, Fig. 2, with the other hand and pull it upwards.
Warning!
On releasing the lifting knob and pulling the button band upwards, the appliance rises to a specific height. Do not place anything on top of the appliance during this process!
☐ Grip the button band adjuster with both hands and finish lifting the top 7, Fig. 2 part of the appliance until you hear a click, which indicates that it has reached its limit. Fig. 4. Plug it in.
For safety reasons, ironing and/or airing can only be started when the upper frame is completely raised.
Ironing
☐ Turn the collar adjuster knob 6, Fig. 2 to its vertical position. ☐ Open all the flaps on the button band adjuster and the collar support.
Fitting the shirt
☐ Unbutton the shirt and the cuffs. ☐ Lift the collar. ☐ Fit the damp, spin-dried shirt onto the ironing dummy. ☐ Fit one arm of the ironing dummy inside the shirtsleeve. Do not twist the sleeves, Fig. 5. ☐ Place the other arm of the ironing dummy into the other shirtsleeve. Do not twist the sleeves. ☐ The arrows shown in the picture indicate the lower seam. Fig. 6. ☐ Line the lower hem up with the line marked on the plastic part at the top of the button band adjuster, Fig. 7. ☐ Hold the collar flaps firmly and close the two top flaps on the button band adjuster.
☐ Pull the button band on the shirt down and fit it vertically onto the button band adjuster, Fig. 8.
To avoid marking of any kind, do not insert the button band too much. Position the button band in such a way that the perforated plate is completely covered.
☐ Starting at the top, close all the flaps on the button band adjuster. Secure the button band firmly in place. Close those flaps not required to hold the shirt in place as well. ☐ Repeat this proceeding to tighten the other side of the shirt. ☐ Turn the collar adjuster knob clockwise from its vertical position while adapting the back of the collar to the Ironer by pulling it gently upwards with the other hand. ☐ Close the two upper supports on the casing to maintain the shirt collar up. Correct the positioning of the back of the shirt by pulling it lightly upwards.
A spring adapts the collar adjuster to the size of the shirt collar. The rotated position of the knob depends on the size of the shirt.
Do not overturn the knob when turning it clockwise. The knob sets itself in the right position.
Do not adjust the knob when the appliance is inflated.
Long-sleeved shirts
☐ Pull on the cuff adjusters until the arms of the ironing dummy reach their maximum length (longer than the shirtsleeves). Raise the shirt to make sure that the ironing dummy arms are not twisted. ☐ After pulling the shirtsleeves back down, push the ironing dummy arms back into the shirtsleeves from the cuff adjusters until the seams between the cuffs and the sleeves line up with the curved parts of the cuff adjusters, Fig. 9.
Warning!
Make sure that the ironing dummy arms are not twisted inside the shirtsleeves.
☐ Open the flaps on the cuff adjusters.
☐ Position the shirt cuffs on the cuff adjusters. Make sure that the cuff adjusters are aligned beneath the openings where the two sides of the shirt cuffs join. ☐ Close the flaps. The cuff adjusters hold the shirt cuffs firmly in position.
Short sleeves:
☐ Fit button arm straps onto the ironing dummy arms approximately 5 cm beneath the shirtsleeves. Figs. 10 and 11.
Warning!
Only use the button arm straps supplied by the manufacturer. Only these straps guarantee the air pressure required for good ironing results.
Adjusting size
☐ If necessary, adjust the size by gradually loosening the adjustment cords.
Attention:
Please make sure that both upper cords that adjust the dressman to the individual shirt sizes are never fully tightened.
To do so ensures that the internal air flow is not interrupted and therefore assures a perfect ironing result.
For an optimum ironing result please always adjust all cords to the individual cut and size of the shirt/blouse.
☐ If the adjustment cords are too tight, the ironing dummy can be adjusted to the garment by gradually loosening the cords.
The adjustment cords not covered by the shirt need to be adjusted.
Starting the ironing process
☐ Press the Ⓐ button. The indicator light comes on. ☐ Set the programme selector switch 4, Fig. 1 to the programme for the fabric to be ironed. Remember that the temperature is the same for all of the ironing cycles; drying time is the only thing that varies. ☐ None of the indicator lights light up. More than 5 minutes have passed since the ironing programme was selected and the shirt ironer has turned itself off.
☐ Turn the appliance back on again by pressing the Ⓐ button. ☐ Press the start/stop button. The ironing dummy inflates. ☐ It is not necessary to wait for the preheating time to finish. You can press Start/Stop when you wish. The length of the ironing time automatically adjusts in order to give a good result depending on the amount of time the appliance has been allowed to preheat for. The same cycle may, therefore, last different lengths of time. ☐ If the adjustment cords have been overadjusted, adapt the ironing dummy to the size of the garment by gradually loosening the cords. ☐ Pull the side seams on the shirt firmly downwards, Fig. 12. ☐ Raise the sleeves and smoothen them out in straight-lined motions from the shoulder seam to the cuffs, Fig. 13. ☐ Position any pleats on the shirt (on the back, yoke and cuffs), Fig. 14. ☐ Smoothen out any breast pockets or pockets in other positions, Fig. 15.
The position of the programme selector switch should not be changed during the ironing process.
Changing the position of the programme selector switch during the ironing process does not alter the original programme setting.
In order to fix the result of the ironing process, the ironing dummy blows cold air for the last minute of the ironing cycle. The “start / stop” light flashes during this minute.
When the ironing process comes to an end, a sound signal is emitted and the light indicating the "start / stop" function goes out.
Pausing the ironing process
The ironing process can be paused to stop the ironing process, e.g. to correct the width of the ironing dummy. To do this:
☐ Press "start/stop" while the ironing cycle is under way. ☐ The ironing process stops and the airing motor turns itself off. The “start/stop” indicator light flashes for 30 seconds. The ironing programme can be started again at any time during this period. □ Adjust as desired. If you press Start/Stop again during this period, the appliance continues the cycle from where it left off. ☐ If the 30-second time limit is exceeded, the "start/stop" function light goes out: the programme has finalised. It is necessary to start a new ironing cycle.
If you change the position of the programme selector switch while on pause, the pause option is disabled and it is necessary to reprogramme the appliance. The previously-selected programme is interrupted.
End of the ironing process
When the minute of cooling comes to an end, a sound signal is emitted and the programme finalises.
The ironing dummy slowly deflates.
☐ Set the collar adjuster knob to vertical. ☐ Open all the flaps on the button band adjuster and on the collar support. ☐ Open all of the flaps on the button band adjuster and the collar support. ☐ Release the cuff adjusters and pull them out of the stretched shirtsleeves.
Leave the shirt to cool on a hanger to help fix the results of the ironing process.
The next shirt can now be fitted onto the appliance ready for the ironing process to begin again.
Ironing/Airing
Warning!
Foreign objects (e.g. pens, clips) may damage the garment and/or the ironing dummy.
Do not air knitwear or elasticated garments! They may lose shape.
Only air non-elasticated, cloth garments.
There are two ironing/airing programmes to choose from: ♘ cold and ♖ hot, see Airing in "Preparing your garments".
☐ Empty all the pockets on the garment to be aired.
☐ Fit the garment onto the appliance and secure it as described in the “ironing” section. See “Use”.
☐ If the garment is a jacket, then it is not necessary to secure the cuffs. Remove the cuff adjusters if necessary.
☐ Select the desired airing programme with the programme selector switch. See "Use".
☐ Press “start/stop”. The start/stop light lights up. The ironing dummy inflates and the airing process begins.
☐ Remove the aired garment from the ironing dummy.
☐ The next garment can now be fitted onto the appliance.
Turning off the shirt ironer
☐ Turn the programme selector switch to "0".
☐ Turn the shirt ironer off by pressing Ⓙ.
☐ Turn lifting knob 1, Fig. 1 anti-clockwise while gripping the button band with the other hand and pull it downwards. The button band starts lowering.
Warning!
The shirt ironer may suffer damage. Make sure that all the flaps are closed before lowering the upper frame.
Make sure the ironing dummy and/or the adjustment cords do not get hooked up.
☐ Lower the appliance completely by pushing the casing down until the upper part clicks into its down position.
Storing your shirt ironer
There are two cable supports on the back of the shirt ironer. 16, Fig. 2.
☐ Wind the mains cable onto the wind pillar. Secure the plug in position.
☐ Take one of the cuff adjusters, fold the inflatable sleeve and insert the adjuster between the size adjustment cords so that the cuff adjuster remains in a vertical position. Repeat the process with the other sleeve.
☐ Fit the cover appliance over the top of the shirt ironer. The pocket goes on the back.
☐ Fit the rubber tightener on the cover appliance into the guide on the lower frame of the shirt ironer.
☐ To transport the ironer, hold the handle 9 Fig. 2 and tilt the appliance backwards.
Transport the shirt ironer fully lowered to the place where you wish to store it!
Control panel and body of the appliance
When necessary:
☐ Use soapy water or a mild cleaning product. Dry with a soft cloth.
Warning!
Do not use solvents or abrasive detergents.
Cleaning the ironing dummy
When necessary or when the dummy is clearly dirty, the ironing dummy can be laundered together with your shirts. Use a mild detergent and a programme for delicate garments at 40°C.
Do not use fabric softeners or starch. The ironing dummy can only be dried naturally (do not use a tumble drier).
Warning!
The ironing dummy cannot be ironed. Fit it straight back onto the shirt ironer when dry.
The ironing dummy assembly consists of the cover material (outer ironing dummy) and the airbags. The airbags are located inside the outer ironing dummy and are attached to the frame independently.
Warning!
Allow the shirt press to cool down before removing the ironing dummy.
Removing the ironing dummy
Close the flaps on the button band adjuster. Remove the short sleeve button arm straps if necessary. Remove the cuff adjusters by releasing the snap fastener. Completely loosen the adjustment cords on the bottom right-hand side of the ironing dummy.
Fully open the collar adjuster.
Open the collar support.
Lightly press the clip on the back of the head upwards. Fig. 16.
☐ Remove the upper head section from back to front. 10, Fig. 2. ☐ Unlock the button band adjuster: Pull the unlocking ring upwards. Fig. 17.
Warning!
The button band adjuster tilts forwards. Support it with one hand.
☐ Open the two adjustment cords in the head area, which is now accessible. Extract them from their guides. Fig. 18. ☐ Open the cord fixture on the rear edge. Extract them from their guide. Fig. 19.
On the front, the cord is fitted behind the button band and secured with the guides fitted for this purpose.
☐ Turn the collar adjuster knob to its vertical position.
☐ Grip the ironing dummy from the bottom and carefully pull upwards.
☐ Pull the ironing dummy from front to back over the collar adjuster. Fig. 20.
☐ You hold now the ironing dummy cover. Open the snap fasteners which join the sleeves of the ironing dummy to the airbags.
The airbags are still on the frame and need to be removed:
☐ Open the six snap fasteners on the shoulders, the snap fasteners in cross formation on the front and the snap fasteners around the left-hand tube on the front at the bottom.
☐ Release the adjustment cord fixture at the bottom of the airbags. Extract them from the guide groove.
The ironing dummy and the airbags can now be washed.
Fitting the ironing dummy
Make sure that nothing enters the air ducts which are now accessible.
It is essential that the ironing dummy be fitted correctly in order to obtain optimum ironing results.
Be particularly careful when fitting the ironing dummy and follow all the instructions given.
The ironing dummy should only be fitted when dry.
First fit the airbags:
☐ Each of the airbags (symmetrical) is joined with a strip. This strip is fitted on the front between the button band and the support tubes. The airbag with an extra section with 2 snap fasteners in the middle must be fitted on the left-hand side of the appliance (looking head on). ☐ There are three snap fasteners on each side of the shoulder area which are fitted to the relevant airbag. ☐ Fit the adjustment cords onto the round guides around the air-output grille and secure the cord fixture. Fig. 21. ☐ Position the cross formation on the airbags and close the snap fasteners on the front at the bottom. Fig. 22.
The extra section on the bottom left-hand side must be wrapped around the left-hand tube, protecting the hole on the tube in this area.
☐ Check that the adjustment cords are secured properly.
☐ Check that the airbags are positioned properly.
☐ Start the “ ✉ cold” programme. The programme can be stopped at any time by pressing the “start/stop” button.
☐ Check that the airbags are positioned properly.
☐ Tighten any slack cords.
□ Correct any problems.
☐ Fit the ironing dummy onto the upper part of the appliance with the button band still unlocked and the knob in its vertical position.
☐ Fit the ironing dummy from back to front. There are 4 holes on the front of the upper part of the ironing dummy. The front adjustment cords are on this section.
☐ When the dummy is fitted, set the knob to horizontal.
There are two guides on the head: front and back. First fit the rear cord and then the front cord into the guides on the collar and secure. The ironing dummy is joined to each airbag via an interior cord. Fig. 23. Once the inner airbags have been fitted, turn the sleeves of the ironing dummy inside out. Then close the snap fasteners joining the two parts and turn the sleeve (currently inside out) outside out again. The arms of the airbags are now inside the ironing dummy arms. Fig. 24. Pull the ironing dummy downwards from the underarms, Fig. 25. Fit the airbag arms into the ironing dummy. Fit the lower adjustment cord on the ironing dummy into the guide. Make sure that it is secured properly. Fig. 26. On the front, the adjustment cord has to be fitted under the 2 supports on the appliance on the rear of the button band. Fig. 27. Tighten the fixture fitting for this cord. The fixture fitting has to be positioned into the central rear groove, Fig. 26. Then pull the adjustment cord again. Check that all of the adjustment cords are secured properly. Close the button band. It clicks into position. Check that the ironing dummy works properly: Start the "cold" programme. The programme can be stopped at any time by pressing the "start/stop" button. Check that the ironing dummy is fitted properly. Tighten any slack cords if necessary. Correct any problems. Fit the head section into the front guide. Click the front hook into the hole on the top part of the head. Press the head section until it clicks into position. Fig. 28. Position each of the cuff adjusters and close the relevant snap fasteners.
Cleaning and maintenance
Cleaning the air filter
Warning!
All repairs or works on the appliance must be carried out with the plug unplugged.
Clean the air filter more or less every six months. This period of time will vary depending on the specific conditions of the surroundings the appliance is used in.
Open the filter cover. Extract the air filter. Fig. 29. Clean it in plenty of hot water. If necessary, use a suitable commercial detergent. Allow the air filter to dry. Clean the filter support with a damp cloth. Fit the air filter when clean and dry. Close the filter cover.
Before calling the Technical Service
This shirt ironer complies with the safety guidelines established for electrical appliances. All repairs, modifications and work of any kind performed on electrical appliances must be carried out by Specialised Technicians. Incorrect repair work may
result in damage to the appliance. However, consult the following list of simple faults which you may be able to solve yourself. If the following recommendations do not solve the problem, call our Technical Service!
Problem Possible cause Solution
| The ironing programme The does not start. | button has not been pressed. | Press the button. |
| The start/stop button has not been pressed. | Press the start/stop button. | |
| The upper support is not correctly set to its upper position. upper position. | Set the upper support to its | |
| The automatic fuse for the household circuit has been triggered. fuse. | Connect/replace the automatic | |
| If the fault recurs, change from 16 amps to 10 amps. | ||
| General electricity supply failure. | Restart the programme when the electricity supply resumes. Reset the programme selector switch according to how dry the garment is. | |
| The plug is not plugged into the socket or is loose. | Insert the plug firmly. |
Problem Possible cause Solution
| Hot air in the “ cold” This is not a fault! Residual heat. The hot air disappears after a programme. short period of time. | ||
| The Start / Stop The start/stop button has been pressed It stops after 30 seconds or light is flashing during an ironing cycle: pause function when start/stop is pressed. | ||
| The ironing programme blows indicates that the cycle is cold air for the last minute. finishing and the appliance has begun to blow cold air. | ||
| Low air pressure in the ironing dummy. | The ironing dummy has not been fitted properly. | Fit the ironing dummy correctly. |
| The air filter is dirty. | Clean the air filter. | |
| Faulty ironing dummy. | Replace the ironing dummy. | |
| Excessive air pressure the ironing dummy. | The airbag is not fitted properly. | Check the airbag adjustment in cords and adjust them correctly. |
| No air pressure in the arms. | The ironing dummy arms are twisted. | Set the arms in the right position. |
| The airbag arms are not inside the ironing dummy arms. | Insert the airbag arms in the ironing dummy arms. Fig. 25. | |
| Ironing process too long. | The 10 A version was used. | Switch over to the 16 A version if possible. |
| The ends of the adjustment cords used to regulate size have become hooked up on the appliance. | Press the gap on the button band. | in and pull on the cord. |
| The fuse triggers when the appliance is connected. | The wrong connection current has been selected. | Select the right connection current. See “Changing the connection current”. |
| You hear a noise on raising or lowering the appliance. | This is because the internal tube is sliding | This is not a fault and does not affect correct operation of the appliance. |
Technical service and Warranty
Technical service
Should your appliance fail to work properly and all the instructions for use and installation (especially the section headed
If the requirements have been carefully observed, then remember that our Technical Service Network is at your full disposal.
When contacting the Technical Service, quote the model code (E-NR) and the appliance's factory number (FD). This information can be found on the characteristics plate, 17, Fig. 2.
Warranty
The conditions of warranty depend on the relevant Supplier in a particular country. Contact the establishment where you purchased your appliance for more information and quote the appliance model and factory number. The receipt of purchase for the appliance must be produced prior to any work carried out under warranty.
Technical Data
Electrical connection ....230 V, 10 A/16 A
Heat power....10 A: 2150 W
16 A: 3400 W
Air flow during ironing: ....approx. 250 m³/h
Measurements of the main body:
Height: 1.73 m
Height, lowered: 1.20 m
Width: 0.37 m
Depth: 0.51 m
Weight:......approx. 24 kg
Index
Inflatable body....59
Cleaning, maintenance
www.bshappliancecare.co.uk/
Siemens
Service Requests (nationwide)
Tel.: 08702 413382
mailto:mks-servicerequest@
bshg.com
Spares, Accessories and Central
Warehouse
Tel.: 08705 543210
mailto:mks-spares@bshg.com
Customer Liaison
Fax: 01908 328660
mailto:mks-customerliaison@
bshg.com
Head office
Tel.: 08705 222777
Fax: 01908 328670
GR Greece, Ελλάς
BSH Ikiakes Siskeves A. B. E.
Kentriko Ipokatastima Service
17 km E.O. Athinon-Lamias &
Potamou 20
145 64 Kifisia
IE Republic of Ireland
BSH Home Appliances Ltd.
BSH Appliance Care,
Service Division
Unit F4, Ballymount Drive
Ballymount Industrial Estate
Walkinstown
Dublin 12
www.bshappliancecare.ie/Siemens
Service Requests, Spares and
Accessories
Tel.: 01450 2655
Fax: 01450 2520
IS Iceland
Smith & Norland hf.
Noatuni 4
105 Reykjavik
Tel.: 0520 3000
Fax: 0520 3011
www.sminor.is
IT Italia, Italy
LT Lietuva, Lithuania
Ogmios pulsas, Ltd.
P. Luksio Str. 23
2600 Vilnius
Tel.: 05 274 1750
Fax: 05 274 1760
www.ogmios.lt/pulsas
LU Luxembourg
72 Buluju street, house 2
1067 Riga
Tel.: 07 74 42 274
Fax: 07 74 73 300
mailto:latinter@latinter.lv
ME Crna Gora, Montenegro
Elektronika komerc
Ulica Slobode 17
84000 Bijelo polje
Tel./Fax: 084 432 575
mailto:elektronikabsh@cg.yu
MK Macedonia, Makedonия
RIMEKO
Partizanski odredi 62 / 13
1000 Skopje
Tel./Fax: 02 3077 744
mailto:rimeko@mt.net.mk
MT Malta
Aplan Limited
Aplan Centre
B – Kara By Pass BKR
Tel.: 021 48 05 90
Fax: 021 48 05 98
mailto:lapap@aplan.com.mt
NL Netherlands




- ENVIRONMENTAL PROTECTION
- SAFETY WARNINGS
- YOUR NEW APPLIANCE
- BEFORE USING YOUR SHIRT IRONER
- USE
- CLEANING, MAINTENANCE
- RECOMMENDATIONS FOR THE DISPOSAL OF PACKAGING
- RECOMMENDATIONS FOR THE DISPOSAL OF YOUR OLD APPLIANCE
- WARNING
- IF THERE ARE CHILDREN IN THE HOME
- BE CAREFUL
- CONTROL PANEL, FIG
- SHIRT IRONER, FIG
- INSTALLING YOUR SHIRT IRONER
- THE SHIRT IRONER MUST BE FULLY LOWERED FOR TRANSPORTATION
- WORK AREA
- SETTING UP YOUR SHIRT IRONER
- SELECTING THE CONNECTION CURRENT
- ADJUSTING THE CONNECTION CURRENT
- CHANGING THE CONNECTION CURRENT
- ADJUSTING THE SIGNAL
- ADJUSTING THE INDICATOR LIGHT
- ADJUSTING SIZE
- ATTENTION
- PREPARING YOUR GARMENTS
- IRONING
- IRONING / AIRING
- THE IRONER MUST BE FULLY LOWERED FOR TRANSPORTATION
- FITTING THE SHIRT
- LONG-SLEEVED SHIRTS
- SHORT SLEEVES
- STARTING THE IRONING PROCESS
- THE POSITION OF THE PROGRAMME SELECTOR SWITCH SHOULD NOT BE CHANGED DURING THE IRONING PROCESS
- CHANGING THE POSITION OF THE PROGRAMME SELECTOR SWITCH DURING THE IRONING PROCESS DOES NOT ALTER THE ORIGINAL PROGRAMME SETTING
- PAUSING THE IRONING PROCESS
- IF YOU CHANGE THE POSITION OF THE PROGRAMME SELECTOR SWITCH WHILE ON PAUSE, THE PAUSE OPTION IS DISABLED AND IT IS NECESSARY TO REPROGRAMME THE APPLIANCE. THE PREVIOUSLY-SELECTED PROGRAMME IS INTERRUPTED
- END OF THE IRONING PROCESS
- LEAVE THE SHIRT TO COOL ON A HANGER TO HELP FIX THE RESULTS OF THE IRONING PROCESS
- IRONING/AIRING
- TURNING OFF THE SHIRT IRONER
- STORING YOUR SHIRT IRONER
- CONTROL PANEL AND BODY OF THE APPLIANCE
- DO NOT USE SOLVENTS OR ABRASIVE DETERGENTS
- CLEANING THE IRONING DUMMY
- THE IRONING DUMMY CANNOT BE IRONED. FIT IT STRAIGHT BACK ONTO THE SHIRT IRONER WHEN DRY
- ALLOW THE SHIRT PRESS TO COOL DOWN BEFORE REMOVING THE IRONING DUMMY
- REMOVING THE IRONING DUMMY
- THE BUTTON BAND ADJUSTER TILTS FORWARDS. SUPPORT IT WITH ONE HAND
- ON THE FRONT, THE CORD IS FITTED BEHIND THE BUTTON BAND AND SECURED WITH THE GUIDES FITTED FOR THIS PURPOSE
- FITTING THE IRONING DUMMY
- MAKE SURE THAT NOTHING ENTERS THE AIR DUCTS WHICH ARE NOW ACCESSIBLE
- BE PARTICULARLY CAREFUL WHEN FITTING THE IRONING DUMMY AND FOLLOW ALL THE INSTRUCTIONS GIVEN
- THE IRONING DUMMY SHOULD ONLY BE FITTED WHEN DRY
- THE EXTRA SECTION ON THE BOTTOM LEFT-HAND SIDE MUST BE WRAPPED AROUND THE LEFT-HAND TUBE, PROTECTING THE HOLE ON THE TUBE IN THIS AREA
- CLEANING AND MAINTENANCE
- CLEANING THE AIR FILTER
- ALL REPAIRS OR WORKS ON THE APPLIANCE MUST BE CARRIED OUT WITH THE PLUG UNPLUGGED
- BEFORE CALLING THE TECHNICAL SERVICE
- TECHNICAL SERVICE AND WARRANTY
- TECHNICAL SERVICE
- WARRANTY
- TECHNICAL DATA
- INDEX
- GR GREECE, ΕΛΛΆΣ
- IE REPUBLIC OF IRELAND
- IS ICELAND
- IT ITALIA, ITALY
- LT LIETUVA, LITHUANIA
- LU LUXEMBOURG
- ME CRNA GORA, MONTENEGRO
- MK MACEDONIA, MAKEDONИЯ
- MT MALTA
- NL NETHERLANDS
Brand : SIEMENS
Model : Dressman TJ10100
Category : Iron