
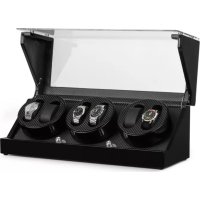
Valmont - Watch winder Klarstein - Free user manual and instructions
Find the device manual for free Valmont Klarstein in PDF.

| Title | Description |
|---|---|
| Device type | Uncategorized |
| Dimensions | Not specified |
| Weight | Not specified |
| Power | Not specified |
| Materials | Not specified |
| Usage | Not specified |
| Maintenance | Not specified |
| Safety instructions | Not specified |
| Warranty | Not specified |
| Additional information | Not specified |
Frequently Asked Questions - Valmont Klarstein
User questions about Valmont Klarstein
0 question about this device. Answer the ones you know or ask your own.
Ask a new question about this device
Download the instructions for your Watch winder in PDF format for free! Find your manual Valmont - Klarstein and take your electronic device back in hand. On this page are published all the documents necessary for the use of your device. Valmont by Klarstein.
USER MANUAL Valmont Klarstein
ONNNNNNNNNNNNNNNNNNNNNNNNNNNNNNNNNNNNNNNNNNNNNNNNNNNNNNNNNNNNNNNNNNNNNNNNNNNNNNNNNNNNNNNNNNNNNNNNNNNNNNNNNNNNNNNNNNNNNNNN
KLARSTEIN
www.klarstein.com


Berlin Brands Group UK Limited
PO Box 42
272 Kensington High Street
London, W8 6ND
United Kingdom
Dear customer,
Congratulations on your purchase. Please read the following instructions carefully and follow them to prevent potential damage. We accept no liability for damage caused by disregarding the instructions and improper use. Please scan the QR code to access the latest operating instructions and further information about the product.

CONTENTS
Safety Instructions 16
Getting Started 16
Fingerprint opening of the watch winder 17
Insertion of watches 18
Operation of watch winders with touch control panel 19
Operation of watch winders with analogue control panel 21
Operation of watch winders with dials 22
Disposal Considerations 23
Manufacturer & importer (UK) 23
TECHNICAL DATA
| Article number 10045619 10045620 10045621 | |||
| Power supply (power adapter) 100-240 V AC, 50/60 Hz, 1.6 A | |||
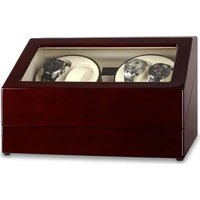
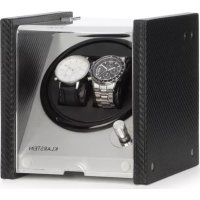
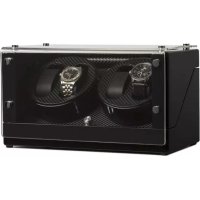
| Number of watches 2 6 12 | |||
SAFETY INSTRUCTIONS
- Children from the age of 8 years and mentally, sensory and physically impaired persons may only use the device if they have been informed in detail about the functions and safety precautions by a supervisor responsible for them beforehand and understand the associated risks.
- Only use the supplied power adapter.
- Do not rotate the watch winder manually as this could damage the watch winder.
- To avoid damaging the box, do not place the watch winder in direct sunlight and do not expose it to water, moisture or extreme temperatures.
- If the watch winder malfunctions, contact a specialist retailer. Do not attempt to repair the device yourself.
- Never insert your finger or objects into the rotating unit during rotation. There is a risk of injury and damage to the mechanics.
- Your watch winder has been developed for use in closed rooms and is designed for a temperature range of 5 - 40^ . Avoid locations with permanently high humidity, such as bathrooms, for installation.
- Protect the watch winder from direct sunlight.
- Only use a damp, lint-free cloth for cleaning. Cleaning agents that contain solvents can permanently damage the surfaces.
- Avoid jerky movements or misuse of any kind to avoid mechanical damage.
- Only use the watch winder to wind automatic watches.
GETTING STARTED
- Only use the power supply included in the scope of delivery. Using other power adapters can lead to malfunctions or damage. For power adapters with international attachments, please select the appropriate adapter for your region.
- Depending on the model, your watch winder has a black toggle switch on the back that can be used to turn the watch winder on and off.
- If you operate the watch winder with batteries, make sure you insert the batteries correctly.
- If you will not be using the watch winder for a long period of time, disconnect it from the power supply and remove the batteries.
FINGERPRINT OPENING OF THE WATCH WINDER
(1) When using for the first time
When delivered, the lock can be opened by placing any finger on the sensor. It is a battery operated lock. To supply the battery with energy, connect the watch winder to the power supply. Then set the red toggle switch to (1).
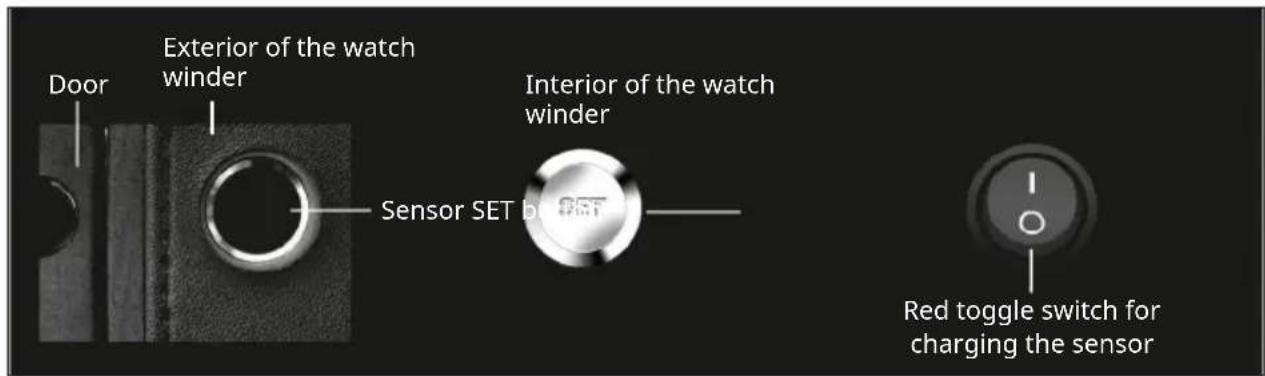
(2) Register a specific fingerprint
Press the SET button inside the watch winder. The LED on the lock will light up green for a short time. Put the finger you want to register on the sensor several times (5-8 times) in quick succession. The successful completion of the registration is signalled by a constant lighting of the green LED. A maximum of 5 fingers can be registered in this way.
(3) Opening the watch winder after registration
Place a previously successfully enrolled finger on the sensor. If the LED lights up red, repeat the process or change your finger.
(3) Delete all registered fingerprints
To delete all registered fingerprints, press and hold the SET button for more than 3 seconds. As soon as the green LED lights up three times, all fingerprints have been deleted and the device is restored to the delivery status.
(4) Low battery warning
If the LED lights up red three times when you open the lock, the battery needs to be charged. Then set the red toggle switch to (I). During charging, the LED flashes at short intervals. As soon as the green LED lights up constantly, the charging process is complete. Then set the red toggle switch back to (0).
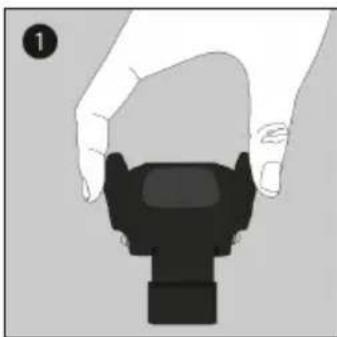
INSERTION OF WATCHES
Note: Before inserting or removing a watch, please always stop the operation, otherwise the gear may be damaged.
The watch winder has one or more watch holders on which the watches must be attached. The watch holder is locked in the housing by means of ball pressure pieces or a similarly designed solution.
Pull the watch holder out of the watch winder with your thumb and forefinger. Some watch holders have two small elevations on the left and right that make it easier to pull them out. Do not put too much pressure on the watch holder when pulling it out. Before starting the rotation, check that the watch holder is securely held in the watch winder.


Setting the current time
1 Press and hold the TPD button for five seconds. The hour digits flash.
2 Press TPD repeatedly to set the hour.
3 Press the OK button. The minute digit flashes.
4 Press TPD repeatedly to set the minute.
5 Press the OK button to confirm the settings.
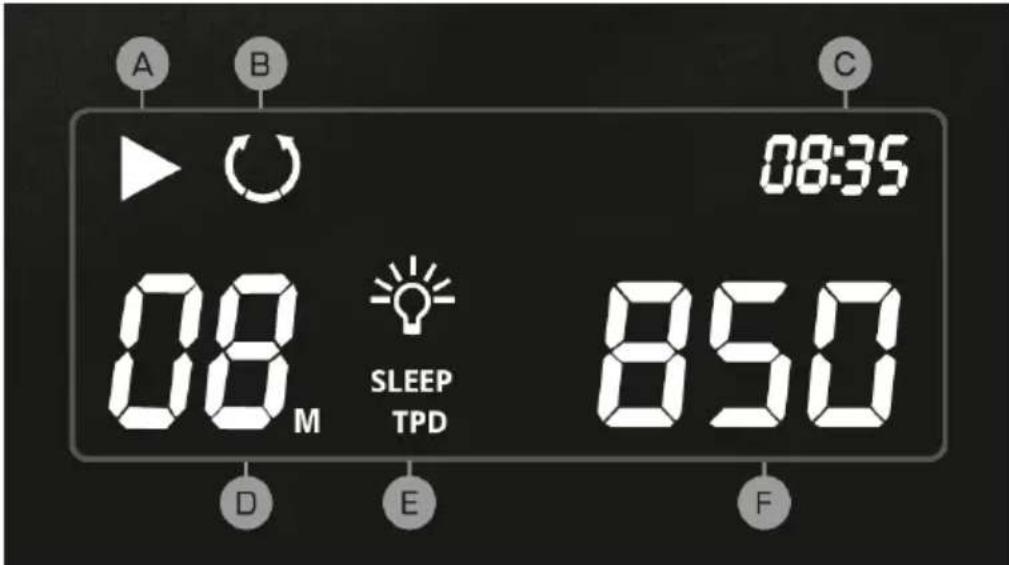
Display indications
| A | Module status: | D M | Module selection | |||
| ON OFF | E Light and sleep phase | |||||
| B | Direction of rotation: | F | Revolutions per day | |||
| • Right • Left • Alternating | 450 / 550 / 650 / 750 / 850 / 950 / 1200 / 1500 | |||||
| C Time | ||||||
Activating and deactivating the sleep phase
To activate or deactivate the sleep phase, press and hold the SLEEP button for 5 seconds. To activate or deactivate the sleep phase, press and hold the SLEEP button for 5 seconds. The modules are idle from 10 p.m. to 11 a.m. In the case of an active sleep phase, the running time in the active phase is extended.
OPERATION OF WATCH WINDERS WITH ANALOGUE CONTROL PANEL

- Unscrew the screw on the back of the watch winder to insert the batteries.
- You can start and stop the rotation using the ON/OFF button.
- You can set one of the four possible rotation modes by moving the TPD button.
- The LED signals the battery status. Flashing green indicates sufficient battery power. Flashing red prompts you to change the battery.
Rotation modes
| A 95 | 0 turns left E 950 turns alternating | ||
| B 95 | 0 turns right F 1700 turns alternating |
OPERATION OF WATCH WINDERS WITH DIALS
- Establish the power supply.
- Turn the left rotary control to determine the direction of rotation. With the right rotary control you determine the number of revolutions per day.
- Symbols and numbers next to and on the rotary controls provide information about the setting options.
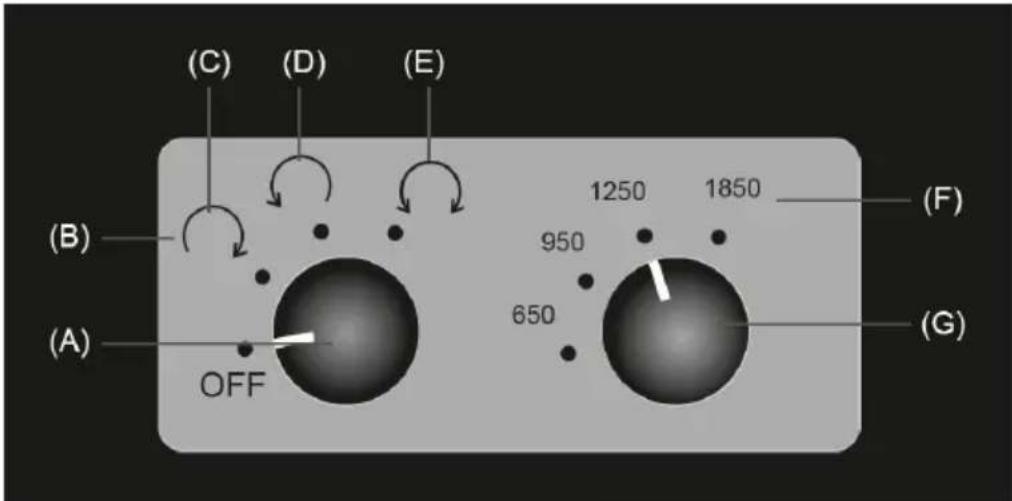
| A Rotary control E Alternating | ||
| B Direction of rotation F Revolutions per day | ||
| C Right G Rotary control | ||
| D Left |
DISPOSAL CONSIDERATIONS

If there is a legal regulation in your country regarding the disposal of electrical and electronic equipment, this symbol on the product or on the packaging indicates that this product must not be disposed of with household waste. Instead, it must be taken to a collection point for the recycling of electrical and electronic equipment. By disposing of this product in accordance with the regulations, you protect the environment and the health of those around you from negative consequences. For information on recycling and disposal of this product, contact your local government or household waste disposal service.
This product contains batteries. If there is a legal regulation in your country regarding the disposal of batteries, the batteries must not be disposed of in household waste. Consult your local regulations for the disposal of batteries. By disposing of this product in accordance with the regulations, you protect the environment and the health of those around you from negative consequences.
MANUFACTURER & IMPORTER (UK)
Manufacturer:
Chal-Tec GmbH, Wallstrasse 16, 10179 Berlin, Germany.
Importer for Great Britain:
Berlin Brands Group UK Limited
PO Box 42
272 Kensington High Street
London, W8 6ND
United Kingdom
Estimado cliente:
Berlin Brands Group UK Limited
PO Box 42
272 Kensington High Street
London, W8 6ND
Reino Unido
Cher client, chere clientele,
Berlin Brands Group UK Ltd
PO Box 42
272 Kensington High Street
London, W8 6ND
United Kingdom
Gentile clientele,
PRODUTTORE IMPORTATORE (UK)
Produttore:
Chal-Tec GmbH, Wallstraße 16, 10179 Berlin, Germania.
Berlin Brands Group UK Limited
PO Box 42
272 Kensington High Street
London, W8 6ND
United Kingdom


KLARSTEIN
- Dear customer,
- CONTENTS
- TECHNICAL DATA
- SAFETY INSTRUCTIONS
- GETTING STARTED
- FINGERPRINT OPENING OF THE WATCH WINDER
- When using for the first time
- Register a specific fingerprint
- Opening the watch winder after registration
- Delete all registered fingerprints
- Low battery warning
- INSERTION OF WATCHES
- Setting the current time
- Activating and deactivating the sleep phase
- OPERATION OF WATCH WINDERS WITH ANALOGUE CONTROL PANEL
- OPERATION OF WATCH WINDERS WITH DIALS
- DISPOSAL CONSIDERATIONS
- MANUFACTURER & IMPORTER (UK)
- Manufacturer:
- Importer for Great Britain:
- Estimado cliente:
- Gentile clientele,
- PRODUTTORE IMPORTATORE (UK)
- Produttore:
Brand : Klarstein
Model : Valmont
Category : Watch winder