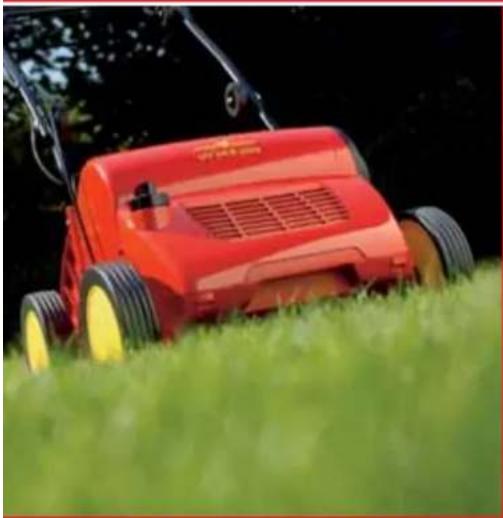
A 3472V - Lawn mower Wolf Garten - Free user manual and instructions
Find the device manual for free A 3472V Wolf Garten in PDF.
| Technical features | Wolf Garten A 3472V lawn mower, petrol engine, 42 cm cutting width, 5-position cutting height adjustment (25 to 75 mm). |
|---|---|
| Usage | Ideal for medium-sized gardens, ergonomic design for user comfort, easy start. |
| Maintenance and repair | Regularly check the oil level, clean the air filter, sharpen the blades, store in a dry place. |
| Safety | Use personal protective equipment, do not use in the rain, disconnect the spark plug during maintenance. |
| General information | Weight of 28 kg, 2-year warranty, spare parts available, optimized fuel consumption. |
Frequently Asked Questions - A 3472V Wolf Garten
User questions about A 3472V Wolf Garten
0 question about this device. Answer the ones you know or ask your own.
Ask a new question about this device
Download the instructions for your Lawn mower in PDF format for free! Find your manual A 3472V - Wolf Garten and take your electronic device back in hand. On this page are published all the documents necessary for the use of your device. A 3472V by Wolf Garten.
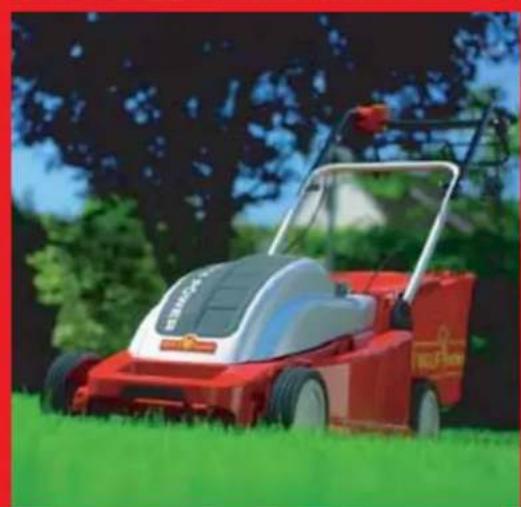
USER MANUAL A 3472V Wolf Garten
1 On-/Off-switch
2 Operator presence bail arm
3 Cable anti-king protection
4 Filling indicator
5 Collector
6 CCM switch (cut-collect-mulch) LI-ION POWER 37, LI-ION POWER 40
7 Deflector plate
8 Exchangeable battery
9 Handle height adjustment
10 Height adjustment
11 Indicator to cutting
12 Charge status indicator
13 Contact key

Congratulations on your purchase of a WOLF lawn mower

It is important that you read, fully understand and observe the following safety precautions and warnings. Careless or improper use of the machine may cause serious or fatal injury. The user is responsible for any accidents involving other people or other people's property.

Never let children or other persons who are not familiar with the operating instructions use the lawnmower. Juveniles under 16 years may not use the equipment. Local regulations may specify the minimum age of the operator.
Contents
Safety instructions 12
Assembly. 14
Operation. 14
Maintenance 16
Faults and how to remedy 16
Spare parts. 17
Warranty 17
A quick guide to features

Lithium ion technology
Exchangeable battery system
- Quick-recharge system
Central 5-position cutting height adjustment
- Fold-down handle for space-saving storage and easy transport
- 2-position handle height adjustment
- Easily emptied, large catchment bag with level indicator
High-quality materials, excellent workmanship and attractive design
Safety instructions
Meaning of the symbols

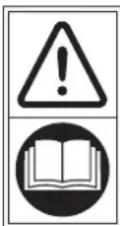
Attention!
Read instruction manual before use!
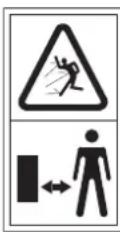
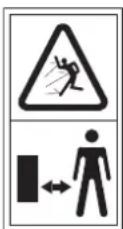
Keep bystanders away!
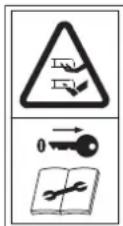
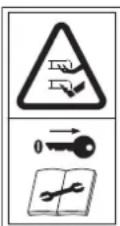
Caution! - Sharp cutting blade - before carrying out maintenance
work, remove contact key and disconnect battery!
Caution! Blades continue rotation when the motor is switched off! Wait until all rotating parts have come to a halt!
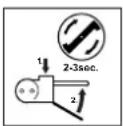
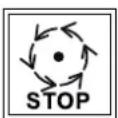
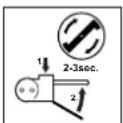
For technical reasons, it might take 2 to 3 seconds before the motor starts up.
General information
This lawnmower is designed for domestic grass and lawn surfaces. Because of the physical risk to the user or to others, the lawnmower must not be used for other purposes.
- Never mow the lawn if others - in particular children and animals - are in the vicinity.
-Only mow the lawn during daylight or with the aid of appropriate artificial light. - Do not expose the lawnmower to temperatures exceeding 80^ C. Never mow for longer periods of time in direct sunlight where there is no shade.
Before mowing
Always wear sturdy shoes and long trousers when mowing.
- Never mow while barefoot or wearing flimsy sandals.
- Check the site on which the machine is to be used, and remove all items which could be caught and ejected.
- Check the line and connection cable fitted to the outside of the lawnmower for damage and ageing (brittleness). Only use if in perfect condition.
-Only have the cable repaired by a qualified person.
- Check the grass catchment device regularly for wear-and-tear and deformation.
Before use, carry out a visual inspection to check whether the cutting gear and its mounts are blunt or damaged. In order to avoid generating an imbalance, replace blunt or damaged cutting gear as an entire set.
When mowing
- Do not tilt the lawnmower when switching on the motor, unless the lawnmower has to be tilted when starting. If that is the case, do not tip the lawnmower more than absolutely necessary, and only lift the part furthest removed from the user. Always ensure that both hands are in the operating position before replacing the lawnmower on the ground.
- Maintain the safety distance prescribed by the handle bars.
-Only switch on the motor if your feet are at a safe distance from the cutting gear.
Take care to ensure a safe and stable position, especially on slopes. Never run; always walk calmly forward.
Mowing on inclines:
Always mow at right angles to the incline, not up and down Take particular care when changing direction.
- Do not mow very steep ground
Be especially careful when mowing backwards and pulling the lawnmower towards you.
- Caution: do not touch running cutters.
- Do not stand in front of the grass ejector opening.
- Never open the guard flap while the motor is still running.
- Never drive across gravel while the motor is running - impacting stones!
-
Avoid mowing wet grass where possible.
In the following circumstances, the machine must be switched off, the contact key must be removed and the mowr must come to a standstill: -
When leaving the lawnmower
- When releasing a blocked blade
- When adjusting the cutting height
- When emptying the bag
After an obstacle has been hit (ensure that the mower or the cutting parts have not been damaged; in this case, first repair the damage) - When the mower begins to vibrate heavily due to unbalance (switch off immediately and identify the cause)
- When the power line has been damaged during operation
Before lifting the mower
Before tilting the mower or transport it (e.g. from one lawn across a road to another)
Maintenance

Attention! Rotary cutter blade
Before all maintenance and cleaning work:
- Remove contact key and disconnect battery.
- Do not touch running blades.
Regularly check and tighten all visible screws and nuts, especially those relating to the cutting bar, to ensure a firm fit.
- Never park your lawnmower in damp rooms.
- For safety reasons, replace worn or damaged parts.
-Only use original WOLF spare parts. Otherwise we can't guarantee that your mower conforms to the safety regulations.
Charger
This charger should only be used with WOLF-Battery Mower LI-ION POWER 34.
- Do not store or use charger in humid or wet conditions but in dry room only.
- Disconnect charging units from mains socket by holding plug only. Do not pull on cable as this can cause damage to internal connections and make the unit unsafe.
- Never use the charger if the cable, plug or any part of the mower itself should be faulty. Any repair should be carried out by a qualified person.
- Ensure that the cooling of the charging unit is always guaranteed by keeping the cooling slots open and clean. Do not use it close to a radiator or other heating appliances.
- Never attempt opening the casing of the unit. If it does not function properly take it to a qualified service centre for inspection.
- To charge the battery, use only the specified WOLF changers. The use of other chargers might damage the machine or cause fire.
Battery
As a result of incorrect use, fluid can leak from the rechargeable battery. Avoid contact with the fluid. In case of accidental contact, rinse with water. In case of fluid contact with the eyes, seek medical aid. Leaking battery fluid can cause irritation of the skin or burns.
In the event of improper use of the battery pack, there is a risk of escaping hazardous vapours. Always ensure proper ventilation and immediately consult a doctor, if you feel unwell. The vapours might irritate the respiratory track.
Risk of fire!
- Never charge batteries near acids or flammable materials.
- Charge battery only at ambient temperatures between 0 and +40^ . After heavy use, allow battery to cool down before charging it.
Risk of explosion!
Protect the battery against heat and fire!
Do not place the battery on radiators. Avoid prolonged direct exposure to sunlight.
- Use battery only at ambient temperatures between 0 and +40^ .
Risk of short circuit
For disposal, transport or storage, pack the battery in a plastic bag or a cardboard box, or isolate the contacts with adhesive tape.
Do not open the battery pack.
Dispose of batteries in an environmentally responsible manner
WOLF batteries are Li-ION rechargeable batteries, and therefore must be disposed of in accordance with waste disposal regulations. Return defective batteries to your dealer for disposal. Batteries must be removed from the appliance before it is scrapped.
WOLF batteries are best suited for battery-powered electric appliances, according to the state of the art. Li-ION batteries are harmful to the environment if disposed of with other household waste.
WOLF Garten would like to encourage environmentally friendly consumer attitudes. Working together with you and WOLF dealers we guarantee the acceptance and recycling of used batteries.
Disposal
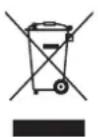
- Do not dispose of electrical equipment in domestic waste. Recycle equipment, accessories and packaging in an environment-friendly manner.
Assembly
Fasten
handle
Bar C

Caution!
The cable can be damaged while folding up or pulling out the handle bar.
Inlay the cable in the bend protection. A
-
When adjusting the handle height take care that the cable is not crimped B
-
Fold the bottom part of the handle up and screw it tight with the two hand wheels |
- Set the handle to the desired height . B
- Fold the upper part of the handle out and screw it tight with the wing nuts (2).
Mount the collecting bag D E F G H J
See illustrations.
Operation
General
Contact key K

Caution! Rotating blade
Before carrying out any adjustments:
- Remove the contact key.
- Do not touch rotating blades.

The mower is only powered with electricity if the contact key is inserted.
Operating times
- Please check noise abatement regulations prevailing in your country.
Instructions for the use of WOLF battery-powered mowers

The area that can be mown by your battery-powered mower is dependent on various factors. These are: Type of lawn
Battery-powed lawnmowers are suitable for lawns the are mown frequently, normally, and, to a certain extent, for lawns that have not been cut for a while after holidays. The surface area that can be mown does however decrease in the order given above. Battery-powered mowers are not suitable for infrequently-mown meadows or similar.
Lawn structure
The area that can be mown decreases in proportion to the density of the grass. The mowing capability is lowest on extremely dense grass, e.g. golf greens.
Lawn condition
The condition of the lawn (dry, damp with dew, wet) has a major influence on the area of lawn which can be mowed. If the lawn is dry, this will give the maximum area which can be mowed. If the lawn is wet, more energy is required for the mowing and collection and thus this is the condition where the area which can be mowed is at a minimum.
Mowing/walking speed
The walking speed influences the duration of mowing and therefore the area that can be covered. We therefore recommend rapid mowing. The mowing path should not be covered twice if possible and the overlap of mowing tracks should be kept as minimal as possible. Frequently switching the mower on and off likewise decreases the battery's power.
Charging the battery

Caution! The charger must only be operated in dry rooms!

General charging instructions
To prolong the service life of the battery, observe the following instructions:
- Charge the battery before using the mower for the first time.
For charging times, see page 128.
If the battery voltage is too low, the lawnmower switches off automatically. In such a case, recharge the battery.
The Lithium iron battery must also be recharged before prolonged periods of non-use, for example at the beginning of winter. -
The Lithium ion battery can be recharged at any charge level, and charging can be interrupted and resumed without any damage to the battery (no memory effect).
-
Rd
remove the contact key K
release the battery cover by pushing it down L

remove the battery from the recess M.

Connect the battery to the charger N.

Connect the charger to the mains socket (230V) N

Instructions for the handling of the charger: Red LED is on: Battery is being charged
Green LED is on: Charge process completed
- If the charger is connected to a power socket without a battery, the LEDs are off.
In order to prolong the life the battery, it should not be charged for a period longer than two days.
i Instructions regarding the charge status indicators: Green LED is on.

Battery capacity =


Yellow LED is on:
Battery capacity


Red LED flashing (battery nearly flat):
Battery capacity

The battery should be recharged

Red LED is continuously on (device switches off):
Battery capacity =

or
-fault (e.g. battery too hot)
Hang up collection bag O

Attention! Rotary cutter blade
Undertake adjustments on the equipment only after the motor is switched off and the cutting tool has come to a standstill.
Do not attach the collection bag until your feet are at a safe distance from the cutting tool.
- Lift the protective flap.
- Hang the grass bag in the chassis with the hooks in the recesses (see arrow).
- Replace the protective flap.
Set cut height P

Attention! Rotary cutter blade
Undertake work/adjustments on the equipment only after the motor is switched off and the cutting tool has come to a standstill.
-
Switch off the motor and remove the contact key.
-
Pull the lever out.
- Set the desired cutting height.
- Press the lever back in.
Selection of Cutting height
If possible, mow when grass is dry in order to protect turf. Do not se cutting position too low when mowing very hight or wet grass.
We recommend an average cutting height of 40 - 50mm
Starting and Stopping
- Switch on motor with mowerplaced on level and firm ground.
not in high grass - alternatively tilt slightly . Q
Switch-on motor R
- Depress button and hold (1).
- Lift up bar (2).
- Release button (1).
Switch-off motor R
Release bar (2).
Tip for mowing:
To prevent strips of grass from being left unmowed, the cutting paths must always overlap a few centimeters S
Overload protection
In case of overload or blocking, the motor shuts down automatically!
Switch off the motor and remove the contact key.
Overload: Cutting height is too low, or forward speed is too fast
- Blocking: Foreign object in cutting area (e.g. branches)
The machine can be switched on again after about 5 min.
Emptying of Grassbox T
When the collection bag is full, the flap lowers by itself.
Attention! Rotary cutter blade
Undertake adjustments on the equipment only after the motor is switched off and the cutting tool has come to a standstill.
- Switch off the motor and remove the contact key.
Empty collection bag.
- Remove potential blockages in the cutting space before starting.
Instructions for level indicator:
For an efficient functioning of the level indicator, regularly clean the holes under the level indicator in the collection bag with a hand brush.
Cut / Collect (LI-ION POWER 37, LI-ION POWER 40)
Activate cut/collect function U
Attention! Rotary cutter blade
Undertake adjustments on the equipment only after the motor is switched off and the cutting tool has come to a standstill.
Do not start the motor until your feet are at a safe distance from the cutting tool.
- Remove the grass collecting bag.
- Turn the switch to "CUT/COLLECT".
- Hang up the collection bag if necessary.
- Start the motor.
Mulch (LI-ION POWER 37, LI-ION POWER 40)
"Mulching" is a process in which the grass is finely chopped by a special cutting system and then deposited on the ground. The result is that the grass does not have to be collected and disposed of. "Mulching" also prevents the lawn from drying out.
Instructions for mulching We recommend:
Depending on the growth of grass, mulch 1 - 2× per week
The grass should not be too high nor too wet!
Go slow while mulching
Take care that the blade channels do overlap.
Do not cut grass more than 20~mm

Note:
Mulching is not advisable in case of moss-affected or entangled grass, because the cut material stays on the moss surface and/or entanglement and thus cannot be absorbed by the ground.
Regularly scarify and manure the lawn.
Maintenance
General

Caution! Rotating blade
Before carrying out any maintenance or cleaning work:
- Remove the contact key.
- Remove the battery.
- Do not touch rotating blades.
Cleaning
Clean mower thoroughly after each mowing with cloth or brush.
- Never spray the mower with water.
Clean the mulch flap at regular intervals with a small broom (LI-ION POWER 37, LI-ION POWER 40). V
Winter Storage
Clean mower thoroughly before storing away.
Have your mower thoroughly checked once a year by an approved Service Centre.
- Do not store it in a wet or humid place.
- The Lithium iron battery must also be recharged before prolonged periods of non-use, for example at the beginning of winter.
Activating the mulch function U

Attention! Rotary cutter blade
Undertake adjustments on the equipment only after the motor is switched off and the cutting tool has come to a standstill.
- Do not start the motor until your feet are at a safe distance from the cutting tool.
- Remove the grass collecting bag.
- Set the switch to „MULCH".
- Start the motor.
Blade change W

Caution! Rotating blade
Before carrying out any maintenance or cleaning work:
- Remove the contact key.
- Remove the battery.
Do not touch rotating blades.
Wear protective gloves.

Attention!
An unbalance can develop after regrinding of the blade.
Always regrind the blades in a specialist workshop, because an unbalance check should be undertaken according to the safety regulations.
Always change blades in a specialist workshop. A torque spanner of 10mm is mandatorily required. Fastening torque of the screws: 6 - 7 N-m (LI-ION POWER 34, LI-ION POWER 37).
Always change blades in a specialist workshop. A torque spanner of 13mm is mandatorily required. Fastening torque of the screws: 16-18 N-m (LI-ION POWER 40).
Use only original WOLF spare parts.
Faults and how to remedy
| Problem Possible causes | Remedy | |
| Jerky run, machine heavily vibrating | • Blade damaged • Contact WOLF Service workshop | |
| • Blade loose | • See page 16 (Blade change) | |
| • Battery flat | • See page 14 (Charging the battery) | |
| Motor fails to start | • Battery defective | • See page 17 (Spare parts) |
| • Contact key not inserted | • See page 14 (General) | |
| Poor cutting/catching performance | • Blade blunt | • Contact WOLF Service workshop |
| • Bag blocked | • See page 15 (Emptying of Grassbox) | |
| • Incorrect cutting height | • See page 15 (Set cut height) | |
| • Battery defective | • See page 17 (Spare parts) | |
Spare parts
| Order no. Product Description | ||
| 4904 031 Grass bag, complete (LI-ION POWER 34) | ||
| 4907 031 Grass bag, complete (LI-ION POWER 37) | ||
| 4970 031 Grass bag, complete (LI-ION POWER 40) | ||
| 4908 096 | Vi 34 X | Blade bar 34 cm |
| 4939 096 | Vi 37 A | Blade bar 37 cm |
| 4949 096 | Vi 40 A | Blade bar 40 cm |
| 4919 096 LI-ION POWER Pack 2 Exchangeable battery | ||
| 4939 090 LI-ION POWER Pack 1 Exchangeable battery | ||
| 4939 072 Charger (standard) |
Warranty
The warranty rules issued by our company or the importer apply to every country. As part of the warranty, we remedy malfunctions on your appliance free of charge provided that this malfunction is caused by a material or manufacturing defect. In the event of a warranty claim, please turn to your dealer or the nearest branch office.
Vangzak montered E F G H J
Zieafbeeldingen.
Gebruik
Algemeen
Contactsleutel K

Attentie! Roterend mes.
Fare for kortslutting!
- Ved avfallshandndering, transport eller lagring ma akkuen pakkes inn (plastpose, eske) eller kontaktene ma vare limit med tape.
Akku-pakken ma ikke apnes.
Atgardenvid storning. .58
Reservdilar. .59
Garanti .59
Regularly scarify and manure the lawn.
Održavanje
Op cenito

Paznja! Okretni noz
Prije svih radova odrzavanja i ciscenja:
- Izvucite kontaktni kluč.
Izvadite akumulator.
-Ne dodirujte ostrice koje se okrece.
Ciscenje
Nakon svakog kosenja očistite kosilicu/prozracivačs ručnom metlicom.
Ni u kojem slucaju prskati vodom.
U redovnim intervalima istite klapnu zakompostiranje runom etkom ili metlom (LI-ION POWER 37, LI-ION POWER 40).V
Skladištenje zimi
Nakon svake sezone koosenja se kosilica treba temeljito očistiti.
Nikada ne prskajte kosilicu vodom niti ju skladišite u vlažnim prostorijama.
Dajte Va'su kosilicu ujesen pregledati od strane WOLF servisne radionice.
Aktiviranje funkcije kompostiranja U
Pažnja! Rotirajuca ostrica!
Izvodite promjene u radu / opremi samo nakon sto se motor iskjuci I kad se alat za rezanje potpuno zaustavio.
HCTpyKuIN 3a TexHnKa Ha 6e3oNaCHOCT
3haueHHe Ha cMBOJNTe
IpeynpexdeHne! Ipei n ekcnloataun npoheTe HnCTpykuiTAta ynotpe6a!
B onachaTa 30Ha He Tp86Ba Da mMa dpyu Inuca!
BHHMaHHe! - OcTpnpexeU HoxoBe - npedn pa6oTne no NODpxbkata n3BaTe KOHTaKTHN KInuN ankyMnatopa!
BHHMaHne! HoxoBepe paobT! N3yakaute, DOKaTO BCNU BbPTAUN CE qactn cnpaT.
3apaDi
CnCTeMaTa
Tpa6Ba Da ce
U3aKaT 2-3
CEkyHn,doKaTo
DBrAteJIaT
TpIbHe.
06uHnctpykcu
Ta3n rpaanHcKa KocayKa e npedHa3HaueHa 3a NnHOnl3BaHe 3a nOdpbXkata Ha TpeBn n NapKOBn IIOuN. Iopadn onachocTt o TeJeCHa nobpeDa Hn3non3BaUTo
IINHnHaDpyrXopaKocaykataHe Tp6Ba Da ce 13no3Ba 3a Dpyu CeJN.
HeKoCeTe 6n30 Do npyHxopa,ocObeHo Deua,N KInBOTHN.
Kocete cmo Ha DHeBHa CBettnHa HIN Pn NOxOJaIO N3KcyCTBeHO OCBtneHHe.
Kocayata He Tp6Ba da ce n3nara Ha TemnepaTpya Hd 80° C, t.e. He Tp6Ba da ce octabra Ha cnHIO cIbHue Ha OTkpnto nn 3a No-dbliro BpeMe B 6baraxnk.
Ppei KocHeTo
He Kocete aKO He cTe cn CNOxNIn 3dpaBn O6yBKn n Dblnn NaHTaNoHn. He Kocete 6ocn nn c nekn caHaJn.
PpOBepe TepeHa, Bbpxy KOnTo Ie pa60n MaunHaTa n OTCTpaHHe BCNUKn PpeMEn, KOnTO MOraT da 6bDaT yNoBEN N 3XbBpNeHN.
PpOBepeTe DaJI MOnTnpaHnT OTBbH Ka6e KbM yPeDa n Cbbp3BaunrKa6e He ca NobpeHn N octapeHn (pa3pyuHe).N3noJ3BaIte MaunHaTa cMo Korato He e noBpeHa.
PpOBepeTe DaH MOnTnpaHnT OTBbH Ka6e KbM yPeDa n CbBp3BaunrKa6e He ca NOBpeHn N OCTapeHn (pa3pyuHe). H3noJ3BaIte MaunHaTa cMo Korato He e NOBpeHa.
Pemontte no Ka6eJa Tp6Ba Da ce N3BbPWBat cmo ot CneuaJIcT
PeIOBHO npOBepBaIte CbOpBXeHHeTo 3a Cb6npaHe Ha TpeBaT a 3a N3HOCBaH e NdeΦopMaun.
Ipeuynotpe6a npOBepBaute (orneaiTe) danipeKeunTE HnCTpyMeHTN nTexHnTe 3akpenBaun eJeMeHTN He ca 3aTbneHN nn NobpeHn CmeHete BCnukn 3aTbnEHn nn NIOBpeHn peKeuIN HnCTpyMeHTN, 3a da He ce NoJyHuDe6anac.
PnKocene
He HAKIOHBAIte ypea, KORA TO BKNIOBATE DBNrAteTIA, OCBEN Ako e Heo6xOIMo ypebT da 6bJe HAKIOHE npn Nyckahe.B TaKbB cnyaH He HAKNAHTe ypea NOBEe OT Heo6xOIMOTU NOBINrHEc Camo Ta3N YAcT, KOrTO e OTdaneuHa OT ONepaTopa.KOHPTOpnnpaTe BNHar, DaIIN I DBeTe pBe ce HAMnPAT B pa60THO NIOJKeHne, Ppei Da IOCTaBnTE ypea OTHOBO Ha 3emTa.
-Подьрkaiteсгурндиэтанцяуpe3pbkoXBaTKIte.
BknHouTe DnBraTeTcAmo Toraba, Korato KpaKaTa Bn ca Ha cnrypHo pa3ctOAHne OT pexeUHTe INHCTpyMeHTN.
-ObpheTe BHMaHHe Ha CnryphOTo nIOJoxHe. He 6raITe, BbpBeTe cNOKoHO HApEi.
KocHe Ha cKnloH: -KocTe BnHaHn HnpeuHo KbM HnKNoHa, He Harope n HaOny.
- Oco6eHO BnHmAbaTe npi CmHa Ha Nocokata.
HeKOCeTeHaCTpbMHNCKIOHOBE.
BHHmabaiTe OcOBeHO, KOraTo KOcHTe Ha 3aJeH XoI N DbPnATE KocayKaTa KbM ce6e Cn.
BHHMaHHe, He NocraIte KbMa6TeUHTe HOXOBe.
He 3actaBai Te nped OTbopa 3a n3XbplnHa H TapeBa.
He OTBapnTe HIKORA npedna3HnA Kanak, KOrato DBrIaTeJIa pa6oTn.
He npemnabaate c pa6oteu Dbraraten npes qakblonachocct OT ynapc kambn!
巧 Nb3MOxHOCT He KocTe Ha MOKpa TpeBa.
PnCneHnTe ycnoBna ypebT Tpr6Ba da ce n3KnOuN, KOHTaKTHnT KIOU Da ce n3DbpNa n ypebT Da ce cnp:
- npn octabrHe Ha KocaykaTa
-3aocbo60kdaBaHeHa6nokpanHOX
-3aperynilpaHeHaBncoHnHaTahpnaHe
-3a n3npa3BaHe Ha KOsha 3a cb6pahe Ha TpeBa
- npn Hauuue Ha yKdo Tno (nbpbo ce y6eTe Da nn KocaykaTaN pexeUte INHCTpyMeHTn He ca NOBpeHn. Cne ToBA oTcTaPHe nOBpeDaTa)
Korato Kocaykata Bn6pnpa MHORO CINHO BCNECDTBHe Ha De6aJNaHc (BdHara n3KNIOyete HAmepTe npuHaTata).
- ako cbeHHTeHHaT KaBeI ce nobpei npn ynoTpe6a
-3a NOBUNrAHe NIN HOCHe Ha KocauKaTa
-3a HAKJaHHe IIN TpaHCnOpTnpAHe Ha KocayKaTa (HaNP, OT/ KbM MopabaT No nTbT)
NoaBpXaHe

BbHMaHHe! BbTpTauCepeXeUuPiactHHIpeDnBCaKbNpaOTo3a0cbnykBaHe nNoHCTBaHe:
N3dbpnaTe KOHTaKTHnKJIouH N3BaJeTe akyMaTopa.
He nnaiTe DnKeeuTe ce octpeta.
PeOBHO npOBepBaIte DaNN BCNU BNDIMN 3aTeRaTEJIHN BnHTOBe n RaIKN, Hau-Beue Ha HOXoDbpxaHa, ca 3aTeHaTn 3dpaBO n IIO3aBnHTeTe.
BHHMaHHe!CMHaHTaIINDOnbHInTeJHOTo HatoBaHe Ha HOXOBeTe BnHarTpr6Ba Da ce N3BbpwBa OT CneuaJIIm3npaHa pa60TNHnUa, 3aOTo CNEd OTBnHTBaHeTo Ha enemeHTte Tpr6Ba Da CE HanpABn TeCTBaHe Ha De6aHaHcCbIacHO npabnata 3a 6e3onacHOCT Ha Tpyda.
-3n03BaTe caMo opnHnHn pe3epBn qacTn Ha WOLF, 3aIoTO B npOTnBEH cIyau HmMaTa rapaHcNue, Ye BaWata Kocayka OTROBapra Ha npabInlata 3a 6e3onachOCT Ha Tpyda.
He cbxpaHbAaTe KocayKaTa BvB BnaXn NomeeHn.
3apraHNo yctpoCTBO
3apnHOTo yctpoCTBO e npEHa3NaeHo cMo 3a 3apeKdahe akyMylatopHaTa rpaHncka KocauKa Ha WOLF LI-ION POWER 34.
Hikora He n3non3BaIte 3apAHOTo yCTpoiCTBO BbB BlaXHa nn MOKpa cpea. N3non3BaIte ro caMo B nOMEeHnra!
Pa3deneTe Ka6eHnTe CbeHHeHnCaMo KaTo N3dbpNaTe 电enceHa.N3dbpNaBHeTo Ha Ka6eJa MoKe Da yBpeN Ka6eNa N 电enceHa He MoKe Da ce rapaHTnpa enektpnueeckata 6e3onachOCT.
He n3no3BaIte 3apJHOTO yCTPOICTBO, aKO Ka6eJIbT, IeNCEJIbT INIcAMnIypeIMaT BbHua NOBpeJa. 3aHecTe 3apJHOTO yCTPOICTBO B HAI- 6JIu3Kna CneuHaUN3IpaH cepBn3.
-368raBte 6IOKnpaHTo Ha oxnaXdaUata FoHKnHa ypeDa qpe3 nokpBaHe Ha OTbOpTe 3a oxnaXdaHe. He n3non3BaTe ypeDa B 6JIn3OCT Do n3TOUHNu HA TOINHa.
B HnkaBb CnyaH He OTBapAne 3apAnHO yCTPOIcTBO. Pn nopea ro 3aHeceTe B cepBn3.
3a 3apekdaheTo Ha akMyIaTopa n3noJIbaiTe cAmo nocOeHnTe 3apJdHn ycTpoiCTBa Ha Wolf-Garten. Ppn H3noJ3BaHeTo Ha npytn 3apJdHn ycTpoiCTBa Morat Da Bb3NKHAT DepeKTHn INI da ce npedn3Bnka nokap.
Batepna
Pn HnpabunHa ynoTpe6a O t akymyIaTopo MoKe Da n3Tee TeuHcT. 36raBaiTe KOHTa C He. Pn cnyaeh KOHTaN3JIakHe T C BODa. Korato TeuHcCTTa nonaHne B OHTe, NotbpcTe DonbHnHtEnHO Jekapcka nomou. N3TuHaata TeuHcT OT aKymyIaTopo MoKe Da npeDn3BnKa dpa3He Ha Koxkata nn n3rapHn.
Pn DepeKTHO HnepaBnHO NO3BaHe Ha akymnaTopHnnaKeT MoRat Da ce noJyCat np. OcnypTe NCT Bb3dyx np OnnKaBnHa NoTpbcTe nekap. NapTe MoRat da Dpa3HrT dnxAteHNHTe Ttua.
Onachoct ot n3raphe!
Hrkora He 3apekdaIte akymyIaTopa B 6nIocTdo KncenHH N IeCHO Bb3PNaMeHIMMaTepeHaJI.
3apekdaTeakymyntopaca mo npTeemnepaTpaHa okonhaTa cpea MeKdy 0^ n +40^ .Pnp cnHno HatoBapBaHe ocTaBeTe akymyntopatnbpOda ce oxna.
OnachocT OT EKCNIO3nI
PaaTe aKymlaTopa OTHarpaBaHe nOrbH.
He ro nocTabraIte Bbpxy HarpeBaTeHn Tea n He ro n3naarTe 3a NO-dbIro BpeMe Ha CnHc HarpBaHe OT cIbHcTeO.
-3nON3BaIte akymyIaTopa cmo npi TempepaTpaHa OKoNHaTa cpeMaKdy 0°C n +40°C.
OnachocOT OT Kbco cbeDneHneI
Pn n3xBpnaHTo, TpaHCnpTupaHeTo nn CbXpaHraBaHeTo akMylaTopbT Tpr6Ba Da e onaKOBaH (HaIOHOba Top6a, apTOHeHa KyTu) nn KOHTAKTITe Tpr6Ba Da ca 3aIeneHn.
AkyMnyatopHnT nakET He Tp6Ba Da ce OTbapra.
AkymylaTopnTe Tp6Ba da ce n3XBpbJrT 6e3 da 3aMbpcaBAt OKOHHaTa cpeda
AkymyIaTOPHe Ha WOLF ca Hau-noXoJusn Cnope nocneHOTnBO haTexHkaT a 3a 3axpaHbAhe Ha eNEKTPoYpeDn, KOITo He 3aBcRr OT eNEKTPuYeCKaTa MPeKa. HKeJI KaDMBeNt e akymyIaTOPn Ca ONaCHn 3a OKOJIHaTcpeDa, KOraTO ce N3XBbPnT C dpyrnte 6ntOBn OTnaDbuN.
Akymylatopnte Ha WOLF ca Hnkei-kaMneBn akymylatopn n 3aTOBa Tpr6Ba da ce n3xBbpIant. DepeKTHnTe akymylatopn Tpr6Ba da ce n3XBpIant OT cneuaIIm3npaHnte mara3HH. Akymylatopnte Tpr6Ba da ce cbaIANT OT ypeDa npedn HerOBtO 6paKyaBahe.
WOLF Garten ncka da Hacbpn OTHoWeHneTo Ha NOTpeBnTeJIte KbM OKOJHaTa CpeJa. 3aedno c Bac n CneuAnIm3npaHnTe TbproBun Ha WOLF Hne rapaHTnpame BpbuaHeTo npeKnnpaHTo Ha yNtpe6raBaHnTe aKymlaTopn.
OTctpaHbAhe Ha otnaDbuNTe
He n3XbBpIyTe eJekTpUeckn ypeDn B 6ntOBInTe OtnaDbu. PeunKlnpaIte ypeDInTe, akcecoapTe nOanKOBkTe No NaHn, ona3BaU OKoJIHaTcpeDa.
MOHTAX
3akpenBaHe Ha pkoXbKaTaA B C

BhimaHne!
KaBeBbT MoKe Da ce NOBpeN pRn CgBaHe nn n3DbpBbAe Ha dpkKaTa.
-П配电а Te Ka6e Na npe3 3aunTaT a cpeu npereBaHe A.
PnperynpaHe hBaBcOuHnHaTa HdpKkKaT BHMaBaTe Da He nperebHeTe Ka6ena B
-
NOBUNHETe DonHaTa YacT Ha pbKoXBaTKaTa I aTeHete C DBeTe pbCHN KOJIeNaI C).
-
HactpoTe XeJHaTa BmCOnHa Ha pbKoXBaTkaTad .B
- 3aTbOpTe DoHnHaTa Yact Ha pbKoxBaTkata N Ra 3aTeHete C KpNJUaTIne raKmD (2).
MoHTnpaHe Ha KoHa 3a Cb6npaHe Ha TpeBaTa D E F G H J
BvIXTe cHpynte.
Ekncnloataza
06uynka3aHn
KoHTaTeH KJIIOU K

BHHMaHHe! BbptTae HOX
IpeDN BCNU pa6oTN IO HacTPOKNTe:
N3BaTe KOHTaKTHn KJIuH.
He nocraTKe bM DnBxkeuTe ce HOxOBe.

Xn6pndHaTgpaHncka KocauKa ce 3axpaHb c TOKcAmO, KOrato KOHTaKTHnT KInu e B ypeda.
PpOdbJxKHTeHOCHT ha pa60Ta
CnataBaTe MeCTHnTe pa3npoe6n.
OcbeDomeTe ce 3a npoDbNKeTHeHocTtHa paBoTa OT MeCThata CnyK6a 3a peJa.
Hnctpykun 3a n3non3BaHeTo Ha akymyNaTopHnTe Kocayn Ha WOLF

KeJanaHata MoUHcT Ha eHNHa a NIOu Ha BaWata ayMyna-TOPHa KocaKa 3aBnCn OT pa3NJuHn fakTopn, a mHeHo:
BudHaTpeBaTa
AkyMaIaTOPHnTE rpaINHcK NOpHbPkaHa TpeBa KaKTo N 3a TpeBa, KOrTo He e 6Nla KocEHa N3BecTHo BpeMe CneOtnyckata. MoHocTt Ha Kocaykata HamaJraBa B Ta3n NocJeDoBaTeHOCr. AkyMaIaTOPHnTE KocAkn He Ce npenOpbYBaT 3a MopABn C DnBn CBeTg, KOITc CE KocRt pRdKO.
CtpykTypa Ha TpeBaTa
MoHocTtHaMaJIbA C yBEnIyauBaIaTa Ce TbcTota Ha TpeBaTa. Hai-Mankata MoHocT ce NOnIyauBa npMHOr TbCTa TpeBa, Hanp. IrpnIe 3a roIφ.
CbctoHne Ha TpeBaTa
CbctoHHeTo Ha TpeBaTa (cyxa, opoceHa, Mokpap Mokpa) OKa3Ba rOJMaMo BnIyHne Bbpxy NIOuHaTa MOUHocT. HainroJMaTa NIOuHa MOUHocT ce NOCTRa npu cyxa TpeBa. Pn MOKpa TpeBa ce n3paxoDa nobue eheprna 3a pR3aHe i 3axBaUaHe, CbOTBeTHo NIOuHaTa MOUHocT Tyke Hai-MaJaKa.
Ckopoct Ha p3aHe/kocene
CkopocTtHa p3aHe OKa3Ba BnHnne Bbpxy BpeMeTo 3a KOCHe N MoUHOCTTa Ha eINHua nIOU, KOrTO MOKe Da Ce NOCTnIe. 3aTOBa Ce npenOpbYBa eHepnHyO KoCeHe. YAcTbKbT, KOITo Ce KcN, He TpRbBa Da ce MInaba Db NbTN I NeHTnTe npu KOCHeTo TprbBa Da CE NOKPbAaT No Bb3MOxHocmMnHMaIIHo. YecTOTO BKnIOUbaHe IN3KnIOUBA He HamaJIbBa KaanaIteTa Ha AkymyIaTopa.
3apeKdaneHaakymyntopa

BHHMaHHe! N3nON3BaIte 3apAaHTo yCTPOcTBO cAmO B cyx nomeeHnI

06uHnCTpykun3a3apeKdaHeTo
C orIeHa IbIgraTnpoIbIgKInTeHocT Ha paBota Ha akymyIaTopa Tpr6Ba Da cna3BaTe CneIhnte ToQKn:
-Ппeдп nbрво n3нoЛЗВаHe aKуМуЛaTOpbТ TрЯБаДа ce 3apeи.
BpeMe 3a 3apeKdaHe, BnK cTpaHua 128.
-ПинскоНанржениHaakMyIaTopa rpaHnckata Kocayka ce n3KnIOyBa aBtOMaTHUHO. BTo3n cIyaua akMyIaTOpbT TpRA6Ba da ce 3apeuN.
Плгпево-ионнгт akумларт Trябва д ce З apeждпpeди no-DbIro npeкьсвае Ha pa6ota, Hanp. CBxpaHЯBaHe npe3 3IMATA.
JIITHeBO-HOHnAT aKymyIaTOP MoKe Da ce 3apeXda BbB CbRAKO CbCTOARHne 3a 3apeXdaHE N 3apeXdaHETo MOKe Da ce IpeKBcHe NO BCraKO Bpeme,6e3 akymyIaTOPbT Da ce NobpeDn (6e3 eFekr Ha 3anaMeTBAhe).
1.ИЗдрай Te KOHTaTKHЯ KlnOu

2.Ocbo6oTe Kanaka Ha akymyntopa c HataNcKaHe c npbct. L
3.ИЗbaДеТeakумлаТopaOTОДЕЛEHnETo3aakymlaTopa.M
4.CbbpkeTe akymyaTopa KbM 3apdHTo ycTpOCTBO .N
5.CbbpkeTe3apnHOToyCTPOINCTBOKMOKHTaKT (230V) N

Hnctpykun 3a 3apndHOy cTPOINCTBO:
CepBeHnT CBeToDmOcCBtN:akymyIaTopbTce 3apeKda
3eHnT CBToIIOcCBt: npouecbT Ha 3apeKdaHe en pNkluu
Ako cmo 3aprHOTO yCTPOINCTBO e BKNHOeHO KbM KOHTAKT, He CBETN HINT OEDNH CBTODIOI.
3a da 6bde cpokbt Ha ekcnnoataun Ha akymynatopa no-DbIbIg, ypeBt He TprBa Da e Cbbp3aH KbM 3apdHOTO yCTpOHTBO NOBEe OT DBA HN.

Hnctpykun 3a HnDnkaunra Ha 3apeKdaHeTo:

3eHnT CBToNDoCBeTn: -KanaHTbTaHaakymyTaTopa


KBJTNAT CBeToND CBeTN: -KanaUTeTbTHaakymyTaTopa=


YeRBeHnT CBeToDnO, Mnra (NoTu npa3EH akMyJNaTOP):
- KanauTebHaakymyNatopa= -AkymnyatopbT pr6ba da ce 3apei

YepBHeHnT CBeToDnOd CBeTn (ypeIbT ce n3KIOUBA): -KanaHTeTbTHaakymyNatopa= HJN
- noBpea (Hanp. MHOr HarpT aKyMylaTop)
OkaBaHe Ha Kowla 3a Cb6npaH e TpeBaTa O
BHMaHHe! Bbptraun ce pexeun nlaactnH
IpeDnpeMaTe peRynpOBKn Ha ypeDa cAmO, cNeI KaToCTe N3KJIIOUINI DVBraTeJIa I pEKeUINrT INHcTpymEnT E BCbCTOHaHE HaNOKo.
He npkaBaiTe Top6aTa 3a cb6npaH He TpeBa, DOKATO KpaKaTa Bn He ca Ha 6e3oNaCHO pa3CTOAHne OT peKeuata Ta IaBA.
1.Повдигн electaцHTиKaнak.
2. Okaute KoIa 3a cb6upaHe Ha TpeBaTc KkyKeTe KbM rHe3data B Kopnyca (BIX CTpeJIkata).
3. NocTaBeTe 3aunTHnKaNaK.
PerynpaHHe HbncuHnHa Ta Hpa3aHe P
BbHMaHHe! BbptaIeI cepexei nlaactHH
Ipeepnemai Te paoTn no/perynipOBKn Ha ypea caMo, CneK aTO CTe n3KNIOUHIN DBNrAteJI N peKeuHr INCTpymENT E B CBCTOHNHe Ha NOKOI.
-3KJIIOyTe DnIraTeI Nn3BaTe KOrTaKTHN KJIOH.
- 36yTaTeNoCTaHaBbH.
- PeryiupaTe XeJHaHtA BnCOUHa Ha pR3aHe.
- OTHOBO n3dbpnaIte IocTa HabbTpe.
BucouHnHa np3aHe -cbctOarHne Ha TpeBaTa
-ПО ВьзмохнocКOCeTe cyxa МораBa, 3a Да He OcTaBaT cNeДиВТpeBaT. ПИЗВлжнИи BUCOKaТpeBa eBentyaJIHO KOCeTe C NO-TOJЯMa BICOUnHa Ha ряЗанe.
-06nKHOBeHOce HacTpoBb BnCOunHa Ha p3aHeTo 40-50 MM.
BknHoyBaHe, n3KnHoyBaHe Ha KocayKaTa
BkIIOHete KocaykaTa Ha paBA HOBbpxHOCT.
He BkIIOUBAIte BBB BnOcKa TpeBa-TyK npH Heo6xOIMOCT NOBUNHETe Q.
BknIOuBaHe Ha DnuratEna R
1.HaTnCHete6yToHa(1)ro3aDpBxTe.
2. 3aterheTe ckobata (2).
3. OtnycheTe 6byToHa (1).
N3KIOUOVAHe Ha DnBnTaTeJRA
Ocbo6oJeTe cko6aTa (2).

Yka3aHHe: 3a da He ce noIyabat IBuCi, OKoCeHInTe yAcTbCn BnHar Tp8Ba Da ce npINOkPnBAt C HkoJko caHTmEtPa S
3aunTa oT npeToBapBaHe
I DnBraTeJrT Ce N3KJIIOUbA aBTOMaTHUHO npn npetOBapBaHne Hn6NOKIPAhe!
3BaTe KOHTaKTHN KJIIOU N OTCpaHete npuHaTa!
PpTeOBapBaHe: MHOrO HnCKa BnCOuHa Ha pR3aHe, MHOrO 6bp3 xd.
5Iokupahe:UyxnteNaB3oHaTaHa p3aHe (Hanp. KIOHN).
乙 p e 日 b T MOKe Da CE BKJIIOUH OTHOBO CneI OK.5MH
N3npa3BaHe Ha Top6ata 3a cb6npaHc TpeBaT
Korato Top6ata ce HanbIc TpeBa, KlaIaTa Ce 3aTbapra cama.
BbHmAHne! Bbptrae ce pexeun nnaCTHH
Ppeepnemate perynpobkn Ha ypea cmo, cne KaTcTe N3KNIOHN DBNrataIeN I pexeIyI INHCTpyMeHT E BCbctOarHe Ha NOKOI.
N3KIOUeTe DnBraTeTn N3BaTe TE KOHTaTKTHN KIOU.
-3npa3HeTOp6aTa 3a Cb6npaHe Ha TpeBa.
PpeDn da npche Te ypeDa,OTcTaHeTe eBeHTyAnHInTe npeyKn OT 30HaTHa KocHe.
Uka3aHnHa 3a HnDnKaTopa Ha HnBOTO Ha 3aNbBaHe:
3a npabnHTo FOHKUOHNpaHe Na HNdkaTopa 3a 3aBbAe, peoOBHO NOuCTBaIte OTBOpNTe noD Hero B Top6ata 3a cbbnpaHe Ha TpeBa C yeTkata C dpbkka.
Kocene / c6bnpahe (LI-ION POWER 37, LI-ION POWER 40)
AKTNBnpaHae hФyHKUraTkoCeH/cb6npaHe HtpeBaTa
U
BbHMaHHe! Bbptrae ce pexeun nactnHn
PpeepnemMaTe peryuropOBKn Ha ypea cmo, cne KaTo Cte N3KIOUHN DBURAteTn INCTpyMeHTe B CbctOraHHe Ha NOKo.
He BKNIOUOBaIe DnBraTeJIa,OKaTO KpaKaTa Bn He CaHa 6e3oNaCHO pa3CTOraHne OTEpeXeUaTAtnaBa.
- CbaIe Te KoWa 3a cb6bpaH e TpeBaTa.
2.3aBbptTe npeBknUoyBaTeJHa ,CUT/COLLECT".
3.Ako e Heo6xOIMO, npkaeTe TOp6aTa 3a cb6upaHe Ha TpeBaT.
4.BkJIOHeTe DnBraTeJIa.
Topehe (LI-ION POWER 37, LI-ION POWER 40)
PnTOpeHETOpeBaTaeKoCNMHOKpatHOye3cneuaHa cnCTema 3a p3aHe NOTHOBOceN3XBpIra Ha 3emrTa.Taka He ce nOlyabat OTnaDbuOn OT KocHeTo. IIO To3n HauHH "TOpeHTo" npedna3Ba TpeBaTaeN3cbXbaHe.
yka3aHnHa 3a Mynpahe
PpenopbHbAmE BN:
B3aBnCIMoCTOTpacteHaHaTpeBaTa,daMyIHpate 1-2 nTn CeMnHNO
TpeBata He Tp8bBa da 6bJe HnTO MHoro npopacna, HnTo npeKaJIeHO BlaJxHa!
-Prn MyIuHpaHeTo HappeBaBte 6aBHO
CTapaaTe ce OKoceHnTe nTteKn da ce 3aCtbnBt.
HeKoCeTe TpeBaTaHa20MM.
3a6eJekka:
He ce npenopbUba MyIuHpaHe, ako TpeBaTa e npopacna C Mbx IIN CTbPKaHa, 3aIoTO OKOeHNrT MaTePnAn OCTaBa BbpXy NOBbPxHOCTTa Ha Mbxa IIN CTbNkAHOTo n CneDoBaTeJHo He MoKe da Ce abCopbupa ot NoVBata.
- PeioBHO pa3poxKbaIe n TopeTe noBaTa Ha TpeBHaT aIIOu.
AKTNBnpaHnФyHKnraTa3aTopeH U
BbHMaHHe! Bbptrae cepexeu npactHH
PpeDnpnemMaTe perynnpOBKn Ha ypeDa cMo, cneKaTo CTe N3KNIOUINN DBNrAteTEn IpeKeuT INHCTpyMeHT E B CbCTOHNHe Ha NOKo.
He BkIIOUyBaIte DnBraTeJI, DOKaTO KpaKaTa BN He Ca Ha 6e3oNaCHO pa3CTOHaHne OTE peKeuata rnaBa.
- CbaneTe KoUa 3a cb6upaHe Ha TpeBaTa.
2.3aBbPTeTe npeKbcBaHa Ha "MULCH".
3.BKJIIOUHTe DBNrAteJRA.
PdIbpxaHe
Osha nHΦopMaun

BnmaHne! Bbptraicce HOX
PpeiBcNqK pa6Otn no noDbpxKaHTo n nouchTaHTo:
N3BaTe KOHTaKTHN KIIHOU.
-3BaDteaKymyataropa.
He nocaraTe KbM DnBxueuTe ce HOxoBe.
NouctBaHe
CneBBCaKO KOCHe NOuHcTBaIe KOCAKaTa C HeTka.
B HnkaBcnyaHne npbckaTe Kocaykata C Boda.
PeOBHO NOUcTBaIe KaIaKa 3a TopeHeTo C YeTka (LI-ION POWER 37, LI-ION POWER 40).V
CbxpahnBaHne npe3 3MaTa
CneBceKNe ce30H Ha KocHe Ha TpeBaTa NOUcTBaIe Ta Kaocayka OCHOBHO.
-Ппeз ecentа Baшатka kocayka trябba da ce npobepn ot cepBn3 Ha WOLF.
CbxaPraBaTKeKocayKaTaBcyxOnomeueHne.
JIITHeBO-HoHHaT aKymyNaTOp Tp6Ba Da ca 3apeKda npeiN No-DbIro npekbcBaHe Ha pa6ota, HAnp. cbxpaHraBaHe npe3 3IMATA.
CMHa Ha HOXOBete W

BHMaHne! BbptraCe HOX
PpeDn BCnK npoTn no nDbpxKaHTo n NoocTbaHeTo:
N3BaTe KOHTKTHN KIIOU.
-3BaTeaKymyntopa.
He nocraTKe kBm DnBxkeuTe ce HOKOBe.
HocTe 3aunTHn pbkauu.
BHMMaHne!
Cnei 3aToBaHe Ha pexeUte OcTpneTa Te MoKe Da ce de6banaHcapat.
Bunhar 3aOuBaItepeXeUHTeOCTPnTa B CneuaJIN3npaH cepBn3,3aIoTO npOBepKaTa Ha 6baHaCtpr6Ba Da ce N3BbPUn B cbOTBETCTBNE C N3NCKBAHnra 3a 6e3OnaCHOCT.
BnharnoNDMeHnTepeXeUHTeOCTpetaB CneuaHn3npaH cepBu3.3aIbIXnTeHNO Tp6Ba Da ce H3non3Ba DnHaMometPnueH KIOHOT 10 MM.BbPTaMOMeHT Ha 3aTgAHe Ha BnHToBeTe:6-7 Nm (LI-ION POWER 34, LI-ION POWER 37).
BnHaI NOmHeYte peKeUte OcTpneTa B CneuAn3npaH cepBn3.3aDbJXKeTEnHO Tp6Ba Da ce N3NOJ3Ba DnHAMoMeTpueH KJIouOT 13 MM. BbptTuM MomeHT Ha 3aTgAHe Ha BnTHoBeTe: 16-18 Nm (LI-ION POWER 40).
3nON3BaTe cMo opuHnHaHn pe3epBn Yactn Ha WOLF.
OTcTpaHЯBaHe Ha noBpeDn
MONTAK c6opHnka D E F G H J
CMOTPNpucyHKn.
3Kcnnyatauia
06uue cBeHn
KoHTaKTHbI KInHou K

BnmaHne! BpaauouiNc Hox
Ipeed BbINOJIHeHEm BcEx pa6oT no HacToPoiKe:
-yaJIHTb KOHTaKTHbI KJIIOU.
He npkaacbca K pa6oTaOuIM Je3BnM.
I r6pndnra30HOKOcNlka NHTaeTcra TOKOM TOnbKO B TOM Cnyuae,ecnn KOHTaKTHbI KInoH HxOaNTcB yctpoiCTBe.
Bpem3knpnyataun
Ppoc6b6a co6JIOdaTb MeCTHbIe npedncaHna.
-ObpatntecbMeCThBie aAMMHnCTpaTHBhIe opraHbI DnBByHCHeHn BpeMeHN 3KcNJIyatauIN.
Yka3aHnno npmeHeHHo aKKyMyJrTophix KocnloK WOLF
I OoctnKmMa BaWe aKKyMnyTOpHoi KocnKnO npOn3BOJNTeJIbHOCtB EeHNuax NIOuaDi 3aBncHT OT pa3NHybIX oakTopoB, a MeHHO:
Tun razoha
AkkymyIaTOPHbIe KocNIKn PImMeHraOTcI IraRa3OHOB cpeYIaRbIM yXoIDOM, HopMaJIbHbIM yXoIDOM, a TaKKe YCIOBHO IINr Ra3OHOB, He CTpIXeHHbIX HeKOTOpOE BpeM, HanpIMep, NocJe OTNcKa. PtN 3Tom npOn3BOAnITeNbHOCtB E EDINHuaX IIIOUaDN y6bIbAE T TOM Xe IopJdke. AkkymyIaTOPHbIE KocNIKn He pInrOdHbI dIpaek OCAuINBaEMbIX pnpOdHbIX NyTob.
Ctpyktypara30ha
PpOIN3BOIDNTeJIbHOCTB EEDHHuaX pIooaDi y6bIbAet npn BO3pactaIOUeH IIOHTOCTH Ra3OHa.Camra HN3KaA npON3BOID-TeJIbHOCTB EEDHHuaX pIooaDi DOCTnRaETc npn OueHb PIoTHbIX Ra3OHax, HApnPmep Ha ra3OHbIX PIIoUaKax DnIgpbI B rOnb.
CocToHHne ra3OHa
CocToHne ra3oHa (cyxO, BlaJXhB OT pOcbI, MOKpbI) cnIbHO BnIeT Ha npOn3BODInTeJIbHOCTb B paChTe Ha eINHnU pNoaAdn.Ha cyux Xra3OHax DoCTnRaETcmaKcIMaJIbHa npOn3BODInTeJIbHOCTb. Ha MOKpbIX ra3OHax pacXoYdETc4 60nbIe 3Heprn Ha cKaunBaHne n C6Op TpaBbl, No3TOMy B TakOM Cnyae npOn3BODInTeJIbHOCTb Ha eINHnU pNoaAdn 6yDet HAMMeHbWei.
Warobar/KocnlochacKopoctb
WarobarckopoctbBnraetHaBpemKaCkbH,taKIM
6b3OM,Hapean3yemyo npon3BODntelhOCTb
EHNuax nnoaadi. NToTomy peKomeHdyetc nnabHbI
npouecc Kcb6bl.No Bo3MOxHOctn,He cneJyET DaBXdb
npoxoHTb yactkn Kcb6bl,a nepexnct CkOweHHbx
dopoxekdoJIkeh 6bItkak MoXHO 60Jee y3KM. YaCToe
BKIOUeHne H BYIKIOUeHne TAKKe CHNkaeT
CyueCTByUOuyo MOUHObT b AkkyMnyIaTopa.
3apnka akkymyITopa

BHHMaHHe! 3apAaHoe ycTPOcCTBO npMHeTb TOnbKO B cyuxn nomueeHnx!

06uye yka3aHnK npoceccy 3apAkn:
Buejnx npoJneHn cpoKa cnKbI akymyIaTopa, Heo6xOIMO BblnoJIHrTB cNeDyUoJe:
Peped npBbIM npmHeHem cneyet 3apnntb akymnyTop.
BpeMzapraCm.HaCTpaHnue 128.
PnH3KOMAKKyMyJrTOpHOMHanpyKeHHIra0HOKOCNIkaABToMaTHUeCKNOTKNIOuAeTcB.3tOMClyuaeAKKyMyJrTOpHyKHO3aprAnTb.
ПитебиньшakумларсдуETapжкппердпгьнIMпepьвamHapn. nOmeueHemHa3mHee xpaHeHne.
-NTHeBO-NOHbIaKKMyJITOpMOXHO3apJxATb npn IIO6oCTeNEH3apKjEHHOCTN INpepbBaTb 3apAky B IIO6oeBpem,6e3BpeDaIraaKKMyJITopa (OTcyTCTBne3ΦΦeKaTa naMAtn).
- 13BneYb KOHTaKTHbI KIIou .K
- HaxaTneM nantbae de6nokpyte KpbIyKy aKkyMnyTopa . L
3.NBnKeNTe aKKMyJnTOp n3 aKKMyJnTOpHoJ WaxTbI .M
4.ПисоeДинITEаКуМЛТОРКЗapДHOMyycTpoIcTBy.N
5.ПодклочiteЗардhoeустpoиctBOКpozetke(230B\~)N

Yka3aHnK 3apAHOmy yCTpoiCTBy:
KpaChbI CBeToIDnOId rOpIT: aKKyMnyTOp 3apJkaETc
3eHbCBToDIOIgropT:npoecC3apAKn 3aBep
EcnTOnbko3apAnHoeyctpOcntBONoKnHoeHO Kpo3eTke,KpacBbINCBTeOIOHe rOpNT.
Bcienx dnttenbHoro cnykbsa kkymyjTopa He CneDyeTe OCTabTb np6op noKnIOeHbIM K 3apAnHomy yctpoiCTBy 6onee,em Ha Dba dn.

- MOUHOCTb aKKMyJrTopa coCTaBnreT =


KjENTbI CBeTOIOID TOpNT:
-MOUHOCTb aKKMyTApocOCTaBnIeT=


KpachbI CBeToDnOd Muraet (aKKymyTApOp NOUTN NcTOI):
-МоцнocьakkymnyTopa coCTabIЯт =
-AkkymyIaTOp HxKHO 3apJdntb


KpachbI CBeToDIOd RopNT (ycTPOINCTBOOTKIOUaETcA):
-MOUHOCTb aKKyMnyTopa COCTaBnIeT = IJIIN
- HenoJaKa (Hanp., AkkymyIaTOp ropAuN)

PpncoeHHeHne c6opnka O

BHMaHHe! Bpaauounecpexuue nonactn
IpoBODHTe HAcTPOky O6OpUdoBaHnToIbKO nocTe TOrO, KaK MOTOP BbIKNoyeH npExKyUne YactN IOnHOCTbIO OCTaHOBNJNCb.
He 3akpennTe MewoK dIra c6opa Do tex np, noka He oToiDeTe Ha 6e2onacHoe pacctOarHne ot pexyux qactei.
1.ПоднIMITEЗaUNTHbIKNJanaH.
2. BCTaBte c6opHnK KpOuKaMn B na3bHa uaccn (cmOTpn CTpeJky).
3. Onyctnte 3aunTHbI KnaanH.
YctaHOBnte BbICOTy cpe3a P

BHMHHe! Bpaauounepexyuie nonactn
IpoBODHTIO6bIE ONEpaUNN HAcTPOUYO6OpUoBaHnTOJbKO NocJIe TOrO, KAK MOTOP BbIKJIooHeH pExyUne YactNIOTHOCTbIO OCTaHOBNIMCb.
BbIKIOHHTb DBINrAteJIb Nn3BNeUb KOHTaKTHbI KJIIOU.
- BbITaHInTe pbUar HApUxJy.
- HactpoTe HuyKHyU BbICOTy cpe3a.
- Choba npnxmnte pbiar BHytpb.
Bbicota cpe3a-CocToHHe TpaBbl
ПО BO3MOXHOCTN KOCHTe cyxOJra3OH, YTO6bI COXPaHNTb DEPH. PnBnAaXHOM r3OHe N BbICOKOITpaBE, BO3MOXHO, CNeDyET KOCHTb PnYBeJIuHHeHOBbICOTcpe3a.
Kak npaBnIO, BbICOTy cpe3a HactpanBaHr Ha 40-50 MM.
BknoueHne,BbIKnOeHneKocnKn
Kocnky BknoaTaH na poBHO noBepxHOCTN.
He onpOKnIbIbTaB B BbICOKo TpaBe - TOJIbKO B KpaHem cnYcae Q.
BknoueHne DnurateTnR
- HaxmTe KhoNky (1) uynepKbAaTe e.e.
- Notarynite ckoby (2).
- OTnycTne KhoNky (1).
OTKIOUOHeHNE DnBraTeJRA
Otnyctnte ck6y (2).

CoBeTbI npu Kocb6e
TObI He octaBnIc nbONCKn TpaBb, cNeyET Bcerda Ha HeckoJIbKO caHTIMeTpOB nepexNecTbIBaTb DOpoxKn Cpe3a S.
3auneta ot neperpy3kn

Pnpeperpy3ke nH6IoknpOBKe DnRaTeB abTomatueeCKN OTKnHOaTcR!
N3BneueKoHTbHKnIOu n yctpaHnTbpnUHy!
-Perperpy3ka: BbICota cpe3a Hn3Ka, 6bICTpoe DnIXKeHne.
Блкровka: ПocToPOHHneпpeДметыВобlaactn cpe3a (Hanp., Betkn).
Arperat MoxHO CHOBA BKJIOUHTb Yepe3 pni6JI.5 MmH.
Onopoxhnte MeoK dna c6opa T
Korda Mewok dny c6op noH, OTKnHaJ KpbIka cama co6oJ onyckaetc.

BhimaHne! Bpaaiooieepejxue nonactn
IpoBODnTe HAcTpOky ObOpyOBaHnToJbKO nocNe TOrO, KaK MOTOP BbIKNoyeH npeKyUne Yactn noNHOCTbIO OCTaHOBUNcB.
BbIKIOHHTb DBINrAteJIb Nn3BNeJy KOHTaKTHbI KJIIOU.
OnopoxkHnTe MeWIOK dIa c6opa.
-NepeH naHOM paObToI yCTpaHnTe noteHuaJIbHbIe nomExHa yUacTke Koc6bl.

Yka3aHnKpa6OTeHnDnKaTopa ypoBn:
YtobI obcneuTb npabnblHyo paOTo uHdkaTopo ypOBH,peyJrnpHO OunlaTe JecKToon TeKoON TBepCTN B MeWke DnC6opa HnKe HndkATopa ypOBH.
Kocb6a / ynaBnBaHne (LI-ION POWER 37, LI-ION POWER 40)
IcnoB3OBAHne FyHKnKoc6bIn C6opa U

BnmaHne! Bpaaiounepekyuie nonactn
IpoBODnTe HAcTPOkU O6OpyOBoAHHa TOnbKO NocNe TOrO, KAK MOTOP BbIKIOueH IN PexKyUe YactN IONHOCTbIO OCTAHOBUNCb.
He BkIIOuAaTe MoTOp Do TeX NOp, NOKa He OToIeTe Ha 6e3oNaChoe pacCTOarHne OT pexyux qacteN.
- Haxmte Ha nepekIouaTeB "KOCbEA/CEOP".
- Ecni Heo6xOIMO, npikpenite Meowok dIra c6opa TpaBbl.
- Bkniouhnte MOTOP.
Mylbupobanhe (LI-ION POWER 37, LI-ION POWER 40)
Pn "MylbHPOBaHH" TpaBA MHOrOKpaTHo pa3pe3aetc CneuHaBHO pexyue cNCTeMoI N BBIOHTc H rpyHT. TaKIM nyTEm He BO3HKnAOT OTXObl. Kpome TOrO, MylbHPOBaHne 3aUHuaET ra3OH OT BbICbXaHH.
IyKa3AHKMyJbHnPOBaHHo
B3aBcHMOCTNOT BbICOTbI TpaBbl, npBOOHTe MylbuPObaHne 1-2 pa3a B HeJeHIO
TpaBa He DoJNKA 6bITb CnMUKOM BbICOKO ININBIAKHO!
Pn MynbHPOBaHN nepemeaTe yCTpoNCTBO MeJeHHO
YIOCTOBePbTecb,TO KAHaNbIpeJyUnx JONacteHAKNaDbIBaIOTcDpyrHa Dpyra.
He cpeaTe TpaBy Hnke 20 MM.
I Ipnmeuahne:
He peKOMeHdyetyTc npOBoNTb MyIbYeHne Ha MUnCTbIX yUactkax ININ CnyTaHHoT TpaBe, NocKOJIbKy I3MeJIbYeHHbIMaTepeNan OCTaETcHa MUnCToN NOBepxHOCTn IN nepenPteHNrX TpaBbN He NorJIOuaeTcNoHBOI.
- Perynpho B3pbxlnBaIte n ydo6pIte ra3OH.
BkIOueHne fyHKmMyJbHypoBaHH U

BhimaHne! Bpaauounecepexuane nonactn
ПобODиTe HAcTpoKу OБopydOBaHЯ TOnbko nocIe TOrO, KaK MToP BbIKNoUeH NpeKyuIe YactN NOHOCtBIO OCTaHOBUNICb.
He BkIIOuAaTe MoTOp Do Tex Nop, Noka He OToIeTe Ha 6e3oNaChoe pacCTOHaHne OT pexyux Yactei.
1.YdaIITepaBoc6OpHnK.
2. ПовернITE поеловать на "MULCH".
3. BkIIOHITe MOTOp.
TexobcnyxbaHne
O6uaHΦopMaun

BHMaHne! BpaauouiNc HOK
Ipeed BbINOJIHeHnEM BCex pa6oT no TexO6cnyKINBaHIO nIyNCTKe:
N3BJeKoHTaTHbI KJIIOH.
n3BneubakKMyIaTOp.
He npnkacatbca K pa6oTaIOUm Ne3BnM.
UncTka
-1ocne kaxdoi Kocb6bluHCTnTB Kocnky MeTkoK.
He 06nBaTb KocuKy BDOI
Peynnpno OunuAnTe MybnypuOnn KnaanC nOMOBHO metEIKN (LI-ION POWER 37, LI-ION POWER 40).V
XpaHeHnB 3mHnn nepnoD
-Поспе кадо cezoHa Kocb6bl TuaTeNbH OOnuAaTe BaUy KocnIky.
OceHbIO OTnpaBnIe BaUy KocNkY B cepBnchHyo MaCTepckyIO WOLF nKHTpOJI.
XpaHnTe KocuKy B cyxom NomeeHN.
ЛNTNtEBo-NOHbIaKKyMylrTop CneNyET 3apXaTb nepeD DnITeJIbHbIMn nepepbIbAMn, HAp., NOMEUeHNEm Ha 3mMHee xpaHHeHne.
3aMeHa HOXa W

BHHMaHHe! BpaauoUncra HOX
Ipeed BbIOJIHeHnEM BCex pa6oT NO TexO6CJyXnBaHIO nUcCTke:
N3BJIeYb KOHTaKTHbI KJIIOU.
V3BnebakKymyTOp.
He npikacatbck KaaboToaUoIm JIe3BnM.
Hocntb nepaTkn.

BHHMaHHe!
Pocne nepetoykn Jnonactm MoKet Hapuyntbcn 6aIahncipOBka.
-NepeTaunBaIte InonactuToIbkoB CneuaanIm3nupoBAHHoMaTepckO,NoCKOBky npaBnna 6e3onachoctn Tpe6yOT Hndnexkauei npobepkn 6aJahncnpBkn.
PpOBODnTe 3aMeHy IONACTe TOnbKO B CneuHaHn3nOpBaHNo MaCTepcKo. O6raTeNbHo NcNoIb3yIte DnHaMoMeTpnuCeckn KlnOu 10 MM.KpyTauN MmEHT npu 3aTaJxke BnHTOB:6-7HM (LI-ION POWER 34, LI-ION POWER 37).
Пюводnte 3aMeHy IonoacteToIbko B CneuHnI3NpOBaHHo MaCTepCKo.Obra3aTeNbHO NcNoJIb3yIte DnHaMOMeTpueckn KlnOu 13 MM.KpyTauNIMOMeHT npi 3aTgKke BInTOB:16-18 Hm (LI-ION POWER 40).
-ПрименTe TOIbKO opINHaJIbHbIe 3aIacHbIe DeTaIIN WOLF.
YctpaHHe HenoJaDOK
| 3аказ № 0603начени Heспокийхов, сильна Вибраць устриства | e Това ОпUCANUEТова | |
| • Hox по breast • Мсторская WOLF | ||
| • Hox оноюнлся о Креленя • смашиу 108 (Замену HOVA) | ||
| Двигатель не разовет | • Актуларгпог рунstов • см. стравиу 106 (Ошоче сveедения) • Актуларгпог по breast • см. стравиу 108 (Усторец) • Контактейки к nullу не встов • см. стравиу 105 (Ошоче сveедения) | |
| Изда мошноctь Косьсы/cбopa | • Hox туpoons • Мсторская WOLF | |
| • Сборник засорпся | • см. стравиу 107 (Опорожни� мешок дли сбopa) | |
| • He сootвета STВУПОДАВИСОТA среса | • см. стравиу 106 (Прinc所需要 в сборниka) | |
| • Актуларгпог по breast • см. стравиу 108 (Усторец • Актуларгпог по breast • см. стравиу 108 (Усторец • Актуларгпог по breast • см. стравиу 108 (Усторец • Актуларгпог по breast • см. стравиу 108 (Усторец • Актуларгпог novet bokov • см. стравиу 108 (Усторец • Актуларгпог novet bokov • см. стравиу 108 (Усторец • Актуларгпог novet bokov • см. стравиу 108 (Усторец • Актуларгпог novet bokov•см. стравиу 108 (Усторец • Актуларгпог novet bokov•сm. стравиу 108 (Усторец • Актуларгпог novet bokov•сm. стравиу 108 (Усторец • Актуларгпог novet bokov•сm. стравиу 108 (Усторец • Актуларгпог novet bokov•сm, ctspansu 108 (Усторец • Актуларгпог novet bokov•сm, ctspansu 108 (Усторец • Актуларгпог novet bokov•сm, ctspansu 108 (Усторец • Актуларгпог novet bokov•сm, ctspansu • Актуларгпог novet bokov•сm, ctspansu • Актуларгпог novet bokov•сm, ctspansu • Актуларгпог novet bokov•сm, ctspansu • Актуларгпог novet bokov•сm, ctspansu • Ангеля • Актуларгпог novet bokov•сm, ctspansu • Актуларгпог novet bokov•сm, ctspansu • Актуларгпог novet bokov•сm, ctspansu • Актуларгпог novet bokov•сm, ctspansu • Аkтуларгпог novet bokov•сm, ctspansu • Актуларгпог novet bokov•сm, ctspansu • Актуларгпог novet bokov•сm, ctspansu • Актуларгпог novet bokov•сm, ctspansu • Актуларrog novet bokov•сm, ctspansu • Актуларrog novet bokov•сm, ctspansu • Актуларrog novet bokov•сm, ctspansu • Актуларrog novet bokov•сm, ctspansu • Актуларrog novet bokov•сm, ctsPANU • Актуларrog novet bokov•сm, ctsPANU • Актуларrog novet bokov•сm, ctsPANU • Актуларrog novet bokov•сm, ctsPANU • Актуларrog novet bokov•сm, ctsPANU • Актуларrog novet bOKV•сm, ctsPANU • Актуларrog novet bOKV•сm, ctsPANU • Актуларrog novet bOKV•сm, ctsPANU • Актуларrog novet bOKV•сm, ctsPANU • Актуларrog novet bOKV•сm, ctsPANU •Актуларrog novet bOKV•сm, ctsPANU •Актуларrog novet bOKV•сm, ctsPANU •Актуларrog novet bOKV•сm, ctsPANU •Актуларrog novet bOKV•сm, ctsPANU •Актуларrog novet bOKV•См. ctsPANU •Актуларrog novet bOKV•См. ctsPANU •Актуларrog novet bOKV•См. ctsPANU •Актуларrog novet bOKV•См. ctsPANU •Актуларrog novet bOKV•См. ctsPANU •Актулаггпог novet bOKV•См. ctsPANU •Актулаггпог novet bOKV•См. ctsPANU •Актулаггпог novet bOKV•См. ctsPANU •Актулаггпог novet bOKV•См. ctsPANU •Актулаггпог novet b OKV•См. ctsPANU •Актулаггпог novet b OKV•См. ctsPANU •Актулаггпог novet b OKV•См. ctsPANU •Актулаггпог novet b OKV•См. ctsPANU •Актулаггпог novet b OKV•Сm. ctsPANU •Актулаггпог novet b OKV•См. ctsPANU •Актулаггпог novet b OKV•См. ctsPANU •Актулаггпог novet b OKV•См. ctsPANU •Актулаггпог novet b OKV•См. ctspansu •Актулаггпог novet b OKV•См. ctsPANU •Актулаггпог novet b OKV•См. ctsPANU •Актулаггпог novet b OKV•См. ctsPANU •Актулаггпог novet b OKV•См. ctsPANU •Ангеля •Актулаггпог novet b OKV•См. ctsPANU •Актулаггпог novet b OKV•См. ctsPANU •Актулаггпог novet b OKV•См. ctsPANU •Актулаггпог novet b OKV•См. ctsPANU •Аkтулаггпог novet b OKV•См. ctsPANU •Актулаггпог novet b OKV•См. ctsPANU •Актулаггпог novet b OKV•См. ctsPANU •Актулаггпог novet b OKV•См. ctsPANU •Актулагgng novet b OKV•См. ctsPANU •Актулагgng novet b OKV•См. ctsPANU •Актулагgng novet b OKV•См. ctsPANU •Актулагgng novet b OKV•См. ctsPANU •Актулагgng novet b OKV•Сm. ctsPANU •Актулагgng novet b OKV•См. ctsPANU •Актулагgng novet b OKV•См. ctsPANU •Актулагgng novet b OKV•См. ctsPANU •Актулагgng novet b OKV•См. ctsPANU * -См. Stavchenko -См. Stavchenko -См. Stavchenko -См. Stavchenko -См. Stavchenko -См. Stavchenko -См. Stavchenko -См. Stavchenko -См. Stavchenko -См. Stavchenko -См. Stavchenko -См. Stavchenko -Одney -Одney -Одney -Одney -Одney -Одney -Одney -Одney -Одney -Одney -Одney -Одney -Одney -Одney -Одney -Одney -Одney -Одney -Одney -Одney -ОдNEY -Одney -Одney -Одney -Одney -Одney -Одney -Одney -Одney -Одney -Одney -Одney -Одney -Одney -Одney -Одney -Одney -Одney -Одney -Одney -Од Barney -Од Barney -Од Barney -Од Barney -Од Barney -Од Barney -Од Barney -Од Barney -Од Barney -Од Barney -Од Barney -Од Barney -Од Barney -Од Barney -Од Barney -Од Barney -Од Barney -Од Barney -Од Barney -Од Barney -Одney -Одney -Одney -Одney -Одney -Одney -Одney -Одney -Одney -Одney -Одney -Одney -Одney -Одney -Одney -Одney -Одney -Одney -Одney -Одvey -Одvey -Одvey -Одvey -Одvey -Одvey -Одvey -Одvey -Одvey -Одvey -Одvey -Одvey -Одvey -Одvey -Одvey -Одvey -Одvey -Одvey -Одvey -Одvey -Одveys -Одvey -Одvey -Одvey -Одvey -Одvey -Одvey -Одvey -Одvey -Одvey -Одvey -Одvey -Одvey -Одvey -Одvey -Одvey -Одvey -Одvey -Одvey -Одvey -Одvoy -Одvey -Одvey -Одvey -Одvey -Одvey -Одvey -Одvey -Одvey -Одvey -Одvey -Одvey -Одvey -Одvey -Одvey -Одvey -Одvey -Одvey -Одvey -Одvey -Одsey -Одvey -Одvey -Одvey -Одvey -Одvey -Одvey -Одvey -Одvey -Одvey -Одvey -Одvey -Одvey -Одvey -Одvey -Одvey -Одvey -Одvey -Одvey -Одvey -Од�试 -Од�试 -Од�试 -Од�试 -Од�试 -Од�试 -Од�试 -Од�试 -Од�试 -Од�试 -Од�试 -Од�试 -Од�试 -Од�试 -Од�试 -Од�试 -Од�试 -Од�试 -Од�试 -Од�试 -Од试 -Од�试 -Од�试 -Од�试 -Од�试 -Од�试 -Од�试 -Од�试 -Од�试 -Од�试 -Од�试 -Од�试 -Од�试 -Од�试 -Од�试 -Од�试 -Од�试 -Од�试 -Од�试 -Од�试 -Од试验区 -Од试验区 -Од试验区 -Од试验区 -Од试验区 -Од试验区 -Од试验区 -Од试验区 -Од试验区 -Од试验区 -Од试验区 -Од试验区 -Од试验区 -Од试验区 -Од试验区 -Од试验区 -Од试验区 -Од试验区 -Од试验区 -Од试验区 -Од�试 -Од�试 -Од�试 -Од�试 -Од�试 -Од�试 -Од�试 -Од�试 -Од�试 -Од�试 -Од�试 -Од�试 -Од�试 -Од�试 -Од�试 -Од�试 -Од�试 -Од�试 -Од�试 -Од疑似 -Од疑似 -Од疑似 -Од疑似 -Од疑似 -Од疑似 -Од疑似 -Од疑似 -Од疑似 -Од疑似 -Од疑似 -Од疑似 -Од疑似 -Од疑似 -Од疑似 -Од疑似 -Од疑似 -Од疑似 -Од疑似 -Од疑似 -Од怀疑 -Од怀疑 -Од怀疑 -Од怀疑 -Од怀疑 -Од怀疑 -Од怀疑 -Од怀疑 -Од怀疑 -Од怀疑 -Од怀疑 -Од怀疑 -Од怀疑 -Од怀疑 -Од怀疑 -Од怀疑 -Од怀疑 -Од怀疑 -Од怀疑 -Од怀疑 -Од疑似 -Од疑似 -Од疑似 -Од疑似 -Од疑似 -Од疑似 -Од疑似 -Од疑似 -Од疑似 -Од疑似 -Од疑似 -Од疑似 -Од疑似 -Од疑似 -Од疑似 -Од疑似 -Од疑似 -Од疑似 -Од疑似 -Од擬似 -Од疑似 -Од疑似 -Од疑似 -Од疑似 -Од疑似 -Од疑似 -Од疑似 -Од疑似 -Од疑似 -Од疑似 -Од疑似 -Од疑似 -Од疑似 -Од疑似 -Од疑似 -Од疑似 -Од疑似 -Од疑似 -Од疑似 -Од≈ -Од疑似 -Од疑似 -Од疑似 -Од疑似 -Од疑似 -Од疑似 -Од疑似 -Од疑似 -Од疑似 -Од疑似 -Од疑似 -Од疑似 -Од疑似 -Од疑似 -Од疑似 -Од疑似 -Од疑似 -Од疑似 -Од疑似 -Од resembles -Од疑似 -Од疑似 -Од疑似 -Од疑似 -Од疑似 -Од疑似 -Од疑似 -Од疑似 -Од疑似 -Од疑似 -Од疑似 -Од疑似 -Од疑似 -Од疑似 -Од疑似 -Од疑似 -Од疑似 -Од疑似 -Од疑似 -Од类似 -Од疑似 -Од疑似 -Од疑似 -Од疑似 -Од疑似 -Од疑似 -Од疑似 -Од疑似 -Од疑似 -Од疑似 -Од疑似 -Од疑似 -Од疑似 -Од疑似 -Од疑似 -Од疑似 -Од疑似 -Од疑似 -Од疑似 -Од类似于 -Од类似于 -Од类似于 -Од类似于 -Од类似于 -Од类似于 -Од类似于 -Од类似于 -Од类似于 -Од类似于 -Од类似于 -Од类似于 -Од类似于 -Од类似于 -Од类似于 -Од类似于 -Од类似于 -Од类似于 -Од类似于 -Од类似于 -Од疑似 -Од疑似 -Од疑似 -Од疑似 -Од疑似 -Од疑似 -Од疑似 -Од疑似 -Од疑似 -Од疑似 -Од疑似 -Од疑似 -Од疑似 -Од疑似 -Од疑似 -Од疑似 -Од疑似 -Од疑似 -Од疑似 -Од不像 -Од疑似 -Од疑似 -Од疑似 -Од疑似 -Од疑似 -Од疑似 -Од疑似 -Од疑似 -Од疑似 -Од疑似 -Од疑似 -Од疑似 -Од疑似 -Од疑似 -Од疑似 -Од疑似 -Од疑似 -Од疑似 -Од疑似 -Од. -Од疑似 -Од疑似 -Од疑似 -Од疑似 -Од疑似 -Од疑似 -Од疑似 -Од疑似 -Од疑似 -Од疑似 -Од疑似 -Од疑似 -Од疑似 -Од疑似 -Од疑似 -Од疑似 -Од疑似 -Од疑似 -Од疑似 -Од疑似 |
3anyactn
Tevikes Tapatnpoeis yia th opiction
Me yyuova tn neyaln diapkeia zwo tsou
etavaopntcpeovou ouawpeut (muatapi) 0a npetie va
tpoeeTe ta napakatw onueia:
TO KOKIPOWtaki LED avaOoBnVEI (ETTavaopoticiouevoosuaowpeutncmuataipac oxEobov adEioC):
Harmonized EU Standards (The indicated standards are consistent with the valid revision):
| WOLF Garten | Original EG-Konformitätserklärung | drawing no. revision | 0054 703 02/10 | ||
| Original EC Declaration of Conformity | |||||
| These Konformität bezieh sich auf den Lieferstatus des Produktes. Durch Kunden vorgenommen Änderungen sind verboten und führen zum Erlösenchen der Erklärung. | |||||
| This conformity refers on the delivery status, any technical changes of the customer are forbidden and conformity expires. | |||||
| DGBFINDKFINISDSNLDKCSZ | EG KonfomitätserklärungDie Forderungen folgender Richtlinien und Normen der EG sind erfüllt.EC Conformity declarationThe demands of EU standards and rules listed below are fulfilled.Déclaration de conformité CELes exigences définies par les directives et normes suivantes de l'Union Européenne sont remplies : article R 233-84 du Code du Travail.Dichiarazione di conformità CEESono soddisfatti i requisiti delle seguenti direttive e nome CE.UE conformiteitsverklaringDe machine beantwoordt volledig aan de Europese normen.EF-overensstemmelseserklaeringKravene i falgende EF-direktiver og EF-normer er opfyldt.EU-vaatimustemnukaisuusvakuutusTäytää alla luetellut EU:n direktivit ja standardit.EF-konformitetserklaeringAlle krav i henhold til falgende direktiver og normer fra EU er oppfylt.EU Försakran om overensstammelseDenna maskin uppfyller kraven i nedanstände EU-direktiv och standarder.Prohlášeni o shode EUPožadavyk následujících norem a směnic EU jsou splněny. | HSLDECECECECECECECECECECECECECECECECECECECECECECECECECECECECECECECECECECECECECECECECECECECECECECECECECECECECECECECECECECECECECECECECECECECECECECECECECECECECECECECECECECECECECECECECECECECECECECECECECECECECEZ | CEMegfelelöségi NyilatkozatiAz alábbi EU elöirasoknak és szabványoknak megfele.I Deklaracja zgodnosci z unia europejskponizsze standardy izasady wymagane w unii europejskiej są spelniione.EU Izjava o suglasnostiIspunjeni su zahtjevi slijedećih smjernica i normi EU.Prehlásenie o zhode EUPožiadavyk nasledovných noriem a smernic EU sù splnéne.Požiadavyk nasledovných noriem a smernic EU sù splnéne.Požiadavyk nasledovných noriem a smernic EU sù splnéne.Požiadavyk nasledovných noriem a smernic EU sù splnéne.Požiadavyk nasledovných noriem a smernic EU sù splnéne.PožiadavyK nedermei našpólnečte kánekvačná našpólnečte kánekvačná našpólnečte kánekvačná našpólnečte kánekvačná našpólnečte kánekvačná našpólnečte kánekvačná našpólnečte kánekvačná našpólnečte kánekvačná naŠpólnečte kánekvačná našpólnečte kánekvačná našpólnečte kánekvačná našpólnečte kánekvačná našpólnečte kánekvačná našpólnečte kánekvačná našpólnečte kánekvačná našpálnciyeRdA Uygūnluk BeyanIsgaïdaki AB standartlarinda ve yönetmeliklerindemöz konusu olantalepler yerinegetirilmistrIGdʌŋwɔŋ πιθόπταç EKOi ataɪtɪŋεɪç πʌλρούν tɪç akóʌLouθες obnyiες kai πρόtuṭa tɪŋ Eupʊπτaɪkns Koivóntaç. | ||
| Machinery Directive2006/42/EC | EMC Directive2004/108/EC | RoHS Directive2002/95/EC | Outdoor Directive2005/88/EC; 2000/14/EC Annex VI | ||
| Electrical Safety EN60335-1; EN50338 | Mechanical Safety EN836 | EMC Compliance EN55014-2; EN55014-1:2000 | ||||||||||
| Notified body involved in the verification of conformity: VDE Prüf-und Zertifizierungsinsitut, Merianstr. 28, D-63069 Offenbach (Ident. Nr.: 0366) | ||||||||||||
| kg | ||||||||||||
| 4919 ... | LI-ION POWER 34 | 34 | 1-5 / 20-60 mm | 13 | 2950 min-1 | 72 V= | 1,45 Ah / 250 m² | 230 V~/50 Hz 36 V≠450 mA | 5 h | ahv = <2,5m/s² | LwA / LwAg = 88 / 89 dB (A) | LpA = 77 dB (A) |
| 4937 ... | LI-ION POWER 37 | 37 1-5 / 20-60 mm 15 2950 min | -1 | 3x36 V= 10 A | 1,45 Ah 250 m² | 230 V~/50 Hz 41 V≠450 mA | 6-8 h | ahv = <2,5m/s² | LwA / LwAg = 88 / 89 dB (A) | LpA = 79 dB (A) | ||
| 4929 ... | LI-ION POWER 40 | 40 | 1-5 / 25-80 mm | 22 | 2950 min-1 | 3x36 V= 10 A | 1,45 Ah 250 m² | 230 V~/50 Hz 41 V≠450 mA | 6-8 h | ahv = <2,5m/s² | LwA / LwAg = 93 / 94 dB (A) | LpA = 79 dB (A) |
Betzdorf, 11.02.10
| BG-Kocauka; CZ-Sekacka trávy; DK-Plaeneklipper; D-Rasenmaher; GR-Koupeutko; GB-Lawn mower; FIN-Poltomoottorikäytöteset; F-Tondeuse à gazon; HR-Kosilica za travu; H-Pázsityriyögep; I-Tosaerba; NL-Gazonmaier; N-Gressklipper; PL-Kosiarka; RO-Cositoare de iarba; RUS-Гаоноксима; SK-Sekacka trávy; SLO-Kosilica; S-Gräsklippare; TR-Cim biçme makinesi |
| BG-Pabotna shinpina; CZ-Pracovni zabér; DK-Arbejdsbredde; D-Arbeitsbreite; GR-Пладуоц ecyaioic; GB-Working width; FIN-Tyoleveys; F-Largeur opérationnelle; HR-Radna Sirina; H-Munkaszélesseg; I-Larghezza di lavoro; NL-Werkbrendte; N-Arbejdsbredde; PL-Szerokósc pracy; RO-Latime de lucru; RU-Ширни obropaobotn; SK-Pracovný zaber; SLO-Delovnasiirina; S-Arbesbredd; TR-Calismga genisligi |
| BG-Peyunipane débjiineta na otkocinte; CZ-Nastaveni vysky stmiše; DK-Indstilling of klippehjede; D-Schnitthöhe einstellen; GR-Púθμηι tou χούς κοπίς; GB-Set the cutting height; FIN-Lekkukorkeiden sàtó; F-Reglez la hauteur de coupe; HR-Podesavanje visine rezanja; H-A vagasi magassag băllitása; I-Regolare l'allezza di taglio; NL-Maihooguste instellen; N-Instnilling av snithoyden; PL-Nastawianie wysoksićcićia; RO-Regliaea inaliti de täere; RUS-Yctanovka býcòtsb crezainia trapeb; SK-Nastavenie vysky stniska; SLO-Nastavitev višne kosenja; S-Installning av klpphojd; TR-Kesme seviyesinin ayarlanmasi |
| BG-Terno; CZ-Hmrotnost; DK-Vægt; D-Gewicht; GR-Bapoc; GB-Weight; FIN-Paino; F-Poids; HR-Težina; H-Suly; I-Peso; NL-Gewicht; N-Vekt; PL-Ciežar; RO-Greutate; RUS-Maccia; SK-Hmrotnost; SLO-Teza; S-Vikt; TR-Agirlik |
| BG-обори elektromotorp; CZ-otáčky elektromotoru; DK-ombrejingnstal; D-Drehzahl; GR-Aρiθμός στρορών έλεκτροκυνητρα; GB-speed of electric motor; FIN-kierosluku sāhömoottori; F-Vitésse du moteur électricité; HR-Broj okretaja elektronotiva; H-Elektronator fordulatszama; I-numero di giri motore elettrico; NL-toenteral elektronotur; N-turalt eigentrol; PL-liczba obrotów silnila elektryczego; RO-turata elektronotur; RUS-Umpno; O-boptobová; SK-otáčky elektromotora; SLO-Stevilo vrtlajev elektronotora; S-variatal elmotor; TR-Devir sayisi, elektronik motor |
| BG-Hanpenje; CZ-Napétí; DK-Spaending; D-Voltage; GR-Xwprntkótna; GB-electric trimmer; FIN-Jännite/nimellisvirta; F-Tension; HR-Napon; H-feszultség; I-Tensione; NL-Spanning; N-Spanning; PL-Napiècie; RO-Tensiune; RUS-Hanpenje; SK-Napatie; SLO-Napetost; S-Spanning; TR-Ge-rilim |
| BG-Kanauzitet / Macx. mochnoct na ediniuza plouoi; CZ-Kapacita / max. plośny výkon; DK-Kapacitet / Maks. Fladeydelse; D-Kapazität / max. Flåchenleistung; GR-Avútato Xóvoç φórpólnoç; GB-Capacity / max. area; FIN-Kapasiteetti / imem. leikkuuala; F-Capacité / rendiment de surface max.; HR-Kapacitet / makes. snaga po povrsni; H-kapacitas / max. teruliel teljesitmény; I-Tension / max. corrente nominale; NL-Capacité / Max. Maiopervlakte; N-Kapasitet / makes. flateffekt; PL-Pojemnośc / max. wydajnośc powierzchniwa; RO-Capacitate / maxima randolement pe suprafátá; RUS-Pronmbdtenhôct/ max. Mochnoct na ediniuca nopevproxencky; SK-Kapacita / Max. Plośny výkon; SLO-Kapaciteta / makes. povrsinska zmogljivost; S-Kapacitet / max. yteffekt; TR-Kapacità / makes. Yüzye Kapasitesi |
| BG-BbHnO 34zdo ncoTvoC Tbx0d; CZ-Nabijecka: Vstup/Vystup; DK-ladeapparat; Input/Output; D-Ladegerät: Input/Output; GR-Egutepián ovoču fróplion; EiofoBoc λημηc/EgoBoc tripoxy;c; GB-Charger: Input/Output; FIN-Latauslaite: Input/Output; F-Chargeur: Input/Output; HR-Vanski punjac; Input/Output; H-kuló tóltokószülek: pemenet/kimetene; I-Caracabatterie: Input/Output; NL-Acculader: Input/Output; N-Ladeapparat: Input/Output; PL-Ladowarka: Zasilanie/Wyjsie; RO-Incarcator: Input/Output; RUS-Bheunée: zaparodnoe yctroyo; Bxod; Bxbyox; SK-Nabija; Vstup/Vystup; SLO-Zunani jol polinikn: Input/Output; S-Laddningsaggregat: Ineffect/Uteffekt; TR-Harici sarih cihazi: Girici/Ciki |
| BG-Bpeme 34zdo ncoTvoC Tbx0d; CZ-Doba nabljeni; DK-Ladetid; D-Ladezeit; GR-Xóvoç φórpólnoç; GB-electric trimmer; FIN-Latausaika; F-Durée de chargement; HR-Vrjemi punjena; H-toléti od; I-Tempo de carica; NL-Oplaaditj; N-Ladetid; PL-Czas ladowania; RO-Duratá de incârcare; RUS-Bpeme zayada; SK-Doba nabljania; S-Laddningsistud; TR-Sar suresi |
| BG-TrpTene - pamo/ptxa; CZ-Vibrace prenase; na ruce; DK-Hand-arm-swingninger; D-Hand- Arm-Schwingungen; GR-Kpáðaqoi γεριουβo; BG-Hand/arm-swing; FR-Ham-darmi-sing; N-Hard arm-swing;nig; N-Hard arm-swing;nig; PL-Drgana przenoszone na donie i ruce; H-Kezet et kar eró rezeg; I-Vibrazioni su mano-braccio; N-Hand-en arnrillingen; N-Hand arm-swing;nig; PL-Drgana przenoszone na donie i ruce; R-Osciati-ma-brat; RUS-Urbovéh kongalh obobru; SK-Vibrace prenase; na ruce; SLO-Treslajdi alan in roke; S-Hand-arm-svängngring; TR-El, kol sallamalar |
| BG-Izmepeha/raapanrnapa zhykova mooshoct (Lw/Lw); CZ-Zmérény / zaručeny akusticky výkon (Lw/Lw); DK-Malt/ garanteret lydefektniveau (Lw/Lw); D-gemessene/garantierte Schalleleitung (Lw/Lw); GR-Metronmučev / evyyučevny πηπικι liuxus (Lw/Lw); GB-Measured/ guaranteed sound power (Lw/Lw); FIN-Mitattu / taatuä aänitehtasno (Lw/Lw); F-Puisance sonore mesure/ garantie (Lw/Lw); HR-Lizmierena / zajeména jakost zvuka (Lw/Lw); H-Mert / garantielt hangteljestmény (Lw/Lw); I-Potenza acustica misuratà/ garantita (Lw/Lw); NL-Gemeten/gegarande-erd geluidsniveau (Lw/Lw); N-Malte / garantierte lydefekt (Lw/Lw); PL-Zmierzony / gwarantowany poziom halasu (Lw/Lw); RO-Putere sonora másurata / garantà (Lw/Lw); RUS-Izmepehny / farrantrapolbanhý yobovénbé zhykové mboucho; SK-Nameruy / zaručeny akusticky výkon (Lw/Lw); S-Laddningsolubil; RUS-Uppmätt / garantead bullereffekt (Lw/Lw); TR-Olculmûs/Garantie edilen ses giucu (Lw/Lw); S-Ludtryck (Lw/Lw) |
| BG-3ybozo harnane (Lw); CZ-Akusticky tlak (Lw); DK-Lydtryk (Lw); D-Schalldruck (Lw); GR-Akouotnić Šižcni (Lw); GB-Sound pressure (Lw); FIN-Aänpenpasetino (Lw); F-Pression acoustique (Lw); HR-Zvučni tlak (Lw); H-Hangnyomas (Lw); I-Pressione acustica (Lw); NL-Geluidsdruk (Lw); N-Lydtryk (Lw); PL-Cisienie akustyczne (Lw); RO-Pressiunea sunetuluf (Lw); RUS-Urbovéh 3bzykoboro daßvlenny (Lw); SK-Akusticky tlak (Lw); S-Lodtryck (Lw); TR-Ses basinc (Lw) |
| BG-Texnuecka dokumenta; npi; CZ-Technické Dokumenty; DK-teknisk dokument for; D-Technische Unterlagen bei; GR-Texnučí TKunpiwi; GB-Technical documentation at; FIN-Tekniset asiakirjat; F-Dossier technique chez; HR-Technické dokumentace na; H-Technikai dokumentatio...ná! I-Documentation technique presso; NL-Technische gegevens bei; N-Technische dokumentatio ...ná! I-Documentation technica presso; NL-Technische dokumente pá; PL-Dokumentacia technica jest archiwomania i dostepna (w firmie); RO-Documente tehnice; RUS-Texnuecká dokumenta na...; SK-Technické podklady u; SLO-Technicná Dokumenti; S-Tek-niska dokument; TR-deki teknik belgelere |
WOLF Garten