GEPM 53 SHW E Li - Electric mower EINHELL - Free user manual and instructions
Find the device manual for free GEPM 53 SHW E Li EINHELL in PDF.

| Product Type | Petrol Lawn Mower |
| Brand | Einhell |
| Model | GEPM 53 SHW E Li |
| Engine | 4-stroke, 1 cylinder, 173 cm³ |
| Power consumption | 2.8 kW |
| Working speed | 2850 ± 100 rpm |
| Cutting width | 530 mm |
| Cutting height adjustment | Central, 25-70 mm |
| Tank capacity | Approx. 1.6 l (petrol) |
| Engine oil | Approx. 0.6 l / 10W30 |
| Spark plug | F7RTC, gap 0.7 ± 0.1 mm |
| Weight | 44.1 kg |
| Sound pressure level | 83.8 dB(A) |
| Guaranteed sound power level | 98 dB(A) |
| Vibration (hand-arm) | 7.12 m/s², uncertainty K=1.5 m/s² |
| Starting system | Electric (battery) and manual (recoil starter) |
| Battery supply | Li-Ion, 18 V (Power X-Change) |
| Grass catcher capacity | Fill level indicator |
| Functions | Cutting, mulching, side and rear discharge |
| Maintenance | Cleaning with scraper or hose connection, oil change, air filter, spark plug |
| Safety | Engine brake, stop lever, accidental start protection |
| Included accessories | Grass catcher, mulching adapter, side discharge adapter, scraper, battery, charger, spark plug wrench, folding handle |
| Recommended use | Domestic and pleasure gardens (max 50 h/year) |
Frequently Asked Questions - GEPM 53 SHW E Li EINHELL
User questions about GEPM 53 SHW E Li EINHELL
0 question about this device. Answer the ones you know or ask your own.
Ask a new question about this device
Download the instructions for your Electric mower in PDF format for free! Find your manual GEPM 53 SHW E Li - EINHELL and take your electronic device back in hand. On this page are published all the documents necessary for the use of your device. GEPM 53 SHW E Li by EINHELL.
USER MANUAL GEPM 53 SHW E Li EINHELL
GB Original operating instructions Petrol Lawn Mower
- Safety regulations
- Layout and items supplied
- Proper use
- Technical data
- Before starting the equipment
- Operation
- Cleaning, maintenance, storage, transport and ordering of spare parts
- Disposal and recycling
- Troubleshooting guide
- Charger indicator
GB
Danger!
When using the equipment, a few safety precautions must be observed to avoid injuries and damage. Please read the complete operating instructions and safety regulations with due care. Keep this manual in a safe place, so that the information is available at all times. If you give the equipment to any other person, hand over these operating instructions and safety regulations as well. We cannot accept any liability for damage or accidents which arise due to a failure to follow these instructions and the safety instructions.
1. Safety regulations
The corresponding safety information can be found in the enclosed booklet.
Danger!
Read all safety regulations and instructions. Any errors made in following the safety regulations and instructions may result in an electric shock, fire and/or serious injury.
Keep all safety regulations and instructions in a safe place for future use.
Explanation of the warning signs on the equipment (see Fig. 18)
1) Read the operating instructions.
2) Take care of the danger from catapulted parts. Keep a safe distance.
3) Danger! Sharp blades - Switch off the engine and pull the spark plug boot before doing any maintenance, repair, cleaning or adjustment work.
4) Fill with oil and fuel before starting the mower.
5) Caution: Wear ear protection and safety goggles.
6) Guaranteed sound power level.
7) Caution! Hot parts. Keep your distance.
8) Fill in fuel only when the engine is switched off.
9) Risk of cut injuries. Caution: rotating cutters.
10) Starting procedure
11) Engine start/stop lever (I=Engine on; 0=Engine off)
12) Drive lever (clutch lever)
13) Empty the tank before you move the mower into cleaning position.
14) Do not expose the device to rain.
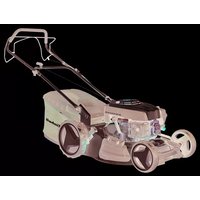
2. Layout and items supplied
2.1 Layout (Fig. 1-17)
1a. Engine start/stop lever (engine brake)
1b. Drive lever (clutch lever)
2. Fuel pump (primer)
3a. Push bar, bottom
3b. Push bar, top
3c. Hole for cord bracket
3d. Cord bracket
4a. Catch bag
4b. Mulching adapter
4c. Level indicator
4d. Side ejector fl ap
4e. Side ejector adapter
5a. Ejector fl ap
5b. V-belt cover
6. Tank fller cap
7. Oil filler screw
8. Cutting height adjustment
9. Starter cable
10.Start button
10a. Cable clip (2x)
10b. Cable clip (1x)
11. Charger
12a. Screw (2x)
12b.Washer, large (2x)
12c. Star nut (2x)
13. Spark plug wrench
13a. Screw (2x)
13b. Washer, small (2x)
13c. Nut (2x)
14. Cleaning scraper
15. Power-X combi-panel
16. Safety plug
17. Battery pack
18. Pushlock button
19. Hose connection
2.2 Items supplied
Please check that the article is complete as specified in the scope of delivery. If parts are missing, please contact our service center or the sales outlet where you made your purchase at the latest within 5 working days after purchasing the product and upon presentation of a valid bill of purchase. Also, refer to the warranty table in the service information at the end of the operating instructions.
- Open the packaging and take out the equipment with care.
- Remove the packaging material and any packaging and/or transportation braces (if available).
GB
Check to see if all items are supplied.
- Inspect the equipment and accessories for transport damage.
If possible, please keep the packaging until the end of the guarantee period.
Danger!
The equipment and packaging material are not toys. Do not let children play with plastic bags, foils or small parts. There is a danger of swallowing or suffocating!
Petrol lawn mower
- Mulching adapter
Catch bag
Side ejector adapter
- Cleaning scraper
Cable clip (3x)
Star nut (2x)
Screw (2x)
- Washer, large (2x)
Spark plug wrench
Push bar, bottom
Push bar, top
Screw (2x)
- Washer, small (2x)
- Nut (2x)
Power-X combi-panel
Safety plug
Battery pack
- Charger
Petrol service manual
Original operating instructions
Safety information
3. Proper use
The equipment may only be used for the tasks it is designed to handle. Any other use is deemed to be a case of misuse. The user/operator and not the manufacturer will be liable for any damage or injuries of any kind caused as a result of this.
The petrol lawn mower is intended for private use i.e. for use in home and gardening environments.
Private use of the lawn mower refers an annual operating time generally not exceeding that of 50 hours, during which time the machine is primarily used to maintain small-scale, residential lawns and home/hobby gardens. Public facilities, sporting halls, and agricultural/forestry applications are excluded.
Please note that our equipment has not been designed for use in commercial, trade or industrial applications. Our warranty will be voided if the equipment is used in commercial, trade or industrial businesses or for equivalent purposes.
The operating instructions as supplied by the manufacturer must be kept and referred to in order to ensure that the lawn mower is properly used and maintained. The instructions contain valuable information on operating, maintenance and servicing conditions.
Warning! Due to the high risk of bodily injury to the user, the petrol lawn mower must not be used to carry out the following work: Trim bushes, hedges or shrubs, to cut scaling vegetation, planted roofs, or balcony-grown grass, to clean (suck up) dirt and debris off walkways, or to chop up tree or hedge clippings. Moreover, the lawn mower may not be used as a power cultivator to level out high areas such as molehills.
For safety reasons, the lawn mower may not be used as a drive unit for other work tools or toolkits of any kind.
4. Technical data
GE-PM 48 S HW-E Li
Engine type ....... One-cylinder four-stroke engine,
Power input: 1.8 kw
Working speed n_0 ..2850 ± 100 min
Fuel: . Petrol
Tank capacity: approx. 1,2 I
Engine oil: approx. 0.5 l / 10W30
Spark plug: F6RTC
Electrode gap (spark plug): 0.7 ± 0,1 mm
Cutting height adjustment: ... Central, (25-70 mm)
Cutting width: 480 mm
Weight: 41,3kg
Danger!
Sound and vibration
L_PA sound pressure level 81.2 dB(A)
Engine type .......One-cylinder four-stroke engine, 173 cc
Power input: 2.8 kw
Working speed n_0 .. 2850 ± 100 min
Fuel: . Petrol
Tank capacity: approx. 1.6 l
Engine oil: approx. 0.6 l / 10W30
Spark plug: F7RTC
Electrode gap (spark plug): 0.7 ± 0,1 mm
Cutting height adjustment: ... Central, (25-70 mm)
Cutting width: 530 mm
Weight: 44,1kg
Danger!
Sound and vibration
L_pA sound pressure level 83.8 dB(A)
K_eq uncertainty 3 dB
Lsound power level 96.5 dB(A)
K_w uncertainty 1.93 dB
Guaranteed sound power level 98 dB(A)
Vibration emission value a_b = 7.12 m/s^2
K uncertainty = 1.5m / s^2
Wear ear-muff s.
The impact of noise can cause damage to hearing.
Long work periods should be avoided due to the development of high noise and vibration levels.
Keep the noise emissions and vibrations to a minimum.
Only use appliances which are in perfect working order.
Service and clean the appliance regularly.
Adapt your working style to suit the appliance.
Do not overload the appliance.
- Have the appliance serviced whenever necessary.
- Switch the appliance off when it is not in use.
Caution!
Residual risks
Even if you use this electric power tool in accordance with instructions, certain residual risks cannot be rules out. The following hazards may arise in connection with the equipment's construction and layout:
- Damage to hearing if no suitable ear protection is used.
- Health damage caused by hand-arm vibrations if the equipment is used over a prolonged period or is not properly guided and maintained.
5. Before starting the equipment
5.1 Assembling the components
Some parts of the equipment come disassembled. For quick and easy assembly, read and follow the instructions below.
Note! You will need the following additional tools (not supplied) for assembly, and also for maintenance work:
One flat oil drip tray (for changing the oil)
One 1 liter measuring jug (oil/petrol resistant)
One petrol can
One funnel (suitable for the tank's petrol filler neck)
Household wipes (to wipe up oil/petrol residue; dispose of these at a filling station)
One petrol suction pump (plastic, available from DIY stores)
One oil can with hand pump (available from DIY stores)
Engine oil
Assembly
- Fit the push bar (Item 3) as shown in Fig. 3a-3b. For fastening choose one of the holes (Fig. 3a/Item A) to suit the required height of the handle.
Important! The identical height must be set on both sides. - Fit the Power-X combi-panel (Item 15) with the supplied screws as shown in Fig. (3c and 3d).
- Insert the grip of the starter cable (Item 9) into the hook provided for that purpose as shown in Fig. 1.
- Fasten the actuator cables to the push bar with the supplied cable clips (Items 10a and 10b) as shown in Fig. 3e.
- Lift the ejector flap (Item 5a) with one hand
GB
and hook in the grass bag (Item 4a) as shown in Fig. 4a.
5.2 Adjusting the cutting height
Warning! Adjust the cutting height only when the engine has been switched off.
The cutting height is centrally adjusted with the cutting height adjustor lever (Fig. 7/Item 8). Different cutting heights can be selected.
- Actuate the adjustor lever and pull it to the required position. Let the lever click into position.
Fit the battery pack (Item 17) and safety plug (Item 16) as shown in Fig. 3f.
5.3 Charging the Li battery pack (Fig. 3f-16) Important!
The charger is allowed to be used only for the lithium-ion batteries of the Power-X-Change series!
Power-X-Change
18 V, 1.5 Ah, 5 lithium-ion cells
18 V, 2.0 Ah, 5 lithium-ion cells
18 V, 3.0 Ah, 10 lithium-ion cells
18 V, 4.0 Ah, 10 lithium-ion cells
18 V, 5.2 Ah, 10 lithium-ion cells
The battery is protected from exhaustive discharge. An integrated protective circuit automatically switches off the equipment when the battery is fl at.
Warning! Do not actuate the On/Off switch any more if the protective circuit has tripped. This may damage the battery.
- Remove the battery pack from the handle, pressing the pushlock button (18) downwards to do so.
- Check that your mains voltage is the same as that marked on the rating plate of the battery charger. Insert the power plug of the charger (11) into the socket outlet. The green LED will then begin to flash.
- Push the battery pack onto the battery charger.
In section 10 (Charger indicator) you will find a table with an explanation of the LED indicator on the charger.
If the battery pack fails to charge, check for the following:
- voltage at the power socket
whether there is good contact at the charging contacts of the charging unit
If the battery pack still fails to charge, send
the charger and charging adapter
and the battery pack
to our customer service center.
To ensure that the Li battery pack provides long service you should take care to recharge it promptly. You must recharge the battery pack when you notice that the performance of the equipment drops.
Battery capacity indicator (Fig. 3f)
Press the switch for the battery capacity indicator (Fig. 3f/Item A). The battery capacity indicator (Fig. 3f/Item B) shows the charge status of the battery using 3 LEDs.
All 3 LEDs are lit:
The battery is fully charged.
2 or 1 LED(s) are lit:
The battery has an adequate remaining charge.
1 LED fl ashes:
The battery is empty, recharge the battery.
All LEDs fl ash:
The battery pack has undergone exhaustive discharge and is defective. Do not use or charge a defective battery pack.
6. Operation
Note!
The engine comes without oil and petrol. Therefore, be sure to add oil and petrol before starting the engine.
- Check the oil level (see 7.2.1).
- Use a funnel and measuring jug to fill the tank with petrol. Make sure that the petrol is clean.
Warning: Never use more than one safety petrol can. Do not smoke when refueling. Switch off the engine before refueling and allow the engine to cool down for a few minutes.
GB
- Ensure that the ignition cable is connected to the spark plug.
Carrying out a safety test on the engine start/stop lever
The lawn mower comes equipped with an engine start/stop lever (Fig. 5a/Item 1a) in order to prevent it from starting up unintentionally and to ensure that the engine and blade stop quickly in case of danger. The lever must be actuated (Fig. 5b) before the lawn mower is started. When the engine start/stop lever is released, it must return to its initial position (Fig. 5a).
Before you start mowing, you should run through this process several times in order to ensure that the lever and actuator cables are working properly.
Repeat the test several times after the engine has started up. When the engine starts/stop lever is released, the engine must stop within a few seconds. If not, contact Customer Service.
Danger: The blade begins to rotate as soon as the engine is started.
6.1 Starting the engine
6.1.1 Starting up with the electric starter
-
Ensure that the ignition cable is connected to the spark plug. Make sure that the safety plug (Fig. 3f/Item 16) is fitted in the Power-X combi-panel.
-
Press the fuel pump (primer) (Fig. 6/Item 2) three times. You can skip this point if the engine has already warmed up.
- Stand behind the lawn mower. Actuate the engine start/stop lever (Fig. 5b) with one hand. The other hand is on the Start button (Fig. 1/Item 10).
- Start the engine by pressing the Start button. Release the Start button immediately once the engine has started. Pressing the Start button again while the engine is running will damage the starting system. Important! In cold weather, it may be necessary to repeat the starting process several times.
6.1.2 Starting up with the reversing starter
- Ensure that the ignition cable is connected to the spark plug.
-
Press the fuel pump (primer) (Fig. 6/Item 2) three times. You can skip this point if the engine has already warmed up.
-
Stand behind the lawn mower. Actuate the engine start/stop lever (Fig. 5b) with one hand. The other hand must be on the starter handle.
- Start the engine using the reversing starter (Fig. 1/Item 9). To do this pull out the handle approx. 10 - 15cm until you feel a resistance and then start the engine with a sharp tug. If the engine does not start, tug the handle again.
Note! Never allow the actuator cable to snap back.
Note! In cold weather, it may be necessary to repeat the starting process several times.
Drive unit
Drive lever/clutch lever (Fig. 5a/Item 1b): If you press this (Fig. 5c) the clutch for the drive will be closed and the lawnmower will start to move with the engine running. Release the drive lever in good time to stop the moving lawnmower. Practice starting and stopping before you use the mower for the first time until you are familiar with controlling the mower.
6.2 Tips on mowing properly
Danger!
Never open the chute fl ap when the grass bag has been detached (to be emptied) and the engine is still running. The rotating blade can cause serious injuries!
Always carefully fasten the chute fl ap and debris bag. Switch off the engine before you remove them.
Whenever you need to perform any kind of adjustment, maintenance or repair work, switch off the engine and wait until the blade no longer rotates. Pull off the spark plug connector.
Mowing
The engine is confi gured for an optimal grass cutting speed, for ejecting grass into the debris bag, and for many years of use.
Only use a sharp blade that is in good condition. This will prevent the grass blades from fraying and the lawn from turning yellow.
Try to mow in straight lines for a nice, clean look. The swaths should overlap each other by a few centimeters in order to avoid stripes.
GB
Keep the underside of the mower housing clean and remove grass build-up. Deposits not only make it more difficult to start the mower; they decrease the quality of the cut and make it harder for the equipment to bag the grass.
Always mow along inclines (not up and down). You can prevent the lawn mower from slipping down by holding a position at an angle upwards. Select the cutting height according to the length of the grass. If necessary, mow a number of times so that you never cut more than 4cm of grass in one go.
Switch off the engine before doing any checks on the blade. Keep in mind that the blade continues to rotate for a few seconds after the engine has been switched off. Never attempt to manually stop the blade. Regularly check to see if the blade is securely attached, is in good condition and is sharp. If the contrary is the case, sharpen the blade or replace it. In the event that the blade strikes an object, immediately switch off the lawn mower and wait for the blade to come to a complete stop. Then inspect the condition of the blade and the blade mount. Replace any parts that are damaged.
Mulching (Fig. 4b)
In mulching mode the cuttings are shredded in the enclosed mower housing and then spread back onto the lawn. It is not necessary to gather and dispose of the grass.
Mulching is only possible if the lawn is relatively short..
To use the mulching function, disconnect the debris bag, slide the mulching adaptor into the ejector opening (Item 4b) and close the ejector opening.
Side ejector (Fig. 4b/4c)
You must fit the mulching adapter (Item 4b) in order to use the side ejector. Hook in the side ejector adapter (Fig. 4c/Item 4e) as shown in Fig. 4c.
Rear ejector (Fig. 4d)
To use the rear ejector function you must open the ejector flap (Fig. 4d/Item 5a) slightly. Lock it in place with the locking lever (Fig. 4d/Item A). Swing up the locking lever and insert its foot into the recess provided (Fig. 4d/Item B). The mulching adapter (Item 4b) is not allowed to be fitted when the rear ejector is used.
6.3 Switching off the engine
All you have to do to switch off the engine is release the engine start/stop lever (Fig. 5a/ Item 1a). Pull off the spark plug connector from the spark plug in order to prevent the engine from starting. Before you start the engine again, check the cable of the engine brake. Check that the actuator cable is correctly fitted. If the switch-off cable is kinked or damaged, it must be replaced.
6.4 Emptying the debris bag
When the debris bag is full, the air throughput will be low and the level indicator (4c) will be up close against the debris bag (Fig. 15). Empty the debris bag and clear out the ejector chute. Danger! Before taking off the debris bag, switch off the engine and wait until the blade has come to a stop.
To take off the grass basket, use one hand to lift up the chute fl ap and the other to grab onto the basket carry-handle. Remove the basket (Fig. 4a). For safety reasons, the chute fl ap automatically falls down after removing the grass basket and closes off the rear chute opening. If any grass remains in the opening, it will be easier to restart the engine if you pull the mower back approximately 1m
Do not use your hands or feet to remove clippings in or on the mower housing, but instead use suitable tools such as a brush or a hand broom.
In order to ensure that the majority of grass clippings are picked up, the inside of both the grass bag and especially the air grill must be cleaned after each use.
Reattach the grass bag only when the engine is switched off and the blade is stopped.
Using one hand, lift up the chute flap, while grabbing onto the basket handle with the other. Hang in the basket from the top.
GB
7. Cleaning, maintenance, storage, transport and ordering of spare parts
Danger!
Never work on or touch any current-conducting parts of the ignition system while the engine is running. Pull the spark plug boot from the spark boot before doing any maintenance or assembly work. Never carry out any work on the equipment while the engine is running. Work that is not described in these operating instructions, should only be carried out by authorized workshops.
7.1.1 Cleaning in the vertical cleaning position
The lawn mower should be cleaned thoroughly every time after it has been used. This applies in particular to its underside and the blade mount. Note: Before tilting the lawn mower into the vertical cleaning position, use a petrol extraction pump to drain all the fuel out of the fuel tank. Do not tilt the lawn mower by more than 90 degrees.
Vertical cleaning position (Fig. 13a/13b)
Important! Before moving the mower into the vertical cleaning position, switch off the engine and pull out the spark plug connector. Caution! Place the mower only on a firm, level surface.
- Open the star nuts (Item 12c).
- Press the lower push bar apart and swing it open (Fig.13a).
- Move the mower into the vertical cleaning position (Fig.13b).
- Clean the bottom side of the mower with the cleaning scraper (Fig.2/Item 14).
Warning!
Sharp blades! Wear gloves during the cleaning work.
It is easiest to remove dirt and grass immediately after mowing. Dried grass remnants and dirt may impair the mowing operation. Check if the grass ejector chute is free of grass remnants and remove any if necessary. Never clean the mower using a high-pressure cleaner. The engine must remain dry. Do not use aggressive cleaning agents such as cold cleaners or petroleum ether.
Warning!
- Leave the mower in the vertical cleaning position only for as long as necessary because
in this position there is a considerable risk of injury.
- Never leave the mower unsupervised.
- Keep children away.
7.1.2 Automatic cleaning of the mowing deck by means of the hos connection (Fig. 17/ Item 19)
The mowing deck is fitted with a hose connection (Item 19) (suitable for conventional garden hose couplings). The lawn mower should be cleaned thoroughly every time after it has been used.
Warning!
Switch off the engine before you do any work on the mower. Risk of injury from rotating blades. Keep the ejector fl ap (Item 5a) closed when you carry out the cleaning. Risk of injury from catapulted parts.
- Place the mower on a fi rm, level surface. The mower must stand on 4 wheels as in mowing mode. Take off the catch basket (ltem 4a) and make sure that the mulching adapter (ltem 4b) has been removed.
- Connect the water hose to the hose connection (19).
- Turn on the tap. Water will flow into the inside of the mowing deck.
- Start the engine. See section 6.1.
- Automatic cleaning will begin. The rotating blades will cast the water against the mowing deck and therefore clean it from the inside. A cleaning period of 1-2 minutes is enough when carried out regularly.
To remove dried grass residues we recommend carrying out several cleaning cycles. Wait a few minutes between the cleaning cycles so that the dried grass can soak and soften up.
Important!
Never clean the mower using a high-pressure cleaner. The engine must remain dry. Do not use aggressive cleaning agents such as cold cleaners or petroleum ether.
7.2 Maintenance
Please refer to the supplied petrol service manual for information on the maintenance intervals.
Note: Disposethe soiled maintenance material and operating materials at the appropriate collection point.
GB
7.2.1 Petrol engine
Note! Never run the engine with no or too little oil.
This can cause serious damage to the engine.
Checking the oil level
Place the lawn mower so that it stands level. Unscrew the oil dipstick (Fig. 9a/Item 7a) by turning it counter-clockwise and wipe the dipstick. Re-insert the dipstick into the filler opening as far as it will go but do not screw it in. Pull out the dipstick, hold it horizontally and read off the oil level. The oil level must be between the two marks min. and max. on the oil dipstick (Fig. 9b).
Changing the oil
The engine oil is best changed when the engine has been switched off but is still warm.
- Make sure that the debris bag has been removed.
- Empty the petrol tank with a petrol suction pump and run the engine until the remaining fuel is fully consumed.
- Place an oil drip tray alongside the mower.
- Open the oil filler plug (Item 7) and tilt the mo- wer 90^ sideways.
- The hot oil will flow through the open oil filler opening into the oil drip tray.
- After the old oil has drained out, set the mower upright again.
- Fill in engine oil up to the top mark on the oil dip stick.
- Important! Do not screw in the oil dipstick to check the oil level - only insert it as far as the thread.
- Dispose of the used oil in accordance with applicable regulations.
7.2.2 Blades
For safety reasons, have all blade sharpening, balancing and mounting work carried out by an authorized service center. To achieve optimal results, we recommend having the blades checked once a year.
Changing the blades (Fig. 8/pos. A)
When changing the cutting unit, be sure to use only genuine replacement parts. The identificaitc mark on the blade must correspond with the number specifi ed in the spare parts list.
Never install a blade from a different manufacturer.
Damaged blades
If, in spite of all caution, the blade comes into contact with an obstacle, switch off the engine imme
diately and pull off the spark plug connector. Tilt the lawn mower to the rear and check the blade for damage. Damaged or bent blades must be replaced. Never straighten a bent blade. Never work with bent or heavily worn blades as this will result in vibrations, causing further damage to the mower.
Warning! Risk of injury when working with a damaged blade.
7.2.3 Axles and wheel hubs
Grease should be applied to the axles and wheel hubs once per season.
To do so, remove the wheel caps with a screwdriver and loosen the fastening screws on the wheels.
7.2.4 Care and adjustment of the actuator cables
Oil the actuator cables at regular intervals and check that they move easily.
7.2.5 Maintenance of the air fi Iter (Fig. 10a/10b)
Soiled air fi liters reduce the engine output by supplying too little air to the carburetor. If the air contains a lot of dust, the air fi liter must be checked more frequently.
Never clean the air filter with petrol or inflammable solvents. Clean the air fiiter only with compressed air or by tapping it.
7.2.6 Maintenance of the spark plug
Clean the spark plug with a copper wire brush.
- Pull off the spark plug connector (Fig. 11/Item A).
- Remove the spark plug using a spark plug wrench.
- Assemble in reverse order.
7.2.7 Inspecting the V-belt
To inspect the V-belt you must remove the V-belt cover (Fig. 12/Item 5b).
7.2.8 Repairs
After carrying out any repair or maintenance work, ensure that all safety parts are installed and in perfect condition.
Keep potentially hazardous parts out of reach of other persons and children.
Note! In accordance with the German Product Liability Act, we are not liable for any damages if they result from improper repairs to the product or if parts are replaced by items other than genuine parts or parts approved by us. Furthermore, we
GB
are not liable for any damages if they result from improper repairs to the product. Arrange for your customer service or an authorized workshop to do the work. The same applies to accessory parts.
7.2.9 Operating times
Please observe the regulations concerning lawn mower operating times, which may differ from town to town.
7.3 Preparing the mower for long-term storage
Warning! Do not empty the petrol tank in enclosed areas, near fire or when smoking. Petrol fumes can cause explosions and fire.
- Drain the petrol tank using a petrol extraction pump.
- Start the engine and run it until the tank and fuel line are completely empty and the engine stalls.
- Change the oil after each season.
- Remove the spark plug. Use an oil-can to fi ll the cylinder with approx. 20ml of oil. Slowly pull back the starter handle, which will bathe the cylinder wall with oil. Screw the spark plug back in.
- Clean the cooling fins of the cylinder and the housing.
- Be sure to clean the entire equipment to protect the paint.
- Store the equipment in a well-ventilated place.
7.4 Preparing the mower for transport
Warning! Do not empty the petrol tank in enclosed areas, near fire or when smoking. Petrol fumes can cause explosions and fire.
- Drain the petrol tank using a petrol extraction pump.
- Always let the engine run until it has used up the remainder of petrol in the tank.
- Empty the engine oil from the warm engine.
- Remove the spark plug connector from the spark plug.
- Clean the cooling fins of the cylinder and the housing.
- Unhook the starter cable from the hook (Fig. 3b). Slacken the connection shown in Fig. 3a on the left and right of the push bar and swing
GB
9. Troubleshooting guide
Warning: Switch off the engine and pull out the spark plug boot before making any checks or adjustments.
Warning: If, after making an adjustment or repair to the engine, you let it run for a few minutes, remember that the exhaust and other parts will get hot. Do not touch these parts as they may burn you.
| Fault Possible cause Remedy | ||
| The equipment does not operate smoothly and vibrationally | - Bolts loose - Blade attachment is loose - Blade imbalanced | - Check bolts - Check blade attachment - Replace blade |
| The engine does not start | - Engine start/stop lever is not pressed - Throttle lever in wrong position (if provided) - Spark plug defective - Fuel tank empty - Fuel pump (primer) not actuated (if provided) | - Press the engine start/stop lever - Check setting (if provided) - Replace spark plug - Top up fuel - Actuate the fuel pump (primer) (if provided) |
| Engine does not run smoothly | - Air filiter dirty - Spark plug dirty | - Clean the air filiter - Clean the spark plug |
| Lawn turns yellow, uneven cut | - Blade is not sharp - Cutting height too small - Engine speed too low | - Sharpen blade - Adjust to the proper height - Set the throttle lever to max. (if provided) |
| Grass chute is not clean | - Engine speed too low - Cutting height too small - Blade is worn - Grass bag is clogged | - Set the throttle lever to max. - Set properly - Replace the blade - Empty the grass bag |
| Starter does not turn | - Battery empty - Battery not connected - Safety plug not fi tted | - Charge battery - Connect battery - Fit safety plug |
The reprinting or reproduction by any other means, in whole or in part, of documentation and papers accompanying products is permitted only with the express consent of the iSC GmbH.
Subject to technical changes
10. Charger indicator
| Indicator status Explanations and actions | |
| Green is flashing | Ready for useThe charger is connected to the mains and is ready for use; there is no battery pack in the charger |
| Red in on Charging | The charger is charging the battery pack. |
| Green is on The battery is charged and ready for use.(Charging time for 1.5 Ah battery: approx. 2 hours)(Charging time for 2.0 Ah battery: approx. 2½ hours)(Charging time for 3.0 Ah battery: approx. 4 hours)(Charging time for 4.0 Ah battery: approx. 5 hours)(Charging time for 5.2 Ah battery: approx. 6½ hours)Action:Take the battery pack out of the charger. Disconnect the charger from the mains supply. | |
| Red is fl ashing Fault | Charging is no longer possible. The battery pack or charger is defective.Action:Never charge a defective battery pack.Take the battery pack out of the charger. |
| Red and green are fl ashing alternately | Temperature faultThe battery pack is too hot (e.g. due to direct sunshine) or too cold (below 0°C).Action:Remove the battery pack and keep it at room temperature (approx. 20°C) for one day.Should this fault still occur afterwards, the battery has undergone ex-haustive discharge and must never be charged or used again. Take the battery pack out of the charger. |
- For our latest prices and information please go to www.isc-gmbh.info
GB

For EU countries only
Never place any electric power tools in your household refuse.
To comply with European Directive 2012/19/EC concerning old electric and electronic equipment and its implementation in national laws, old electric power tools have to be separated from other waste and disposed of in an environment-friendly fashion, e.g. by taking to a recycling depot.
Recycling alternative to the return request:
As an alternative to returning the equipment to the manufacturer, the owner of the electrical equipment must make sure that the equipment is properly disposed of if he no longer wants to keep the equipment. The old equipment can be returned to a suitable collection point that will dispose of the equipment in accordance with the national recycling and waste disposal regulations. This does not apply to any accessories or aids without electrical components supplied with the old equipment.
The reprinting or reproduction by any other means, in whole or in part, of documentation and papers accompanying products is permitted only with the express consent of the iSC GmbH.
Subject to technical changes
GB
Service information
We have competent service partners in all countries named on the guarantee certificate whose contact details can also be found on the guarantee certificate. These partners will help you with all service requests such as repairs, spare and wearing part orders or the purchase of consumables.
Please note that the following parts of this product are subject to normal or natural wear and that the following parts are therefore also required for use as consumables.
| Category Example | |
| Wear parts* | Air filter, Bowden cables, grass basket, tires, drive clutch, Battery |
| Consumables* Blades | |
| Missing parts |
- Not necessarily included in the scope of delivery!
In the effect of defects or faults, please register the problem on the internet at www.isc-gmbh.info. Please ensure that you provide a precise description of the problem and answer the following questions in all cases:
- Did the equipment work at all or was it defective from the beginning?
Did you notice anything (symptom or defect) prior to the failure? - What malfunction does the equipment have in your opinion (main symptom)? Describe this malfunction.
GB
Warranty certificate
Dear Customer,
All of our products undergo strict quality checks to ensure that they reach you in perfect condition. In the unlikely event that your device develops a fault, please contact our service department at the address shown on this guarantee card. You can also contact us by telephone using the service number shown. Please note the following terms under which guarantee claims can be made:
- These guarantee terms apply to consumers only, i.e. natural persons intending to use this product neither for their commercial activities nor for any other self-employed activities. These warranty terms regulate additional warranty services, which the manufacturer mentioned below promises to buyers of its new products in addition to their statutory rights of guarantee. Your statutory guarantee claims are not affected by this guarantee. Our guarantee is free of charge to you.
- The warranty services cover only defects due to material or manufacturing faults on a product which you have bought from the manufacturer mentioned below and are limited to either the rectification of said defects on the product or the replacement of the product, whichever we prefer. Please note that our devices are not designed for use in commercial, trade or professional applications. A guarantee contract will not be created if the device has been used by commercial, trade or industrial business or has been exposed to similar stresses during the guarantee period.
-
The following are not covered by our guarantee:
-
Damage to the device caused by a failure to follow the assembly instructions or due to incorrect installation, a failure to follow the operating instructions (for example connecting it to an incorrect mains voltage or current type) or a failure to follow the maintenance and safety instructions or by exposing the device to abnormal environmental conditions or by lack of care and maintenance.
- Damage to the device caused by abuse or incorrect use (for example overloading the device or the use or unapproved tools or accessories), ingress of foreign bodies into the device (such as sand, stones or dust, transport damage), the use of force or damage caused by external forces (for example by dropping it).
-
Damage to the device or parts of the device caused by normal or natural wear or tear or by normal use of the device.
-
The guarantee is valid for a period of 24 months starting from the purchase date of the device. Guarantee claims should be submitted before the end of the guarantee period within two weeks of the defect being noticed. No guarantee claims will be accepted after the end of the guarantee period. The original guarantee period remains applicable to the device even if repairs are carried out or parts are replaced. In such cases, the work performed or parts fitted will not result in an extension of the guarantee period, and no new guarantee will become active for the work performed or parts fitted. This also applies if an on-site service is used.
-
To make a claim under the guarantee, please register the defective device at: www.isc-gmbh.info. Please keep your bill of purchase or other proof of purchase for the new device. Devices that are returned without proof of purchase or without a rating plate shall not be covered by the guarantee, because appropriate identification will not be possible. If the defect is covered by our guarantee, then the item in question will either be repaired immediately and returned to you or we will send you a new replacement.
Of course, we are also happy offer a chargeable repair service for any defects which are not covered by the scope of this guarantee or for units which are no longer covered. To take advantage of this service, please send the device to our service address.
Also refer to the restrictions of this warranty concerning wear parts, consumables and missing parts as set out in the service information in these operating instructions.
F
Sommaire
Chere cliente, cher client,
Svingningsemissionstal ah = 7,12 m/s²
Usikkerhed K = 1,5m / s^2
Brug horevaern.
Paraoculars:
Paraoculars.
Paraoculars.
Paraoculars.
Paraoculars.
Paraoculars.
CMOHHTPOBaTb akHymyIaTOp (no3.17) n 6e3oNaChHyIO wTeNceBHyIO BnIKy (no3.16), KaK nokaHaHO Ha pnc.3f.
5.2 PerynpoBb BbICoTb cpe3a
PpeynpeHdHne! PeryInpoBHy BbICotbI cpe3a pa3pewaetc npOn3BODHTb ToIbHO npN BbIKIOUeHHOM DBrHateNe.
PerynipOBKa BbICOt bcpes3a OcyueCTBJIeTcR CEHTpaIN3OBAHHo pni NOMOuP pbHara perynipOBKn BbICOt bcpes3a (pnc.7,po3.8).MoJHo Hactponb pa3Hy0 BblCOTy cpe3a.
HaKMMte Ha pbyar perynipOBKn BbICOTb cpe3a n nepeBedeTe ero B HyyHoe noLoKeHHe. Pbyar doJIneH 3aΦHKcnpoBaTbca.
5.3 3apnHa 6noHa JntHeBbix aHHyMylrTOPOB (pnc. 3f / 16)
BHHMaHHe!
3apnHoe yctpoCTBO MOxHO NcNoIb3ObaTb TIObKO dIa 3apdN IITNI-OOHbIX aKHyMnyTopoB cepHn Power-X-Change!
Power-X-Change
18B,1,5A4,5NHTH-NHOHHbIX3JIeMeHTOB
18B,2,OA4,5NHTH-NHOHHbIX 3JIeMeHToB
18B.3.0A.Y.10JITNU-HOHbIX3JIeMeHTOB
18B,4.0A.Y,10JNTN-HOHbIX3JIeMeHToB
18B,5,2Aq,10NITIN-HOHHBIXJEMEHTOB
AkhymyIaTOp 3aunuien OH rny60KoRo pa3praJa. BcTpoeHnOe yCTPOiCtBO 3auNTbI OTHIOUaEt yCTPOiCTBO ABTomatueckn npn pa3pJe aHHmyIaTopa.
IpeynpeKdHne! He BkIOuayTe 60JIbe
RUS
peekuataeBkUcyeHo-BbIKUcyeHO,ecnnpaobtalo3aunTHoeycTPOCTBO.3TOMOHETnpnbctnKNOBpeJdeHIOaKMyIaTOPa.
- N3BJIeHnTe aKHyMnyIaTOpHbI 6NoH n3 pyKoATHn, pN 3OM HaHmMaTe fHKcHpyUOyU KlaBnUy (18).
- Y6eHNTecb TOM, YTO yka3aHHoe Ha HnprMeHHo TaBnHKe 3HaueHHe HAnpJxHeHH CTeN COOTBeTCTByET NMeIOUeMYC 3HaueHHo HAnpJxHeHH CTeN BCTabIe WtEKe3apAHorO yCTpoiCTBa (11) BHTeNCeJIbHyIO po3EtHy. 3JeHbI CBETOINOD HAHTET MfRaTb.
- Bctabte aKhymyIaTOpB 3apAHOe yCTpoCTBO.
Bpa3dene 10(«HnndkaTOpbI 3aprAnHOrO yctpoCTBa))npBeHeHaTa6InuCa cyKa3aHnEM 3NaueHn CBeTOINOHOH INDnKaun Ha 3apAHN yCTPOINCTBe.
Ecnn AHHyMylTOpHbI 6IOK He 3apJHaeTcA, HEOxOIMO nPoBepntb CLeJeUoee:
HaJIyHe HaIpyKeHnCeTHB WTeNceHbHOI pO3ETke;
HaJIINHHeIIOTHORO CoEINHEnHa KOHTaKTax 3apdHOrO yCTpoiCTBa.
Ecnn ankymyntopn6k0BCEe He 3apKaetcnpoc6baOTnpaBtB
3apAHOe yCTpoCtBOI 3apAHybI aadTep
n aKKMyIaTOpHbI 6LOH B Haw OTdeI OcbLyKbBaHna.
ДяТOrO,YTO6blObEcneuHt bIITeIbHbI cpoK cIy6blaAkhymyTApOHoro NaKeTa oBecepeBte CBOEBPemEHyO 3apJky IITNeBFO OaKhymyTApOHoro NaKeTa.3To Heo6xOJMoO OcyUeCTBnTb Oco6eHb BTexClyuaX, KOrJa OTMeueaTcR CHINKeHHe MOUHOCTN yCTPOiCTBa.
HnHaun3apda aHHymyTopa (pnc.11)
HaHMMte Ha KONky INDINKaUN 3apJa aKHYMJIYTOPA (pnc.11/ no3.A). INDINKAtop 3apJa aKHYMJIYTOPA (pnc.11/ no3.B) nOKa3bIaBET yPOBeHb 3apJa aKHYMJIYTOPa npn NOMOuN 3CBETNOIOOB.
ToprBce 3 cBeToaHoa:
AkkymyIaTOp nIoHocTbIO 3apRKeH.
Topr2nH1CBetOndo
OctatoHbI 3aPd aKHyMylAToPA doCTaTOeH.
Muraet 1 cBeToaOa:
AHHyMnTOp pa3paJKeH, Heo6xOaIMo 3apAnTb ero.
MhraT BCE CBetOAnoDbI:
AkkymyIaTOp nIoHocTbIO pa3pRKeH IOBpeJxHe. 3aPpeSeHo npOdoJIKaTb IcNoIb3OBAHHe N 3apRAKaTb HeNCnPpaBHyI aKKymyIaTOp!
6. 06paueHne c yctpoiCTBOM
Yka3aHne!
BnurateIb noctabnaTc6e3 3HcnpnyataaunHOHBIX MATEpnaIOB
TOMypeepBBOOMB3KcNpyatauHO 08aTeIbHo 3aIITb MaCNO H6eH3nH.
- PpOBePnTb yPoBeHb Macla (CM.7.2.1).
2.ПиЗАЛВИЕбБИИнAИСЮЛБУМТЕВОПОНNYИМЕРHYIO EMKOCb.Y6eДNTcB.CYTOбБИИNЯJBILETCЯHCTBIM.
PpeynpeKeHHeH: Bcerda nCnoIb3yIte ToIbKO 6e3oNaChyIO KaHnCTpy IaIe 6eH3nHa. He Kypnte npn 3anpaBke 6eH3nHa.Ipeed 3anpaBkoI 6eH3nHa OTKJIQUHTe DBIrAteIbN daTe DBrAteTIO OCTbITb HEcKOBKO MNHT.
3.Y6eHTeCb,TOI npoBOD 3aJnHaHnIPOKJIIOUeH K CBEYe 3aJnHaHnI.
IpoBepKa 6e3oNaChOCTn pbUra Tycha/ octaHOBKn DBrTaTeJIa
ДлпnpdynpeHdHnClyaHoro nycha ra30HOHOcNJIKN, a taHKe IJb6bIcTporo octahOBa DBInraTeJI N HOJa B CJyae onaCHOCTn Ra3OHOKOCNJIKA OCHaJIeHa pbUarOM nycka/OctaHOBKn DBInrataJIe (pnc.5a, no3.1a). Ha Hero Heo6xOdIMO HauKaTb (pnc.5b) nepeDnyCKOM Ra3OHOKOCNJIKN. Ppi OTnyckAHn pbYuara Nycka/OctaHOBKn DBInrataJIe OH DOJIHeBepHyTBcB INCXoDHoe NOIOKeHne (pnc.5a).
Ipeed 3aynckom Dniratela Heo6xodmo BbINOHNHT bTOT npocecc HecKoJIbKO pa3, YTO6bl y6eINbC8B TOM, yTO pbUar N TpOcOBle TARH FyHKIOHNPuykOT HaJeKaUmm Opa3OM.
IbTOPnTe 3OT TcT eue pa3 npn 3anyeHOM DBratene. Nocne OTnyckanra pbuara nyca/ OCTaHOBKn DBrataJIb DOJKeH OCTaHOBHTbcB TeueHHe HeCKoJIbKIn cEHyHd. Ecln
RUS
3TOrO He npOn3oJTeT, o6paTnTeCb B OTdI 06cnyKuBaHn KJIneHTOB.
Onachoctb!Pn nyche Dniratela BpaaetcpekyuHn HK.
6.1IyckdbnraTeTna
6.1.1 Pn npn nmooun 3ehtpocaptepa
- Y6eINTecb, YTO npoBOD 3aJHraHnnaIOHIOKUOEN K CBEue 3aJHraHnN.Y6eINTecb, YTO 6eONacHaa WTeNCeJIbHa BUNKa (pnc.3f, no3.16) BCTaJIbHa B yHINBepCaJIbHyOn naHeIb Power-X.
- HAnMnte Ha 6eH3nHObBn Hacoc (Primer) (pnc.6, no3.2) 3 pa3a. Ecn n DnBaIraTeIb nporpeT, 3OT nyHKT MoHxO onyCTnTb.
- CToIe 3a ra3oHOKOCHIO.HaHMMTe pbHarnyCKA/OCTaHOBKN DBrAteTEn (pnc.5b) OHOpyKoi.DpyryIO pyK depHKe Ha KhoNKe ncyKa (pnc.1, no3.10).
- 3aynctte Dniratel nytem HaKaTn HKnHn nycKa. Nocle 3aynca Dniratela HEmdIeHHO OTyCTte KOnKny ncyKa. NOBTOPHO eHaKaTHne KOnHn ncyKa BO BpempaobTo bDniratela npNBOHT K NOBpeJDeHIO cNCTeMbI ncyKa.Yka3AHNE! PnnpoxlaHoi noroede MoKeT noTpe6oBaTc nobTOrntb npoucc ncyKa HeckOJIbKO pa3.
6.1.2 Pyn npn nmoos peBepcnBhoro cTapTepa
- Y6eHITecb, YTO npoBOD 3aKnIraHIN NOKJIIOHc K CBEYe 3aKnIraHIN.
- HAnMMTe Ha 6eH3nHObbl Hacoc (Primer) (pnc.6, no3.2) 3 pa3a. Ecn nDbIgatelnb nporpeT, 30T nyHKT MoXHO onyCTnTB.
- CToIe 3a rasoHokocnKoH. HAnMnte pbHar nycKa/OctaHOBn DBrIraTeJI (pnc.5b) OJHOI pyKoI. Dpyra pyKa DOJIKHHa HxOOnTbcrHa npyKoTke CTapTepa.
- 3anyctHTe DBHrataJIb npn nOmoU npeBepcNBHO CTapTepa (pnc.1, no3.9). IaIraTOro BbITAHyTb pyKoRTy npnmePHO Ha 10-15 cm (noKa He NoHyCBTByETC conpoTnBHe), 3aTeM CnblHo DePHytB OHNIM pbIKOM. Ecln DBHrataJIb He 3anyCTHTc, To HxHIO DePHytb 3a pyKoRTy eue pa3.
YhaaHHe He otnyckaiTe TpocobyTary 6paTHO C cnio.
Yka3aHHe!PnpnoxpaHNOIporoMe moKeT noTpe6oBaTbCnOBTopuTb npOeCC nycha HeckOJIbKO pa3.
PnBOD ABNKeHn
IpychOBoB pbUar (pbUar cUeJIeHn) (pnc.5a no3.1b):
Pn npBBeHn B DeIcTBne 3TOr pbyara (pnc.5c) 3ambkaetc CseIJIeHHe nla npBbOa DBHXEHn, Ira3OHOKoNkHaHnHaET DBHXEHne npn pa6oTaOeM DnIgateJe.
CBoEBpeMeHHO OTNcyTHe NycBOB pbHar dIg octaHOBKn DBHXyuec Ra3OHOHcHKn.IpePe nepBoKoc6bOn NotpEnHyptec B 3aNycke I octaHOBKe, NOHa BHe OcBOHTec C XoOobIMn KaueCTBaMn.
6.2 Yka3aHnno npabHbHn Koc6e
Onachoctb!
HnKOrda He OTHpbIbAaTe HpbluKy BbIbOpa npn OnopOnHeHHn PnCnOcOBeHHn DnA c6opa TpaBbI BpaCae eue pa6oTaIOUeM dBntrapeJe.BpaauOuHc HOH MoKeT haHeCTN Bam TpaMbI.
Bcerda aHkypaTHO 3aKpenJIaTe KpbIshny BbIbPOca N TpaBOc6OpHbM MeWOK. PnC CHrTm NpeDbapHTeNbHO BbIKIOuHTb DBurateIb.
Ipeed hauaIom IIO6bIX pa60r No hactpoHHe, Texo6cLyHHBAHnIO n peMOHTy BbIKIOHTe DBnIateJIb N DOHdNTecb NOHORO OCTaHOBa HOHa. BbInbTe WTEKeP CBeu 3aHHraHnN 3 rHE3da.
Houen
BniratelpaacHTaHaCKOpocTbIpype3aHnTPaBbI N BbIbOcA TpaBbIBc6OpHbIMeWOKNHaDNTeBhlCpOK CnyKobI.
IcnoIb3OBAbT ToIbKO OCTpbIE, IcnpaBHbIe HOxN, TTO6bl CTe6bn TpaBbI He pAcTppeaHnCb, H ra3OH He NoKeIteJI.
YTo6bI Do6HtbcA kKhpaTHoI CTPNHH, Heo6xOJIMo BECTn Ra3OHOKOCNHy KaH MOHKO 60JIe IprMbIMn DOpOKKaMn. PnI 3OTM dopOKHBCerda DoJIKNbI NepeKpbIBaTbcHa HECKoJIbHO CaHTmEtPOB, YTo6bI He OcTaBaJIncb nONocbl.
Heo6xOdHMO COepeKbT B YNCTOTE HINHHIO CTOpOHy KOpNYCA KOCHNI N O63aTeBHO ydaIbT b OTIOKeHn TpaBbl.OTIOKeHn 3aTpYdHOT pOcEe 3aNyCa, CnHKeHn KaueCTBO Cpe3a N HApUwAoi TBbIpc TpaBbl.
RUS
Ha cKIOHax CJIeDyET nPOKlaDbIbA Tb
cKaUINBaEMyIO DOpOKNy NOnpeK cKIOHa.
CCKaJIb3bIBaHnRA 3aOHOKoCNIKMOKHO
N36EJaTb, yCTaHOBnEE NOJyIOM BBepX.
BbIbEPnTe BbICOTy Cpe3a B 3aBcIMOCNTO t
ΦaHTNHeCHOn DmHb TpaBraHOro nOKpOBa.
B I pIoTHnB bICoKo TpaBe HacTpOme
MaKcMnAbhB yPoBeH Cpe3a N KocInTe
MeDJIeHNHe. BbIOnNIte HeckOJIbKO nPoxOJoB,
TAK YTO6bI CHMaTb HE 60lee 4 cm TpaBraHOrO
nOKpOBa 3a ODN PA3.
Ipepe IIO6bIMnpOBepkAMn HOKa BbIKIOHHTe DBrIaTeNb.He 3a6yIbTe, YTO nocLe BbIKIOUChENr DBINrAteNHOJ npOJKAeT BpaIaTcB eEHEckoIbKOceHyD.HNKOrTa HneblTaeTcB OCTAHOBNTb HOK.PeyIpyRno pOBepnTe, YTO6bI HOK bIaNAdJeXaUM mbpa3OM 3aKePENJIH. HaxOHNCB NcnpaBHM COCTOAHNIu 6blN XOpOo 3aToueH.EcIn 3to He TaK, 3aToCHTE NIN 3aMeHIne erO.Ecn HaxOJaUNCB B DbIXeHHN HOYdApReTcO KaOH-JIbO pPeDMET, OCTAHOBNTe Ra3OHOKOCINHy NDxDNITcB NOHONctAHOBKN HOKa.3aTe mPobepBe T coCTOHNHOJ N DEpKAteNHOJA.EcIn HOK NOBpeJHEn,ero Heo6xoJIMHOzAMEHtB.
MylbHropobAHne (pnc. 4b)
Ipn MybHpOBaHHn Cpe3aHHa TpaBa
ImeJIbHaTeCn B 3aKpbTOM KOpNcE KocNIHN CHOba pacnPpeJelAeTc Hra3oHe. Het
Heo6xOIMOCt N B c6ope TpaBb N yTuIN3aUN.
MylbHpOBaHHe BO3MOKHO TOJIbKO npn OTHOCHTeBHO KOPOTKOM Ra3OHe.
YTO6bI NCNOB3OBA Tb FHNKUH MUYBnUPOBAHN CHIMNTe C6OpHBMyMeWOK, BCTaBBTe BOTBepCTNE BB6Poca MylbnypuuJn aanTep (no3.4b) n 3aKpOte KpbIkuy Bb6Poca.
BoHOBOB BbIb6poc (pnc. 4b-4c)
Tc06bI HcNOb3oBaTb 60KOB Bbl6poc,doJIKeH 6bITb CMOTnPOBAn MUYbHpyUoiu aAdnTeP (no3.4b). HabecBe T aAdnTe pIa 60KOBoro 6bIbPoCa (pnc.4c, no3.4e), KaK nokaHaHo Ha pncyHke 4c.
HHHm BbIbpc (pnc. 4d)
TObbBocNoB3OBAtBCfYHKnEHNHKeHrBoBbPoCA,HeoBXoHmIO pnoTkPbITbKpblkHy BbIbPoCA (pnc.4d,No.5a).3aΦnKcnpyTe ee c nOMoUbHO PbHaRa ΦHKcTaOpa (pnc. 4d, No3.A).OTKnHbTe pbIarΦKcTaOpa nomeCTnte erO onopy B npedHa3NaueHHoe
ДлгэТOrOуглбелене(pnc.4d,nos.B).ДлгИСПОЛБЗOBAHЯннКHERо Вьбрoca HeьзяуctанавиBaTbМУьчИPyUOuNi aanTeP(no3.4b).
6.3 OTHJIIOUeHHe DBnraTeIa
TtO6bBbHIOUHTb DnuratIb,OTNCTHe pIar ncha/OctaHOBN DBurateIa (pnc. 5a, no3.1a).CHMNTe CBEHOn HAHOeHNK CO BcEHn 3aHnIHARu, TtO6bI PpeOTBpaTntb NcK DnurateJI. NpeE NOBTOHbIM NcKOM npOBepbTe TPOCOBOY TOrIy MOTOPHO TOpMO3a. IpoBepbTe, TtO6bI TPOC0BA TrrA 6b/na npABINbHO CMOHTnpoBaHa.HaIOMLeHHbI INn NOBpeKeJDeHHbTPOC BkLIooHEHoeXoDmO 3aMeHHTb.
6.4 OnopokHeHne TpaOc6OpHoro MeuKa
Horda TpaBoc6OpHbI MeWbK HAnOJIHeH, KOJIYeCTBO IponyCaEMoRO B03Dyxa yMeHbUaTeCn, N yHa3aTeNb 3aONJIHeHnA (4c) nIoTHo npIneRaET K MeuHy (pnc.15). OOnpOKHNITE MeWbK N OChTNe KaHaJI Bb6PocA.
Onachoctb!Ipeed Chrtnem c6pHoro MeuHa BbIKIOHTb DBrIaTeJIb N NOOxKaTaB octaHOBN peKyUero HnCTpyMeHTa.
ДясгггсбогоMeшkaOДнй руко npinnoHrtb KpbIshKByBbIbOpa, a Dpyroyn pyHoi n3BLeuB c6OpHbM MeWOK 3a pyKHy dЯ nepeHoCn (pnc.4a). B coOTBETCTBn C npEtnicaHnem NO TExNHKe 6e3oNaChOCTN npi ChTn C6OpHOro MeShka KpbIshKa BblbOpa 3axlonbBaetcN 3aKpbIBaET 3aHee OTBepCTne BblbOpa.EcIn npn ATOM B OTBepCTn 3aCtpeBAIoT OCTaTH TpaBbI, To nla 06JIeTuHn NyCKa DBnIraTeJy CEleCoObpaHO OTTHryTb Ra3OHokocnHy pImePho Ha 1 M Ha3a.
OcTaTKn Cpe3aHHoN TpaBbI B Kopnyce KocnIKN Hn paoboyem INCTpyMeHTe CneDyET YdaJIaTb He pyKoN IIN HORAM, a NOxOJaIzIMN BCNOMORATeNbHbIMN CpeDCTBaMn, HaNpHMeP, 5eTKoN IIN BEHNKOM.
Дяобсесеняхopoшero cбора Heo6xodmo nocnie HcnoIb3OBAHnO OYNCNTb c6OpHbIM MeWOK N3HyTPN.
HabeWeBaTb C6OpHbM MeoK ToIbHO npn OTHIOUeHHOM DVBrAteNe I OCTaHOBJIeHHOM peKyuem HNCTpyMeHTe.
RUS
Ondno pykno npnnoHnTb KpbIyKbYbIbPoca, a dpyro no pykno HabeCnTb Cbepyx C6OpHbMeWOK, ydepHXBaera 3a pyKy dna nepeHoCKn.
7.Чиста, Тхоблuyнване, xpaанeнe, TpaHcnpTupOBha n 3aHa3 3anachbix DeTaJIe
OnachocTb!
Hnkorga He pa6oTaIte Ha ToKOBeDyuix
DeTalax CnCTeMbI 3aKnirAHINr npn pa6oTaIOUeM
DbIrataTe I He npKacAaTcB K HIM.
PiPeJ LIObIMn Pa6oTAMn IO TexHneCCHOMY
OcLHyHNBaHHIO yXoOy CHmnte CBeHNOH
HaKoHeuHK Co CBeyn 3aKnIRAHNr. HnkOrDa
He npBODoHTe HNKaHNe pa6oTbHa
pa6oTaIOe MycTroPCTBe. Pa6oTb, KOtOpBle
HE ONICaHb B HAcTOIeM pyKOBODCTBe NO
3KcIIyatauIN, DOnkHb BblINOJIHrTBc TOLbKO
B ABTOPI3NPOBAHHO CNEuIN3NPOBAHHO
MaCTepCKOH.
7.1.1 OCHCTa B BEPTKakbHOM NOIOHEHN
Iocne KaKDoOr npimHeHn Heo6xOdmo TuaTeNbHO OChCTNb KocNlKy.OcoBeHNO HxHHIO CTOpOHy IN KpeJIeHne HOKa. Yka3aHHe:PepeTtemKaHakHOHbTa3OHOKoCHNy INpHBecTn ee B BepTKKaJIbHoNE NOLOKeHne DIA OChCTN,POHOCbHO ONOPOXHnte ToPINBHyBbIb6aKnPi NOMOuH NaCoca dAor OKaYBaHnB6eH3Ha. HeIb3a HaKHOHTb Ra3OHOKoCHNy 6olee HeM Ha 90 rpaDCOB.
BepTKaJIbHoe nOLOKeHne dIra OUHcTkn (pnc.13a-13b)
BHHMaHHe!IpeaTcKak npBeCTn
ra30HOHOCHNHyBaBPTNKaJIbHOe NIOJOHEHe
dIaOHTKN, BbIKIOHHTe DBrAteJIb H CHMHTe
CBeuHOHaKOHeuHK.
BHmAHHe! CtaBtE KocNHy ToJIbKO Ha PObHyIO
yToHbYIO NOBepXHOCTb.
- OTBnHTIe 3Be3do06pa3HbIe raIKn (no3. 12c).
- HaKMMTe Ha HnHnHIO BeDyUyO pyKoTky, YTO6bI ee yactn pa3BeDnHnInCb, n OTKpoIte ee (pnc. 13a).
- PnBVeIeTe KocNlKy B BePtnKaIbHoe NOLOXHeHne IJr ONUCTKn (pnc.13b).
- OuHCTHTe DHO KOCINK C NOMOuHcKpe6Ka Ia OUHCTKN (PNC 2, no3.14).
PpeynpeKdene!
OctpbIe HOK! NcnoJIb3yIte BO BpEma YnCTKn 3aunTHble nepaTkn.
Jerue Bcero ydaIbT rpa3b n TpaBy cpa3y
He nocle Koc6bl. Pncoxwne octatkn
TpaBbI n Tpa3b Moryt npnbEcTn K hapweHIO
peHHMA Koc6bl. PpOBepTe, YTO6bl B KaHane
Bb6PocA TpaBb I He 6blIO OCTaTHOB TpaBb I
pn Heo6XoDMOCTH ydaIaTE nx. HkoRa
He YCTnTe KocNlKy C NOMOsbIO annapaTa
BbICOKOr DaBnEHN. DnBaTeIb DOJIKeH
OctabTbc syxM. HeIb3r NcNoIb3OBAb
arpeCCNBhIe YnCTaUne cpeDCTBa, TaKHe
KaK cpeDCTBa dJa XoIoDHOu CYCTKN IN
IpomboHbHb SeH3INH.
PpeynpeHene!
OctabIyTe KocNHy B BepTnKaIbHOM NOJIOKeHN IIN OYNCTKI TOIbKO B TeUHeHNE Heo6XoHmOro BpeMeHH, NCKoJIbKpy Prn HaxoHNDeHN KOCNIKNB TaKOM NoIOKeHN BO3HKnAe3HaHTeNbHbI PnCK nOnuYeHN TpABMbI.
HnKoIa He OCTabJIte KocNIky 6e3 npICMOtpa.
He noDnyckaIte K yCtpoNCTBy deteN.
7.1.2 ABTomatHueckar OuchTka Hocuero 6Ioka c NMOOuBIO naTppybKa dIa IooCoeINHeHHa IuaHa (pnc.17, no3. 19)
Koczni6kOcHaeHnATpybKOMIaN NOcoeHHeHHn 7HaHra (no3.19) (NOxOHT KOBHyBmCOEaHHeHHMaDObbIX 7HaHRO). NocleKaJdOroPnIMHeHHn Heo6XoHMO TuaTeNbHO ONUCTNTb KOCHNy.
PpeynpeHene!
BbIKIOHHTe DBIRATEb npN BbINIOHEHN
MaHInyIaJIuHa HOCHKe. OAnCHocTb
NoIyHeHr TpaBM OT BpaAioUxxCra HOKe.
Bo BPemn PpoaeDpybO uOChTKn DEpKHe T KpbIHy
BbIbPoCA (no3.5a) 3akpBITo. OAnchOCTb
NoIyHeHr TpaBM OT BbIbPoCA npEIMTOB.
- Ctabbte Kocnky Ha pOBHyO yCToHByIO NOBepxHOCTb.KocnHa DoJHKHa CToTb Ha 4-x KOlecax, KaK B peHmE Kocb6bl. CHMNTe c6OpHbM MeWOk (no3.4a), MyIbHnpUoosn aadantep (no3.4b) DEMOHTHPOBaH.
2.Понклкчiteшланглпногивдык натубкдяпсдсоeннehнгшланга (no3. 19).
RUS
- OTKpoIe KpaH c BDOiB.Boa noJIbETcB BO BHTpeHHIOu Cactb KOcSAero 6noka.
- 3anyctnte DbrarateIb.CMOTpTe a63aU 6.1
- HaheTcA BAtomatHecka OHCTHa. BpaOoIeC HOKN NOaOT Body H3HyTpNa HA KocAun 6LoK, CMBBa TaHIM 0bpa3OM 3aqr3HeHn. PnppeyIpHOM nOJb3OBAHN DOCTaTOHNO pPoBOITb OHCTKy B TeueHne1-2 MInHT.
IydaHn npcoxnxOCTaKOB TpaBb peKOMeHyETc npoBeCTn pnoeDpy OuchTn Heckobko pa3.Mexdy npoeDypam OunchTneJeai Te nepebbHa Heckobko MmHyT, YTO6bl npcoxua Tpaba pa3MaKaJa.
Yka3aHHe!
Hikorda He YnCTHTe KocNHy C NOMOsbIO annapata BbICOKOr DaBLeHHa. DnBraTeIb DOJHeN OCTabTcBc cyXM. HeJb3r NCNoB3oBaT arpeCCNBbIe YnCTaune cpeCTBA, TAHKe KaK cpeCTBa dJaXoLoHDHO nCTKn HIN pombboOHb6EH3HN.
7.2TexHueckoeO6cLyHbAHne
IepnoDnHocTbTexHueChoro 06cIyHNBaHHcM.B npHlaRaEMoI cepBnCHO KHMHe 6eH3HOBOra3OHOKCNH.
Yka3aHHe: HanpaBnIe 3aRpa3HeHHbIe CpeCTBa TexHuecKOrO yXoJa I 3KcPiyaTaUHOHHbIe MaTePnaJIbIB npEHa3HaueHHbI dIraTOTOpyHKTpnpema.
7.2.1 BeH3nHObBn DBnRaTeJIb
Yha3aHHe! HkOgTa He 3KcNlIyATnpoBaTb DnIraTeNb 6e3 MaCna NIN CO CInuHOM MaBlIM KOINHECTBOM Macna.3TO MOKeT Bbl3BaTb cepbe3hie NOBpeJdeHn I DnIraTeJIa.
KoHTpOJIb yPoBHa Macla
YCTaHOBnTb r3OHOKOCNlky rOpN3OHTaJIbHO.
yKa3aTeNb yPoBH MaCna (pnc.9a, no3.7a)
BbIBNHTNb PyTEM BpaUeHn BJIeBO N BbITEpeTb.
BHObB BCTaBnTb yKa3aTeNb yPoBH B WtUeyep
3aONJIHeHn DoYoPAp, Ho He 3aBHNuBaTb.
BbHyTb yKa3aTeNb yPoBH n B rOpN3OHTaJIbHom
ero NOJKeHmOnIpeJeHn b yPoBeHb Macna.
YPoBHehMa NaDoJIKeHn HaxoDHTbc MeKdy
OTMeTHAMn min. (MHNMaJIbHb) n max.
(MaKcIMaJIbHb) yKa3aTeNb yPoBH MaCna (pnc. 9b).
3aMeHaMacna
3aMeHa MOTOPHO macna npOn3BOdntc npn
BbIKIOHOM,HOeTeTINOMDbIraTeJe.
1. Y6eHntecb,HTpABoC6OpHNK CHT.
2. OnopoxHHte 6eH3HOBbB 6aK c NOMOsbH HacocA DIA OTHaYBaHNr 6eH3Ha, OCTaBbTe DBIraTeIb BKJIOUeHHbIM, NOKa He 6yDet I3pacXoDBaHcOCTaBUnCnRc 6eH3INH.
3. Pa3mecHTe pIaOM c rA3oHOKcHIOK mAcLO6OpHBn NOHO
4. OTKpoTe MaCIOHaJIINBHOI BnHT (no3.7) n HAKJIOHInTe KOCINKy BCTOPOHy Ha 90°
5. Yepe3 OTHpbIToE OTBepCTHe 3aINbKIMacJIaTeNIOe MacNo BbITEKaET BMacIOc6OpHbI NODOH.
6. Nocne cInBa OTPaBoTaHHOro MacJa ChOBa NOCTaBBTe KOCNlIKy POBHO.
7. 3aHTb MOTOPHOe MACNo Do BepxHne OTMeTHyKa3aTeJIy yPOBn MaCJa.
8. BHIMaHHe! IJI npOBepn yOpOBn MaCna He BBINuBaT yKa3aTeIb yOpOBn MaCna, a JIMUb BCTaBt b ero do pe3b6bl.
9. OTPa6oTaHHoe MacNo Heo6xOJHMo yTINIIN3HPOBaTB B COOTBETCTBnC DeIcTByUOUMn PpeINNCAHJHMN.
7.2.2 Hoh
NcxOJa n3 coo6paJHHeH 6e30nAcHocTn,
3aTOuyK, 6aIaNcHPOBky HMOHTA HOKa TOLbKO
doJIHHbl BByIOINHbTb TObKO CNEUaJIHCTbl
abTOpI3NpOBaHHoCNEUaJIHcNpOBaHHo
MACTepCHOy. YoBbl DoobHcR ONITMaJIbHOro
pe3yIbTata paObTb, peKOMeHdyeTcOdHN pa3 B
rOd npOyATb npOBepHy HOka CneuaJIHCTam.
3aMeHa HOHa (pnc.8, no3.A)
Pn3aMeHe peKyuIero HNCTpyMeHTa MOHNO
NCNoJIb3OBaTb TOJIbKO OPGINHaJIbHbIe 3aNaChbIe
yactn. MapKnPOBka HOKa DOJIXHa COBnaDaTb
cHOMEpOM, yKa3aHHbIM B CnncHE 3aNaChbIX
yactEi
HnB KOem Cnyae He yCTaHaBnBaTb npyroHOK.
NoBpeKdEHHbHe HOXH
EcIn, HeCMOTpHa Bce Mepbl
npedoctoPOKHOCTn HOx COnPNKOCHJcR
C npenrTCTBnEM, HEmdJeHNO BbIKHOHTb
DBnATeJIb N CHrTB CBeyHNO HAKOHeYNK.
HaHOHTb RaOHOKoCNky Ha3ad N pOBePHTb
HOH Na HauNne NOpeKeDhen. NOpeKeDeHNbIe
HIN NCKPBLeHbIE HoHN Heo6XoDNMO
3aMeHbIb.HNKOrDa He BbInpaBnTe
NCKPBLeHNbI HoK. HNKOrDa He pa6OtaJte
C NCKPBLeHNbIM HIN CNbHo H3HOWeHNbIM
HOxOM, 30 BoB3bBaet BV6paunu N MOKeT
npNBecTI K DaJIbHeNIM NOpeKeDeHNM
RUS
KOCNIK.
IpeynpeKdHne!Pnpa6oTe c NOBpeKdHbIM HOXOM CyueCTByET ONaCHOCTb TpaBMnPOBaHn.
7.2.3 Konechbte OCH n CTynu
KoilechblcOcnHCTynuIbHeo6xOdmo Cma3bIbTaB OINH pa3 B Ce3OH. ⅡIaTOrO CHIMNTE KOJIaHKn KOleC Pn NOMOUI OTBePTKN IOTBHTNTe KpeNeXHbE BNHTbl KOJeC.
7.2.4 PerynipobKa n yxOd 3a TpocOBbIMN Taramn
PeyrnpHO cma3bIaBte TpOcOBIE TARn MacIOM nPiOBepeTNe IeKoCTb INX XOA.
7.2.5 TexHHueckoe 06cJyHbAHne BO3dyuHoro fHbtpa (pnc.10a/10b)
3aqrpaHHeBIO3dyuHbIe FnIbTpbl CHNkaOT MOUHOCb DBHratae H3-3a yMeHbSeHHaNOdaHbO3dyxa B KAp6KpAToP. PnB bILcOKo KOHcHTpaun NblN B O3dyx He06Xdmo 4aue npOBepaTb O3dyuHbIy FnIbTp. 3aPeJeHO OOnuTaB O3dyuHbIy FnIbTp 6BeHNiHM IINrTOPOHM pACTBOpNTeRIMN. UCTnTB O3dyuHbIy FnIBTp TOIbHO CkAtbIM BO3dyXOM INI NYTEM BblBaHHa.
7.2.6 Texnuechoe 06cnyHbAHne cBeu3aHrAHH
OuHCTHTe CBeUy 3aXnraHnI yEtHoN n3 MeDHO npoBOJOKn.
- BbHbTe CbeHNo HAKOHeHHK (pnc. 11, no3. A).
- CHINMITE CBEUY 3aHnraHnC NOMOIO CBEHORO KIOQA.
- C6opka ocyuaceCTBnAeTcB ObpaTHoN nocJeDoBaTeJIbHOCTN.
PpeynpeHHe He cInBaTe 6eH3nB 3aKpbTbIX NOMEUeHNx, B6NtN OT ORHn HaxoNDTeCb Ha pacCTOaHNn npn KpyeHN. Ta0BbI Napy MOrTy pNBeCTn K B3pbiBaMnn BOCnIaMeHEHIO.
- OnopoxHHt6eH3nHObBb6aKnpni nOmoiHa cOca dIy OTKaYBaHna 6eH3nHa.
- 3anyctntb Dniratelb N daTb DniratelIO npa6oTaB, noka He 6ydet HcnoJIb3OBAH octaounc6eH3nH.
- 10 OKOHaHH KaHDoRo ce3OHa npOBoHTb 3AmEH MaCla.
- YdaJIte cBey 3aHraHH.C nOmoIbIO MacLeHN 3aJeIeTe B uINHdp OKoNo 20 Mm Macla.MedNeHNO notRnHTe 3a pyKoTHy CTapTepa,Tak TOb6I MaCIO pEdoXpAHno UINHdp N3HyTpN.BBVNTb CBEvy 3aIKHaHH Ha MeCTO.
- OuHCTnTb pe6pa oxlaKeHna UINHnpa IN KOpnyc.
- OuHCTnTB BCE yCTpOJCTBO, YTObI 3aUHTb 3MaJIb.
- XpaHHTe yCTPOINCTBO B XopoOIO npOBETpNBaEMOM MecTe.
7.4IoproTOBHa ra3oHOKOCHINK TpaHCnOpTnpOBKe
PpeDynpKdHHe! He cInBaIte 6eH3nB 3aKnptbIX NOMeueHINX, B6mNt OT ORHn HaxoNTcB Ha paccTOrHHn npn Kpyehnn. Ta0Bbe napbl mOryT pniBecTH K B3pBlamnn BOCnIaMeHEHIO.
RUS
- OnopoxHHt6e3HOBbI 6aK npn nOmoi HacocA dIy OTKaHBaHn 6e3Ha.
- DAtb DniratTeIIO nopabotaTb, noka He 6ydet HcnoJIb3OBAH octaOnuNc8eHN.
- CInMb MOTOPHOE MACNo I3 TEIIORO DBNrAteJIa.
- ChTb CBeHNo HAKOHeuHK CO CBeuN 3aHNrAHH.
- OuHCTnTb pe6pa oxlaKdEHHa nIINHnp a KOpNyc.
- ChTb Tpoc ncyka c KpOyka (pnc. 13a, no3. A). OcnaBte CoeDnHeHne, n3o6paKeHHoe Ha pnc. 3a, cNeBa n Cnpaba Ha bEdupe pyKoTke H OTKNbTe BEDUyIO pyKoTHy BHN3 (pnc. 14). PnI ATOM CJIeDnTE, YTObI pNt OTKNbIBaHHn He HADLOMmINCb TPOCOBbl TReN.
- HamotaTe HeCKoJIbHO CNoeB rophiropoBaHHoro KapToHa MeKdy BepXHei HnKHei BePyUeI pyKOrTHOIN DBrIaTeJeM, TTO6bI N36eKaTb NOpeKeHn PnTPeHN.
- 06ecneythe Heo6xOIMoe KpeIeHnE rpy3a, TTo6bl npdeynpeNTb NOBpeJDeHn I TpaBMbl, Bbl3BaHHbIe erO COCKaJIb3bIBaHHem BO BpEMr TpaHCnOpTnPOBKn.
7.5 PacxoHbIM MaTePnJI, H3HaUNBaOuIcMaTePnJI 3aNaChBle YactN
3anachbIe yactn,pacxOndbIe n
H3HaunBaioUneCeMaTePnaJIbI (HaNPmEp,
MOTOpHOe MacIO,KnHOBbIe peMHN,CBEHN
3aKnHaHn, CMeHHbIy 3JeMeHT Bo3dyuHOro
ΦJIbTa,BeH3NHObBMynTp,AkKymJYrTObp
nI N HoNN) He NoJaadaIoT No dEeCTBVe
rapaHTn Ha yctPoIcTBO.
7.6 3aHa3 3anachbix Yacte
Pn3aKa3e 3anachbix yactei Heo6xOdmo
yka3aTb cIeDyUOuNE daHHbE:
TIN yCTPOINCTBA;
apTNkyhBHyH Homep yCTpoiCTBa;
- NdeHTnФнKaUNOHbI HOMep yCTpoiCTBa;
HOMep HEO6XODIMo3aNaCHOHacTN
AHTaJIbHbIe HebI INHΦopMaIHO MOXHO HaTnHa caTe www.isc-gmbh.info
RUS
9. Ta6Iina noncKa HeHcnpaBHOCTe
Ipeynpejkaioee ykaaahne: Ipeep npoBeHnem npoBepKu nnIOCTnpOBKn CJeayet Chauana OTKLIQUHTb DnIraTeJIb N CHaTb CBEyHOH NaHOeHHNK.
Ipeynpekaooye yha3aHne: Ecnno nocne IocnpoBHN nn peMOHTa DBIRatel npap6oTaN HeCKOJIbKO MmHyT, He 3a6bIBaIe, YTO BIXIONHAR TpyBa N dpyrme DeTaII IN CTaII IN ROPaHIMN. To eCTb, He pInKacaIteCb K HIM, YTO6bI IN36eHaTb OHOROB.
| HéncnPabHoctb | Возмонные prinnihly Uystpanenenne | |
| HecnokonHybIxod, cnIbnaB Vi6paunia Koprnya | - He3akpeIeHHbIe BInHTbl - PAc7aTaHNoE KpeIeHne HOJa -Ди6baIaHc HOJa | - ПрOBepITb BInHTbl - ПрOBepITb KpeIeHne HOJa -ЗамeHITb HOJ |
| He pa6oTaet dBrIraTeIb | - He NaHaT p6yHar NysCa/OctaHOBKn DBrIraTeIa - HEnpABNlHoE noLoJHene IdoCceJIbHoro p6yHara (ecln ImeETcR) - HcncPabHbA CBeya 3aJinrAgHn - TOnJIbHbIb 6ak nycf - He npIBeDen B DeiCTBne 6eH3INHObIh Hacoc (Primer) (ecln ImeETcR) | - HaNtB p6yHar NysCa/OctaHOBKn DBrIraTeIa - ПрOBepITb HacToPOHy (ecln ImeETcR) -ЗамeHITb CBeCy 3aJinrAgHn - 3aJIbTb TOnJIbBO -ПрИБeСТи B DeiCTBne 6eH3INHObIh Hacoc (Primer) (ecln ImeETcR) |
| HepOBnO pa6oTaet dBrIraTeIb | - 3aRpy3HIIcR BO3dUshbIyФIbTp - 3aRpy3Hena CBeya 3aJinrAgHn | - OChSTNb BO3dUshbIy ИльTp. -ОчeSTNb CBeCy 3aJinrAgHn |
| Га3OHJeJIteEу.TyKOC HepaBbHomepeH | - 3aTyIqIcR HOJ -СлишКOM Hn3Kaj BvICota cpe3a -СлишКOM Hn3Koe YncILOобopotOB DBrIraTeIa | - HAtOCHTb HOJ -HAcTpoIb NOxODaIyU YoBicOTy -УсТaHOBtDroCCSeIbHbI pyIcHgВnoIoJeHne MaKc. (ecln ImeETcR) |
| 3aRpy3HEN BvIbPoc TpaBbl | - СлишКOM Hn3Koe YncILOобopotOB DBrIraTeIa -СлишКOM Hn3Kaj BvICota cpe3a -ИЗошЕН HOJ -Засорен сборнIb MeIooK | - YcTahOBtB DroCCseIbHbI pyIcHgВ noIoJeHne MaKc. (ecln ImeETcR) -HAcTpoIb NOxODaIyU YoBicOTy -ЗамeHITb HOJ -ОпорОжнITbсборнIb MeIooK |
| СтартЕн БраanzaETcR | - AkHymЛЯТOP pa3prJHek - AkHymЛЯТOP He NOДнIQUeH - He BcTAbIeHa Be3OJaNachay StTeNCEIbHaN BvIka | - 3aRpy3HIIcR AkHymЛЯТOp. -ПоДнIQUHtB AkHymЛЯТOp -ВсТaВtB 6e3OJaNachyo StTeNCEIbHfy BvIka |
IpepeaHa npoee TnpaKpOBaHne DOkymeHTaunn IN cOnpoBOAnTeJbHbIX DOkymeHTOB n3dJI, TaHKe YacTHyoe, DonycKaETC TOLbKO npn HauNnY YeTKoro corlaCn KOMpaHn ISC GmbH.
CoxpaHaeTc npaBO Ha TEXHHueckHe N3MeHHeHn.
RUS
10. INHINHaTOPbI 3apArdHO yCTpoiCTBa
| Состорическая сбета | Знauthении и DeястVEN |
| MiraetzeеленьсBet | Готовhoeх К Эксплуатаци Зарадhoe усточью К сети иrotobok Эксплуатаци, аKKумлгогр He B зарадном усточьve. |
| Торит красnéсBet | Зардka Зарадhoe усточью Зарддахетаунглгогр. |
| Торит зеленьсBet | Анкумлгогр Зардхетаунглгьховаги. (Праздддддддддддддддддддддддддддддддддддддддддддддддддддддддддддддддддддддддддддддддддддддддддддддддддддд徳. (Празддддддддддддддддддддддддддддддддддддддддддддддддддддддддддддддддддддддддддддддддддддддддддддддд徳. ( Праздддддддддддддддддддддддддддддддддддддддддддддддддддддд徳. ( Празддддддддддддддддддддддддддд徳. ( Празддддддддддддддддддддд徳. ( Праздддддддддддддддд徳. ( Праздддддддддддддд徳. ( Празддддддддддд徳. ( Празддддддддд徳. ( Празддддддд徳. ( Праздддддд徳. ( Празддддд徳. ( Праздддд徳. ( Празддд徳. ( Праздд徳. ( Празд徳. ( Празд徳. ( Празд徳. ( Празд徳. ( Празд徳. ( Празд徳. ( Празд徳. ( Празд徳. ( Празд徳. ( Празд徳. ( Празд徳. ( Празд徳. ( Празд徳. ( Празд徳. ( Празд特征. ( Празд特征. ( Празд特征. ( Празд特征. ( Празд特征. ( Празд特征. ( Празд特征. ( Празд特征. ( Празд特征. ( Празд特征. ( Празд特征. ( Празд特征. ( Празд特征. ( Празд特征. ( Празд特征. ( Празд特征. ( Празд特征. ( Пraz�特征. ( Пraz�特征. ( Пraz�特征. ( Пraz�特征. ( Пraz�特征. ( Пraz�特征. ( Пraz�特征. ( Пraz�特征. ( Пraz�特征. ( Пraz�特征. ( Пraz�特征. ( Пraz�特征. ( Пraz�特征. ( Пraz�特征. ( Пraz�特征. ( Пraz�特征. ( Пraz�特征. (Пraz�特征. ( Пraz�特征. ( Пraz�特征. ( Пraz�特征. ( Пraz�特征. ( Пraz�特征. ( Пraz�特征. ( Пraz�特征. ( Пraz�特征. ( Пraz�特征. ( Пraz�特征. ( Пraz�特征. ( Пraz�特征. ( Пraz�特征. ( Пraz�特征. ( Пraz�特征. ( Пraz�特征 ( Пraz�特征. ( Пraz�特征. ( Пraz�特征. ( Пraz�特征. ( Пraz�特征. ( Пraz�特征. ( Пraz�特征. ( Пraz�特征. ( Пraz�特征. ( Пraz�特征. ( Пraz�特征. ( Пraz�特征. ( Пraz�特征. ( Пraz�特征. ( Пraz�特征. ( Пraz�特征. ( Пraz�特征. ( Пraz�特征. ( Пraz�特征. ( Пraz�特征. ( Пraz�特征. ( Пraz�特征. ( Пraz�特征. ( Пraz�特征. ( Пraz�特征. ( Пraz�特征. ( Пraz�特征. ( Пraz�特征. ( Пraz�特征. ( Пraz�特征. ( Пraz�特征. ( Пraz�特征. ( Пraz�特征. (Пraz�特征. ( Пraz�特征. ( Пraz�特征. ( Пraz�特征. ( Пraz�特征. ( Пraz�特征. ( Пraz�特征. ( Пraz�特征. ( Пraz�特征. ( Пraz�特征. ( Пraz�特征. ( Пraz�特征. ( Пraz�特征. ( Пraz�特征. ( Пraz�特征. ( Пraz�特征. ( Пraz�特征 ( Пraz�特征. ( Пraz�特征. ( Пraz�特征. ( Пraz�特征. ( Пraz�特征. ( Пraz�特征. ( Пraz�特征. ( Пraz�特征. ( Пraz�特征. ( Пraz�特征. ( Пraz�特征. ( Пraz�特征. ( Пraz�特征. ( Пraz�特征. ( Пraz�特征. ( Пraz�特征. ( Пrazal特征. ( Пrazal特征. ( Пrazal特征. ( Пrazal特征. ( Пrazal特征. ( Пrazal特征. ( Пrazal特征. ( Пrazal特征. ( Пrazal特征. ( Пrazal特征. ( Пrazal特征. ( Пrazal特征. ( Пrazal特征. ( Пrazal特征. ( Пrazal特征. ( Пrazal特征. ( Пrazal特征. (Пraz�特征. (Пraz�特征. (Пraz�特征. (Пraz�特征. (Пraz�特征. (Пraz�特征. (Пraz�特征. (Пraz�特征. (Пraz�特征. (Пraz�特征. (Пraz�特征. (Пraz�特征. (Пraz�特征. (Пraz�特征. (Пraz�特征. (Пraz�特征. (Пraz�特征. ( Пraz�特征. (Пraz�特征. (Пraz�特征. (Пraz�特征. (Пraz�特征. (Пraz�特征. (Пraz�特征. (Пraz�特征. (Пraz�特征. (Пraz�特征. (Пraz�特征. (Пraz�特征. (Пraz�特征. (Пraz�特征. (Пraz�特征. (Пraz�特征. (Пraz�特征 (Пraz�特征. (Пraz�特征. (Пraz�特征. (Пraz�特征. (Пraz�特征. (Пraz�特征. (Пraz�特征. (Пraz�特征. (Пraz�特征. (Пraz�特征. (Пraz�特征. (Пraz�特征. (Пraz�特征. (Пraz�特征. (Пraz�特征. (Пraz�特征. (Пrazal特征. (Пraz�特征. (Пraz�特征. (Пraz�特征. (Пraz�特征. (Пraz�特征. (Пraz�特征. (Пraz�特征. (Пraz�特征. (Пraz�特征. (Пraz�特征. (Пraz�特征. (Пraz�特征. (Пraz�特征. (Пraz�特征. (Пraz�特征. (Пraz�特征 ( Пraz�特征. (Пraz�特征. (Пraz�特征. (Пraz�特征. (Пraz�特征. (Пraz�特征. (Пraz�特征. (Пraz�特征. (Пraz�特征. (Пraz�特征. (Пraz�特征. (Пraz�特征. (Пraz�特征. (Пraz�特征. (Пraz�特征. (Пraz�特征. (Пrazal特征 (Пraz�特征. (Пraz�特征. (Пraz�特征. (Пraz�特征. (Пraz�特征. (Пraz�特征. (Пraz�特征. (Пraz�特征. (Пraz�特征. (Пraz�特征. (Пraz�特征. (Пraz�特征. (Пraz�特征. (Пraz�特征. (Пraz�特征. (Пraz�特征. (Извалгам). (Извалгам) (Извалгам) (Извалгам) (Извалгам) (Извалгам) (Извалгам) (Извалгам) (Извалгам) (Извалгам) (Извалгам) (Извалгам) (Извалгам) (Извалгам) (Изьгам) (Изьгам) (Изьгам) (Изьгам) (Изьгам) (Изьгам) (Изьгам) (Изьгам) (Изьгам) (Изьгам) (Изьгам) (Изьгам) (Изьгам) (Изьгам) (ИзьгAM) (Изьгам) (Изьгам) (Изьгам) (Изьгам) (Изьгам) (Изьгам) (Изьгам) (Изьгам) (Изьгам) (Изьгам) (Изьгам) (Изьгам) (Изьгам) (Изьгам) - |
| Miraet красnéсBet | Нерспавноь Зарддахетаунглгьховаги. (Праздддддддддддддддддддддддддддддддддддддддддддддддддддддддддддддддддддддддддддддддддд徳. (ДерстВе:) (Зарддахетаунглгьховаги. (Празддддддддддддддддддддддддддд徳. (Извалгам) (Извалгам) (Извалгам) (Извалгам) (Извалгам) (Извалгам) (Извалгам) (Извалгам) (Извалгам) (Извалгам) (Извалгам) (Извалгам) (Избгам) (Избгам) (Избгам) (Избгам) (Избгам) (Избгам) (Избгам) (Избгам) (Избгам) (Избгам) (Избгам) (Избгам) (Избгам) (Избгам) (Избгam) (Избгам) (Избгам) (Избгам) (Избгам) (Избгам) (Избгам) (Избгам) (Избгам) (Избгам) (Избгам) (Избгам) (Избгам) (Избгам) (Избгам) - |
* AktyaIbHble uehI INHΦopMaUHIO MOHHO NaITNa caTe www.isc-gmbh.info
RUS

TolbkoДЯстан EC
3anpeuho BbIbpaBt bJIeHTponHCTpyMeNT BobHHbI DomaunHm Mycop.
Cornacno ebponecko dnpeKTHBE 2012/19/EG o6 nCnOJIb3OaHbIX 3JIeKTPnuecKnx HJIeKTPoHHbIX yCTPOINCTBAX IN peAIN3aUN B npABOBN CNTEME COOTBETCTBYUOe CTpaHbI HeoBXODIMO HCIOJIb3OaHbH NJIeKTPnuecKN INCHTpymEny TYNIN3npoBaTb OTDeJIbHO HAnPaBIArTa Ha BTOpNUHyIO nepepaOToKy dIra OXpaHbIKpyKaioSe cpebl.
Btopuha nepepaobtka - aIbtepehntba o63aTeNbHOn OTCblnke yctpoeCTBa Ha3ad n3rotOBNTeIO: Bnaedeue aleKTPnueeckoYyCTPOeCTBA B Clyae H36abLeHnAOT CO6CTBeHHOCTN 063aH,B HAeCTBe aIbTEpHaTHbbl OTcblnH H3ad N3rTOBHTeIO, CoeJeCTBOBaTb HADJIeKaUe YTHIN3aCNI. PInpuoJeeB HerodHocTb yctPOeCTBO MOKeT 6bITb NepeDaHO B pnpemHbIM npHKT, KOTOpBm OCyuctBnLTINHDAuH B COOTBEcTBnC 3aKOHOM CTpaHbIO uKINHCHOM pOn3BOCTBe N o6paueHN C Mycopom. 3To He OTHOCNTCR K npINOKeHHbIM K npuweDiMeY B HerODHocTb 6OpyoBaHAnIO donoONHiteMbHM yctPOeCTBaM H BCNOMaTeHBm CpeCDTBam, HE CoepKauHM 3JeKTPnueeckHe qactn.
IpeeneaTbBAHne nnnnpue BnDpa3MHoKeHn aDOKyMeHTaun H cOpPOBOnTeNbHix NtCTOB npOdyKuHn FmPbI, noNHOCTbHO nnHaCTnHNO, pa3peSeHn pOn3BOOnTb TOnbKO C OdHO3HaHOrO pa3peSeHn ISC GmbH.
CoxpaHReTcI npaBO HaTexHnueckne H3MeHeHH
RUS
HΦopMaζηo cepBnCHOM 06cIyHnBaHH
Bo Bcex ctpaHax, yKa3aHHbIX B rapaHTnHOM CBnTeJIbCTBe, y Hac IMeIOTcKOMNeTeHTHbIE cepBnCHbe napThepbI, KOHTAChBE daHHle KOTOpbIX Bbl HauDeT B rapaHTnHOM CBnTeJIbCTBe. OHN Bcerda B Baewm pacnopJKeHN II peSeHIna IIObIX BonpocOB, CB3aHHbIX C o6cIyKnBaHNEM, HanPIMep, JnpeMOHaT, NoCTaBN 3aNpacte N b6ICTpon3HaUNBaOuXcx DeTaJe, a TaHOke npno6peTeHN paCXoNDbIX MaTePnaIOB.
CneyetobHbMaHHeHaTo,HTOB3OMn3dIeHNcNeDyUOuIeTaNIOBepKeHbI cTeCTBeHHOMY H3HOcy IIN H3HOcy B CBA3N C 3KcNpyatauei / cNeDyUOuIe Detanl Tpe6yOTcB KaeeCTBe paCXoNDhIX MaTePnaIIOB.
TapaHTnHoe CBnTeJIbCTBO
YbHaemnoknyntelbHua, yBaHaemnoknyntelb,
HnnpdykTb npoxoTt uateIbeHneu KOnhtpoJI kaueCTBa.EcIn 3To yctpoNCTBO BCE He 6ydet
fynKmIOHPOBaT b6zypHe, Mbl npocim Bac opaHTbcB Hnaw cepBncbH no aDpecy,
yka3aHHOMy B 30m rapaHTnHOM TaIOHe. Mbl TaKHe oxOTHo OTBeTM Ha Baun BonpOcbI NO TeLEFOHy,
HomeR KOtporo npnbEeh HnKe. Pn npdeBraHennrpaHTnHbIX TpeBoAHn deCTbyOT cJeDyoUne
ycNoBN.
- HactoIe npaBnla rapaHTn DeiCTbYOT NCHIOUHTeB OTOHOENN NOJb3ObaTeJe, T.e. fHnecknx niu, KOtOpBie He HamepeBaIOCTc HcNOJIb3OBAbT b HactoIeue N3dJIeN B pAmhax CBOe npocecMOHaBnOH INpyrO CamOToTERTbHOB DEaTEbHOCTn. HactoIe npaBnla rapaHTm peryIpyOT DONoJIbHeBHe yCIOBnA OKa3AHnRA rapaHTnHBx YCnyT, KOtOpBie HINKeYOMaHTbI npOn3BOIDNTeB o6cNeuHbAET NOKyNaTeJAM CBOX HOBbY cTPOJCTB D noToJIHEnE K yCIOBnAR rapaHTn B COOTBeTCTBN C 3aHOHOM. 3Tu rapaHTnHbE o63aTeNbCTBa He 3aParNABoT BaHn 3aKoHNbIE rapaHTnHbIE tpe6oBaHN.HaHI rapaHTnHbE ycLytn dIn Bac 6ecnIaTHbl.
- RapaHTHnHbE yCnyr paacnpocTpaHrOcTc TlBHO HA DeFeKTb HOBOrO yCTPOrCTBa HNKeYOMrHYTO rpoa3BOHTeJI, HOTOpoe Bbl pno6peJI, C83aHHbIe c HeOCTaKOM MATEpHaJIa NIN IpnON3BOdCTBeHHbIM KpAOM, I ORpAHuYBaIOcTc NOHAeMyBbOpy UyCTPAHemM TaHXs DeFeKTOB ycToPcTBa NII 3aMeHOH yCTPoJcTBa.YUHTte, YTO HaHIu YcToPoiCTBa HE npDeHaaHaeHbI JN CNOJIb30BaHnB I PpOMbLIJIeHHbIX ZcJIAX, B pEmecLeHHOM pOn3BOdCTBE H Na IpoQeCCHOHaJIbHO OHObE. NoTOMy rapaHTHnHbI dORoBOP CHTaETcH NeHeCTBtJIbHIM, eCNy UcToPcTBo IcNoJIb30BaIOCb B TeueHneR rapaHTnHOrO cPoKa H a KcyTapHbN, pOMbLIJIeHHbIX npDpPrTTHx IIN B pEmecLeHHOM pOn3BOdCTBe, A tAOHe NOBepraIOcb CONOTABMOH HarpyKe.
-
Haa rapaHTnHa pacnpocTpaHaeTc Ha:
-
NOBpeKdEHHy yCtpoHCTBa, Bo3NHkUHe B pe3yIbTaTe HecO6JIIODeHHy pyKOBODCTBa NO MOHTaKy IIN HeNpabInbHO MOHTaHa, HecO6JIIODeHHy pyKOBODCTBa NO kCNpyATAuHN (HapnIMep, pni NOKJIOeHHN K CTeT C HEnpaBnJIbHbIM HAprrKeHHem IIN PoDM TOHa), HecO6JIIODeHHr Tpe6oBAHNI KAcateJIbHo TEXHueCKOrO 0cClyHnBaHn I Tpe6oBAHNI TexHnK 6e3OnaCHocTN, Bo3DeiCTBn HA yCTPOrCTBO AHOAmalbHbIX OYcNoBn OKpyKaIoUeI cpebl IIN HeNOCTaTOHOrO YXoDa I TexHnueChORO 06cLyHnBaHn;
-
NOBpeKdHn yCtpoiCTBa, BO3HNkIe B pe3yIbTaTe HENpaBnIbHO rNl HEnaIeKaIeFo
ICNOJb3OBAHn (HanpIMep, neperpy3Ha yCtpoiCTBa IIN npimHeHHe He dOnyueHbIX K
HCIOJIb3OBAHn HacaDok IIN npINAHDLeXHocTe), nonaDAHH B yCtpoiCTBO nOcTOPOHHx
PpeMeTob (HanpIMep, neceKa, kAMHeN IIN bblN, NopBeXeHn pIn TpAChOpNTPOBKe),
PnpimeHeHn CINbl IIN BHEWHN XO3DeIcTbn (HapIMep, nobpeXeHn pIn IaDeHn); -
NOBpeKdEHHy yCTpoCTBA HIN YACTeY cTPOCTBA, CB3aHbIe C N3HOCOM B C8R3N C 3KcJIpyatauNe, O6bHbIM HIN DpyrIM ECTeBHbIM N3HOCOM.
-
RapaHTHnHbI cPOK coCTaBnAET 24 MeCA, OTCyET HauHHeTcO Co Dn HOKynHycToPcTBA. RapaHTHbIe npaba Heo6xOIMO ppebBnAe Tdo nCTeueHHa cPoKa rapaHTHn B TeueHHn DBYx HeDeJIb NocE ToTO KAK 6yEt ObHApYHeHa HEnCpABHOCTb.3aBJeHHa Ha rapaHTHnHOE 0cbLHyHNBaHne NocE HeCTeueHHa cPoKa rapaHTHn He npHHMaKOTc. PeMOHT IIN 3aMeHa YcToPcTBA He BeDc K npOJNeHHo RapaHTHnHOr cPoKa, TaHoE pN oka3aHHn TaKoi YeCnyn OTCeET HOBOrO rapaHTHnHO rpoKa HcyToeCTBO IIN BO3MOHKO yCTaHOBLeHHbIe DetAIJI He HauHHeTc3 3aHOBO. 3To ycNoBE DeiCTByET TaKe npO6paueHHn B MecTHbI cepBNCbI OTdI.
5.Длпрдьгеленя rapaHTHbIX tpe6oBaHn CO6uHTe O HeNcnpaBHOCTHa yctpoCTBa Ha caTe www.isc-gmbh.info.ПиroTOBtRE KBNTauHIO O noKnyHe uIIN DpyrNe DOka3aTeJIbCTBa npHO6peTHeBAm HOBOrO YCTPOICTBa. OKa3aHne rapaHTHbIX ycIg prnMeHITelbHO K yCTpoCTBaM, HappaBHeHbIM Ha paccMOtePHe 6e COOTBeTCTByOuHx IOKa3aTeJIbCTB IIN PhpMeHHoTabJInH, NcIIIOuaTcB BnHy HeIOCTaTKa DAHbIX dI INeHTNfHkauN taKHX yCTpoCTB.EcIn HAwa rapaHTHpaCpNaocptPaHReTcA Ha HeNcnpaBHOCTb yctpoCTBa,Bbl HeMeJdEHHo NOyUHTe OTpeMOHTPOBAHHOe nII HOBOe YCTPOICTBO.
Camo 6oob paayMeTcB, mbo MoHem TaHHe yctpaHnB pnp ONIATE 3aTpa HEmCpNaBHocTHyCTpoiCTBa, KOTOpBHe bXoBD B oEBm rapaHTnHbX ycnyr nnn npN cTeHeHH cpoKa rapaHTn. IJra 3TOr BA Hno6Oxmo BblcTaB yctpoHCTBO ha aDpeh NaeH cJyKb6 cepBnCA.
YTo Hacaetc 6bIcTpo3HaunBaOxxC, paXoNDhIX DetaJIe N HeDocTaOxH KOMnoHETOB, Mbl o6paaaem BHnMaHHe Ha OpaHnueHn 3ToI rapaHTn COIaCHO IHΦOpMauN O cepBnCHOM 06CnyKnBaHH NaO pkoBOdCTBaNo kCNyatauN.
SLO
Vsebina
4e. Pooapouoyea nAevupikns Eaywyns
5a. KaIuμa εEaywyn
5b. KaIuμa Tpanεoδn μavT
-
a
-
Bida nIipwoC aio
-
P'θμισ Φ'ous kɔmɪs:
-
Σχοινεκκίνησς
-
Koupi Ekkivnon
10a.2xKaiπKaλωδlou
AvaBooBnyevI eva LED:
H mntapia eiva adelta, ophiote mv.
Avaβoβnνovouv oλa ta LED:
H mntapia exi ekphiotieti batheta kai eivai elattwamikn Mia elattwamikn mntapia dev iival duvatov va enavafoptiotie!
6. Xειριομός
Yrtd68e1g!
O kivntipacnapabiiedetai xwpiuikakéitoupyiac. ta to loyo auto npenei vayeioeTe kai bevziva npiv ano tn eoon 0e keitoupyia.
- Na ɛλέγχετε η τοῦμη του λαδιου (βλ. 7.2.1).
- Tn oun npwn nC bEvIvac va xnpaonoe t eva xwvi kai eva 0oouepiko doxio.N aivoupeuteire nq n bEvivn elva kaapn
PpOeIbOIOInoN:NaXpOaUOIOeTe navTa mOvo eva muvTovi aodAeiac yia BeVcivn.Mnv KAnViTe OtAV YeuiTe BcVcIVn.Ppv YeuiTe Tm BeVciN,va oBhveTe Tov KInTnpa Kai va aHvTe ToV KInTnpa V KpuOe Eti epiKa AETTA.
7.2.3 AEvoc Tpoovkai nImuves
Olaovc kai oai nmuves twv tpoxwva
lauivovtai eiaoppa maopa tnoaiov.
Tto okoanto auto va aphiapeite ta taoia twv
tpoxw me eva kaotaoiidi kai vae biowete TIC
Bideocotepeownc twv tpoxw.
7.2.4 IepinoiOn kaipuoian twv oxoiwv
Na laawveTe ouxva ta oxiovia kai va ta TNV eukivnoia touc.
GR
7.2.5 Epyaiec ouvtnpnnc tou piatpou tou aepa (Eik.10a/10b)
Evnpwon yia to epbic
GB explains the following conformity according to EU directives and norms for the following product
□90/396/EC_2009/142/EC
89/686/EC_96/58/EC
2011/65/EU
2006/42/EC
Annex IV
Notified Body:
Notified Body No.:
Reg.No.
2000/14/EC_2005/88/EC
Annex V
Annex VI
Noise: measured L_PA = 93.4 dB (A); guaranteed L_WA = 96 dB (A)
P=1,8KW; L/0=48cm
Notified Body: TÜV SÜD Industrie Service GmbH, Westendstrasse 199
80686 München, Deutschland, Notifi ed Body (0036)
2012/46/EU
Emission No.: e1197/68SA2012/46091104 (II)
Standard references: EN 55014-1; EN 55014-2;
EN 60335-1: EN 60335-2-29: EN 62233; EN 61000-3-2: EN 61000-3-3;
EN ISO 14982; EN ISO 5395-1; EN ISO 5395-2; EN 62321
Subject to change without notice
Archive-File/Record: NAPR015988
Documents registrar: Markus Jehl
Wiesenweg 22, D-94405 Landau/Isar
GB explains the following conformity according to EU directives and norms for the following product
90/396/EC_2009/142/EC
89/686/EC_96/58/EC
2011/65/EU
2006/42/EC
Annex IV
Notified Body:
Notified Body No.:
Reg.No.
2000/14/EC_2005/88/EC
Annex V
Annex VI
Noise: measured L_PA = 83.8 dB (A); guaranteed L_WA = 98 dB (A)
P = 2.8 KW; L/0 = 53 cm
Notified Body: TÜV SÜD Industrie Service GmbH, Westendstrasse 199
80686 München, Deutschland, Notifi ed Body (0036)
2012/46/EU
Emission No.: e1197/68SA2012/46152902 (II)
Standard references: EN 55014-1; EN 55014-2;
EN 60335-1: EN 60335-2-29: EN 62233; EN 61000-3-2: EN 61000-3-3;
EN ISO 14982; EN ISO 5395-1; EN ISO 5395-2; EN 62321
Subject to change without notice
Archive-File/Record: NAPR015987
Documents registrar: Markus Jehl
Wiesenweg 22, D-94405 Landau/Isar


EH 10/2017 (01)