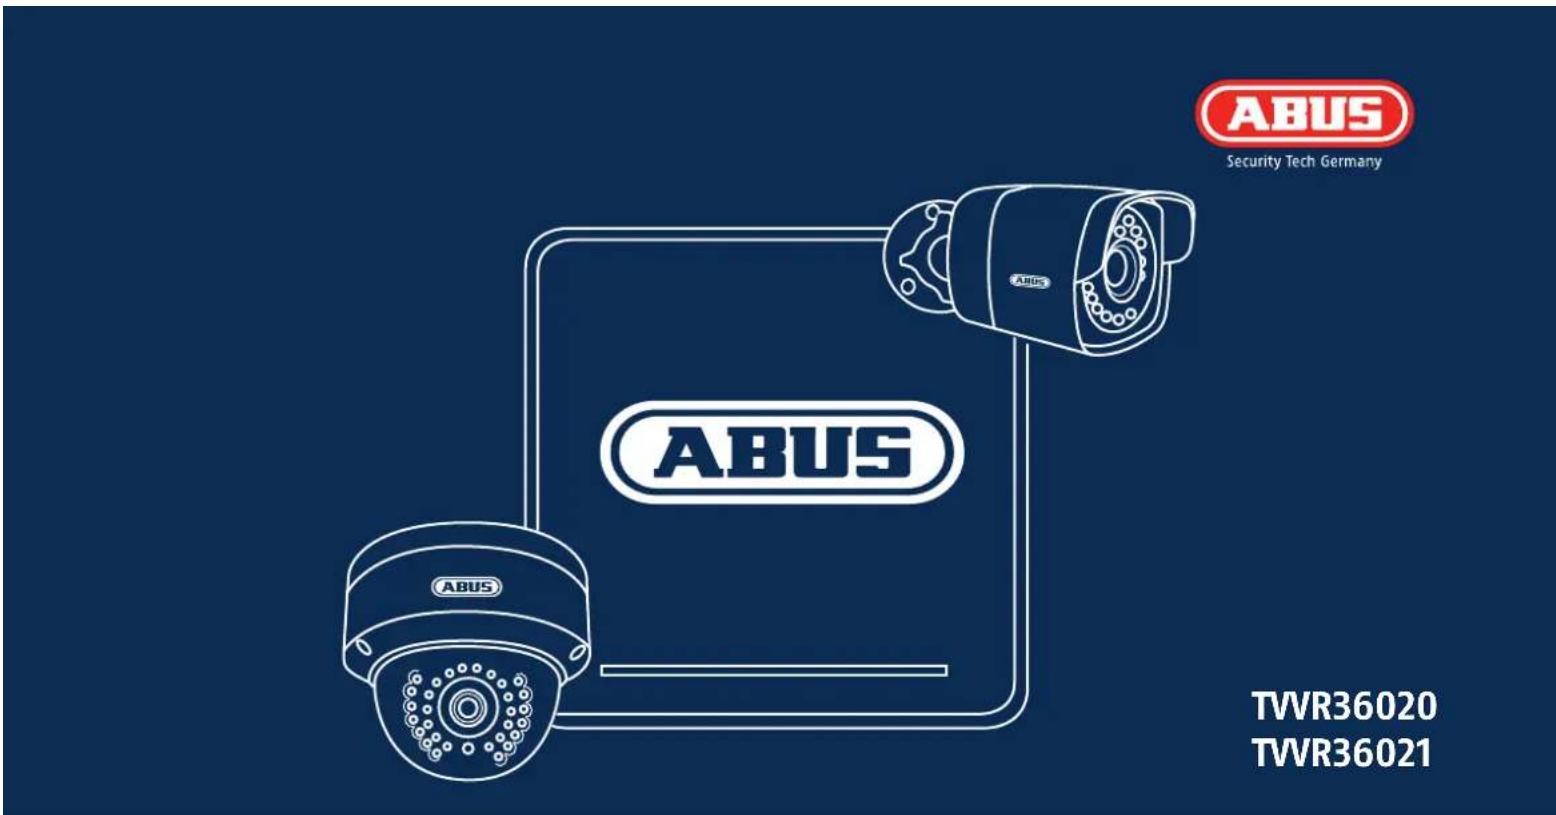
TVVR36020 - Surveillance Camera ABUS - Free user manual and instructions
Find the device manual for free TVVR36020 ABUS in PDF.
| Technical Features | ABUS TVVR36020 surveillance camera, 1080p resolution, night vision, 360� viewing angle. |
|---|---|
| Usage | Ideal for indoor and outdoor surveillance, easy installation, compatible with ABUS security systems. |
| Maintenance and Repair | Regularly check the lens to avoid obstructions, firmware update recommended. |
| Security | Data encryption, secure access via mobile app, real-time alerts. |
| General Information | 2-year warranty, technical support available, compact dimensions for discreet installation. |
Frequently Asked Questions - TVVR36020 ABUS
User questions about TVVR36020 ABUS
0 question about this device. Answer the ones you know or ask your own.
Ask a new question about this device
Download the instructions for your Surveillance Camera in PDF format for free! Find your manual TVVR36020 - ABUS and take your electronic device back in hand. On this page are published all the documents necessary for the use of your device. TVVR36020 by ABUS.
USER MANUAL TVVR36020 ABUS
Warnings 25
Scope of delivery 26
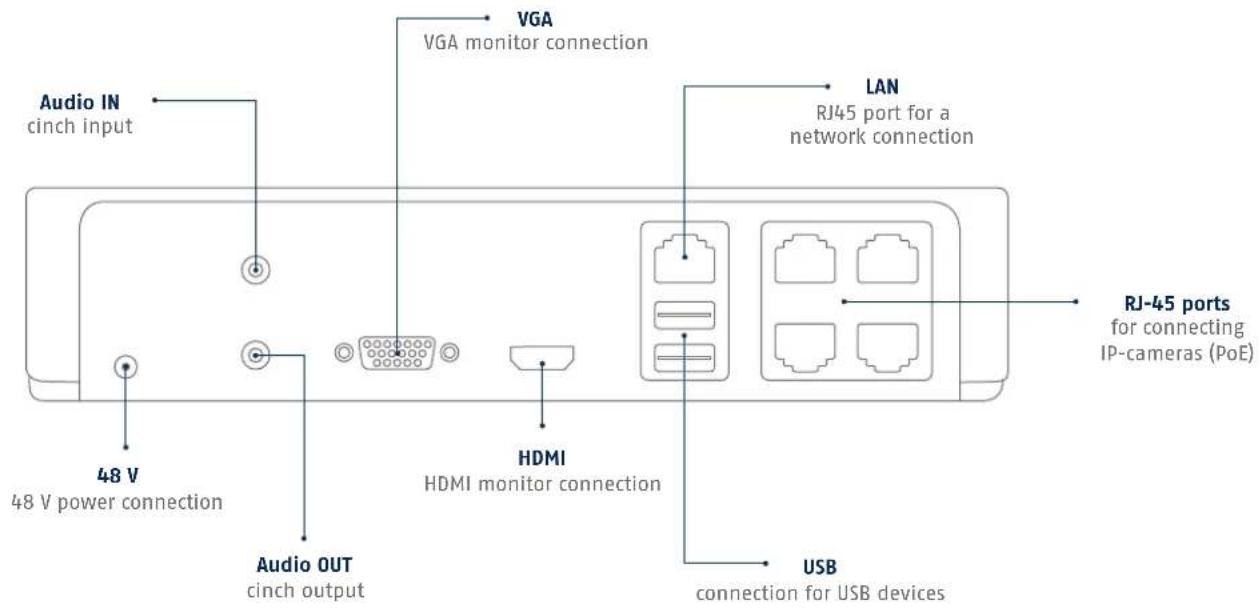
Overview: Network recorder 27
Overview: Outdoor dome camera 28
Overview: Outdoor camera 29
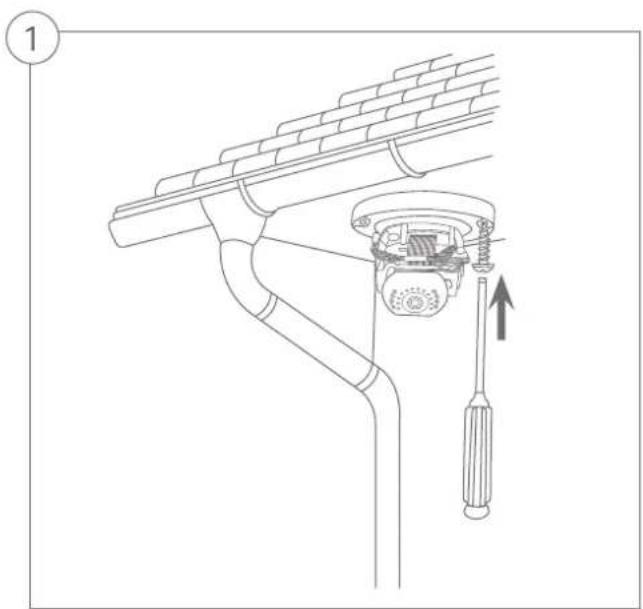
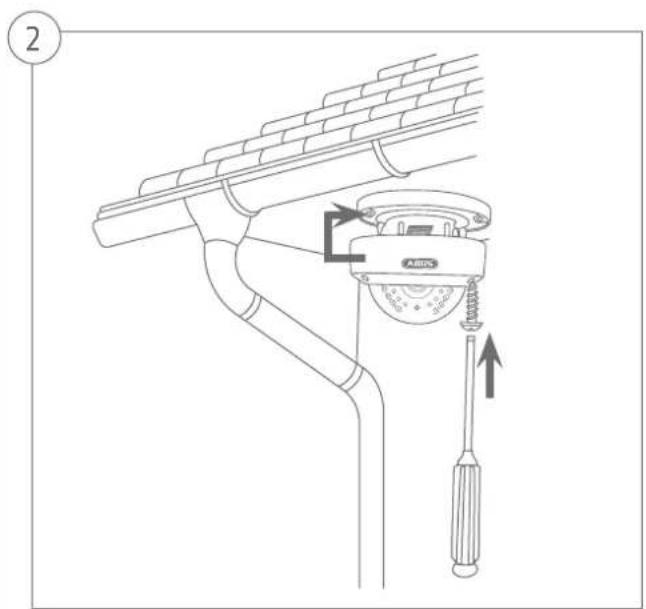
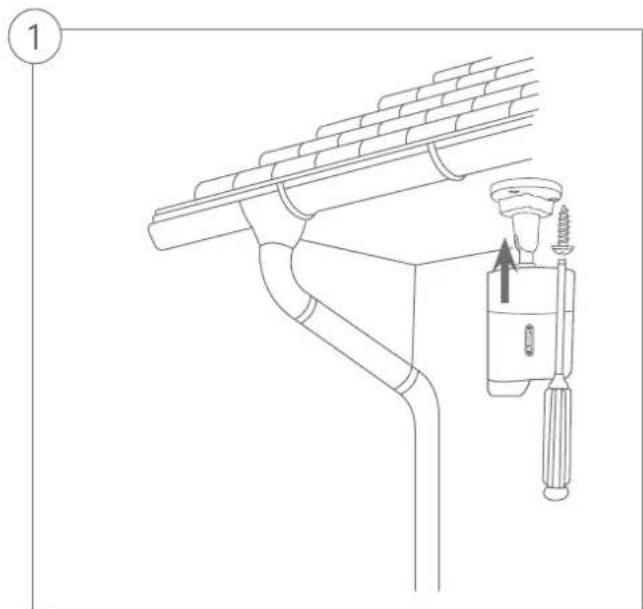
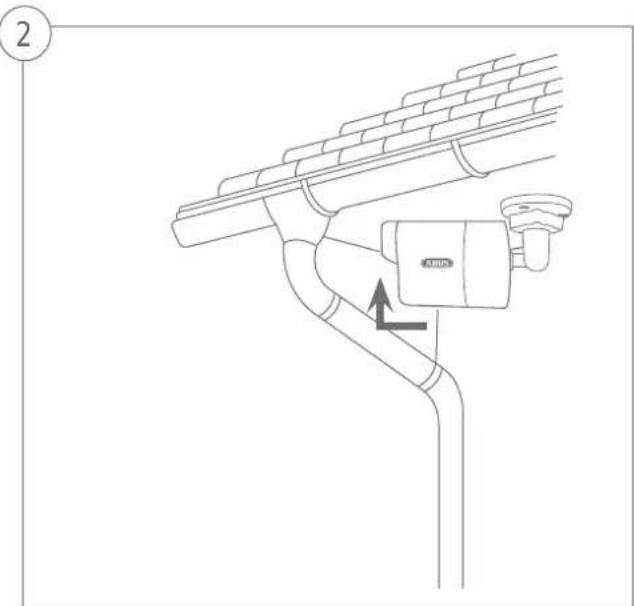
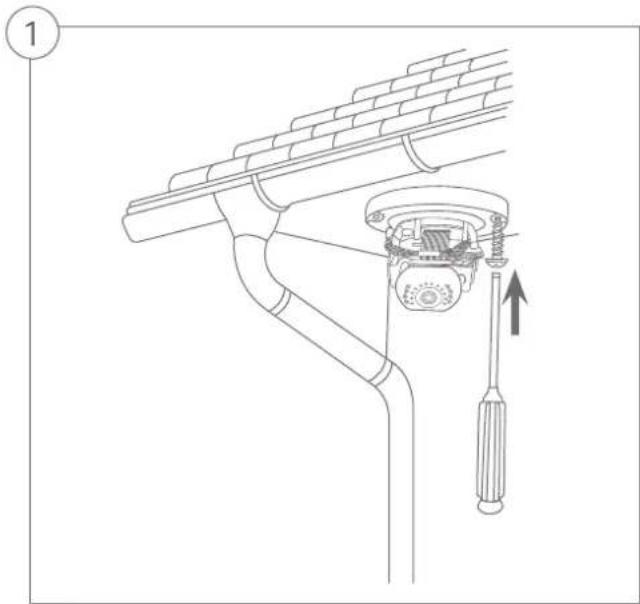
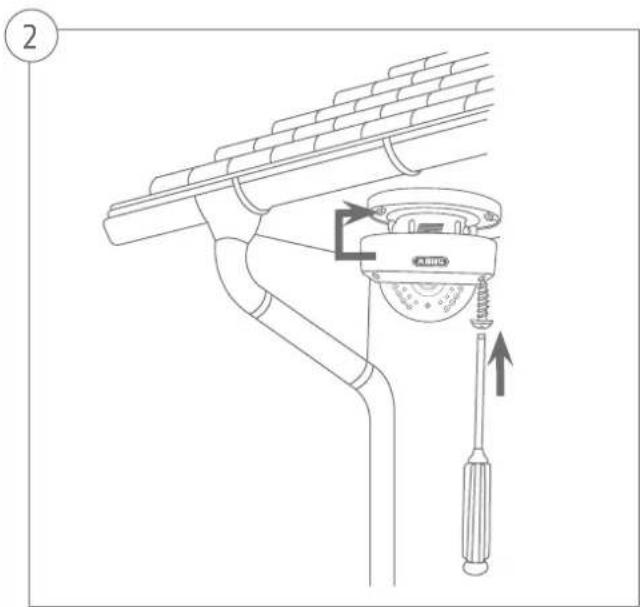
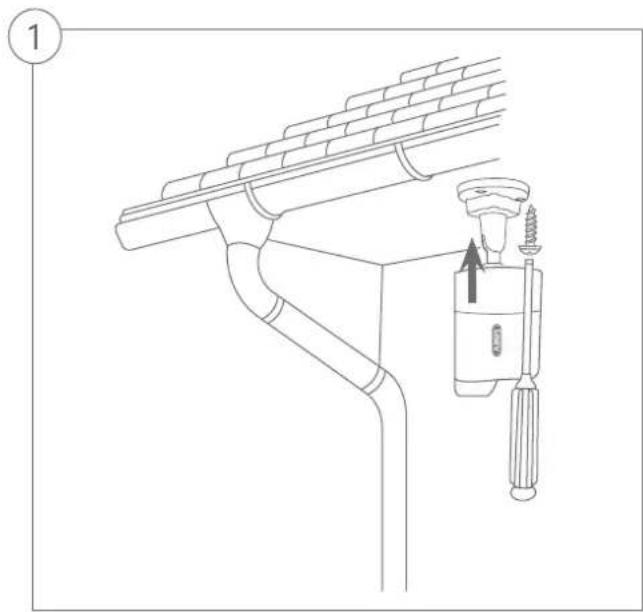
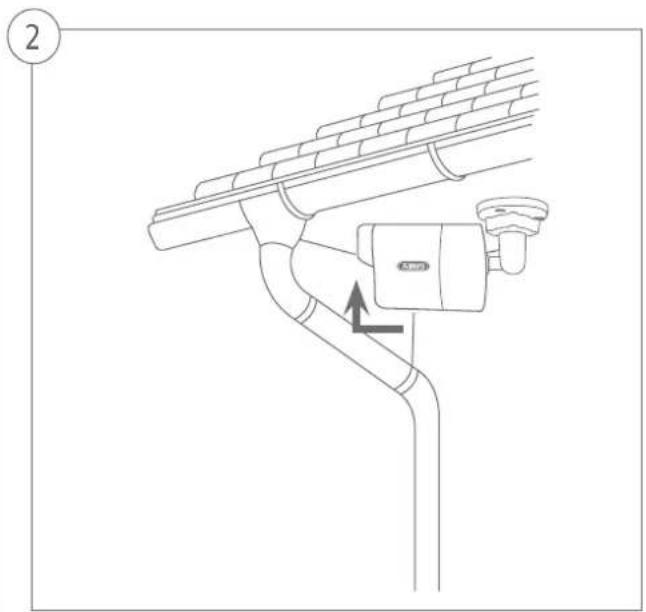
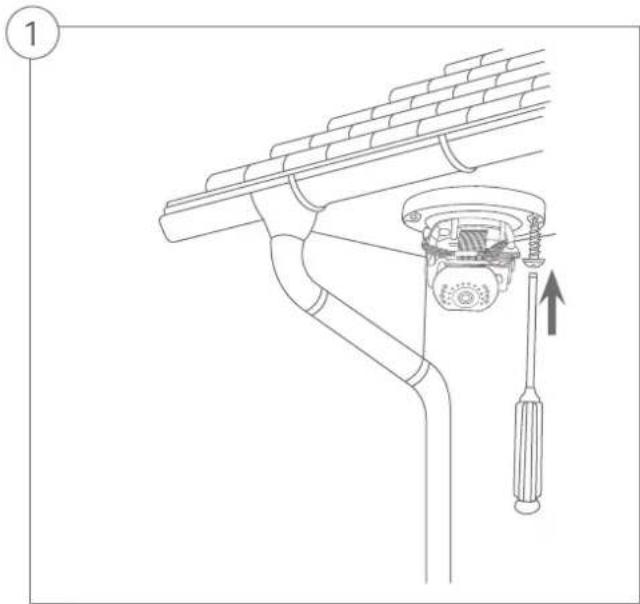
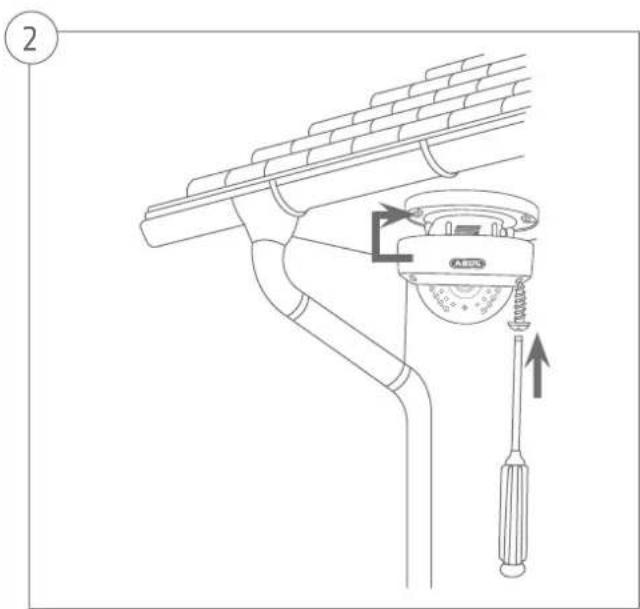
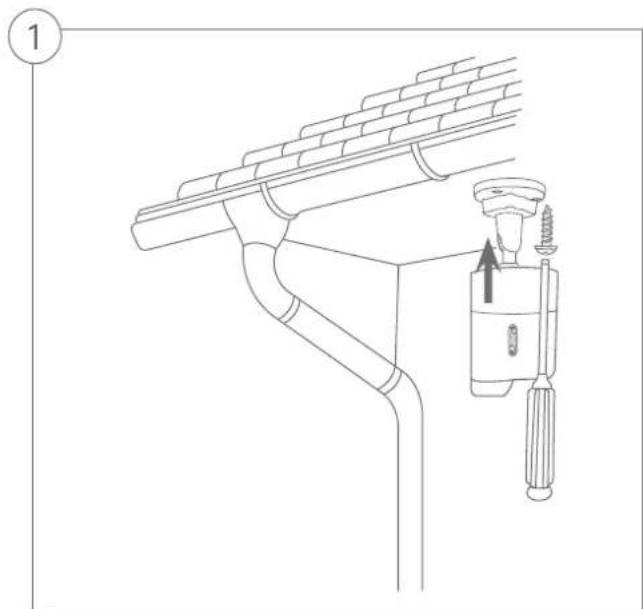
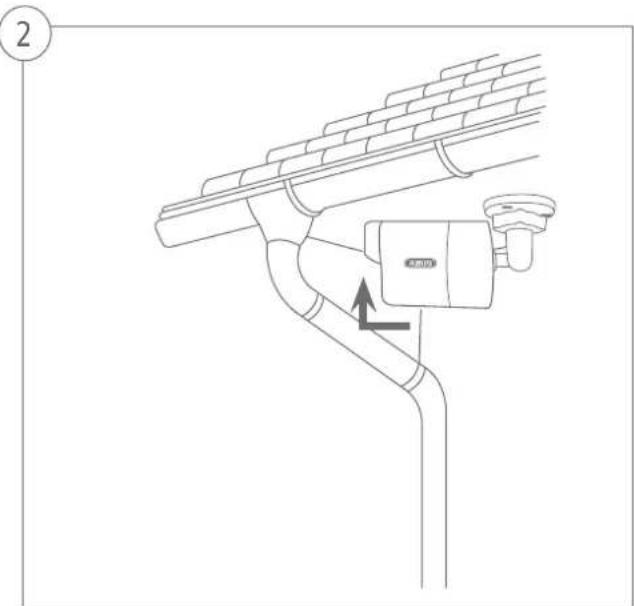
Tips for camera installation 30
Software Set-up 31
Hardware installation 38
Français
Security Tech Germany
16 17 18
Hardwareinstallation


Quick guide for Video Surveillance kit: TVR36020 | TVR36021
This quickstart guide describes the initial installation steps for your video surveillance kit. More detailed information can be found in the accompanying user guide.
Dear customers,
Thank you for purchasing this product. This product complies with current domestic and European regulations.
Conformity has been proven, and all related certifications are available from the manufacturer on request (ABUS Security-Center GmbH & Co. KG, Linker Kreuthweg 5, 86444 Affing, Germany).
To maintain this status and to guarantee safe operation, it is your obligation to observe these operating instructions! Read the entire operating manual carefully before putting the product into operation. Pay attention to all operating and safety information! All company names and product descriptions are trademarks of the corresponding owner. All rights reserved.
If you have any questions, please contact your specialist dealer.

Warnings
Keep the recorder and camera away from strong magnetic fields.

Ensure an uninterrupted power supply.

Keep liquids away from the recorder.

Only store the recorder and camera in the ambient conditions recommended by the manufacturer.

Do not insert any objects into the camera (e.g. needles).

Ensure that there is always sufficient ventilation.

Make sure that the network camera is mounted securely.

Only operate the network camera with a suitable power source.

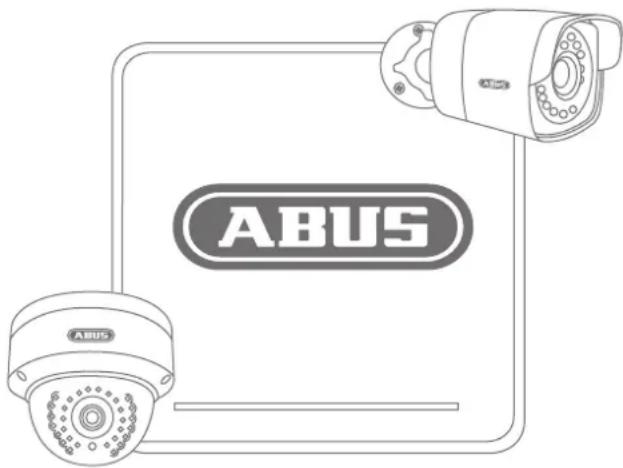
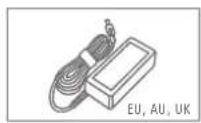
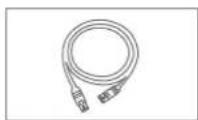
Scope of delivery
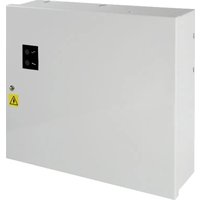
4-Channel Network Digital Recorder incl. HDD
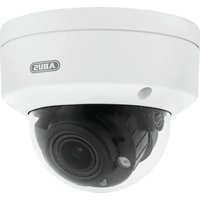
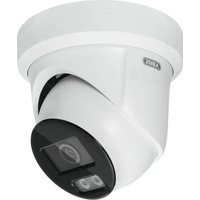
- 2 x WLAN HD 720p Outdoor Dome Camera | WLAN HD 720p Outdoor Camera
- 3 x Power supply unit (incl. EU, AU, UK)
- 1x1m network cable
2 x 18 m network cable
- USB mouse
- Installation material
Quick Guide
CD
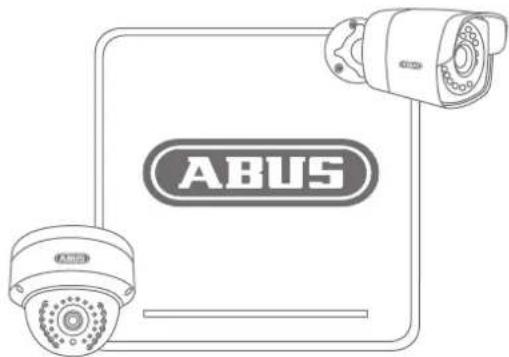


Overview: Network recorder
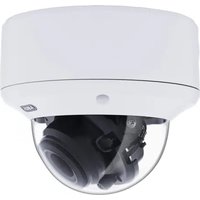
Overview: Outdoor dome camera


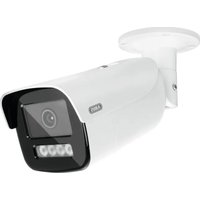
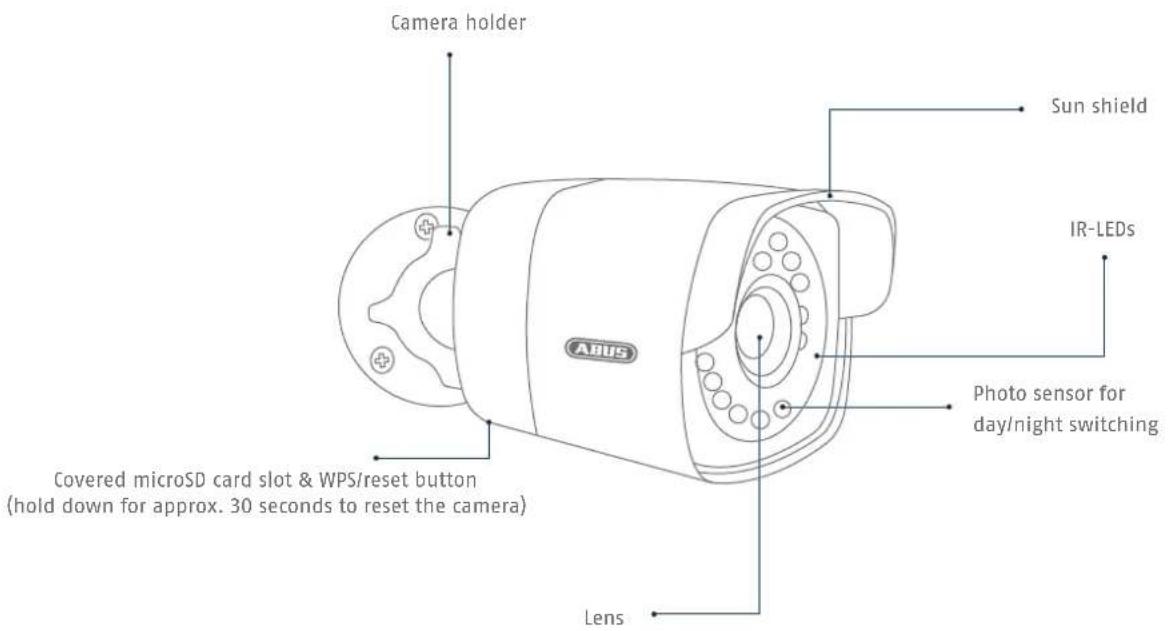
Overview: Outdoor camera
Tips for camera installation
Plug the recorder into the power supply. The blue LED bar on top of the recorder indicates that the device is on. You can choose to turn off the light on the LED bar via the menu.

Software Set-up
123
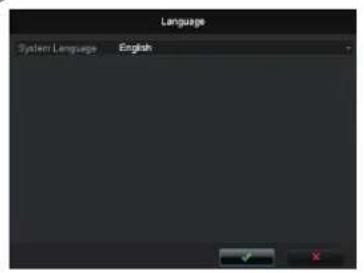
Select a language and click [n]n . In the
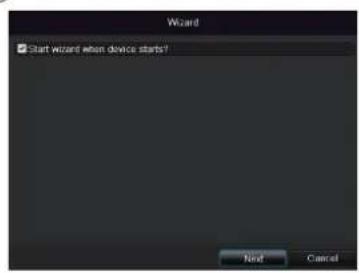
Admin Passwortckfield,benchen the setup wizard will no longer run automatically at the next start-up. Click Next.
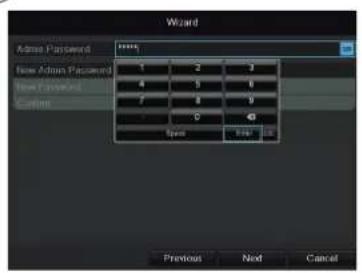
12345. Confirm with Enter.
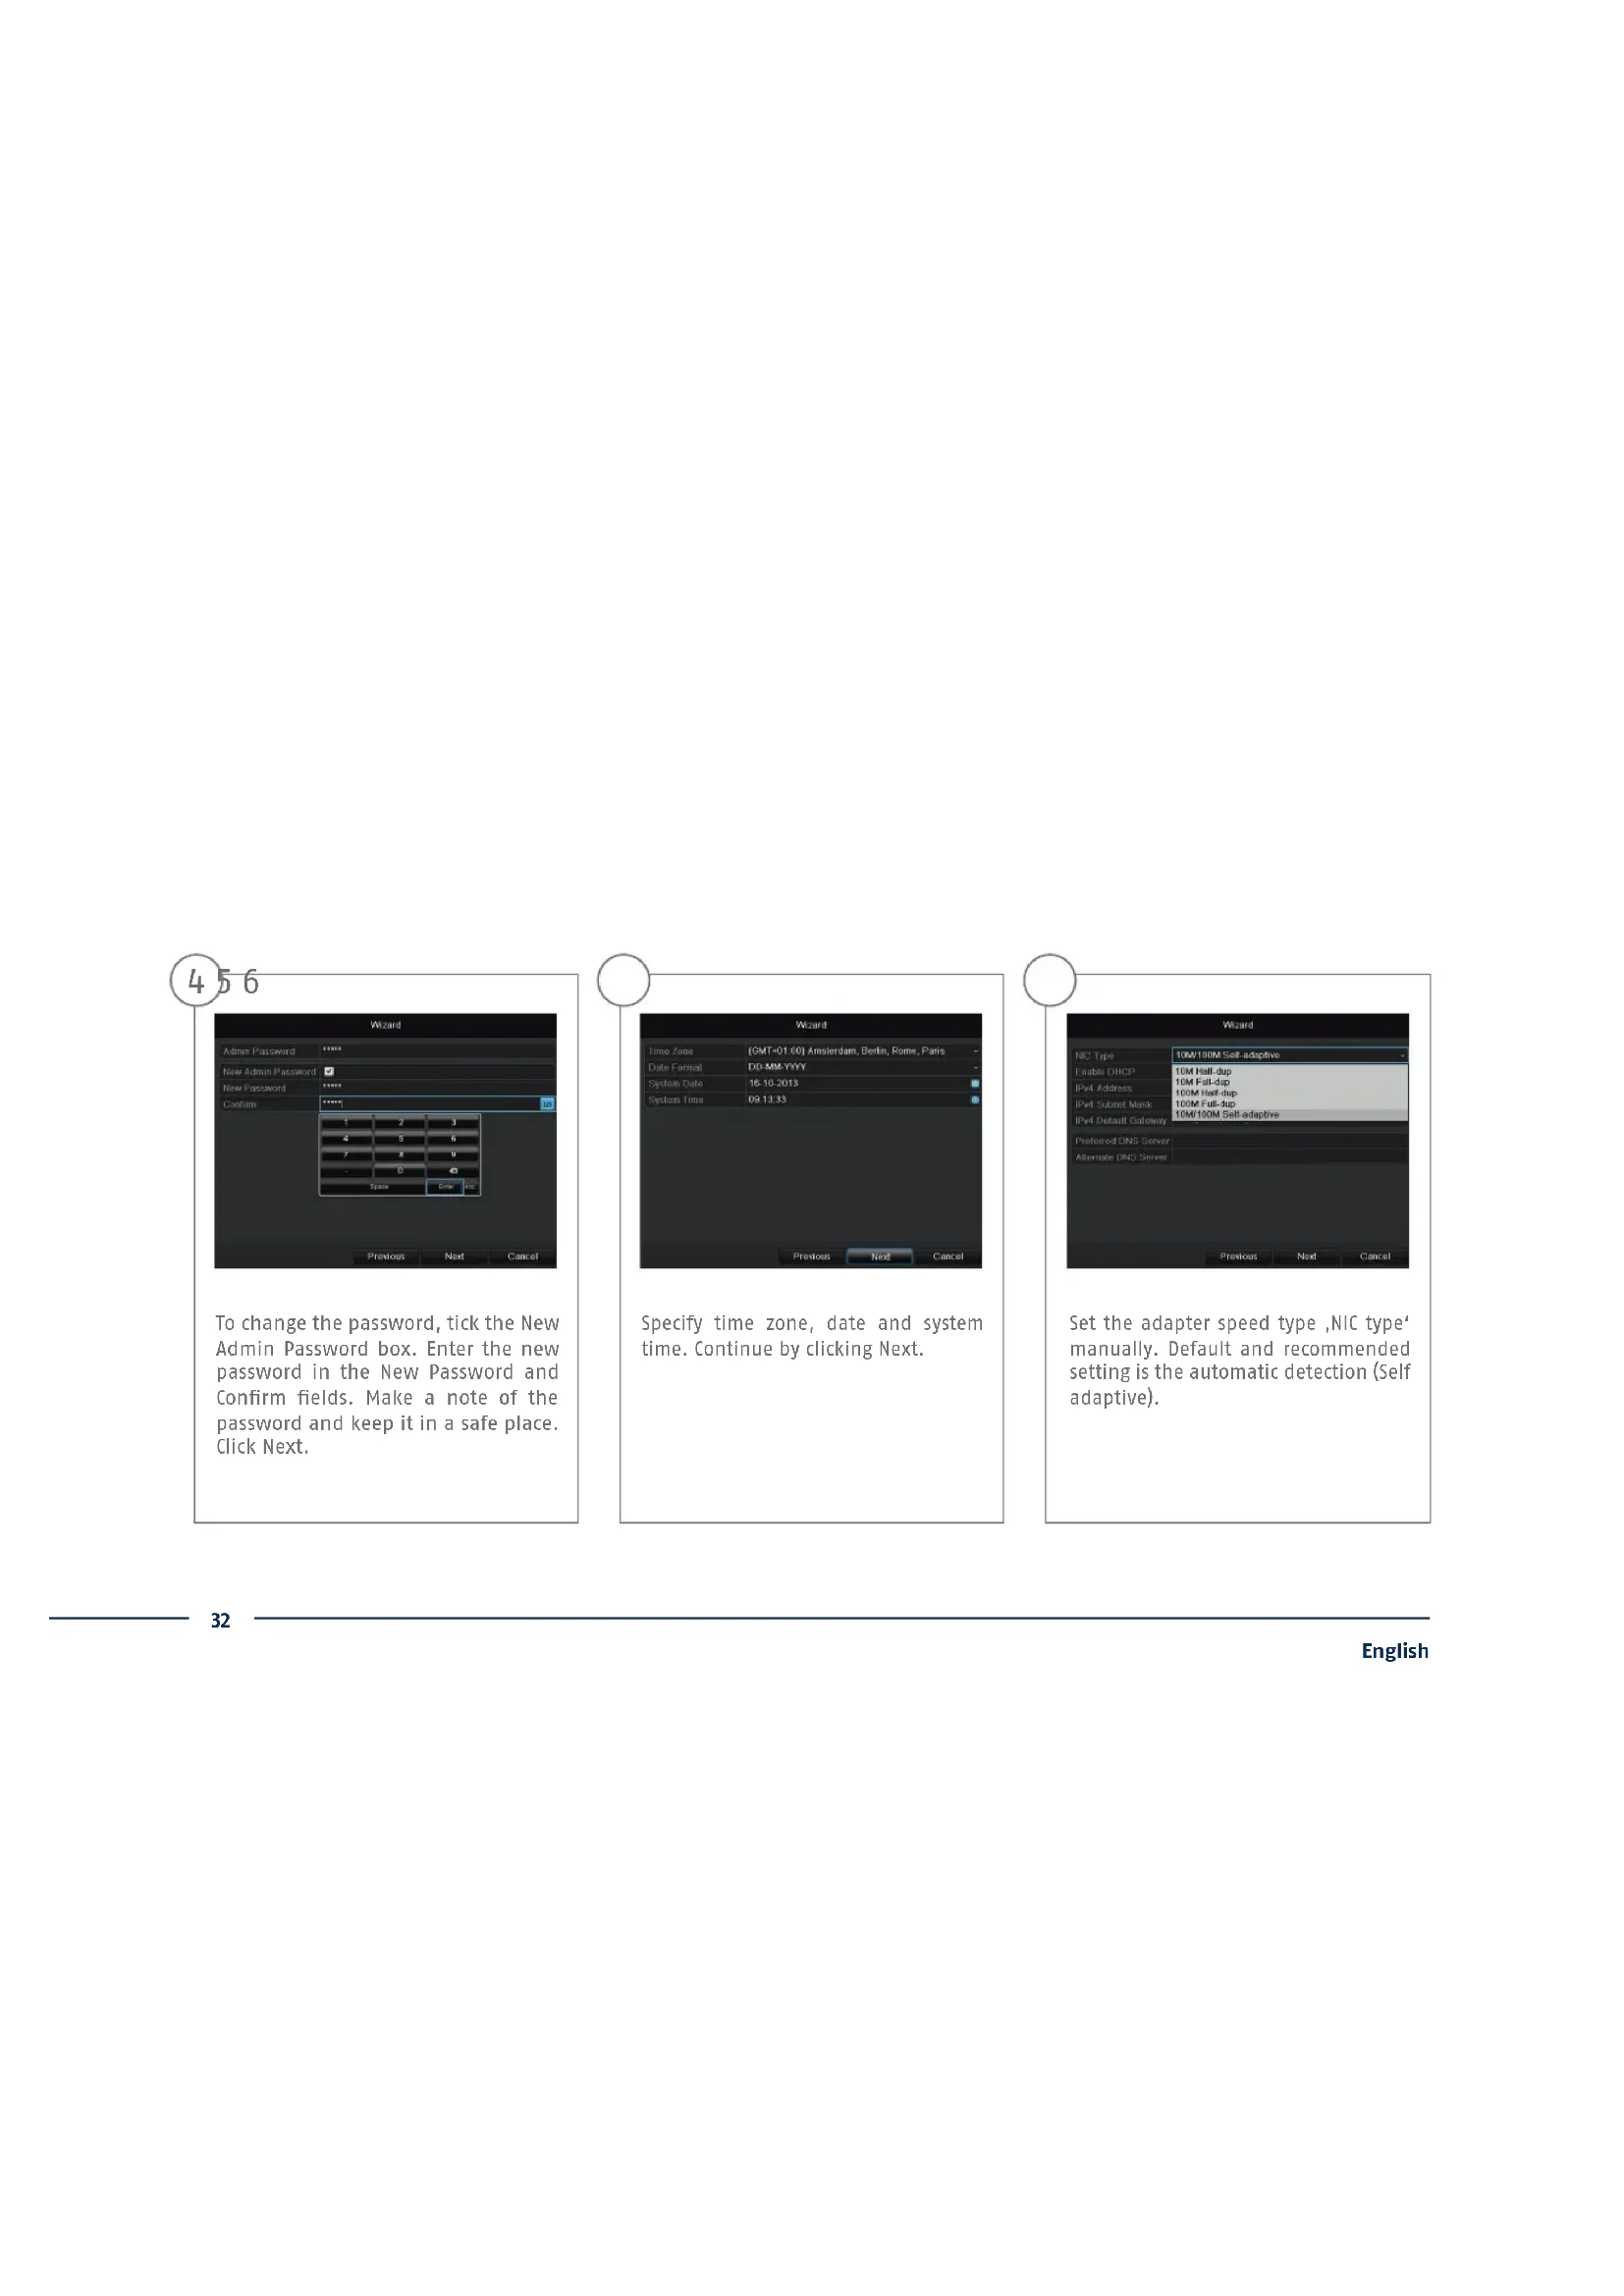
456
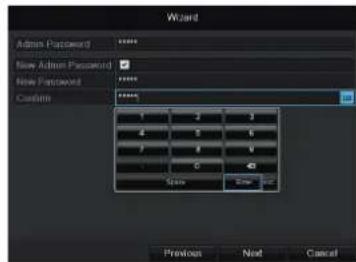
To change the password, tick the New Admin Password box. Enter the new password in the New Password and Confirm fields. Make a note of the password and keep it in a safe place. Click Next.
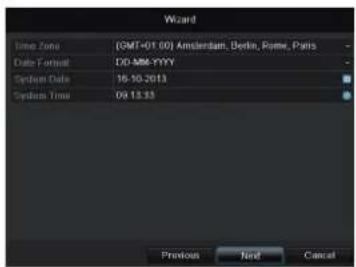
Specify time zone, date and system time. Continue by clicking Next.
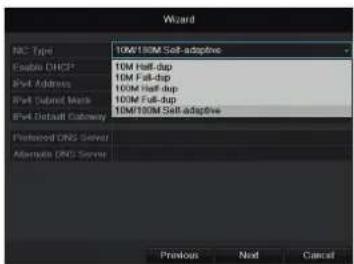
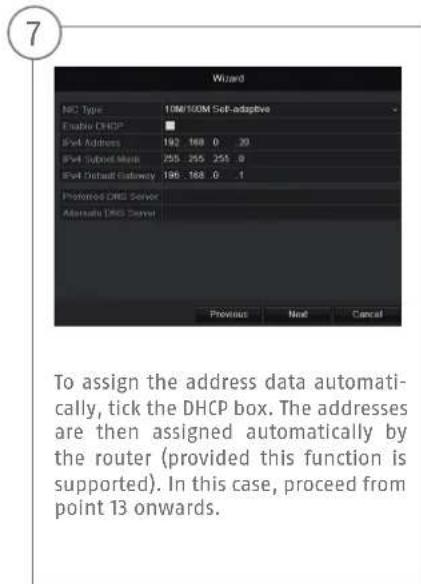
Set the adapter speed type, NIC type manually. Default and recommended setting is the automatic detection (Self adaptive).

10 11-12
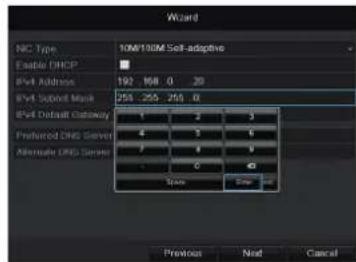
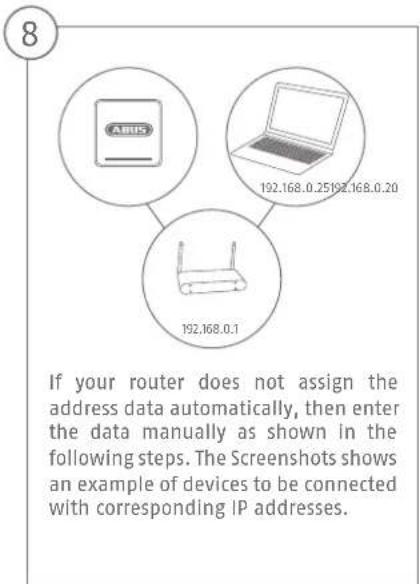
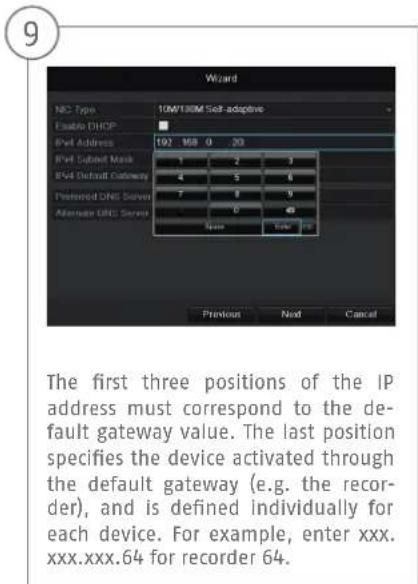
The Subnet Mask is a network segment where IP addresses with identical network addresses are used. The standard value here is usually 255.255.255.0. To determine the value for the IPv4 Default Gateway, use one of the computers connected to the network with Windows.
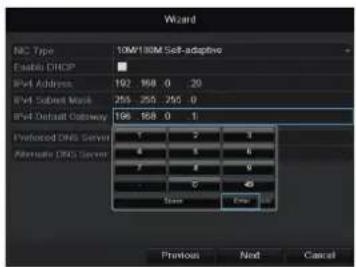
Call up "Run" in the start menu. Enter "cmd" in the new window, then "ipconfig" in the prompt which follows. Enter the default gateway value in the recorder screen.
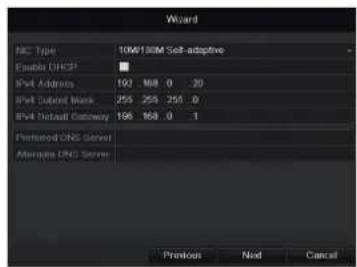
The DNS Server translates an Internet address into an IP address. Enter the default gateway value under Preferred DNS Server.

13 14 15
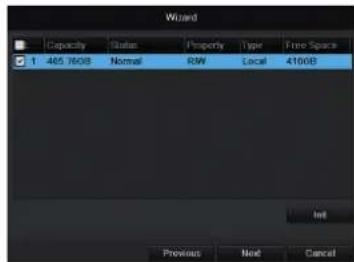
All hard drives which are to be used for recording must be initialized beforehand. To initialise the hard drives, tick the corresponding drive.
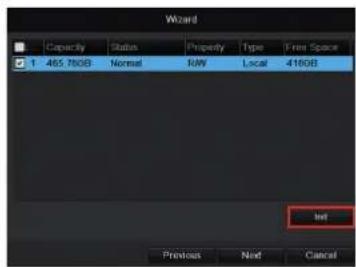
Click Init, then confirm the successful initialisation with OK. Exit the screen by pressing OK, then go to the next screen by pressing Next.
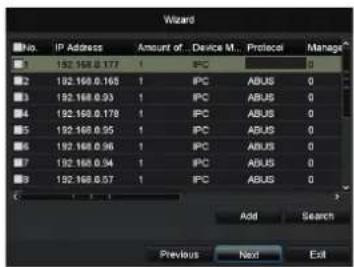
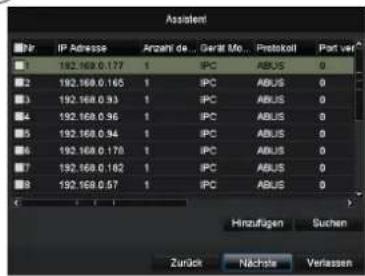
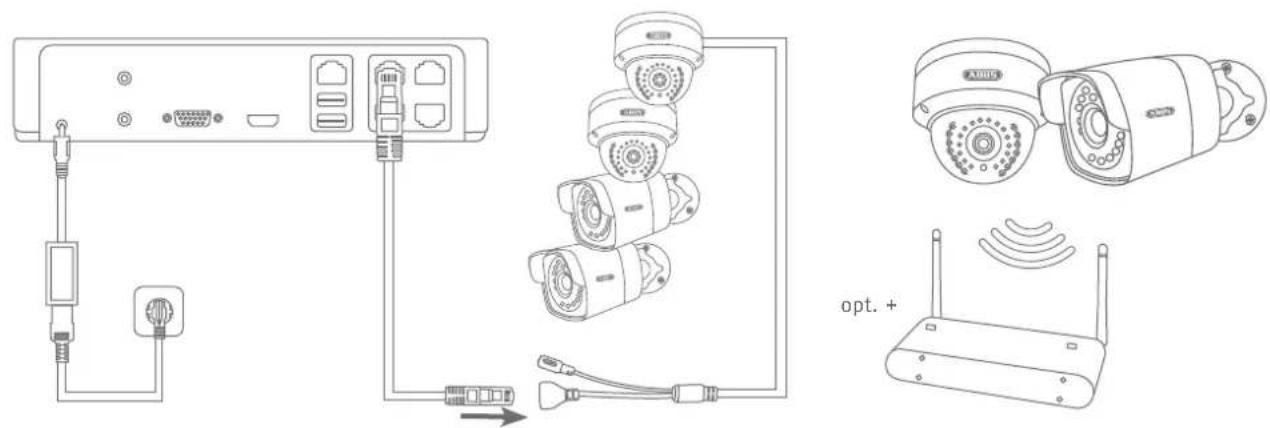
Click on Search to look for available cameras in the network.
16 17 18

You will find all the compatible network cameras below. Tick the checkbox of the cameras you wish to use and click on Add. Go to the next screen with "Next".
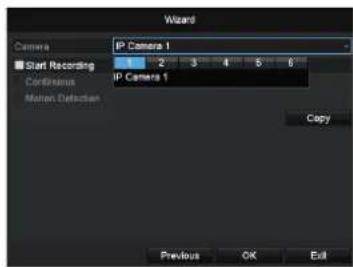
Chose the channel which shall be configured at Camera. Please note that you still have to configure the arming schedules in the recorder menu. For further information please read the user manual.
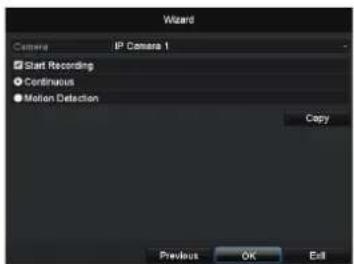
Please click in the checkbox Start Recording to activate the record. Choose between a durable record (Normal) or a record with motion detection (Motion Detection).

1920
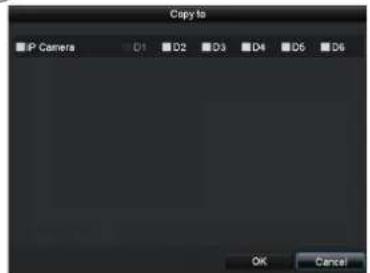
For copying these settings to other camera channels please click on Copy. Click in the checkbox of the camera channels you want to transfer the settings to and click on OK to activate these settings.
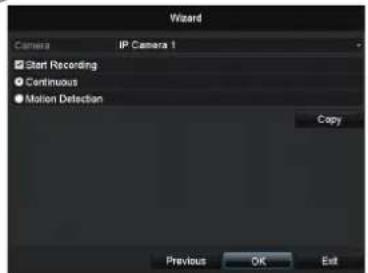
Click on OK to finish the initial set-up.
Hardware installation


Chere cliente, cher client.
Hardwareinstallation