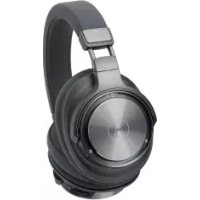
ATHDSR7BT - Earphones AUDIO TECHNICA - Free user manual and instructions
Find the device manual for free ATHDSR7BT AUDIO TECHNICA in PDF.
| Product type | Wireless headphone |
| Brand | AUDIO TECHNICA |
| Model | ATHDSR7BT |
| Weight | 300 g |
| Power supply | Rechargeable lithium-polymer battery (LiPo) 3.7 V DC |
| Playback time | Approximately 15 hours |
| Charging time | Approximately 4 hours |
| Transducer type | 45 mm closed dynamic |
| Frequency response | 5 to 40,000 Hz |
| Impedance | 35 ohms |
| Sensitivity | 100 dB/mW |
| Microphone | Electret condenser, omnidirectional |
| Bluetooth | Version 4.2, profiles A2DP/AVRCP/HFP/HSP, range ~10 m |
| Supported audio codecs | aptX HD, aptX, AAC, SBC |
| Main functions | Play/pause, track change, volume adjustment, hands-free calls, voice command, NFC |
| Wired connectivity | USB (Micro-B) for charging and PC audio (up to 96 kHz/24 bits) |
| Maintenance and cleaning | Wipe with a dry cloth; do not use alcohol or solvents |
| Safety instructions | Do not use near medical equipment; avoid prolonged listening at high volume |
| Available spare parts | Ear pads, USB cable (sold separately) |
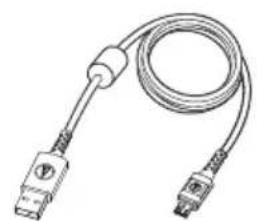
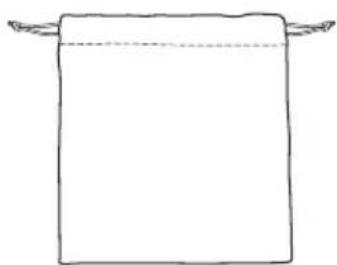
| Included accessories | USB cable (2.0 m), protective pouch |
Frequently Asked Questions - ATHDSR7BT AUDIO TECHNICA
User questions about ATHDSR7BT AUDIO TECHNICA
0 question about this device. Answer the ones you know or ask your own.
Ask a new question about this device
Download the instructions for your Earphones in PDF format for free! Find your manual ATHDSR7BT - AUDIO TECHNICA and take your electronic device back in hand. On this page are published all the documents necessary for the use of your device. ATHDSR7BT by AUDIO TECHNICA.
USER MANUAL ATHDSR7BT AUDIO TECHNICA
natural_image
Simple geometric diagram of a triangle inscribed in a circle (no text or symbols)
natural_image
Line drawing of a pair of outdoor headphones (no text or symbols)ATH-DSR7BT
取扱説明書
ワイヤレスヘッドホン
User Manual
Wireless Headphones
natural_image
Line drawing of a coiled cable with two connectors (no text or symbols)
natural_image
Simple line drawing of a rectangular object with two curved lines above it, no text or symbols present.- 専用USBコード (2.0m)
- ポーチ
充電のしかた
natural_image
Line drawing of a banana-shaped object with three small inset compartments and three diamond-shaped holes (no text or symbols)text_image
Diagram showing a device connected to an ear with a smartphone, labeled with 'N' and 'L' indicating components.接続を解除する
text_image
Diagram of a car front panel with labeled buttons and directional arrows indicating traffic or movementボリュームコント
Thank you for purchasing this Audio-Technica product.
Before using the product, read through this user manual to ensure that you will use the product correctly.
Please keep this manual for future reference.
Safety precautions
Cautions for the product
- Do not use the product near medical equipment. Radio waves may affect cardiac pacemakers and medical electronic equipment. Do not use the product inside medical facilities.
- When using the product in aircraft, follow airline instructions.
- Do not use the product near automatic control devices such as automatic doors and fire alarms. Radio waves may affect electronic equipment and cause accidents due to malfunction.
- Do not disassemble, modify or attempt to repair the product to avoid electric shock, malfunction or fire.
-
Do not subject the product to strong impact to avoid electric shock, malfunction or fire.
-
Do not handle the product with wet hands to avoid electric shock or injury.
- Disconnect the product from a device if the product begins to malfunction, producing smoke, odor, heat, unwanted noise or showing other signs of damage. In such a case, contact your local Audio-Technica dealer.
- Do not allow the product to get wet to avoid electric shock or malfunction.
- Do not put foreign matter such as combustible materials, metal, or liquid in the product.
- Do not cover the product with a cloth to avoid fire or injury by overheating.
-
Follow applicable laws regarding mobile phone and headphone use if using headphones while driving.
-
Do not use the product in places where the inability to hear ambient sound presents a serious risk (such as at railroad crossings, train stations, and construction sites).
- To prevent damage to your hearing, do not raise the volume too high. Listening to loud sound for an extended period may cause temporary or permanent hearing loss.
- Discontinue use if skin irritation results from direct contact with the product.
- Be careful to avoid pinching yourself between the housing and the arm of product.
Cautions for rechargeable battery
The product is equipped with a rechargeable battery (lithium polymer battery).
- If battery fluid gets into eyes, do not rub them. Rinse thoroughly with clean water such as tap water and consult a doctor immediately.
- If battery fluid leaks, do not touch fluid with bare hands. If fluid remains inside the product, it may cause malfunction. If battery fluid leaks, contact your local Audio-Technica dealer.
- If fluid gets in your mouth, gargle thoroughly with clean water such as tap water and consult a doctor immediately.
- If your skin or clothing comes in contact with fluid, immediately wash the affected skin or clothing with water. If you experience skin irritation, consult a doctor.
- Never heat, disassemble or modify the battery, nor dispose of it in a fire to avoid leakage, generation of heat or explosion.
- Do not attempt to pierce with a nail, hit with a hammer or step on the battery to avoid generation of heat, damage or ignition.
- Do not drop the product or subject it to strong impact to avoid leakage, generation of heat or explosion.
- Do not get the battery wet to avoid generation of heat, explosion or ignition.
- Do not use, leave or store the battery in the following places: - Area exposed to direct sunlight or high temperatures and humidity
- Inside of a car under the blazing sun - Near heat sources such as heat registers
There is a risk of leakage, generation of heat, explosion, and decreased performance.
- Charge only with the included USB cable to avoid malfunction or fire.
- After using the device, be sure to switch it off. Leakage often occurs due to battery drain that results from a failure to switch off device.
- The internal rechargeable battery of this product cannot be replaced by the user. The battery may have reached the end of its service life if the usage time becomes significantly shorter even after the battery has been fully charged. If this is the case, the battery needs to be repaired. Contact your local Audio-Technica dealer for repair details.
- When the product is disposed of, the built-in rechargeable battery needs to be discarded properly. Contact your local Audio-Technica dealer to learn how to properly dispose of the battery.
Safety precaution
For customers in the USA FCC Notice
Warning
This device complies with Part 15 of the FCC Rules. Operation is subject to the following two conditions: (1) This device may not cause harmful interference, and (2) this device must accept any interference received, including interference that may cause undesired operation.
Caution
You are cautioned that any changes or modifications not expressly approved in this manual could void your authority to operate this equipment.
Note: This equipment has been tested and found to comply with the limits for a Class B digital device, pursuant to part 15 of the FCC Rules. These limits are designed to provide reasonable protection against harmful interference in a residential installation. This equipment generates, uses and can radiate radio frequency energy and, if not installed and used in accordance with the instructions, may cause harmful interference to radio communications. However, there is no guarantee that interference will not occur in a particular installation. If this equipment does cause harmful interference to radio or television reception, which can be determined by turning the equipment off and on, the user is encouraged to try to correct the interference by one or more of the following measures:
- Reorient or relocate the receiving antenna.
- Increase the separation between the equipment and receiver.
- Connect the equipment into an outlet on a circuit different from that to which the receiver is connected.
- Consult the dealer or an experienced radio/TV technician for help.
RF Exposure Statement
This transmitter must not be co-located or operated in conjunction with any other antenna or transmitter used in other systems. This device complies with FCC radiation exposure limits set forth for an uncontrolled environment and meets the FCC radio frequency (RF) Exposure Guidelines. This equipment has very low levels of RF energy that is deemed to comply without testing of specific absorption rate (SAR).
For customers in Canada IC statement
CAN ICES-3 (B)/NMB-3(B)
This device complies with INDUSTRY CANADA R.S.S. 247. Operation is subject to the following conditions: (1) This device may not cause harmful interference and (2) this device must accept any interference received, including interference which may cause undesired operation.
Under Industry Canada regulations, this radio transmitter may only operate using an antenna of a type and maximum (or lesser) gain approved for the transmitter by Industry Canada. To reduce potential radio interference to other users, the antenna type and its gain should be so chosen that the equivalent isotropically radiated power (e.i.r.p.) is not more than that necessary for successful communication.
This device complies with RSS-102 radiation exposure limits set forth for an uncontrolled environment.
Notes on use
- Be sure to read the connected device's user manual before use.
- Audio-Technica will not be liable in any way for any loss of data in the unlikely event that such losses should occur while using the product.
- On public transportation or in other public places, keep the volume low so as not to disturb other people.
- Minimize the volume on your device before connecting the product.
- When using the product in a dry environment, you may feel a tingling sensation in your ears. This is caused by static electricity accumulated on your body, not by product malfunction.
- Do not subject the product to strong impact.
- Do not store the product in direct sunlight, near heating devices, or in hot, humid, or dusty places. Additionally, do not allow the product to get wet.
- When the product is used for a long time, the product may become discolored due to ultraviolet light (especially direct sunlight) and wear.
- Do not expose the product to excessive stress or pressure, which could result in deformation.
- Use only the included cable. Performance cannot be guaranteed when using another cable.
- Make sure to hold the plug when connecting and disconnecting the included cable. The included cable may become severed or an accident may occur if you pull on the cable itself.
- When you are not using the included cable, make sure to disconnect it from the product.
- When you are not using the product, store it in the included case/pouch.
- Do not apply excessive stress to the plug of the included cable when connecting or using the included cable. There is a risk of damage to the computer and the plug.
-
Make sure to turn off the computer before connecting or disconnecting the included cable, otherwise there is a risk of computer malfunction.
-
If the computer does not function properly or if any other problem is experienced while the product is connected to the computer, turn off the computer and reconnect the product. If the problem persists, please contact your local Audio-Technica dealer. Continuing to use the computer could cause damage to the computer.
- The product does not support audio that is protected by DRM (digital rights management), such as digital terrestrial broadcasts.
- This product can be used to talk on the phone only when using a mobile telephone network. Support for telephony apps that use a mobile data network is not guaranteed.
- If you use the product near an electronic device or transmitter (such as a mobile phone), noise may be heard. In this case, move the product away from the electronic device or transmitter.
- If you use the product near a TV or radio antenna, noise may be seen or heard in the television or radio signal. In this case, move the product away from the TV or radio antenna.
- To protect the built-in rechargeable battery, charge it at least once every 6 months. If too much time passes between charges, the life of the rechargeable battery may be reduced, or the rechargeable battery may no longer be able to be charged.
- Use a finger to operate the tap controller. Tapping or pressing the tap controller with a pen, pencil, or other pointed object may not produce the desired result, and may scratch or damage the controller.
- Do not tap the tap controller with the tip of a fingernail. There is a risk of cracking the fingernail and injury.
- When tapping the tap controller repeatedly, lift your finger a few millimeters away from the tap controller for each tap. If you do not lift your finger away from the tap controller between taps, the taps may not be recognized.
- If the tap controller does not respond to your taps or responds differently than expected, make sure another finger, a part of your hand, or a piece of clothing is not touching the tap controller. Additionally, the tap controller may not respond as expected when you are wearing gloves, when your fingertips are dry, or when the surface of the tap controller is dirty.
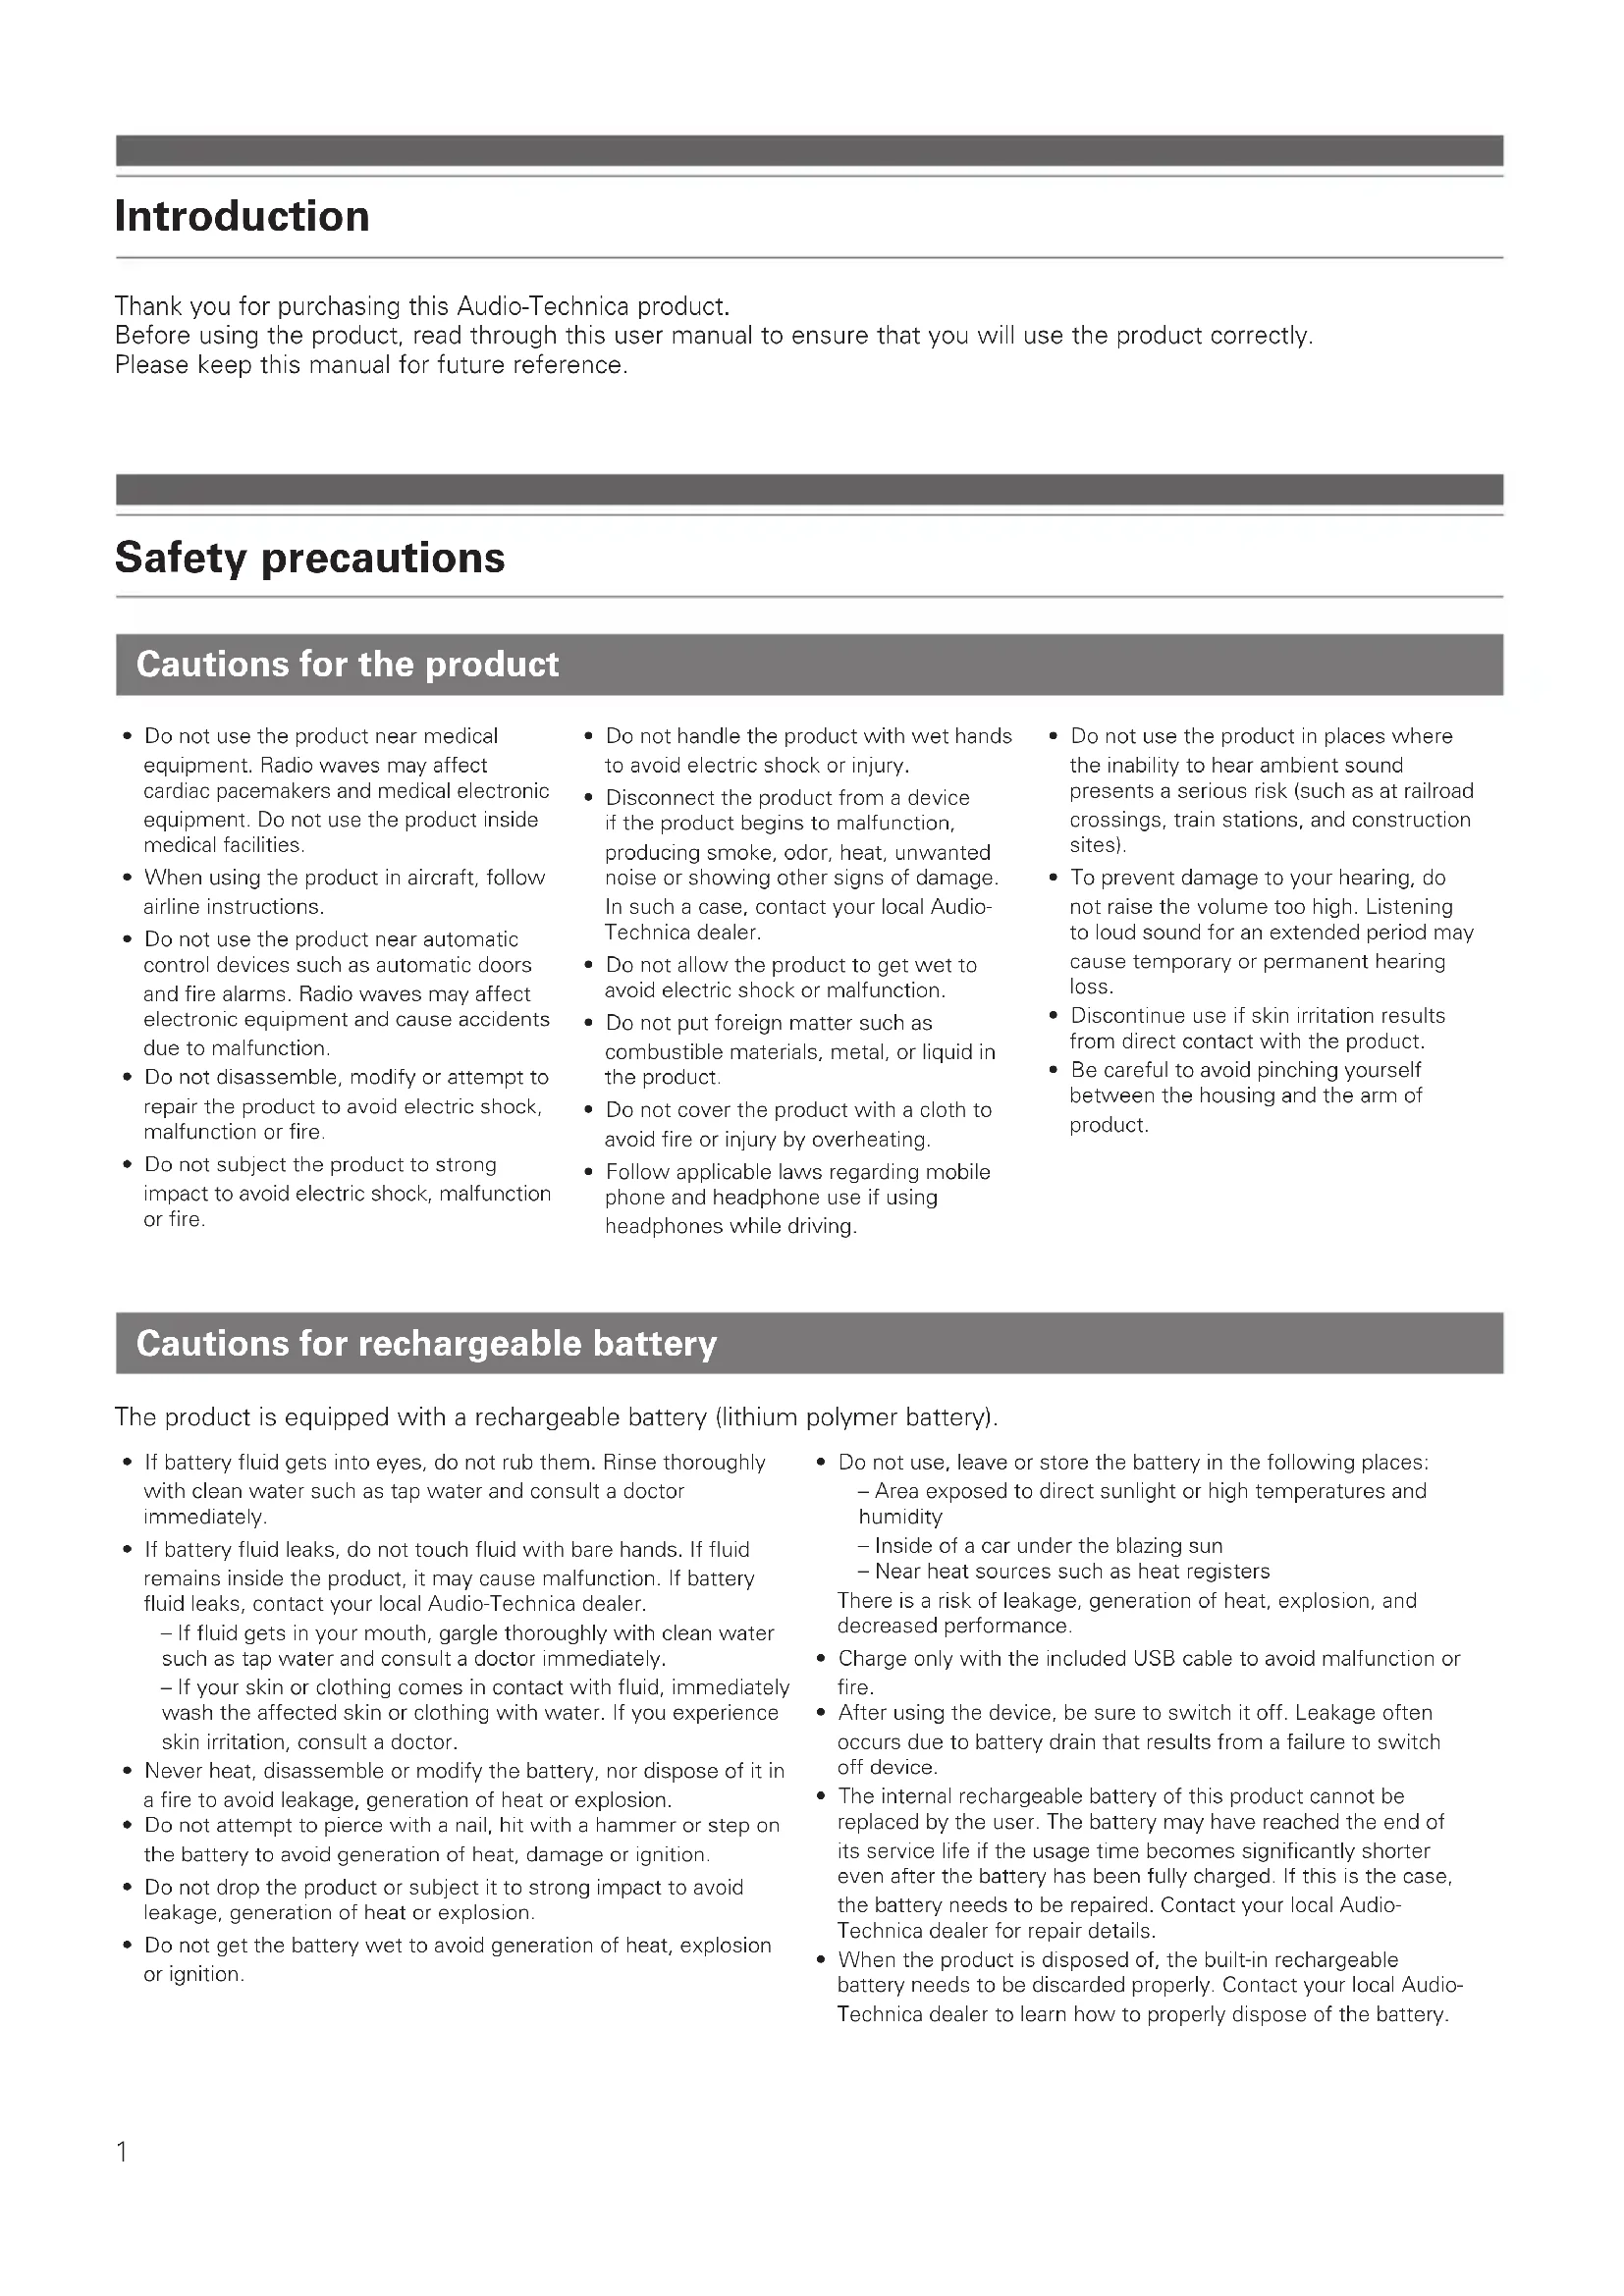
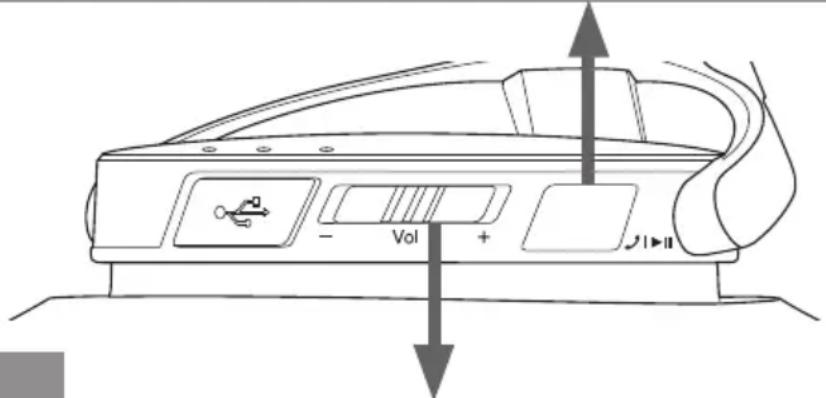
Part names and functions
N-Mark
text_image
Shows the location for detecting NFC. Slider Headband Left/right (L/R) indicator Reset button Use this button to reset the product if it is malfunctioning. Indicator lamps Displays the operating status and battery level of the product. Housing Power switch Turns the power on and off. Earpad Arm Volume controller Adjusts the volume when you slide it toward + and -. USB connector jack* Allows you to charge the product by connecting the product to a computer using the included USB cable. Additionally, it allows you to play audio when connected to a computer. *It is equipped with a cover. Tap controller Allows you to play or pause music and videos, and perform phone call operations.Included accessories
natural_image
Line drawing of a USB cable with connector port (no text or symbols)• USB cable (2.0 m [6.5'])
natural_image
Simple line drawing of a rectangular object with two curved handles above it (no text or symbols)- Pouch
Charging the battery
- Fully charge the battery when using for the first time.
- When the rechargeable battery is running low, the product will sound 2 sets of 2 beeps through the headphones, and an indicator lamp will flash in red. When these beeps sound, charge the battery.
- It takes about 4 hours to charge the battery fully. (This time may vary depending on usage conditions.)
text_image
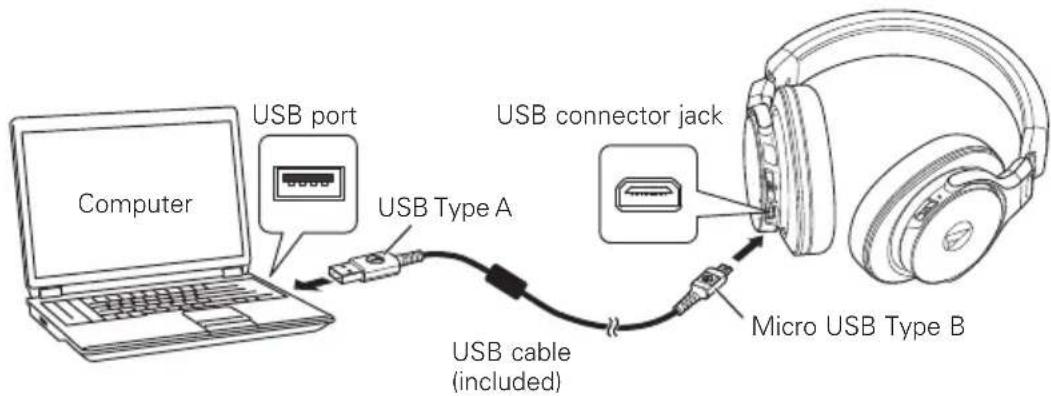
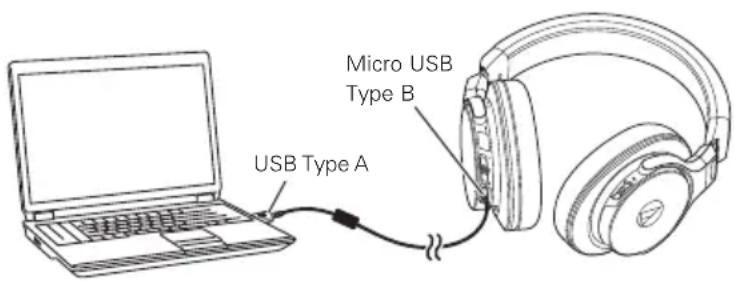
Computer USB port USB Type A USB connector jack Micro USB Type B USB cable (included)-
Open the USB connector jack cover.
-
Connect the included USB cable (micro USB Type B side) to the USB connector jack.
- The included USB cable is designed for exclusive use with the product. The operation of this cable with other products cannot be guaranteed.
- Connect the included USB cable (USB Type A side) to the computer to start charging. During charging, the 3 indicator lamps light as follows to indicate the battery level.
| Battery charge status | Indicator lamps Red White Off | |
| Lamp display Light pattern | ||
| Less than 30% | Flashes | |
| 30 to 60% | Only center lamp flashes | |
| 60 to 100% | Only left lamp flashes | |
| Charging complete | Lights | |
| Charging error | Flashes quickly | |
natural_image
Line drawing of a curved, segmented object with three diamond-shaped markers on its surface (no text or symbols)- Charging errors are caused by battery malfunction. Disconnect the product from the computer and then contact your local Audio-Technica dealer.
- When charging is complete, disconnect the included USB cable (USB Type A side) from the computer.
- Disconnect the included USB cable (micro USB Type B side) from the USB connector jack and close the cover firmly.
Connecting via Bluetooth® wireless technology
About pairing
To connect the product to a Bluetooth device, the product needs to pair (register) with the device. Once they are paired, you do not need to pair them again.
However, you will need to pair again in the following cases:
- If the product is deleted from the Bluetooth device's connection history.
- If the product is sent out for repair.
- If the product is paired with 9 devices or more.
(The product can be paired with up to 8 devices. When you pair with a new device after pairing with 8 devices, pairing information for the device with the oldest connection date will be overwritten by the information for the new device.)
Pairing a Bluetooth device
- Read the user manual for the Bluetooth device.
- Place the Bluetooth device within 1 m (3.3') of the product to perform pairing correctly.
-
To confirm the progress of the pairing process, wear the product while performing this procedure and listen for sound.
-
Starting with the product turned off, slide the power switch to the "ON" position.
-
For information about how the indicator lamps indicate pairing (searching for devices), refer to "Indicator lamp display" (p.12).
-
The product beeps when pairing begins.
-
Use your Bluetooth device to begin the pairing process and search for the product.
When your Bluetooth device finds the product, "ATH-DSR7BT" will be displayed on the device.
- For information about using your Bluetooth device, refer to the device's user manual.
-
Select "ATH-DSR7BT" to pair the product and your Bluetooth device.
-
Some devices may ask for a passkey. In this case, enter "0000". The passkey may also be called a passcode, PIN code, PIN number, or password.
- The product beeps when pairing is complete.

text_image
Settings Bluetooth Bluetooth MY DEVICES ATH-DSR7BT SelectConnecting via Bluetooth wireless technology
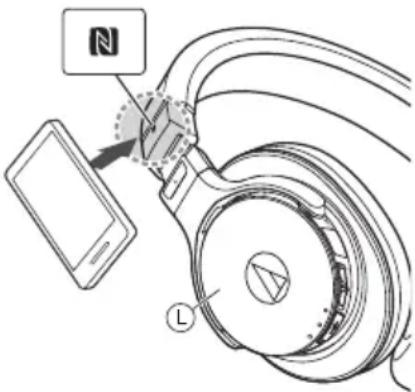
Using NFC when pairing
NFC (Near Field Communication) is a technology that allows for short-range wireless communication between various devices, such as mobile phones and IC tags. It allows two devices to communicate when you simply touch them to each other. You can use NFC to pair your Bluetooth device with this product.
Compatible devices: NFC-compatible Bluetooth devices
Compatible OS: Android
Pairing an NFC-compatible Bluetooth device
To confirm the progress of the pairing process, wear the product while performing this procedure and listen for sound.
- Turn on your NFC-compatible device's NFC feature.
- Refer to your NFC-compatible device's user manual as necessary.
- Starting with the product turned off, slide the power switch to the "ON" position.
- Touch your NFC-compatible device to the N-Mark on the product (see figure at right), then use your NFC-compatible device to complete the pairing process.
- For the location of your NFC-compatible device's NFC antenna, or how to end the connection between the product and your devices, refer to the device's user manual.
- The product beeps when pairing is complete.
text_image
Diagram showing a device connected to an ear with a smartphone, labeled with 'N' and 'L' indicating components.Disconnecting a device
Touch your NFC-compatible Bluetooth device to the part just above the N-Mark on the product again to disconnect the product from your device.
Using the product
The product can use Bluetooth wireless technology to connect to your device and play music, receive phone calls, etc. Use the product for whichever of these purposes suits your needs.
Note that Audio-Technica cannot guarantee compatible operation with connected Bluetooth devices.
Power supply
Slide the power switch to the "ON" or "OFF" position.
| Power supply | Power switch operation | Indicator lamps Red White Off | ||
| Lamp display Battery charge status Light pattern | ||||
| ON* | 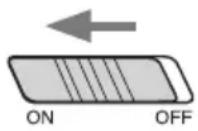 | Battery level low Flashes | every 5 seconds | |
| Less than 30% | All 3 indicator lamps light for 3 seconds, then lamps light to indicate that the product is "pairing". | |||
| 30 to 60% | ||||
| 60 to 100% | ||||
| OFF* |  | While the 3 indicator lamps flash, each turns off in order from left to right. | ||
* If you are wearing the product, you will hear a beep to indicate when the product has turned on and off.
Wearing the product
Place the product with the side marked "L" over your left ear and "R" over your right ear, and adjust the headband length by sliding the adjustable slider so that the earpads cover your ears completely.

text_image
SliderUsing the product
Listening to audio
- To connect for the first time, pair the product and your device by using either the Bluetooth wireless technology or NFC. If you have already paired the product and your Bluetooth device, turn on the product and turn on your device's Bluetooth connection.
- Use your Bluetooth device to start playback, referring to the device's user manual as necessary.
You can perform the following operations using the product.
Tap controller
| Tap (1 short press) Plays or pauses music and video playback.* | |
| Double-tap (2 short presses) | Displays battery level. The indicator lamps light the same way as when the power is turned on.(p.8) |
| Long tap (1 long press, lasting about 4 seconds) | Depending on the connected device, activates the device's speech recognition feature (such as Siri for compatible iOS devices). |
text_image
Diagram of a vehicle air vent system with labeled ports and directional arrows indicating flow or movementVolume controller
 | Short slide Increases the volume by 1 level.* | 2 |
| Long slide (about 2 seconds) Plays the next track.* | 1 | |
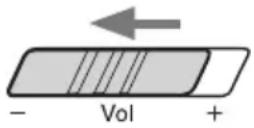 | Short slide Decreases the volume by 1 level.* | 2 |
| Long slide (about 2 seconds) Plays the previous track.* | 1 |
*1 Some controls may not be available for music and video playback on some smartphones.
*2 A beep is heard each time you slide the volume control. A low beep is heard when the volume is at the maximum or minimum level.
- The volume control of some devices may not work well together with the product.
Using the product
Compatible codecs
The product is compatible with Qualcomm® aptX™ HD audio (hereafter "aptX HD"), Qualcomm® aptX™ audio (hereafter "aptX"), AAC, and SBC codecs. The appropriate codec will be determined automatically by the Bluetooth device during the pairing process.
The indicator lamps also light to indicate the codec used for audio playback.
| Playback codec | Indicator lamps White Blue Purple Off | |
| Lamp display Light pattern | ||
| aptX HD | 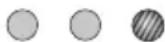 | Flashes every 3 seconds |
| aptX |  | |
| AAC |  | |
| SBC |  | |
If sound cuts out while listening to music using the aptX HD codec, you may be able to remedy the problem by switching to a mode incompatible with the aptX HD codec. The codec (aptX, AAC, SBC) used after switching is different depending on the connected device.
- Switch to a mode incompatible with the aptX HD codec:
- When the power is off, slide the power switch toward "ON" while holding the volume control slid toward "--".
- Display the battery level by sliding the power switch to "ON" or double-tapping the tap controller.
- Confirm that the right indicator lamp lights in blue.
- Switch to the normal mode (the mode compatible with the aptX HD codec):
- When the power is off, slide the power switch toward "ON" while holding the volume control slid toward "+".
- Display the battery level by sliding the power switch to "ON" or double-tapping the tap controller.
- Confirm that the right indicator lamp lights in white (normal indicator lamp display).
Using the product
Talking on the phone
- If your Bluetooth device supports telephone features, you can use the product to talk on the phone.
- When your Bluetooth device receives a phone call, the product sounds a ring tone.
- If a call is received while you are listening to music, music playback is paused. When you finish the call, music playback resumes. *1
| When | Operation Function | |
| Receiving a call | Tap the tap controller Answers the call. | |
| Long tap (about 2 seconds) the tap controller | Rejects the call. | |
| Talking on a call | Double-tap the tap controller Ends the call. | |
| Long tap (about 2 seconds) the tap controller | Each time you long tap (about 2 seconds) the tap controller, you switch the call to your Bluetooth device or to the product. *2 | |
| Slide the volume controller Adjusts the volume (+ or -) of the call. | ||
*1 Depending on your Bluetooth device, music playback may not resume.
*2 When you hear a beep, release the tap controller.
- The phone call controls explained above may not be available on some smartphones.
Auto power off function
The product automatically turns off after 5 minutes of not being connected to a device that has its power turned on.
Listening to music while using a USB connection
You can connect the product to a computer and listen to music at up to 96 kHz/24 bit from a music player program while charging the product.
- Read the user manual for the computer.
-
Even if the computer meets the requirements listed in "Specifications for computer connection" (p.15), these features may not function properly depending on the computer's hardware and software.
-
Connect the included USB cable (micro USB Type B side) to the product's USB connector jack.
- Connect the included USB cable (USB Type A side) to the computer's USB port.
- Turn on the computer.
- Configure the computer as necessary.
- Refer to the included "Setup Manual (Computer Settings)" and configure the connected computer according to its operating system.
- Refer to "Wearing the product" (p.8) and place the product on your head.
-
Use your computer's music player program to start playing music.
-
Adjust the volume as needed using the product, your computer, or your music player program.
- The product's power switch and tap controller are disabled while the product is connected to a computer.
- The product cannot be used as a headset while it is connected to a computer.
text_image
Micro USB Type B USB Type AUsing the product
Reset function
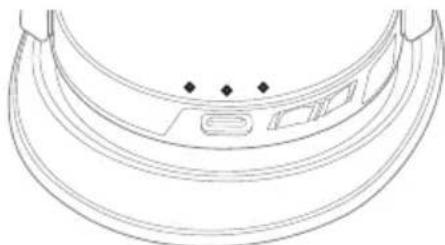
If the product does not operate properly or if other malfunctions occur, pressing the reset button should resolve any problem you are experiencing. If the problem persists, please contact your local Audio-Technica dealer. Pressing the reset button does not change any of your settings (pairing information, volume setting, etc.).
- Do not use excessively hard metal tools or sharply pointed tools, nor press the reset button with excessive force. Doing so may result in malfunction.

text_image
PressIndicator lamp display
The product's indicator lamps indicate the product's status as explained below. For information about how the indicator lamps indicate the battery (charging) status, see "Charging the battery" (p.5). For information about how the indicator lamps indicate the codec, see "Compatible codecs" (p.10) in "Listening to audio".
| Status | Indicator lamps White Blue Off | |
| Lamp display Light pattern | ||
| Pairing (searching for devices) | Each lamp turns on in order from right to left → All lamps turn off → Each lamp turns on in order from left to right → All lamps turn off → Pattern repeats | |
| Waiting for connection | Flashes every 3 seconds | |
| Connecting | Each lamp turns on in order from right to left → All lamps turn off for 3 seconds → Each lamp turns on in order from left to right → All lamps turn off for 3 seconds → Pattern repeats | |
| Receiving a call | Flashes | |
| Talking on a call | Flashes every 3 seconds | |
Cleaning
Get into the habit of regularly cleaning the product to ensure that it will last for a long time. Do not use alcohol, paint thinners or other solvents for cleaning purposes.
- To clean, wipe with a dry cloth.
- Wipe away perspiration and any other dirt from the cable with a dry cloth immediately after use. Failure to clean the cable may cause it to deteriorate and harden over time, resulting in malfunction.
- Wipe the cable's USB plug with a dry cloth if dirty. Failure to clean the USB plug may cause the sound to cut out and may cause noise.
-
Wipe the earpads and headband with a dry cloth if dirty. Perspiration or water on the earpads or headband may cause discoloration. Wipe with a dry cloth and allow to dry in the shade.
-
If the product will not be used for an extended period of time, store it in a well-ventilated place free from high temperatures and humidity.
- Earpads are consumable items. They will deteriorate over time due to use and storage, so replace them when necessary. For information about replacing earpads or other parts, or for information about other serviceable parts, contact your local Audio-Technica dealer.
Troubleshooting
Problem Solution
| Power is not supplied. • Charge the product. | |
| Unable to pair. • Confirm that the | Bluetooth device communicates using Ver. 2.1+EDR or higher.Place the product and the Bluetooth device within 1 m (3.3') of each other.Set the profiles for the Bluetooth device. For procedures on how to set profiles, refer to the Bluetooth device's user manual. |
| No sound is heard / Sound is faint. | Turn on the power of the product and the Bluetooth device.Turn up the volume of the product and the Bluetooth device.If the Bluetooth device is set to the HFP/HSP connection, switch to the A2DP connection.Remove obstacles between the product and the Bluetooth device and place them closer together.Switch the output of the Bluetooth device to the Bluetooth connection. |
| No sound is heard during USB connection / Sound is faint. | Make sure the computer's audio output settings are correct.Turn up the volume of the product, your computer, or your music player program. |
| Sound is distorted / Noise is heard / Sound cuts out. | Turn down the volume of the product and the Bluetooth device.Keep microwaves and other devices such as wireless routers away from the product.Keep TVs, radios, and devices with built-in tuners away from the product. These devices can also be affected by the product.Turn off the equalizer settings of the Bluetooth device.Remove obstacles between the product and the Bluetooth device and place them closer together. |
| Sound cuts out when using the aptX codec | Adjust your Bluetooth device's settings to disable the aptX codec. |
| Cannot hear the voice of the caller / Voice of the caller is too quiet. | Turn on the power of the product and the Bluetooth device.Turn up the volume of the product and the Bluetooth device.If the product is set to the A2DP connection, switch to the HFP/HSP connection.Switch the output of the Bluetooth device to the Bluetooth connection. |
| Unable to pair using NFC. • Make sure your device is an NFC-compatible Bluetooth device.Turn on your NFC-compatible Bluetooth device's NFC feature.Touch the product to the correct location of your NFC-compatible Bluetooth device.Depending on the NFC-compatible Bluetooth device you are using, the NFC sensitivity may not be strong enough to connect to the product with just one touch. In this case, refer to the NFC-compatible Bluetooth device's user manual.Depending on the NFC-compatible Bluetooth device you are using, it may take some time to communicate via NFC. Keep the product and your NFC-compatible Bluetooth device touching until the connection is completed.Remove your NFC-compatible Bluetooth device from its case so that it can communicate via NFC. | |
| The tap controller is not functioning properly. | Make sure that you are not tapping with your fingernail and that the tip of your finger is not too dry, and then try again. |
| The product cannot be charged. | Make sure the included USB cable is firmly connected and then try again. |
- For details about how to operate your Bluetooth device, refer to the device's user manual.
- If the problem still remains, reset the product. To reset the product, refer to "Reset function" (p.12).
Specifications
Headphones
| Type | Closed-back dynamic |
| Driver | 45 mm |
| Sensitivity | 100 dB/mW |
| Frequency response | 5 to 40,000 Hz |
| Impedance | 35 ohms |
| Input jack | Micro USB Type B |
Microphone
| Type | Electret condenser |
| Polar pattern | Omnidirectional |
| Sensitivity | -44 dB (1 V/Pa, at 1 kHz) |
| Frequency response | 50 to 4,000 Hz |
Specifications for Bluetooth connection
| Communication system | Bluetooth version 4.2 |
| Output | Bluetooth Specification Power Class 21.5 mW EIRP |
| Maximum communication range | Line of sight - approx. 10 m (33') |
| Frequency band | 2.4 GHz (2.402 GHz to 2.480 GHz) |
| Modulation method | FHSS |
| Supported Bluetooth profiles | A2DP, AVRCP, HFP, HSP |
| Supported codecs | Qualcomm® aptXTM HD audio, Qualcomm® aptXTM audio, AAC, SBC |
| Supported content protection method | SCMS-T |
| Supported sample rates | 44.1 kHz, 48 kHz |
| Supported bit rates | 16 bit, 24 bit* |
| Transmission band | 20 to 20,000 Hz |
*When using the aptX HD codec
Specifications for computer connection (operating environment)
| Computer | Built-in USB port that supports USB 2.0 |
| CPU | Intel Core 2 processor running at 2.2 GHz or faster, or an equivalent AMD processor |
| RAM | 2 GB or more for 32-bit OS, 4 GB or more for 64-bit OS |
| Supported operating systems | Windows 7, Windows 8, Windows 8.1, Windows 10, Mac OS X El Capitan (10.11)• Visit our web site for the latest information about the product. |
| Supported sample rates | 44.1 kHz, 48 kHz, 96 kHz |
| Supported bit rates | 16 bit, 24 bit |
| Frequency response | 5 to 40,000 Hz (during 24 bit, 96 kHz playback) |
Specifications
Other
| Power supply | DC 3.7 V lithium polymer battery |
| Charging time | Approx. 4 hours* |
| Operating time | Continuous transmission time (music playback): Approx. 15 hours*Continuous standby time: Approx. 1,000 hours* |
| Weight | Approx. 300 g (10.6 oz) |
| Operating temperature | 5°C to 40°C (41°F to 104°F) |
| Included accessories | • USB cable (2.0 m (6.5'), USB Type A, Micro USB Type B)• Pouch |
| Sold separately | • Earpads• USB cable |
* The above figures depend on operating conditions.
For product improvement, the product is subject to modification without notice.
- The Bluetooth® word mark and logos are owned by Bluetooth SIG, Inc. and any use of such marks by Audio-Technica Corporation is under license. All other trademarks are property of their respective owners.
- "AAC" logo is a trademark of Dolby Laboratories.
- Qualcomm is a trademark of Qualcomm Incorporated, registered in the United States and other countries, used with permission. aptX is a trademark of Qualcomm Technologies International, Ltd., registered in the United States and other countries, used with permission.
- The N-Mark is a trademark or registered trademark of NFC Forum, Inc. in the United States and in other countries.
- Android™ is a trademark of Google Inc.
- iOS is a trademark or registered trademark of Cisco in the U.S. and other countries.
- Siri is a trademark of Apple Inc.
Introduction
natural_image
Line drawing of a flexible network cable with connector ends (no text or symbols)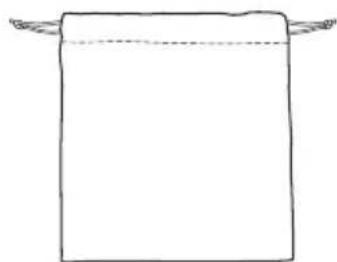
natural_image
Simple line drawing of a rectangular container with handles (no text or symbols)- Câble USB (2,0 m) • Pochette de protection
natural_image
Line drawing of a banana-shaped object with decorative cutouts and four diamond-shaped markers on the surface (no text or symbols)text_image
Diagram showing a device connected to a smartphone, with a labeled component 'L' and a logo 'N' pointing to the device.natural_image
Line drawing of a USB cable with connector port (no text or symbols)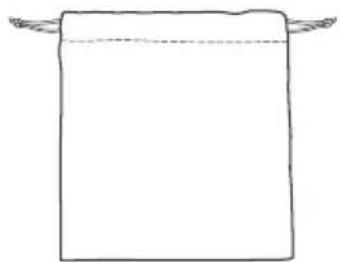
natural_image
Simple line drawing of a rectangular object with two curved handles above it (no text or symbols)• USB-Kabel (2,0 m) • Tasche
Laden des Akkus
natural_image
Line drawing of a banana-shaped object with three diamond-shaped markers on its surface (no text or symbols)text_image
Diagram showing a device connected to a microphone, with labeled parts including 'N' and 'L'text_image
Diagram of a vehicle air intake device with labeled ports and directional arrows indicating flow or movementLautstärkeregler
natural_image
Line drawing of a flexible electrical cable with connector ends (no text or symbols)
natural_image
Simple line drawing of a rectangular shape with two curved arrows above it, no text or symbols present.• Cavo USB (2,0 m) • Sacca
natural_image
Line drawing of a curved mechanical component with mounting holes and a central slot (no text or symbols)text_image
Diagram showing a device connected to a smartphone via cable, with a labeled component 'L' and a logo 'N' pointing to the device.natural_image
Line drawing of a coiled cable with two connectors (no text or symbols)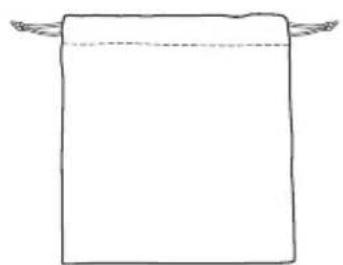
natural_image
Simple line drawing of a rectangular shape with two curved handles above it (no text or symbols)- Cable USB (2 m) • Bolsa
Cargar la batería
natural_image
Line drawing of a banana-shaped object with decorative cutouts and four diamond-shaped markers (no text or symbols)text_image
Diagram showing a device connected to a microphone, with labeled parts including 'N' and 'L'Desconectar un dispositivo
text_image
Umen - Vol +natural_image
Line drawing of a flexible electrical cable with connector ends (no text or symbols)
natural_image
Simple line drawing of a rectangular shape with two curved arrows above it, no text or symbols present.• Cabo USB (2,0 m) • Bolsa
natural_image
Line drawing of a banana-shaped object with decorative cutouts and three diamond-shaped markers on the surface (no text or symbols)text_image
Diagram showing a device connected to a microphone, with a label pointing to the microphone and a 'N' icon pointing to it.text_image
Pressionarnatural_image
Line drawing of a flexible electrical connector with two connectors and a coiled cable (no text or symbols)
natural_image
Simple line drawing of a rectangular object with two curved handles above it (no text or symbols)natural_image
Line drawing of a banana-shaped object with decorative cutouts and four diamond-shaped markers on its surface (no text or symbols)text_image
Diagram showing a device connected to a smartphone, with labeled parts including 'N' and 'L'text_image
T1 - Vol +Регулятор громкости
natural_image
Line drawing of a flexible cable with connector ends (no text or symbols)
natural_image
Simple line drawing of a rectangular shape with two curved handles above it (no text or symbols)natural_image
Line drawing of a banana-shaped object with decorative cutouts and four diamond-shaped markers (no text or symbols)text_image
Settings Bluetooth Bluetooth MY DEVICES ATH-DSR7BT 선택text_image
Diagram showing a device connected to a microphone, with a magnified inset highlighting the connector and labeled component 'L'.장치 분리
text_image
Diagram of a car air vent system with labeled ports and directional arrows indicating flow or pressure direction.볼룸 컨트롤러
natural_image
Line drawing of a USB cable with connector port (no text or symbols)- USB线 (2米)
natural_image
Simple line drawing of a rectangular shape with two curved handles above it (no text or symbols)- 收纳袋
对电池充电
natural_image
Line drawing of a banana-shaped object with four small rectangular cutouts and three diamond-shaped markers on the surface (no text or symbols)text_image
Diagram showing a device connected to a smartphone, with a labeled component 'L' and a logo symbol above the device.断开设备
text_image
Diagram of a car front panel with directional arrows indicating traffic flow or movement, showing valve positions and control buttons.音量控制器
natural_image
Line drawing of a USB cable with connector port (no text or symbols)- USB導線(2.0 m)
natural_image
Simple line drawing of a rectangular shape with two curved handles above it (no text or symbols)- 攜存袋
為電池充電
natural_image
Line drawing of a banana-shaped object with four small rectangular cutouts and three diamond-shaped markers on the surface (no text or symbols)text_image
Diagram showing a device connected to a microphone, with a label pointing to the microphone and a 'N' icon pointing to it.移除設備
text_image
Diagram of a vehicle rear panel with directional arrows indicating traffic flow and valve positions音量控制器
©2016 Audio-Technica Corp.
Global Support Contact: www.at-globalsupport.com
中国大陆客户联系资料
制造商:鐵三角有限公司
代理商:广州市德讯贸易有限公司