
GEOVID 42 HDB - Binoculars LEICA - Free user manual and instructions
Find the device manual for free GEOVID 42 HDB LEICA in PDF.
| Product type | Laser rangefinder binoculars |
| Brand and model | Leica GEOVID 42 HDB |
| Magnification | 8x or 10x depending on variant |
| Objective lens diameter | 42 mm |
| Exit pupil | 5.2 mm (8x) / 4.2 mm (10x) |
| Field of view at 1000 m | 128 m (8x) / 113 m (10x) |
| Eye relief | 18 mm (8x) / 16 mm (10x) |
| Close focusing distance | Approx. 5 m / yd |
| Prism type | Perger prism |
| Optical coating | HDC™ and Aqua-Dura, P40 phase correction |
| Diopter adjustment | ± 4 dpt |
| Interpupillary distance adjustment | 56 - 74 mm |
| Operating temperature (electronic) | -20 °C to +55 °C |
| Operating temperature (mechanical) | -30 °C to +55 °C |
| Storage temperature | -40 °C to +85 °C |
| Waterproofness | Up to 5 m depth |
| Housing material | Die-cast magnesium with rubber coating |
| Measuring range | Approx. 10 m - 1825 m / 2000 yd |
| Measurement accuracy | ±1 m at 500 m, ±2 m at 1000 m, ±0.5% beyond |
| Display | 4-digit LED |
| Power supply | 3 V lithium round battery type CR2 |
| Battery life | Approx. 2000 measurements at 20 °C |
| Laser | Invisible, class 1 (eye-safe) |
| Dimensions (L × H × W) | 127 × 81 × 177 mm |
| Weight (with battery) | Approx. 950 g |
| Main functions | Laser rangefinder, ballistic compensation (ABC®), Scan mode, atmospheric condition display |
| Maintenance and cleaning | Clean lenses with a damp, lint-free cloth; do not use alcohol or chemicals |
| Safety | Do not look directly at the sun or intense light sources; laser eye-safe |
| Spare parts and repairability | Spare parts available through Leica after-sales service; do not open the device |
| Disposal | Do not dispose of with household waste; deposit at a recycling collection point |
| Included accessories | Carrying strap, case, protective covers, 2 GB microSD memory card, adapter, tweezers, certificate of authenticity |
Frequently Asked Questions - GEOVID 42 HDB LEICA
User questions about GEOVID 42 HDB LEICA
0 question about this device. Answer the ones you know or ask your own.
Ask a new question about this device
Download the instructions for your Binoculars in PDF format for free! Find your manual GEOVID 42 HDB - LEICA and take your electronic device back in hand. On this page are published all the documents necessary for the use of your device. GEOVID 42 HDB by LEICA.
USER MANUAL GEOVID 42 HDB LEICA
7.1.1: n = 2 and m = 0
国
100
This process is a great way to obtain the following results:
Deutsch 02
English 28
Françias 54
Nederlands 80
Italiano 106
Espanol 132
Norske 158
Pycckn 184
US = Anzeige in yards
EU = Anzeige in Meter

US EU

EU
Hinweis:
- Eyes for carrying strap
- Eyepiece
- Eyepiece cup with
a. Diopter scale
Position a: Extended for viewing without glasses (4 settings)
Position b: Screwed in for viewing with glasses
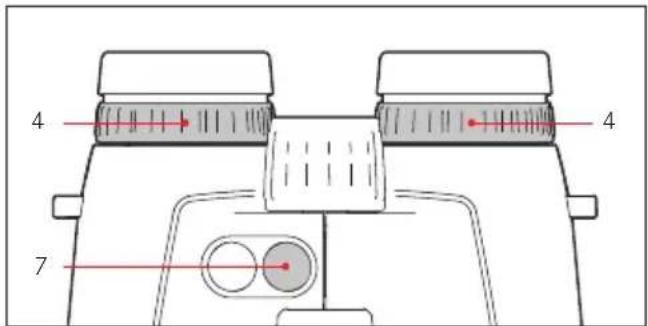
- Diopter compensation dial with
a. Scale - Central focusing dial
- Diopter compensation dial for displays with a. Scale
- Main/release button for range measurement
- Secondary/menu button
- Hinged axes for adjusting the eye spacing
- Laser transmission optics
- Cover for battery compartment / memory card slot (closed)
- Battery compartment
- Memory card slot
- Objective lens
PACKAGE CONTENTS
- Binoculars
- 1 lithium button cell, 3V, type CR 2
- Carrying strap
Ever ready case - Eyepiece cover
- 2 lens covers
- 2GB microSD memory card
- microSD card adapter
Warranty card - Tweezers
- Test certificate
Warning notice
As with any binoculars, avoid looking directly at bright sources of light when using the Leica Geovid HD-B, to prevent eye injury.
FOREWORD
Dear Customer,
Throughout the world, the Leica name stands for premium quality, accurate precision mechanics, optimum reliability and long service life.
We wish you much enjoyment and every success with your new Leica Geovid HD-B binoculars.
These binoculars with integrated range finder transmit invisible infrared pulses that are harmless to the eyes and a built-in microprocessor calculates the distance to the object from the reflected signal. They also detect the ambient and usage conditions. Along with the measured distances, this data can be used to calculate and display the appropriate point of aim correction for various selectable and freely programmable ballistics curves, the appropriate click adjustments for the reticle on a telescopic sight or the equivalent horizontal range.
To enable you to make the best possible use of this high performance and versatile device's features, we recommend that you read these instructions before use.
DISpOSAL OF ELECTRICAL AND ELECTRONIC EQUIPMENT
(Appplies within the EU, and for other European countries with segregated waste collection systems)
This device contains electrical and/or electronic components and should therefore not be disposed of in general household waste. Instead it should be disposed of at a recycling collection point provided by the local authority. This costs you nothing.
If the device itself contains removable batteries or rechargeable batteries, these should first be removed and, if necessary, properly disposed of (refer to the specifications in the manual for your device).
Further information on this issue is available from your local administration, your local waste collection company, or in the store where you purchased this device.
CONTENTS
Designation of parts. 28
Package contents 28
Menu structure / operating scheme diagram .........U3
Foreword 29
Disposal of electrical and electronic equipment 29
Applications 31
Attaching the lens covers 31
Attaching the carrying strap and the eyepiece cover. 31
Inserting and changing the battery 32
Battery charge level 33
Adjusting the eyepiece cups / using with and without glasses 34
Adjusting the eye spacing 34
Focusing / diopter compensation 35
Basic information on menu system 36
Setting the unit of measure 36
Range measurement 37
Scan mode 38
Measurement range and accuracy. 39
Displaying the atmospheric conditions 40
Calculating the ballistics curve 41
Setting the zeroing distance 42
Displaying the set ballistics curve and zeroing distance. 43
Ballistic output formats 43
Equivalent horizontal range 44
Point of aim 44
Windage correction using elevation adjustment (click / MOA adjustment) 45
Settings and selection of ballistic output formats 45
Displaying and checking the set ballistic parameters. 46
Using alternative ballistics curves 46
Maintenance / cleaning. 49
Spare parts. 49
Troubleshooting 50
Technical data 51
Leica Academy 52
Leica Info Service. 52
Leica Customer Service 53
Appendix / Ballistics tables. 210
AppLICATIONS
The Leica Geovid HD-B binoculars have a robust magnesium housing, allowing them to be used even under adverse conditions. There's no need to worry about moisture - they are absolutely waterproof to a depth of 5m and the internal optics do not become fogged thanks to a nitrogen filling.
ATTACHING THE LENS COVERS
To fit the two lens covers, the rubber rings on the covers are pushed over the binocular tubes from the lens side in such a way that the covers fold downwards.
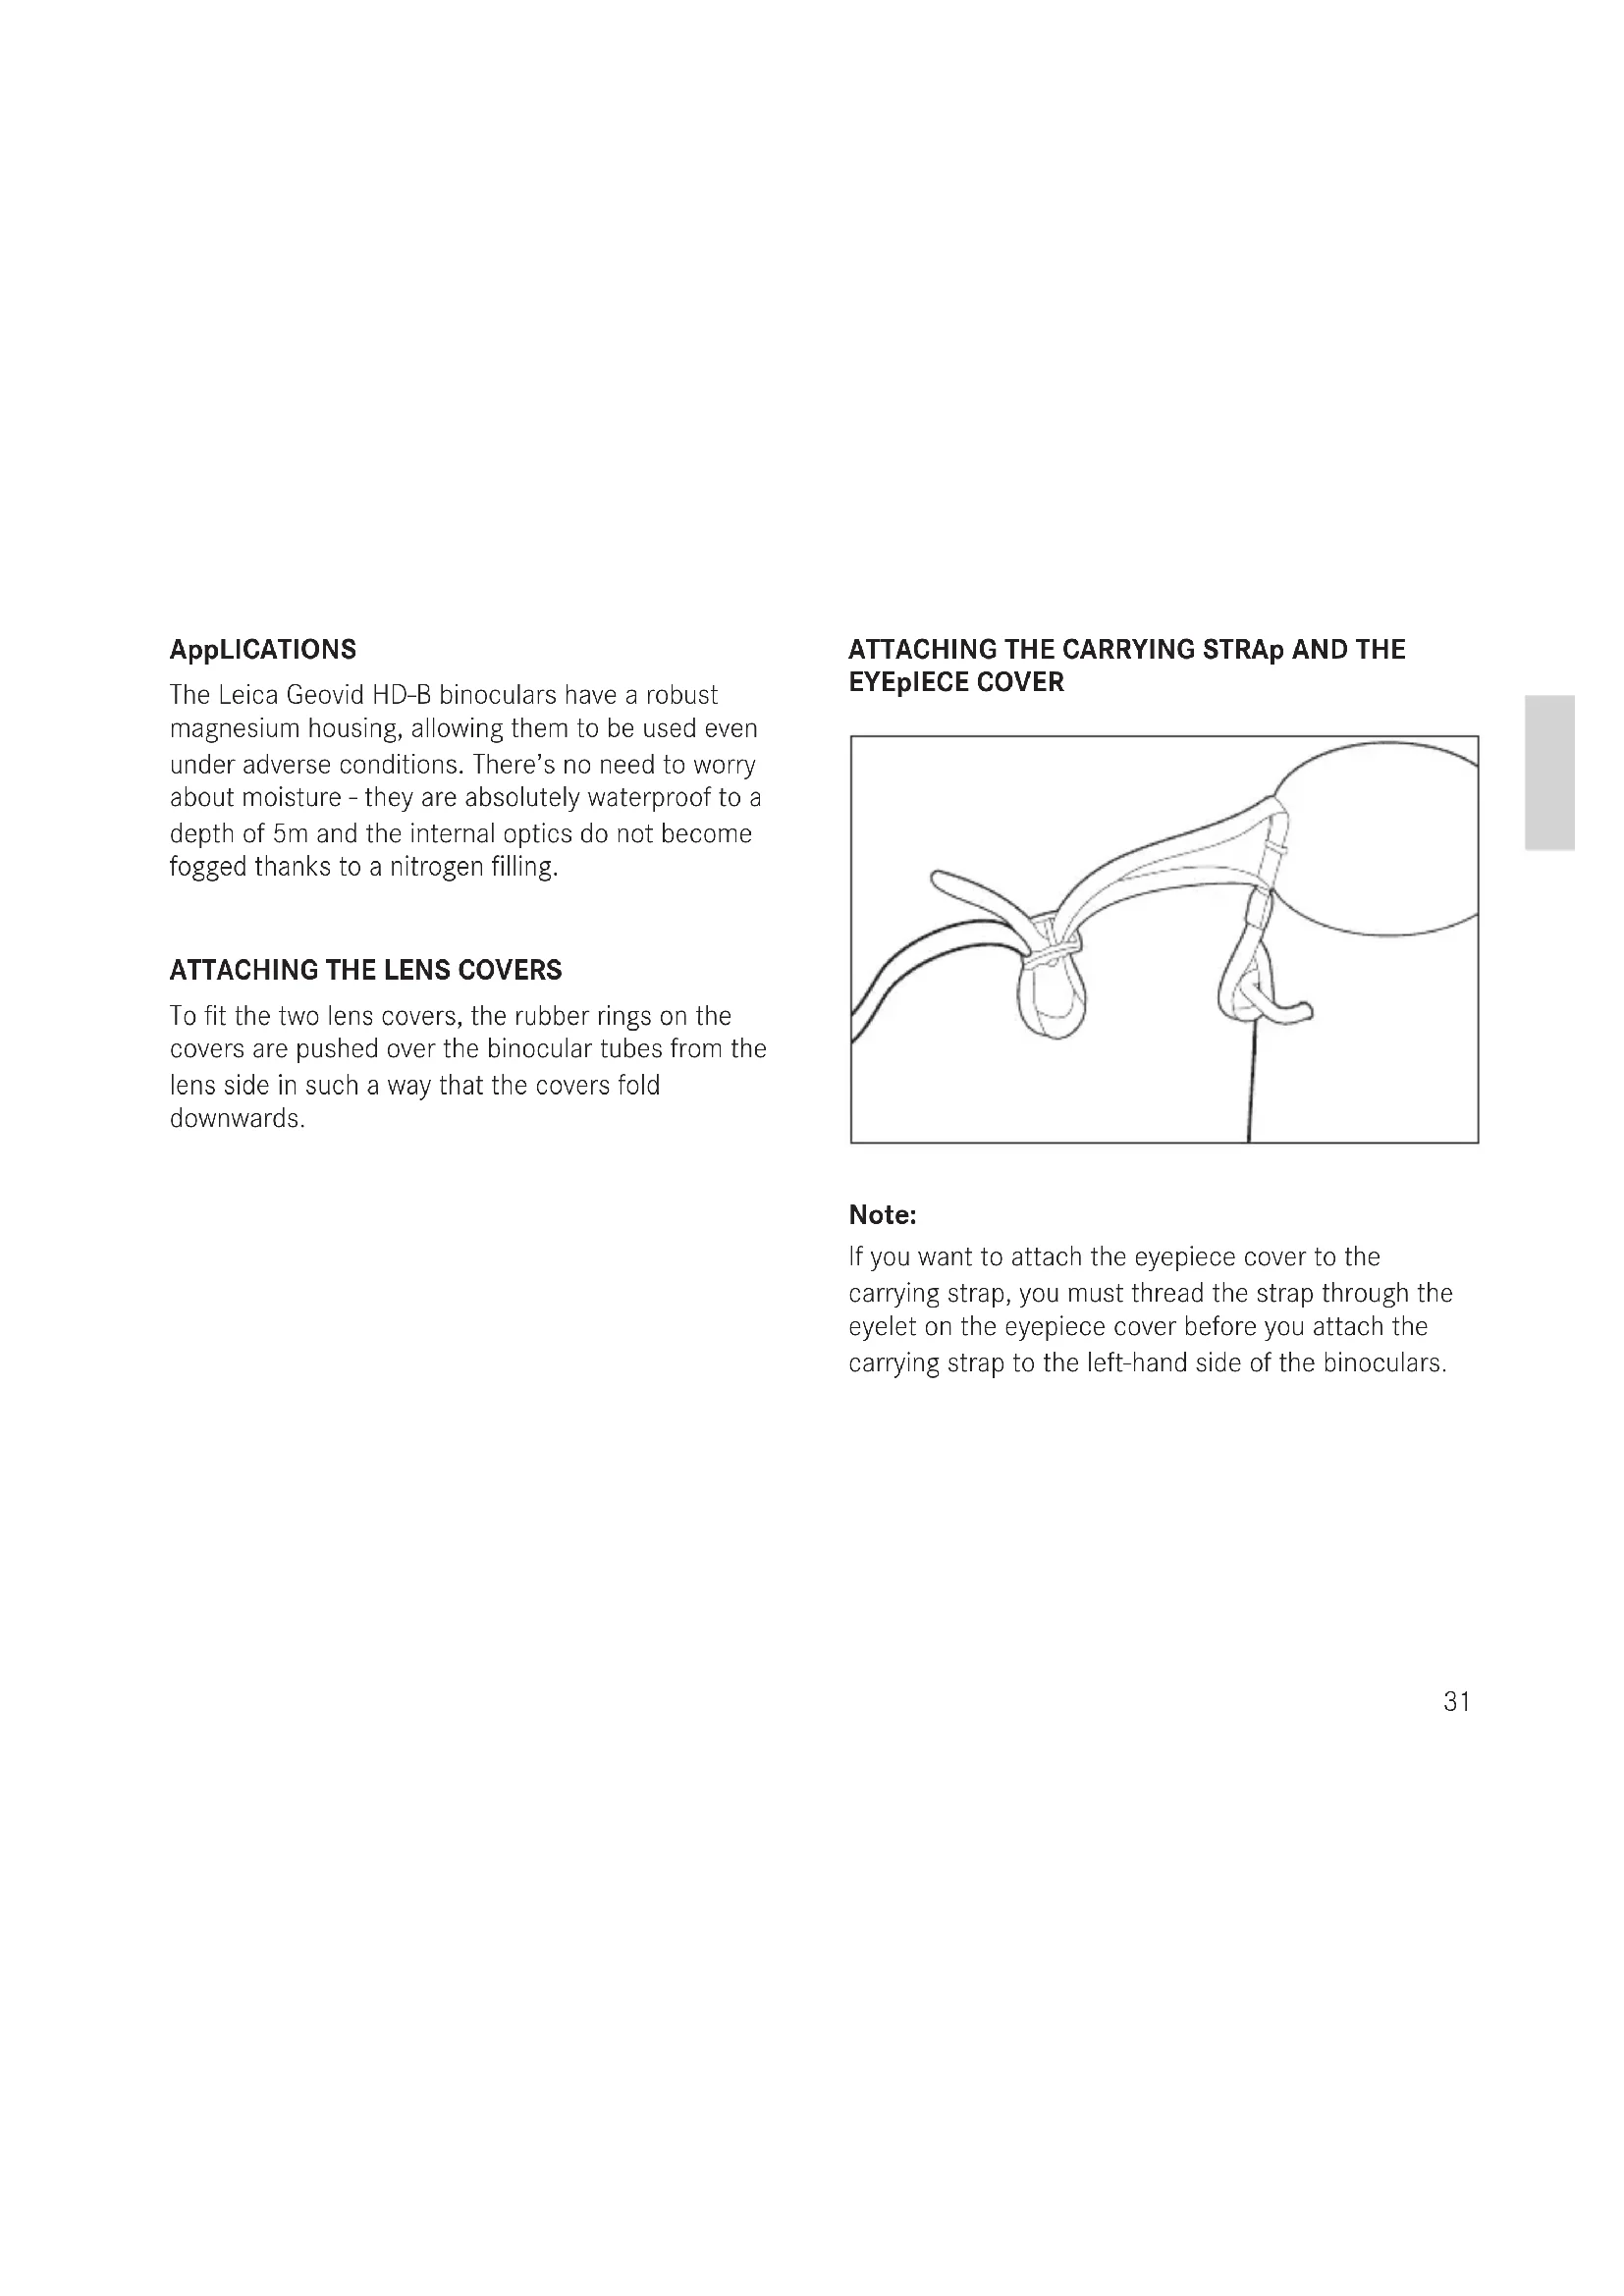
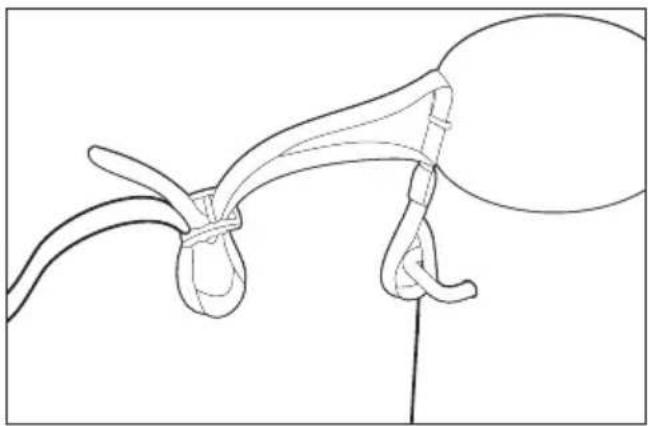
ATTACHING THE CARRYING STRAP AND THE EYEPIECE COVER
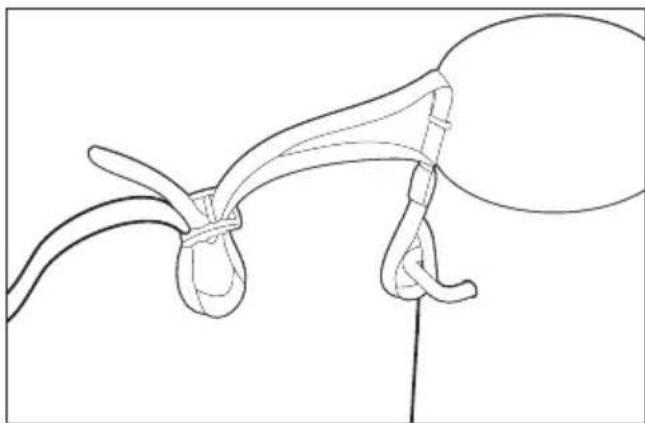
Note:
If you want to attach the eyepiece cover to the carrying strap, you must thread the strap through the eyelet on the eyepiece cover before you attach the carrying strap to the left-hand side of the binoculars.
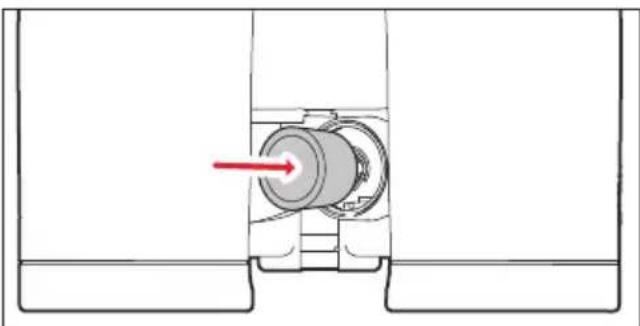
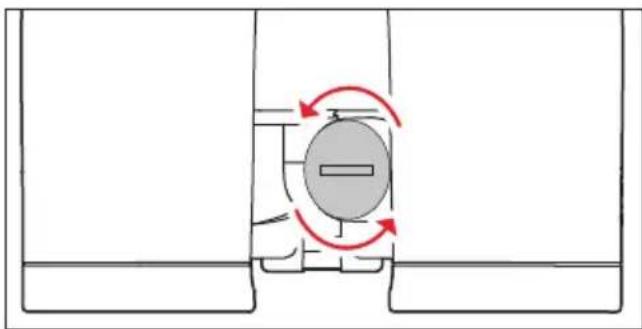
INSERTING AND CHANGING THE BATTERY
The Leica Geovid HD-B draws its power supply from a 3 Volt lithium button cell (type CR2).
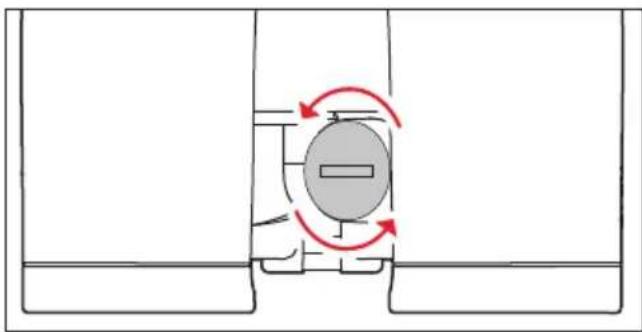
- Open the cover (11) over the battery compartment (12) by turning it anticlockwise, e.g. with a coin.
- Insert the battery so that the positive contact goes in first (as shown by the markings in the battery compartment).
- Close the cover again by turning it clockwise.
Notes:
- Cold conditions impair the battery performance. Therefore, at low temperatures the binoculars should be kept as close to the body as possible and a new battery should be fitted.
If the binoculars are not going to be used for a long time, the battery should be removed. - Batteries should be stored in a cool dry place.
Attention:
- Batteries should never be put in a fire, heated, recharged, taken to pieces or broken apart.
Used batteries may not be disposed of as normal, household waste as they contain toxic materials that are harmful to the environment.
To ensure that they are properly recycled, they should be returned to the dealer or disposed of as special waste (at a collection point).
BATTERY CHARGE LEVEL
A new battery lasts for more than 2000 measure ments at 20^ / 68^
Depending on the conditions of use, the battery life can be significantly shorter or longer than this. Low temperatures and frequent use of scan mode (see p. 35) shorten the battery life.
A used battery is indicated by a flashing measured value and reticule display. When flashing starts, around another 50 measurements are possible, but with a continuously reduced range.
Leica recommends the use of branded batteries.
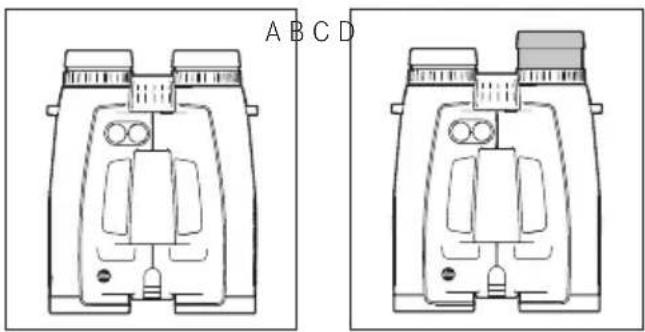
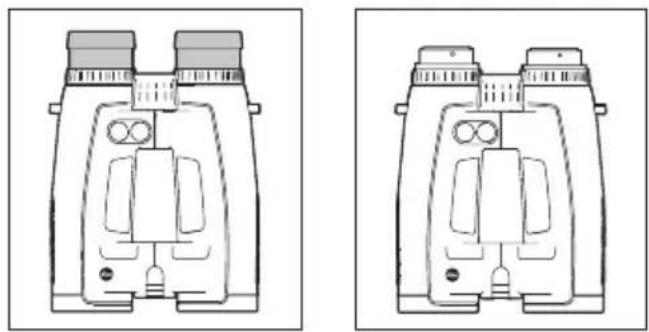
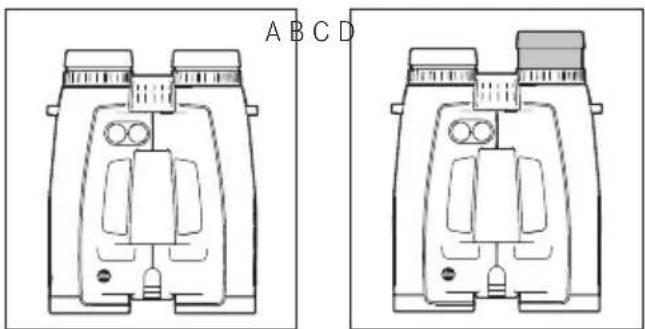
ADJUSTING THE EYEPIECE CUpS / USING WITH AND WITHOUT GLASSES
The eyepiece cups (1) can easily be adjusted by turning them, and lock securely in the selected positions. They can be removed completely for thorough cleaning.
For viewing with glasses (Figure A), they remain in the fully screwed in position. For viewing without glasses, they are extended by turning them anticlockwise. Four positions are available for optimum adjustment (Figure B).
If the eyepieces are heavily soiled, we recommend removing the cups for cleaning (Figure C). They are removed by gently pulling them in the fully extended position.
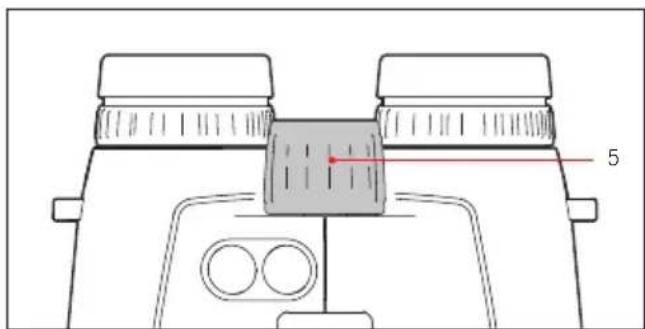
ADJUSTING THE EYE SpACING
Bending the binoculars about the hinged axes (9) individually adjusts the eye spacing. The right and left field of vision should merge into a circular image.
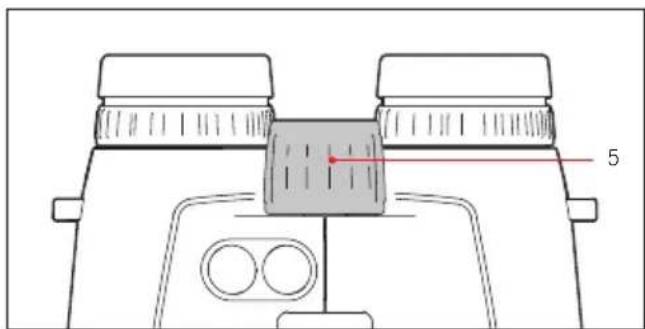
FOCUSING / DIOpTER COMPENATION
On the Leica Geovid HD-B binoculars, the focus is set for objects different distances away using the central focusing dial (5).
The two diopter compensation dials (4) are used to compensate for individual eyesight problems when viewing without glasses and to focus the reticule.
Carefully run through the steps described below. Only then can you utilize the full capabilities of the optical system.
- Turn the two diopter compensation dials (4) to their zero positions.
- When viewing with both eyes, adjust them to a distant object using the central focusing dial.
- Press the main / release button (7) to activate the reticule.
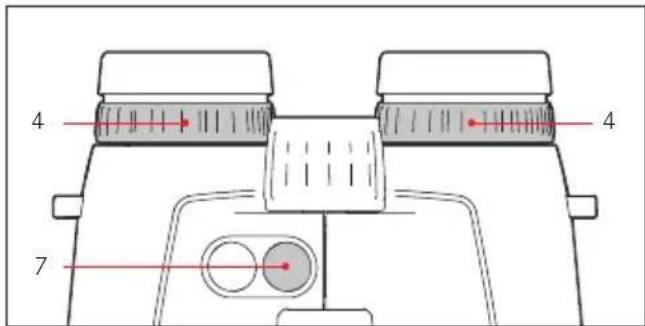
- When the reticule appears, while continuing to view with both eyes, adjust the right diopter compensation dial (red index) so that the reticule can be seen in focus in the right optical system.
- Then, with the reticule still activated but only viewing with the right eye, use the central focusing dial to adjust the image in the right lens until it is exactly in focus.
- Then repeat this procedure for the left lens using the left diopter dial (4).
- The set values can be read off using the "+" or "-" values on the diopter scales (4a).
Note:
When looking through just the left or right side, the other eye should be squeezed shut or you can simply hold the corresponding half of the binoculars on the lens at the front.
BASIC INFOMATION ABOUT THE MENU SYSTEM
For all settings:
-
The main menu contains four options: Display in yards/meters (USEU), ballistics curve (bdL), zeroing distance (Sd) and ballistic output format (ABC). Details of these functions can be found in the relevant sections.
-
Both the main menu and the relevant setting options scroll in a continuous loop, i.e. all options/ settings can be accessed by repeatedly pressing the relevant button.
SETTING THE UNIT OF MEASURE
The Leica Geovid HD-B can be set to either the imperial unit system commonly used in the USA (US) or the metric system (EU) i.e. yards and inches / Fahrenheit / inHG (inches of mercury) or meters and centimeters / Celsius / millibars for distance, temperature and air pressure respectively.
This setting also determines the units used for the point of aim, the ballistics curves and the zeroing distances. The factory setting on the Leica Geovid HD-B is yards.
Setting
-
Press and hold (≥ 3s) the secondary / menu button (2).
-
US.EU appears in the display (flashing).
-
Press the main / release button (7) to select the unit of measure you want to use.
US = Display in yards
EU - Display in meters

US EU

1
Note:
The current setting can always be seen in the display: If metric values are selected, a dot appears to the bottom right of the reticule.
-
Save your setting by pressing the secondary / menu button.
-
The saved setting lights up as confirmation and the display then switches to the next option (BALL = Ballistics curve) and then goes out if no more settings are made.
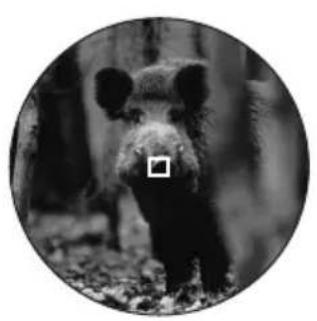
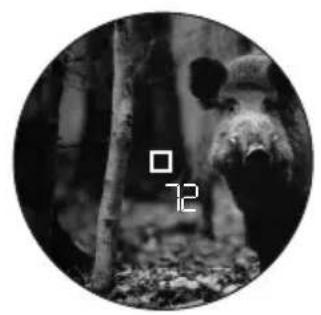
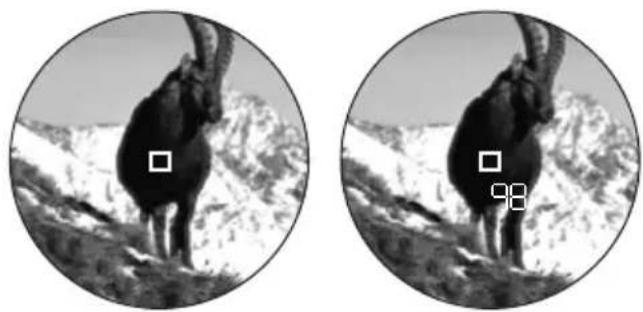
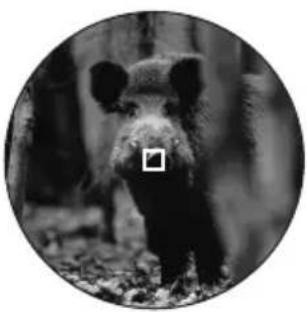
RANGE MEASUREMENT
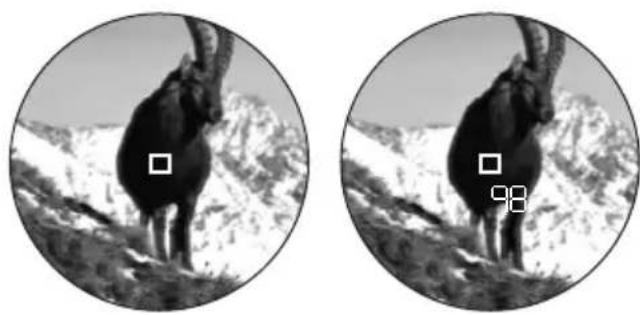
To measure the range to an object, you must aim directly at it. To do this, proceed as follows:
- Press the main / release button (7). The range finder is activated.
The reticule appears.
When you let go of the main / release button, the reticule is lit for a further six seconds. If you hold the button down, the reticule remains lit.
- Aim at the object while the reticule is lit.
- Press the main / release button (7).
a. The reticule disappears briefly during the measurement.
b. The measured value is displayed.
As long as the reticule is still lit, a new measurement can be started at any time by pressing the main / release button again.
The display shows: - - - if
- the object distance is less than 10 meters/yards, or
the range is exceeded, or - the object is not sufficiently reflective.
When the display disappears, the range meter is automatically deactivated.
SCAN MODE
The Leica Geovid HD-B binoculars can be used to measure continuously (scan mode).
Hold down the main / release button (7) on the 2nd press.
After around 2.5 seconds, the binoculars switch to scan mode and then carry out measurements continuously. This can be seen by a change in the display:
Around every 1 s a new measured value is shown. Scan mode is particularly practical for measuring small and moving targets.
Notes:
In scan mode, the correction value is not displayed until after the last measurement.
- Because of the continuous measurements, power consumption is greater in scan mode than for single measurements.
MEASURING RANGE AND ACCURACY
The measuring range of the Leica Geovid HD-B is up to ± 1825m / 2000yds . The maximum range is achieved with high reflective target objects and a visual range of 10km / 6.2 miles.
Note:
To reliably detect very distant objects, we recommend holding the binoculars very steadily and/or placing them on a stable surface.
The measuring range is influenced by the following factors:
| Range Higher Lower | ||
| Color | White Black | |
| Angle to lens | Perpendicular Acute | |
| Object size | Large Small | |
| Sunlight | Low (Cloudy) | High (midday sun) |
| Atmospheric conditions | Clear Hazy | |
| Object structure conditions | Homogeneous (wall of building) | Inhomogeneous (bush, tree) |
In sunlight and with good vision, the following ranges and accuracies can be achieved:
| Range | Approx. 10m/yds to 1825m/2000yds |
| Accuracy | Approx. ±1m/yd up to 500m/yds Approx. ± 2m/yds up to 1000m/yds Approx. ± 0.5% above 1000m/1000yds |
DISpLAYING THE ATMOSPHERIC CONDITIONS
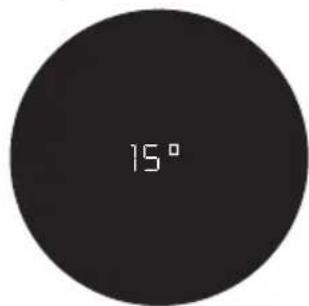
For precise calculation of the point of impact (see next section) the Leica Geovid HD-B determines three other important pieces of information during the range measurement: the inclination of the binoculars, the temperature and the atmospheric pressure. The relevant values can be displayed at any time.
Briefly press the secondary / menu button (8) once.
The reticule appears briefly (if range measurement was not already active). The following are then displayed alternately instead of the range for around 2s:
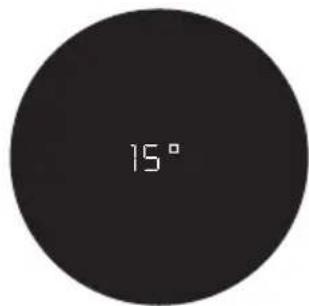
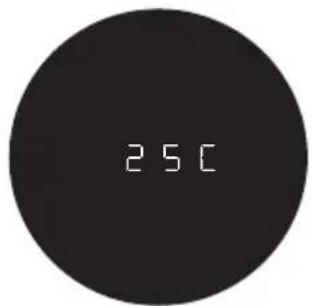
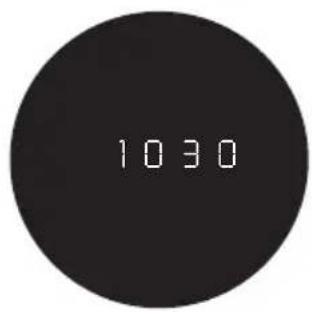
Angle of inclination
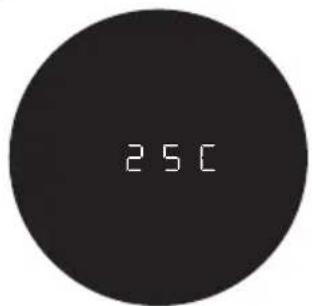
- Temperature
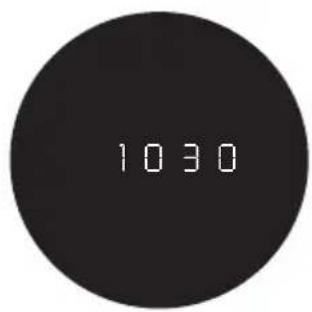
- Atmospheric pressure
Note:
If the housing of the Leica Geovid HD-B initially has a significantly different temperature than its surroundings, e.g. when taking it outside, it can take up to 30 minutes before the internal sensor can determine the correct ambient temperature.
DETERMINING THE BALLISTICS CURVE
To adjust the equivalent horizontal range calculation (EHR, see p. 44), the point of aim (HOLD, see p. 44) or the reticule adjustment (NOR, see p. 45) to different calibers, ammunition types and weights, you can choose from 12 different ballistics curve. The Appendix contains six tables, three different ones for zeroing distances in meters and in yards. In the table that corresponds to the set zeroing distance, find the ballistics curve that is closest to the point of impact specification provided by the ammunition manufacturer.
Example:
The weapon is zeroed to 100 meters with the associated telescopic sight, Table 1 is applicable. The ammunition manufacturer specifies 15.0cm at 200m as the point of impact for the ammunition used. In the corresponding column, this corresponds most closely to the value of 14.5cm in the EU7 line - this is therefore the appropriate ballistics curve.
Note:
When using the ballistics function on the Leica Geovid HD-B, particularly at ranges of >300m / 300 yards, we recommend determining the ballistic data for your ammunition by practical trials, so that you can select the appropriate curve.
SETTING THE BALLISTICS CURVE
Start with step 1 if you have not yet opened the menu system and with step 3 if you have already set the unit of measure and b_PII is still flashing in the display.
-
Press and hold (≥ 3s) the secondary / menu button (8).
-
USEU appears.
-
Briefly (<2s) press the secondary / menu button once.
The display changes to LL ( = Ballistics curves).
- Press the main / release button (7).
The display changes to
USI or
EUI
-
Repeatedly press the main / release button to select the relevant ballistics curve, i.e.
-
US1 to US2 or
EUI to EUE, or
if you want the range to be displayed with no point of impact correction (HBC) OFF.
- Save your setting by pressing the secondary / menu button.
The saved setting appears continuously for 4s as confirmation and the display then changes to Sld and goes out if no more actions are performed.
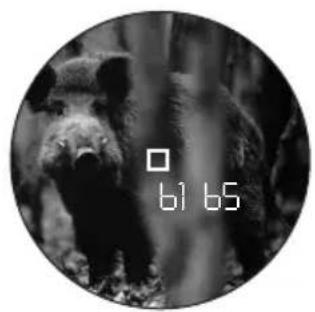
If a ballistics curve is set, after each range measurement the range is displayed for 2s and then the calculated correction value for 6s.
Start with step 1 if you have not yet opened the menu system and with step 3 if you have already set the ballistics curve and Sld is still flashing in the display.
- Press and hold (≥ 3s) the secondary / menu button (8).
USEU appears.
- Briefly (<2s) press the secondary / menu button twice.
The display changes to ALL and then to SH.
-
Select the relevant zeroing distance by repeatedly pressing the main / release button (7).
-
100 [m],
- 200 [m], or
- GEE [m], or
- 100 [y], or
-
200 [y], or
-300[y]. -
Save your setting by pressing the secondary / menu button.
The saved setting appears continuously for 4s as confirmation and the display then changes to ABC and goes out.
DISpLAYING THE SET BALLISTICS CURVE AND THE ZEROING DISTANCE
To check your settings, e.g. if the hunting situation has changed or you have not used the binoculars for some time, you can quickly display the three values at any time.
To do this, briefly press the secondary / menu button (8) twice.
The following information briefly appears in turn below the reticule (instead of the range) for approx. 2s:
- The set ballistics curve
- The set zeroing distance
- The set ballistic output value
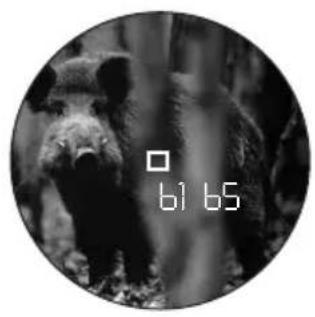
BALLISTIC OUTpUT FORMS (ABC®)
Advanced Ballistic Compensation (ABC) on the Leica Geovid HD-B allows you to display one of the following three ballistic values after measuring the range:
- the equivalent horizontal range (HH)
- the corresponding point of aim(HDLd)
- the number of clicks required for quick reticule adjustment
Both the point of aim and EH-value displayed take account of:
a. the measured distance to the target,
b. the angle of inclination of the weapon,
c. the set ballistics curve,
d. the measured temperature and atmospheric pressure values
e. the set zeroing distance.
Notes:
The calculation of the specified values is based on the set ballistics curve, i.e. this must be selected first (see p. 41).
- Ballistic output values are only specified up to a range of 800m / 875 yards on safety grounds. In addition, only the range actually measured is specified.
Important:
Note that at longer ranges, the influence of all the factors relevant in ballistics increases significantly and considerable variations can occur. The ballistic values displayed should therefore be seen only as a reference.
- Regardless of whether or not you use this information, you are responsible for assessing the relevant hunting situation.
EQUIVALENT HORIZONTAL RANGE
Shots at higher or lower targets are subject to changed ballistic conditions. They therefore require the use of the equivalent horizontal range, which differs from the actual distance to the target (in some cases significantly).
Note:
Even horizontal EHR measurements can result in values that differ from the "normal" measured range, for example if the temperature and/or atmospheric pressure differ from the programmed mean values.
POINT OF AIM
The point of aim is the point the weapon is aimed at instead of the actual target to compensate for the variations caused by the flight of the bullet (e.g. when using conventional hunting reticules).
By displaying the point of aim, the Leica Geovid HD-B can provide valuable support when used in hunting, ensuring that shots are as accurate as possible. In addition to the range, the calculation is based on the general conditions outlined in the previous section and the ballistics curve you have selected.
Note:
The point of aim / attachment value displayed is always expressed relative to the distance to the target. Example: If 300m 30 is displayed, you would need to aim 30cm higher on the object than would be the case without correction.
pPOINT OF IMPACT CORRECTION USING ELEVATION ADJUSTMENT (CLICK / MOA ADJUSTMENT)
Variations in the point of impact can be compensated by a corresponding adjustment of the reticule on your telescopic sight.
Taking into account the measured range, the trajectory of the bullet and the set zeroing distance (see p. 42), the Leica Geovid HD-B can display the required adjustments, i.e. the relevant number of clicks.
For the different elevations, you can specify whether the clicks are to be specified
- based on the international standard MOA (minutes of angle) graduation, or
- in 5 or 10 centimeter graduations.
SETTINGS AND SELECTION OF BALLISTIC OUTpUT FORMATS
Start with step 1 if you have not yet opened the menu system and with step 3 if you have already set the unit of measure and ABC is still flashing in the display.
- Press and hold (≥ 2s) the secondary / menu button (8).
USEU appears. - Briefly (<2s) press the secondary / menu button three times.
The display changes to ALL and Sid and then to ABC. -
Select the relevant ballistic setting by repeatedly pressing the main / release button (7).
-
or
HOLD or - H(1MOA), or
- 13 (1/3MOA), or
-14(1/4MOA), or
-5
- Save your setting by pressing the secondary / menu button.
The saved setting is displayed continuously for 4s as confirmation and the display then goes out.
DISpLAYING AND CHECKING THE SET BALLISTICS pPARAMETERS
If you want to check your settings, you can display the values at any time.
To do this, briefly press the secondary / menu button (8) twice.
The following information briefly appears in turn below the reticule (instead of the range) for approx. 2s:
- The set ballistics curve (see p. 41)
- The set zeroing distance (see p. 42)
- The set ballistic output value (see p. 45)
If all ballistics functions are deactivated (BALL = OFF), only the US or EU setting is displayed.
USING ALTERNATIVE BALLISTICS CURVES
If the intended weapon / ammunition combination is not covered by one of the 2 × 12 programmed ballistics curves on the Leica Geovid HD-B you can use your own custom ballistics curves. These are initially precisely calculated based on the load data your provide online - such as caliber, ammunition weight etc. - and then transferred to the microSD memory card supplied so that it can be retrieved on the binoculars once the card has been inserted.
This is done in three stages:
A. Calculation and transfer of requested ballistics curve to the memory card. On the Leica Camera AG homepage at www. leica-camera.com, the Sport Optics area - includes instructions for entering the required information/values for calculation of a ballistics curve - the corresponding input screen - a description of the download process,i.e. how to transfer the calculated ballistics curve to the memory card

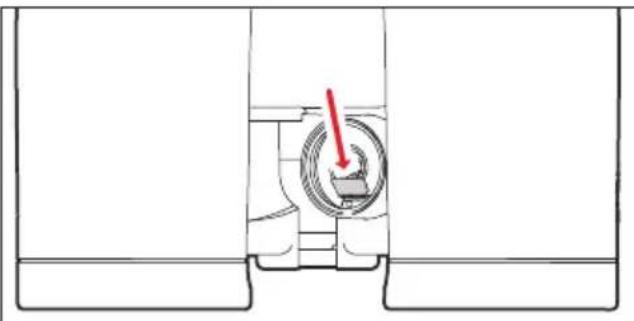
B. Inserting the memory card in the binoculars The memory card slot (13) is located in the battery compartment (12), where it is protected from soiling and the ingress of water.
- Open the cover (11) over the battery compartment (12) by turning it anticlockwise, e.g. with a coin.
- Remove the battery.
- Slide the memory card into the slot with the contacts pointing forwards and downwards, until you feel it engage.
- Insert the battery so that the positive contact goes in first (as shown by the markings in the battery compartment).
- Close the cover again by turning it clockwise. To remove the memory card, follow these instructions in reverse. Use the tweezers supplied.
C. Retrieving the ballistics curve from the memory card
If a memory card containing a ballistics curve is inserted in the binoculars, this curve can be retrieved in exactly the same way as described under "Setting the ballistics curve" on p. 41.
In this case, when you press the main / release button (7) Card appears first.
The following warning messages can appear instead:
- Ecl if the Sld menu is open but the memory card is then removed, or if the card is defective or cannot be read. In this case, Card also disappears.
- Err2 if there is no ballistics curve on the memory card
- Eer3 if the ballistics curve on the memory card does not contain correct data
The subsequent procedure is exactly the same as for the pre-programmed ballistics curves.
Note:
Even if a memory card is inserted, you can set one of the pre-programmed ballistics curves at any time. You should always check your settings.
Notes:
- For safety reasons, i.e. to prevent confusion, only one ballistics curve can ever be saved on the card.
- When using ballistics curves from the memory card, ranges up to 925m / 1000yds are displayed.
The range of microSD cards is too large for Leica Camera AG to be able to completely test all available types for compatibility and quality. Therefore, we recommend using a card such as the "microSDHC™" cards from the leading brand "SanDisk". - Although using other card types is not likely to damage the binoculars or the card, some "no name" cards do not comply with the microSD standards, and Leica Camera AG is unable to provide any guarantee that they will function correctly.
MAINTENANCE / CLEANING
Your Leica Geovid HD-B binoculars do not require any special care. Coarse dirt particles, such as sand, should be removed with a fine hair brush or blown away. Marks such as fingerprints on the front lens and eyepiece lenses can be cleaned with a damp cloth and then wiped off with a soft, clean leather or dust-free cloth.
Important:
Do not exert heavy pressure when wiping highly soiled lens surfaces. Although the coating is highly abrasion resistant, it can be damaged by sand or salt crystals. The housing should only be cleaned with a moist leather cloth. Using dry cloths brings a risk of static charge. Alcohol and other chemical solutions must not be used to clean the optical system or the housing. All Leica Geovid HD-B binoculars have their "personal" serial number in addition to the type designation. Note this number in your documentation for security.
Attention:
The housing may not be opened.
SPARE PARTS
If you should require any spare parts for your Leica Geovid HD-B binoculars, e.g. eyepiece cups or covers, please contact our Customer Service department or the Leica office in your country (see warranty card for addresses).
TROUBLESHOOTING
| problem Cause Remedy | ||
| A circular image is not obtained when viewing. | a. The user's pupils are aligned with the eyepiece exit pupil. b. The position of the eyepiece cup does not match that for correct use with and without glasses. | a. Correct the eye position. b. Correct the adjustment: If wearing glasses, twist the eyepiece cups; if using without glasses they remain flipped up (see p. 34). |
| Display not focused Diopter compensation | not precise Repeat diopter compensation | (see p. 35) |
| The display "─ ─ ━" appears when measuring the range. | a. Above or below measuring range b. Object is not sufficiently reflective c. Poor ambient conditions (visibility etc.) | Refer to the measuring range details (see p. 37) |
| Display flashing or no measurement possible | Battery used Replace battery (see p. 32) | |
| The display "Err" appears | Error involving the memory card Check wh | ether - the memory card used is OK - the data saved on it is OK For further details, refer to p. 46 |
TECHNICAL DATA
| Magnification | 8x 10x |
| Lens diameter | 42mm |
| Exit pupil | 5.2mm / 13/64" 4.2mm / 11/64" |
| Twilight number | 18.3 20.5 |
| Geometric luminous intensity | 27.5 17.6 |
| Field of vision (at 1,000m) / Objective field of view | Approx.128m /142yds / 7.3° Approx. 113m /125yds / 6.5° |
| Exit pupil longitudinal distance | 18mm / 45/64" 16mm / 25/32" |
| Close range limit | Approx. 5m/yds |
| Prism type | Perger prism |
| Coating on lenses and prisms | High Durable Coating (HDC™) and hydrophobic Aqua-Dura coating on external lenses, P40 phase correction coating |
| Diopter compensation | ±4dpt. |
| Eyepiece cups | Adjustable by turning for use wearing glasses, 4 settings, removable for easy cleaning |
| Eye spacing | Adjustable, 56 - 74mm/ 27/32" - 229/32" |
| Operating temperature | Electrical system: -20°C/ 4°F to 55°C/131°F, mechanical system: -30/-22°F to 55°C/131°F |
| Storage temperature | -40 to 85°C / -40 to 185°F |
| Water tightness | Impermeable to press water up to 5m/yds deep |
| Housing / chassis material | Die cast magnesium, non-slip rubber reinforcement |
| Range | Approx. 10m/yds - 1825m/2000yds |
| Measuring accuracy | Approx. ±1m/y up to 500m/yds / Approx. ±2m/yds up to 1000m/yds / Approx. ±0.5% over 1000m/1000yds |
| Display/Unit of measure | 4-digit LED/optionally in yards/inches or meters/centimeters |
| Battery | 3V lithium button cell, CR2 type |
| Battery life | Approx. 2,000 measurements at 20°C/68°F |
| Laser | Invisible, safe for eyes in compliance with EN and FDA Class 1 |
| Laser beam divergence | Approx. 0.5 x 2mrad |
| Maximum measurement duration | Approx. 0.9s |
| Dimensions (W x H x D) | Approx. 127 x 81 x 177mm / |
| Weight (with battery) | Approx. 950g |
LEICA ACADEMY
Our various seminars allow participants to discover the Leica values and the fascination of expert use of Leica products, all in a practical, contemporary form. The content of the courses are focused on use of the products and offer an array of practical ideas, information and advice.
More details, along with the current seminar program, are available from:
Leica Camera AG
Leica Academy
Oskar-Barnack-Str. 11
D-35606 Solms
The Leica information service can provide you with an answer to any technical application questions relating to the Leica range either in writing, on the telephone or by e-mail.
Leica Camera AG
Customer Care
Produkt Support
Gewerbepark 8
35606 Solms
Tel: +49 (0)6442-208 111
Fax: +49 (0)6442-208 339
info@leica-camera.com
LEICA CUSTOMER SERVICE
For servicing your Leica equipment or in the event of damage, the Leica Camera AG Customer Care department or the repair service provided by authorized Leica agents in your country are available (see the warranty card for a list of addresses).
Leica Camera AG
Customer Care
This is a Class B product based on the standard of the Voluntary Control Council for Interference from Information Technology Equipment (VCCI). If this is used near a radio or television receiver in a domestic environment, it may cause radio interference. Install and use the equipment according to the instruction manual.
FCC NOTE: (U.S. ONLY)
This equipment has been tested and found to comply with the limits for a Class B digital device, pursuant to Part 15 of the FCC Rules. These limits are designed to provide reasonable protection against harmful interference in a residential installation. This equipment generates, uses, and can radiate radio frequency energy and, if not installed and used in accordance with the instructions, may cause harmful interference to radio communications. However, there is no guarantee that interference will not occur in a parti cular installation. If this equipment does cause harmful interference to radio or television reception, which can be determined by turning the equipment off and on, the user is encouraged to try to correct the interference by one or more of the following measures:
- Reorient or relocate the receiving antenna.
- Increase the separation between the equipment and receiver.
- Connect the equipment into an outlet on a circuit different from that to which the receiver is connected.
- Consult the dealer or an experienced radio/TV technician for help.
FCC CAUTION:
To assure continued compliance, follow the attached installation instructions and use only shielded interface cables with ferrite core when connecting to computer or peripheral devices. Any changes or modifications not expressly ap proved by the party responsible for compliance could void the user's authority to operate this equipment.
Trade Name: LEICA
Model: Geovid HD-B
Responsible party/ Leica Camera Inc.
Support contact: 1 Pearl Court, Unit A
Allendale, New Jersey 07401
Tel.: +1 201 995 0051 232
Fax: +1 201 995 1684
technicalinfo@leicacamerausa.com
This device complies with Part 15 of the FCC Rules. Operation is subject to the following two conditions:
(1) This device may not cause harmful interference, and
(2) this device must accept any interference re ceived, including interference that may cause undesired operation.
This Class B digital apparatus complies with Canadian ICES-003
Complies with 21 CRF 1040.1 and 1040.11 except for deviations pursuant to Laser No. 50, dated June 24, 2007
LEICA GEOVID HD-B

Tested To Comply
With FCC Standards
FOR HOME OR OFFICE USE
DESIGNATION DES COMpOSANTS
US = affichage en yards
EU - affichage en metres

US EU

E0
Remarque:
INNHOLDSFORTEGNEALSE
Betegnelsepà delene. 156
Leveringsomfang. 156
Diagram menystruktur / betjeningsskjema....U3
Forord. 157
BO3MOXHOCTN PIMHEHEN
BnHokn Leica Geovid HD-B nmeot Kpenkn Kopnyc
n3 MaHn, 6naOapra KOTOPOMy cTahOBNTcra
BO3MOxHO 3KcNpyataaJaXe npn IIOxnx ycNOBHX.
He cIeNyET o6paatb BnHaMaHn DaJx He cIpyo
norody -3tn 6nHOKn pnpn NorpyxeHH B Body Ha
rnybHy do 5 M octaOTc a6coJIHTHO repMeTHNbIM, apacnoLoXeHHa BHyTpN ONTHa He 3anoteBaet
6naOapra a3OTHom HyanlneHIO.
KPEIIENHE3AUNTHbIX KpbiUeK ObEKTINBA
IyctaHOBKn 06eHX 3aunTHbIX KpbIweK 06beKeTNaBa Heo6xOJIMo HATryHytpe3nHOBBie KOJIbua KpbIweK Ha Tpy6Kn 6HHOKn CO CTOpOHbI 06BeKTNa TaKIM O6pa3OM, YTO6blKpbIwKn 3aKpbIinCb.
KPEIIEHNE PEMHJIIEPEHOCKN 3AUHTHOKpBIXKNOKYJRA
Yka3aHHe:
EcnBbXOTnTe 3aKpeNtB 3auHTHyo KpbIuKy OkyIpa Ha peMHe nI nepeHocKn, Bam HyxHo npOeTb NocneHN B npoyunHy 3aunTHOH KpbIuKN OkyIpa Do TORO KaK 3aKpeNtB pEmh dIra nepeHocKn c IeBOI cTOPOHb6HOKJI.
YCTAHOBKA H 3AMEHA BATAPEH
Дя Leica Geovid HD-B B kaueCTbe nctouHnka 3neKtpoNTaHnCnyknt OIN KpyTbI JNTHeBbI 3JeMeHT nITAHn HAnpJxKeHHem 3 BoNt (TN CR2).
- OtkpoIte KpbIshky (11) otceKa dIra 6aIapEn (12), noBepHyB ee, HApPIMeP, C NMOUbIO MOHeTbl, npOTnB YacOBO B CTpeKN.
- BCTaBbTe 6atapeIO NOIOXHTeNbHbIM KOHTaKTOM BnpeI (KAK NOKa3aHO Ha pncyHKe B OTceKe dJa 6atapeI).
- 3akpoTe KpbIuKy, NOBepHyB ee no yacobOn CTpeKe.

Yka3aHnHa:
OTXOJIOyUMeHbwaETcMoUHocTb6aTapeN. TOnToMByBOBpeMaNCnOJIb3OBaHnI npn Hn3KoI TeMnepaType 6uHOKJB Heo6xOJIMO HOChTb KaK MoXHO6JIHXKe KTeNy UyCTaHOBnTb HOByIO 6aTapeIO.
Ecn6HOKbDolrOeBpemHeHCnoJb3yeTc, Heo6xoIMOnn3BNeu6BaTapeIO.
3apka 6aapei dOJXHa BbIIOJIHrTbcB npoxlaHOM n cyxom MeCTe.
BHHMaHHe:
Batape 3aPepaetc6pocatb B orOhb,HarpeBaTb, 3apkaTb,pa36npatb nn pa36nBaTb.
OtpaobotaHbIe 6aTapeEN 3aPpeaetcBbIpaCbBaTb C ObIyHbIMN DOMaUHMIM OTXoDAMN, NCKOJIky OHN COJePKaT YIOBNTbIE IN BpeHbIe IIN OKpyKaIOUeI cpebl BeLcECTBa.
ДяТOrOчTo6bI NOOBeprHybБaTapeKINВTOpHOn nepepa60tke,ИХ Heo6xODnMo CdaBaTb B TOPROBbIX ToUkax HIn Bbl6paCbIBaTb BmecTe CO CneLOTXoJaMn (nyHKT npema).
CTENHe 3APRA BATAPEN
HOBO6BaTapeINXBaTNTДЯBbIOnHeHn60JIeueM 2000 n3mepenH npn 20^ / 68^
B 3aBnCmOCTn OT yCIOBn npImeHEnr cPoK cIyK6bl
6aTapeKn MoKeT 6bITb 3HaunTeJbHO KopOye nn
doJIbWe. Ha cokpaueHne cPoka cIyK6bl 6aTapeN
BIIraET Hn3KaA Tempeatypa n UacToe NcNoJb3OBaHne
peXIMa cKaHnpOBaHn (cm. cTp. 191).
MnraUHm HnIkaTOp n3MepeHHo BELuHbI N BN3nPHo MapKn COO6aet O TOM, YTO 6atapey n3pacXoIOBaJIcB0n pecypc. Nocne nepBOrO mHaHn MOxHO BbIOnHHTb eue OKOLO 50 n3MepeHn, npabDa, CO CTpeMHTbHO yMeHbJIoUeIcR daJIbHOCTbIO DeiCTBnI.
ΦπρMa Leica peKOMeHnyet nCNoJb3ObaTb 6aTapeNn3BecTHbIX 6pHIOB.
PEYIINPOBKA OKYJIPOB/HCIOJIb3OBAHNE C OUYKAMN H6E3 HNX
Okyjarpb1(1)Ierko perylnpyOTcnyTeM BpaueHnHaadexkHoФHKCpYOTcB BbIbpaHHOM NOLOXeHn.HTo6bl BblONHtB TtatehHyOuNCTKy,HXMOxHO NOLHOCTbIO CHrTb.
Dnro 06O3peHnB OOKax (PncyHOK A) OHN OCTaIOTcBNOJHOCTbIO BKpyeHHOM NOLOXeHn.Dnro 06O3peHnBe3 OOKOB OHN BblKpyuHBaIOTc Nytem BpaueHnnpOTNB YACOBO CTpeKN.Dnro ONTMalbHO aAanTaunIDocTyHbI YeTbIpe NLOXeHn (PncyHOK B).EcnN OKyJarpbCINbHO 3arpy3HeHb, peKOMEHyETCHrTB IN Dnra NocJeDuOSei OOnCTKn (PncyHOK C).HTo6bl 3TO CdeIaTb, Heo6xoJIMO npri NOJIHOCTbBOBVIKpyeHHOM NOLOXeHn OKyJrpOB CJIeRka NOTAHyTbIX.

PERYIINPOBKA PACCTOHHMEXKJY TIA3AMN
IyTeM Cn6aHn6HOKnNo 7apHnHbIM OcM (9) yCTaHaBnBaEtCn HnDnBnDyalbHoe pacCToHne MeKny rna3am. PpaBn n neBn cekTop o63opa npn eTOM dJHKhbl CNtbcB EeINHOe OKpyrnoe N3O6paKeHne.
PEYIINPOBKA PE3KOCTH/PEYIINPOBKA IHOINTPNI
PerynnpOBka pe3KocTn dIpa3IuHbIX ydaIeHHbx
obkeTob doCTnraeTcna Ha 6InHoKne Leica Geovid HD-B
C nOMOuBIO ueHTpAlbHOro KOleCnKa fokycnpOBKn (5).
IJIa KOMpeHCauIN INDINbUdyaNbHO AmETPONNn pni
6o3peHNn 6e3 OUYOB n IJNf oKycnpOBaHn BA3NPHO
MapKn cLykata BcKbua perynnpOBKn dnoNTpn (4).
BHHMaTeIbHO BbINOHnTe OINcaHhble HNKe DeIcTBn. ToIbKO nOcNe 3rTO Bo CMOXKeTe NcPONb3OBaTb BCIO MOUHOCTb ONTKN.
1.Поворауньая оба кольcaperуларOBKNДиОптprn(4),yctahOBHTe nB hyneBOE NOLOXKeHne.
2.CnOMOuHO CEHTpaHbHO KONEcHka FOKycnpOBKn, CMOTpy 06oHm rna3aMn, CFOKycnpyITeCb Ha ydaJIeHHOM o6beKeT.
3.C NOMOUIIgIaBHO/NcyCKOBKHOKN (7) aKTINHPYITe Tepb BnHpyo Mapky.
4.Поссп NOBENH Bn3nPHoM aK N, Bce TaK Jc
CMOTpO 60uMn rna3aMn, OTepeYnHyte npaBoe
KOBuO peynpOBKn dnoTpn (4, KpaChbI
yKa3aTeN) TAKM 6bpa3OM, UTo6bl B npaBOM
ObekTBe Bbl MoTn YeTKo BnDeTb Bn3nPHyIO MapKy.
5. 3aTeM OTpeRyI npIyIe T c NOMOuBIO CEHTpaIbHOro KOJIecNka FOKycnPoBKn pe3KoCTb H3O6paXeHNBa I npAbOM o6BeKTHBE pR N BkJIOueHHo BN3npHOI MapKe, HO CMOTpTeIepb TOJbKO pPaBbIM rJa30M.
6. 3aTeM OTpeRyIpyuTe ONTmAlbHyU pe3KoCTb H3O6paXeHnB IeBOM OBeKTnBE C NOMOuBo JeBOrO KOJIbua DIOONTPn (4).
7.YctaHOBHeHHbI BeJIuHbI BbIMoKTe npocMOTpeB ^ 串 + ^ 串 IIN-3HaueHNx XkAnbI dnoontpn (4a).
Yka3aHHe:
Pn npocmOTpe uepe3 neBbI nn npabBIO bekTHeo6xOIMIO npuypntb pyroN rna3 nn npocTo ydepKINBaTb COOTBECTByUOyIO NOOBHy 6HOKJI peepo6bekTNBOM.
OCHOBHAR INHΦOPMAUJI NO YYPABJIENIO C NOMOUIK MOHIO
Pn BbInonHeHH BCex HacTpoek DeIcTByIOT CneDyIOUne npabnla:
-ΓλaBHOe MeHIO COCTOHT n3 ueTbIePex NyHKTOB
INHdNkaunia npbl/Metpbl (USEU), BaNnIcTHuecka
KpIBaB (boll), PacctOHaHne IJn ToHOrO BbICTpeLa
(Sld) IN BaNnIcTHueckn φOpMaT BbIBoA (RbC).
Ioppo6Ho əTN φyHKuIn Onncahbl B
COOTBeTCTByIOx npa3JeJax.
- KaK rIaBHOe MeHIO, TaK i COOTBeTCTByIOUe OIcUN HAcTpoE KKnHoyeHbI 6eCKOHeuHbIM NTeTJIaMn, To ECTb BCEx IyHKTOB/HAcTpoE KMOXHO DOCTNuB MHOrOKpaTHbIM HaKaTneM KHOnOK.
HACTPOIKA XEJIAEMOJ EDINHUNbI N3MEPEHnA
Leica Geovid HD-B MoKet 6bItb HAcTpoeH Ha
HcNoIb3yEmyo B CUIA ImnepckyIO cNCTemy eHNu
H3MepeHnra (U5) NnHa MeTpnueeCKyIO CnCTemy (EU), To
ecTb dIpa pacCToHnra/TeMnpaTypbI/daBNeHnRA Bo3DyXa
MOrTy HcNoIb3OBAtbcr Nn rPdbI n IIOIMbl/rgadycbl
ΦapeHReYTa/DIOHMbl pTyTHoro CTOn6a, Nn IMeTpbl n
caHTmEtpbl/rgadycbl Lelbcnra/Mnlln6apbl.
3Ta HacTPOiKa TaKke OnPedeJenET eHNuCy TOkKn
HABODKn, 6aJIInCTNueecknx KpNBbIX n pacCToHnra dI
toHOrO BbICTpeNa. Leica Geovid HD-B Ha 3abOde-
H3ROTOBITeNe 6bl HAcTpoeH Ha rPdbI.
Hactponka
- Haxmnte u ydepknaite BCnOmaTeIbHyIO KhoNky/KhoNky Bbl0Ba MeH0 (2) (≥ 3c)
- IOrBnIeTeaEU (MnaTaE).
- Haxmnte InaBHyIO KhoNky/KhoNky BbI0Ba MeHIO (7), yTo6bl BbI6paTb HyKHyIO eINHHUy N3MepeHnA.
US=HNДИКацИЯВярдax
EU- INHINKAUINB Metpax

US EU

E
Yka3aHHe:
ДанHyн HabToPy BCeRa MoXHo y3HaTb NO ИнДиКaци: ecn Bbl6paHbI MeTpNueckne 3HauEHHa,TO РяДOM C Bn3HrHoi MapKoI Cnpaba Bn3y NOBHTcR TOUka.
- CoxpaHnte HacTpoKny, 6bICTpo HaxaB dIy 3TORO BCNOMORAteIbHyIO KHOKNy/KHOKNy BbI3OBA MeHIO.
- Chauana coxpaHennH aHCTpoKa rOpNT dIa NOITBepKdEHNr He Mnra, 3aTeM HNDnKaunr Chauana nepexoINT K CneNyUOeMy NyHKTu MeHIO (BALL = 6aJIInCTnuecka KpNba) n rachet, ecnn HAcTPOKn 60JIbWe He IpnOn3BOJATcR.
H3MEPEHENE PACCTOHHN
YTo6bI n3Mepntb pacctOraHne do o6beKta,ero HxKHO TOUHO 3aBn3npoBaTb. JIJI aTOrO HyXHO BblONHTb CNeDyIOuEe:
-
Haxmnte rnaBHyIO KHOIky/KHOIky Bbl3Oba MeHIO (7). DaIbHOMep BKJIouHaETcR.
-
IOnBntCn Bn3nphar Mapka.
Iocne OTnyckanraJnBHOH KHOKN/KHOKN Bb3OBA MeHIO BN3nPHa Mapka 6ydet npdoJXKatb CBETNbC eEe B TeueHne npm. 6 cekyn. Ecnu ydepKNaBt b ee HaxaTo, BN3nPHa Mapka CBeNTcH enpepbIBHO.
- CMOTpIte Ha o6BeKT uepe3 BnIoNcKaTeIb, noka CBETITcR BnHPha Mapka.
- CHOBA HAXMITE rnaBHyIO KHONKy/KHONKY Bbl3OBA MEHIO.
a. Bn3npHaj Mapka BO Bpemn3mepeHHra cachet Ha He npoJOnKHTeIbHoe Bpemr.
b. Noka3bIbAeTcN 3MepeHHoe 3NaueHHe.
Ioka Bn3npHa MapKa eue CBeHTcra, MOxHO BblONHHTb HOBOe H3MepHe, Haxab Ira 3TOr0 rnaBHyIO KhoNky/KhONKy BblOBA MeHIO.
PnBnTc: -ecn
- pacctoHne do oBekTa coCTaBnaret Mehhe 10 MeTPOB/rapIOB Hn
IpeBbIaewaetc daJIbHOCTb,INN
-Obbekt HeioctaToHOO Otpaxaaet.
Nocne toro kak Hnkaunn NoracHe, daIbHomep 6ydt aBtOMaTnueckn BblKIOUeH.
PEKIM CKAHINPOBAHNA

C nomoiLeica Geovid HD-B BbINOJIHrIb N3MepHne BO3MOxHO TaKKe B HeNpepbIBHom pexHMe pa6Otbl (peKm cKaHnpOBaHH):
ydepKnBaTe rnaBHyIO KHONKy/KHONky Bb3Oba MeHIO (7) npu BTOpOM HaxKaTIN B HaxKaTOM NIOJOKeHN.
IpymepHo uepe3 2,5cekyHdbI ycTpoiCTBO nepeKIOHTcB pexIM cKaHnpOBaHn I6ydet HepepbIBHO npOn3BOOHTb N3MepeHHN. 3TO BnHO nO MeHIOUeCn HnDKaUN.
IIO nCTeueHn npm. 1 cekyHdbi 6ydt noka3aHO HOBOE n3MepeHHoe 3HaueHHe.
Pekn m cKaHPOBaHn oO6eHHo yO6eH npn n3MepeHn Ha He6oJIbIuN H IOBnKhblx O6beKtA.
Yka3aHnHa:
BpeKIme cKaHnpoBaHnI nonpaBOUHO K03ΦΦnueHr6yJeT OTo6paXeH TOnbKO nO kOHuaHHIOcneHero N3MepeHn, Ho He paNbwe.
BpeKIme cKaHnOpaBHaN npn BbIIOJIHeHN HeIpepbIBhIx n3MepeHn IOTpe6JIeHne 3JIeKTpo3Heprn 60JIbSe, Yem npn BbIOJIHeHN eINHHbIX n3MepeHn.
HHINKAUNAATMOCΦEPHBIX YCIOBNI
Дя paçaeta noLOXeHnTockn nonaHaHn (cM. cnEduoIuIpa3dIe) 6HOKb Leica Geovid HD-BdoNoJIHTeBHO onpeJeT Bo Bpemn3MepeHn paCToHn TpN BaKHbIe HOpMaUH: HaKIOH yCTpoiCTBa, TeMnepaTy pN aTMocOpeHoe daBHeHne. DaHHbIe 3HaueHnBbl MoKeTe npocMOTpeTB NIO6oe Bpemr.
Haxmnte n ydepknBaTe BCnOMaTeIbHyIO KHOKNy/ KHOKNy Bbl3OBA MeHIO (8) napy cekyHd.
Ha npay cekyHnIOBnIeTcBn3npHnA mapKa (ecnn Do TOrO eue He 6bIIO BkIIOyeHO n3MepeHne pacCToHnHa).3aTeM nooopeENo npImepHo Ha 2 cekyHdbmecTO paCCToHHnIOBnIOTc
- yrOHaKNOHa
TeMnepaTypa
- aTMOCepHoe JaBHeHne.
Yka3aHHe:
Ecn Koprnyc 6nHokla Leica Geovid HD-B, Hapnpmep, npn BbIXOe n3 BHyTppeHHnx NomeueHn HapyKy, IMeet TEMepaTpy, KOtopa 3HaunTeBHO OTnuaeTcR O OKpyKaIOseM, MoKeT npoTN Do 30 MNHT, Noka BHyTppeHHn DaTuNK He NauchET ONpeJeTb PpaBnblHyIO TEMepaTpy.
ONPEDEJEHNE BAJIINCTHUECKOKNKPHBOI
Для corlacobahna paccuHaHHORO 3haueHnIЯ KBBaJIeHTHO rOpN3oHTaNbHO r pacCToHnI (EHR, CM. ctp. 200),ToUKN HABODKn (HOLD,cm. ctp. 200) nIIN XOJa CMeUeHn IpruIeNa (NbOAR,cm. ctp. 201) c pa3IInuHbIMn KaIIb6paMn, TINpAMn IN BecOM NpIb Bbl MoXeTe Bbl6paTb IIO6yIO n3 12 BaJIInCTnuecknx KpIBbIX.
ДяЗTOROBpinloKeHnBbHaJTe6Ta6JIu:noTpna3hbyx Ta6Ncblco 3NaueHnMn paCCTOHNДTOHOro BbICTpeJa BMeTpax NByrpaX.
OtbIuHTe TabJIue, KOtOpa COOTBcTcByeT
HaCTpoEHHomy pacCToAHNIO dIaTOUHO BbICTpeIa,
6aJIInCTnueckyIO KpNByIO, KOtOpa MaKcImaHbHO
NoXoINr DaHHbIM pOn3BOJNTeI rOpxNIA
OTHCInTeBHO NIOJOKeHNr TOCKI NOnaDaHNI.
PnmuMep:
Opykne BmecTe C COOTBETCTBYUHIM ONTNUeCKM
PnueLOm PnucTeJHO Ha 100 MeTPOB, NOToMBy
DaHHOM cIyuae NoxOHT Ta6nua 1. B KaueCTBe
NoIOKeHn TOUKN NOnaHaHn DnA NcNOb3yeMOrO
OpxuNpON3BOUnTeHem OpxuN yKa3aHo paCtOHaHne
OT 15,0 cm Do 200 M. B COOTBeTCTByUHEm CToJI6ue
MaKcImaJIbHO NoXoDIT 3HaueHHe 14,5 cm, yKa3aHHOe
B CTPOKe EU7,-3TO n eCTb NoxOJaUa
6aJIInCTNuEcKa KpuBa.
Yka3aHHe:
Pn nCnoB3OaHHn 6aHnCTnuecko fynKuN Leica Geovid HD-B Ha paacctoHnax >300 M/300 npDob Mb peKoMeHnyem OnpedeJIHTb 6aHnCTnueckne daHHbIe CBOe amHyuINu IN B XOe npakTnuecknx TcTeOB, YTO6bl BbIbpaTb POnxOJaUyIO KpNByIO.
HACTPOIKA BAJIINCTNUECKOKNKPNBOI
Haunhe c 1, ecn Bb do eTo o e He b3Bayn ynpablenie c nOoBmHIO; c 3, cn Bblb6pann ennuy n3mepeHHn HnDnKaunne eue Muraet.
-
Haxmnte n yapedknaite BCnOmaTeIbHyIO KhoNky/KhoNky Bbl0Ba MeHIO (8) (≥ 3c)
-
IORBNTDEEL
-
Haxmte BCnOMoTeJIbHyIO KHOJky/KHOJky BblOBA MeHIO 1 pa3 n ydepXnBaIe He npOdoJIxHtJeBHOe Bpemr (< 2 c).
-
HДИКацинЗмEHNTСн(=6aJIINCTNueeCKNe KpNBbIe).
-
Haxmnte TnabHyIO KHOKNy/KHOKNy BbI3OBA MeHIO (7).
HДИКaUЯ N3MeHHTbcraHa
- 151nn
-EU
- NocpeDCTBOM MHOROKpaTHORO 6bICTpOro HaxaTnraBHOKHNK/KNONKBbI3OBA MeHIO BbI6epnteJenAemyIO 6aannCTnueckyIO KPNByIO,TO eCTb
USIOUSI
EUIIOEUIIIN,
ecn Bbl XeNaTe Bndetb HNDKauuPaccToHn 6e3 HNDKaun KoppeKun TouKn NonaDaHn
(ABC) OFF.
- CoxpaHnTe HacTpoKy, 6bICTpo HaxaB IaIa3TOBO CnOMoRAteJIbHyIO KHONKy/KHONKy BblOBA MEHIO.
CoxpaHnHa HactpoKa rOpNT DnI NOITBepXJeHn 4cHeMnra,3aTeM nHnKaun CHauJa NepexoNt K5d n 3aTeM rachet,ecn60nbE He BbINOJHrOTc KaKne-nbo DeCTBn.
EcIn 6aillnctuueckKa KpBbHa HactpoeHa,To nocLe BblnoJIHeHn KaJDoHO N3MepeHn paCCToHn 6yJeT ChauJa Ioka3aHo Ha 2 cekyHdbI 3NaueHne pacCToHn, 3aTeM Ha 6 cekyHd paccHTaHHa TouKa HABOKn.
HACTPOIKA PACCTOHHN IN TOHHO BbICTPEJI
Haunhe c wara 1, ecn Bbl do 3Toro eue He BblBayn ynpablenne C nOmoBIO MeHIO; c wara 3, ecn Bbl Bbl6pann 6aJIncntueckyIO KpNByIO INHdkauSId ue Miraet.
- Haxmnte u ydepknaTe BCnOmaTeIbHyIO KhoNky/KhONky Bbl30Ba MeHO (8) (≥ 3c)
IOBNTO8EU.
- Haxmte BCnOMOraTeIbHyIO KHOKNy/KHOKNy BbI3OBA MeHIO 2 pa3a uYdePknBaIe He npOdoJXnTeIbHoe Bpemr (< 2 c).
HnKauMa MeHaETcRdLL KSh.
-
NocpeIcTBOM MHOROKpaTHORO HaxaTnRAABHOH KHOKN/KHOKN BbIOBA MeHIO (7) BBIEpTe XeNaemoe pacCToHHe nIra ToHOro BbICTpeHa.
-
[M],
-200[M],WNI
-CEE[M],NIM -
[r], nui
-200[9],nui
-300[9]. -
CoxpaHnte HacTpoKky, 6bICTpo HaxaB dIa 3TORO BCNOMORAteIbHyIO KHONKY/KHOKNY BbI3OBA MEHIO.
CoxpaHeHHa HactpoKa rOpHT dIa IIOITBePKeHn4 C He Mmra, 3aTeM INHnKaun CHaHaJIpePxoDNT K ABCN 3aTeM rachET.
HДИKAUHACTPOEHHOI BAJINCTNueCKOKNPBOINPACCTOHHI JTOUYHO BbICTPEJIA
EcnBbXOTte npOBepntb Baun HacptponKn,
HaipnMep, no npuHne n3MeHEnn CHTyaun Ha oxote
nnn no npoWeCTBn 60nbUoro KOJIueCTBa BpeMeHN
MeKdy nCnoJb3OBAHNem, TO Bbl Bcerda MoKeTe 6bIcTpo
npocmTopeTb 3TN 3HaueHn.
HaKMnTe BCnOMoTaTeNbHyIO KHOIpKy/KHOIpKy BbI3OBA MeHIO (8) 2 pa3a n ydepKnBaIte He npOIoJXnTeNbHoe BpeM.
-
PoiBn3HnHOI MapKo 6yDyT NoaBnTbCra (pnp Heo6xoDnMoCTn BmecTo paCCToHHa) npM. Ha 2 c Dpyr 3a dpYrom 3HaueHn
-
NaCTPOEHHO 6aJIINCTnueeCKo KpNUBOI
- HAcTpoeHHOro paCCTOraHnI dJI TOUHO RO BbICTpeNa
- HactpoeHHbIX 6aJIInCTnuecknx npapametpoB BblBOda
BAJIINCTNueCKNE OFOPMATbI BblBODA (ABC)
- Haxmte u yepkBaIte BCnOMOraTeIbHyIO KhoNky/KhoNky BblOba MeHIO (8) (≥ 2c)
PONBNTDUEEL
- Haxmte BCnOMOraTeIbHyIO KHOINKy/KHOINKy Bbl3OBA MeHIO 3 pa3a n ydepXnBaIe He npoDoJnxTeIbHoe Bpemr (< 2 c).
HnKaun MeHaeTcAALL N SHHa ABC.
3.ПocpeIcTBOMMHOROKpaTHORHaxKaTnIraBHOH KHOKN/KHOKNBbIOBaMeHIO(7)BbIEpnte XeNaemy6aannCTnueckyHnHaCtpoNky.
EH,nn
HOLD, UNI
- H(1MOA), nnn
-13(1/3MOA),nii
-14(14MOA),nui
-5
-
CoxpaHnte HacTpoKky, 6bICtPo HaxaBДЯ 3TOrO BCNOMORAteIbHyIO KHOKNy/KHOKNy Bbl3OBA MeHIO.
-
CoхpaHeHHa HacTpoHka 6yJeT CBeHTbC8 B TeueHne 4 c B KaueCTBe NOpTBePxxJdeHnA, a 3aTeM nOrachET.
HINKALUNI INPOBEPKA HACTPOEHbIX BAJINCTNUECKNX IAPAMETPOB
EcIn BxOHTe npOBepntb HAcTPOKn,napaMeTpbl MOXHO BJIIO60MOMeHT BbIECTn Ha IpOCMOTp. HaxmTe BCnOMoTaTeBHyU KHOKNy/KHOKNy BbI3OBA MeHIO (8) 2 pa3a n ydepXnBaIte He npoDOnKnTeNbHoe BpeM.
- Пд ВИЗИРНО Марков 6уДТ NOЯВЛТбС (при HeоБхODIMOCTN BmecTo paCCTOHH) npIM. Ha 2 c Дуг 3a ДуROM 3начEHN
- HAcTpoeHHo 6aJIInCTnueckO KpINBOI (CM. CToP. 197)
- HactpoeHHORo paacctOraHnI dIa ToUHOro BbICtpena (cm. cTp. 198)
-HaCtpoeHHbIX 6aJIIncTnuecknx npaMeTpOB BbIOda (cm. cTp. 201)
Pn OTKIOueHn BCex 6aJIInCTNueCKnx FyHKuIN (bALL = OFF) noka3bIbaetcTOnbKO HacTpOJa US IN EU.
YCTAHOBKA DIOONHINTELHBbIX BANINCTNueCKNX KPNBbIX
EcnI nI npdeymoTpeHHo KOMbHaunn ,opyKne/ nyu" yke He doctatoHOn oJHO n3 2 x 12 3anporpammmpoBaHHbIX 6aJIncTHueCKNX KPNBbIX,TO npn nOmoU Leica Geovid HD-B Bby taKxe moKete yCTaHOHTb co6CTBeHHbIe, INDINBUdYalbHbIe 6aJIncTHueCKNe KPNBbIe. Chayana OHn ToUHO paccuNTbIBaOTcra Ha OCHOBAHN Yka3aHHbIX B peXnme OHnH TaKnx DaHHbIX CHapJKeHna, KaK KaJInp, BeC npIn n T. d., 3aTeM OHn NepeHoCrtcra Ha KapTy NaMaTn Micro-SD, KOtopa BxOINT B KOMNKeT NoCTabKn. B pe3yIbTaTe, Nocne yCTaHOBKn KApTb I naMRTn, 6aJIncTHueCKNe KPNBbIE MOXHO Bbl3BaTb C NOMOuBo MeHIO bHOKn.
3TO BbIIOJIHЯETCBA TPN 3Tana:
A. Pacueti nepeHoc Jeklaemoi 6aJIInCTnueeCKoK npBoi Ha KapTu namrTn. Ha Be6caTe KOMpaHn Leica Camera AG (www.leica-camera.com) B pa3dene ,CnpTHBna ONTka" Bbl NaIte:
- OINCAHNE O TOM, KAK BBOJNTb HEO6XoIMyIO HΦopMaUHO/3NaueHnAДЯ paCyeTa 6aJIInCTuYeCKoKpIbO;
-COOTBETCTBYIOUyIOΦOpyMnIaBBOdaaHHbIX; - OINCAHHe Ipouecca 3aRpy3Kn, To eCTb INHCTpyKUnn No NpeHocy paccuHTaHHoB 6aJIInCTnuecko KpNBOH Na KapTu nAMrTn.
B. YctaHObKa KapTbI nAmrIn B 6HOKJIb
THe3oDnKapTbI namrtn (13) HaxOHTcB BOTceKe dJa6BaTapen (12), 6Jlroqapryemy 3aunuena OTO 3aqr3HeHnI npOHKnHOBeHn BObl.
- OTKpoIte KpbIuKy (11) otceKa dIra 6aTapen (12), NOBepHyB ee, HApnMep, C NMOUbIO MOHeTbl, IPOtINB YacOBO B CTpeKN.
2.ИЗВЕКИТЕбАтЕЮ. - BCTaBbTe KapTu NaMAtu Do UeJUcA B WaxTy KOHTaKTAmN BHepeTak, YTo6bI OHN 6bln 06paueHbBHN3.
- BCTaBbTe 6atapeIO NOJOKHTeJIbHbIM KOHTaKTOM Bneped (kak noka3aHo Ha pncyHke B OTceKe dJa 6atapen).
5.ЗakpoIte KpbIuKy, NOBepHyB ee no YacobOn CTpeJIke.
YTo6bI n3BLeuK KapTu NaMHTN, BblONHtE BCE DeInCTBnB O6paTHo NocJeDoBaTeJbHOCTN.
IcnoB3yIte PnHcET, KOTOpb BxOaNT B KOMJIeKT NOCTABKN.
C. BbI3OB 6aJIINCTnueeCKoK PnBOc KApTbI NaMRTN EcIn B 6uHOKlb BCTaBHeHa KapTa NaMRTN, Ha KOtOpO HaxoINTc8 BaJIINCTnueeCKa KpNBaR, To ee MOxHO Bbl3BaTb TOUHO TaKKe, KaK OINcaHO B pa3dJe „HacTpoiKa 6aJIINCTnueeCKoK PnBO" Ha cTp.197.
Iocne Haxatna IaBHOKHOKN/ KHOKN BbIOBa MeHIO (7) KapTa 6yTe OTobpaXeHa KaK nepBar Cord. B KaueCTBe npedynpexJeHHa BmecTo eToro NOBNTc:
Errl,ecINBbI3BaHO MeHIO Sid,HO 3aTeM N3BNEKaETcKapTa NaMRTN,NiHa NOBpeXeHHbIX INI He CUnTbIBaEmbIX KapTx.B ONpeDeJIeHHbIX cIyuaX rachet TaKke Card.
- Err2, ecn Ha KapTe NaMaTn Het 6aannctnuecko KpNBoi
Ecr3,ecn6aannctuueckKaKpBaHa KapTe namrTcOedePKeNT He npabunbHbIe daHHbIe
Даьншпд ДЕСТВИВTOUHOCTHCOOTBETCTBYOT ДЕСТВИМ,ПРIMEHЯEMbIXДЛЗ3aNPoPpAMMnPoBaHHbIX БаJIINCTNueeCKNXKPNBbIX.
Yka3aHHe:
JaKe ecn KaPa nAmrN BCTaBHeHa,TO B IIO6oe BpeMa MoXHO yCTaHOBntb OndHy N3 3aIporpaMMIpOBAHHbIX 6aJIInCTnueeCKnx KpNBbIX. PoTOMy BCerDa npOBepRte BaHn HAcTPOKn.
Yka3aHHa:
B ueJx 6e3onacHocTn,TO eCTb IaToro,TO6bl NCKJIIOUHTbIpyTaHnUy,HaKapTe MoXHO XpaHnTb TOnbKO OndHy 6aannctnueckyIO KpNByIO.
- Pn nCnoJb3ObaHnn 6aJIInCTnueeCKnx KpNBbIX C KapTbI NaMrtn OTo6paKaOTcra pacCToHnro 925 M/1000 npdoB.
Bb6op KapT microSD cnHkOM BnIK nIra TOrO, UTo6bl Fnpma Leica Camera AG cmorna nonHoCTbIO npOBepNTb BCE HMeUuuecra TINbHa COBMecTmOCt b N KaueCTBO. IOnrTomy Mbl peKOMeHnyeM, HAnpImep, KApTb ,microSDHC™" OT BeNyueero npOn3BoDnteJIa "SanDisk".
XOTnHcNoB3OBaHHn DpyrNx TINOB KapT He CneIyET OKndTaTb TORO, YTO 6HHOKNb IIN KaP Ta 6yDyT NOBpeKdEhbl, TAK KAK B OCO6eHNOCHTn TAK Ha3bIbAeMbIe ,6e3bIMAHHbIe" KapTb HE NOLHOCTbIO npIndepKbBAOTcra CTAndapTOB dIra KapT microSD, fnpMa Leica Camera AG BCE JHe MoKeT B daHHOM clyuae rapaHTnpOBaTB nCnpabHyU pa60Ty.
YXOD/OUHCTKA
Leica Geovid HD-B He Tpe6yeT ocoboro yxoda. rpybile 3aqr3HeHnra, TaKne KaK, HApnpMep NecOK, DOnJkHbI ydaJIbTCBc C NOMOuBIO BOLOscHON KNCToQKN INN cDyBaTbcr. OTneuATKn paNbUeB nT. n. Ha JInH3ax oBeKTnBa n OKyIpa MOXHO pPeDbapntelHo OunchTtB BJaXHo CaTeKoN n CtepeTB MrgKoY nCTOn KOKe nn CaTeKoN, He CoedePkauee nbJIb.
BaxkHo:
При Вытupaни сильно 3агрязньхлнЗ He НадаВиBaIte сишКOM сиьнHa noBepxHocTb. XOTЯ прOCБтLEHne И IMeET BИСOKу YCTOчNBOCTb K ИЗHOCY,ОHO BCE Ze MEоKet 6blТ NOВpeжdeHo ЧаСТУКAMи Necka ИИ N КрИСТаллamс COII. Корпс pa3peшaetc OUnSаТ b TolьК c NOMOць ВlaЖнОй кожи. Пpr ИСпЛьЗOBaHи cyxnx calФeTOK суцEcTBуET onaCHOCt b CTaTNueCKOr 3apЯДa. CnIrtи ДPyгHe xIMuYeCKne pactBOPby 3aPpeUaETcR ИСПОЛьЗOBaT b ДЯ OUnICTKN ONTNUK И KOpnyca. Кадь 6иHoklb Leica Geovid HD-B КрOME бОЗнauЧЕня TINа ИМeET CBoI CO6CTBeHHbI серинь Homep.ДЯ 6e3ОпaСHOCtN 3aNnWite 3TOT HomepВdoKymeHTax.
BhimaHne:
Pn6op 3anpeaetc0TkpbBaTb!
3AIIACHbIE DETAJIH
Ecni Bam noHaio6Tc3aacHbIe Detann ILa Leica Geovid HD-B, HanpImep, Harnla3HKn IIn 3aunTHaJ KpbIka OKyIpa, o6paauTeCb, NoKaNyIcTa, B HaW cepBnchbI cHTp IIN B npedCTabNTbCTBO Leica B BaWei cTpaHe (adpeca yka3aHbI B rapaHTnHOM nIcTe).
TUO DEJATb, ECIN...
TEXHUNECKHEXAPAKTEPNCTIKN
-
Tables 1, 2 and 3 show the ranges in meters and the holdover corrections in centimeters, while tables 4 and 5 use yards and inches.
All values are applicable for: -
An atmospheric pressure of 1013mbar
A temperature of 20^ / 68^
Horizontal shots
Remarques:

- Hinweis:
- PACKAGE CONTENTS
- Warning notice
- FOREWORD
- DISpOSAL OF ELECTRICAL AND ELECTRONIC EQUIPMENT
- CONTENTS
- AppLICATIONS
- ATTACHING THE LENS COVERS
- ATTACHING THE CARRYING STRAP AND THE EYEPIECE COVER
- Note:
- INSERTING AND CHANGING THE BATTERY
- Notes:
- Attention:
- BATTERY CHARGE LEVEL
- ADJUSTING THE EYEPIECE CUpS / USING WITH AND WITHOUT GLASSES
- ADJUSTING THE EYE SpACING
- FOCUSING / DIOpTER COMPENATION
- BASIC INFOMATION ABOUT THE MENU SYSTEM
- For all settings:
- SETTING THE UNIT OF MEASURE
- Setting
- RANGE MEASUREMENT
- SCAN MODE
- MEASURING RANGE AND ACCURACY
- DISpLAYING THE ATMOSPHERIC CONDITIONS
- DETERMINING THE BALLISTICS CURVE
- Example:
- SETTING THE BALLISTICS CURVE
- DISpLAYING THE SET BALLISTICS CURVE AND THE ZEROING DISTANCE
- BALLISTIC OUTpUT FORMS (ABC®)
- Important:
- EQUIVALENT HORIZONTAL RANGE
- POINT OF AIM
- pPOINT OF IMPACT CORRECTION USING ELEVATION ADJUSTMENT (CLICK / MOA ADJUSTMENT)
- SETTINGS AND SELECTION OF BALLISTIC OUTpUT FORMATS
- DISpLAYING AND CHECKING THE SET BALLISTICS pPARAMETERS
- USING ALTERNATIVE BALLISTICS CURVES
- MAINTENANCE / CLEANING
- SPARE PARTS
- LEICA ACADEMY
- LEICA CUSTOMER SERVICE
- FCC NOTE: (U.S. ONLY)
- FCC CAUTION:
- LEICA GEOVID HD-B
- DESIGNATION DES COMpOSANTS
- Remarque:
- INNHOLDSFORTEGNEALSE
- BO3MOXHOCTN PIMHEHEN
- KPEIIENHE3AUNTHbIX KpbiUeK ObEKTINBA
- KPEIIEHNE PEMHJIIEPEHOCKN 3AUHTHOKpBIXKNOKYJRA
- Yka3aHHe:
- YCTAHOBKA H 3AMEHA BATAPEH
- Yka3aHnHa:
- BHHMaHHe:
- CTENHe 3APRA BATAPEN
- PEYIINPOBKA OKYJIPOB/HCIOJIb3OBAHNE C OUYKAMN H6E3 HNX
- PERYIINPOBKA PACCTOHHMEXKJY TIA3AMN
- PEYIINPOBKA PE3KOCTH/PEYIINPOBKA IHOINTPNI
- OCHOBHAR INHΦOPMAUJI NO YYPABJIENIO C NOMOUIK MOHIO
- HACTPOIKA XEJIAEMOJ EDINHUNbI N3MEPEHnA
- Hactponka
- H3MEPEHENE PACCTOHHN
- PEKIM CKAHINPOBAHNA
- HHINKAUNAATMOCΦEPHBIX YCIOBNI
- ONPEDEJEHNE BAJIINCTHUECKOKNKPHBOI
- PnmuMep:
- HACTPOIKA BAJIINCTNUECKOKNKPNBOI
- HACTPOIKA PACCTOHHN IN TOHHO BbICTPEJI
- HДИKAUHACTPOEHHOI BAJINCTNueCKOKNPBOINPACCTOHHI JTOUYHO BbICTPEJIA
- BAJIINCTNueCKNE OFOPMATbI BblBODA (ABC)
- HINKALUNI INPOBEPKA HACTPOEHbIX BAJINCTNUECKNX IAPAMETPOB
- YCTAHOBKA DIOONHINTELHBbIX BANINCTNueCKNX KPNBbIX
- Yka3aHHa:
- YXOD/OUHCTKA
- BaxkHo:
- BhimaHne:
- 3AIIACHbIE DETAJIH
- Remarques:
Brand : LEICA
Model : GEOVID 42 HDB
Category : Binoculars