
RCQC2 - Drone VELLEMAN - Free user manual and instructions
Find the device manual for free RCQC2 VELLEMAN in PDF.
Frequently Asked Questions - RCQC2 VELLEMAN
User questions about RCQC2 VELLEMAN
0 question about this device. Answer the ones you know or ask your own.
Ask a new question about this device
Download the instructions for your Drone in PDF format for free! Find your manual RCQC2 - VELLEMAN and take your electronic device back in hand. On this page are published all the documents necessary for the use of your device. RCQC2 by VELLEMAN.
USER MANUAL RCQC2 VELLEMAN
natural_image
Top-down view of a four-legged drone with propellers and control panels (no visible text or symbols)USER MANUAL 3
HANDLEIDING 14
MODE D'EMPLOI 25
MANUAL DEL USUARIO 36
To all residents of the European Union
Important environmental information about this product

This symbol on the device or the package indicates that disposal of the device after its lifecycle could harm the environment. Do not dispose of the unit (or batteries) as unsorted municipal waste; it should be taken to a specialized company for recycling. This device should be returned to your distributor or to a local recycling service. Respect the local environmental rules.
If in doubt, contact your local waste disposal authorities.
Thank you for choosing Velleman! Please read the manual thoroughly before bringing this device into service. If the device was damaged in transit, do not install or use it and contact your dealer.
2. Safety Instructions
 | Keep this device away from children under age 14 and unauthorized users. | |
 | This appliance is not intended for use by persons (including children) with reduced physical, sensory or mental capabilities, or lack of experience and knowledge, unless they have been given supervision or instruction concerning use of the appliance by a person responsible for their safety. Children under age 14 shall be supervised to ensure that they do not play with the appliance. | |
 |  | Keep this device away from rain, moisture, splashing and dripping liquids. |
 | DO NOT disassemble or open the cover. There are no user-serviceable parts inside the device. Refer to an authorized dealer for service and/or spare parts. | |
 | Warning: Do not puncture batteries or throw them in fire as they may explode. Do not attempt to recharge non-rechargeable batteries (alkaline). Dispose of batteries in accordance with local regulations. Keep batteries away from children. | |
RCQC2
3. General Guidelines
Refer to the Velleman® Service and Quality Warranty on the last pages of this manual.
Keep this device away from dust and extreme temperatures.

Protect this device from shocks and abuse. Avoid brute force when operating the device.
- Familiarise yourself with the functions of the device before actually using it.
- All modifications of the device are forbidden for safety reasons. Damage caused by user modifications to the device is not covered by the warranty.
- Only use the device for its intended purpose. Using the device in an unauthorised way will void the warranty.
- Damage caused by disregard of certain guidelines in this manual is not covered by the warranty and the dealer will not accept responsibility for any ensuing defects or problems.
- Nor Velleman nv nor its dealers can be held responsible for any damage (extraordinary, incidental or indirect) – of any nature (financial, physical...) arising from the possession, use or failure of this product.
- Due to constant product improvements, the actual product appearance might differ from the shown images. Product images are for illustrative purposes only.
- DO NOT use this product to violate privacy laws or perform other illegal activities. Always make sure to comply with local rules and regulations when using this device.
- Only use this product in an area legal for remote control flying and free of interfering radio signals.
- Do not switch the device on immediately after it has been exposed to changes in temperature. Protect the device against damage by leaving it switched off until it has reached room temperature.
- Keep this manual for future reference.
RCQC2
4. Features
- gyro quadcopter for indoor and outdoor use
- supports various movements: up-down, left-right, forward-backward, hover, 4 ways flips and loops, 360° roll
- headless flight mode
- stable, easy to control
- 2.4 GHz technology reduces interference when flying multiple quadcopters at once
- rechargeable high-performance lithium-polymer battery (charges via included USB cable)
- suitable age: 14+
- included:
- quadcopter
- 4-channel transmitter
- 3.7 V, 150 mAh lithium-polymer battery (for quadcopter)
- USB charging cable
- multilingual user guide with mounting and flying instructions
5. Overview
Refer to the illustrations on page 2 of this manual.
| A | shell |
| B | blade |
| C | propeller protector |
| D | motor |
6. Remote Control
6.1 Installing the Batteries
- Use a screwdriver to remove the screw on the back of the remote control. Open the battery cover.
- Install four AAA-type batteries (not included) according to the indicated polarity.
- Close the battery cover and tighten the screw.
Warning: Do not puncture batteries or throw them in fire as they may explode. Do not attempt to recharge non-rechargeable batteries (alkaline). Dispose of batteries in accordance with local regulations. Keep batteries away from children.
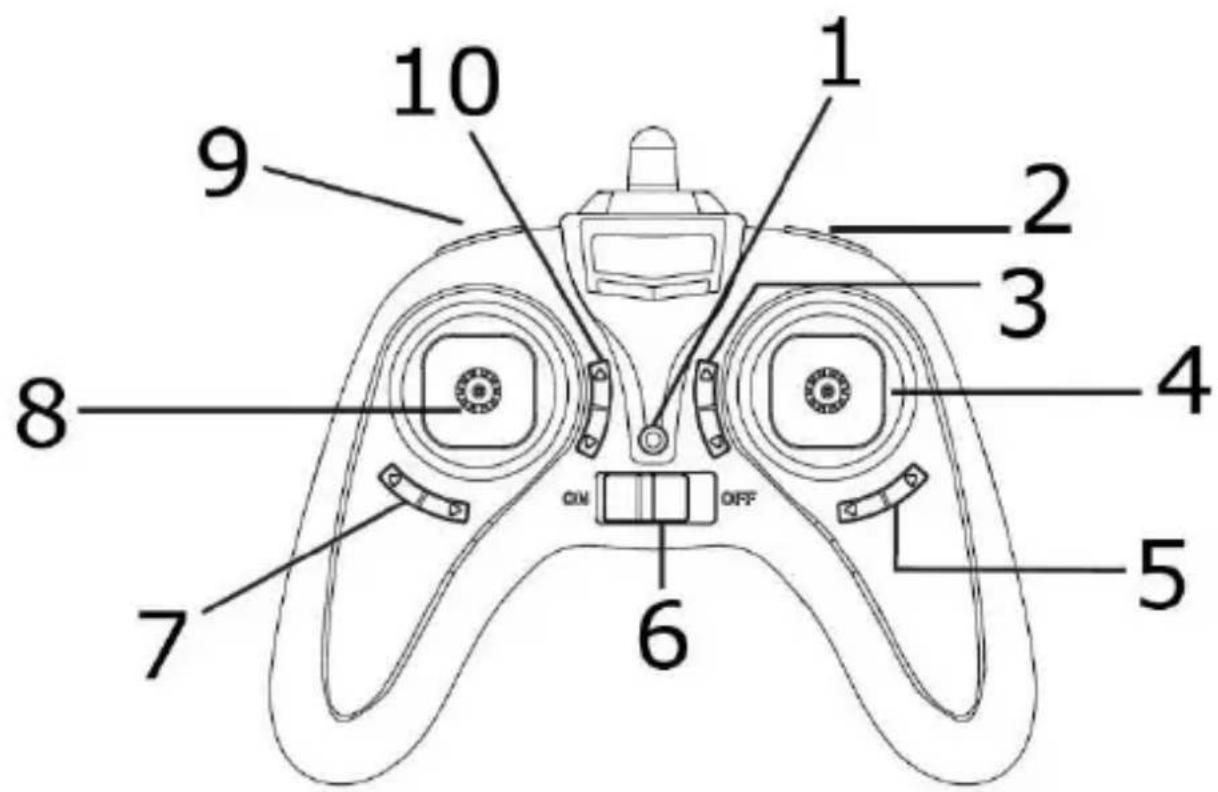
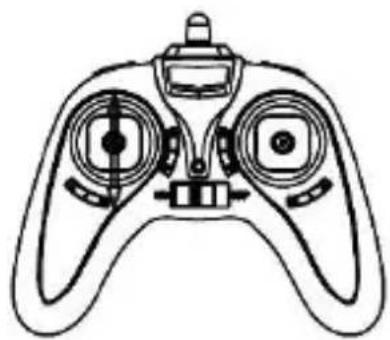
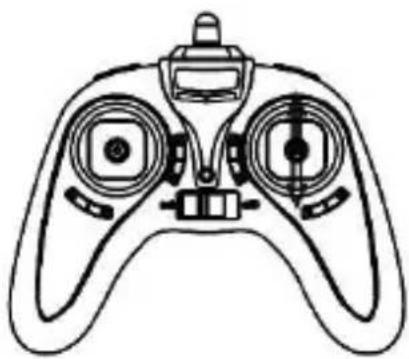
6.2 Function Overview
text_image
1 2 3 4 5 6 7 8 9 10| 01 | battery power indication |
| 02 | 360°/3D flight switch |
| 03 | fine-tuning forward/backward flight |
| 04 | right cyclic stick |
| 05 | fine-tuning lateral flight |
| 06 | on-off switch |
| 07 | fine-tuning turn around |
| 08 | left throttle stickRemark:The throttle stick can be subdivided into 3 power levels: 25 %, 50 % and 100 %. Choose the power level according to your flying skills as the quadcopter will react more swiftly at 100 % than at 25 %. Select the power level with the speed-change switch. The battery power indication indicates which power level is selected: red for 25 %, green for 50 % and yellow for 100 %. Power level by default is 25 %. |
| 09 | speed-change switch |
| 10 | headless mode/auto home mode |
7. Preparing your Flight
7.1 Charging the Battery
- Make sure your quadcopter is switched off (on-off switch on the quadcopter to the right).
- Connect the quadcopter to the included USB cable and connect to a switched-on USB output. The LED on the USB plug will not light during charging; it will switch on as soon as the battery is fully charged. Charging time is about 45 minutes.
- Disconnect the battery from the USB output.
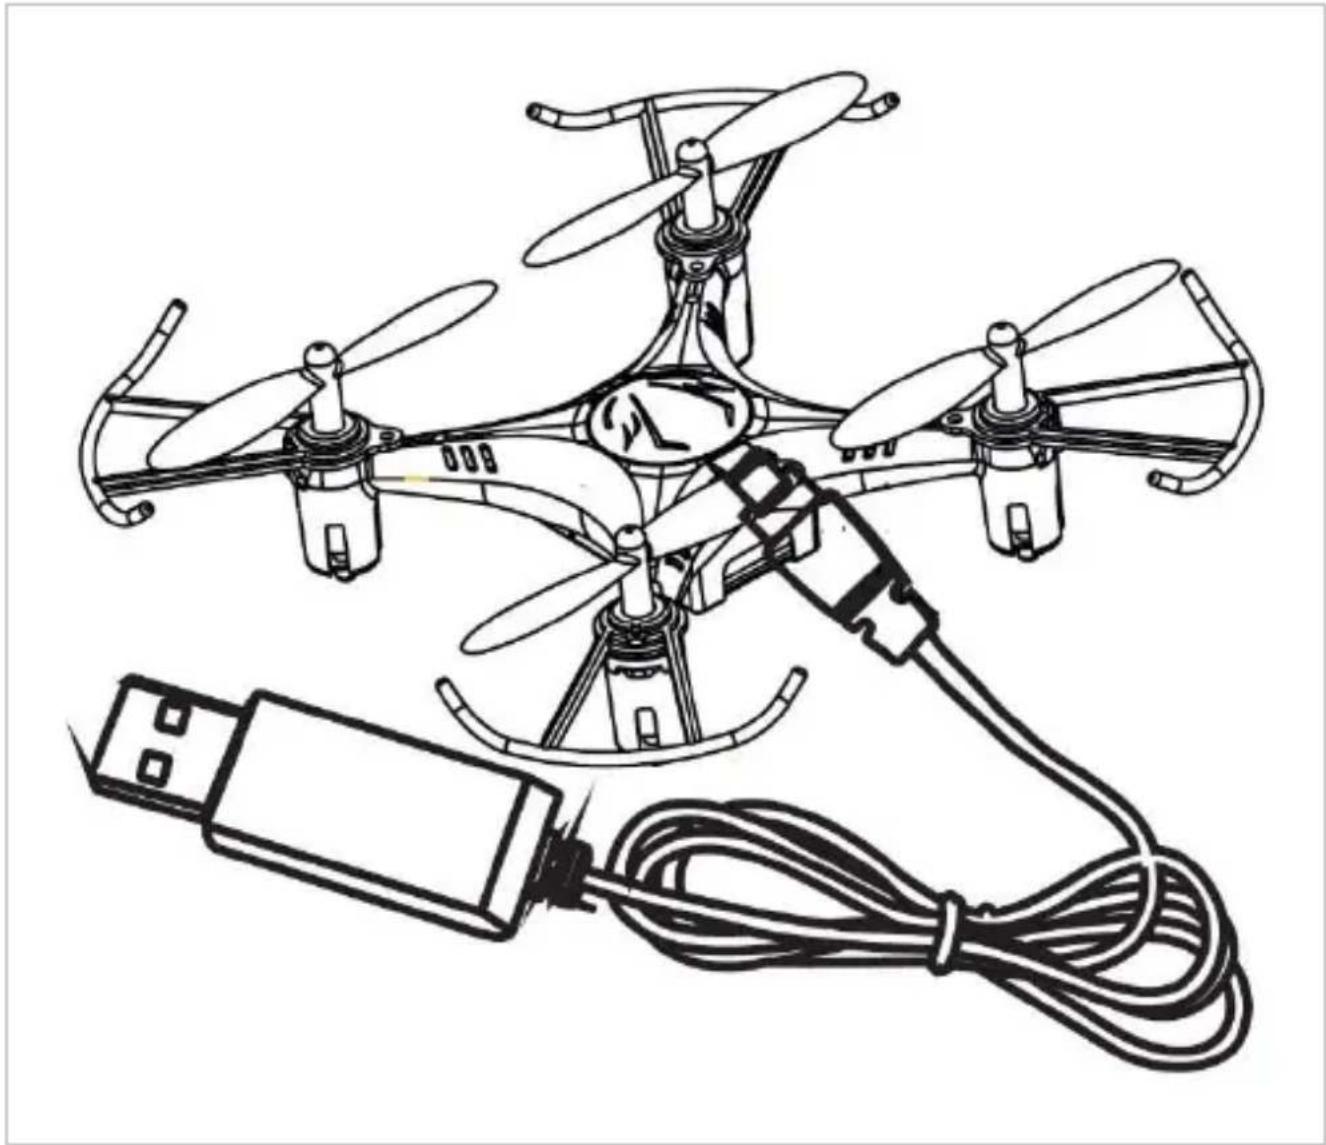
natural_image
Line drawing of a multi-rotor drone with four propellers and a connected cable, no text or symbols present.Remark
The LEDs on the quadcopter will flash when the battery is low.
RCQC2
7.2 Before Take-Off
- Operate in a spacious indoor room or outdoors without rain, snow or wind. Make sure to limit the number of people, animals and obstacles in your flight area.
- Make sure both the remote control and quadcopter are correctly and sufficiently powered.
- Switch on the quadcopter: it should flash slowly and constantly. Place it on a flat surface and step away a few metres.
- Pull the throttle stick to its lowest position and switch on the remote. The quadcopter will flash rapidly and beep, meaning it is linked to the remote.
- Your quadcopter is now ready for take-off.
8. Flying your Quadcopter
8.1 Basic Manoeuvres
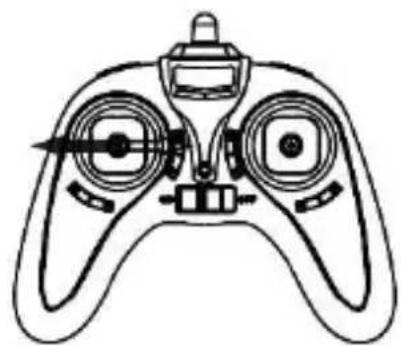
Ascending/descending flight
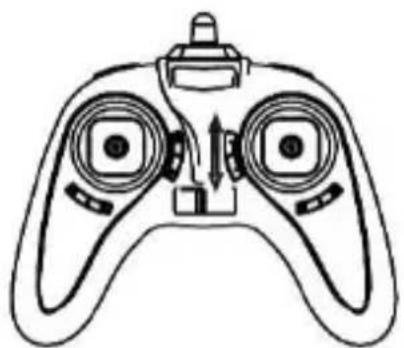
Move the left throttle stick up and down to fly the quadcopter upward and downward.
natural_image
Line drawing of a handheld device with dual motors and a central hub (no text or symbols)
natural_image
Diagram of a multi-rotor drone with visible propellers and control panels, no text or symbols presentTurning
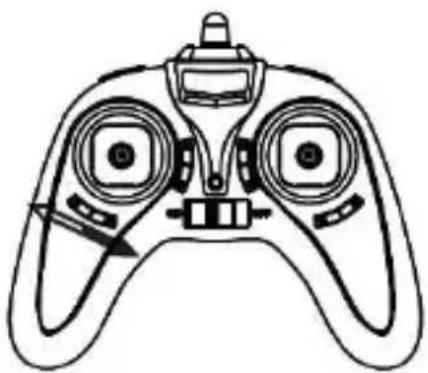
Move the left throttle stick to the left and right to turn the quadcopter left and right.
natural_image
Line drawing of a handheld control device with dual motors and a central hub (no text or symbols)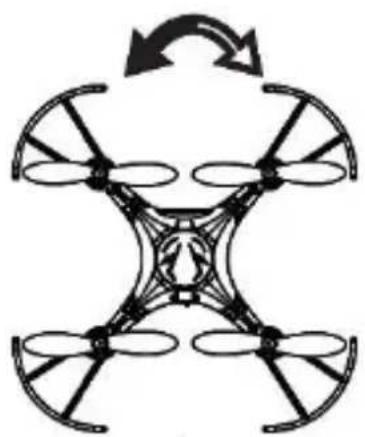
natural_image
Symmetrical diagram of a four-blade drone with directional arrows indicating rotation (no text or symbols)RCQC2
Forward/backward flight
Move the right cyclic stick up and down to move the quadcopter forwards and backwards.
natural_image
Line drawing of a handheld device with dual circular ports and a central hub (no text or symbols)
natural_image
Diagram of a four-blade drone with an upward arrow indicating rotation (no text or symbols)Lateral flight
Move the right cyclic stick to the left or right to incline the quadcopter to the left or to the right.

natural_image
Line drawing of a handheld device with dual circular ports and a central hub (no text or symbols)
natural_image
Diagram of a four-bladed drone with propellers and directional arrows (no text or symbols)Fine-tuning – turning flight
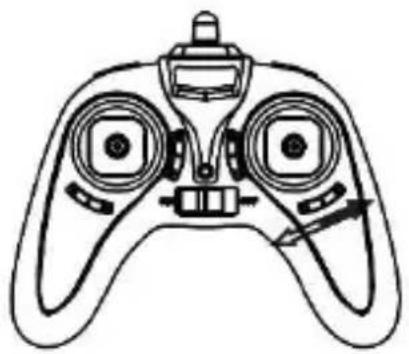
While the quadcopter is hovering, press the turning fine-tune switch until the quadcopter keeps balance.
natural_image
Line drawing of a handheld device with dual circular ports and a central hub (no text or symbols)
natural_image
Diagram of a four-blade drone with propellers and a central body, showing rotational arrow (no text or symbols)RCQC2
Fine-tuning – lateral flight
While the quadcopter is hovering, press the lateral flight fine-tune switch until the quadcopter keeps balance.
natural_image
Line drawing of a handheld device with dual motors and control knobs (no text or symbols)
natural_image
Diagram of a four-bladed drone with directional arrows indicating top and bottom (no text or symbols)Fine-tuning - forward/backward flight
While the quadcopter is hovering, press the forward/backward fine-tune switch until the quadcopter keeps balance.
natural_image
Line drawing of a handheld device with dual circular ports and a central hub (no text or symbols)
natural_image
Diagram of a four-blade drone with an upward arrow indicating rotation (no text or symbols)8.2 Flying Practice
1. Hovering
Slowly push the throttle stick until the quadcopter takes off and hovers in the air. Then, slowly pull the throttle stick until the quadcopter descends and lands. Practice repeatedly until you fully control the quadcopter.
2. Forward and Backward Flying
When the quadcopter hovers in the air, slowly push the cyclic stick in the desired direction to make the quadcopter hover in the chosen direction.
3. Turning
When the quadcopter hovers in the air, slowly push the throttle stick to the left or right, until the quadcopter turns in the chosen direction. Make sure to keep the same amount of throttle!
RCQC2
8.3 3D Flight
After having fully mastered the basic manoeuvres and clocked up enough flying hours, you can now do some spectacular aerobatics!
One of those stunts is the 3D flight or roll. To do so:
- Keep your quadcopter hovering at a steady height of minimum 3 m.
- Press the 3D flight button. Move the cyclic stick to the left, the right, forward or backward.
- You will now have completed a perfect 360^ roll, left, right, forward or backward according to your cyclic stick movement!
Only use the 3D flight with fully-charged quadcopter and remote control batteries, and in an open-space area without obstacles.
8.4 Resetting the Quadcopter
- Switch on the quadcopter: it should flash slowly and constantly. Place it on a flat surface and step away a few metres.
- Pull the throttle stick to its lowest position and switch on the remote. The quadcopter will flash rapidly and beep, meaning it is linked to the remote.
- Push the throttle and cyclic sticks to the bottom-right corner until you hear a double beep. Release the sticks.
9. Troubleshooting
No response from the quadcopter.
The battery of the quadcopter is insufficiently charged.
→ Charge the battery.
The batteries of the remote control are insufficiently charged.
→ Charge or replace the batteries.
The bandwidths of the remote control and the quadcopter do not correspond.
→ Choose the same bandwidth for both the remote control and the quadcopter by resetting and synchronizing the remote control and the quadcopter.
The blades spin but the quadcopter does not take off.
The battery of the quadcopter is insufficiently charged.
→ Charge the battery.
The blades are distorted.
→ Replace the blades.
RCQC2
The quadcopter is flying erratically.
The blades are distorted.
→ Replace the blades.
The blades spin while the throttle stick is at its lowest.
The throttle stick is incorrectly fine-tuned.
→ Fine-tune the throttle stick correctly.
The quadcopter is flying erratically despite fine-tuning.
The blades are distorted.
→ Replace the blades.
The motor(s) do(es) not work properly.
→ Replace the motor(s).
The quadcopter is flying erratically after crashing.
The six-axis sensor is out of balance.
→ Reset the quadcopter or leave it to rest on the ground for 15 seconds.
10. Cleaning and Maintenance
The quadcopter does not need any particular maintenance. However, occasionally wipe it with a damp cloth to keep it looking new. Do not use harsh chemicals, cleaning solvents or strong detergents.
11. Technical Specifications
transmitter channels ....4
control signal 2.4 GHz
material .... plastic and electronic parts power supply
quadcopter ....rechargeable 3.7 V 150 mAh Li-Po
(incl., spare battery RCQC2/SP1)
transmitter 4 x 1.5 V AAA/LR03C (not incl.)
charging time 30-45 min
flying time....5-7 min
control range .... ± 30 m
charging mode....via USB cable (incl.)
dimensions 13.2 x 13.2 x 2.8 cm
RCQC2
options and spare parts
spare battery for quadcopter ....RCQC2/SP1
4 blades.... RCQC2/SP2
4 propeller protectors.... RCQC2/SP3
USB charging cable.... RCQC2/SP4
L+R spare motors.... RCQC2/SP5
Use this device with original accessories only. Velleman nv cannot be held responsible in the event of damage or injury resulting from (incorrect) use of this device. For more info concerning this product and the latest version of this manual, please visit our website www.velleman.eu. The information in this manual is subject to change without prior notice.
R&TTE Declaration of Conformity
Hereby, Velleman NV declares that the radio equipment type [RCQC2] is in compliance with Directive 2014/53/EU.
The full text of the EU declaration of conformity is available at the following internet address: www.velleman.eu.
© COPYRIGHT NOTICE
The copyright to this manual is owned by Velleman nv. All
worldwide rights reserved. No part of this manual may be copied, reproduced, translated or reduced to any electronic medium or otherwise without the prior written consent of the copyright holder.
HANDLEIDING
1. Inleiding
natural_image
Line drawing of a multi-rotor drone with four propellers and a connected cable, no text or symbols present.Opmerking
natural_image
Line drawing of a handheld device with dual control knobs and a central hub (no text or symbols)
natural_image
Diagram of a multi-rotor drone with visible propellers and control panels, no text or symbols presentnatural_image
Line drawing of a handheld device with dual circular ports and a central hub (no text or symbols)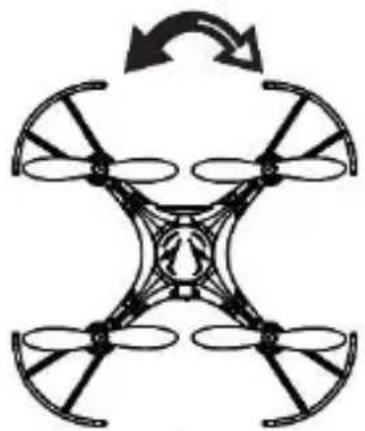
natural_image
Symmetrical diagram of a four-blade drone with propellers and a central body, shown in black and white (no text or symbols)RCQC2
natural_image
Line drawing of a handheld device with dual circular ports and a central hub (no text or symbols)
natural_image
Diagram of a four-blade drone with an arrow indicating vertical motion (no text or symbols)Zijwaarts vliegen
natural_image
Line drawing of a handheld device with dual circular ports and a central hub (no text or symbols)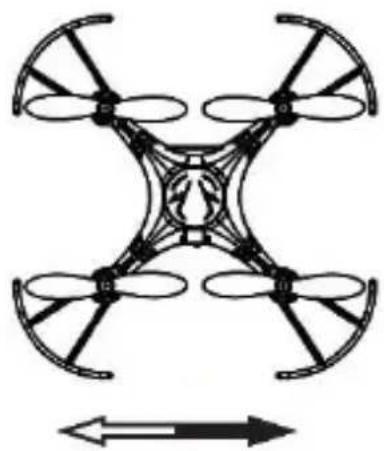
natural_image
Diagram of a four-bladed drone with propellers and directional arrows (no text or symbols)natural_image
Line drawing of a handheld device with dual circular ports and a central hub (no text or symbols)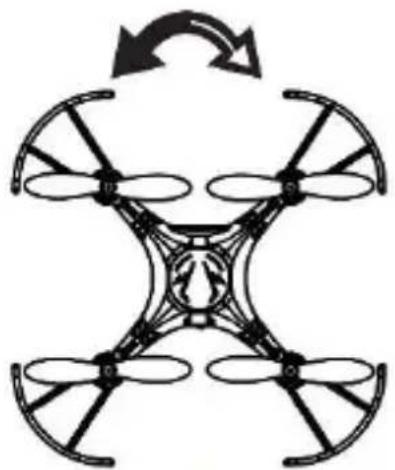
natural_image
Diagram of a four-blade drone with propellers and a central body, showing rotational arrow (no text or symbols)RCQC2
natural_image
Line drawing of a handheld device with dual circular ports and a scroll wheel (no text or symbols)
natural_image
Diagram of a four-bladed drone with directional arrows indicating top and bottom (no text or symbols)natural_image
Line drawing of a handheld device with dual circular ports and a central hub (no text or symbols)
natural_image
Diagram of a four-blade drone with an upward arrow indicating rotation (no text or symbols)8.2 Leren vliegen
1. Zweven
natural_image
Line drawing of a multi-rotor drone with propellers and a connected cable, no text or symbols presentRemarque
natural_image
Line drawing of a handheld device with dual motors and a central hub (no text or symbols)
natural_image
Diagram of a multi-rotor drone with visible propellers and control panels, no text or symbols presentnatural_image
Line drawing of a handheld control device with dual motors and a central hub (no text or symbols)
natural_image
Symmetrical diagram of a four-blade drone with directional arrows indicating rotation (no text or symbols)RCQC2
natural_image
Diagram showing a drone with control panel and its 3D equivalent view, illustrating the concept of balanced positioning (no text or symbols present)Vol latéral
natural_image
Two technical diagrams of a drone with control panels and propellers, shown from different angles (no text or labels)natural_image
Two line drawings of a drone with control panels and propellers, shown from different angles (no text or symbols)RCQC2
natural_image
Line drawing of a handheld device with dual motors and control knobs (no text or symbols)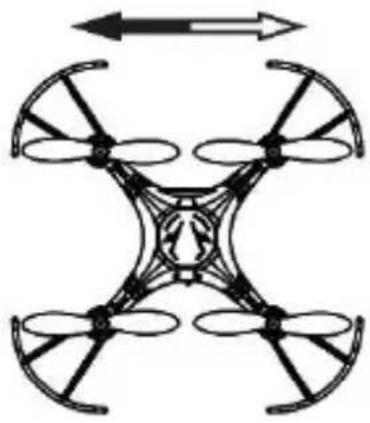
natural_image
Symmetrical mechanical diagram of a four-blade drone with directional arrows indicating rotation (no text or symbols)natural_image
Line drawing of a handheld device with dual circular ports and a central hub (no text or symbols)
natural_image
Diagram of a four-blade drone with an upward arrow indicating rotation (no text or symbols)natural_image
Line drawing of a multi-rotor drone with four propellers and a connected cable, no text or symbols present.Observación
natural_image
Line drawing of a handheld device with dual control knobs and a central hub (no text or symbols)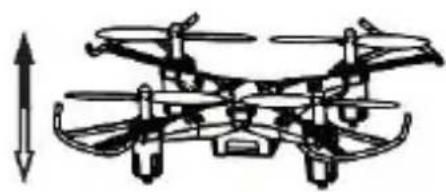
natural_image
Diagram of a multi-rotor drone with visible propellers and control panels, no text or symbols presentnatural_image
Line drawing of a handheld device with dual circular ports and a central hub (no text or symbols)
natural_image
Symmetrical diagram of a four-blade drone with propellers and a central body, shown in black and white (no text or symbols)RCQC2
natural_image
Diagram showing a drone with control panel and its 3D equivalent view, illustrating the concept of balanced positioning (no text or symbols present)Vuelo lateral
natural_image
Two technical diagrams of a drone with control panels and directional arrows indicating orientation (no text or symbols)Ajuste fino - rotar
natural_image
Two line drawings of a drone with control panels and propellers, shown from different angles (no text or symbols)RCQC2
Ajuste fino - vuelo lateral
natural_image
Line drawing of a handheld device with dual circular ports and a central hub (no text or symbols)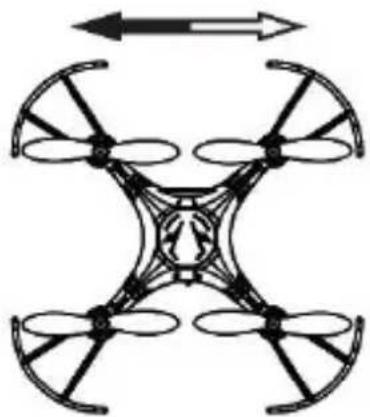
natural_image
Diagram of a four-bladed drone with directional arrows indicating top and bottom (no text or symbols)natural_image
Line drawing of a handheld device with dual circular ports and a central hub (no text or symbols)
natural_image
Diagram of a four-bladed drone with an upward arrow indicating rotation (no text or symbols)natural_image
Line drawing of a multi-rotor drone with four propellers and a connected cable, no text or symbols present.Bemerkung
natural_image
Technical line drawing of a drone with front and side views (no text or symbols)Drehen
natural_image
Two identical line drawings of a drone with control panels and a circular head, shown in top and side views (no text or symbols)RCQC2
natural_image
Line drawing of a handheld device with dual circular ports and a central hub (no text or symbols)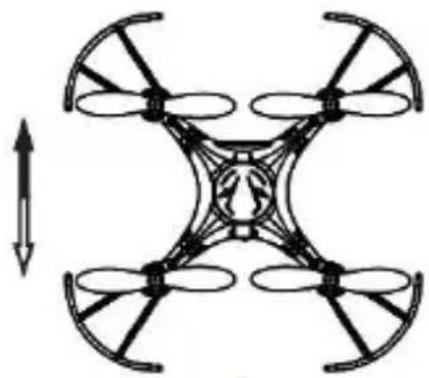
natural_image
Diagram of a four-blade drone with an arrow indicating upward motion (no text or symbols)Seitwärts fliegen
natural_image
Line drawing of a handheld device with dual circular ports and a central hub (no text or symbols)
natural_image
Diagram of a four-bladed drone with propellers and directional arrows (no text or symbols)Trimmung - Drehen
natural_image
Line drawing of a handheld device with dual circular ports and a central hub (no text or symbols)
natural_image
Diagram of a four-blade drone with propellers and a central body, showing rotational arrow (no text or symbols)RCQC2
natural_image
Line drawing of a handheld electronic device with dual rotary knobs and a central hub (no text or symbols)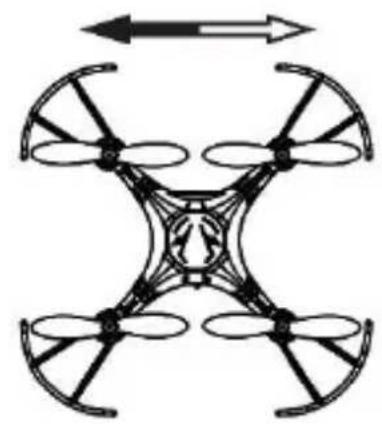
natural_image
Diagram of a four-bladed drone with directional arrows indicating top and bottom (no text or symbols)natural_image
Line drawing of a handheld device with dual circular ports and a central hub (no text or symbols)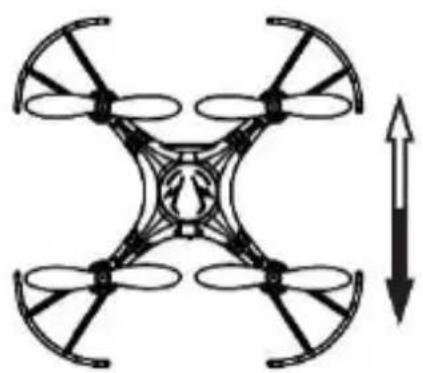
natural_image
Diagram of a four-blade drone with an upward arrow indicating rotation (no text or symbols)8.2 Flugtraining
1. Schweben
4 Propeller RCQC2/SP2
4 x Propeller-Schutz.... RCQC2/SP3
USB-Ladekabel.... RCQC2/SP4
L+R Ersatzmotoren RCQC2/SP5
natural_image
Line drawing of a multi-rotor drone with four propellers and a connected cable, no text or symbols present.Uwaga
natural_image
Line drawing of a handheld electronic device with dual circular ports and a central hub (no text or symbols)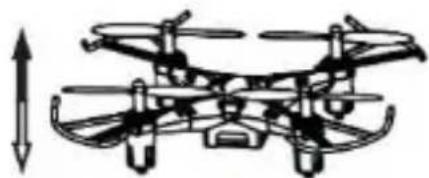
natural_image
Technical line drawing of a multi-rotor drone with visible propellers and control panels (no text or symbols)Skręcanie
natural_image
Line drawing of a handheld device with dual circular ports and a central hub (no text or symbols)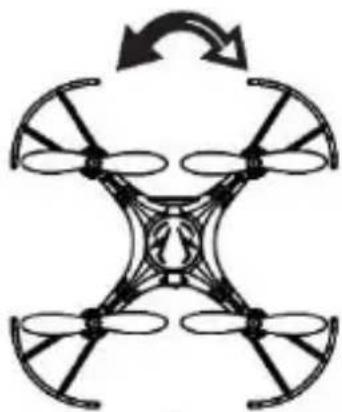
natural_image
Symmetrical diagram of a four-blade drone with directional arrows indicating rotation (no text or symbols)RCQC2
natural_image
Diagram of a drone with front and side views showing internal components (no text or labels)Lot na boki
natural_image
Two technical diagrams of a drone with control panels and propellers, shown from different angles (no text or labels)natural_image
Two technical line drawings of a drone with control panels and propellers (no text or symbols)RCQC2
natural_image
Line drawing of a handheld electronic device with dual motors and control knobs (no text or symbols)
natural_image
Diagram of a four-bladed drone with directional arrows indicating top and bottom (no text or symbols)natural_image
Line drawing of a handheld device with dual circular ports and a central hub (no text or symbols)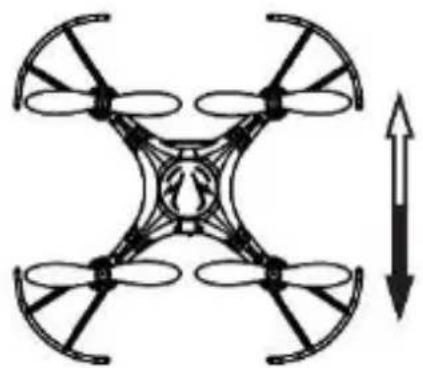
natural_image
Diagram of a four-blade drone with an upward arrow indicating rotation (no text or symbols)6.1 Colocar as pilhas
natural_image
Line drawing of a multi-rotor drone with propellers and a connected cable, no text or symbols presentObservação
natural_image
Line drawing of a handheld device with dual motors and a central hub (no text or symbols)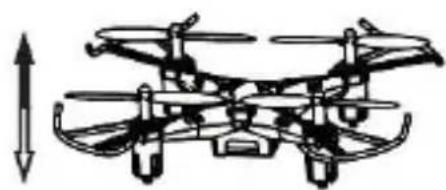
natural_image
Diagram of a multi-rotor drone with visible propellers and control panels, no text or symbols presentVirar
natural_image
Line drawing of a handheld control device with dual motors and a central hub (no text or symbols)
natural_image
Symmetrical diagram of a four-blade drone with directional arrows indicating rotation (no text or symbols)RCQC2
natural_image
Diagram showing a drone with control panel and its 3D equivalent view, illustrating the concept of balanced positioning (no text or symbols present)Vôo lateral
natural_image
Two technical diagrams of a drone with control panels and directional arrows indicating orientation (no text or symbols)natural_image
Two line drawings of a drone with control panels and propellers, shown from different angles (no text or symbols)RCQC2
Sintonia-fina - vôo lateral
natural_image
Line drawing of a handheld device with dual circular ports and a scroll wheel (no text or symbols)
natural_image
Diagram of a four-bladed drone with directional arrows indicating top and bottom (no text or symbols)natural_image
Line drawing of a handheld device with dual circular ports and a central hub (no text or symbols)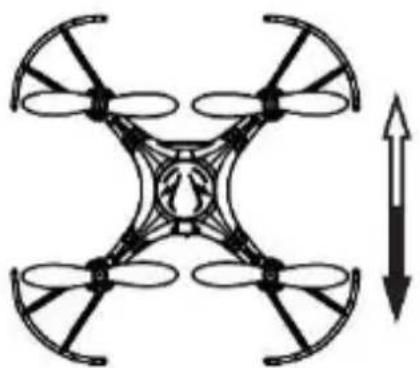
natural_image
Diagram of a four-blade drone with an upward arrow indicating rotation (no text or symbols)8.2 Praticar o Vôo
1. Pairar
Velleman® Service and Quality Warranty
Since its foundation in 1972, Velleman® acquired extensive experience in the electronics world and currently distributes its products in over 85 countries.
All our products fulfil strict quality requirements and legal stipulations in the EU. In order to ensure the quality, our products regularly go through an extra quality check, both by an internal quality department and by specialized external organisations. If, all precautionary measures notwithstanding, problems should occur, please make appeal to our warranty (see guarantee conditions).
General Warranty Conditions Concerning Consumer Products (for EU):
- All consumer products are subject to a 24-month warranty on production flaws and defective material as from the original date of purchase.
- Velleman® can decide to replace an article with an equivalent article, or to refund the retail value totally or partially when the complaint is valid and a free repair or replacement of the article is impossible, or if the expenses are out of proportion.
You will be delivered a replacing article or a refund at the value of 100% of the purchase price in case of a flaw occurred in the first year after the date of purchase and delivery, or a replacing article at 50% of the purchase price or a refund at the value of 50% of the retail value in case of a flaw occurred in the second year after the date of purchase and delivery.
- Not covered by warranty:
- all direct or indirect damage caused after delivery to the article (e.g. by oxidation, shocks, falls, dust, dirt, humidity...), and by the article, as well as its contents (e.g. data loss), compensation for loss of profits;
- consumable goods, parts or accessories that are subject to an aging process during normal use, such as batteries (rechargeable, non-rechargeable, built-in or replaceable), lamps, rubber parts, drive belts... (unlimited list);
- flaws resulting from fire, water damage, lightning, accident, natural disaster, etc....;
- flaws caused deliberately, negligently or resulting from improper handling, negligent maintenance, abusive use or use contrary to the manufacturer's instructions;
- damage caused by a commercial, professional or collective use of the article (the warranty validity will be reduced to six (6) months when the article is used professionally);
- damage resulting from an inappropriate packing and shipping of the article;
- all damage caused by modification, repair or alteration performed by a third party without written permission by Velleman®.
- Articles to be repaired must be delivered to your Velleman® dealer, solidly packed (preferably in the original packaging), and be completed with the original receipt of purchase and a clear flaw description.
- Hint: In order to save on cost and time, please reread the manual and check if the flaw is caused by obvious causes prior to presenting the article for repair. Note that returning a non-defective article can also involve handling costs.
- Repairs occurring after warranty expiration are subject to shipping costs.
- The above conditions are without prejudice to all commercial warranties.