EASY BIKE Alu Plus - Bike rack EAL - Free user manual and instructions
Find the device manual for free EASY BIKE Alu Plus EAL in PDF.
Frequently Asked Questions - EASY BIKE Alu Plus EAL
User questions about EASY BIKE Alu Plus EAL
0 question about this device. Answer the ones you know or ask your own.
Ask a new question about this device
Download the instructions for your Bike rack in PDF format for free! Find your manual EASY BIKE Alu Plus - EAL and take your electronic device back in hand. On this page are published all the documents necessary for the use of your device. EASY BIKE Alu Plus by EAL.
USER MANUAL EASY BIKE Alu Plus EAL
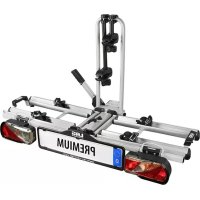
Bicycle transport for vehicles with hatchback, fastback, and liftback
Mounting instructions:
Important!
Please read the mounting instructions at all costs carefully before mounting your carrier onto the vehicle and observe these instructions closely.
INSTRUCTIONS FOR ASSEMBLING THE BICYCLE CARRIER: Image no 1
Fix the carrier frame (1) and the restraining bars (2) with the aid of the parts no 6, 8, 10, and 18 while observing the instructions (see image no 1). After that check if you have screwed down the selfblocking nuts (19) properly.
- Connect the bicycle rails (3) with the screws (19) and the parts no 8 and 10, like it is shown in image no 2. Then put the end caps (9) onto them.
- Check if you have screwed down the nuts (19) correctly. After that fasten the assembled bicycle rails (3) with the aid of the parts no 7, 8, and 10 onto the rail carrier tube (2), like it is shown in image no 3. Here you have to check as well if the nuts have been screwed down properly.
- Mount the poles (4) with the aid of the spring pins (5) and see to it that these pins are locked correctly (see image no 4 for this).
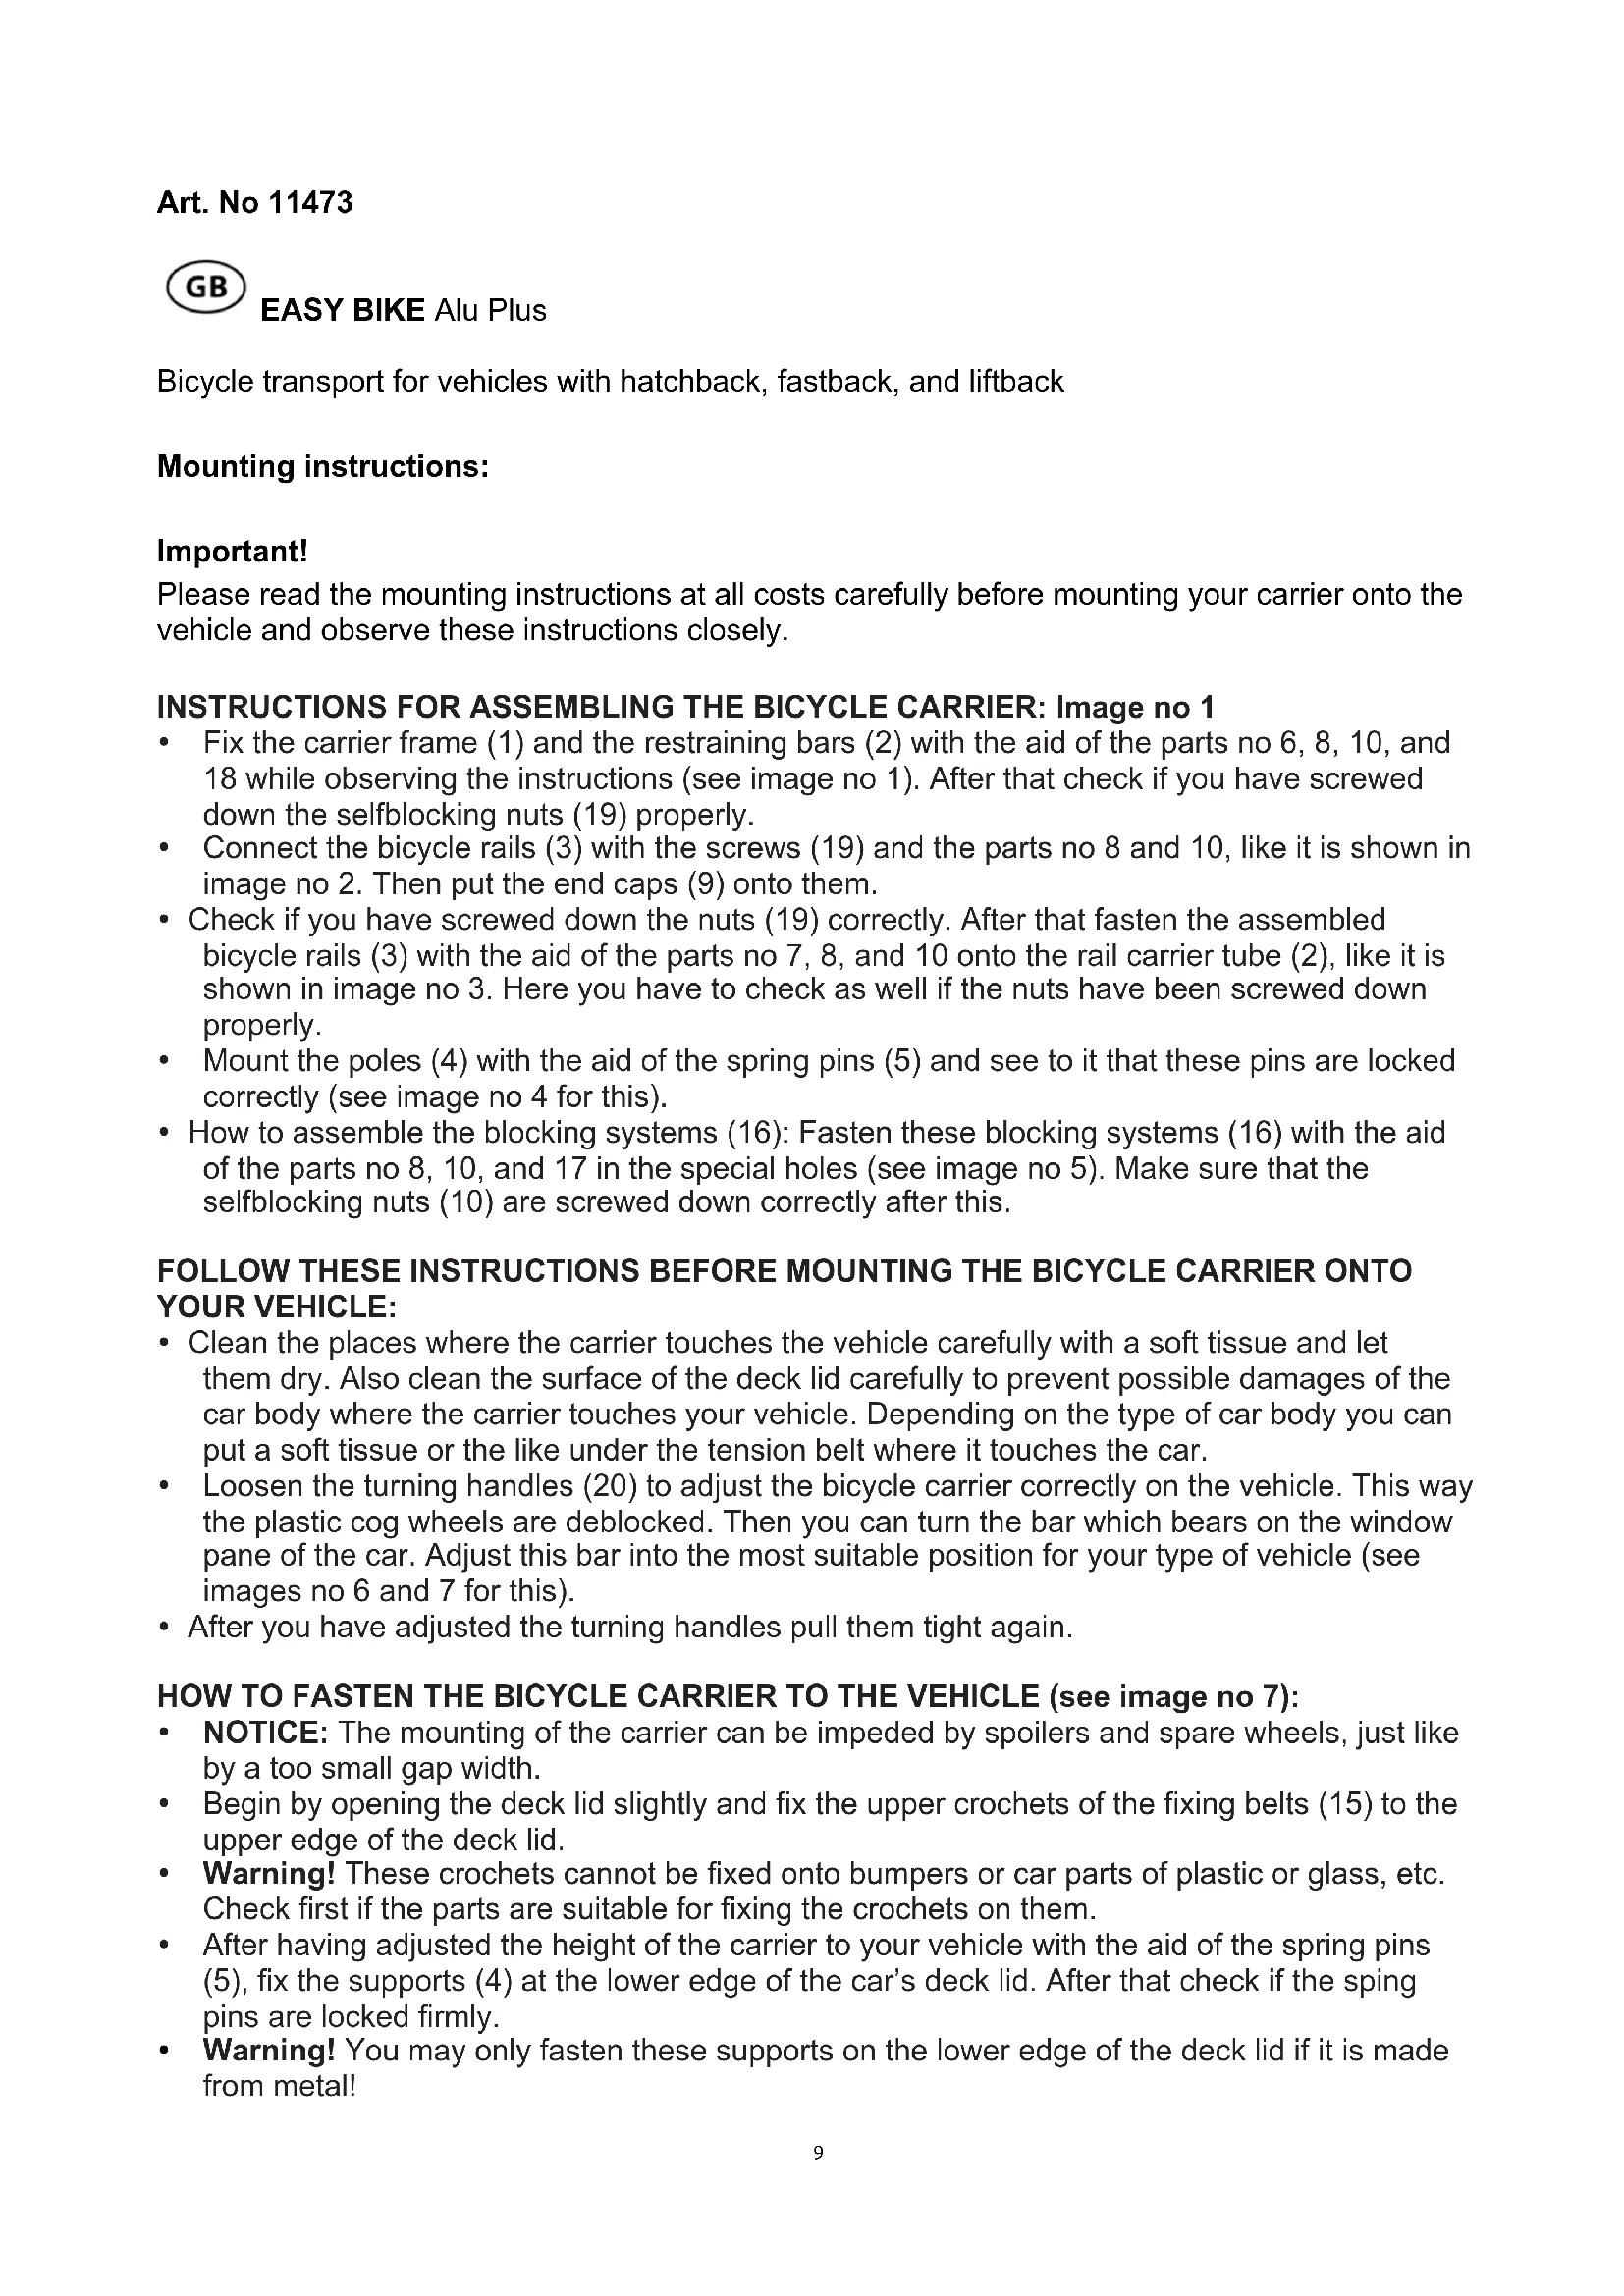
- How to assemble the blocking systems (16): Fasten these blocking systems (16) with the aid of the parts no 8, 10, and 17 in the special holes (see image no 5). Make sure that the selfblocking nuts (10) are screwed down correctly after this.
FOLLOW THESE INSTRUCTIONS BEFORE MOUNTING THE BICYCLE CARRIER ONTO YOUR VEHICLE:
- Clean the places where the carrier touches the vehicle carefully with a soft tissue and let them dry. Also clean the surface of the deck lid carefully to prevent possible damages of the car body where the carrier touches your vehicle. Depending on the type of car body you can put a soft tissue or the like under the tension belt where it touches the car.
- Loosen the turning handles (20) to adjust the bicycle carrier correctly on the vehicle. This way the plastic cog wheels are deblocked. Then you can turn the bar which bears on the window pane of the car. Adjust this bar into the most suitable position for your type of vehicle (see images no 6 and 7 for this).
After you have adjusted the turning handles pull them tight again.
HOW TO FASTEN THE BICYCLE CARRIER TO THE VEHICLE (see image no 7):
- NOTICE: The mounting of the carrier can be impeded by spoilers and spare wheels, just like by a too small gap width.
- Begin by opening the deck lid slightly and fix the upper crochets of the fixing belts (15) to the upper edge of the deck lid.
- Warning! These crochets cannot be fixed onto bumpers or car parts of plastic or glass, etc. Check first if the parts are suitable for fixing the crochets on them.
After having adjusted the height of the carrier to your vehicle with the aid of the spring pins (5), fix the supports (4) at the lower edge of the car's deck lid. After that check if the sping pins are locked firmly. -
Warning! You may only fasten these supports on the lower edge of the deck lid if it is made from metal!
-
Turn the blocking systems (16) on the right and then on the left (pull them tight) with the provided crank (13) in clockwise direction, until the bicycle carrier and the deck lid form a compact and solid entity. Then you have to screw down the counter nuts (22) firmly. Finally check again if all the turning handles, blocking pins, and screws are locked properly.
HOW TO FASTEN THE BICYCLES ON THE MOUNTED BICYCLE CARRIER:
(See the images no 8 and 9.)
- First remove the accessories and all movable objects (like bottles, the bicycle pump, etc.).
- Do not cover the bicycles with objects which could be loosened by the airflow. Remove all parts from the bicycles which could loosen themselves during the ride. Also fasten the bicycles' front wheels.
Depending on the type of your vehicle you sometimes have to turn the bicycles' handlebars a bit and to pay attention to the pedals. - It is important to fix the bicycles on the carrier rails in opposite direction to each other. The handlebar of the first bicycle should be on the right and the handlebar of the second one on the left. See to it that the pedals, the handlebars, and the metal parts do not touch your vehicle.
- Fasten the first bicycle with the aid of the short frame holder (21) to the upper tube (1), like it is shown in image no 8.
- Then fix the wheels with the fixing belts (12), like shown in image no 8: take two of these belts for the front wheel and one for the back wheel.
- Fasten the second bicycle with the aid of the long frame holder (11), like it is shown in image no 9.
Fix its wheels with the belts (12) just like described above for the first bicycle. - Now secure both bicycles with the safety belt (14) which you have to put around the supporting tube of the carrier. Finally check if the bicycles are mounted firmly on the carrier.
- After that you have to make sure that the vehicle, the carrier, and the bicycles form a compact entity and that no part has loosened itself.
- Depending on the form of your bicycles' frames it can be necessary to use additional fixing belts or fastening systems.
IMPORTANT:
- The number plate and the rear lights of your vehicle may not be covered.
- You can charge the bicycle carriers "LOGIC Model EASY BIKE" and "EASY BIKE Alu Plus" with up to two bicycles with a maximum total weight of 30kg .
- If your vehicle disposes of rear windscreen wipers, their functioning can be restrained by the carrier. Perhaps it is better to dismount them.
Warning:
If you lift the deck lid of your car this rotary motion can change the gap width. This in turn can cause damage to the car body.
SAFETY INSTRUCTIONS:
- This bicycle carrier has been designed, constructed, and tested with care and according to the corresponding safety regulations.
- If the deck lid is charged with the carrier, the total charge is allocated differently on the wheels' axles than originally intended by the manufacturer. Weigh your vehicle with its charge and make sure that the weight per axle does not surpass the intended maximum weight. If you want to use the carrier on the draw bar, you have to observe the angular separation for the trailer
according to the corresponding DIN standard (no 74058). Also check if the belts work properly. If not, replace then before you go on a ride.
- After a short ride you should always check if the whole carrier and the bicycles are fastened properly, if the tension of the belts is right, and if the different screws and nuts are still screwed down firmly. But check these points over during the whole ride, as well.
- The driver has to check regularly if the carrier system is fixed well. He is furthermore responsible for the correct fastening of the charge (according to the road traffic regulations): it may not surpass the edge of the head- or rear lights by more than 400mm .
- By and by the crochets, the belts, the screws, and the fixing belts can show signs of wear. If this is the case, you have to replace them immediately. When the carrier system is mounted you also have to adjust your speed to the changed riding and breaking conditions.
- The airflow, hard breaking, narrow bends, high speed, ascending slopes, or potholes can influence the riding qualities of your vehicle. You have to reduce your speed accordingly and to strictly observe the speed limits. At no time may you surpass the maximum speed of 80mp / h (130 km/h).
- The manufacturer is not liable for damage caused by a too high speed or improper manner of driving. Generally the driver alone is responsible for the correct fastening of the carrier and its charge. We do not assume any responsibility for incorrect mounting or handling of this product nor for damages of the car's lacquer coating or any consequential damage. How to avoid damage of the coating: Wrap the tension belts with a cotton tissue and keep the deck lid clean.
- Before you go on a longer ride and always in between the transport check if the fastening systems and the screws are locked firmly, and if the whole entity is mounted properly.
- The bicycle carrier with mounted bicycles may not surpass the bar for the rear lights by more than 40~cm .
- To be allowed to drive your car with mounted carrier, you also have to equip the vehicle with a separate external rear-view mirror. The width of the bicycle carrier with mounted bicycles may not surpass 2,5m . Be especially careful when riding through narrow passages, garage doors, or the like. The bicycles should not possess any sharp parts which could injure people. Objects which are hard to keep in view may not surpass the bicycle rails. If you do not use the carrier, dismount it from your car. Also dismount the carrier if you want to wash your vehicle. Do not cover the bicycles with objects which could be loosened by the airflow.
- This system has to be mounted carefully and the mounting and operating instructions should be observed closely. During the whole transport you are responsible for your own and the safety of other persons.
- Abide by the corresponding regulations valid in your respective country.
- Please inform every driver who uses your bicycle carrier about these instructions, as well.
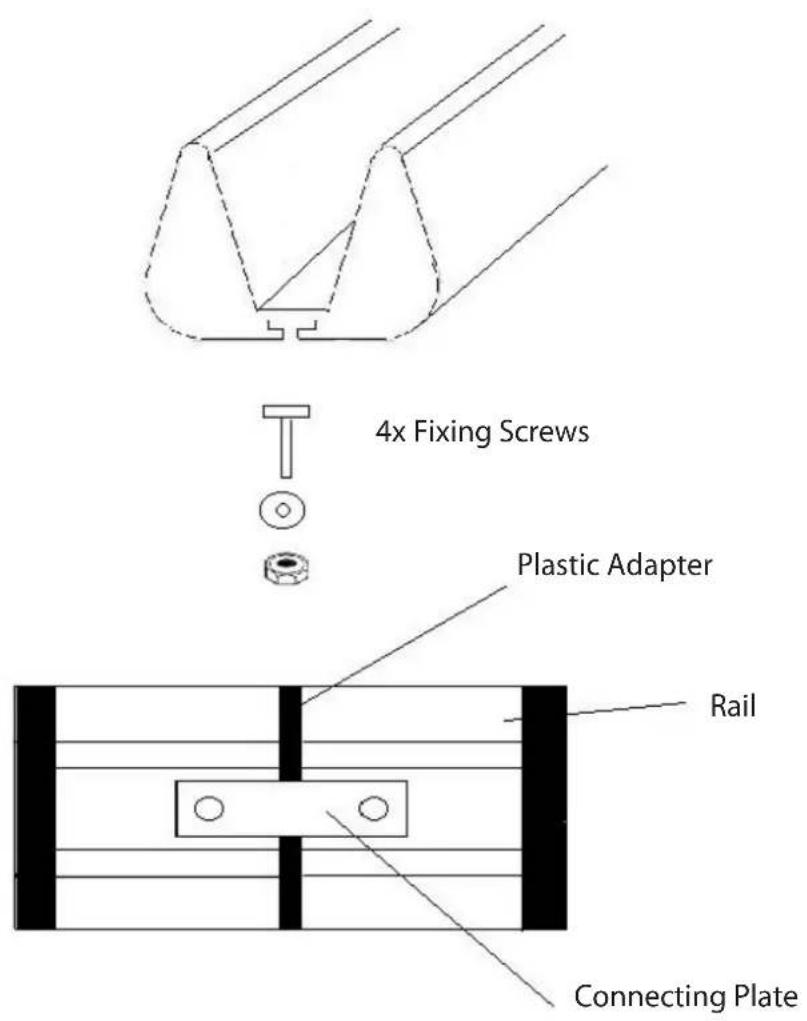
4x End Cap Disk

2x Rail Connection

4x M6 X 40 Screw 4x U -

4x M6 Nut 4x Strap Guide
The individual parts listed here are required for the assembly and fixing of the aluminium rails. Please place both rail parts together. Insert the M6 X 40 screws into the rail connection and thus connect the rail. Place the connecting plate under the rail, over the screws, and secure this connection using the disks and M6 nuts. Insert the fixing screws on both sides underneath the rail, align the rails
on the support base and secure using the disks and M6 nuts. Insert the strap guide under the rail (two on the front wheel and one on the back wheel of the bicycle). Attach the end caps on both sides.
N^ d'art. 11473

EASY BIKE Alu Plus
POKYNY, KTERyMI JE NUTNO SE RIDIT PRED MONTAZI NOSICE NA KOLA NA VOZIDLO:
Name and address of the customer
is authorized toprovide the productoned below withark as illustrated
Manufacturing plant
Geprüft nach
Tested in accordance with
Description of product (Details see Annex 1)
The above mentioned products could be provided with the following marking:
TUV NORD CERT GmbH
The above mentioned products could be provided with the following marking:
TÜV NORD CERT GmbH
The above mentioned products could be provided with the following marking:
TUV NORD CERT GmbH
The above mentioned products could be provided with the following marking:
TUV NORD CERT GmbH