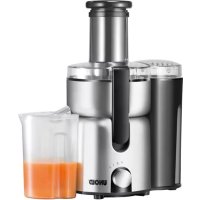
78216 - Juicer UNOLD - Free user manual and instructions
Find the device manual for free 78216 UNOLD in PDF.


Frequently Asked Questions - 78216 UNOLD
User questions about 78216 UNOLD
0 question about this device. Answer the ones you know or ask your own.
Ask a new question about this device
Download the instructions for your Juicer in PDF format for free! Find your manual 78216 - UNOLD and take your electronic device back in hand. On this page are published all the documents necessary for the use of your device. 78216 by UNOLD.
USER MANUAL 78216 UNOLD
natural_image
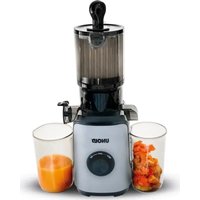
Black-and-white photo of a UNOLD brand juice brush with fresh tomatoes and a glass pitcher in the background (no text or symbols visible on main objects)Bedienungsanleitung
Instructions for use - Notice d'utilisation Gebruiksaanwijzing - Istruzioni per l'uso Instrucciones de uso - Návod k obsluze
Impressum:
Instructions for use Model 78216
Technische Daten 14
Preparing the appliance for operation 15
Preparing fruits and vegetables 15
Extracting juice 16
Disassembly 16
Cleaning and Care 17
Recipes 17
Troubleshooting 19
Guarantee Conditions 50
Waste Disposal / Environmental Protection 54
GB Stainless steel sieve
F Tamis en inox
GB Juice can with lid
GB Nose on juice tray
Dimensions: appr. 25.0 x 19.5 x 41.0 cm (L x W/D x H)
Power cord: appr. 100 cm
Weight: appr. 4 kg
Features: 2 speed settings and momentary switch
Large lling shaft
Stainless steel sieve
1.2 liter pomace container
1 liter juice container with lid
Technical details subject to change.


RoHS√
SAFETY INFORMATION
Please read the following information and 1. keep it for future reference.
This appliance is not intended for use by 2. persons (including children) with limited physical, sensory or mental abilities or with lack of experience or lack of knowledge, unless they are supervised by a person who is responsible for their safety or have been instructed on how to use the appliance.
Children should be supervised 3.
to ensure that they do not play with the 4. appliance.
- Keep the appliance out of the reach of children.
Connect appliance only to an AC power 6. supply with voltage corresponding to the voltage on the rating plate.
- Do not operate this appliance with an external timer or remote control system.
This appliance is intended to be used in 8. household and similar applications such as:
■ staff kitchen areas in shops, of ces and other working environments;
■ farm houses;
■ by client in hotels, motels and other working environments;
■ bed and breakfast type environments.
Never immerse the appliance or the power 9. cord in water or other liquids.
Do not clean the appliance or power cord in 10. a dishwasher.
Never touch the appliance or power cord 11. with wet hands.
- For safety reasons, never place the appliance on hot surfaces, a metal tray or a wet surface.
Do not place the appliance or power cord near openames during operation.
Always use the juicer on a level, uncluttered 13. surface.
Make sure that the power cord does not hang 14. over the edge of the countertop or table, since this can cause accidents, for example if small children pull on the cord.
- Do not operate or store the juicer outdoors.
Use the appliance only after it has been 16. properly assembled. Make sure that both clamps are properly closed.
Use only the included tamper for Iling the 17. appliance. For safety reasons, never allow hands, hair, articles of clothing or other utensils to enter the Iling shaft.
The blades of the stainless steel sieve have 18. very sharp edges. Therefore, you should avoid touching them. Touch the sieve only on the edge.
The motor must come to a complete stop 19. before you can remove the moving parts.
- The appliance is not intended for continuous operation. Therefore, do not allow the appliance to operate for more than 3 minutes; afterwards, it has to cool off.
Do not use the appliance with accessories 21. of other manufacturers or brands, to prevent damage.
- Do not use the appliance if the rotating sieve is damaged.
Unplug the appliance from the power supply 23. after use and before cleaning. Never leave the appliance unattended when it is plugged in to the power supply.
Clean the appliance after every use (see 24. chapter on Cleaning and Care, page 17). Check the appliance, the plug and the power 25. cord regularly for wear or damage. In case of damage to the power cord or other parts, please send the appliance for inspection and repair to our after sales service (for address, see warranty terms, page 50). Unauthorized repairs can result in serious risks to the user and void the warranty.
The manufacturer will not be liable in the event of improper or incorrect use or if repairs are carried out by unauthorized third parties.
PREPARING THE APPLIANCE FOR OPERATION
Clean all parts with a damp cloth, as 1. described in the chapter "Cleaning and care" on page 17.
Place the appliance on a suitable level 2. surface.
Place the grease pomace container (6) on 3. the base (8) provided on the motor block (7).
Place the juice tray (5) on the appliance. 4. Make sure that the nose on the tray empties into the pomace container.
Now place the stainless steel sieve (4) onto 5. the drive unit in the juice tray. For your convenience, there are arrows on the drive unit in the juice tray and on the edge of the stainless steel sieve. Align the two arrows and press the sieve onto the drive unit. The sieve has to lock rmly into place.
Place the transparent lid (3) onto the juice 6. tray and the pomace container. The lid has a small plastic „nose“, which has to t exactly
into the matching recess on the juice tray; otherwise, the appliance cannot be switched on, for safety reasons.
Attach the lid to using the two locking clamps 7.
(9). To do so, hand the locking clamps into the matching recess on the lid and then carefully press downward and inward. You can hear the clamps lock into place.
Place the lid of the juice can (10) onto the 8. can.
Set the juice tray under the spout (11) on 9. the appliance. The lid of the juice can has an opening in it; the spout ts directly into this opening. Check to make sure that all parts are assembled correctly to prevent juice from splattering.
Make sure that the switch (12) on the 10. appliance is set to „0“.
Connect the appliance via the power cord to 11. the power supply (AC, 230 V, 50 Hz).
PREPARING FRUITS AND VEGETABLES
Use only fresh fruits and vegetables, if 1. possible.
Wash the fruit or vegetables carefully and 2. dry them thoroughly.
If you wish to extract juice from fruit with a 3. hard skin, you rst have to peel it. This is the case with pineapple, for example.
Fruit with an inedible skin, such as citrus 4. fruit, also has to be peeled rst.
We do not recommend that you use this 5. appliance for bananas, since they cannot be processed properly in a juicer.
The juice extracted from oranges using a 6. juicer is foamy. Please peel oranges before
extracting the juice; otherwise, the juice may be bitter.
If you wish to extract juice from berries, add 7. 14 of an apple with the peel to about 200 g of berries.
Remove any large seeds (such as those in 8. cherries or plums) as well as leaves and stems. Grapes and currant berries do not have to have the seeds removed. Currant berries can be processed with the stems.
Cut the fruit or vegetables into pieces that 9. will t into the lling shaft.
EXTRACTING JUICE
Prepare the appliance as described in the 1. section "Preparing the appliance for operation" on page 15.
Remove the tamper from the lling hole.2.
Set the selection switch to the desired 3. speed.
Use setting 1 for soft fruits and vegetables, such as grapes, melons, pears or cucumbers.
Use setting 2 for hard fruits and vegetables, such as potatoes or apples.
Setting P is a momentary switch for brief ■ chopping of ingredients, such as horse-radish. This setting is also useful for loosening ingredients that get jammed during processing.
Place the fruit or vegetables in the lling 4. shaft and slowly press the pieces down using the tamper. The less pressure you apply, the more juice you will have in the end.
Caution: Never put ngers or foreign objects 5. into the lling shaft while the juicer is in operation. Danger of injury!
- In case pieces of fruit or vegetables get jammed and cannot be loosened with the
tamper, switch the appliance off. Unplug the appliance from the power supply take it apart to remove the piece of fruit or vegetable that is causing the blockage. Then reassemble the appliance and continue processing.
-
The juice will now run into the juice can.
-
Make sure not to over ll the pomace container. If the pomace container is full, switch the appliance off. Unplug the appliance from the power supply and take it apart: rst remove the lid, then take out the sieve; then remove the juice tray and empty the pomace container. Then reassemble the appliance and continue processing.
If the juice can is full, switch the appliance 9. off, pour the juice into another container and then continue processing.
Tip: The juice can is equipped with a foam 10. separator. If you prefer foamy juice, simply remove the lid from the juice can after extracting the juice and then pour the juice. During operation of the juicer, however, the lid should remain on the can to prevent splattering.
DISASSEMBLY
- When you have nished extracting juice, switch the appliance off. Wait until no more juice ows out and the stainless steel sieve is no longer turning.
- Unplug the appliance from the power supply.
- Remove the juice can.
- Remove the tamper from the lling shaft. Open the two locking clamps by carefully 5. pressing them up and slightly forward.
- Remove the transparent lid. Take out the stainless steel sieve. To do so, 7. you have to pull gently on the sieve. However,
touch the sieve only on the edge, since the blades in the sieve can cause injuries.
Remove the juice tray and the pomace 8. container.
Empty the pomace container. You can use 9. the at end of a dish brush for this.
- Remove any pulp remaining in the juice tray.
CLEANING AND CARE
We recommend cleaning the appliance immediately after using it to extract juice. Otherwise, dried pulp remnants are difficult to remove.
Switch the appliance off.1.
Unplug the appliance from the power supply.2.
Disassemble the appliance as described in 3. the section “Disassembly” on page 16.
Remove the pomace from the pomace 4. container and any pulp remaining in the juice tray.
Clean all parts in warm water with a little 5. dishwashing detergent added. The sieve can easily be cleaned using a normal dish brush made of plastic. However, touch the sieve only on the edge, to prevent injuries from the sharp blades. Make sure to remove all remaining pulp from the sieve to ensure high juice yields the next time you use the appliance. If necessary, you can also soak the sieve in water before cleaning it.
All parts except the motor block can be 6. washed in the dishwasher, as well. After removing coarse pulp remnants, place the parts in the upper basket of the dishwasher and select a program with a temperature between 50 and 55 degrees Centigrade.
Yellow discoloration can easily be wiped 7. off with a piece of paper towel soaked in vegetable oil.
Wipe off the motor block with a damp 8. cloth.
Wipe the drive unit with a damp cloth 9. regularly, as well.
Never use any abrasive scouring agents, 10. steel wool, metal objects, hot cleaning agents or disinfectants.
The appliance and power plug must be 11. completely dry before the appliance can be operated again.
When completely dry, store the assembled 12. juicer in a dry, safe place so that it is protected from dust, shocks, heat and moisture.
RECIPES
General information about extracting juice
Fruit and vegetable juices are loaded with vitamins. They are refreshing any time of year. Many vitamins break down when exposed to air; therefore, always drink freshly pressed juice right away.
Since many vitamins need some fat to make them soluble, you can add 1 teaspoon of sweet cream or 2 drops of cold-pressed vegetable oil for each glass of juice.
Freshly pressed grape juice is ideal for use in a grape cure.
Besides drinking prepared juice as a fresh beverage, it is also good in soups or jellies!
For example, try mixing juice with some egg white or cold soluble gelatin and process in the Unold® ice cream machine to make a delicious and refreshing, low-calorie sorbet.
And if you need crushed ice for your juice, it is very easy to make using the Unold® ice crusher!
Power juice beverage
Juice 3 carrots and 1 apple at setting 2; juice 1 orange using a citrus press. Mix all juices and serve with 2 ice cubes.
Vegetable juice
Juice 12 kohlrabi, 1 carrot, 1 yellow bell pepper, 4 sprigs parsley, 1 tomato. This juice needs no extra seasoning, but you can add a dash of Tabasco sauce and a few drops of maple syrup to enhance the flavor.
Vitamin bomb
Juice 400 g spinach, 2 carrots, 1 stalk celery, 1 TBSP cress, 2 tomatoes, 12 cucumber.
Mix in 1 TBSP lemon juice, chopped chives and parsley, a pinch each of pepper and sugar and add 14 liter milk.
Pina Colada, nonalcoholic
1 pineapple (enough for 2 to 3 glasses), 50 ml sweet cream, 3 TBSP coconut syrup, crushed ice.
Juice pineapple on setting 2, pour juice into a pitcher, mix with cream, coconut syrup and ice; pour into glasses, decorate glasses with 14 pineapple slice and a cocktail cherry.
Strawberry juice with a shot of vodka
Juice 250 g strawberries and 1 apple; add 1 TSP honey, 1 TBSP sweet cream and 2 cl vodka; stir and serve.
Apple jelly
Juice enough apples (not too ripe) until you have 800 ml of juice; mix juice with 1 kg canning sugar (1:1) and follow instructions on package to make jelly.
Multi-fruit jelly
Juice blackberries, currant berries, raspberries, strawberries, gooseberries on setting 1 and juice 2 apples on setting 2; add 1 kg canning sugar (1:1) and follow instructions on package to make jelly.
Of course, you can also use any combination of berries.
Refreshing cold cucumber soup
1 salad cucumber, 1 clove garlic, 14 liter buttermilk, 1 onion, salt, pepper, fresh dill
Juice 34 of the cucumber on setting 2, with the onion and garlic. Dice the remaining cucumber nely and mix with the buttermilk. Season with salt and pepper and garnish with dill.
Cold fruit soup
Extract juice from fruits in season, for example mixed berries or apples, peaches, pears and apricots, to make 12 liter of juice.
Dilute this juice with 14 liter water; remove 3 TBSP of juice and mix with 1 TBSP food starch. Heat the remaining juice with 2 TBSP sugar; stir in starch, bring to a boil and then allow to cool. Garnish with a few berries or pieces of fruit before serving.
Cold tomato soup
Juice tomatoes with 1 onion and 1 clove garlic on setting 1 (to make ca. 3/4 liter of juice). Season juice with freshly ground pepper, a dash of Tabasco sauce, salt and chopped basil and serve. Tip: with the Unold® ice cream machine you can use the juice to make a refreshing tomato sorbet in the twinkling of an eye.
TROUBLESHOOTING
| Problem Solution | |
| The appliance does not operate. Check to make sure that all parts have been■ assembled correctly. If this is not the case, a safety system prevents the appliance from being switched on. Assemble the appliance again as described in the section “Preparing the appliance for operation” on page 15. | |
| The motor stops during extraction of juice. | Switch the appliance off; unplug it from the power ■ supply.Disassemble the appliance as described in■ “Disassembly” on page 16 and check whether the sieve is jammed by pieces of pulp. Clean the sieve under warm running water with a plastic dish brush, reassemble the appliance and continue processing. To prevent the sieve from becoming jammed, do not use fruits or vegetables that are very hard or stringy. Do not add fruit or vegetables to the Iling shaft too quickly and empty the pomace container regularly. |
| The stainless steel sieve stops turning. Switch the appliance off; unplug it from the power ■ supply.Disassemble the appliance as described in■ “Disassembly” on page 16 and check whether the sieve is jammed by pieces of pulp. Clean the sieve under warm running water with a plastic dish brush, reassemble the appliance and continue processing. To prevent the sieve from becoming jammed, do not use fruits or vegetables that are very hard or stringy. Do not add fruit or vegetables to the Iling shaft too quicklyand empty the pomace container regularly. | |
| Low juice yield. Check whether the sieve is jammed. ■ Add the ingredients more slowly into the Iling shaft. Some fruits and vegetables yield less juice, for example apricots. | |
DONNÉES TECHNIQUES
Puissance: 700 W, 230 V\~, 50 Hz
Dimensions: env. 25,0 x 19,5 x 41,0 cm (LxI/PxH)
Misure: circa 25,0 x 19,5 x 41,0 cm (lungh.x largh./PxH)
DIAGNOSTICA DEI PROBLEMI
Medidas: aprox. 25,0 x 19,5 x 41,0 cm (LxA/PxH)
PŘÍPRAVA OVOCE A ZELENINY
We guarantee our appliances for 24 months, or in case of commercial use for 12 months, from the date of purchase in case of defects that occur during normal use and are demonstrably due to a factory fault. Within the warranty period we will remedy defective materials or workmanship through repair or replacement, at our option.
Our warranty terms apply only to appliances sold in Germany and Austria. For other countries, please contact the responsible importer. In the event of a claim for remedy of defects, please send the appliance to our after sales service, properly packaged and postage paid, together with a copy of the automatically generated sales receipt, which must show the date of purchase, and a description of the defect. If the defect is covered by the warranty, the customer will be reimbursed for the shipping costs. The warranty does not cover damage from normal wear, improper handling and failure to comply with the maintenance and care instructions. The warranty is void if repairs or modifications are made to the appliance by third parties.
Any claims of the end consumer vis-à-vis the retailer are not limited by this warranty.
CONDITIONS DE GARANTIE
Our appliances are produced on a high quality level for a long lifetime. Regular maintenance and expert repairs by our after-sales service can extend the useful life of the appliance. If an appliance is defective and repair is not possible we ask you to follow the following instructions for disposal.
Do not dispose this appliance together with your standard household waste. Please bring this product to an approved collection point for recycling of electric and electronic products.
By separate collection and disposal of waste products you help to protect natural resources and ensure, that the product is disposed in an adequate way to protect health and environment.