NC 510 - Coin and bill counter OLYMPIA - Free user manual and instructions
Find the device manual for free NC 510 OLYMPIA in PDF.
| Product type | Coin and banknote counter |
| Brand | Olympia |
| Model | NC 510 |
| Dimensions (W x D x H) | 348 x 238 x 205 mm |
| Weight | 7.5 kg |
| Power supply | 230 V / 50 Hz |
| Maximum power consumption | 60 W |
| Counting speed | 1000 banknotes/min |
| Display | LCD |
| Counterfeit detection | UV, width test |
| Counting functions | Simple counting, batch counting, addition mode |
| Hopper capacity | Approximately 200 banknotes (adjustable with limiters) |
| Detection methods | UV, IR (optional), width |
| Operating modes | Normal, batch (presets 10/20/50/100/unlimited), addition |
| Maintenance and cleaning | Regular cleaning of sensors with brush or soft cloth; use of compressed air spray recommended |
| Safety | Automatic stop on suspicious banknote; UV and width detection; lockable cover |
| Spare parts and repairability | Replaceable transport belts and rollers; replaceable fuse; pressure adjustment screw |
| Included accessories | Cleaning brush, rubber washers, fuse, instruction manual |
| Options | Additional display (optional) |
| Warranty | 24 months (with proof of purchase) |
Frequently Asked Questions - NC 510 OLYMPIA
Do not use solvents or flammable sprays.
Do not use a different rating fuse.
User questions about NC 510 OLYMPIA
0 question about this device. Answer the ones you know or ask your own.
Ask a new question about this device
Download the instructions for your Coin and bill counter in PDF format for free! Find your manual NC 510 - OLYMPIA and take your electronic device back in hand. On this page are published all the documents necessary for the use of your device. NC 510 by OLYMPIA.
USER MANUAL NC 510 OLYMPIA
natural_image
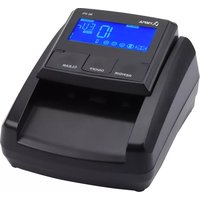
Black and silver OLYMPIA NC 510 digital currency counter with control panel (no visible text or symbols on device body)Bedienungsanleitung
Allgemeines
text_image
Labeled diagram of a computer drive showing internal components and connectors with numbered annotations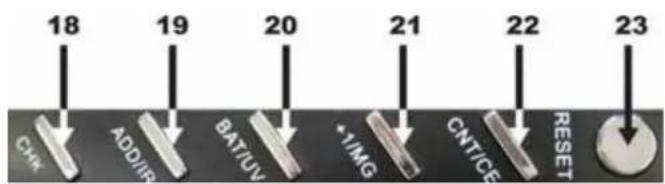
text_image
18 19 20 21 22 23 CHK ADD/IIP BAT/UV *YIMG CNT/GE RESET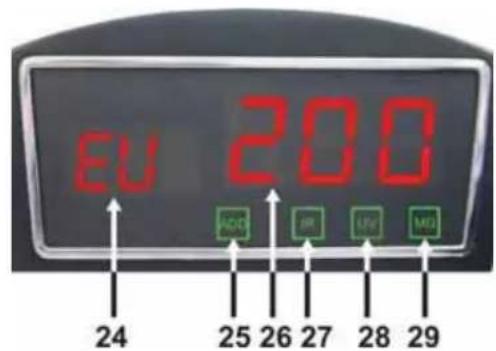
text_image
EU 200 ADC IR UV MΩ 24 25 26 27 28 291.4. Inbetriebnahme
text_image
Printer's image showing a document with the European Union flag and euro symbol, indicating financial or legal documentation.text_image
The labor order to bankmort The labor order to bankmortnatural_image
Pure mechanical cross-section diagram without any text, numbers, or symbols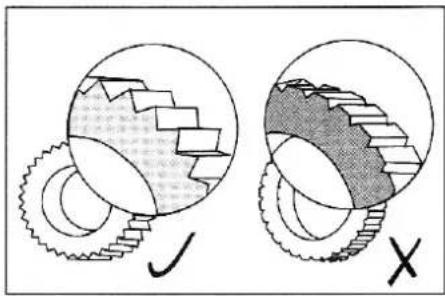
text_image
Diagram illustrating gear meshing process with labeled components and checkmark indicator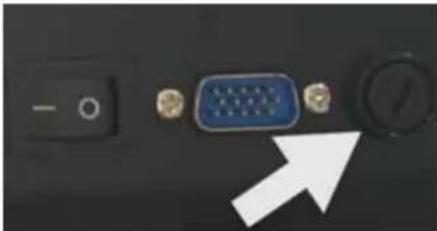
natural_image
Close-up of a computer interface showing a blue VGA port, a black control knob, and a white arrow pointing to it (no text or symbols visible)
natural_image
Close-up of a mechanical device with transparent casing and internal components (no visible text or symbols)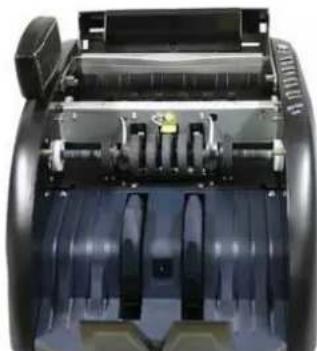
natural_image
Interior view of a mechanical device showing internal components and housing (no visible text or symbols)3.3. Zubehör
Service-Center Hattingen
Settings and functions
2.1. General settings
2.2. Set detection counterfeit money
2.3. Set functions
2.4. Set counting mode
Troubleshooting and maintenance
3.1. Description of error codes
3.2. Care and maintenance
3.3. Accessories
3.4. Service
3.5. Technical specifications
1.1. Introduction
Thank you for purchasing one of our products! This Olympia product will make your (daily) check of counterfeit money easier, more reliable and quicker than before.
Please note that the currency counter has to be cleaned regularly to guarantee an optimum count and long life span. You will find directions for correct care and maintenance in chapter 3. Troubleshooting and maintenance in this instruction manual.
Should you experience problems with the unit in spite of correct care, do not hesitate to contact our service team. All contact information is provided in chapter 3.4. Service.
1.2 Safety Instructions
Please read the safety instructions before use! You will find the most important notes in chapter Safety Instructions. Please read all warnings and cautions to avoid damage to the unit and personal injury.
 | WarningPlease observe these directions unconditionally; non-compliance can result in grave and even fatal injuries (e.g. electric shock). |
 | CautionPlease observe these directions unconditionally; non-compliance can result in damage of the currency counter. |


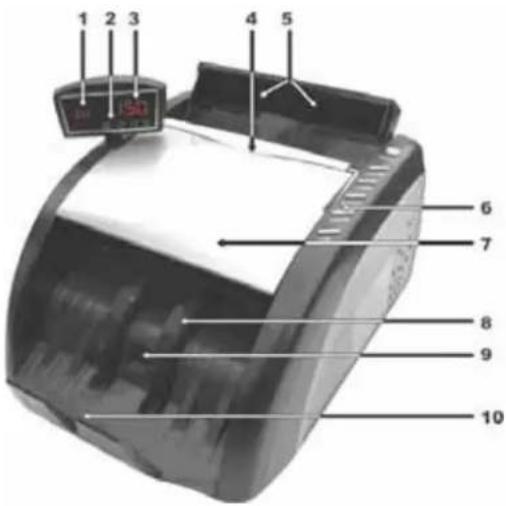
1.3. Unit design
Front View
- Currency and batch display
- Activated functions display
- Counted banknotes display
- Carry handle
- Banknote limiter / feeder
- Function keys
- Cover
- Banknote transport wheel
- Stacker sensor
- Stacker
Rear View
- Banknote limiter
- Regulating screw for contact pressure
- Rating plate with serial number
- Fuse
- Display jack in
- Mains cable
- ON/OFF switch
Keys
- CHK - key
- ADD/IR - key
- BAT/UV-key
- +1/MG - key
- CNT/CE - key
- RESET - key
Display
- Currency / batch display
- ADD function on / off
- Counting result
- IR function on / off
- UV function on / off
- MG function on / off
text_image
1 2 3 4 5 6 7 8 9 10
text_image
Labeled diagram of a device rear panel with numbered components and directional arrows indicating assembly or movement.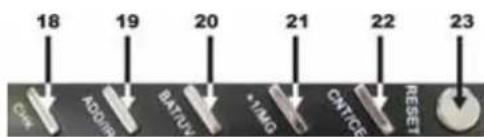
text_image
18 19 20 21 22 23 CAN ADAM BATUV *1M0 CNTCE RESET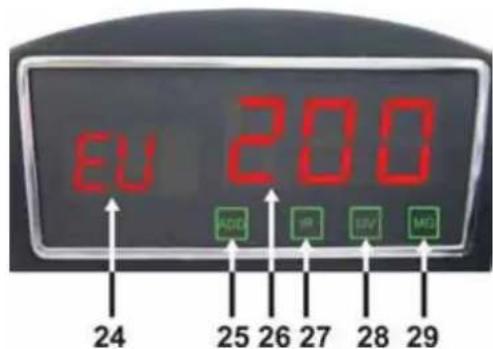
text_image
EU 200 ADC IR SUV MD 24 25 26 27 28 291.4. Start-up Procedure
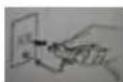
- Plug the power cord into the main power supply.
- Connect the power supply cable to the currency counter and switch it on.
- The unit starts up automatically with all counterfeit money test methods activated.
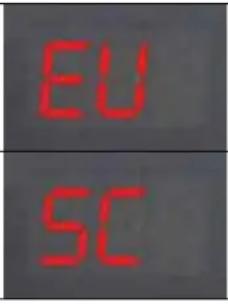
- Ensure that the correct currency is displayed (e.g. EU for Euro check). The previous currency setting is still activated after a restart.
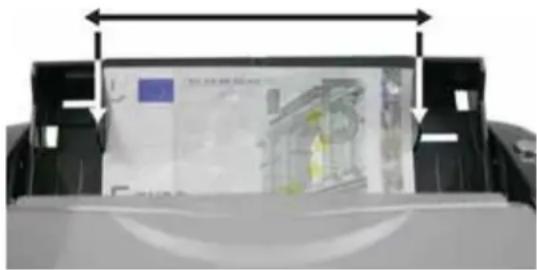
- Place the banknotes flush stacked on two sides in the center of the feeder and adjust the two banknote limiters for best counting results. If the banknotes are not stacked flush or centred, counting errors are possible.
Please note:
To avoid miscounting and damage to the unit the following banknotes should be taken out before counting:
- pasted banknotes
- washed banknotes
- very dirty banknotes
- damaged banknotes
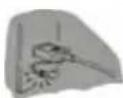
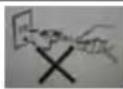
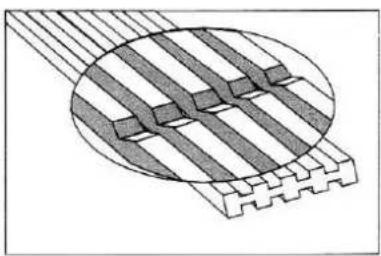
Correct procedure when counting banknotes
Sort banknotes by denomination before counting and remove damaged and dirty banknotes from the bundle. Banderols are to be removed before counting. Fan the banknotes out towards the back (see illustration 1) and place them on the feeder.
Illustration 1 shows correct fanning
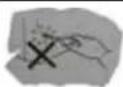
Illustration 2 shows incorrect fanning
Illustration 3 shows banknotes which are not fanned out
If the code "EJ" is displayed the banknotes were drawn in incorrectly.
Remove the banknotes, fan them out and place them in the feeder again.

Settings and functions
2.1. General settings
Set currency
If your currency counter is designed for several currencies you can change the currency setting by pressing the "CNT/CE" button for 2 seconds.
 | The NC 510 checks the security features based on Euro banknotes and rejects banknotes whose security features do not comply with Euro banknotes. | |
| The NC 510 checks banknotes for the presence of activated security features. Make sure the checked currency has the respective safety features. |
Counting small banknotes
With the banknote guide rails counting of smaller banknotes is possible. Place the banknotes in the center of the feeder and move the two guide rails against the banknotes.
natural_image
Close-up of a printer's front panel showing paper with a yellow garment and a blue square, no visible text or symbols.2.2. Set detection counterfeit money
The NC 510 Standard only has UV testing available. These methods can be used during counting. The display shows the active counterfeit tests with lit symbols.
Some keys, e.g. "ADD/IR" have two allocated functions. Toggle between the functions by pressing "CHK". Press "CHK" once to select the second function, "-CH" flashes in the display.

text_image
UVCounterfeit test ON

text_image
UVCounterfeit test OFF
UV detection (UV)
Press "CHK" and then "BAT/UV" to activate/deactivate UV detection mode.
Width detection of banknotes
If among the sorted banknotes smaller ones than the first banknote are present, the counting stops and "Ed" is displayed. The last banknote in the stacker is the smaller one. Factory setting for this detection feature is 5 mm. The smallest setting is 3 mm and can be increased up to 8 mm. We strongly advise you to change this adjustment ONLY if Olympia asks you to.
Display of suspect notes
The unit stops automatically and sounds a short beep tone if a suspect note is detected. The last banknote in the stacker is the suspect note. Remove it from the bundle and press "RESET" to restart the counting.
Please note to reduce the amount of counted banknotes by one, because the suspect banknote is included in the result.
Set Test Criteria
Press and hold “+1” and switch the unit on. The following is displayed:
| Counting display Batch display Description | ||||
 |  | Width setting | ||
| UV setting | ||||
| Test sensitivity setting | ||||
Press "BAT" or "ADD" to toggle between the settings. Increase the displayed value with "UV" and decrease it with "+1". Press "RESET" to exit the setup menu.
Press and hold "BAT" while switching the unit on to reset to factory settings. "dEF" and "-H-" is displayed. Press "RESET" to continue working with the unit.
2.3. Set Functions
Addition
Press “ADD/IR” to activate addition mode, ADD is displayed. When counting more than 999 banknotes, the display is set to 0 with the 1000^th banknote and the counting is continued.

text_image
999 → 0002.4. Set counting mode
Batch count
Press "BAT/UV" to count a certain number of banknotes. The stack display shows the preset amount 100. Repeatedly press "BAT/UV" to toggle between the preset stack amounts (100, 50, 20, 10, unlimited). Press "+1" to increase the preset amount and set an individual number. The unit stops automatically when reaching the desired amount. A new counting procedure is started after removing the banknotes from the unit.

text_image
100 50 20 10 5Press "CNT/CE" to exit the batch menu.
Troubleshooting and maintenance
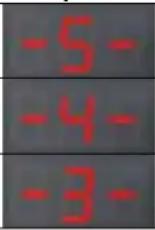
3.1. Description of error codes
The unit executes a self-diagnosis with every start-up. When displaying one of the following error codes it is generally due to banknotes still inside the unit or dirty sensors. Remove the banknotes and clean the sensors with a brush or dry cloth (included) and restart the unit.
| Error code Error position Troubleshooting | |||
| E00 | UV sensor Adjust the cover to keep out any external light. | ||
| E10 | Hopper sensor Remove the banknote and clean the sensors. | ||
| E11 | Key sensor Remove the banknote and clean the sensors. | ||
| E30 | Left UV sensor As above, additionally pay attention that no external light enters the unit. | ||
| E31 | Right UV sensor As above. | ||
| E50 | Motor / speed sensor Clean the transport wheel or replace the belts. | ||
| E80 | Memory error Reset to default settings. | ||
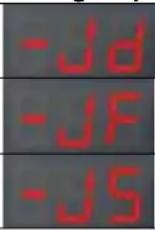
Error codes during counting:
Please follow the instructions for troubleshooting if one of the following error codes is displayed during counting.
| Error code Cause and troubleshooting | |||
 | A folded or half-note is detected; please remove the banknote and restart the counting. | ||
 | Some banknotes are stuck together or are drawn in together. Recount the banknotes. If FJ is displayed more often, adjust unit with regulating screw clockwise. | ||
 | Skewed banknotes; please remove and press RESET. | ||
 | The banknote is off-size; please remove und press RESET to resume counting. | ||
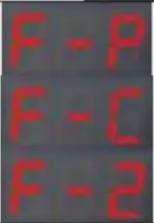 | 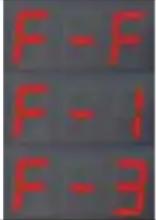 | Counterfeit or suspect note is detected; please remove and restart counting. Decrease the test level, if the problem persists. | |
Recount the banknotes if one of the error codes is displayed.
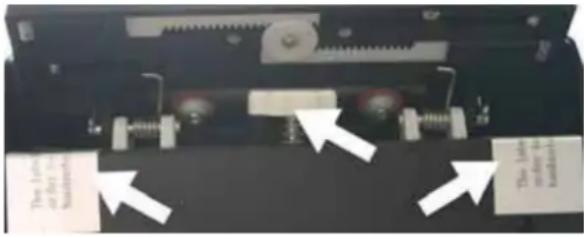
Set Feeder
The contact pressure can be adjusted if the feeder malfunctions. Remove both safety stickers on the rear of the unit next to the regulating screw. Turn the regulating screw clockwise to increase the pressure and counterclockwise to decrease the pressure. After adjusting place a banknote in the feeder and hold it; when feeling the strain of the transport rollers the pressure adjustment is correct.
text_image
The line or fit to Sketchers The line or fit to Sketchers3.2. Care and maintenance
Exchange of wearing parts
- If the transport belts are worn and malfunction, remove the feeder and press down the contact face to exchange the belts. Restore original conditions.
- Worn transport wheels can be exchanged the same way. Remove the complete feeder unit and restore original conditions after exchange.
- Unscrew the fuse holder cap for changing the fuse. Close after change and tighten again.
natural_image
Diagram of a layered structure with diagonal striped elements inside an oval (no text or symbols)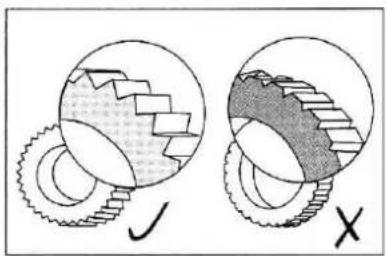
natural_image
Diagram showing two mechanical gear configurations with no text or symbols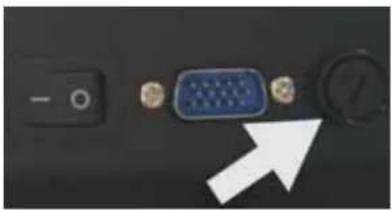
natural_image
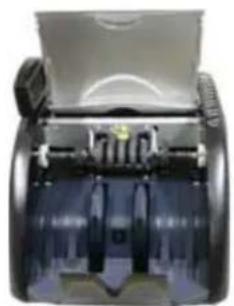
Close-up of a computer monitor with an VGA port and control knob (no visible text or symbols)Cleaning the NC 510
The NC 510 has to be regularly cleaned of dust and other contamination, which are partly getting into the unit during operation; they contaminate the sensors and prevent optimal counting and checking of banknotes. Lift the NC 510 cover and remove it. Use a soft brush or cloth (included) for cleaning the sensors and remove the course dust. Use a compressed air spray for currency counters to remove dust from difficult to access places. This ensures years of correct functioning of the NC 510.
natural_image
Close-up of a mechanical device showing internal components and housing (no visible text or symbols)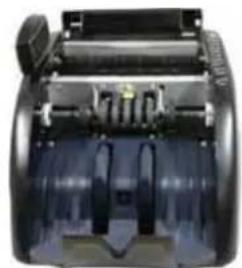
natural_image
Close-up of a mechanical device with transparent casing and internal components (no visible text or symbols)3.3. Accessories
Additional display (optional)
For connecting an additional display please use the jack input at the rear of the unit. Only connect while the unit is switched off. The display should show "O". If a different display appears please check in chapter 3 Troubleshooting.
| Accessoires | |
| Instruction manual (multi-lingual) Included | |
| Rubber ring for drive mechanism Included | |
| Resistance washers Included | |
| Rubber cogs Included | |
| Cleaning brush Included | |
| Fuse | Included |
| Additional display Optional | |
| Cleaning set Optional |
Please check package contents for completeness and sound condition immediately.
3.4. Service
In the unlikely event that the device should develop a technical problem please observe the following points:
The guarantee period for the device is 24 months.
Make sure that you store the purchasing receipt and the original packaging.
➢ Should a problem occur, please call our hotline first:
+ 49 (0) 180 5 007514
(Fee for connections outside Germany: additional Euro 0.14
per call for the connection within Germany.)
Our personnel are often able to provide helpful advice over the phone.
If it is not possible to clear up the problem over the phone, please send the device back to the following address:
Service-Center Hattingen
45525 Hattingen, Germany
Guarantee repairs will only be performed if the purchase receipt is enclosed with the device.
Thank you for your understanding.
Yours faithfully,
Your Olympia Business Systems partner
3.5. Technical Specifications
Dimensions 348 x 238 x 205 mm
Weight 7.5 kg
Power supply 230V/50Hz
Power consumption max. 60W
Counting speed 1000 notes/min
Display LCD
Gebruiksaanwijzing
Algemeen
text_image
Labeled diagram of a computer rear panel showing internal components and connectors with numbered labels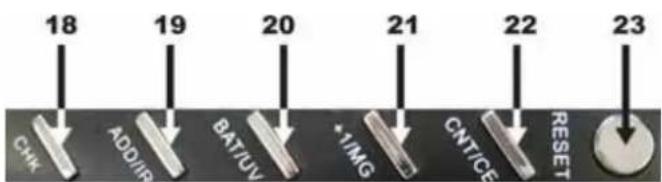
text_image
18 19 20 21 22 23 CHK ADD/IR BAT/UV *1/MG CNT/GE RESET
text_image
EU 200 ADCT IR LIV MD 24 25 26 27 28 291.4. Opstartprocedure
natural_image
Close-up of a printer with a printed sheet of paper and a small inset image showing buildings (no visible text or symbols)natural_image
Close-up of a mechanical device with attached components and directional arrows indicating movement (no readable text or symbols)natural_image
Diagram of a layered structure with diagonal striped elements and a circular boundary (no text or symbols)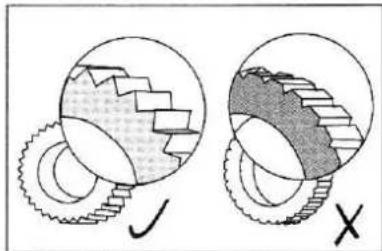
natural_image
Diagram showing two gear meshing operations with no text or symbols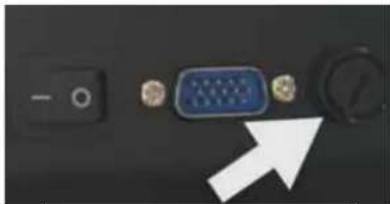
natural_image
Close-up of a computer interface showing a switch, VGA port, and control knob with an arrow pointing to it (no text or symbols visible)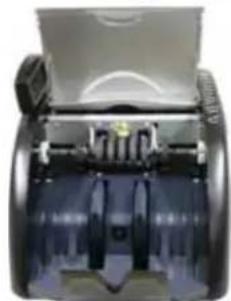
natural_image
Close-up of a mechanical device with transparent casing and internal components (no visible text or symbols)
natural_image
Close-up of a mechanical device with internal components and no visible text or symbols3.3. Accessoires
Extra scherm (optioneel)
Service-Center Hattingen
natural_image
Diagram of a printer or printer with internal components and alignment arrows, no readable text or symbols present.natural_image
Close-up of a mechanical device with attached components and directional arrows indicating movement (no readable text or symbols)natural_image
Diagram of a mechanical or electrical component with layered structure and diagonal striped pattern (no text or symbols)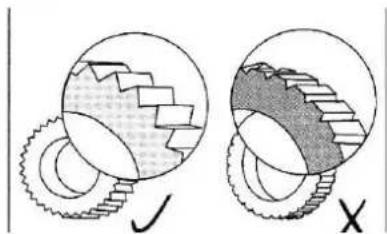
natural_image
Diagram showing two circular gear meshing with shaded segments, labeled X and Y (no text or symbols beyond labels)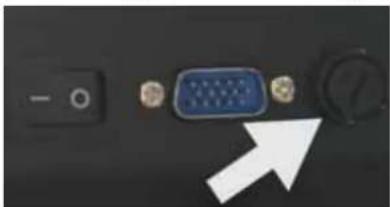
natural_image
Close-up of a computer interface with a blue VGA connector and black buttons, no visible text or symbolsNettoyer le NC 510
natural_image
Close-up of a mechanical device with transparent casing and internal components (no visible text or symbols)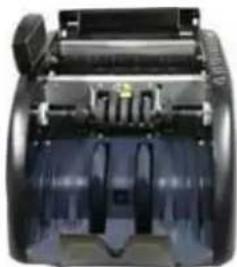
natural_image
Close-up of a mechanical device with internal components and no visible text or symbols3.3. Accessoires
Service-Center Hattingen
text_image
Labeled diagram of a device rear panel with numbered components and directional arrows indicating assembly or movement.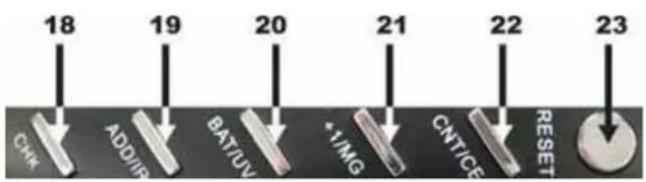
text_image
18 19 20 21 22 23 CHK ADD/IR BAT/UV *1/MG CNTICE RESET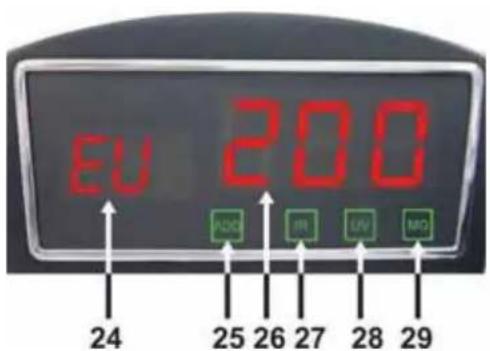
text_image
EU 200 ADC IR UV MD 24 25 26 27 28 29natural_image
Diagram of a printer or printer with an open screen showing a person in uniform, no visible text or symbols.text_image
The light window - 12 The light window - 12natural_image
Diagram of a mechanical or electrical component with layered structure and hatched patterns (no text or symbols)natural_image
Diagram showing two mechanical gear configurations with no text or symbolsnatural_image
Close-up of a computer interface showing a switch, VGA port, and control knob with an arrow pointing to the next component (no text or symbols visible)Pulire il NC 510
natural_image
Close-up of a mechanical device with transparent casing and internal components (no visible text or symbols)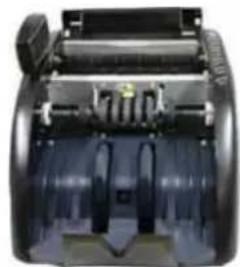
natural_image
Close-up of a mechanical device with cylindrical components and mounting holes (no visible text or symbols)3.3. Accessori
Service-Center Hattingen
text_image
Labeled diagram of a device interior with numbered components and directional arrows indicating movement or flow.Teclas
text_image
EU 200 ACC IR UV MD 24 25 26 27 28 29natural_image
Close-up of a printer's front panel showing paper print and printer casing (no visible text or symbols)natural_image
Close-up of a mechanical component with two white arrows pointing to specific parts (no visible text or symbols)natural_image
Diagram of a mechanical or electrical component with layered structure and internal components (no text or symbols)natural_image
Diagram showing two circular views of gear meshing with different gear profiles (no text or symbols)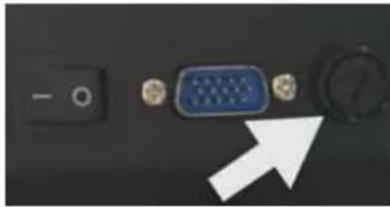
natural_image
Close-up of a computer interface showing a blue VGA connector with a white arrow pointing to it (no text or symbols visible)natural_image
Close-up of a mechanical device with transparent casing and internal components (no visible text or symbols)