
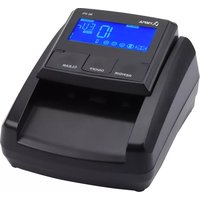
NC 355 - Coin and bill counter OLYMPIA - Free user manual and instructions
Find the device manual for free NC 355 OLYMPIA in PDF.
| Product type | Coin and banknote counter with counterfeit detection |
| Brand | Olympia |
| Model | NC 355 |
| Dimensions (L x W x H) | 136 x 124 x 80 mm |
| Weight | 453 g |
| Mains power supply | 100-240 V AC, 50/60 Hz, 12 V DC, 1 A adapter |
| Battery (optional) | Lithium-Ion 11.1 V, 700 mAh, runtime 3-4 hours |
| Counting speed | 0.5 seconds per banknote |
| Maximum displayable value | 9 995 € |
| Banknote thickness | 0.075 mm to 0.15 mm |
| Operating temperature | 0 °C to 40 °C |
| Operating humidity | 30 % to 90 % |
| Main functions | Counting, counterfeit banknote detection, value addition, quantity and amount display, selection of ejection direction, printing via USB, software update via microSD card |
| Display | Screen with total quantity, currency, total amount or banknote value, error code |
| Security | Detection of doubles, skewed banknotes, suspicious banknotes; foreign object prevention mechanism |
| Maintenance and cleaning | Clean surfaces with a soft, lint-free cloth; clean sensors after each use; do not use solvents |
| Spare parts and repairability | Optional battery available; power adapter; repairs only by qualified personnel (do not open yourself) |
| General information | Update via update.bin file on microSD; printing function via USB interface (cable not included); automatic shutdown after 10 min in standby mode on battery |
Frequently Asked Questions - NC 355 OLYMPIA
User questions about NC 355 OLYMPIA
0 question about this device. Answer the ones you know or ask your own.
Ask a new question about this device
Download the instructions for your Coin and bill counter in PDF format for free! Find your manual NC 355 - OLYMPIA and take your electronic device back in hand. On this page are published all the documents necessary for the use of your device. NC 355 by OLYMPIA.
USER MANUAL NC 355 OLYMPIA
Read the operating manual thoroughly and observe the information contained when using the device. Keep the operating manual close by for future reference.
Observe the Safety Information
Read and observe all the safety information to protect yourself and the environment from any harm.

WARNING!
Risk of suffocation!
Children can swallow small parts, packaging and protective foils. Risk of suffocation through batteries.
- Keep the product and packaging out of reach of children!
- Keep batteries out of reach of children. If a battery is swallowed, contact medical assistance immediately.

WARNING!
Risk of fatal injury through electric shock!!
There is a risk of an electric shock!
Never open or attempt to repair the device or its components!
- Never touch bare contacts with metallic objects.
- Never connect or disconnect the power adapter with wet hands.
- NEVER use the device if you suspect damage to the power cable or power plug or you can see damage to the power cable or power plug.

CAUTION!
Risk of entanglement!
- Keep fingers, hair etc. away from the infeed.
Risk of tripping through improperly laid cable!
Lay the cables so that nobody can trip over them.

CAUTION!
The device can be used by children from the age of 8 and persons with restricted physical, sensory or mental capabilities or a lack of experience and knowledge as long as they are supervised or have been instructed with regard to safe use of the device and are aware of the potential risks involved with its use.
Children must never play with the device. Cleaning and user maintenance may not be completed by children without any supervision.

CAUTION!
Risk through batteries!
There are different risks involved when dealing with batteries.
- Never attempt to recharge standard batteries, never short circuit batteries and/or open batteries. Doing so leads to a potential risk of overheating, fire or explosion.
Improper handling of batteries can put your health and the environment at risk. Batteries may contain toxic, ecologically hazardous heavy metals.
Ensure the connection terminals are not short-circuited.
Never throw batteries into a fire or water.
Never expose batteries to any mechanical loads.
Leaking batteries could cause damage to the device. If a battery should start to leak, remove it from the device immediately to prevent any further damage. Take the utmost care when handling damaged or leaking batteries and always wear protective gloves. - Avoid any contact with the skin, eyes and mucous membranes. Rinse any parts of the body which have come into contact with battery acid with plenty of clean water and contact a doctor immediately. Avoid extreme conditions and temperatures which could affect the batteries, e.g. by placing them on radiators or exposing them to direct sunlight.
Only use batteries of the type specified. - Never use batteries of different types or new and old batteries together.
Ensure batteries are inserted with the correct polarity.
If the device will not be used for a longer period, switch the device off and remove the batteries.
- Remove empty batteries from the device and dispose of them according to the applicable directives.
The batteries must be removed from the device before its disposal.

ATTENTION!
Risk of property damage!
Ensure no foreign bodies, such as paper clips, rubber bands, etc. get into the infeed.
Property damage through environmental influences!
Unfavourable environmental influences such as smoke, dust, vibration, chemicals, moisture, heat or direct sunlight could damage the product.
Repairs may only be carried out by properly trained specialists.
Intended Use
The bank note validator (subsequently referred to simply as the device) serves to control bank notes with regard to the most important security features. Any other use is considered unintended use. Unauthorised modification or reconstruction is not permitted. Under no circumstances open the machine or complete any repair work yourself.
Package Contents
Bank note validator NC 345, NC 355, NC 365
Power adapter
Operating manual
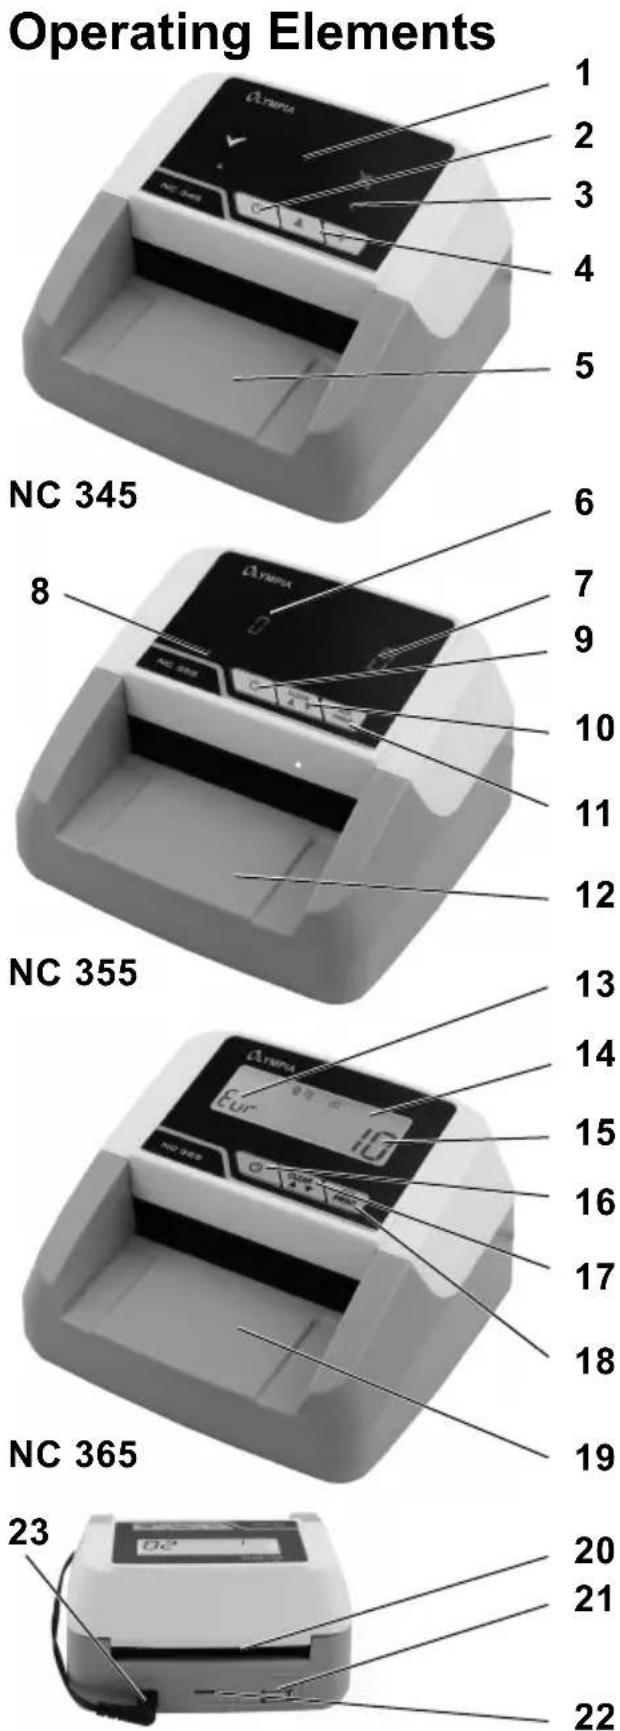
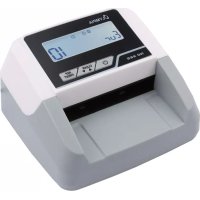
- Display
- ON/OFF button
- Indicator for output side selected
- Button for output direction
- Front input/output side
- Indicator for total quantity/cur- rency/faulty bank note
- Indicator for total amount or value of the bank notes
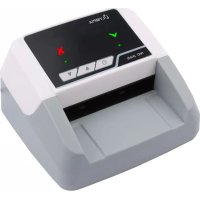
- Indicator for output side selected
- ON/OFF button
- CLEAR/Output side button
- REP/PRINT button
- Front input/output side
- Indicator for total quantity/cur- rency/faulty bank note
- Indicator for output side selected
- Indicator for total amount or value of the bank notes
- ON/OFF button
- CLEAR/Output side button
- REP/PRINT button
- Front input/output side
- Rear output side
- USB port (for printer)
- Slot for microSD memory card
- Power supply socket
Operation
Display and Notation
1./2. Action to be completed
Result of the action
REP/PRINT button

Helpful information
Connecting the Device
Switch the device off if it will not be used for a longer period. The data displayed is not necessarily saved. End the working processes in good time or connect the device to an external power supply.
- Connect the power adapter to the device and to a properly installed power socket.
Switching On/Off
NC 345, 355, 365
- Press and hold the ON/OFF button to switch the device on and off.
After switching the machine on, it performs a self-diagnosis. When the self-diagnosis has finished without any errors 0 0 appears in the display (NC 355, 365). If an error is detected, it is indicated in the display (refer to Error Table).
An acoustic signal is issued.
A green arrow at the bottom of the display indicates the output direction (NC 345, 355).
An arrow at the top right of the display indicates the output direction (NC 365).
Preparing Bank Notes
Pay attention to the following points to prevent malfunctions:
- Check the batch of bank notes for paper clippings, paper clips, rubber bands and other foreign bodies and remove them before inserting the bank notes in the machine.
- Do not insert any damaged bank notes.
- Smooth out any creased and folded bank notes before inserting them.
Inserting Bank Notes
Lay the bank notes individually in the tray on the input/output side with the short side at the front. The bank note is drawn in and controlled automatically.
In the case of a bank note which is wrongly inserted, suspicious or not recognised, an error is indicated in the display and an acoustic signal is issued. The bank note is rejected and returned to you.
Pay attention to the output direction selected.
- Wait until the bank note controlled has been fully ejected from the device and remove it before inserting the next bank note to be controlled.
The best results are achieved after a warm-up phase of 3 minutes. Bright ambient light can affect the sensor and falsify results.
Selecting the Output Side
Depending on the output side you select, the bank notes are ejected at the front or rear side of the device, accordingly.
Counterfeit or unrecognised bank notes are always ejected at the front output side.
NC 345
- Press the arrow buttons ( ) to select the bank note output direction (forwards or backwards).
A green arrow at the bottom of the display indicates the output direction.
NC 355, 365
- Press and hold the CLEAR button for 2 seconds to select the output side.
An arrow icon in the display indicates the output side currently selected.
Resetting the Display for Value and Quantity (NC 355, 365)
You can reset the values and quantities counted to zero in order to begin a new counting process.
- Press the CLEAR button.
The value and quantity counters are reset to zero.
Indicators and Displays
The range of indicators and displays is dependent on the device.
NC 345
A validation process is completed. No values are displayed.
NC 355, 365
The current EURO value is displayed after being detected. The total quantity and total value detected are displayed after 5 seconds.
In the case of these devices, the values of the bank notes counted are added. Initially, the value of the bank note being controlled is displayed and then the display switches to show the total value. The quantity of bank notes counted is displayed on the left-hand side and the value (total amount) of the bank notes controlled until this moment is displayed on the right-hand side.
The value display can show a maximum amount of 9,995 € (NC 355) or 99,995 € (NC 365).
Denominations (NC 355, 365)
You can display the bank notes of each denomination (5 €, 10 €, 20 €, etc.) which make up a specific value, that have been counted until now.
- Press the REP/PRINT button, several times if necessary, to check the quantity of each denomination.
The value of the bank notes counted is indicated on the left-hand side of the display and the quantity of the respective bank notes counted is displayed on the right-hand side. Each time the button is pressed, the quantity of bank notes counted for the respective EURO denomination appears.
REP/PRINT
- You can connect a printer at the USB port. A special cable (not contained in the package contents) is available from GO Europe.
- Press this button for 2 seconds to activate the printer function.
All the details regarding quantities, denominations and total values of the bank notes detected are printed out.
A few seconds after having pressed the REP/PRINT button for the last time, the device switches back to normal operating mode.
Battery Operation
The device can also be powered for up to 4 hours without the need for an external power supply by means of a rechargeable battery (not contained in the package contents). Only use the battery specified and distributed by GO Europe.
When powered by the battery, the device automatically switches off after 10 minutes in Standby mode.
The battery icon continues to indicate that the battery is fully charged. If the icon flashes slowly, it indicates the battery is being charged. If it flashes quickly, it indicates the battery charge is low and must be recharged.
Inserting / Changing the Battery
- Open the battery compartment cover on the underside of the device.
- Connect the plug on the battery to the socket in the battery compartment.
- Insert the battery in the battery compartment.
- Close the battery compartment cover.
- Connect the power adapter to a properly installed power socket.
An icon in the display indicates the current charge status of the battery (NC 365 only).
- Disconnect the power plug from the power socket.
- When the charging process has been completed, disconnect the external power adapter from the power supply socket on the bank note validator.
The bank note validator can now be used as a portable device.
- Charge and discharge the device every 15 days, otherwise the service life of the battery will be impaired.
The charging time required is one hour. A fully charged battery can test up to 500 bank notes. The battery can operate between 3 and 4 hours.
Software Update
- Download the "update.bin" file from the GO Europe homepage (www.go-europe.com).
- Load the "update.bin" on a microSD memory card.
- Switch the machine off.
- Insert the microSD memory card in the corresponding slot provided on the rear of the machine. The contacts must point upwards.
- Switch the machine on.
During the update process, the machine produces a noise and the display remains empty.
When the software update has been completed, the noise stops and the display appears as normal.
If you want to complete the software update on several devices, set the "update.bin" file attribute to "read only".
Technical Data
Model NC 345 / 355 / 365
Counting speed 0.5 seconds per bank note
Capacity Maximum value 9,995 € (NC 355)
Maximum value 99,995 € (NC 365)
Thickness of bank notes 0.075 mm to 0.15 mm
Power supply 100-240 V (AC); 50/60 Hz
Power consumption 6.6 W
Power adapter 12 V (DC); 1 A
Rechargeable battery (option) Lithium-ion battery 11.1 V; 700 mAh
Operating time with full battery 3 - 4 hours
Model NC 345 / 355 / 365
Temperature and rel. humidity 0 - 40^ and 30 - 90%
Dimensions 136 × 124 × 80 ~mm
Weight 445 g (NC 345), 453 g (NC 355),
462 g (NC 365)
Care Instructions
- Clean the housing surface with a soft, lint-free cloth.
- Clean the sensors after each use.
- Do not use any solvents or cleaning agents.
Error Table (NC 345)
Display Significance

Authentic bank note

Suspicious or counterfeit bank note
Error Table (NC 355, 365)
Error code Significance Solution
CF X Not validated
Check the bank note for damage or contact service personnel.
CF4
Doubled bank notes have been detected
Check whether the bank notes stick together.
Start the counting function again.
Error code Significance Solution
CF6
Bank note was drawn in askew.
Lay the bank note in the input side again.
Declaration of Conformity
Symbol Significance

The CE Mark on the device confirms conformity.
DEUTSCHLAND, declare in sole responsibility, that the product complies with the EU Directives: 2014/35/EU, 2015/863/EU,
2014/30/EU and 2011/65/EU. The full EU Declaration of Conformity is available online at the following website:
www.go-europe.com
Manufacturer
GO Europe GmbH
Zum Kraftwerk 1
D-45527 Hattingen
Germany
Warranty
Dear customer,
We are delighted that you have chosen this equipment.
In the case of a defect, please return the device together with the receipt and original packing material to the point of sale.
Disposal
Symbol Significance

Packaging materials must be disposed of according to local regulations.

The packaging is made of environmentally friendly materials that you can dispose of at local recycling points. Advice on the options with which to dispose of your old device can be obtained from your municipal or local administration offices.
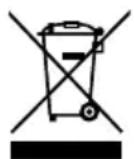
The adjacent symbol indicates laws dictate that electrical and electronic apparatus no longer required must be disposed of separate from domestic waste. Dispose of your device at a collection point provided by your local public waste authority. Packaging materials must be disposed of according to local regulations.
Defective or empty batteries must be recycled in accordance with Directive 2006/66/EC and ist amendments. Return batteries and the device via the collection points provided.
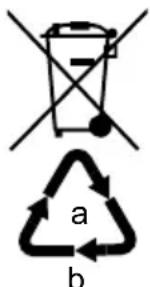
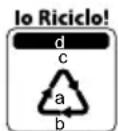
Observe the identification on the packaging materials during the waste sorting process; they are identified by abbreviations (b) and numbers (a) which have the following significance: 1-7: plastic/20-22: paper and cardboard/80-98: composite materials.

The device and packaging materials can be recycled; sort them for disposal to simplify waste management. The Triman logo is only relevant for France.
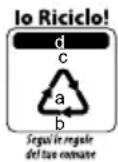
The device and the packaging material can be recycled, so sort them prior to disposal for better waste management. Contact your local authorities for information on the various options available to ensure correct disposal. Observe the following identifications of the packaging materials: (a) numbers, (b) abbreviations and (c) materials which have the following significance: 1-7: plastics / 20-22: paper and cardboard / 80-98: composite materials and (d) type of packaging. The logo is only applicable to Italy.
Pour votre sécurité

Netadapter 12 V (DC); 1 A
Accu (optioneel) Lithium-ion-accu 11,1 V; 700 mAh
segulregul defutc emnate
Tpooobotiko 12 V (DC); 1 A
Mttatapia (TpOaipetiká) Mttatapia λiθiou ióvτωv 11,1 V; 700 mAh
XpovocIeIToupyiaC PAnp 3-4 wPec
Mntapia

- Observe the Safety Information
- WARNING!
- Risk of suffocation!
- Risk of fatal injury through electric shock!!
- CAUTION!
- Risk of entanglement!
- Risk through batteries!
- ATTENTION!
- Risk of property damage!
- Intended Use
- Package Contents
- Operation
- Display and Notation
- 1./2. Action to be completed
- REP/PRINT button
- Connecting the Device
- Switching On/Off
- NC 345, 355, 365
- Preparing Bank Notes
- Inserting Bank Notes
- Selecting the Output Side
- NC 355, 365
- Resetting the Display for Value and Quantity (NC 355, 365)
- Indicators and Displays
- NC 345
- Denominations (NC 355, 365)
- REP/PRINT
- Battery Operation
- Inserting / Changing the Battery
- Software Update
- Technical Data
- Care Instructions
- Error Table (NC 345)
- Error Table (NC 355, 365)
- Error code Significance Solution
- Declaration of Conformity
- Symbol Significance
- Manufacturer
- Warranty
- Disposal
- Pour votre sécurité
Brand : OLYMPIA
Model : NC 355
Category : Coin and bill counter