
Gamma G7 - Blood pressure monitor HEINE - Free user manual and instructions
Find the device manual for free Gamma G7 HEINE in PDF.
Frequently Asked Questions - Gamma G7 HEINE
User questions about Gamma G7 HEINE
0 question about this device. Answer the ones you know or ask your own.
Ask a new question about this device
Download the instructions for your Blood pressure monitor in PDF format for free! Find your manual Gamma G7 - HEINE and take your electronic device back in hand. On this page are published all the documents necessary for the use of your device. Gamma G7 by HEINE.
USER MANUAL Gamma G7 HEINE
GAMMA G5, G7, XXL LF
Please read and follow these instructions for use of and keep them for future reference.
Intended Use
The HEINE GAMMA® sphygmomanometers are intended for use for non-invasive, non-automated blood pressure measurements by medical professionals or trained personnel. The devices are non-sterile, intended for multiple use and may only come into contact with intact skin. The HEINE GAMMA® blood pressure cuffs are available in various sizes ranging from small infants to large adults.

For U.S. only:
Federal law restricts this device to sale by or on the order of a Physician or Practitioner!
Warnings and Safety Information

CAUTION! Indicates potential hazardous situations. Ignoring the corresponding instructions may lead to dangerous situations of mild to moderate extent. (Background color yellow; foreground color black).

NOTE! Indicates valuable advice in terms of installation, operation, maintenance or repair. Notes are important, but not related to hazardous situations.
Setting up
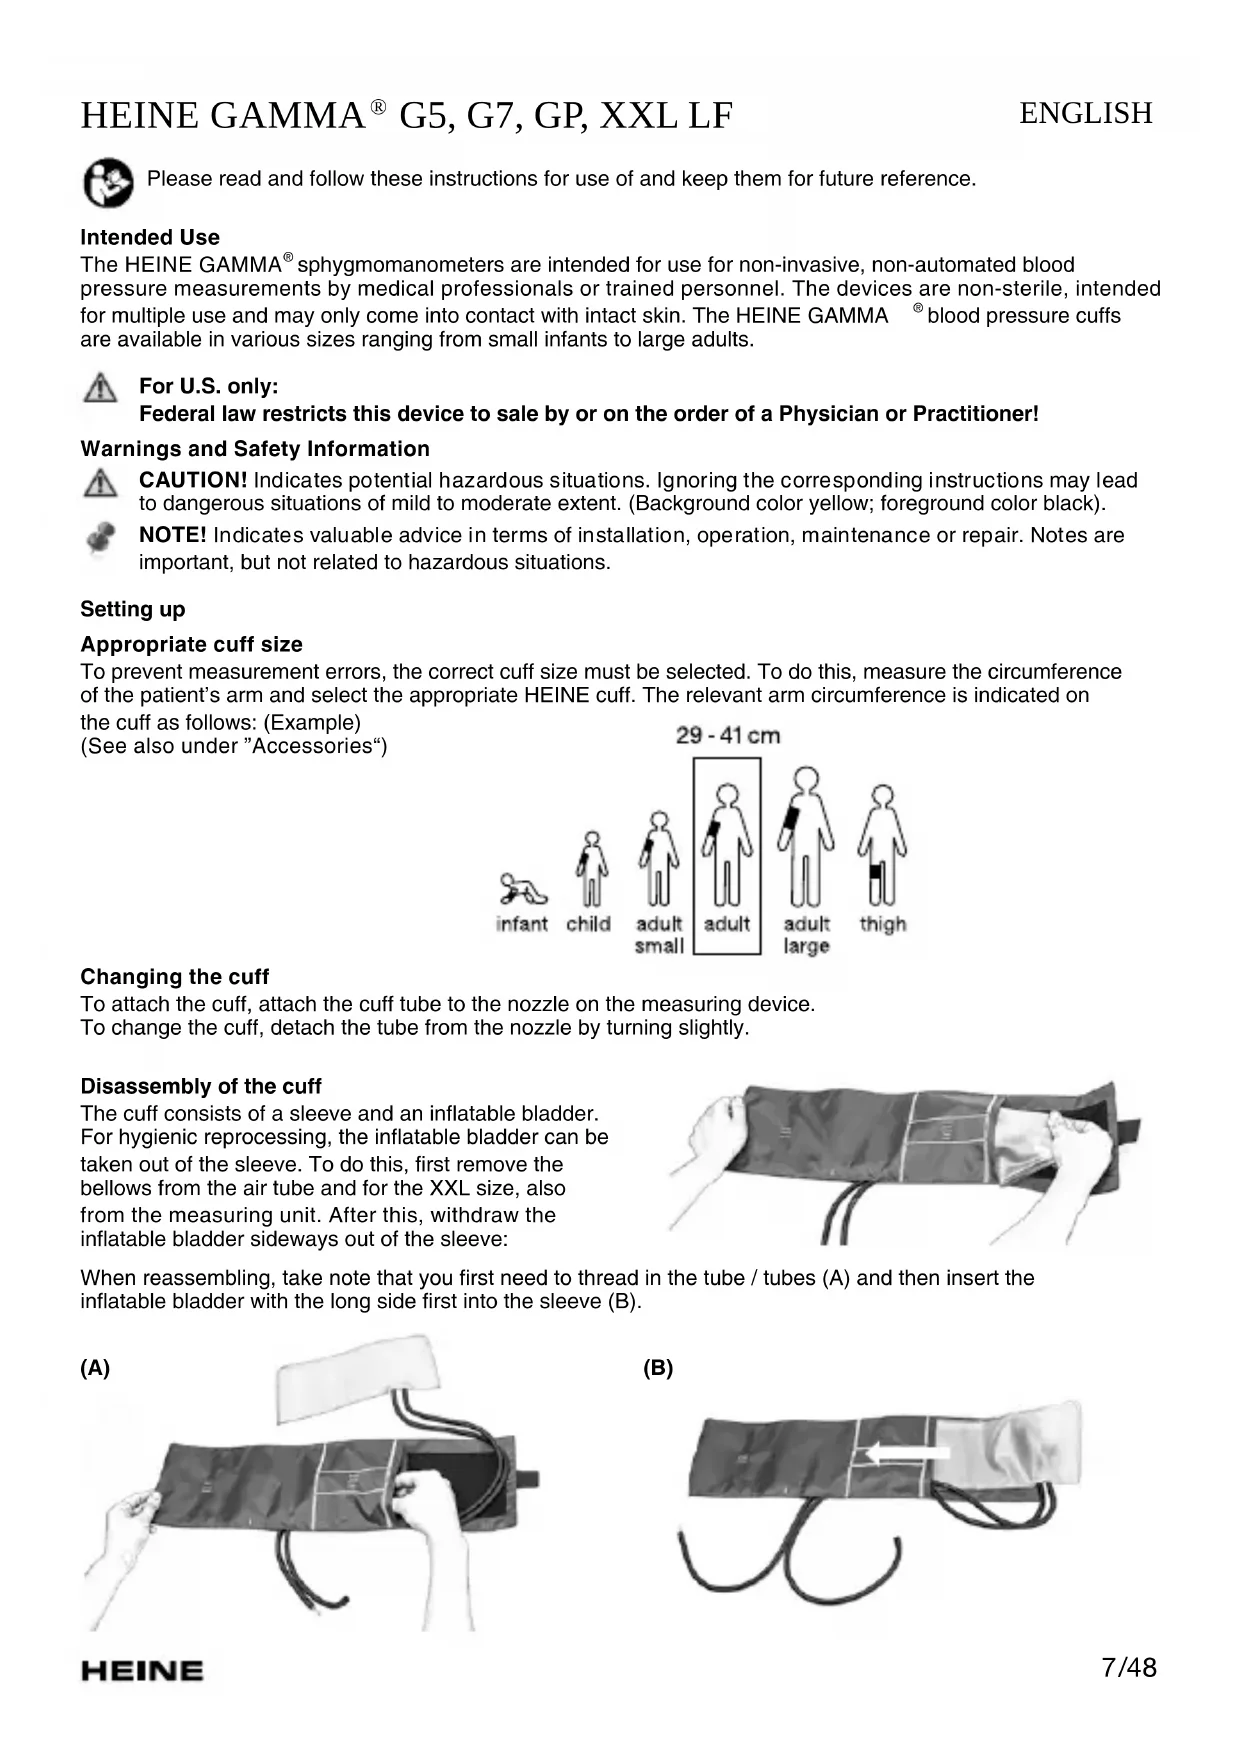
Appropriate cuff size
To prevent measurement errors, the correct cuff size must be selected. To do this, measure the circumference of the patient's arm and select the appropriate HEINE cuff. The relevant arm circumference is indicated on
the cuff as follows: (Example) (See also under "Accessories")
Changing the cuff
To attach the cuff, attach the cuff tube to the nozzle on the measuring device. To change the cuff, detach the tube from the nozzle by turning slightly.
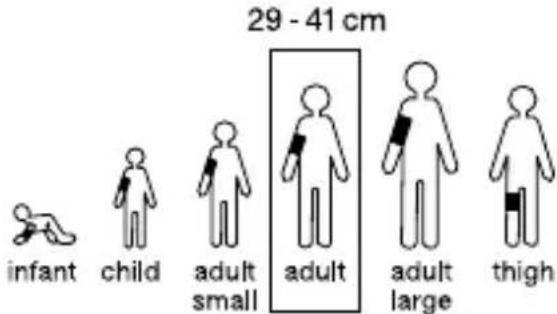
Disassembly of the cuff
The cuff consists of a sleeve and an inflatable bladder. For hygienic reprocessing, the inflatable bladder can be taken out of the sleeve. To do this, first remove the bellows from the air tube and for the XXL size, also from the measuring unit. After this, withdraw the inflatable bladder sideways out of the sleeve:
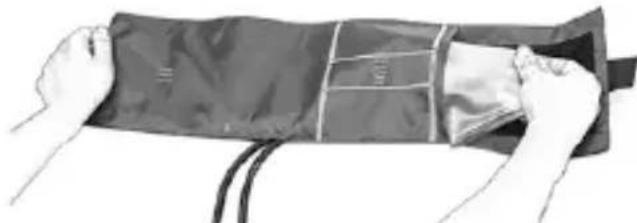
When reassembling, take note that you first need to thread in the tube / tubes (A) and then insert the inflatable bladder with the long side first into the sleeve (B).

(B)
Operation
Fitting the cuff
Fit the cuff so that the lower edge is about 2-3 cm above the elbow (or about 5 cm above the knee). Locate the special mark over the artery. The white index mark should be located in the marked index area.

Do not take your blood pressure for more than 2 minutes!
Wait for at least 2 minutes before taking a repeat measurement!
Measurements
Let the patient relax for approx. 5 min. before you start the measurement. During the measurement, the patient should not talk if possible and should sit relaxed without crossing their legs. The back and arm should be supported.
The indicator on the scale should be at zero. To prevent measurement errors, the measured value should be read vertically to the measuring scale.
Pump the cuff approximately 30mmHg above the expected systolic pressure. The artery is now compressed and no flow sounds should be heard.
The pulse-synchronous sounds which can be heard when the pressure is slowly released in the cuff are called Korotkoff sounds.
Use the K5 sound for measurements in adults and the K4 sound for children aged 3-12 years.
If Korotkoff sounds can be heard in adults or pregnant patients with a vented cuff, use the K4 sound as well for the measurement.
Open the valve to release the pressure. The pressure should go down at a speed of 2-3 mmHg per second. When sounds can be heard again, blood is flowing through the vessel again in the systole of the heart (Systolic / top pressure). Let the pressure slowly go down until the sound disappears (Diastolic / bottom pressure). Now there is no compression of the vessel and blood flows through again free from turbulence and sounds. At the end of the measurement, open the valve fully to quickly release the air from the cuff.
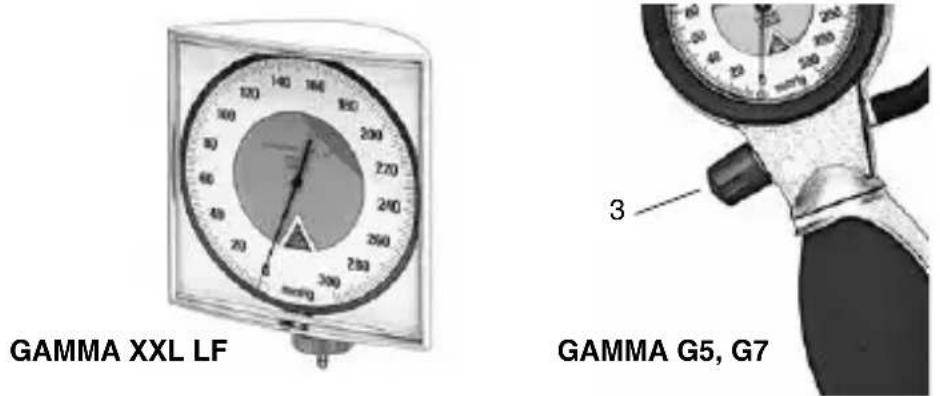
GAMMA G5, G7, XXL LF
Close the air release valve by turning to the right. Pump the cuff by pressing the bulb and release the air from it by opening the valve (3).
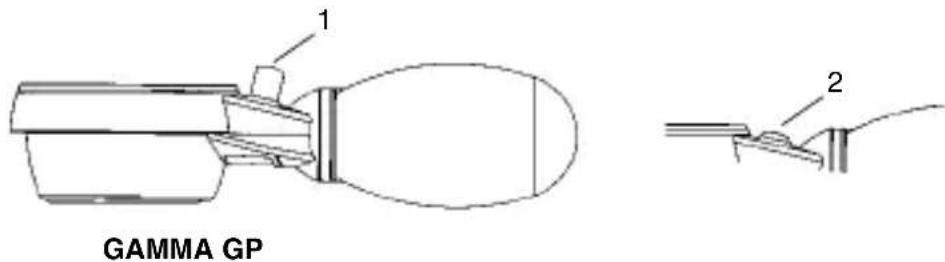
GAMMA GP
Press the button to close the valve completely (1). Pump the cuff by pressing the bulb and release the air from it by opening the valve. (1 + 2)
Please note: It is not possible to pump up the cuff with the button in position (2).
Changing the position of the spoon (GAMMA G5, G7, GP)
The spoon is normally set for right-handed use. If you wish to inflate the cuff with the left hand, the spoon can be re-positioned for left-handed use:
- Remove the ball from the instrument with a twisting and pulling motion.
- Loosen the two screws near the air intake but do not screw them out completely.

Note: A special tool is supplied with GAMMA G7 for this purpose.
- If necessary, moisten the air intake to ease fitting.
- Rotate the base of the spoon through 180^ and re-tighten the screws.
- Grip the neck of the ball and push it back onto the air intake with a twisting motion.
Hygienic Reprocessing
Instructions on hygienic reprocessing must be adhered to, based on national standards, laws and guidelines. Classification according to KRINKO: non-critical
Spaulding Classification USA: non-critical

In the event of suspected contamination, carry out hygienic preparation of the instrument.
The described cleaning and disinfection measures do not replace the specific rules applicable for the establishment.
HEINE Optotechnik only approves the agents and procedures mentioned below.
Cleaning and disinfection may only be carried out by personnel with sufficient hygienic knowledge.
Observe the instructions of the manufacturer of the reprocessing media.
Do not use spray or immersion disinfection, dripping wet or heavily foaming tissues, automated or ultrasonic reprocessing for the sphygmomanometers.
Procedure for the sphygmomanometer
Clean and disinfect the Sphygmomanometers manually (wipe clean and wipe disinfect).
Recommended agents
Cleaning agent: Neodisher® MediClean
Disinfectant agent: quaternary ammonia compounds (e.g. Microbac tissues)
Procedure for the blood pressure cuff
Clean and disinfect the blood pressure cuffs and tubes manually (wipe or immersion cleaning and disinfection).
The cuff sleeve can be hand-washed at max. 30^ after removing the inflatable bladder.
Recommended agents
Cleaning agent: Neodisher® MediClean
Disinfectant agent: alcoholic (e.g. Incides Tissues)
Maintenance and Service
The instruments do not require maintenance or service.
GeneralWarnings

Check the correct operation of the device before use! Do not use the device if there are visible signs of damage.
Do not modify the device.
Use only original HEINE parts, spare parts, accessories and power sources.
Repairs shall only be carried out by qualified persons.
Protect the instrument from impact or shocks (do not drop) and protect from moisture and dirt.
Avoid damaging the cuff, tube and bulb with pointed objects such as needles or scissors.
Do not expose the sphygmomanometer to direct sunlight for long periods of time.
This product is not allowed to be entered or used in strong magnetic fields like MRI scanners.
General Notes

The warranty for the entire product is invalidated if non-genuine HEINE products or non-original parts are used and if repairs or modifications are made to the device by persons not authorized by HEINE. For more information, please visit www.heine.com.
All components of this sphygmomanometer are latex-free, the inflation bulb is also phthalate-free. Please refer to the enclosed assembly instructions.
Note technical inspection: A technical inspection should be carried out at the latest every two years by the manufacturer or an authorized service technician.
The referenced measuring device must be traceable to a national/international standard.

A rectangular label is attached to the back of the instrument which displays a year-mark. This indicates the year in which the instrument should be reinspected.
Disposal

Disinfect the product before disposal. Please observe the relevant state-specific disposal regulations.
The appendix contains following tables
- Accessories
- Technical specification
- Explanation of the used symbols
HEINE GAMMA® G5, G7, GP, XXL LF

GAMMA G5, G7, XXL LF
GAMMA G5, G7, XXL LF
GAMMA G5, G7, XXL LF
GAMMA G5, G7, XXL LF
GAMMA G5, G7, XXL LF
GAMMA G5, G7, XXL LF
GAMMA G5, G7, XXL LF
GAMMA G5, G7, XXL LF
Cuffs for GAMMA GP / G5 / G7
| name size / cm | circumference | / cm order number | |
| infant 6x28 8-13 | M-000.09.700 | ||
| child 10x34 13-20 | M-000.09.702 | ||
| adult small | 14x53 | 20-29 | M-000.09.704 |
| adult 14x58 29-41 | M-000.09.619 | ||
| adult large | 17x70 | 35-47 | M-000.09.706 |
| thigh | 20x86 | >41 | M-000.09.615 |
Cuffs for GAMMA XXL LF
| name size / cm | circumference | / cm order number | |
| infant 6x28 8-13 | M-000.09.701 | ||
| child 10x34 13-20 | M-000.09.703 | ||
| adult small | 14x53 | 20-29 | M-000.09.705 |
| adult | 14x58 | 29-41 | M-000.09.629 |
| adult large | 17x70 | 35-47 | M-000.09.631 |
| thigh | 20x86 | >41 | M-000.09.625 |
Mounting for GAMMA XXL-LF
| Cuff-holder | For desk (T) | M-000.09.141 |
| Desk Stand | For desk (T) | M-000.09.142 |
| Wheel Stand | For wheel stand (S) | M-000.09.145 |
| Universal mounting plate | Universal mounting plate for rail-(R), wall-(W) and whell stand-model (S) | M-000.09.306 |
| Rail clamp | For rail model (R) | M-000.09.307 |
Technical specification
| Environmental conditions for operation | +10 °C to +40 °C 15 % to 85 % rel. humidity 700 hPa to 1060 hPa |
| Environmental conditions for storage | +5 °C to +45 °C 45 % to 80 % rel. humidity 500 hPa to 1060 hPa |
| Environmental conditions for transport | -20 °C to +50 °C 45 % to 80 % rel. humidity 500 hPa to 1060 hPa |
| Measuring range | 0-300 mmHg |
| Accuracy of the pressure indicator | ± 3 mmHg |
Explanation of utilized symbols
The following symbols are used on the device or on the packaging: