
31V EL - Lawn mower SABO - Free user manual and instructions
Find the device manual for free 31V EL SABO in PDF.

Frequently Asked Questions - 31V EL SABO
User questions about 31V EL SABO
0 question about this device. Answer the ones you know or ask your own.
Ask a new question about this device
Download the instructions for your Lawn mower in PDF format for free! Find your manual 31V EL - SABO and take your electronic device back in hand. On this page are published all the documents necessary for the use of your device. 31V EL by SABO.
USER MANUAL 31V EL SABO
When you are reading the operator's manual, please unfold the front and back page.

Nederlandse
Original Instruction
Nederlands NL
GB Explanation of the pictograms
DE Betriebsanleitung lessen!
FR Lisez le mode d'emp oi!
GB Read the operator's manual!
Bedieningshandleiding lezen!
RU PpOHTaTb pyKOBOdCTBO nO 3KcIpyatauIN!


DE Gefahr durch fortschleudernde Teile bei laufendem Motcr - Sicherheitsabstand halten / Dritte fernhalten! Schutzbrille/TRagen!
FR Les pieces ejectees represent un danger lorsque le noteur est en marche -conserver les distances de sécurité / garder les personnes étrangères à l'ecart ! Le port de lunettes de protection est obligatoire !
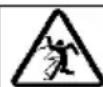
Risk caused by thrown elements when the motor is running - Maintain in the safety gap / Keep o'ters away! Wear protective goggles!
NL Gevaar door weggeslingerde delen bij lopende motor - veiligheidsafstand houden / derden op afstand houden! Veiligheidsbril dragen!
RU Onachoctb Bbl6paCbIBaHnnpedMeTOB npn BKlIOueHHOM DBnraTeJe - co6JIHOaTb 6e3OanacHoe pacCToHne n He doTUCaTB HaxOXJDeHnA Dpynx IIOHe B onachOH 30He! O6aTeBHo HOwe Hne 3aunTHx OOKOB!

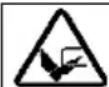
DE Netzkabel von schneidenden Zinken fernhalten.
FR Tenez le cordon d'alimentation eloiigné des griffes tranchantes.
GB Keep supply flexible cord away from cutting tines.
Netsnoer van snijdende vorktanden verwijderd houden.
He donyckatb nonadaHna 3neKtpnueckoro Ka6eB 30Hy pa60TbI pexkyuero MexaHn3Ma.

| C1 | C3 |
| C2 (31-V EL) | C2 (35-V EL) |
| D2 | A2 (31-V EL) |

A2 (35-V EL)

F (31-V EL)

F (35-V EL)
Z2
V2

M
GB Explanation of the pictograms
Auf scharfe Zinkel achten - Vor der Ausführung von Wartungsarbeiten oder falls die Leitung beschädigt ist, Gerät vom Netz trennen.
Attention aux griffes tranchantes - Avant l'exécution de travaux d'entretien ou si le cable est endommagé, débranchez la machine du secteur.
Beware of sharp tines - remove plug from mains before maintenance or if cord is damaged.
Op scherpe vorktanden letten - Voor de uityoering van onderhoudswerkzaamheden, of indien het snoer beschadigd is, het toestel van het net scheiden.
BHNMaHHe: ocTpbie 3y6b! NpeJn Hauanom pa6oT no TexO6cnyKuBaHHIO nIIN B Cnyuae nobpeXdEHHa Ka6eJr OTKJIouHTb yCTpOJCTBO OT 3JeKTPOCeTN.
DE Elektrogeräte gehoren nicht in den Hausmull, Gerät, Zubehör und Verpackung einer umweltfreundlichen Wiederverwertung zuführen.
FR Les apparèils électriques ne doivent pas être jetés à la poubelle; remettre l'appareil, les accessoires et l'emballage à un centre de recyclage ecologique.
Electrical appliances must not be disposed of as household waste. Send equipment, accessories and packaging for environmental recycling.
NL Elektrische apparaten horen nicht bij hetuisvuil; breng apparaat, toebehoren en verpakking maar een milieuvriendelijk recyclagepunt.
He Bb6paCbIBaTb 3JIeKTpNueCKne npn6Opbl B 6bITOBbIe OTXoDbI. YcTpoiCTBO, RU KOMIIeKTyIOUne N yNaKOBKa NOJNeXaT yTNIN3aCUN C cIeNbIO BTOpNCHO INpepepa60TKN.
| DE | FR | GB | NL | RU |
| Technische Daten Car actéristiques techniques | Technical data | Technische gegevens | Texhimiècken XapakTepnCTNK | |
Schalleistungspegel / Niveau de puissance acoustique / Sound power level / Geluidsvermogen / IapaHTnpyembI ypoBENb 3ByKOBoMoiHocTn
| Garantieter Schäflleistungspege; gemessen nach 2000/14/EG Niveau de puissance acoustique assuré; mesure selon 2000/14/CE Guaranteed sound power level; measured according to 2000/14/EC Gegardeerd geluidsvermögen; gemeten conformi 2000/14/CE Гарantaуемы урочь 3вуковая мошисти;有很大ervени согл auto 2000/14/EC | Lwa = 87 dB(A) |
| Lwa = 87 dB(A) |
Schaldruckpegel / Niveau de pression sonore / Sound pressure level / Geluidsdrukniveau / YpO BEnb 3ByKOBOrO dAbJeHnra
| Emissions-Schalldruckpegel am 3edienerplatz; gemessen nach EN 836/A4 Messunsicherheiten; nach ISO4371 Niveau de pression sonore d'émission au poste d'opérateur; mesure selon EN 836/A4 Incertitudes de mesure ; selon ISO4871 Emission sound pressure level a operator's workplace; measured according to EN 836A 4 Measuring inaccuracy; according to ISO4871 Emissie - geluidsdrukniveau op de planta van de operator; gameten volgens EN 836/A4 Meetonzekerheden; conform IS D4871 Уrobenvиз nullу暱ьх умов на рабочем месе; Исторенny соглесно EN 836/A4 Погашноши пимерени; согласно ISO4871 | LpA = 78 dB(A) 3 dB |
| LpA = 78 dB(A) 3 dB |
Schwingungen / Vibrations / Vibrations / Trillingen / Bn6 paun
| Schwungungen am Führungshol n; gemessen nach EN 836/A4 Messunsicherheiten; nach EN1 2096 Vibrations sur la poignée ; mesu ées selon EN 836/A4 Incertitudes de mesure ; selon EN12096 Vibrations on the lawnmower's handlebar; measured according to EN 836/A4 Measuring inaccuracy; according EN12096 Trillingen aan de sturboom; meteten volgens EN 836/A4 Meetonzekerheden; conform EN12096 Вибраця ручи;在其меренham сгласно EN 836/A4 Погашносту在其меренham сгласно EN12096 | a HW = 1,5 m/s² 0,8 m/s² |
| a HW = 1,5 M/c² 0,8 M/c² |
| DE | FR | GB | NL | RU |
| Technische Daten | Caractéristiques techniques | Technical data | Technische gegevens | Te x Hηчесné xapακτεριστυκ |
| Motor | Moteur | Motor | Motor | Двигатуль |
| Wechselstrommotor | Moteur à courant altematif | Alternating current motor | Wisselstroom-motor Д. | Ингател пегеменогтоksa |
| Anschluss-Spannung | Tension d'alimentation | Connection voltage | Aansluit-sp anning Hanря | Жени пitaIGNЯ |
| 230 V | 230В | |||
| Leistung | Puis sance | Power | Vermogen M | ошносты |
| 1400 W / 1600 W | 1400ВТ/1600ВТ | |||
| Motor-Drehzahl Vitesse de e rotation du moteur | Motor speed | Toerental motorЧасто | Та вразсану Дзигатуль | |
| 3000 min-1 | 3000 MIn-1 | |||
| DE | FR | GB | NL | RU |
| Technische Daten Car actéristiques techniques | Technical data | Technische gegevens | Texnliche Kennzeichne xapaktermieCTNK | |
| Vertikutierer | Scarificateur | Scarifier | Verticuteerder | A¾atop |
| Gehäuse | Carter | Housing | Behuizing | Корпунс |
| Schlagfester Kunststoff (ABS) | Plastique résistant aux clocs (ABS) | Impact-resistant plastic (ABS) | Slagbe stendige kunststf (ABS) | Удaporочая пл actмаса (ABC) |
| Arbeitsbreite Lar | geur de travail | Operating width Werkb reedte P | абочаяшируна | |
| 310 mm / 350 mm | 310 MM / 350 MM | |||
| Vertikutiermesser Lames du scarificateur | Scarifier cutters Verteice ermessen Ko | Лучестохожец | ||
| 13 / 15 Stck | 13 / 15 pces | 13 / 15 pieces | 13 / 15 stuks | 13 / 15 stt. |
| Führungsholm höhenversellbar | Poig née régable en hauteur | Adjustable-height Sturboo min hoogte regelbaar | Рушировka висоты ручки | |
| 2-fach | double | 2-way | 2-voudig | 2 поожения |
| Fangsackvolumen Cont e nu du sac de récupération | Grass collector capacity Capaciteit pvangzak | Обем травосорнika | ||
| 50 Litr | 50 litres | 50 litres | 50 liter | 50л |
| Gewicht | Poids | Weight | Gewicht | Вес |
| 17,5 kg / 18,5 kg | 17,5 кг / 18,5 кг | |||
| Länge | Longueur | Length | Lengte | Длиа |
| 1330 mm | 1330 MM | |||
| Breite | Largeur | Width | Breedte | Шерпа |
| 490 mm | 490 MM | |||
| Höhe | Hauteur | Height | Hoopte | Бу科协а |
| 990 mm | 990 MM | |||
| Räder vorn 'hinten Rque s avant/arière | Wheels front/rear Wielen v cor/achter | Пегедnéв/orдnéve кoleса | ||
| Ø 180 mm | Ø 180 MM | |||
| Lagerung var n/hinten Logem ent avant/arière | Bearing front/rear Lagers v cor/achte | Пегедnéв/orдnéve пordшеники | ||
| Gleitlagerung Palie r à glissement | Sleeve bearing; | Glijges | Пordшеники сокльжени | |
| R1 | S1 |
| L | N3 |
| N | 1 |

A John Deere Company
Auf dem Höchsten 22
D-51645 Gummersbach
Tel. +49 (0) 22 61 704-0
1 Explanation of the rating plate affixed to the machine .2
2 Introduction 2
3 Explanation of the symbols. 3
4 Proper use 4
5 General safety guidelines for the electric scarifier ....4
General safety instructions 4
Preparatory measures 5
Handling 5
Maintenance and storage 7
6 Description of components. 8
7 Preparation 8
Assembling the handlebar lower section
(Illustration C1) 8
Assembling the handlebar upper section
(Illustration C3) 8
8 Before using the scarifier for the first time. 8
9 Starting the machine. 9
Attaching the connecting cable (Illustration C2) 9
Attaching the connecting cable to the strain relief fitting (Illustration D2)
Starting the motor (Illustration A2) 9
10 Switching off the Motor (Illustration F) 9
11 Emergency stopping. 10
12 Adjusting the scarifying depth. 10
Setting (Illustration Z2 + V2) 10
Scarifying test 10
13 Grass collector 10
Operation with grass collector (accessory) 10
Attaching the grass collector to the scarifier (Illustration R1 + S1) 10
Emptying the grass collector (Illustration L) 11
Operation without grass collector 11
14 Scarifier operation 11
Using the machine on slopes. 11
Handling the cable during use 11
Checking operating safety 11
Time restrictions 11
Tips on caring for your lawn (Illustration M) 12
15 Service intervals. 12
16 Care and servicing of your scarifier 12
Cleaning (Illustration N3) 12
Storage. 13
Folding the guide tube 13
Transporting and securing the equipment (Illustration N) 13
Maintenance of the blade shaft. 13
Changing the drive belt. 13
17 Troubleshooting 14
Technical data .. see rear inner cover Declaration of conformity . Before Technical Data
GB
1 EXPLANATION OF THE RATING PLATE AFFIXED TO THE MACHINE
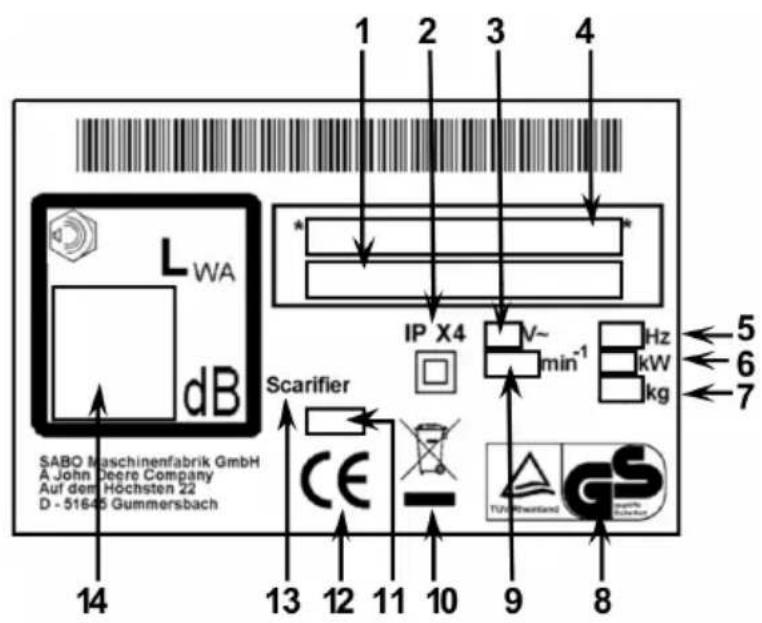
1 Type designation
2 Protection type
3 Connection voltage
4 Model - and Serial number
5 Network frequency
6 Power
7 Weight
8 Tested safety
9 Motor speed
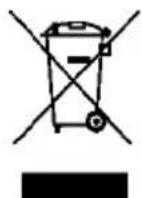
10 Electrical appliances should not be disposed of with household waste. Equipment, accessories and packaging must be disposed of in an environmentally friendly way
11 Year of manufacture
12 CE conformity symbol
13 Scarifier
14 Guaranteed sound power level
GB
2 INTRODUCTION
Dear gardening fans,
Taking pride in a well-kept lawn is one thing, but if you also enjoy your gardening, it is the good quality of your gardening equipment that you have to thank. With your new SABO scarifier, you have made an excellent choice. This combines the outstanding performance of a great traditional brand with the innovations of modern high tech. You will notice this when using the scarifier, and be pleased when you see the perfect result achieved.
However, before starting to care for your lawn, please read and follow the important information given below.
Before starting the scarifier for the first time, please read these operating instructions through carefully, in order to familiarize yourself with the correct operation and maintenance of the machine, and avoid injuries or damage to your scarifier.
Always operate the scarifier with care. The pictograms affixed to the scarifier draw attention to the most important precautionary measures. The meaning of the pictograms is explained on the cover page.
The safety instructions in these operating instructions are designated by symbols. The explanation of these symbols is given in the table overleaf.
The designations "left" and "right" always refer to the left or right side of the scarifier viewed from the direction of movement.
The more closely you follow the technical instructions, the more reliably your SABO scarifier will work. We must point out that damage to the scarifier caused by operating errors is not covered by our warranty. Please note the following extract from our warranty conditions.
We wish you great pleasure in caring for your lawn.
| WARNING Always read and follow the operating instructions and general safety regulations carefully. Keep the operating instructions for reference purposes. Proper use also includes adherence to the operation, maintenance and service conditions prescribed by the manufacturer. | |
| WARNING Keep all persons outside the danger area! Contact with the rotating cutters can cause severe injury. Objects ejected at high speed can cause severe injury. You must never scarify the lawn if there are other persons nearby, especially children or animals. | |
| WARNING Electric shock can cause severe injuries. The electrical equipment must not be modified. Check the connecting cable regularly for signs of damage and ageing. Ensure that the cable is free at all times, and not kinked, abraded or trapped. Faulty connecting cables must be replaced. Do not spray the machine down with water. This could damage the electrical system. Always have the replacement of the blades carried out by an authorized workshop, since an insulation protection test to DIN EN 60335 must be carried out after repair and maintenance work to insulation components (e.g. blade shaft, attachment fittings). | |
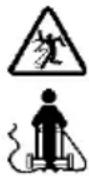
| WARNING Watch out for sharp blades! Contact with the rotating cutters can cause severe foot injuries. Only start the motor when standing behind the machine. Ensure that your feet do not get under the housing. | |
| WARNING Watch out for sharp blades! Contact with the rotating cutters can cause severe hand and foot injuries. When the motor/blade shaft is running, always observe the safety distance to the machine which is maintained by the handlebar. Ensure that your hands and feet do not get under the housing. | |
| WARNING Objects thrown upwards can cause serious injuries. Before scarifying areas covered in leaves in particular, remove all stones, sticks, wires and other objects from the lawn. Never use the equipment with the protective devices damaged or missing. Before initial use, check to make sure the cutting tool is fitted tightly, then check the cutter blades for a tight fit, wear and damage every time you do any scarifying work. Have an authorised workshop replace worn or damaged blades. Before starting the engine, check whether the tools have been removed. | |
| WARNING Electric shock can cause serious injuries. Keep the connecting cable away from the cutters. Ensure when starting that the connecting cable is safely away from the housing. Do not run over the connecting cable when operating the machine. In case of damage, switch the machine off, wait until the cutters have come to a standstill and remove the plug from the socket. Faulty connecting cables must be replaced. | |
| CAUTION If the mains plug is not disconnected from the mains during work on the equipment, the motor may start up and this can result in serious injuries. Switch the motor off and disconnect the mains plug before carrying out any maintenance and repair work. When servicing the cutter blades note that they can be moved even when the voltage source is switched off. Consult the operating instructions for respective cleaning or maintenance instructions. | |
| WARNING Contact with the rotating cutters can cause serious hand and foot injuries. Objects ejected at high speed can cause severe injury. Switch the motor off, and wait until the cutters come to a standstill: - if the machin has to be lifted or tilted, e.g. in order to transport it; - when magithe machine of the lawn on paths or roads; - if the machin is left unsupervised for any time; - before setithe scarifying depth; - before reving the grass collector. | |
| CAUTION Contact with the sharp edges of the scarifier cutterscan cause severe injury. Protective gloves must be worn at all times during maintenance and cleaning work. | |
| WARNING Wear protective goggles! Objects thrown upwards can cause serious injuries. Never do any scarifying without wearing protective goggles. |
4 PROP ERUSE
The mine is intended solely for scarily for scarily for scarily for scarily for scarily for scarily for scarily for scarily for scarily for scarily for scarily for scarily for scarily for scarily for scarily for scarily for scarily for scarily for scarily for scarily for scarily for scarily for scarily for scarily for scarily for scarily for scarily for scarily for scarily for scarily for scarily for scarily for scarily for scarily.
- If used i r public areas, parks, sports grounds, on roads and in agricultural and forest areas, special care must be taken.
The sier must not be used in particular for the removal of weeds between stones or paving stones; on terraces or paths, as a rotavator or for levelling uneven areas of ground, such as molehills.
The use of any additional devices not approved by SABO is prohibited. If such additional devices are used, this invalidates the CE conformity and any warranty claims. Unauthorized modifications to this machine rule out any liability on the part of the manufacturer for resulting damages.
5 GENE RAL SAFETY GUIDELINES FOR THE ELECTRIC SCARIFIER
General safety instructions:

For your own safety and in order to ensure that the machine functions correctly, please read this operator's manual carefully. Accuaint yourself with the controls and the correct use of t le machine. Keep t he operating instructions for reference purposes.
Please e member that theerson opering or using the machine bears full responsibility not only for possible risks to other peo ple or their property, but also for accidents which occur whilst using the machine.
This cater's manual is part of the scope of supply of the machine and must be handed over to the |purchaser of the machine in the event of resale.
- Never load children or persons under the age of 16 or other persons who are not familiar with the operator's manual to use the machine. Local regulations can determine the minimum age of the person allowed to use the machine.
Please explain the possible dangers and how to prevent accidents to every person who is supposed to work with this machine. This machine may only be used, maintained or serviced by persons who are familiar with the machine, and who are aware of the possible dangers.
This eent is not mert to be used by persons (including children) with restricted physical, sensory or mental capabilities or lacking in expierence and/or knowledge, unless they are accompanied by a person responible for their safety and unless they received instructions from the person on how the equipment is to be used. This responsible person must decide in advance, whether the person with restricted physical, sensory or mental capabilities is suitable for this activity.

You must never scarify the lawn if there are other persons nearby, especially children or animals.
Please keep your machine in a safe place! Machines which are not being used should be kept in a dry, locked room out of reach of children.
Preparatory measures
- When scarifying you must always wear a strong pair of shoes or safety shoes and long trousers. Avoid wearing loose clothing or clothing with cords or belts hanging down. Do not scarify whilst you are barefooted or wearing sandals. Wear protective goggles to protect your eyes.
Always check the area where you intend to use the machine completely for stones, sticks, wires and other foreign objects which might be picked up and ejected, before and during scarifying.
If you also use an auto mower for lawn care, the following safety instructions must be heeded with regard to the working area of the auto mower:
Before working on these areas (mowing, scarifying etc.) always check the range of the boundary wire.
If the wires are laid in the ground they must be checked, no wires may be visible, with particular attention necessary at the charging station.
If the boundary wires are laid above ground they should be routed tight directly on the ground and not lie loose in the grass. The wires must be sufficiently fixed using boundary staples, see the operating manual.
- The boundary staples must not project, if this is the case push them firmly in place.
- Remove any residual wires that are lying around before starting to mow.
In the cases described above, there is a risk of the wire being pulled in and wound up by the tool; this can lead to serious injury.
Low-hanging branches and similar obstacles can injure the operator or interfere with the scairifying operation. Before scairifying, identify potential obstacles such as low-hanging branches, and trim back or remove those obstacles.
In order to guarantee the proper and safe operation of garden equipment, a connection cable of the minimum quality H05 RN-F (alternatively H05 VV-F) in accordance with DIN/VDE 0282/4 with a cross-section of 3 × 1 ~mm^2 and a connection plug made of or covered with rubber in accordance with DIN/VDE 0620 are required. Connection must be to a CEE 7/4 socket 230 V AC.
- When a childproof cable is used, care must be taken that the fuse works perfectly (smoothly) as otherwise the device connection plug could become damaged.
- The plug must be fitted with a 16 amp slow fuse.
We recommend that a residual current operated device with a maximum breaking current of maximum 30mA or equivalent safety equipment be used.

The electrical equipment must not be modified.
The connection cable must be checked for signs of damage and ageing before every new mowing job and may only be used in a perfect condition.
If the unit is to be operated via a generator, an authorised specialist workshop should first be consulted with regard to a suitable generator.
Before using the scarifier and to avoid danger, check the machine for firm seating of screw fittings, correct assembly and the condition of the blade shaft. Worn or damaged blades and attachment screws must be replaced.
The condition of the pictograms must be checked every time the device is used. Worn or damaged pictograms must be replaced.
Handling
- The machine must not be operated in potentially explosive surroundings.

The connecting cable must kept away from the cutters. Whilst you are scarifying the lawn, do not drive over the connecting cable with the machine; when guiding the connecting cable, always make sure that you are keeping a safe distance.

If the connecting cable is damaged, turn off the machine immediately and wait until the cutters have come to a standstill, then remove the plug from the socket. Faulty connecting cables must be replaced. Always ensure that the cable can move freely, make sure it does not get kinked, abraded or trapped.
- Do not wear radio or music headphones. Safe service and operation requires your full attention.
Only use the scarifier during daylight or if the lighting is good. Always push the machine at walking pace.
Use care when approaching blind corners, shrubs, trees, or other obstacles that may obscure vision. - Do not move too closely to compound steps, trenches and banks. The equipment can suddenly topple over when a wheel suddenly gives way over the edge of a cliff or trench or when an edge suddenly yields.
Do not operate the equipment when you are sick, tired or under the influence of alcohol, medicine or drugs. - Avoid using the machine if possible on wet grass, in order to avoid the danger of slipping.
Always make sure that you are standing securely whilst using the scarifier on slopes. Always work at right angles to the slope, never straight up or down. Please be especially careful when you change direction when using the scarifier on a slope.
- Do not scarify excessively steep slopes! Scarifying slopes always means additional risks. Your scarifier is so powerful that it can scarify slopes with a gradient of up to 25^ . For safety reasons, however, we urgently recommend you not to exploit this theoretical performance potential. Always make sure you have a firm stance. Manually guided scarifiers should never be used for slopes of more than 15^ . Stability may be lost.
- Please be especially careful when turning the machine or pulling it towards yourself.
If you walk backwards whilst using the machine, you can easily stumble so this should be avoided. Avoid unnatural body positions. Ensure that you are standing securely and keep your balance at all times.
- Always observe the safety distance to the machine which is maintained by the handlebar.
In order to avoid the machine slipping when being carried, always hold the machine by the grip devices provided (carrying handle, housing, handlebar ends or transverse bar of the lower handlebar section). Do not grasp the machine by the ejection flap!
Note the weight of the machine before lifting or carrying it (see technical data). Lifting heavy weights can lead to health problems.
- Never lift or carry the machine when the engine is running.
- Never operate the machine with damaged or missing safety or protective devices.
Safety devices include:

Safety cut-off/lever (13)
In case of danger, release the safety cut-off/lever: The motor will be switched off and the cutters will come to a standstill. Warning! The cutters may take a few seconds to stop!
The function of the safety cut-off/lever must not be deactivated.
It is important to make sure that the safety grip/safety lever functions correctly. If it does not, have it repaired by an authorized specialist workshop.
GB
Protective devices include:

Housing, grass collecting bag, ejection flap (8).
The protective devices protect the user against objects being ejected at high speed.
The machine must not be operated with a damaged housing or without a properly fitted collecting bag or ejection flap on the housing.

Housing
This protection unit protects against injuries through contact with the rotating cutting tool.
The equipment must not be operated with a damaged housing. Please make sure that hands and feet are not placed underneath the housing.

Cover hose at upper part of bar (11), engine hood (6) and engine bracket, covers (4), mounting parts, switch-plug combination with cable (1, 12), connection cable,
This protection unit protects against injuries through contact with electrical power carrying parts.
The electrical equipment must not be modified.
Damaged connection cables must be replaced. Please use a connection cable with a minimum quality of H 07 RN-F in accordance with DIN/VDE 0282/4.
In accordance with the existing standard DIN EN 60335, an insulation protection test must be made after repair and maintenance work at insulation parts.
The safety devices must not be modified.
- Start or operate the starter switch with great care and according to the manufacturer's instructions.

When you start the machine, make sure that your feet are at a sufficiently safe distance away from the cutting blades.

When you start the engine, the machine must not be lying on its side or in a slanting position. If it is necessary to hold the machine at a slant, always ensure that the cutting tools are pointing away from the person using the machine, although only as far as absolutely necessary.

Never put your hands or feet near or under revolving parts. Always make sure that your hands or feet do not get under the housing.
Stop the motor, pull the plug, check that all moving parts have come to a complete standstill:
- when leaving the machine;
before checking the power connection;
before you check, clean or carry out any work on the machine;
before you eliminate jams or blockages in the ejection channel; - when you hit a foreign body;
- if the machine starts to vibrate strangely.
If a foreign object has been encountered or if the machine becomes blocked, e.g. by driving onto an obstacle, a specialist dealer must check whether parts of the machine have been damaged or deformed. Any necessary repairs must also be carried out by an authorized specialist workshop.
If you notice unusually strong vibrations in your machine, you must have it checked by an authorized dealer.

Switch the motor off and ensure that all moving parts have come to a complete standstill,
- when lifting or tilting the machine, e.g. for transport;
- when transporting the machine to and from the working area;
- when moving the machine off the lawn;
- if leaving the machine for any time;
- when setting the scarifying depth;
before removing the collector bag.
Maintenance and storage
- Ensure that all screws have been tightened securely and that the machine is in a safe working condition.

The ejection flap must only be opened and the grass collector removed when the motor is turned off.
Before you start scarifying, always check the grass collecting equipment for wear or loss of functionality.
Before you start scarifying, always check the condition and firm attachment of the cutter blade shaft. Worn or damaged blades must always be replaced. Always have a specialist workshop replace the cutter blades or work on the cutter blade shaft. If the cutter blade shaft is assembled incorrectly parts can become loose, which can lead to serious injuries.
Always have the replacement of the blades carried out by an authorized workshop, since an insulation protection test to DIN EN 60335 must be carried out after repair and maintenance work to insulation components (e.g. blade shaft, attachment fittings).
- For reasons of safety, always replace worn or damaged parts.
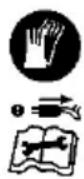
Protective gloves must be worn at all times during maintenance and cleaning work.
Maintenance and cleaning work may only be carried out with the motor switched off and mains plug disconnected. When servicing the cutter blades note that they can be moved even when the voltage source is switched off.
Do not clean the machine with running water or pressure cleaners. This could damage the electrical system.

For warranty and safety reasons, original replacement parts must be used at all times.
Notes for Switzerland:
Electric appliances must only be operated if a residual current operated device with a maximum breaking current of 30 mA is also integrated into the circuit.
Notes for Austria:
The socket coupler of the connecting cable must be splashproof.
6 DESCRIPTION OF COMPONENTS
1 Cable connection plug
2 Retaining element
3 Lever for lowering/raising the blade shaft
4 Cover
5 Air slots for electric motor
6 Motor hood
7 Carrying handle
8 Ejection flap
9 Strain relief device for electric cable
10 Cable guide
11 Cover hose at upper part of bar
12 Locking button (red)
13 Actuating grip for motor (safety grip) (35-V EL) Actuating lever for motor (safety lever) (31-V EL, not illustrated)
7 PREPARATION
The following parts are included in the packaging for assembly of the scarifier:
Scarifier
Pre-assembled handlebar upper section
- Handlebar lower section
- Tool bag with the following contents:
Operator's manual with Declaration of Conformity
Warranty conditions and Warranty card
Various fixing parts (strain relief fitting, flat-head screws, washers, nuts, cable guides, wing-nuts, cable ties).
In the unlikely event of a missing part, please contact your dealer.
GB
Assembling the handlebar lower section (Illustration C1)
Before assembling the handlebar lower section, the strain relief device (1) must first be fitted over the handlebar lower section (2).
- Fit the ends of the handlebar over the attachment points on the housing and both sides. Two different handlebar heights can be set.
Insert the flat-headed screws supplied (3) from inside through the housing and handlebar. - Fit washers (4) onto both screws from outside, and secure using the self-locking nuts (5).
Assembling the handlebar upper section (Illustration C3)
- Fit the upper part of the bar on the right and left of the lower part of the bar, so that the attachment bore holes of the two parts of the bar are matching.
Insert the cable guides (1) from the outside to the inside, screw the two parts of the bar together using one washer (2) and one wing nut (3) on the inside.
Insert the cable (4) and throttle cable (5) in the cable guides (1). This prevents the cable or throttle cable being jammed when the handlebar is folded down.
Fix the cable and throttle cable to the lower part of the bar using the cable ties (6) from the tool bag.
8 BEFORE USING THE SCARIFIER FOR THE FIRST TIME
Safety instruction!
See table for explanation of symbols page 3
Check all screw fittings for firm seating. Tighten screws if necessary! Check in particular the correct assembly and condition of the blade shaft (see Chapter "Maintenance of the blade shaft").
Always have work on the blade shaft carried out by an authorized workshop, since an insulation protection test to DIN EN 60335 must be carried out after repair and maintenance work to insulation components (e.g. blade shaft, attachment fittings). Make sure that all safety devices are fitted properly and are not damaged.
9 STARTING THE MACHINE


Safety instruction!
See table for explanation of symbols page 3
IMPORTANT
If the unit is to be operated via a generator, an authorised specialist workshop should first be consulted with regard to a suitable generator.
Attaching the connecting cable (Illustration C2)
NOTE
In order to guarantee the proper and safe operation of the garden equipment, a connection cable of the minimum quality H05 RN-F (alternatively H05 VV-F) in accordance with DIN/VDE 0282/4 with a cross-section of 3 × 1 ~mm^2 and a connection plug made of or covered with rubber in accordance with DIN/VDE 0620 are required. Connection must be to a CEE 7/4 socket 230 V AC, slow-blow 16 A fuse.
When a childproof cable is used, care must be taken that the fuse works perfectly (smoothly) as otherwise the device connection plug could become damaged.
IMPORTANT
Cables with a cross-section of 3 × 1 mm^2 should only be used up to a length of 25 metres. If a connection cable with a cross-section of 3 × 1.5 mm^2 is used, the length of the connection cable can be up to 40 metres.
- Plug the cable into the switch/plug combination on the upper handle.
- Only then should the connecting cable be connected to the mains.
- When removing the cable always disconnect the cable plug from the mains first.
Attaching the connecting cable to the strain relief fitting (Illustration D2)
ATTENTION
The unit may not be used without the cable relief in order to prevent damages to the switch/plug combination and to the cable. The cable must be hung in the cable relief on the unit to ensure that it is fixed safely. This prevents the cable socket from being pulled off the unit. Moreover, the cable aligns itself automatically on the other side when cornering.
Form a semi-circular loop in the cable, keep a distance of approx. 80~cm from the connection cable coupling.
- Insert the cable from the bottom into the cable relief and loop it around the fastening post.
- Hold the cable by both ends and pull it firmly into the cable relief.
Starting the motor (Illustration A2)
Before starting the motor, ensure that the blade shaft is in the lifting position (1) Z2.
Only start the motor when standing behind the machine. Always place the machine on a level surface where the grass is not too high (too high grass will impede the starting of the blade shaft and make starting more difficult). Where this is not possible, starting can be aided by tilting the machine, with the cutters pointing away from the user, but only as far as absolutely necessary.
- To switch on the motor, first press and hold the red button.
- With the other hand, pull the lever (31-V EL) or grip (35-V EL) on the upper handlebar section.
The lever or grip must be held in this position during operation.
- The red button can then be released.
IMPORTANT
If the motor does not start up within 5 seconds of the device being switched on, then
- Release the control handle again
- Remove the mains plug!
- Check the connection lead
- Check the voltage supply in the house (fuse)
- Check device for blockage of the cutter blade shaft
- Have it checked by an authorised workshop.
10 SWITCHING OFF THE MOTOR (Illustration F)
To switch off the motor, release the safety cut-off/lever. The motor will be switched off and the cutters will come to a standstill. Warning! The cutters may take a few seconds to stop!
11 EMERGENCY STOPPING
ATTENTION
Avoid injury! Motor and cutters must stop. If not, please contact the nearest authorized dealer.
Release the safety grip/lever.
- The cutters will stop.
- The motor will stop.
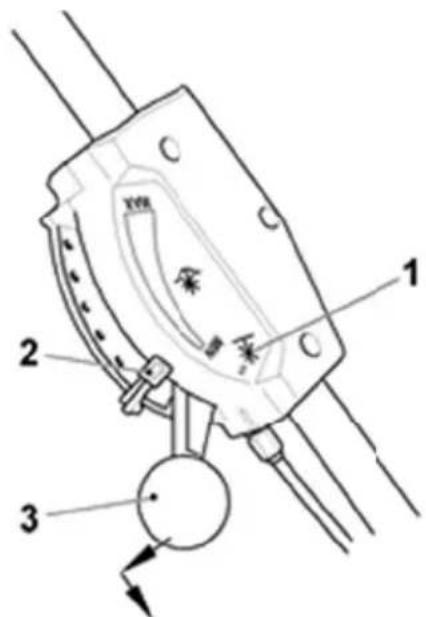
12 ADJUSTING THE SCARIFYING DEPTH


Safety instruction!
See table for explanation of symbols page 3
The scarifying depth must only be adjusted with the motor switched off!
The working depth depends on the blade wear, and must also be set taking into account the relevant grass and ground conditions.
Always check and adjust the scarifying depth on a level area of lawn.
With the blade shaft lowered, the blades should just be in contact with the turf. A working depth of up to 3mm is recommended. In the case of a well-tended lawn with soft ground, the working depth can be set slightly deeper. In case of a very mossy lawn surface, the initial working depth should be slightly less.
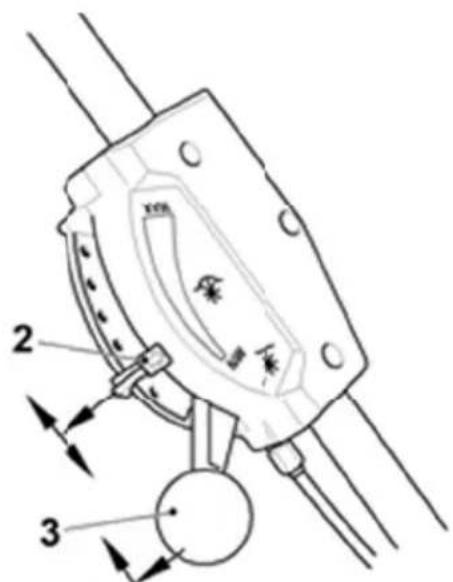
Setting (Illustration Z2 + V2)
On delivery, the blade shaft is in the raised position (1) Z2.
- The scarifying depth is selected with the aid of the grey retaining element (2). Push the retaining element gently downwards and retain again in the required position V2. This returning element enables you to find the set working position again at any time.
The blade shaft is lowered to the selected working depth by means of the black lever (3) fitted at the left. First press the lever gently downwards, and then pull to the stop against the retaining element (2) V2. To reduce the lever forces, the machine can be lifted slightly by the upper handlebar until the rear wheels are off the ground.
To raise the blade shaft from the working position, the lever (3) is first pressed gently downwards, and then pushed fully forwards. In Pos. (1), the blade shaft is no longer engaged. This does not change the pre-set working depth Z2.
Scarifying test
In case of a new machine, place the retaining element (2) in the "MIN" position.
- Start the motor.
Lower the blade shaft.
- Push the machine slowly in the working direction. Check the result. If the result is not satisfactory, raise the blade shaft, switch the motor off and place the retaining element (2) in the next position.
- Carry out another test.
If the motor stops, or if stone impact noises are heard, switch the machine off immediately, and set a lower working depth.
After a few operating hours, the blade shaft may need to be re-adjusted because of wear. The more intensive the use, the greater the wear to the blades. Hard or very dry ground will increase the wear to the blades.
Then carry out the working depth adjustment as described above.
13 GRASS COLLECTOR


Safety instruction!
See table for explanation of symbols page 3
Operation with grass collector (accessory)
The scarifier can also be operated with a grass collector (Order no. - see Original replacement parts and accessories).
Attaching the grass collector to the scarifier (Illustration R1 + S1)
First insert the grass bag frame with the clip forward into the grass bag. Align the upper seams of the bag with the clip.
Press the retaining profiles of the collecting sack onto the bars of the collecting sack frame R1.
- Open the ejection flap of the scarifier upwards.
Pick up the collecting sack by the carrying strap and hang it in the scarifier casing with its two side hooks upwards S1
- Attach ejection flap to collector.
When using the machine, ensure that the collector is emptied in good time. The grass collector will only collect grass properly if air can pass through it freely.
IMPORTANT
Do not clean the grass collector with hot water!
Emptying the grass collector (Illustration L)
- Switch of th e motor and wait until the cutters come to a stop.
Lift the oejdt.
- Remove the grass bag from the scarifier by the carrying strap - the ejection flap closes automatically.
- Shake out of the grass bag thoroughly, holding it by the carrying strap and bottom.
Operation without grass collector
WARNING
When scarifying without grass collector the ejection flap on the scarifier housing must always be closed (flap down).
See table for explanation of symbols page 3
Using the machine on slopes
NOTE
The equipment can be driven on banks and slopes at an angle of up to 25^ .
For safety reasons, however, we urgently recommend you not to exploit this theoretic performance potential.
Always make sure you have a firm stance. Manually guided scarifiers should never be used for slopes of more than 15^ . Stability may be lost!
Handling the cable during use
Position the cable in such a way that the machine can pull it along easily over the lawn surface that has already been worked. When the machine turns the cable grip automatically positions the cable to the other handle side. Ensure that the cable is kept well away from the cutters and that no loops are formed. Check the mains cable regularly for signs of damage and only use it in proper condition.
Checking operating safety
Before doing anyscarifying make sure that the safety control handle or lever is working perfectly. The motor must switch off when the control handle / control lever is released, and the cutting tool must come to a standstill. Caution! The cutting tool runs for a while!
Make sure that all protective devices have been attached properly and are not damaged.
Check the upper part of the bar (insulation) for damage. If the casing should be damaged, contact the nearest authorised workshop without delay, since otherwise injuries (electric shock) can occur through touching the live parts.
Also check screws and nuts for a firm fit every 10 operating hours and tighten if necessary!
To avoid danger, check the condition and tight fit of the cutter blades before every scarifying job (refer to the chapter "Cutter blade shaft care" for more details).
WARNING
Always have a specialist workshop carry out work on the cutter blade shaft, open or remove any covers connected with the device, since an insulation protection test must be always carried out following repairs or maintenance work on insulated parts (e.g. cutter blade shaft, attachment parts, vers) in line with standard DIN EN 60335. If the cutter blade shaft is assembled incorrectly parts can become loose, which can lead to serious injuries..
If the cutter blade shaft becomes blocked e.g. by colliding with an obstacle or through foreign objects, have an authorised workshop check whether any parts of the scarifier are damaged or deform ed. Always have any necessary repairs done by an authorised workshop too.
Time restrictions
The time at which scarifiers may be used varies from region to region. Please ask the relevant authorities before using your scarifier.
Tips on caring for your lawn (Illustration M)
When using the machine, always guide it in straight lines at medium walking speed. Due to the forward direction of rotation of the blade shaft, only a slight pushing force is required. Depending on the properties of the surface, it may be necessary to hold the machine back against the working direction. Avoid moving in tight curves.
On very mossy and weedy lawns, it is advisable to apply the scarifier a second time, at right-angles to the first working direction. When using the machine without a grass collector, removes the loose grass from the lawn before the second run. Loose grass lying on the lawn will have an adverse effect on the result, put an additional strain on the machine and make the work unnecessarily difficult for the user (stronger pushing forces).
Loose materials can best be removed by vacuuming with a TurboStar lawn mower or manual raking.
15 SERVICE INTERVALS
IMPORTANT
Avoid damage! Under extreme or unusual conditions, shorter servicing intervals than the ones specified below may be necessary. If you establish any problems, please contact an authorised workshop.
Carry out routine servicing on the machine in line with the following servicing intervals.
Work must be carried out at the following servicing intervals in addition to the maintenance work listed in these operating instructions.
Before initial use
- Check all screw connections for a tight fit.
- Check the cutter blade and have an authorised workshop tighten it if necessary.
- Check whether the safety control bar is working properly.
- Check that all protective devices have been attached properly and are not damaged.
Before every operation
- Check the lawn area and remove any objects.
- Check the area of the boundary wires (if an auto mower is being used for lawn care).
-
Check the condition and firm fit of the blades and have them replaced or tightened by an authorised workshop if necessary.
-
Check whether the safety control bar is working properly.
- Check that all protective devices have been attached properly and are not damaged.
- Check grass collecting equipment for wear or loss of functionality.
- Check the upper part of the bar (insulation) for damage.
- Check the connection cable for damage and ageing.
Every 10 operating hours
- Check all screw connections for a tight fit.
- Check the blade shaft for wear and a tight fit.
After every operation
- Clean the scarifier.
- Check the blades for damage and wear.
During annual servicing
- Have the area under the belt cover cleaned.
16 CARE AND SERVICING OF YOUR SCARIFIER
Regular care is the best guarantee of long working life and trouble-free operation!
Only use original spare parts because only those guarantee safety and quality!


Safety instruction!
See table for explanation of symbols page 3
Cleaning (Illustration N3)
Remove all dirt and grass directly after scarifying. Turn the machine over onto its side and use a brush or cloth to clean it. The air slits for the cooling of the electric motor (1) must be free from dirt and grass cuttings.
IMPORTANT
Never spray the machine with water since this could damage the electrical system.
Storage
Always keep the machine in a clean condition in a closed, dry room out of reach of children. Always allow the engine to cool down before you store the machine in a closed room.
Folding the guide tube
To save storage space, loosen the two wing nuts such that the top guide tube can be folded down towards the engine.
- In doing so, do not kink nor squeeze the cable and throttle cable.
CAUTION
When folding the bar for transport and storage, the bar may fold over unintentionally when the wing nuts are released. In addition, beware of potential squashing spots between the bottom and top parts of the bar. This may result in risk of injury!
Transporting and securing the equipment (Illustration N)
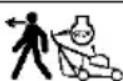
If the equipment has to be carried, do not hold the ejection flap! Hold the front part on the handle and at the rear on the cross tube of the bottom guide tube (see illustration N).
Pay attention to the weight of the equipment before you lift or carry it (see Technical data). Lifting heavy loads can cause health problems.
We recommend that the equipment be always lifted or carried by at least two people.
- Transport the equipment in the upright posture.
- Park the means of transport on level ground so that the equipment cannot roll away before it is secured
- Hang out the collection bag and secure it separately during transport
- Secure the equipment with approved load-strapping means (e.g. tie-down straps with clamping elements) on or inside the vehicle. Tie-down straps are belt bands made of synthetic fibres. Every tie-down strap is designated. The label contains important details for application
- For loaded goods that can roll, it is recommended to use direct strapping with four belts. Secure the equipment on the wheels so that it does not move during transportation.
ATTENTION
Do not tighten the belts too firmly. Fixing the equipment too firmly can cause damages.
Maintenance of the blade shaft
Before using the machine, always check the condition and firm seating of the blades. Worn or damaged blades should be replaced immediately.
WARNING
Always have replacement of the blade shaft carried out by an authorized workshop, since an insulation protection test to DIN EN 60335 must be carried out after repair and maintenance work to insulation components (e.g. blade shaft, attachment fittings).
An incorrectly assembled blade shaft can also cause parts to become detached, possibly leading to serious injury.
The complete blade set must be replaced when the wear limit is reached (round marking on the blade) or when the scairifying depth can no longer be adjusted.
- Only use original scarifier blades for replacement purposes.
- Replacement scarifier blades must be indelibly marked with name and/or trademark of the manufacturer or supplier and with the parts number.
Changing the drive belt
For safety reasons, expressed attention is drawn to the fact that the drive belt must only be replaced by an original replacement part.
Always have replacement of the drive belt carried out by an authorized specialist workshop.
17 TROUBLESHOOTING
| Fault | Possible | cause |
| Motor does not start up within 5 seconds of the device being switched on | No mains voltage. | Connect the mains plug C2 . Check the fuse. |
| Connection cable damaged. Have it checked | Checked by an authorised workshop. | |
| Cutter blade shaft blocked Have scarifying depth checked. Clean the cutter blade shaft (remove the mains plug first!) Tilt the machine during start-up. | ||
| Have it checked by an authorised workshop. | ||
| Motor stops | Grass is too high Mow the lawn first. | |
| Blockage by foreign bodies Have machine checked by an authorized specialist workshop. | ||
| Working depth to deep | Re-adjust the working depth V2 . | |
| Unsatisfactory result | Grass is too high Mow the lawn first. | |
| Blades are worn | Adjust the working depth V2 . Have the blade shaft replaced by an authorized specialist workshop | |
| Working depth not suitable for grass and ground conditions | Re-adjust the working depth V2 . | |
| Extreme vibration | Have it checked by an authorized dealer | |
| Blade shaft will not turn | Drive belt defective Have it checked and replaced if necessary by an authorized specialist workshop. | |
Repairs to electrical machines must always be performed only by qualified electricians. Please do not repair them yourself. In the case of faults and defects which have not been listed here, please contact the nearest authorized dealer. This applies in particular to appliances with electrical motors, as when these are repaired they must always undergo an insulation protection test.
Your authorized dealer will also help you if you do not wish to perform any of the maintenance work described here yourself.
PpOBepka 6e3oNaChOCTN E 3KcnpIyatauNN
KaKdbi pa3 1eped hauanom pa60tbl npOBepaTb nCpabHocTb 3aun THoro pbuara. OTryckaHne 3aunTHo ro pbuara dONXHO npBODHTB K bIKIOeHNIO DBnIra IocAHOby pexyuero MexaHn3Ma. BHMaHne! FexyuIM MexaHN3M pa6Otaet no INhepuIN!
Y6eIHTbcra B TOM, YTO BCE 3aunTHbIe ycTpoiCTBa yCTaHOBneHbHaJIexKaUIM o6pa3oM n He IMeHOT NOEJekdeHn!
PpOBepntb B3pxHIOU qactb pyuKN (n30JyIO) Ha HAnuue NOBpeKdHNI. B cnyae NOBpeKdHNI NOKpbITN Heo6xOIMo
obpaTtbcra B 6JIINaIHyIO yNOHOMOeHHyIO MaT epckyIO, T.K. B pONHBOM clyuae IMeETcR PNCK TeNEQhBX IOBpeKdHNI
(ydap 3NeKTPuYeCKM TOKOM) pN pINKOCHOBeHN K TOKOpBODAIUM M qACTM KOHCTpyLIMN.
Yepe3 kaxkblc 10 yacob pa6oTbI npOBepaTb npOHTb 3aTgKn 6oTTOB nraek, n npHHeo6xoDmOCTn ODTaHyt!
B cIeJx 6e30nacHocT npei KaKdbim 3aynckom MaunHb CneNyET TaKke npOBepaTb COCToHHe n Hae KHOCTb KpenJIeHnHOKe (cm. p13dE "TexO6cnyKnbAHne Bana pexyuero MexaHn3Ma").
PNEyIpyEKeHHe
Pa60tbcpekyuMmexaHn3MOM,aTakKeOTKpbIBaHne HnCHrTne NIO6bIX KpbIweK MaunHbI DOnJXHbI BblONNHTBCsCOTpydNHkAMnYNONHomOueHHoMaCTepCKo,T.I.nocNe npOBedeHnpa6ot npopeMOHTynn TexO6cnykBAHNHeO6xODIma npOBepKa HApEXHOCTn 30JIaU (HanpUmep,Ban pexyero MExaHN3Ma, KpenexHbIe 3IeMeHbI,KpbIsh) cornaCHO deNCTByUoemy cTaNdapTy DIN EN 60335.HenpaBnHna c6Opka HOKeBOBaJaMOxETnpNBcTN KOTcoEInHeHIO Detanei,YTO MOxET cTAtb npuHNo TJeKeBix yBeuH.
B cnyae 6nK npOBKn pexyueoMexaHn3Ma (Ha npimep, npn Hae3Ha npenTCTBne A nn nonanaHn BHytpb noctopOHnx npedmetob) neDyET obaTntbCBA ynoHMOOeHNyO MaTePckyo C ceIbIO npOBepKN OHCTpykun a3paTopa Ha hAnuHe NobpeXdeHn nIeOpmaui. Bce Heo6xOumB e peMOHTbIe pa 6 OTb I TAKKe BBINOJHJOTc COtpyHKn amn yNoHOMOeHHo MaTePcKOi.
OrpaHnueHn no BpeMeHn
Pn 3Kcnnyataaun a3paTopa BO3MOXhbl OpahnueHb BO BpeMeHH pa6oTb COIacHO MeCThblm npabnam. Peped BBODOM a3paTopa B 3KcnnyatauCneDye T 3anPoCtB COOTBeTCTByOuyIO HOpMaUIO B MeCThblx MyHUnPnAbhblx OpraHax.
CoBeTbI no yxody 3a ra3oHOM (pnc. M)
Bo Bpempa6oTbI cneNyET nepemeaatb a3paTOp C MaJOn CKopocbIO no npMbIM IINHm. Blaorapr TOMy, YTO BaI pexyuero mexaHn3Ma BpaaetcBpeD, dIra nepemeueHnmauHbI Tpe6yOTcR Iusb He6oJIbUne ycInn. B 3aBNCIMOCtN OT Oco6eHHOCTe IpyHTa MOKET IOTp6obBaTcry UdepXNBaHne a3paTOpa B HApPabNeHn, IpOTIBONONOJHOM HanpaBHeHnIO DvIXeHn. CneNyET n36eRaTb y3kX KpnBix.
PnO6pa6OTKe 3aMSeIoro NIN NOKpbIToro COPHO TpABoRA3OHa peKOMeHdyETcBbINOHNHTb DOIOHNHTeHBHyO a3paUIO nepEniKnyrphno nCxOHDomy HAnpabNeHHIO DvIXKeHH. B cnyae a3paun 6e3 TpABOC6OpHka nepeBTOpbIM pa6OUM cnKlOM CneDyET ydaNtB OTXObI a3paUN. DoIOJIHTeNbHO HAKNaDbIbAembIE OTXObI a3paUN yxduAOT KaueCTBO a3paUN, pINBOJRT K DOIOHNHTeHBHO Harpy3Ke MaunHbI N 3aTpynHryOT pa6Otu Ipn OepaTopa (T.K. dIpypeMeuHna MaunHbI Tpe6yIOTc NOBbIeHHbIe ycIIIN).
IyanaeHn/6bopa OTXoOB a3paun MOxHO NcNoB3OBA Tb Ra3OHOKOCNky C nCTeMoB BcaBaHna TurboStar nnpyhIe rpa6n.
15 INHTEPBAJIbI TEXOBCJNYKUBAHNIA
BAXHO
Onachoctb nobpejdeH! B 3KCTpeMaIbHbIX Hn HeCTaHdapThbIX ycNOBnx 3Kcnnyatau np a60tbl no Texo6cnykmbAHIO BbINOJIHOTc C 6Oone KopoTknM INTEpBaIamN, Yem yka3aHO B tabNiue. B cnyae 6hApyHeH N deEeKTOB CneJyET o6paatbC B yNoIHomOeHHyMQactepckyU.
Ipaobie pa6oTbIO Texo6cyxKBAHIO MaunHbI BbINOJHOTcB COOTBETCTBUN C npBedeHHbIM HIXe INHTepBaJAMn.
IpeueNcJIeHHbI Daane pa6oTbIO Texo6cyxKBAHIO BbINOJHOTcD ONoJHITeJbHO K pa6oTAM IO Texo6cyxKBAHIO,
pNBedeHHbIM B daHHOM pyKOBoIDCTBe NO 3KcPJIyatauIN.
Ipeed nepBbIM BBOOM B 3KcnnyatauH
- PpOBepntb IIOTHOCTb BCex pe3b60BbIX CoeINHeHn.
- IpoBepntb HOKeBOB BaJI n npn Heo6xOdMocTn o6paTHTbcra B yNoJHOMOeHHyIO MaCTepcKyoI DJIa 3aMeHbl.
- PpOBepntb nCnpaBHOCTb 3aunTHoro pbUara.
- IpoBepntb, BCE JI 3aunTHbIe ycTpoiCTBa yCTaHOBnEhbl HaJIeXaUIM o6pa3OM n He IMeOT NOBpeKdEHH.
Ipeed hauanom pa6oTbI
PioBepntb noBepxHocTb r30Ha n y6paTb BCE nOCTOpOHnpeDmTebl.
- IpoBepntb 30Hy orpaHnHTeIbHOro Ka6eJra (ecJn dya yxoJa 3ra3oHOM nCIOJIb3yeTc aBOTOHMHa ra3OHOKocNIka).
IPOBepntb coCTOAHnue n HauJeXHocTb KpePJIeHnra HOka. Iprn Heo6xoJIMOCtN o6paTNTbcR B yIOJHOMOeHHyU MactepcKyo Dnla 3aMeHbI NII 3aTJKKI.
IPOBepntb nCnpaBHOCTb 3auNTHOro pbYuara.
PpOBePbTb, Bce JIN 3aunTHbIe ycTpoNCTBaYcTaHOBHeHb IHaJnEkaUIM Opa3OM Hne IMeOT NOBpeKdEHM.
- PIOBepntb MexaHn3M C60pa TpaBb Ha HauJNue PpN3HaKOB N3Hoca NJIN NOTeepn pa6oTOcNOc6HOCTN.
Pobepntb BepxHIOU qacTb pyKn (I3OJIaIIO) Ha HAIuHne NOBpeJdeHn.
PIOBepntb 3JIeKtpnueckn Ka6eIb Ha HAIuHne IOBpeJdeHm I npn3HaKOB CTapeHnA.
Kaxdbie 10 yacob kcnnyataun
PpOBepntb IIOHTOcTB BCex pe3b60BbIX CoeINHeHn.
- PpOBepntb HOKeBOB BaI Ha HAIuHne npn3HaKOB n3HOca IHa npOCHOb nOCAdkn.
Pocne 3aBepueHna pa6oTbI
- PpOBeCTn OuNCTky BePtNkTyepa.
- IpoBepntb HOx Ha Hajiunye NOBpeXdeHn n pIn3HaKn n3HOca.
Pn exkeoHOM ocmOtpe
- O6paTntb8cB MaCTepckyI0IyOuNCTKnyUyacTknoND KpbIshkoJpeMHra.
16 YXODI NTEXOBCJYKUBAHNE A3PATOPA
Perynhyb yxod 3a raoHokocnKo YBnEeTcra paaHTne dInTeIbHO n 6ecpeboHO h Kcnpnyataun!
ToIbKO opuHnHaBHeI 3aunactn cnoc6hbl oecneHTb 6e3onacHOCTb n kauctBO!


Yka3aHne no TexHnke 6e3onachochtn!
PacuipboKy CmBOIOB cm. B Ta6nue Ha ctp.3
OuncTka (pnc. N3)
YdaIHTb rpa3b NocTKn TpaBbl HenocpeDCTBeHHo nocJe 3aBepHnra pa60tbl. IonoKntb MaunHy Haok N BbINOHNb OCHCTky C IIMOuBHO uETKn INI JOCKyTa.
BeHTnIaHIOHHbE OTBepCTN3NEKTPoDIBrAteTEn (1)doJXh6bITbOCHUeHbIOT 3aPra3HeHmIOCTaTKOB TpaBbl.
BAXHO
He 6pb13rNBabYcTpoNCTBO BDO! 3TO MOxET pNBeCTN K NOBpeXeHIO 3JIeKTPnueCKOrO 6OpydoBaHHa.
XpaHeHne
XpaHbT yCtpoCTBO B OUYIeHHOM COCTOHN B 3aKpbITOM, CYXOM HHeoCTyHOM IJIa DeTeI NOMEeHIN. IpeD TEM, KAK NOMeCTHTb MaunHy Ha XpaHHeHne B 3aKpbITOM NOMEeHIN, DOxJaTaBcA OCTbIBaHn DBNrTaTeJIA.
CknaDbIbAHne pyKn
- ⅡЯ зкohOMm MeCTa npxpaHEnn Ocna6ntb o6e bapaKOBbIe raKu TaKIM o6pa3OM, YTO6bl BepXHIOU qactb pyKIMMOxH0 6bl NO HApPABHeHIO K DBnTaTeJIIO.
He donyckaTb crnbHnna nn 3aKmHaHn Ka6eI n troca Booyena.
OCTOPOXHO
PnCKJaIbIbAHnpyKnCcJIbTO TpaHcNOpTnpOBKn IIN XpaHeHnOcJa6JeHne 6apaWkoBbIX Raek MoKeTpNBecTN KHexeNaTeJbHomy CKJaIbIBaHnIO pyKn. TaKKe NMeetcOnaChocT b3aUeMLeHn MExdY HnxKHei BepxHeuacTAMpyKn, YTO MOKe TpNBecTN K TeJeceHbIM NOBpeXdeHnMa!
TpaHcnpToPbKa n 3akpenJIeHne ycTpOuCTBa (pnc. N)
- Ecn trpe6yetc npepnocka MaunHbI, He 6paTbcra 3a OTKnDHyo KpbUkky! IJn npepHOca MaunHbI nCNoB3yOTc pyka B nepeJHeu cactn Kopnyca n nepeKnaDHa B HxKHeu cactn pyKN (CM. pnc. N).
IpeepnOdbemOMnnnepehocOMMaunHbIobpaTntBHNMaHHeHaeeBec(cm.TexHnueckneXapakTePncTNK).
Tae TaeBem TaeeBix npedmetOB MoKet OTPuataeNoBnA H 3doopobbe.
B cnyuae oTcuyTCTBnA BcNOMOraTeIbHbIX cpeiCTB peKOMeHNdyeTcra NODHMaTb IIN IpeEHOCHTb MaUNHy KaK MNHmMyM BIDBOEM.
BoBpeMaHcnpOpOBMaHnHaOnKHa HxOuTbcBaBepTKaJIbHOMIOJIOKeHN.
py30Oe TpaHcnpTHoe cpeDCTBO DOJIxHO HaxoITbCra Ha POBHO NOBepXHOCTN, YTO6bl He DOnyCTNb BbIKaTbIBAHMaunHbI Do ee 3akpeJIeHn.
HaBpemnpeBo3KnCneDyeTCHrTpaboc6OpHnKn3aKpennberoOTdEhHo.
Haedexho 3akpenntb MaunHy c NOMOuBo pa3peeHHbx K npimeHeHIO npncnoc6JeHIN dJI KpeIeHnra rpy3OB (HapnpMep, KpeExhBix pemHe C hATXHBMN 3JemeHTAMU) Ha NOBepxHOCTn ABTOMOBnI IN BHYTPn Hero.
KpeIeXhble pemHn npedctabnIOT coboi IeHTOHybe pemHn n3 cnHTeTNUeCKNX BOLOKOH. KaJdbI KpeIeXhbl peMeHb IMeET MapKnpoBky, codepKaUyIO BaxHbIe yka3aHnK PnpMeHeHIO.
- 13a3akpenneHn rpy3OB, IMeOuXKoNEca, peKOMeHdyETcHHeNOCpeCDBeHHoe 3akpenneHne YeTbIpMHaT8KHbIMn peMHm. 3akpenntb KOleCa MaunHb TaKIM o6pa3OM, yTo6bl BO Bpemr nepeBO3KN OHA OCTaBaNacb HenoDbHXHOH.
BHIMAHNE
He donyckaTb ype3mepHoro HataxKeHHa peMHe. 3To MoKTe npNBecTu K NOBpeXdeHIO MaunHbI.
TexobcnyxmbHne BaIapeKyIero MexaHn3Ma
KaKdIpa3nepeHaayalompa60Tb npOBepaTbcoCToHHe nHaedxHocTb KpeJIeHnHOKei.13HOweHHie nnIOBpeKdEHHBe HOKn IOJNeXkAT O63aTeJbHOJ 3ameHe.
PNEyPPEXDEHNE
3aMeHa HOKeI DOJXHb BA BINOJNHTbcr COTpydHnKAMN yONHOMOeHHo MaCTepcKoT, T.K. NocIe npOBedeHnpa601 No peMOHTy IIN TexO6cnyxuBaHNIO Heo6xOUMa npOBepka HAdEHXoCTn 3OJauu (HaNPmEp, BaI pExyUero MexAHn3Ma n KpeNXHbIe 3JeMeENTbl) corNaCHO deiCTByIoUeMy cTaHdApTy DIN EN 60335.
Kpome Toro, HenpaBnBHa n c6opka pexyueero MexaHn3Ma MoKe T npBeCTN K OTcoeHNHeHIO HOKe, YTO MOKe CTaTb npuHHoT JKeJIbIX yBeuH.
KOMNNEKT HOKeI NOJIHOCbIO NOJNeKHT 3aMeHe B TOM CNYae,ecNI DOCTnHyT npeJeBbHbN 3Hoc (Kpyrna MapKnPOBa Ka Ha NOBepxHOCTN HOKa) INI HEBO3MOXHa NOBTOpHa HAcTPOKa Iy6BnHb a3paun.
- Pn 3ameHe nCOnb3oBaTb TOnbKO opuHaJIbHbIe HOxI dIa aapaun!
Ha noBepxHocn CMeHHoro HOKa DoJIKHa 6bIb HaHeceHa HecMbIaEma MapKnipOBKa C HauMeHOBaHneM N/INN o6o3HaueHneM pOn3BOOHTeTNe IIN NoCTaBzUka, a TaKKe C Homepom DeTaII.