Supa Dupa Go - Stroller COSATTO - Free user manual and instructions
Find the device manual for free Supa Dupa Go COSATTO in PDF.
| Product type | Stroller |
| Brand | Cosatto |
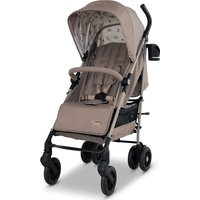
| Model | Supa Dupa Go |
| Usage | From birth up to 15 kg |
| Dimensions (unfolded) | Approximately 100 x 60 x 105 cm (estimate) |
| Dimensions (folded) | Approximately 80 x 30 x 60 cm (estimate) |
| Weight | Approximately 10 kg (estimate) |
| Power supply | None (manual stroller) |
| Safety standard | BS EN 1888:2012 |
| Basket capacity | Up to 2 kg each |
| Harness | 5-point height-adjustable |
| Reclining backrest | Yes, multiple positions |
| Adjustable leg rest | Yes |
| Canopy | Extendable with UV protection |
| Brake | Foot-operated parking brake |
| Swivel front wheels | Yes, with locking latch |
| Maintenance | Clean with warm water and mild detergent, lubricate with silicone spray |
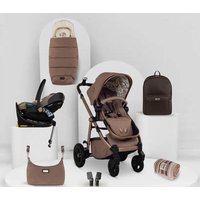
| Spare parts available | Handle, canopy, harness, wheels, baskets, etc. (references S1 to S13) |
| Included accessories | Rain cover, seat cover, canopy |
| Repairability | Spare parts available through Cosatto customer service |
Frequently Asked Questions - Supa Dupa Go COSATTO
User questions about Supa Dupa Go COSATTO
0 question about this device. Answer the ones you know or ask your own.
Ask a new question about this device
Download the instructions for your Stroller in PDF format for free! Find your manual Supa Dupa Go - COSATTO and take your electronic device back in hand. On this page are published all the documents necessary for the use of your device. Supa Dupa Go by COSATTO.
USER MANUAL Supa Dupa Go COSATTO
baby stuff with personality®
SUPA DUPA
60
DOUBLE PUSHCHAIR
NITTY GRITTY
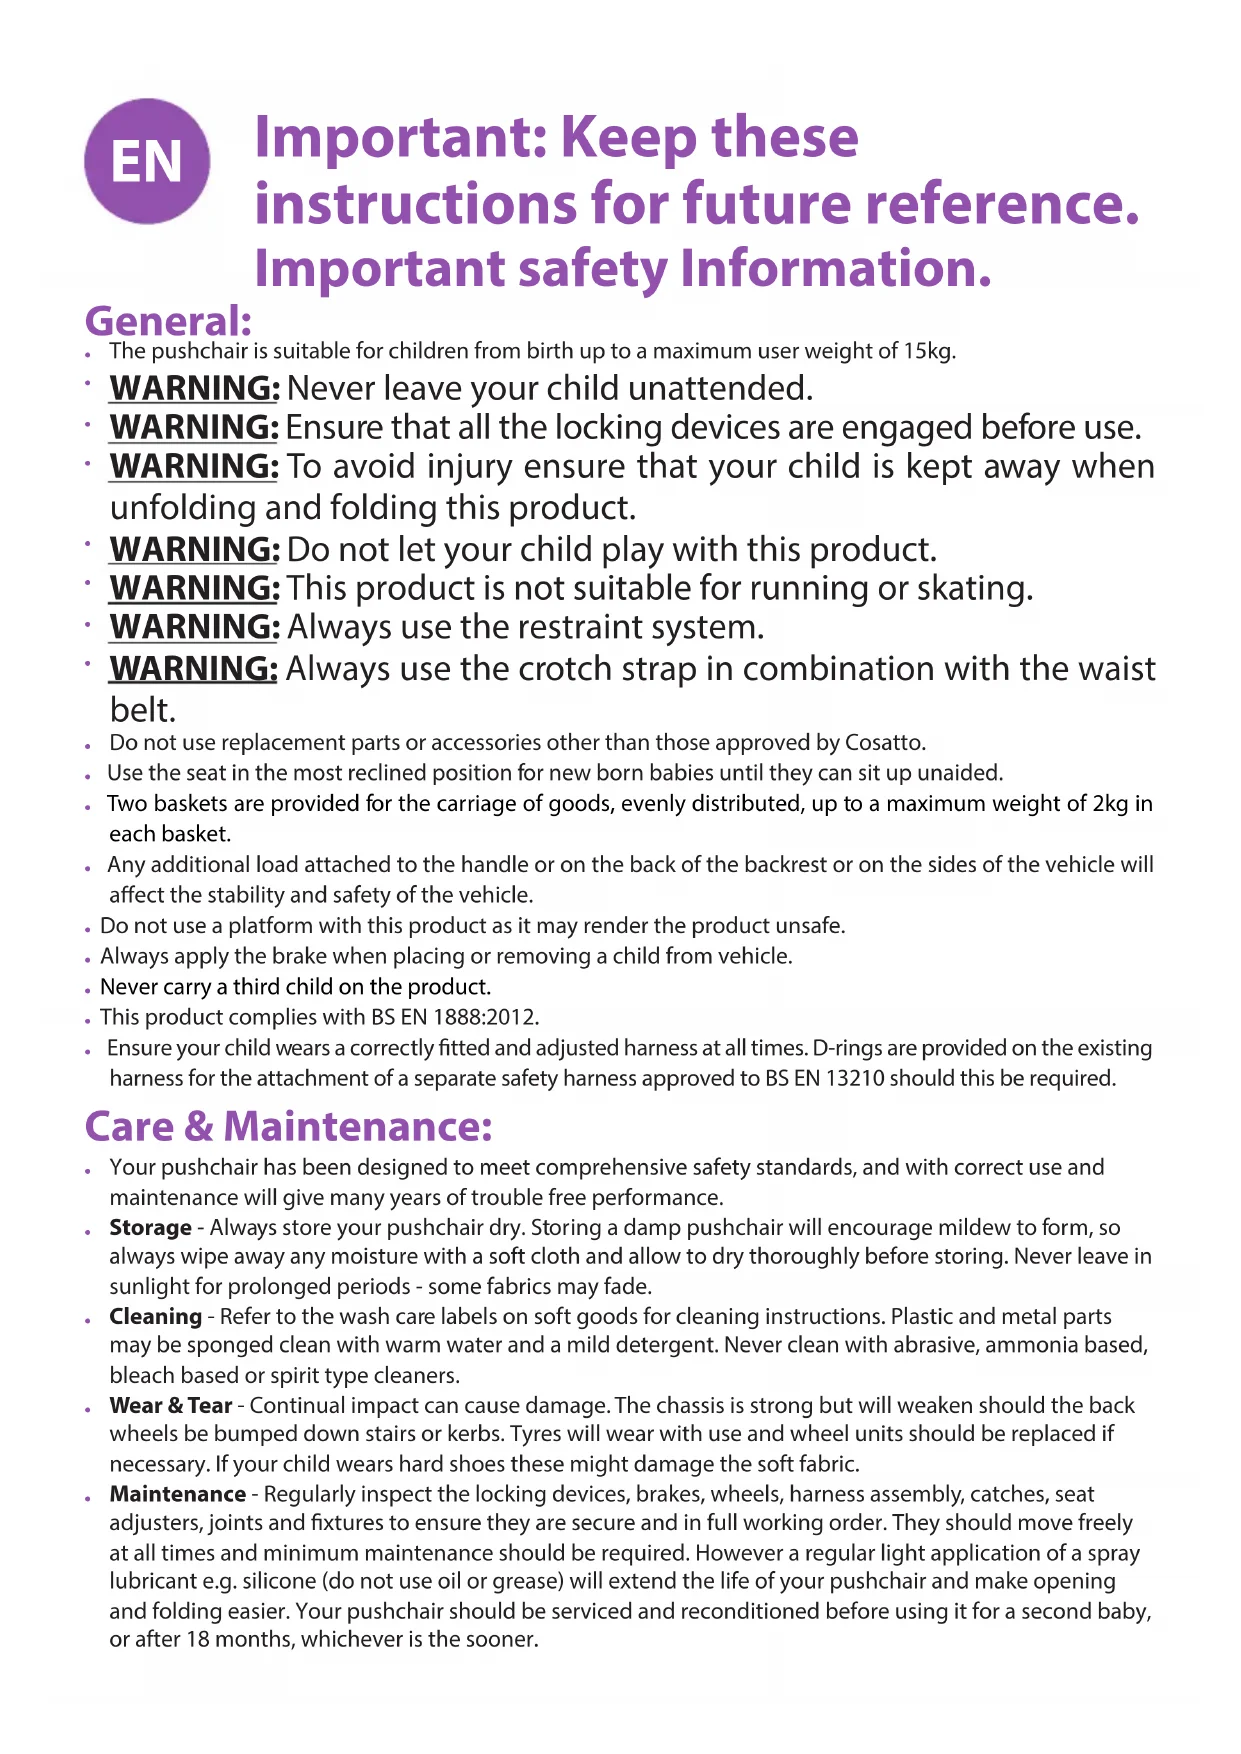
Important: Keep these instructions for future reference. Important safety Information.
General:
The pushchair is suitable for children from birth up to a maximum user weight of 15kg
WARNING: Never leave your child unattended.
- WARNING: Ensure that all the locking devices are engaged before use.
- WARNING: To avoid injury ensure that your child is kept away when unfolding and folding this product.
WARNING: Do not let your child play with this product.
WARNING: This product is not suitable for running or skating.
WARNING: Always use the restraint system.
WARNING: Always use the crotch strap in combination with the waist belt.
- Do not use replacement parts or accessories other than those approved by Cosatto.
- Use the seat in the most reclined position for new born babies until they can sit up unaided.
- Two baskets are provided for the carriage of goods, evenly distributed, up to a maximum weight of 2kg in each basket.
- Any additional load attached to the handle or on the back of the backrest or on the sides of the vehicle will affect the stability and safety of the vehicle.
- Do not use a platform with this product as it may render the product unsafe.
Always apply the brake when placing or removing a child from vehicle.
- Never carry a third child on the product.
This product complies with BS EN 1888:2012.
- Ensure your child wears a correctly fitted and adjusted harness at all times. D-rings are provided on the existing harness for the attachment of a separate safety harness approved to BS EN 13210 should this be required.
Care & Maintenance:
- Your pushchair has been designed to meet comprehensive safety standards, and with correct use and maintenance will give many years of trouble free performance.
Storage - Always store your pushchair dry. Storing a damp pushchair will encourage mildew to form, so always wipe away any moisture with a soft cloth and allow to dry thoroughly before storing. Never leave in sunlight for prolonged periods - some fabrics may fade. - Cleaning - Refer to the wash care labels on soft goods for cleaning instructions. Plastic and metal parts may be sponged clean with warm water and a mild detergent. Never clean with abrasive, ammonia based, bleach based or spirit type cleaners.
- Wear & Tear - Continual impact can cause damage. The chassis is strong but will weaken should the back wheels be bumped down stairs or kerbs. Tyres will wear with use and wheel units should be replaced if necessary. If your child wears hard shoes these might damage the soft fabric.
- Maintenance - Regularly inspect the locking devices, brakes, wheels, harness assembly, catches, seat adjusters, joints and fixtures to ensure they are secure and in full working order. They should move freely at all times and minimum maintenance should be required. However a regular light application of a spray lubricant e.g. silicone (do not use oil or grease) will extend the life of your pushchair and make opening and folding easier. Your pushchair should be serviced and reconditioned before using it for a second baby, or after 18 months, whichever is the sooner.
Visual language Key:
| XX | Refer to warning XX | XX | Repeat action x times | C | Press and hold |
| ✓ | Correct action | General action arrow | ! | Check | |
| X | Incorrect action | Lock | Cont.xx | Continue to step XX | |
| CLICK! | Audible sound | Unlock | ← | Repeat on other side |
Part List:
Please refer to diagrams:
P1:Pushchair
P2: Hood
P3: Raincover
Replacement Parts:
The replacement parts shown below are available for your product. For UK & Ireland customers, order through our website: http://www.cosatto.com/service-centre/spares
For customer outside UK & Ireland, contact information for your local distributor can be found on http://www.cosatto.com/stockists
If you require any further assistance, please contact us at cuddle@cosatto.com
S1: Foam handle S6: Harness S11: Basket
S2: Handle pip S7: Raincover S12: Rear wheel
S3: Hood S8: Footrest S13: Auto lock
S4: Seat cover S9: Front wheel
S5: Backrest board (Set) S10: Wheel cap
Fitting & Operation information:
Please refer to the following diagrams:
Pushchair 1- Opening
Release the auto lock (1) on both sides then pull the handles upward (2).
Press down on the locking levers (3) until 'Click' is heard and the secondary lock bar (4) is locked in place.
Check the chassis has locked in place.
Brake 2- Applying
3- Releasing
Front wheel swivellock 4- Applying
5- Releasing
Handle 6-Raising
7-Lowering
Harness 8- Opening
9-Closing
10- Adjusting the strap length
Slide the strap adjustor to suitable length (1, 2 & 3).
11- Adjusting the shoulder strap position
12- Removing
Push the shoulder strap retainer through the backrest (1).
Push the crotch strap retainer through the seat (2).
Rotate the "C" clip to expose its opening (3) and slide the waist strap out of clip (4).
Refitting is a reversal of this procedure.
Backrest
13-Lowering
14-Raising
15-Lowering
16-Raising
17- Removing
Refitting is a reversal of this procedure.
Calf support
18-Fitting
Fit the hood around the middle handle (1).
Push the brackets onto the mounts on the chassis (2).
Attach the fabric fasteners to the outside of the seat unit (3).
Fit the rear of the hood behind the backrest and attach the fabric fastener (4).
Attach the straps to the front chassis tubing (5).
Basket
19-Opening
20-Extending
21-Removing
Removal is a reversal of step 18.
Raincover
22-Fitting
Removing
23- Release both primary lock rings (1) & secondary lock bar (2).
24- Release fabric fasteners at rear of backrest (1).
25- Rotate "C" clip to expose gap (1) and slide waist strap out (2).
26- Fold retainer flat (1) and push through slot in mounting block (2).
There are three retainers on each side of the pushchair. One on the front chassis tubing (3) and two on the underside of the seat (4).
27- Disconnect double "D" ring strap under the calf support (1).
28- Slide seat cover off calf support end (1) and off the backrest tubing (2).
29- Prior to washing, unzip the top of the backrest section (1) and remove the three backrest boards (2).
Refitting is a reversal of this procedure.
Pushchair
30-Closing
Ensure both backrests are in the upright position 14.
Always remove the raincover, placing it in the basket and close the hood completely.
Pull the primary lock rings upward (1) then press down the secondary lock bar (2).
Push the handles forward (3) until the auto locks engage (4).
Baxkho: 3ana3eTe Te3n HnCTpyKcnn 3a 6bdeua cnpaVBka. Baxkha nHΦopMaun 3a 6e3oNaChocT
Osha nHΦopMaçnja:
JIaTHata DeTcKa KOJInuChka e NOxOJa7a 3a HOBOpOJeHn n Deca Ido 15 Kr.
- PPyPckHe: HkoHa He octaTe TeTeTo cn 6e3 Ha3Op.
- ПРЕДУПЕЖDEHNE: Рпени улотpe6а поверете дали BCИЧКИ 3akliuYBaUn yctpoiCTBa ca 3aJeIcTBaHI.
- INPEДУПЕЖДЕHИЕ: 3a Да се ИЗБЕгHe риСka OT НараняВаHe, увepete ce, чe Baшeto DeTe He e B 6ЛиЗОCT Do пpoДуКТа пи HerOBOTO cTBВaHe и pa3ГьВaHe.
- ПЕДУПЕЖДЕНЕ: He поЗволяваи Ту на DeTeTo Да си Играс с ToЗп рождк.
- ПРЕДУПЕЖDEHNE:Този прodyкт He e podхODяц 3a 6яганe ппьрзалянe.
PPEyPExEHE: BnHaTn no3BaIte o6e3OpacnteHaTa cnCTema.
- INPEДУПЕЖDEHNE: BInHaRn n3NoJ3BaIte Y-6Opa3HnA peMbK B KOM6uHaCn C NoJcHnA (XOpN3OHTaJIHnA) KOJaH.
He n3noJI3BaIte pe3epBHN qactn IIN akcecoapn, pa3nnuHn OT Te3N, KOInTo ca oJIo6peHn ot Cosatto.
- I3noI3BaIte cedaikata BbB b3MOxHO Ha-NaKNOHeHaTa N03nua 3a HOBOPoEHO,doKaTo DeTeTo He 3anoHc da cya 6e3 yJka nOMOu.
- IBa KoIa ca npEIOCTabeHn 3a HOceHeTo Ha CTOKN, paBHomepHO pa3npeDeneHn C MaKcIMaJIHO TerNo ot 2 Kr BbB BCEKN KOII.
BceknDOnbHnHTeJHeN TOBap,3aKpeJeh Ha npbXkKaTa, rbp6a Ha 06nerankata nn OTCpaHn Ha KOINyKaTa, ce OTPa3raHa HneHaTcA6nHocT n 6e3onacHOCT.
He noctabrayTe To3n npOdyk TBbpy NlaTOpMa, TbN KaTO TOBa MoKe da Ro HappaBn OnaceH.
BunarnakTnBnpaTe cnnpaKaTa, KOrato NoCTabrTe NIn B3emaTe JeTeTo OT KOINyKaTa.
Hnkora He HocTe TpeTo DeTe Bbpxy npOdyKta.
To3n npoodyk OTroBapra Ha BS EN 1888:2012.
Bunar npobepaBaiTe daHn 0e3onacntenHte peMbci Ha deTeTo ca perynilpaHn nocTaBeHn npabInHo. Ako e Heo6xOdmo, Moke da ce doctabT D-6pa3Hn pHHrobe 3a 3akpePbAHe KbM cbseCTbByBaIHTe 0e3onacntenHn peMbci Ha OTdeJHa 0e3onacntenHa cnCTema, KOrTO e B CbOTBEcTBnE c BS EN 13210.
Kurv 17- For at fjerne
For at montere selenigen skal donne proces udfores omvendt.
Dække 18-Montering
http://www.cosatto.com/service-centre/spares
http://www.cosatto.com/stockists
于:http://www.cosatto.com/service-centre/spares
国
奉之爲上,請予轉動。
S1: 楊芃芃打龍
S6: 贝贝
S11: 南国
S2: 冒険はの云長道を呎。
S7: 雷尔専専
S12: 尸部封
S3:
S8: 背腔
S13: 自動-follow
S4: 卡士贝
S9:
S5: 通韩日(
S10: 那么
試証実例
daiy
| 류목지 유모shi | 1- 힘류지 양zhou's자동상품장shi(1)을 썼고 기재를:wir로(2)단가심시오. 'ched-talk'Srisi가 힘일 때 기재 기재 끼버(3)을 twelve만 전보조 기재 끼버(4)가 힘자리에고정일다. franchiseim이제다로고정였어요. |
| 드래이트 | 2- 겨기 3-울기 4- 겨기 5-울기 6-내용기 7-화하기 8-울지기 9-상그기 10-赎드워지조절가 赎드워지조절가 힘들어지에Match城市群.(1,2&3) 11-어개赎드워지조절가 12-본리 하기 (1)어개赎드워고정장shi를일어등이에고수과서全覆盖.(2)가려이의赎드워고정장shi를일어chaft선에고수과서全覆盖.(3)"C"름회의 lodge가 bg이에고rock울러다운(4)허리赎드罡에고리에고수과서全覆盖. 재상achtash일 때는 사의고성을 back对外于사만면고고. |
| 동물이 중요리bservhxe | 13-목지가 14-상우기 15-화하기 16-상우기 17-본리 하기 재상achtash일 때는 사의 고성을 back对外于사만면고고. |
| 사류고 사류고x | 18-상학가 후드라에 odds한테일(1)에 출以上学历사고. (2)버輯대를 ph萊류원의고성부wu에일어내용수.(3)자선와부wu에원단고성부wu를 onet에고고. (4)자상류고부wu에 odds한테일어내용수에고고. 스트러를 편들 텝류(5)에 onet에 onet에 onet에 onet. |
| 개从而使 개从而使x | 19-菲律지가 20-본지가 21-본리 하기 개从而使的是 18%道路上을 back对外于사만면고고. |
| 개从而使x 개从而使x | 22-상학가 개从而使 23-기본 출고고고(1)에 odds해고고(2)多达 힘어고성사고. 24- 힘bay(1)의 today에이에이에이에고성사고. 25- "C" 힘류를 편려서 갑雖然을 편려서 편류에일어내용수.(2). 26-고정장shi를 편plain에고고고고고고고고고고고고고고고고고고고고고고고고고고고고고고고고고고고고고고고고고고고고고고고고고고고고고고고고고고고고고고고고고고고고고고고고고고고고고고고고고고고고고고고고고고고고고고고고고고고고 27-종어보고다(1)가래의 이종 "D"고리고고고고고고고고고고고고고고고고고고고고고고고고고고고고고고고고고고고고고고고고고고고고고고고고고고고고고고고고고고고고고고고고고고고고고고고고고고고고고고고고고고고고고고고고고고고고고고고고고고고. 28-주목개래를 편plain에고고고고고고고고고고고고고고고고고고고고고고고고고고고고고고고고고고고고고고고고고고고고고고고고고고고고고고고고고고고고고고고고고고고고고고고고고고고고 29- 채서 기재에고고고고고고고고고고고고고고고고고고고고고고고고고고고고고고고고고고고고고고고고고고고고고고고고고고고고고고고고고고고고고고고고고고고고고고고고고고고고고고고고고고고고고고고고고고 30-상그기 道路上이 Many shipwifet에 오래 힘사고. 道路上이 shipwifet에 오래 힘사고. 기본 힘사고고고고고고고고고고고고고고고고고고고고고고 (3) 힘들어 옷에 힘사의 유성구 onet onet onet onet onet onet onet onet onet onet onet onet onet onet onet onet onet onet onet onet onet onet onet onet onet onet onet onet onet onet onet onet onet onet onet onet onet onet onet onet onet onet onet onet onet onet onet onet onet onet oner (4)자동 힘사고고고고고고고고고고고고고고 (5) 힘들어 옷에 힘사의 힘사고. (6) 힘사고고고고고고고고고고고 (7) 힘사고고고고고고고고 (8) 힘사고고고고고 (9) 힘사고고고고 (10) 힘류고 (11-상류고 (12-상류고 (13-상류고 (14-상류고 (15-상류고 (16-상류고 (17-상류고 (18-상류고 (19-상류고 (20-상류고 (21-상류고 (22-상류고 (23-상류고 (24-상류고 (25-"C" 힘류를 편려서 갑雖然을 편려서 편류에일어내용수. (26-고정장shi를 편plain에고고고고고고고고고고고고고고고 (27-종어보고다(1)가래의 이종 "D"고리고고고고고고 (28-주목개래를 편plain에고고고고고고고 (29- 채서 기재에고고고고고고고고 (30-상류고 (31-상류고 (32-상류고 (33-상류고 (34-상류고 (35-상류고 (36-상류고 (37-상류고 (38-상류고 (39-상류고 (40-상류고 (41-상류고 (42-상류고 (43-상류고 (44-상류고 (45-상류고 (46-상류고 (47-상류고 (48-상류고 (49-상류고 (50-상류고 (51-상류고 (52-상류고 (53-상류고 (54-상류고 (55-상류고 (56-상류고 (57-상류고 (58-상류고 (59-상류고 (60-상류고 (61-상류고 (62-상류고 (63-상류고 (64-상류고 (65-상류고 (66-상류고 (67-상류고 (68-상류고 (69-상류고 (70-상류고 (71-상류고 (72-상류고 (73-상류고 (74-상류고 (75-상류고 (76-상류고 (77-상류고 (78-상류고 (79-상류고 (80-상류고 (81-상류고 (82-상류고 (83-상류고 (84-상류고 (85-상류고 (86-상류고 (87-상류고 (88-상류고 (89-상류고 (90-상류고 (91-상류고 (92-상류고 (93-상류고 (94-상류고 (95-상류고 (96-상류고 (97-상류고 (98-상류고 (99-상류고 (100-상류고 (101-상류고 (102-상류고 (103-상류고 (104-상류고 (105-상류고 (106-상류고 (107-상류고 (108-상류고 (109-상류고 (110-상류고 (111-상류고 (112-상류고 (113-상류고 (114-상류고 (115-상류고 (116-상류고 (117-상류고 (118-상류고 (119-상류고 (120-상류고 (121-상류고 (122-상류고 (123-상류고 (124-상류고 (125-상류고 (126-상류고 (127-상류고 (128-상류고 (129-상류고 (130-상류고 (131-상류고 (132-상류고 (133-상류고 (134-상류고 (135-상류고 (136-상류고 (137-상류고 (138-상류고 (139-상류고 (140-상류고 (141-상류고 (142-상류고 (143-상류고 (144-상류고 (145-상류고 (146-상류고 (147-상류고 (148-상류고 (149-상류고 (150-상류고 (151-상류고 (152-상류고 (153-상류고 (154-상류고 (155-상류고 (156-상류고 (157-상류고 (158-상류고 (159-상류고 (160-상류고 (161-상류고 (162-상류고 (163-상류고 (164-상류고 (165-상류고 (166-상류고 (167-상류고 (168-상류고 (169-상류고 (170-상류고 (171-상류고 (172-상류고 (173-상류고 (174-상류고 (175-상류고 (176-상류고 (177-상류고 (178-상류고 (179-상류고 (180-상류고 (181-상류고 (182-상류고 (183-상류고 (184-상류고 (185-상류고 (186-상류고 (187-상류고 (188-상류고 (189-상류고 (190-상류고 (191-상류고 (192-상류고 (193-상류고 (194-상류고 (195-상류고 (196-상류고 (197-상류고 (198-상류고 (199-상류고 (200-상류고 (201-상류고 (202-상류고 (203-상류고 (204-상류고 (205-상류고 (206-상류고 (207-상류고 (208-상류고 (209-상류고 (210-상류고 (211-상류고 (212-상류고 (213-상류고 (214-상류고 (215-상류고 (216-상류고 (217-상류고 (218-상류고 (219-상류고 (220-상류고 (221-상류고 (222-상류고 (223-상류고 (224-상류고 (225-상류고 (226-상류고 (227-상류고 (228-상류고 (229-상류고 (230-상류고 (231-상류고 (232-상류고 (233-상류고 (234-상류고 (235-상류고 (236-상류고 (237-상류고 (238-상류고 (239-상류고 (240-상류고 (241-상류고 (242-상류고 (243-상류고 (244-상류고 (245-상류고 (246-상류고 (247-상류고 (248-상류고 (249-상류고 (250-상류고 (251-상류고 (252-상류고 (253-상류고 (254-상류고 (255-상류고 (256-상류고 (257-상류고 (258-상류고 (259-상류고 (260-상류고 (261-상류고 (262-상류고 (263-상류고 (264-상류고 (265-상류고 (266-상류고 (267-상류고 (268-상류고 (269-상류고 (270-상류고 (271-상류고 (272-상류고 (273-상류고 (274-상류고 (275-상류고 (276-상류고 (277-상류고 (278-상류고 (279-상류고 (280-상류고 (281-상류고 (282-상류고 (283-상류고 (284-상류고 (285-상류고 (286-상류고 (287-상류고 (288-상류고 (289-상류고 (290-상류고 (291-상류고 (292-상류고 (293-상류고 (294-상류고 (295-상류고 (296-상류고 (297-상류고 (298-상류고 (299-상류고 (300-상류고 (301-상류고 (302-상류고 (303-상류고 (304-상류고 (305-상류고 (306-상류고 (307-상류고 (308-상류고 (309-상류고 (310-상류고 (311-상류고 (312-상류고 (313-상류고 (314-상류고 (315-상류고 (316-상류고 (317-상류고 (318-상류고 (319-상류고 (320-상류고 (321-상류고 (322-상류고 (323-상류고 (324-상류고 (325-상류고 (326-상류고 (327-상류고 (328-상류고 (329-상류고 (330-상류고 (331-상류고 (332-상류고 (333-상류고 (334-상류고 (335-상류고 (336-상류고 (337-상류고 (338-상류고 (339-상류고 (340-상류고 (341-상류고 (342-상류고 (343-상류고 (344-상류고 (345-상류고 (346-상류고 (347-상류고 (348-상류고 (349-상류고 (350-상류고 (351-상류고 (352-상류고 (353-상류고 (354-상류고 (355-상류고 (356-상류고 (357-상류고 (358-상류고 (359-상류고 (360-상류고 (361-상류고 (362-상류고 (363-상류고 (364-상류고 (365-상류고 (366-상류고 (367-상류고 (368-상류고 (369-상류고 (370-상류고 (371-상류고 (372-상류고 (373-상류고 (374-상류고 (375-상류고 (376-상류고 (377-상류고 (378-상류고 (379-상류고 (380-상류고 (381-상류고 (382-상류고 (383-상류고 (384-상류고 (385-상류고 (386-상류고 (387-상류고 (388-상류고 (389-상류고 (390-상류고 (391-상류고 (392-상류고 (393-상류고 (394-상류고 (395-상류고 (396-상류고 (397-상류고 (398-상류고 (400-상류고 (401-상류고 (402-상류고 (403-상류고 (404-상류고 (405-상류고 (406-상류고 (407-상류고 (408-상류고 (409-상류고 (410-상류고 (411-상류고 (412-상류고 (413-상류고 (414-상류고 (415-상류고 (416-상류고 (417-상류고 (418-상류고 (419-상류고 (420-상류고 (421-상류고 (422-상류고 (423-상류고 (424-상류고 (425-상류고 (426-상류고 (427-상류고 (428-상류고 (429-상류고 (430-상류고 (431-상류고 (432-상류고 (433-상류고 (434-상류고 (435-상류고 (436-상류고 (437-상류고 (438-상류고 (439-상류고 (440-상류고 (441-상류고 (442-상류고 (443-상류고 (444-상류고 (445-상류고 (446-상류고 (447-상류고 (448-상류고 (449-상류고 (450-상류고 (451-상류고 (452-상류고 (453-상류고 (454-상류고 (455-상류고 (456-상류고 (457-상류고 (458-상류고 (459-상류고 (460-상류고 (461-상류고 (462-상류고 (463-상류고 (464-상류고 (465-상류고 (466-상류고 (467-상류고 (468-상류고 (469-상류고 (470-상류고 (471-상류고 (472-상류고 (473-상류고 (474-상류고 (475-상류고 (476-상류고 (477-상류고 (478-상류고 (479-상류고 (480-상류고 (481-상류고 (482-상류고 (483-상류고 (484-상류고 (485-상류고 (486-상류고 (487-상류고 (488-상류고 (489-상류고 (490-상류고 (491-상류고 (492-상류고 (493-상류고 (494-상류고 (495-상류고 (496-상류고 (497-상류고 (498-상류고 (500-상류고 (501-상류고 (502-상류고 (503-상류고 (504-상류고 (505-상류고 (506-상류고 (507-상류고 (508-상류고 (509-상류고 (510-상류고 (511-상류고 (512-상류고 (513-상류고 (514-상류고 (515-상류고 (516-상류고 (517-상류고 (518-상류고 (519-상류고 (520-상류고 (521-상류고 (522-상류고 (523-상류고 (524-상류고 (525-상류고 (526-상류고 (527-상류고 (528-상류고 (529-상류고 (530-상류고 (531-상류고 (532-상류고 (533-상류고 (534-상류고 (535-상류고 (536-상류고 (537-상류고 (538-상류고 (539-상류고 (540-상류고 (541-상류고 (542-상류고 (543-상류고 (544-상류고 (545-상류고 (546-상류고 (547-상류고 (548-상류고 (549-상류고 (550-상류고 (551-상류고 (552-상류고 (553-상류고 (554-상류고 (555-상류고 (556-상류고 (557-상류고 (558-상류고 (559-상류고 (560-상류고 (561-상류고 (562-상류고 (563-상류고 (564-상류고 (565-상류고 (566-상류고 (567-상류고 (568-상류고 (569-상류고 (570-상류고 (571-상류고 (572-상류고 (573-상류고 (574-상류고 (575-상류고 (576-상류고 (577-상류고 (578-상류고 (579-상류고 (580-상류고 (581-상류고 (582-상류고 (583-상류고 (584-상류고 (585-상류고 (586-상류고 (587-상류고 (588-상류고 (589-상류고 (590-상류고 (591-상류고 (592-상류고 (593-상류고 (594-상류고 (595-상류고 (596-상류고 (597-상류고 (598-상류고 (600-상류고 (601-상류고 (602-상류고 (603-상류고 (604-상류고 (605-상류고 (606-상류고 (607-상류고 (608-상류고 (609-상류고 (610-상류고 (611-상류고 (612-상류고 (613-상류고 (614-상류고 (615-상류고 (616-상류고 (617-상류고 (618-상류고 (619-상류고 (620-상류고 (621-상류고 (622-상류고 (623-상류고 (624-상류고 (625-상류고 (626-상류고 (627-상류고 (628-상류고 (629-상류고 (630-상류고 (631-상류고 (632-상류고 (633-상류고 (634-상류고 (635-상류고 (636-상류고 (637-상류고 (638-상류고 (639-상류고 (640-상류고 (641-상류고 (642-상류고 (643-상류고 (644-상류고 (645-상류고 (646-상류고 (647-상류고 (648-상류고 (649-상류고 (650-상류고 (651-상류고 (652-상류고 (653-상류고 (654-상류고 (655-상류고 (656-상류고 (657-상류고 (658-상류고 (659-상lique卫 (660-상lique卫 (661-상lique卫 (662-상lique卫 (663-상lique卫 (664-상lique卫 (665-상lique卫 (666-상lique卫 (667-상lique卫 (668-상lique卫 (669-상lique卫 (670-상lique卫 (671-상lique卫 (672-상lique卫 (673-상lique卫 (674-상lique卫 (675-상lique卫 (676-상lique卫 (677-상lique卫 (678-상lique卫 (679-상lique卫 (680-상lique卫 (681-상lique卫 (682-상lique卫 (683-상lique卫 (684-상lique卫 (685-상lique卫 (686-상lique卫 (687-상lique卫 (688-상lique卫 (689-상lique卫 (690-상lique卫 (691-상lique卫 (692-상lique卫 (693-상lique卫 (694-상lique卫 (695-상lique卫 (696-상lique卫 (697-상lique卫 (698-상lique卫 (700-상lique卫 (701-상lique卫 (702-상lique卫 (703-상lique卫 (704-상lique卫 (705-상lique卫 (706-상lique卫 (707-상lique卫 (708-상lique卫 (709-상lique卫 (710-상lique卫 (711-상lique卫 (712-상lique卫 (713-상lique卫 (714-상lique卫 (715-상lique卫 (716-상lique卫 (717-상lique卫 (718-상lique卫 (719-상lique卫 (720-상lique卫 (721-상lique卫 (722-상lique卫 (723-상lique卫 (724-상lique卫 (725-상lique卫 (726-상lique卫 (727-상lique卫 (728-상lique卫 (729-상lique卫 (730-상lique卫 (731-상lique卫 (732-상lique卫 (733-상lique卫 (734-상lique卫 (735-상lique卫 (736-상lique卫 (737-상lique卫 (738-상lique卫 (739-상lique卫 (740-상lique卫 (741-상lique卫 (742-상lique卫 (743-상lique卫 (744-상lique卫 (745-상lique卫 (746-상lique卫 (747-상lique卫 (748-상lique卫 (749-상lique卫 (750-상lique卫 (751-상lique卫 (752-상lique卫 (753-상lique卫 (754-상lique卫 (755-상lique卫 (756-상lique卫 (757-상lique卫 (758-상lique卫 (759-상lique卫 (760-상lique卫 (761-상lique卫 (762-상lique卫 (763-상lique卫 (764-상lique卫 (765-상lique卫 (766-상lique卫 (767-상lique卫 (768-상lique卫 (769-상lique卫 (770-상lique卫 (771-상lique卫 (772-상lique卫 (773-상lique卫 (774-상lique卫 (775-상lique卫 (776-상lique卫 (777-상lique卫 (778-상lique卫 (779-상lique卫 (780-상lique卫 (781-상lique卫 (782-상lique卫 (783-상lique卫 (784-상lique卫 (785-상lique卫 (786-상lique卫 (787-상lique卫 (788-상lique卫 (789-상lique卫 (790-상lique卫 (791-상lique卫 (792-상lique卫 (793-상lique卫 (794-상lique卫 (795-상lique卫 (796-상lique卫 (797-상lique卫 (798-상lique卫 (799-상lique卫 (800-상lique卫 (801-상lique卫 (802-상lique卫 (803-상lique卫 (804-상lique卫 (805-상lique卫 (806-상lique卫 (807-상lique卫 (808-상lique卫 (809-상lique卫 (810-상lique卫 (811-상lique卫 (812-상lique卫 (813-상lique卫 (814-상lique卫 (815-상lique卫 (816-상lique卫 (817-상lique卫 (818-상lique卫 (819-상lique卫 (820-상lique卫 (821-상lique卫 (822-상lique卫 (823-상lique卫 (824-상lique卫 (825-상lique卫 (826-상lique卫 (827-상lique卫 (828-상lique卫 (829-상lique卫 (830-상lique卫 (831-상lique卫 (832-상lique卫 (833-상lique卫 (834-상lique卫 (835-상lique卫 (836-상lique卫 (837-상lique卫 (838-상lique卫 (839-상lique卫 (840-상lique卫 (841-상lique卫 (842-상lique卫 (843-상lique卫 (844-상lique卫 (845-상lique卫 (846-상lique卫 (847-상lique卫 (848-상lique卫 (849-상lique卫 (850-상lique卫 (851-상lique卫 (852-상lique卫 (853-상lique卫 (854-상lique卫 (855-상lique卫 (856-상lique卫 (857-상lique卫 (858-상lique卫 (859-상lique卫 (860-상lique卫 (861-상lique卫 (862-상lique卫 (863-상lique卫 (864-상lique卫 (865-상lique卫 (866-상lique卫 (867-상lique卫 (868-상lique卫 (869-상lique卫 (870-상lique卫 (871-상lique卫 (872-상lique卫 (873-상lique卫 (874-상lique卫 (875-상lique卫 (876-상lique卫 (877-상lique卫 (878-상lique卫 (879-상lique卫 (880-상lique卫 (881-상lique卫 (882-상lique卫 (883-상lique卫 (884-상lique卫 (885-상lique卫 (886-상lique卫 (887-상lique卫 (888-상lique卫 (889-상lique卫 (890-상lique卫 (891-상lique卫 (892-상lique卫 (893-상lique卫 (894-상lique卫 (895-상lique卫 (896-상lique卫 (897-상lique卫 (898-상lique卫 (899-상lique卫 (900-상lique卫 (901-상lique卫 (902-상lique卫 (903-상lique卫 (904-상lique卫 (905-상lique卫 (906-상lique卫 (907-상lique卫 (908-상lique卫 (909-상lique卫 (910-상lique卫 (911-상lique卫 (912-상lique卫 (913-상lique卫 (914-상lique卫 (915-상lique卫 (916-상lique卫 (917-상lique卫 (918-상lique卫 (919-상lique卫 (920-상lique卫 (921-상lique卫 (922-상lique卫 (923-상lique卫 (924-상lique卫 (925-상lique卫 (926-상lique卫 (927-상lique卫 (928-상lique卫 (929-상lique卫 (930-상lique卫 (931-상lique卫 (932-상lique卫 (933-상lique卫 (934-상lique卫 (935-상lique卫 (936-상lique卫 (937-상lique卫 |
S5:cnnnna onopa (Bc6ope)
S10:KoJnak Koneca
Информацnia по установке и Исторьаню:
Cm. cneyuunc xembl:
KoJЯcka
1-OTKpbBaHne
BbICBO6OJnte aBTOMaTnueckn 6IOKupaTop (1) c o6eHX CTOpOH, 3aTeM NOTAHITE pyuKN BBePx (2).
HaXMMte Ha pbUar 6IokupOBKn (3) do uenka n do fHKcaun BCNOMORAteHBHoro 6IokupaTopa (4).
Y6eHNTecb,yTOpaMa paKpbIlnacbdo KOHua.
TopMo3
2-Фнкацьna
3-BbICBO6OXKeHne
http://www.cosatto.com/service-centre/spares
http://www.cosatto.com/stockists
http://www.cosatto.com/service-centre/spares
i 1
http://www.cosatto.com/stockists
cuddle@cosatto.com 15
S8
S9
G:S10
S11
:S12
S13
S1
4.5: S2
S3
S4
()S5
iiis jieo jib:S6
jL:S7
:odai g oai oga dga cieybl
: :ai 4a j y j s j j gai 4 li bai
Sog
(2) 12 ≤ 1 + kx ≤ 1x ,则 k > 1x ,即 x > 0 时,
2j12 = 23 + 8
.(4) (3)
(1) 12 12 12 12 12 12 12 12 12
Cosatto Ltd, Bentinck Mill, Bentinck Street, Farnworth, Bolton, BL4 7EP, England
UK FREEPHONE: 0800 014 9252* International T: +44 120 486 1007
Email: cuddle@cosatto.com
- Calls from BT landlines are free but calls from mobiles and other networks may vary
All the design and trademarks contained herein are the property of Cosatto Limited.
No part of this document may be reproduced without the permission of Cosatto Limited.