Pino 2 - Slicer Ritter - Free user manual and instructions
Find the device manual for free Pino 2 Ritter in PDF.
Frequently Asked Questions - Pino 2 Ritter
Download the instructions for your Slicer in PDF format for free! Find your manual Pino 2 - Ritter and take your electronic device back in hand. On this page are published all the documents necessary for the use of your device. Pino 2 by Ritter.
USER MANUAL Pino 2 Ritter
Operating instructions
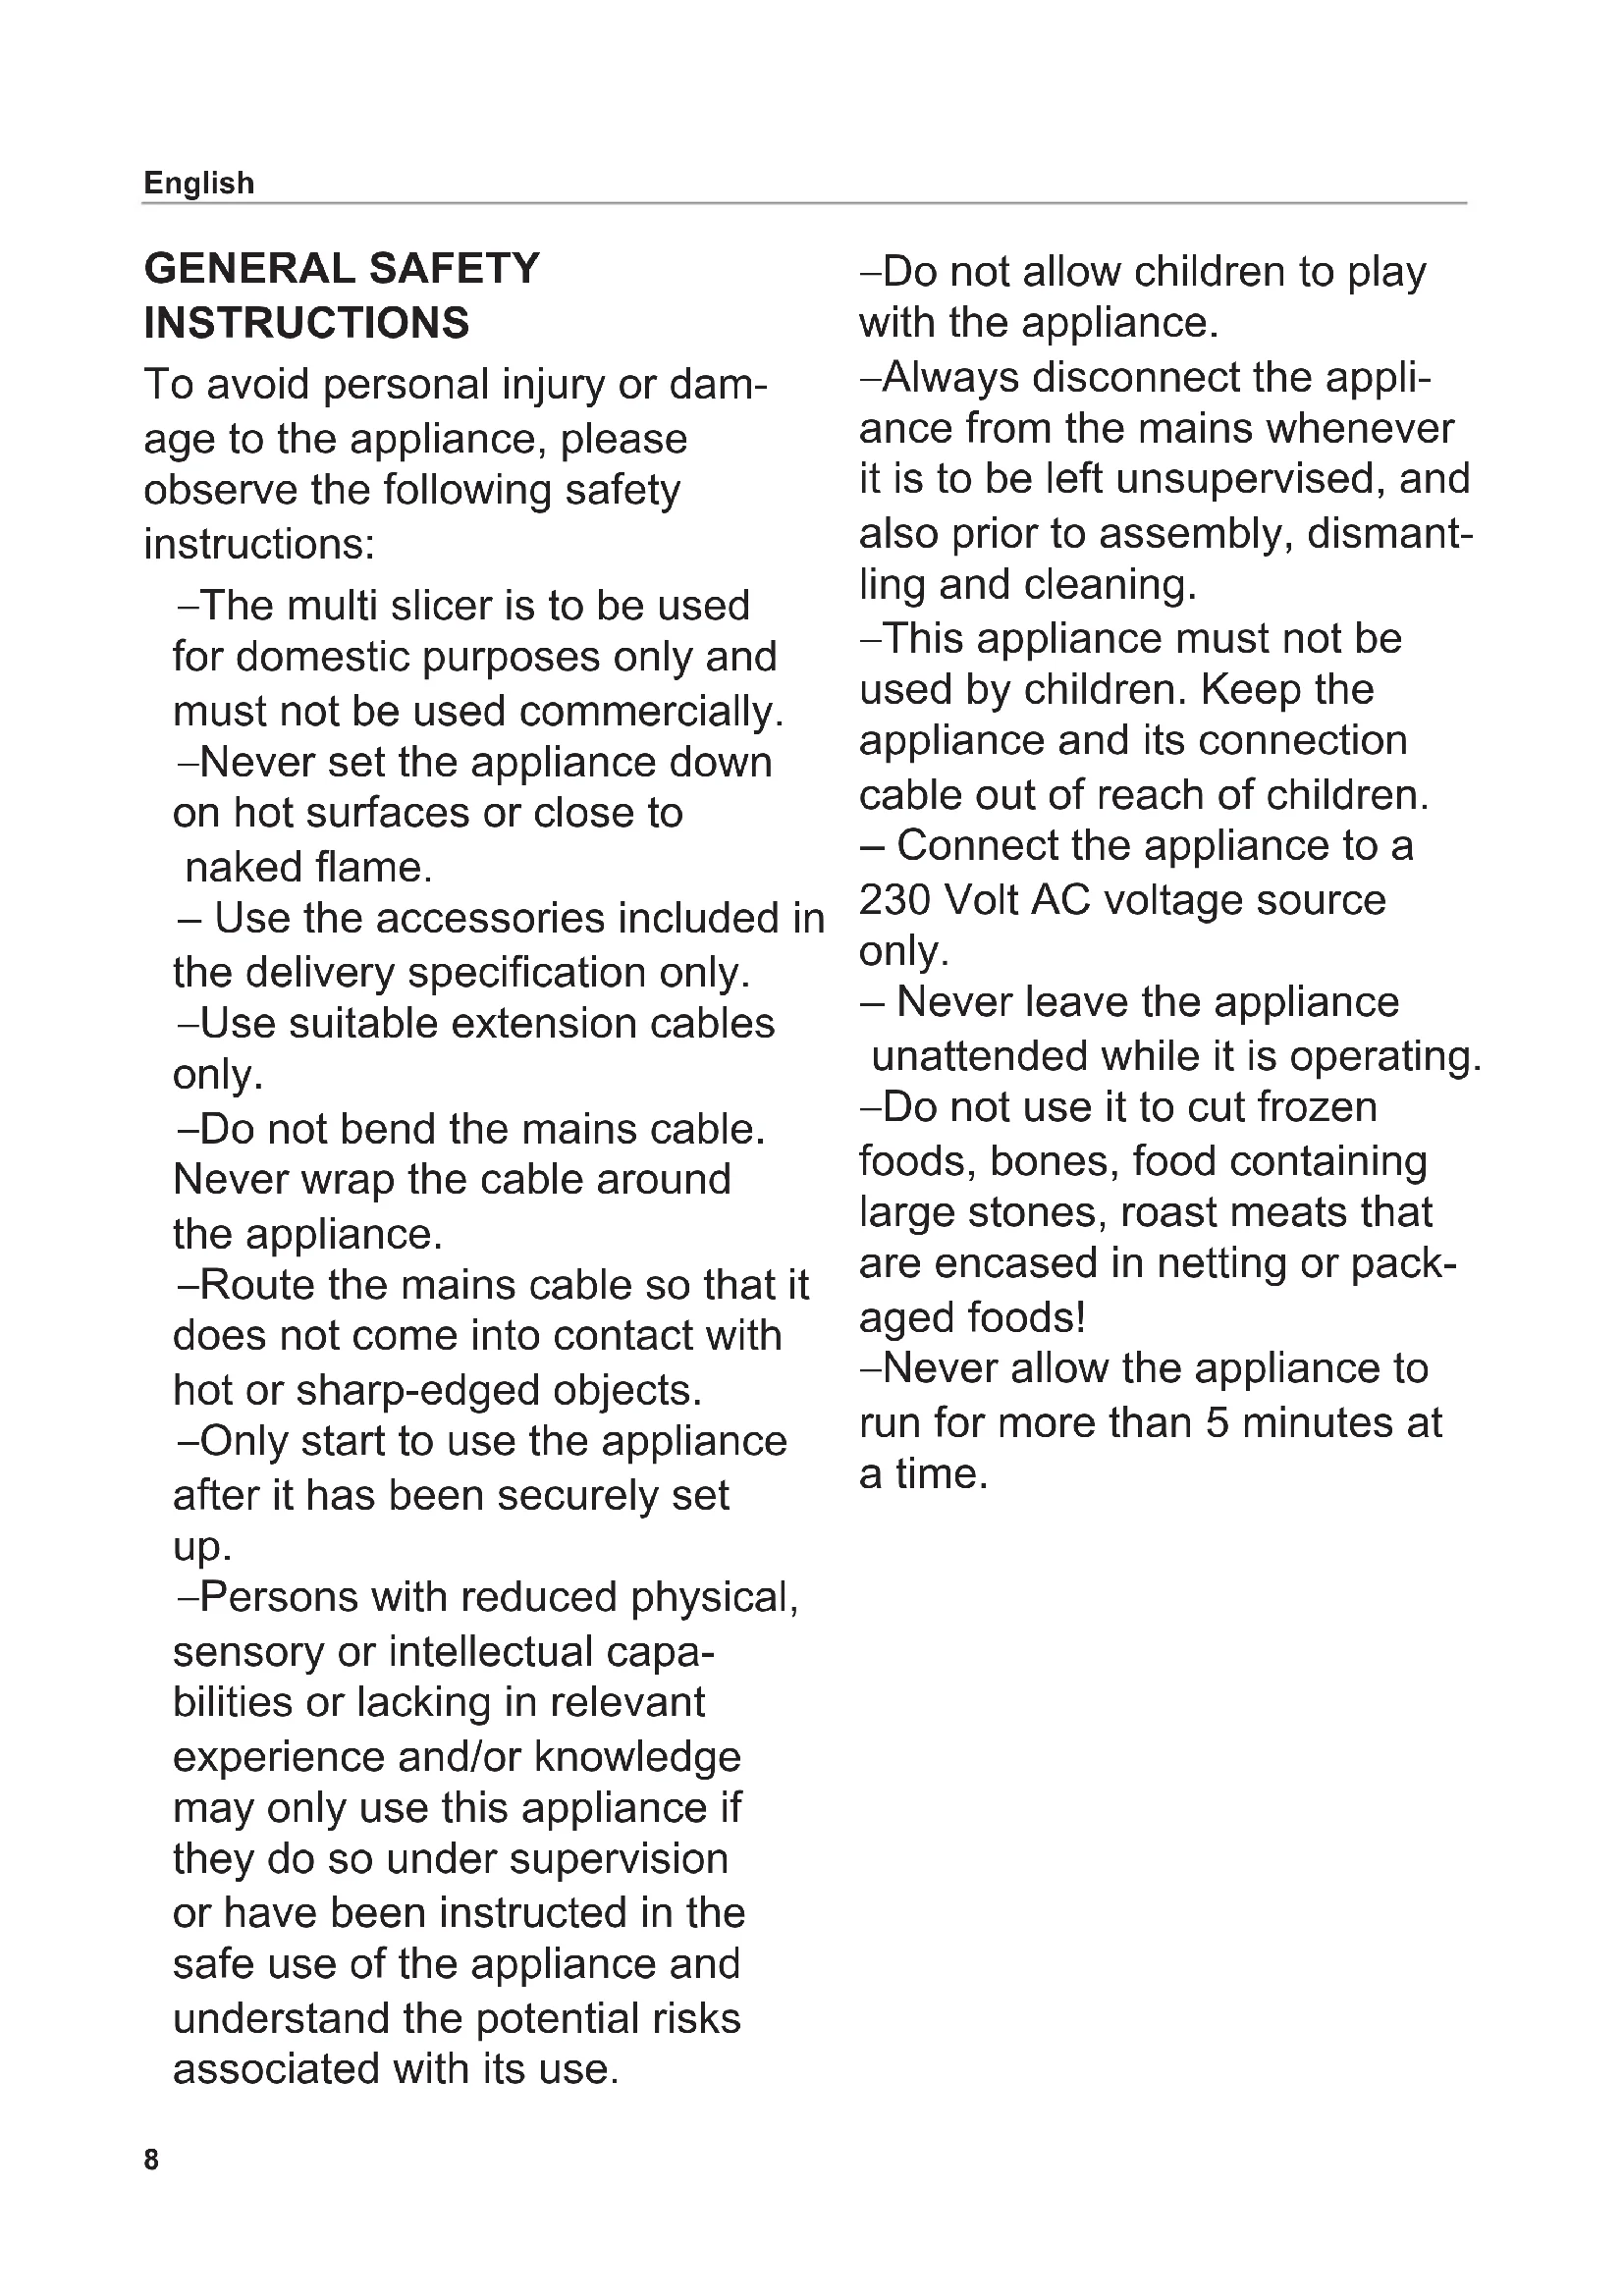
FIRST TIME Preparation Remove the appliance carefully from the packaging. Remove all packaging parts and keep these together with the packaging in a safe place. Clean the appli- ance before allowing it to come into contact with any food (see CLEANING). Setting-up the appliance
- Set the appliance down on a at, non-skid surface close to a mains socket. Using a small amount of force, push the slice carriage (8) vertically into the guide groove on the appliance until it audibly locks into place. Slide the left-over holder (9) onto the slice carriage's handle. Unwind the mains cable (5) to the length required from the cable compartment (10) under the ap- pliance and insert the mains plug into the socket. SLICING Use the slice thickness adjust- ment knob (2) to set the required thickness. Note: The slice thickness adjustment scale is not a millimetre scale. For safety reasons, the "0" position is designed to cover the blade. Place the food to be sliced onto the slice carriage (8). Use the left-over holder (9) to press it up against the stop plate (11). Protect your hands, by always using the slice carriage and, where applicable, the left-over holder. Exception: Excessively large foods to be sliced. Turn the appliance on using the switch (1). Two operating modes are available: Temporary operation: Press the switch and slide it towards the arrow until you feel some resistance. The rotary blade (6) runs as long as the switch is pressed and held down in this position. Continuous operation: Press the switch and slide it towards the arrow beyond the resistance point until it latches into place. The rotary blade runs without the switch having to be pressed and held down, until you push the switch back into the "0" position. Note: Never use the appliance for more than a maximum of 5 minutes in continuous operation.
- With the appliance running, gently feed the food to be sliced into the path of the rotary blade.
- Once slicing has been com- pleted, wait until the rotary blade has come to a complete stop.
- After each use, turn the slice thickness adjustment knob to the "0" position, in order to cover up the sharp rotating blade and to avoid any injuries. Pull the slice tray (3) to the right and out of the appliance. CLEANING Caution: Switch the appliance off before cleaning it; pull the mains plug out off the socket and turn the slice thickness adjustment knob (2) to the "0" position. Clean the multi slicer regularly to prevent the accumulation of food residue. The rotary blade must also be cleaned regularly as described below to prevent its surface from rusting. Note: Over time, an accumulation of food residue may cause damage to the surface of the rotary blade, causing it to rust. Preparation
- Remove the slice tray (3) and the left-over holder (9). Pull the slice carriage (8) forward and then lift it up and out of the guide groove. Removing the rotary blade: Place a suitable coin on the blade catch (7) and turn it in an anticlockwise direction.
- Take hold of the rotary blade at its rotational centre and remove it. Cleaning after each use
- Wipe down the housing and all removed parts, including the rotary blade, with a damp cloth. Occasional cleaning
- Give all removed parts, includ- ing the rotary blade, a thorough wash in warm soapy water (not in the dishwasher!).
- Clean the housing behind the blade using a dry cloth/brush. Note: Do not use any abrasive cleans- ers, sponges with rough surfaces or hard brushes to clean the appliance. English11
- Dry all parts that you have washed.
- Grease the rotary blade's gear wheel with a little Vaseline.
- Fit the rotary blade back into the appliance. MAINTENANCE Your multi slicer is maintenance- free. However, we recommend that you occasionally apply a little Vaseline to the rails for the slice carriage to keep them lubricated and ensure that the carriage continues to move easily. STORAGE Keep the appliance out of the reach of children. To store the cable always use the cable compartment integrated into the appliance.Storage DISPOSAL At the end of its service life this product may not be disposed of as part of normal domestic waste. It must be taken to a dedicated collection point for recycling electrical and electronic devices. This is referred to by the symbol on the product, the operating instructions or the packaging. The materials can be used again in accordance with their identication. The reusage, material-sensitive recycling or other forms of recycling of old ap- pliances enables you to make a vital contribution to protecting our environment. Please consult with the disposal ofce at your local authority. REACh DIRECTIVE See www.ritterwerk.de SPECIAL ACCESSORIES A non-toothed rotary blade is also available specically for sliced meat, sausage and ham.
SERVICE, REPAIRS AND
SPARE PARTS Please contact your local after- sales service for all service, repairs and spare parts matters! See www.ritterwerk.de TECHNICAL DATA This appliance complies with the following regulations and direc- tives: – 2004/108/EC – 2006/95/EC – 1935/2004/EC – EuP 2009/125/EC – 2011/65/EU The appliance thus complies with the CE specications. Mains voltage: 230 V~ Power consumption: Refer to the type label on the underside of the appliance Slice thickness: 0 mm to approx. 14 mm WARRANTY This ritter appliance comes with a two-year manufacturer’s warranty, starting with the date of purchase and in accordance with the EU warranty directives. In the event of a warranty claim or for servic- ing, the appliance must always be sent to the appropriate national customer service centre. English12 Français