FT 92 - Heating Toolland - Free user manual and instructions
Find the device manual for free FT 92 Toolland in PDF.
| Product type | Gas supplementary heater |
| Brand | Toolland |
| Model | FT 92 |
| Gas category | 13+ (Butane/Propane) |
| Supply pressure | 28-30 mbar (Butane) / 37 mbar (Propane) |
| Power | 3.2 kW |
| Number of positions | 3 (Maximum, Medium, Minimum) |
| Ignition | Piezo |
| Consumption | 235 g/h |
| Gas type | Propane / Butane |
| Gas supply | 13 kg gas cylinder with regulator and flexible hose (max 60 cm) |
| Main functions | Supplementary heating, 3 power levels, piezo ignition |
| Safety | Protective grille, shut-off by closing cylinder valve, leak detection with soapy water |
| Maintenance and cleaning | Clean the exterior with a soft cloth and soapy water; regularly check the hose and seals |
| Spare parts and repairability | Contact the local distributor; have it inspected by a professional once a year |
| Warranty | 24 months on manufacturing defects (see conditions) |
Frequently Asked Questions - FT 92 Toolland
User questions about FT 92 Toolland
0 question about this device. Answer the ones you know or ask your own.
Ask a new question about this device
Download the instructions for your Heating in PDF format for free! Find your manual FT 92 - Toolland and take your electronic device back in hand. On this page are published all the documents necessary for the use of your device. FT 92 by Toolland.
USER MANUAL FT 92 Toolland
a land of possibilities

natural_image
Black industrial air purifier with mesh grille and control panel (no visible text or symbols)INHOUDSOPGAVE
flowchart
graph TD
    A["START"] --> B["Arrow to top of circle"]
    B --> C["Arrow right to bottom of circle"]
    C --> D["Arrow down left to bottom of circle"]
Pos. 3 (Minimum)
text_image
STARTThis appliance has been designed for use at home. Please contact your local dealer if you need spare parts.

WARNING
Read this instruction manual carefully for your own safety. Keep the instruction manual in a safe place for future reference. When the owner of the appliance changes the instruction manual must be given to the new owner.
1. SAFETY INSTRUCTIONS
- Only persons who can understand and follow the instructions should use or service this appliance. Children may not use the appliance
- Failure to comply with the precautions and instructions provided with this heater, can result in dangerous situations with serious body injuries, property loss, damages, death, ...
- Please contact your local dealer if you have questions or need assistance concerning the installation and use of the appliance.
- The appliance may be used only to heat dry spaces, not dusty environments or mobile homes such as campers, mobilhomes, caravans, ...).
- Never go a sleep when the appliance is still in operation.
- DANGER! Never place the appliance near inflammable materials such as gasoline, paints, solvents,... Never store gas cylinders in the basement or cellar. Do not expose the gas cylinders to the sunlight.
- Only use the appliance in rooms with a good ventilation.
- Proper ventilation air must be provided to support the combustion air requirements of the heater being used. An improper combustion can lead to carbon monoxide poisoning leading to serious injury or death.
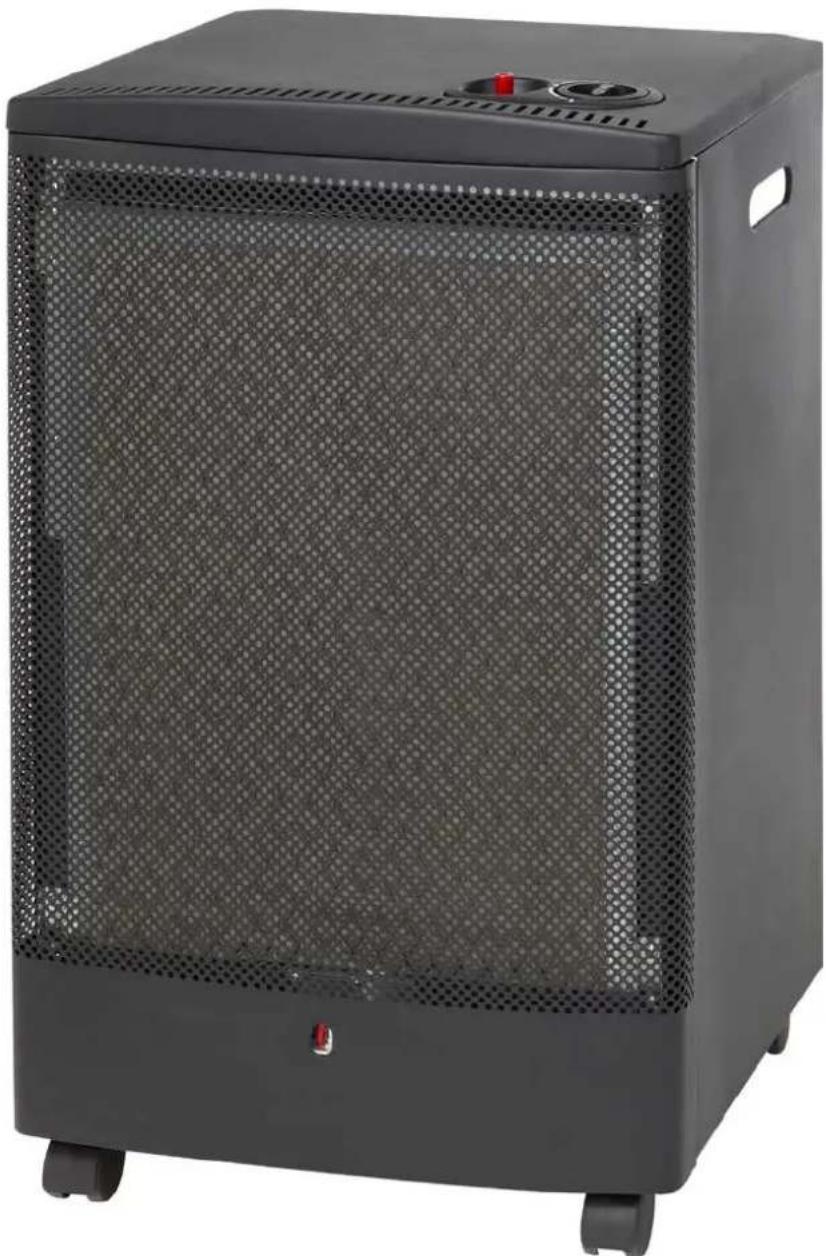
- The heater has a front grill to prevent the risk of fire or accident. This grill must always protect the burner and never be removed. The grill gets hot during use and cannot provide complete protection for children or irresponsible people. Make sure children, persons and animals keep at a safe distance from the radiant part in order to avoid burns or other injuries.
- Do not place any objects on the heater to avoid damage or risk of fire.
- The appliance must be inspected before use at least once a year by a professional expert. Cleaning may be necessary more often, especially in the area around the burner and the valve to ensure sufficient air flow to the burner.
- The appliance gets hot when it is in operation. Only touch the handle and
plastic knobs. Avoid direct contact with the heating element.
- Never leave the appliance unattended while it is in use and connected to the supply.
- Do not touch the heater with wet hands or feet.
- Do not expose the heater to the weather (sun, rain, snow, etc...).
- Never cover the heater with cloths or clothes. Warning: Overheating.
2. DANGER : CARBON MONOXIDE POISONING
Improper combustion can lead to carbon monoxide poisoning leading to serious injury or death. Carbon monoxide is toxic and dangerous for human and animals. The symptoms of inadequate ventilation are:
Headache, dizziness, dry mouth and/or throat, burning eyes and nose, nausea ...
Gasses such as propane are heavier than air. If propane leaks it sinks to the floor where it collects and forms a potentially explosive mixture. Therefore it is forbidden to use this appliance in low areas such as a basement.
DANGER! If you notice a gas leak you must follow the instructions bellow:
- Do not ignite the fuel gas. Do not operate electrical switches. Do not pull any power supply cord. Do not light matches or any other source of flame. Do not use any other objects that could ignite the fuel (e.g. phone, lights, ...).
- Open windows and doors so the gas can escape from the building.
- Get everyone out of the building and away from the area immediately.
- Close the gas supply.
- Contact your gas supplier and/or firefighters. Do not use a phone in the building! It could ignite the gas.
- Stay out of the building and away from the area until it is declared safe by the firefighters or/and your gas supplier.
4. DETECT GAS LEAKS
- To find the gas leak you must brush soapy water on all the fittings and connections of the gas circuit. If there is a leak you will notice bubbles.
- If you notice bubbles you must close the leak.
- If there is still a leak after you closed the leak you must close the gas cylinder valve and request professional assistance.
- Only check for leaks when the appliance has cooled down completely.
- WARNING! Never use a flame to detect a gas leak!
5. USE
5.1 PREPARATIONS
- Check the appliance for possible transport damage. Never use a damaged appliance.
■ Follow all the instructions carefully. - Never place the gas cylinder in front of the heater. Place the gas cylinder and the appliance on a stable and level surface.
- Always check if the specifications of the regulator and the hose are the same as the specifications mentioned on the rating label.
■ Take the cabinet on the rear cylinder cover unscrew of the two fixing screw.
- The heater must be used with a regulator and hose. The flexible hose must be checked regularly whenever the cylinder is replaced to be sure it has no scratches or cuts and that it is in a perfect state. It must be replaced in any case before the expiry date stamped on the hose itself.
- Connect the flexible tube to the hose union of the pressure regulator and to that of the tap, making sure that the metal bands are tight and paying particular attention not to tamper with or damage any component or fitting.
■ Before connecting the cylinder, make sure that its tap is closed and that there are no open flames (lit oven, etc.) in the place where you are working. Screw the pressure regulator onto the cylinder, keeping these warnings in mind:
- Check that the gasket seal is in good condition.
- Attach the regulator to the tap, screwing the nut tightly counterclockwise.
- Carefully check that there is no gas leaking from the connection using soapy water: if there is a leak, bubbles will form; tighten the connection more or seek professionally qualified service.
- Place the cylinder in its compartment, taking care that the tube is not twisted or choked and isn't touching hot parts.
- Hook the rear cylinder cover on the cabinet, insert the two hooks in the respective holes of the cabinet and put the wing screws.
- To replace the cylinder, make sure that its tap is closed and that there are no open flames (lit oven, etc.) or sources of heat in the place where you are working; we recommend that you check that the gasket seals of the regulator and flexible rubber tube are in good condition and replace them, if necessary.
- To not mishandle the connections or other components.
- Do not turn the cylinder upside down to completely use its contents: this releases liquid residues left in the tank that will irreparably damage the heater.
- Do not disconnect the pressure regulator from the cylinder when the cylinder tap is open.
- The manufacturer will not be responsible if one of the above points is disregarded.
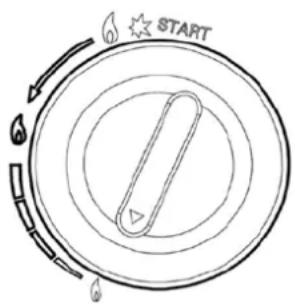
5.2 START AND STOP
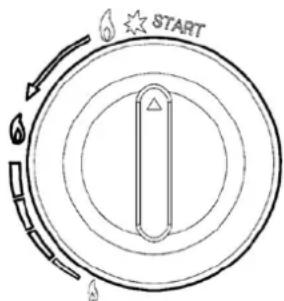
Pos. 1 (Start and Maximum Heating)
text_image
STARTPos. 2 (Medium)
flowchart
graph TD
    A["START"] --> B["Arrow to top"]
    B --> C["Arrow right"]
    C --> D["Arrow down"]
    D --> E["Arrow left"]
    E --> F["Arrow down"]
    F --> G["Arrow down"]
    G --> H["Arrow down"]
    H --> I["Arrow down"]
    I --> J["Arrow down"]
    J --> K["Arrow down"]
    K --> L["Arrow down"]
    L --> M["Arrow down"]
    M --> N["Arrow down"]
    N --> O["Arrow down"]
    O --> P["Arrow down"]
    P --> Q["Arrow down"]
    Q --> R["Arrow down"]
    R --> S["Arrow down"]
    S --> T["Arrow down"]
    T --> U["Arrow down"]
    U --> V["Arrow down"]
    V --> W["Arrow down"]
    W --> X["Arrow down"]
    X --> Y["Arrow down"]
    Y --> Z["Arrow down"]
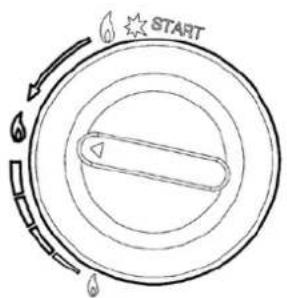
Pos. 3 (Minimum)

flowchart
graph TD
    A["START"] --> B["Arrow Right"]
    B --> C["Arrow Down"]
    C --> D["Arrow Left"]
    D --> E["Arrow Up"]
    E --> F["Arrow Left"]
    F --> G["Arrow Right"]
    G --> H["Arrow Down"]
    H --> I["Arrow Left"]
    I --> J["Arrow Right"]
- Open the valve on the gas cylinder.
- Put the control knob in 'Start position and Maximum heating' (Pos.1) and press down.
- After 10 seconds – while holding the control knob in pressed condition – push the piezoelectric ignition button fully down. It could be necessary to push the piezo button several times before the pilot is lighted. Each time you push the piezo button down you will hear a clicking sound as well as see a spark on the pilot burner. This spark will light the pilot.
- Once the pilot is lit, continue on holding the gas control knob in the pressed position for further 20 seconds. The heater will heat at Maximum (Pos.1)
- Now you can put the control knob in the desired heating position. Pos.2 = Medium, Pos.3 = Minimum.
- To turn off the device, completely close the gas cylinder valve.
- Do not move the heater when it is operating.
6. MAINTENANCE
- Always turn off the appliance before cleaning it and wait till it is cooled completely.
- To clean the outside of the heater, use a soft cloth soaked with water and a liquid detergent. Do not use scouring pads or
abrasive products. Do not use water or abrasive products.
■ Regularly inspect the atmosphere analyzer and the aeration holes.
- Regularly check the condition of the connections. Check the condition of the hose and the pressure regulator every time the gas cylinder is changed.
- Take care not to hit or damage the surface of the burner, the fittings and gas tubes, the tap and all the other components of the gas circuit.
- We recommend that you have the heater inspected once a year by a qualified professional.
- If you decide not to use the heater for an extended period, you must follow the instructions bellow:
- Close the tap on the cylinder and disconnect the pressure regulator from the cylinder.
- Store the cylinder in a well-ventilated room, far from inflammable or explosive materials and preferably outside your home. Never store the cylinder in a basement or attic.
- The heater must be stored in a dry place and protected from dust. It is recommended to store the heater in its original packaging.
7. ENVIRONMENT
Should your appliance need replacement after extended use, do not put it in the domestic waste but dispose of it in an environmentally safe way.
8. WARRANTY
Refer to the enclosed warranty conditions for the terms and conditions warranty.
- TECHNICAL SPECIFICATIONS
| Standen | 3 |
| Vermogen | 3,2kW |
| Gas type | Propaan/Butaan |
| Gas Category | 13+ |
| Mbar | 28-30/37 |
| Ignition | Piezo |
| Consumption | 235g/u |
EN
Velleman® Service and Quality Warranty
Since its foundation in 1972, Velleman® acquired extensive experience in the electronics world and currently distributes its products in over 85 countries.
All our products fulfil strict quality requirements and legal stipulations in the EU. In order to ensure the quality, our products regularly go through an extra quality check, both by an internal quality department and by specialized external organisations. If, all precautionary measures notwithstanding, problems should occur, please make appeal to our warranty (see guarantee conditions).
General Warranty Conditions Concerning Consumer Products (for EU):
- All consumer products are subject to a 24-month warranty on production flaws and defective material as from the original date of purchase.
- Velleman® can decide to replace an article with an equivalent article, or to refund the retail value totally or partially when the complaint is valid and a free repair or replacement of the article is impossible, or if the expenses are out of proportion. You will be delivered a replacing article or a refund at the value of 100% of the purchase price in case of a flaw occurred in the first year after the date of purchase and delivery, or a replacing article at 50% of the purchase price or a refund at the value of 50% of the retail value in case of a flaw occurred in the second year after the date of purchase and delivery.
• Not covered by warranty:
- all direct or indirect damage caused after delivery to the article (e.g. by oxidation, shocks, falls, dust, dirt, humidity...), and by the article, as well as its contents (e.g. data loss), compensation for loss of profits;
- consumable goods, parts or accessories that are subject to an aging process during normal use, such as batteries (rechargeable, non-rechargeable, built-in or replaceable), lamps, rubber parts, drive belts... (unlimited list);
- flaws resulting from fire, water damage, lightning, accident, natural disaster, etc....;
- flaws caused deliberately, negligently or resulting from improper handling, negligent maintenance, abusive use or use contrary to the manufacturer's instructions;
- damage caused by a commercial, professional or collective use of the article (the warranty validity will be reduced to six (6) months when the article is used professionally);
- damage resulting from an inappropriate packing and shipping of the article;
- all damage caused by modification, repair or alteration performed by a third party without written permission by Velleman®.
- Articles to be repaired must be delivered to your Velleman® dealer, solidly packed (preferably in the original packaging), and be completed with the original receipt of purchase and a clear flaw description.
- Hint: In order to save on cost and time, please reread the manual and check if the flaw is caused by obvious causes prior to presenting the article for repair. Note that returning a non-defective article can also involve handling costs.
• Repairs occurring after warranty expiration are subject to shipping costs.
- The above conditions are without prejudice to all commercial warranties.
The above enumeration is subject to modification according to the article (see article's manual).