FT5130 - Heating Toolland - Free user manual and instructions
Find the device manual for free FT5130 Toolland in PDF.
Frequently Asked Questions - FT5130 Toolland
User questions about FT5130 Toolland
0 question about this device. Answer the ones you know or ask your own.
Ask a new question about this device
Download the instructions for your Heating in PDF format for free! Find your manual FT5130 - Toolland and take your electronic device back in hand. On this page are published all the documents necessary for the use of your device. FT5130 by Toolland.
USER MANUAL FT5130 Toolland
natural_image
Exterior view of a modern flat-screen solar panel with attached piping and base mount (no text or symbols visible)USER MANUAL 3
GEBRUIKERSHANDLEIDING 6
MODE D'EMPLOI 9
MANUAL DEL USUARIO 12
To all residents of the European Union
Important environmental information about this product
This symbol on the device or the package indicates that disposal of the device after its lifecycle could harm the environment. Do not dispose of the unit (or batteries) as unsorted municipal waste; it should be taken to a specialized company for recycling. This device should be returned to your distributor or to a local recycling service. Respect the local environmental rules.

If in doubt, contact your local waste disposal authorities.
Thank you for choosing Toolland. Please read the manual thoroughly before bringing this device into service. If the device was damaged in transit, do not install or use it and contact your dealer.
2. Safety Instructions
- This appliance should be installed in accordance to law and regulations. Always use this heater in accordance with these instructions. Keep this manual for future reference.
- This heater is only for use in a well-ventilated area outdoors. Do not use indoors or in leisure vehicles such as caravans.
- This device is not to be used in basements or as main heating.
- This device requires a flexible gas hose and gas regulator. Check with your gas supplier.
- Do not cover the heater with clothing or other fabrics to avoid risks of fire.
- Do not move a switched-on heater.
- Do not place a switched-on heater alongside walls or near furniture, curtains, bed linen or any other flammable materials as this could result in a risk of fire.
- The following distances should be respected: 100 cm from the side, 150 cm from the front and 200 cm above the device.
• Always face the heater toward the centre of the room. - Place the heater on a level surface.
- If a leak is suspected, turn off the gas at the cylinder. Do not disconnect the regulator and extinguish all open flames. Check all the connections, slowly turn the gas on and brush the connections with soapy water. Soap bubbles may point to a gas leak. If a gas leak is found, turn off the gas and inform your gas supplier. Do not use the heater again until it has been checked by your dealer.
- The changing of the cylinders must only be undertaken outdoors in a flame-free environment.
• The device is designed for use with butane/propane cylinders with a capacity between 7 and 15 kg.
3. General Guidelines
Refer to the Velleman® Service and Quality Warranty on the last pages of this manual.
Keep this device away from dust and extreme temperatures.

Protect this device from shocks and abuse. Avoid brute force when operating the device.
- Familiarise yourself with the functions of the device before actually using it.
- All modifications of the device are forbidden for safety reasons. Damage caused by user modifications to the device is not covered by the warranty.
- Only use the device for its intended purpose. Using the device in an unauthorised way will void the warranty.
- Damage caused by disregard of certain guidelines in this manual is not covered by the warranty and the dealer will not accept responsibility for any ensuing defects or problems.
- Due to constant product improvements, the actual product appearance might differ from the shown images.
- Product images are for illustrative purposes only.
- Do not switch the device on immediately after it has been exposed to changes in temperature. Protect the device against damage by leaving it switched off until it has reached room temperature.
- Keep this manual for future reference.
4. Features
• infrared ceramic heater with thermocouple safety and tilting reflector
- for outdoor use
- mounting bracket
• can be used with butane and propane gas
- compact design
5. Operation
5.1 Installation
- Make sure all components are standing safely.
- Use a clamping screw to fix the holder on the bottle.
- Screw the pressure controller and the gas hose on the valve of the gas cylinder.
- Use the butterfly nut and the chrysanthemum gasket to put the heater to the required position. Fix it on the stand.
- Screw the other end of the gas hose to the safety valve. Make sure all the screws are tight.
5.2 Connection to the Gas Cylinder.

Keep the gas cylinder and heater away from any open flames.
- Use an approved regulator and a gas hose with a length between 40 cm and 50 cm. Avoid twisting the hose.
- Slowly turn on the regulator and check if there are no gas leaks. To do so, brush some soapy water on all connections.

Before putting the device into operation, check for gas leaks at the screwcaps using a detection spray or soapy water. Retighten them if necessary.
5.3 Using the Heater

Never aim the heater at the cylinder. The hose must always trail at the rear of the heater. Never separate a switched-on heater from the gas cylinder.
natural_image
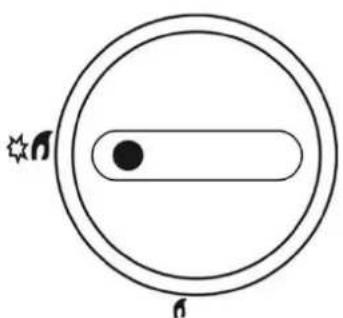
Simple circular diagram with a horizontal bar and a black dot, no text or symbols present.start/position 1 (high)

natural_image
Simple line drawing of a circular object with an internal oval and a black dot, no text or symbols present.position 2 (low)
- Make sure the heater has been assembled correctly.
- Open the regulator to feed the gas.
- Turn the control knob to position 1 and hold pressed. Activate the piezo igniter to create a spark. Keep pressing the control knob for another 10 seconds.
- Turn the control knob to position 2 to adjust the flame.
- To turn off the heater, interrupt the gas feeding by closing the regulator. Once the flame has died out, turn the control knob back to position 1.
5.4 Changing a Gas Cylinder

Only replace the gas cylinder in a non-flammable and non-smoking environment.
- Close the valve of the gas cylinder.
- Unscrew the regulator from the valve of the cylinder. Remove the device. Take the empty cylinder away from the heater.
- Make sure the sealing of the pressure controller is still place.
- Install the heater onto a new gas cylinder. To do so, follow the instructions described above.
5.5 Storage
- Disconnect the heater from the cylinder. Refer to the instructions described above.
- Store the cylinder in a well-ventilated area, preferably in an outhouse, away from any combustible materials.
- Store the heater in its original package and keep in a dry and dust-free environment.
6. Cleaning and Maintenance
• Have the heater checked by a qualified authorized technician once a year.
- Periodically check that the gas hose is intact. If it is expired, have it replaced. Only use a gas hose of the correct length.
Cleaning
- Clean the heater using a soft and dry cloth. Avoid using aggressive, abrasive or inflammable products.
7. Technical Specifications
| heating power | 2.6-4.5 kW | |
| type of gas | butane/propane (i3+) | |
| maximum pressure | ||
| butane | 28-30 Mbar | |
| propane | 37 Mbar | |
| consumption | 330 g/h | |
| pressure valve | required, not included | |
Use this device with original accessories only. Velleman nv cannot be held responsible in the event of damage or injury resulting from (incorrect) use of this device. For more info concerning this product and the latest version of this manual, please visit our website www.toolland.eu. The information in this manual is subject to change without prior notice.
© COPYRIGHT NOTICE
The copyright to this manual is owned by Velleman nv. All worldwide rights reserved. No part of this manual may be copied, reproduced, translated or reduced to any electronic medium or otherwise without the prior written consent of the copyright holder.
GEBRUIKERSHANDLEIDING
1. Inleiding
natural_image
Simple diagram with a circle, horizontal bar, and star symbol (no text or labels)natural_image
Simple line drawing of a circular object with a central dot and a star symbol (no text or labels)positie 2 (laag)
natural_image
Simple diagram with a circle, horizontal bar, and star symbol (no text or labels)démarrer / position 1 (fort)

natural_image
Simple line drawing of a circular object with an internal shape and a star symbol (no text or labels)position 2 (léger)
natural_image
Simple circular diagram with a horizontal bar and a star symbol, no text or labels present.natural_image
Simple line drawing of a circular object with an internal oval and a black dot, no text or symbols present.posición 2 (baja)
natural_image
Simple diagram with a circle, horizontal bar, and star symbol (no text or labels)natural_image
Simple line drawing of a circular object with an internal vertical bar and a black dot, no text or symbols present.natural_image
Simple diagram with a circle, horizontal bar, and star symbol (no text or labels)natural_image
Simple line drawing of a circular object with an internal vertical bar and a black dot, no text or symbols present.posição 2 (baixo)
Velleman® Service and Quality Warranty
Since its foundation in 1972, Velleman® acquired extensive experience in the electronics world and currently distributes its products in over 85 countries.
All our products fulfil strict quality requirements and legal stipulations in the EU. In order to ensure the quality, our products regularly go through an extra quality check, both by an internal quality department and by specialized external organisations. If, all precautionary measures notwithstanding, problems should occur, please make appeal to our warranty (see guarantee conditions).
General Warranty Conditions Concerning Consumer Products (for EU):
- All consumer products are subject to a 24-month warranty on production flaws and defective material as from the original date of purchase.
- Velleman® can decide to replace an article with an equivalent article, or to refund the retail value totally or partially when the complaint is valid and a free repair or replacement of the article is impossible, or if the expenses are out of proportion.
You will be delivered a replacing article or a refund at the value of 100% of the purchase price in case of a flaw occurred in the first year after the date of purchase and delivery, or a replacing article at 50% of the purchase price or a refund at the value of 50% of the retail value in case of a flaw occurred in the second year after the date of purchase and delivery.
• Not covered by warranty:
- all direct or indirect damage caused after delivery to the article (e.g. by oxidation, shocks, falls, dust, dirt, humidity...), and by the article, as well as its contents (e.g. data loss), compensation for loss of profits;
- consumable goods, parts or accessories that are subject to an aging process during normal use, such as batteries (rechargeable, non-rechargeable, built-in or replaceable), lamps, rubber parts, drive belts... (unlimited list);
- flaws resulting from fire, water damage, lightning, accident, natural disaster, etc....;
- flaws caused deliberately, negligently or resulting from improper handling, negligent maintenance, abusive use or use contrary to the manufacturer's instructions;
- damage caused by a commercial, professional or collective use of the article (the warranty validity will be reduced to six (6) months when the article is used professionally);
- damage resulting from an inappropriate packing and shipping of the article;
- all damage caused by modification, repair or alteration performed by a third party without written permission by Velleman®.
- Articles to be repaired must be delivered to your Velleman® dealer, solidly packed (preferably in the original packaging), and be completed with the original receipt of purchase and a clear flaw description.
- Hint: In order to save on cost and time, please reread the manual and check if the flaw is caused by obvious causes prior to presenting the article for repair. Note that returning a non-defective article can also involve handling costs.
- Repairs occurring after warranty expiration are subject to shipping costs.
• The above conditions are without prejudice to all commercial warranties.
The above enumeration is subject to modification according to the article (see article's manual).