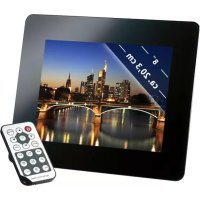
Media Director - Digital photo frame INTENSO - Free user manual and instructions
Find the device manual for free Media Director INTENSO in PDF.



Frequently Asked Questions - Media Director INTENSO
User questions about Media Director INTENSO
0 question about this device. Answer the ones you know or ask your own.
Ask a new question about this device
Download the instructions for your Digital photo frame in PDF format for free! Find your manual Media Director - INTENSO and take your electronic device back in hand. On this page are published all the documents necessary for the use of your device. Media Director by INTENSO.
USER MANUAL Media Director INTENSO
ALLGEMEINE PRODUKT MERKMALE....2
ÜBERSICHT....3
FERNBEDIENUNG 4
EINSETZEN DER BATTERIE IN DIE FERNBEDIENUNG 5
ERSTE SCHRITTE....6
ALLGEMEINE PRODUKT MERKMALE
text_image
Technical diagram of a device with labeled components and internal layout, including front, top, and side views.natural_image
Line drawing of a device with a cable and power outlet, no text or symbols present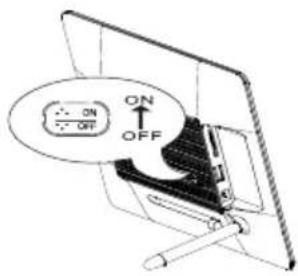
text_image
ON OFFnatural_image
Technical line drawing of a computer monitor with a screen and stand (no text or symbols)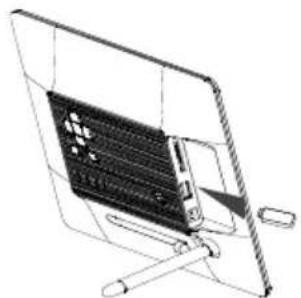
natural_image
Line drawing of a flat-screen monitor with a grid and scroll (no text or symbols)Hinweis:
text_image
Scanned text image showing menu options with Chinese labels and keyboard shortcutstext_image
Photo None None None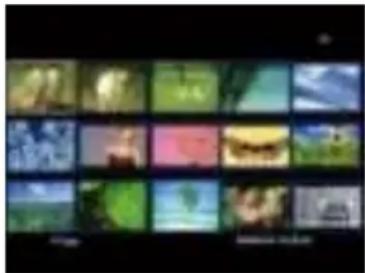
natural_image
Grid of 20 colorful square images showing natural scenes and landscapes, no text or symbols visibleHinweis:
text_image
vs. Photo By: 750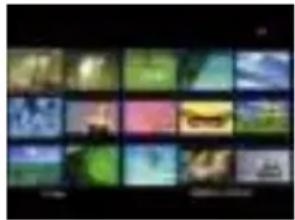
natural_image
Grid of 20 colorful square images with no visible text, numbers, or symbolsHinweis:
text_image
Screenshot of a media player control bar with playback, audio, and refresh iconstext_image
Screenshot of a software interface with three labeled buttons and a dropdown bar showing text options.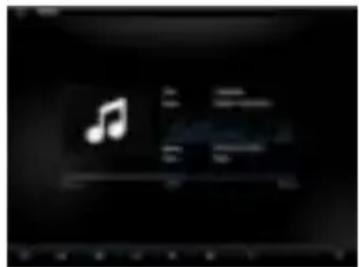
text_image
Digital music player interface showing a musical note icon and playback controls
natural_image
Black background with blue play button icons (no text or symbols)text_image
Screenshot of a software interface with menu options and navigation buttons, likely from an older application or settings tool.natural_image
Two people in vintage attire conversing, one wearing a hat and the other in a suit (no visible text or symbols)ORDNER DATEIEN
text_image
None OK Cancel Cancel Cancel Cancel Cancel Cancel Cancel Cancel Cancel Cancel Cancel Cancel Cancel Cancel Cancel Cancel Cancel Cancel Cancel Cancel Cancel Cancel Cancel Cancel Cancel Cancel Cancel Cancel Cancel Cancel Cancel Cancel Cancel Cancel Cancel Cancel Cancel Cancel Cancel Cancel Cancel Cancel Cancel Cancel Cancel Cancel Cancel Cancel Cancel Cancel CNCnatural_image
Two circular images: one showing a yellow-orange fruit-like object, the other a dark circular shape with a scale bar (no text or symbols)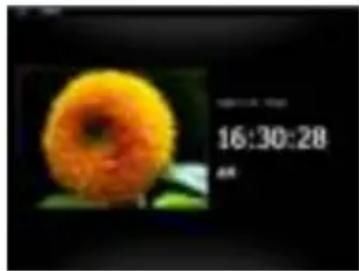
text_image
16:30:28 AMOperating Instructions
Intenso MEDIADIRECTOR
Table of Contents
INTRODUCTION....1
GENERAL PRODUCT CHARACTERISTICS 2
OVERVIEW 3
REMOTE CONTROL 4
INSERTING BATTERIES INTO REMOTE CONTROL 5
FIRST STEPS....6
USING MEMORY CARDS 7
WATCHING A SLIDE SHOW 8
MAIN MENU 9
WATCHING PHOTOS 10
Starting a Slide Show....10
Displaying Individual Pictures / a Slide Show.... 13
Changing the Display Mode....14
Using the OSD Menu 15
LISTENING TO MUSIC....17
PLAYING VIDEOS 19
DIRECTORY FILES 21
Copying Files....22
Deleting Data....23
SETUP MENU 24
Setup Date and Time 27
Alarm Setup....28
Activating Automatic Power On/Off 29
Clock Display....30
Calendar Display.... 31
FAQs.... 32
PRODUCT SPECIFICATIONS.... 35
SERVICE AND MAINTENANCE 36
INTRODUCTION
Thank you for buying the Intenso's DIGITAL PHOTO FRAME (DF).
Before using this device please carefully read these operating instructions and observe all safety notes. Please store these instructions at a safe place to have an answer at hand whenever you have questions. These instructions have been compiled with great care to enable you to safely use all functions of the DF.
The DF allows you watching digital photos directly from your camera's memory card. You can watch your photos in a slide show mode provided by the photo frame. The DF is compatible with the following card formats: SD ^TM (Secure Digital), SDHC ^TM (Secure Digital High Capacity), MMC ^TM (Multimedia Card), MS ^TM (Memory Stick) and USB flash drive.
We are not liable for any damages or loss of data in the case of malfunction, maloperation or if you repair the device yourself. Please do not disassemble the device into individual parts and do not try to repair it yourself; in such a case guarantee will expire. Software, hardware and the operating instructions can be all subject to change. We will not inform you hereof and reserve all rights in this matter.
GENERAL PRODUCT CHARACTERISTICS
• Decorative appearance, excellent quality
• Shows pictures (JPEG) without requiring a computer
• Automatic slide show with various transition effects and individual display duration
- Plays MP3 / WMA music via integrated speakers
• Digital slide show with MP3 background music
- Plays video files as MPEG-4 and M-JPEG
• Supports various playback modes for music and video
- Calendar function
- Alarm function
- Timer function
- Compatible with SD / SDHC / MMC and MS cards
• USB slot to connect USB flash drives
• 2-way control: 7 buttons on the digital photo frame, infrared remote control
OVERVIEW
natural_image
Simple geometric diagram of a square frame with no text or symbols
text_image
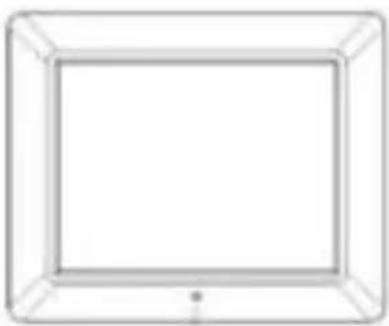
Technical diagram of a device with labeled components and directional arrows indicating assembly or flow.1 Infrared sensor
2 Menu button, opening the OSD menu
3 Left [◀] button
4 Up [ˌ]button
5 Play/Pause [▶]button
6 Right ▷ button
7 Down [↓button
8 Exit [⊃] button
9 Power On/Off
10 SD/MMC/MS - card slot
11 USB host slot
12 DC 5V 2A input
13 Frame base
14 Threaded opening for stand
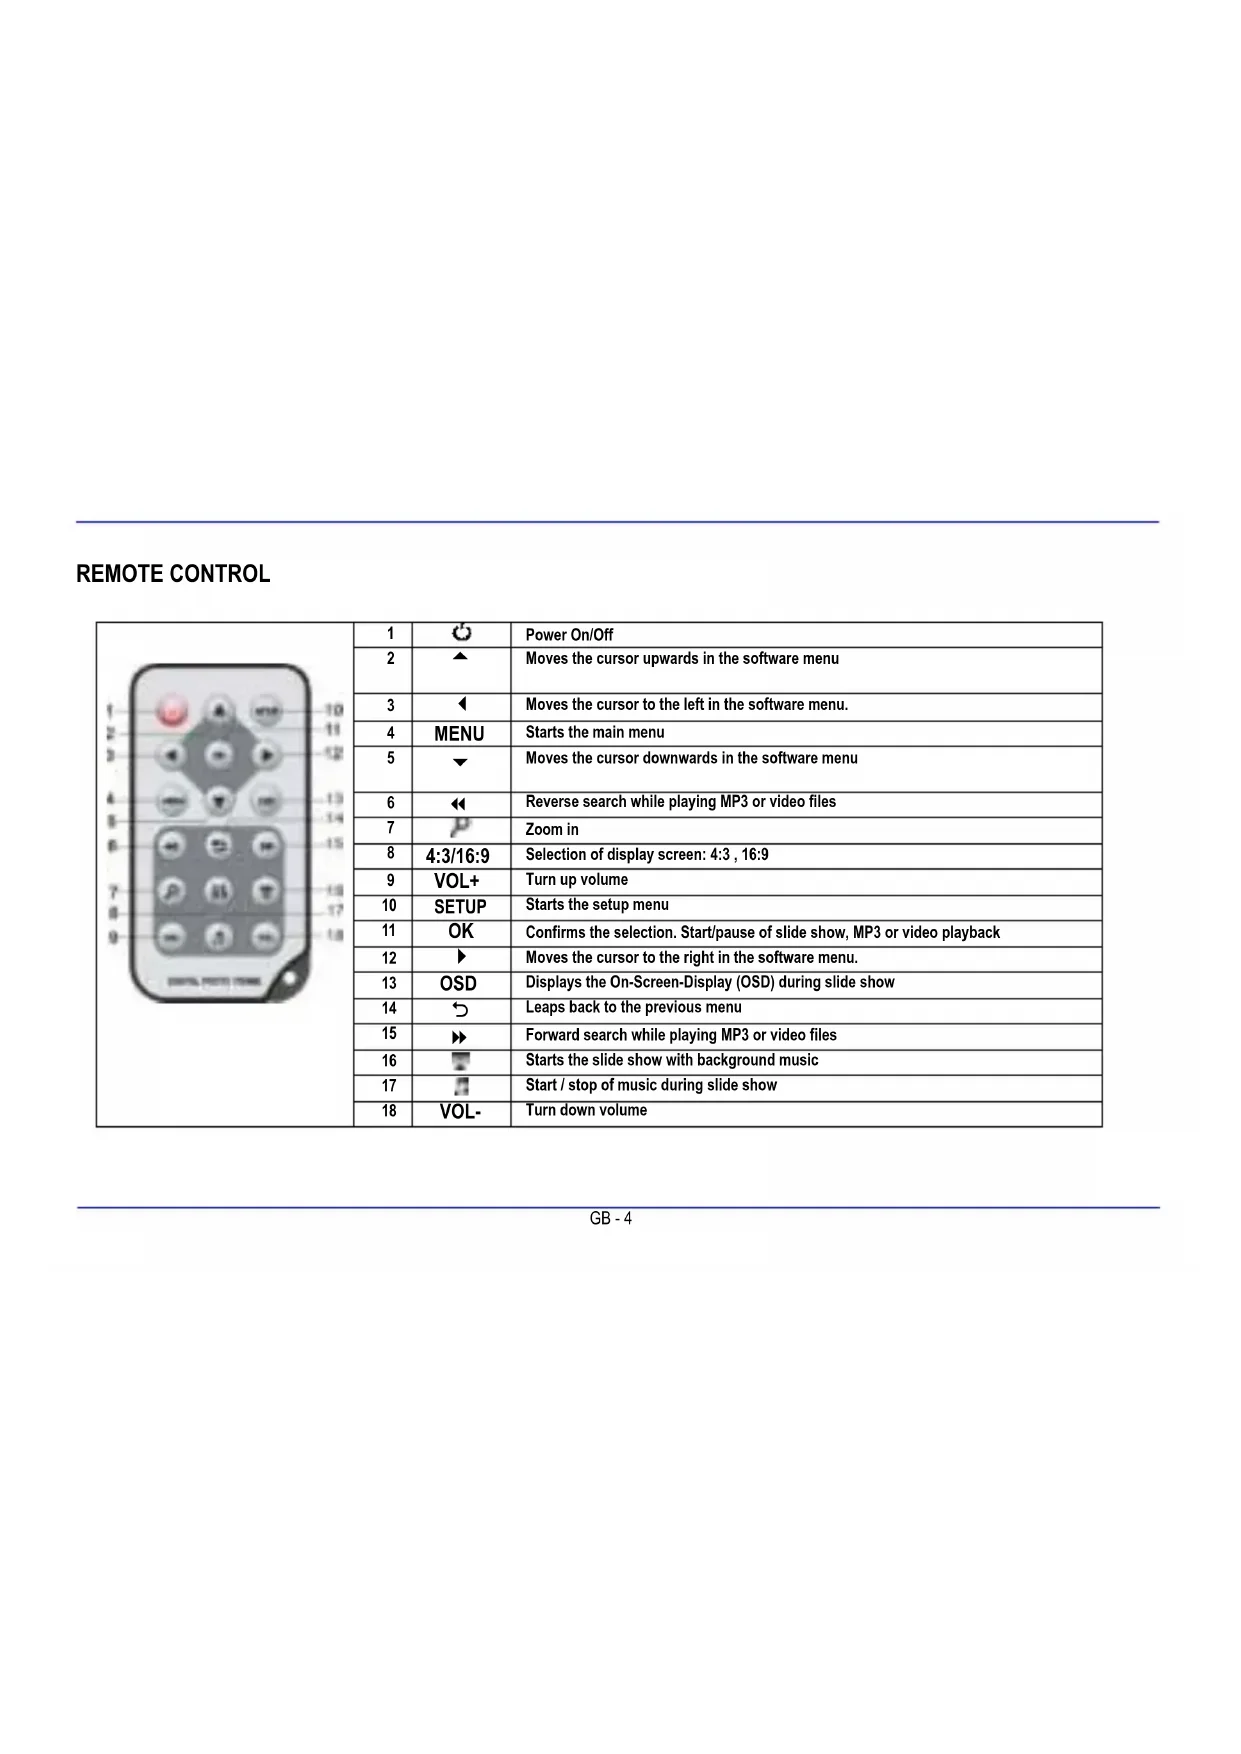
REMOTE CONTROL
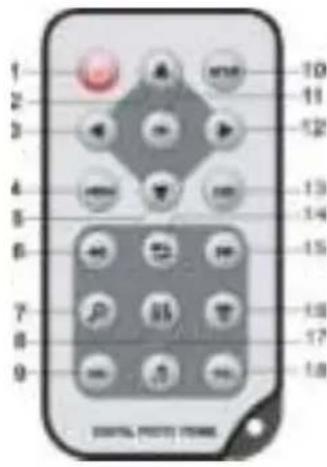 | 1 | Power On/Off | |
| 2 | Moves the cursor upwards in the software menu | ||
| 3 | Moves the cursor to the left in the software menu. | ||
| 4 | MENU | Starts the main menu | |
| 5 | Moves the cursor downwards in the software menu | ||
| 6 | Reverse search while playing MP3 or video files | ||
| 7 | Zoom in | ||
| 8 | 4:3/16:9 | Selection of display screen: 4:3, 16:9 | |
| 9 | VOL+ | Turn up volume | |
| 10 | SETUP | Starts the setup menu | |
| 11 | OK | Confirms the selection. Start/pause of slide show, MP3 or video playback | |
| 12 | Moves the cursor to the right in the software menu. | ||
| 13 | OSD | Displays the On-Screen-Display (OSD) during slide show | |
| 14 | Leaps back to the previous menu | ||
| 15 | Forward search while playing MP3 or video files | ||
| 16 | Starts the slide show with background music | ||
| 17 | Start / stop of music during slide show | ||
| 18 | VOL- | Turn down volume |
INSERTING BATTERIES INTO REMOTE CONTROL
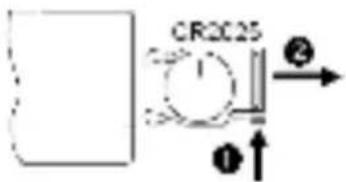
- Turn your remote control upside down with the buttons facing down.
• There is a spring on the left side of the battery compartment. Hold it to the right and simultaneously pull out the battery compartment. - Insert a CR2025 Lithium battery to the battery compartment with the Plus symbol facing upwards.
• Reinsert the battery compartment into the housing of the remote control.
text_image
CR2C25 ①↑Please note: Please dispose batteries according to legal regulations.
FIRST STEPS
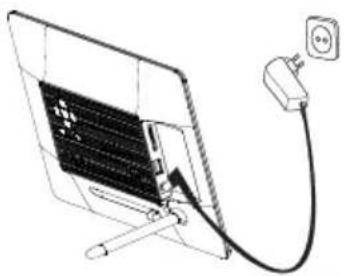
- Connect the frame base to the DIGITAL PHOOTE FRAME (DF).
- Connect the mains adapter provided with the DF. Plug the other end of the provided mains adapter into the power outlet.
natural_image
Line drawing of a device with a cable and power outlet connected to a grid-patterned panel (no text or symbols)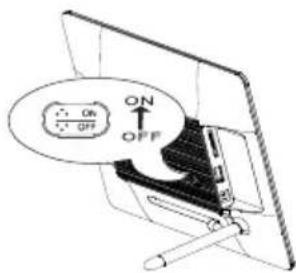
text_image
ON OFF ON OFF- Move the slider of the DF into "ON" position.
- Using the device for the first time please select the Language in the appearing window by use of the keys on the rear side or the remote control. Confirm your selection with the [▶] button on the rear side or the OK –button on the remote control.
USING MEMORY CARDS
Insert SD / SDHC / MMC / MS cards into the 3-in-1 card slot with the contacts facing the display. USB storage mediums can be connected with the DIGITAL PHOTE FRAME by inserting these mediums into the USB port (USB host).
text_image
(Intensio) ISO-C 16 GB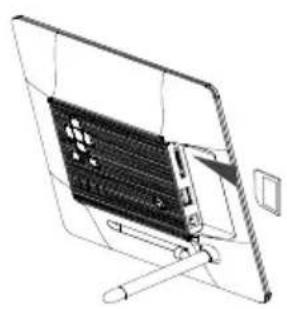
natural_image
Technical line drawing of a device with internal components and a stand (no text or symbols)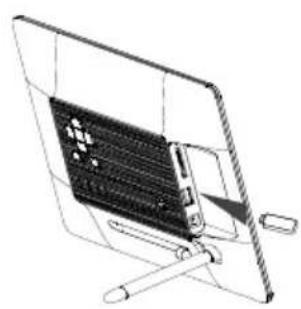
natural_image
Technical line drawing of a device with a grid and support structure (no text or symbols)Please note:
- Please do not insert memory cards by use of force.
- The 3-in-1 card reader can only read one card at a time. Thus, please connect only one SD / SDHC / MMC or MS card with the photo frame at a time.
- To disconnect inserted cards from the DIGITAL PHOTO FRAME remove them carefully from the card slot. (Please note: SD/SDHC and MMC cards have a small notch in cross direction. By use of your finger nail you can remove the card from the slot)
WATCHING A SLIDE SHOW
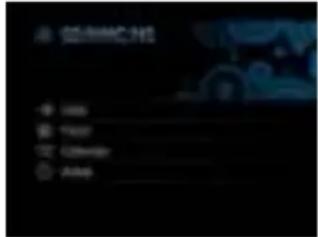
After power-on you will be guided directly to the main menu.
If a memory card or a USB memory stick is connected to the DF, the slide show will start directly after power on.
text_image
SOMACH Add New Delete AddPress the [M] button on the rear side of the DF or the Menu button on the remote control and then the [▲], [▼] buttons on the rear side of the DF or the ▲, ▼ buttons on the remote control to start the storage medium connected, the setup menu, the clock or the calendar.
Please note:
• If a storage medium is connected to the DF, the slide show will start automatically after power on.
- If more than one storage medium is connected with the photo frame, after power on the DF will at first read the pictures from the SD / SDHC / MMC or MS cards.
MAIN MENU
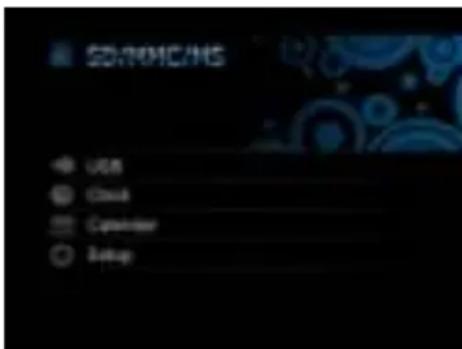
In the main menu you can select the storage mediums connected, the clock, the setup menu and the calendar.
- Press the [M] -button on the DF or the MENU button on the remote control to access the main menu.
| Menu | Description |
| USB | Displayed if a USB medium is connected. |
| SD/MMC/MS | Displayed if a SD, MS or MMC card is connected. |
| Clock | Displays the clock |
| Calendar | Displays the calendar |
| Setup | Menu to make individual settings. |
- Press the [▲],[▼] buttons on the DF or the ▲,▼ buttons on the remote control to select a storage medium or a menu item.
- Confirm your selection by pressing the [▶] button on the DF or the OK -button on the remote control.
text_image
SOMICANS USB Clock Controller SetupWATCHING PHOTOS
Starting a Slide Show
To start the slide show you can use the [■] button on the remote control in each menu. It then starts with first photo. To stop the slide show and display individual photos please press the [▶] button on the DF or the OK-button on the remote control. By repeatedly pressing the [▶] button on the DF or the OK-button on the remote control you can proceed with the slide show.
- Press the [ ↩] button on the remote control or the on the DF to leave the slide show and to access the picture preview menu.
- Press the MENU-button on the remote control to access the main menu.
Please note:
- If an additional storage medium is inserted when watching a slide show, the slide show will automatically leap to the first picture of the new storage medium and the slide show will start with this picture.
- If a SD/SDHC/MMC/MS-card and a USB drive are connected to the DF at the same time, only the pictures selected on the relevant medium will be continuously played during the slide show. The individual storage mediums are not automatically played one after the other in the slide show.
Picture Preview Menu / File Selection
Picture Preview Menu
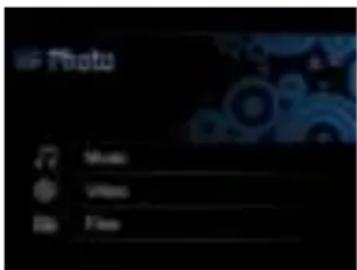
The pictures on the storage medium selected are depicted as thumbnails. It is possible to display up to 15 pictures at a time.
- In the main menu please select a storage medium (USB, SD/MMC/MS) and press the [▶] button on the DF or the OK-button on the remote control.
- Now please select the button Photo using the [▲], [▼] buttons on the DF or the ▲, ▼ buttons on the remote control and confirm it using the [▶] button on the DF or the OK-button on the remote control.
- To navigate within the thumbnails please use the [◀],[▶],[▲],[▼] buttons on the DF or the ▲, ▼, ◀, ▶ buttons on the remote control. To directly access the next preview page please use the ◀ or ▷ button on the remote control.
Please note:
- During a slide show or the picture single view mode you can also access the picture preview menu by pressing the [ ☑] button on the remote control or on the DF if you have started the show from the Photo directory. If you have started the slide show using a file, you can return to the last directory from where the slide show has been started.
text_image
Photo Music Image File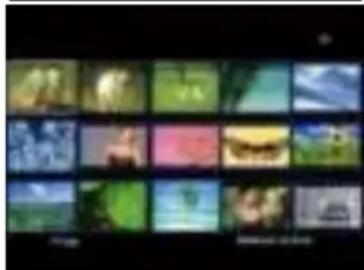
natural_image
Grid of 20 colorful square images showing natural scenes with trees and landscapes (no text or symbols visible)Select Pictures from File
File Preview Menu
The files and pictures on the storage medium selected will be shown with their name. If there are pictures in a sub-directory, this can directly be accessed.
- In the main menu please select a storage medium (USB, SD/MMC/MS) and press the [▶] button on the DF or the OK-button on the remote control.
- Now please select the button File using the [▲], [▼] buttons on the DF or the ▲,▼ buttons on the remote control and confirm it using the [▶] button on the DF or the OK-button on the remote control.
- To navigate between the files please use [▲], [▼] buttons on the DF or the ▲,▼ buttons on the remote control and confirm it using the [▶] button on the DF or the OK-button on the remote control.
text_image
in Music By you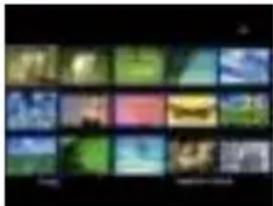
natural_image
Grid of colorful square images with no visible text, numbers, or symbolsPlease note:
- During a slide show or the picture single view mode you can access the last directory by pressing the [ ↗] button on the remote control or on the DF.
Displaying Individual Pictures / a Slide Show
You can select individual pictures without starting a slide show.
-
In the picture preview menu please select a picture and press the [▶] button on the DF or the OK-button on the remote control. The picture is now displayed in full screen mode. Now you will see the II symbol in the screen's upper left corner. Now please press the [▶] button on the DF or the OK-button on the remote control to start the slide show.
-
To display previous or following pictures please press the [◀], [▶] buttons on the DF or the ◀, ▶ buttons on the remote control.
-
To display a picture with a magnification, please repeatedly press the Ⓞ button on the remote control. If the picture is displayed as a magnified version, you can vary the depicted display window by using the [◀], [▶], [▲], [▼] buttons on the DF or the ▲, ▼, ◀, ▶ buttons on the remote control.
-
To return to the picture preview menu please press the [ ↩] button.
- Press the [▶] button on the DF or die OK-button on the remote control to start the slide show, starting with the selected photo.
Please note:
- Please mind that, if you have started the single picture mode from a directory, only the pictures of this directory will be continuously displayed during the slide show.
Changing the Display Mode
While watching a picture or during the slide show you can change the display mode by repeatedly pressing the [4:3/16:9] button on the remote control.
• 4:3: With this selection a picture which is saved in the 16:9 or a larger format is stretched and displayed as full screen picture.
- 16:9: With this selection a picture which is saved in the 16:9 or a larger format is displayed in its original format with a black bar at the upper and lower margin.
Please note:
• A photo which is saved in the 4:3 format can only be depicted in the format 4:3.
• This function is not available with photos whose resolution is lower than 800 x 600 pixels.
Using the OSD Menu
You can use the OSD menu carry out the following functions.
- Press the [OSD] button on the remote control or the [M] button on the DF when watching a picture or a slide show. The OSD menu will appear on the display and the slide show will be stopped.

natural_image
User interface toolbar with play, music note, refresh, download, and control buttons (no text or symbols)- Press the [◀], [▶] buttons on the DF or the ◀, ▶ buttons on the remote control to navigate between the functions.
- To stop or continue the slide show please select the symbol ▶ and press [▶] on the DF or OK on the remote control. The ▶ (Play) symbol in the OSD-menu will be replaced by the II (Pause) symbol.
- By selecting the [♪] symbol and pressing the [▶] button on the DF or OK on the remote control you can start the music playback. Using the [▲], [▼] buttons on the DF or the ▲, ▼ buttons on the remote control you can change the volume.
- To enlarge the picture please select the symbol 🔒 and press the [▶] button on the DF or OK on the remote control. If the picture is displayed as magnified version, you can vary the depicted display window using the [◀], [▶], [▲], [▼] buttons on the DF or the ▲, ▼, ◀, ▶ buttons on the remote control.
- To rotate the picture by 90 degrees in clockwise direction please select the 🔔 symbol and press the [▶] button on the DF or OK on the remote control.
- By selecting the [ ] symbol and pressing [▶] on the DF or OK on the remote control you can start the slide show with background music starting with the first picture and first title.
- By selecting the [ ] symbol and pressing [▶] on the DF or OK on the remote control the DF will continue with the slide show.
LISTENING TO MUSIC
If MP3 / WMA files are available on a storage medium, you can play them on the DF.
- In the main menu please select the relevant storage medium (USB, SD/MMC/MS) and press the [▶] button on the DF or the OK-button on the remote control.
- Press the [▲], [▼] buttons on the DF or the ▲, ▼ buttons on the remote control to start the Music menu. Press the [▶] button on the DF or the OK-button on the remote control to confirm your selection. Now the music title bar appears.
- To select the desired song please use the [▲], [▼] buttons on the DF or the ▲,▼ buttons on the remote control and confirm your selection using the [▶] button on the DF or the OK-button on the remote control.
text_image
Screenshot of a software interface with menu options and buttons, likely from an older application or settings tool.
text_image
Digital music player interface displaying a musical note with playback controls and track controls
natural_image
Black background with a row of blue play and audio playback icons (no text or symbols)- Use the [◀], [▶] buttons on the DF or the ◀, ▶ buttons on the remote control to navigate within the OSD menu.
- Select ▶ or II and press the [▶] button to pause or continue music playback.
• Using the [▲], [▼] buttons on the DF or the [VOL+] or [VOL-] buttons on the remote control you can change the volume.
- By selecting ▶ / ▶ and pressing the [▶] button the DF leaps tot he previous or next title
- By selecting “/” and pressing the [▶] button you can activate the Fast Forward or Rewind mode to fast forward or rewind the current title. By repeatedly pressing the button you can change the speed of the search [2X, 3X, 4X, 1X]
- To end playback please press the [ ↩] button.
PLAYING VIDEOS
If video files are available on a storage medium, you can play them on the DF.
- In the main menu please select the relevant storage medium (USB, SD/MMC/MS) and press the [▶] button on the DF or the OK-button on the remote control.
- Press the [▲], [▼] buttons on the DF or the ▲, ▼ buttons on the remote control to start the Video menu. Press the [▶] button on the DF or the OK-button on the remote control to confirm your selection. Now the video title bar appears.
- To select the desired video please use the [▲], [▼] buttons on the DF or the ▲,▼ buttons on the remote control and confirm your selection using the [▶] button on the DF or the OK-button on the remote control.
- Please press the [OSD] button on the remote control
text_image
Screenshot of a software interface with a dropdown menu and three action buttons labeled 'OK', 'Cancel', and 'Help'.- Use the [◀], [▶] buttons on the DF or the ◀, ▶ buttons on the remote control to navigate within the OSD menu.
- Please select ▶ or II and press the [▶] button on the DF or the OK-button on the remote control to pause or continue video playback
• Using the [▲], [▼] buttons on the DF or the [VOL+] or [VOL-] buttons on the remote control you can change the volume.
- By selecting ▶ / ▶ and pressing the [▶] button the DF leaps to the previous or next video
- By selecting / and pressing the [▶] button you can activate the Fast Forward or Rewind mode to fast forward or rewind the current title. By repeatedly pressing the button you can change the speed of the search [2X, 3X, 4X, 1X]
• To end playback please press the [ ↩] button.
natural_image
Two individuals in vintage attire conversing, one wearing a hat and the other in a suit (no visible text or symbols)DIRECTORY FILES
In the file directory you can see all existing files and directories on the storage medium selected. You can also copy data from one storage medium to another. It is also possible to delete existing files on a storage medium.
- In the main menu please select a storage medium (USB, SD/MMC) and press the [▶] button on the DF or the OK-button on the remote control.
- Please press the [▲], [▼] buttons on the DF or the [▲], [▼] buttons on the remote control to select the File-menu. Please confirm your selection by pressing the [▶] button on the DF or the OK-button on the remote control. Now the file list with the directories and files available will be shown.
- Use the [▲], [▼] buttons on the DF or the ▲, ▼ buttons on the remote control to navigate between the files and directories.
- To open a directory please press the [▶] button on the DF or the OK-button on the remote control. To return to a parent directory please press the [⊃] button on the DF or on the remote control. To play a file please select it and press the [▶] button on the DF or the OK-button on the remote control. To return to the file list please press the [⊃] button.
text_image
File ShareCopying Files
- Now please select the file using the [▲],[▼] buttons on the DF or the ▲,▼ buttons on the remote control and press the [▶] button on the DF or the ▶ button on the remote control. A checkmark ☑ appears next to the file. To select more than one file, please repeat these steps.
- Please press the OSD-button on the remote control. Now the display shows the options Copy and Delete.
- Please use the [▲],[▼] buttons on the DF or the ▲,▼ buttons on the remote control to select Copy and press the [▶] button on the DF or the OK-button on the remote control. Additional storage mediums available are shown in the display.
- Please use the [◀],[▶],[▲],[▼] buttons on the DF or the ▲, ▼, ◀, ▶ buttons on the remote control to select the relevant storage medium and press the [▶] button on the DF or the ▶ button on the remote control to select the desired storage medium and sub-directory.
- Press the [▶] button on the DF or the OK-button on the remote control to start the copy process.
- Repeatedly press the [▶] button on the DF or the OK-button on the remote control to confirm the "Complete" message.
Please note:
- If your desired storage medium does not appear in the list, this may be due to the fact that this medium is read-only. Please remove the read-only mode and try restarting the copy process.
Deleting Data
- Now please select a file using the [▲], [▼] buttons on the DF or the ▲,▼ buttons on the remote control and press the [▶] button on the DF or the ▶ button on the remote control. A checkmark ☑ appears next to the file. To select more than one file, please repeat these steps.
- Please press the OSD-button on the remote control. Now the display shows the options Copy and Delete.
- Please use the [▲], [▼] buttons on the DF or the ▲,▼ buttons on the remote control to select Delete and press the [▶] button on the DF or the OK-button on the remote control.
- Using the [◀], [▶] buttons on the DF or the ◀, ▶ buttons on the remote control you can select YES to delete the files, or No to leave the menu without any changes.
- Press the [▶] button on the DF or the OK-button on the remote control to delete the selected files.
- Repeatedly press the [▶] button on the DF or the OK-button on the remote control to confirm the "Complete" message.
SETUP MENU
You can individually adjust the configuration of the DIGITAL PHOTOFRAME (DF).
- In the main menu please select the menu item SETUP and confirm your selection with the [▶] button on the DF or the OK-button on the remote control. You can also access this menu by pressing the [SETUP] button on the remote control.
- To select settings please use [▲], [▼] buttons on the DF or the ▲,▼ buttons on the remote control and confirm your selection using the [▶] button on the DF or the OK-button on the remote control.
- To change settings please confirm your selection by pressing the [▶] button on the DF or the OK-button on the remote control. To reach the next higher selection menu please use the [◀] button on the DF or, alternatively, the ◀ button on the remote control.
- To leave the menu please press the [ ↘] button on the DF or on the remote control.
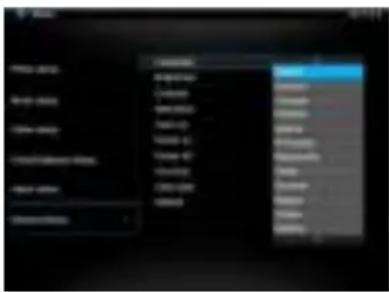
text_image
Screenshot of a software menu with Chinese options, showing dropdown menus and keyboard shortcuts| Settings | Description | |
| Photo setup | Sliding show time | Select how long a picture is displayed during a slide show.Options: 3 sec., 5 sec., 15 sec., 1 min., 15 min. |
| Photo mode | Please decide whether the picture is shown as Full Screen Picture or with its original ratio using the Standart screen function. | |
| Transition effect | Select from random and continuous transition modes | |
| Date stamp | In full screen mode and during a slide show this function shows the picture's creation date | |
| Music setup | Music repeat mode | Repeat mode Off: Plays all songs in the selected directoryRepeat mode On: Repeats the selected songRepeat mode All: Plays all songs on the selected storage medium |
| Video setup | Movie repeat mode | Repeat mode Off: Plays all videos in the selected directoryRepeat mode On: Repeats the selected videoRepeat mode All: Plays all videos on the selected storage medium |
| Clock / calendar setup | Time mode | Please select the digital or analogous clock |
| Show photo | Adjusting the time. | |
| Clock Wallpaper | Adjusts the time format to 12 hours (AM / PM) or 24 hours | |
| Set time | Adjusts the date | |
| Set time format | Please select the display format for your calendar, e.g. DD/MM/YYYY | |
| Alarm setup | Alarm 1 | Adjusts alarm, alarm tone and time |
| Alarm 2 | Adjusts alarm, alarm tone and time | |
| Alarm 3 | Adjusts alarm, alarm tone and time | |
| Alarm 4 | Adjusts alarm, alarm tone and time | |
| Ringtone volume | Adjusts the alarm volume. Options: 1,2,3,4,5,6 | |
| General setup | Language | Select your preferred language. |
| Brightness | Adjusts the brightness of the TFT display. Options: -3, -2, -1, 0, 1, 2, 3. | |
| Contrast | Adjusts the contrast of the TFT display. Options: -3, -2, -1, 0, 1, 2, 3. | |
| Saturation | Adjusts the colour saturation of the TFT display. Options: -3, -2, -1, 0, 1, 2, 3. | |
| Auto-run | Here you can select the mode your photo frame starts in after power on.( Photo, main menu, clock, calendar ) | |
| Power-on | Enables automatic power-on. Off / once / daily | |
| Power-off | Enables automatic power-off. Off / once / daily | |
| Hint time | Specify how long the notification window of the key's functions is displayed in the slide show mode and the status II (pause) or ▶ (play) in the picture. Options: 0 sec., 5 sec., 10 sec., 20 sec. | |
| Default | Device is reset to factory settings. |
Setup Date and Time
How to adjust date and time on the Intenso DF:
- In the main menu select the menu item SETUP.
- Press the [▲], [▼] buttons on the DF or the ▲, ▼ buttons on the remote control to select the menu item Time settings.
- Press the [◀], [▶] buttons on the DF or the ◀, ▶ buttons on the remote control to select the next or previous element (hour, minute). Press the [▲], [▼] buttons on the DF or the ▲, ▼ buttons on the remote control to adjust the desired values.
- To confirm your entries please press the button [▶] on the rear side of the DF or the OK-button on the remote control.
How to adjust the date on the Intenso DF:
- Press the [▲], [▼] buttons on the DF or the ▲, ▼ buttons on the remote control to select the menu item Date.
- Press the [◀], [▶] buttons on the DF or the ◀, ▶ buttons on the remote control to select the next or previous element (month, day, year). Press the [▲], [▼] buttons on the DF or the ▲, ▼ buttons on the remote control to adjust the desired values.
- To confirm your entries please press the button [▶] on the rear side of the DF or the OK-button on the remote control.
Alarm Setup
- In the main menu select the menu item SETUP.
- Press the [▲],[▼] buttons on the DF or the ▲,▼ buttons on the remote control to select the menu item Alarm Setup and confirm your setting by pressing the [▶] button on the DF or the OK-button on the remote control.
- Press the [▲],[▼] buttons on the DF or the ▲,▼ buttons on the remote control to select an alarm and confirm your setting by pressing the [▶] button on the DF or the OK-button on the remote control.
- Press the [◀], [▶] buttons on the DF or the ◀, ▶ buttons on the remote control to select the next or previous element (hour, minute, time, alarm tone). Press the [▲], [▼] buttons on the DF or the ▲, ▼ buttons on the remote control to adjust the desired values.
• Off: Deactivates the alarm function.
• Daily: The alarm is set for every day.
• Once: The alarm is set for one time only.
- To confirm your entries please press the button [▶] on the DF or the OK-button on the remote control.
Please note:
It is possible to define 4 different alarm times and tones independent of each other
Activating Automatic Power On/Off
You can have Intenso's DIGITAL PHOTO FRAME switch on/off automatically at a preset time.
Please note: This function requires setting the correct time in advance.
- In the main menu select the menu item SETUP and then General Setup.
- Press the [▲], [▼] buttons on the DF or the ▲, ▼ buttons on the remote control to select the menu item autom. power-on or autom. power-off.
- Press the [◀], [▶] buttons on the DF or the ◀, ▶ buttons on the remote control to select the next or previous element (hour, minute). Press the [▲], [▼] buttons on the DF or the ▲, ▼ buttons on the remote control to adjust the desired values and the time.
• Off: Deactivating Automatic Power On/Off
• Once: The DIGITAL PHOTO FRAME switches on and/or off at the preset time for one time.
• Daily The DIGITAL PHOTO FRAME switches on and/or off at the preset time every day.
- To confirm your entries please press the button [▶] on the DF or the OK-button on the remote control.
Clock Display
The clock mode displays the current date, the current time and a slide show with thumbnails in the background.
- In the main menu select the menu item CLOCK.
- To leave the clock mode please press the [ ↘] button.
Please note:
- Date and time as well as the desired clock representation can only be adjusted in the menu Clock/Calendar Setup.
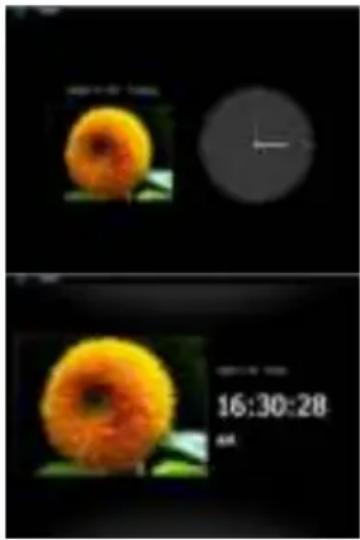
text_image
16:30:28 AMCalendar Display
The calendar mode displays the current date, the current time and a slide show with thumbnails in the background.
- In the main menu select the menu item Calendar.
- To leave the calendar mode please press the [ ↗] button.
Please note:
• Date and time can only be set in the Clock/Calendar Setup menu.
- By pressing the [◀], [▶] buttons on the DF or the ◀, ▶ buttons on the remote control the calendar can leap back or forth by the month.
- By pressing the [▲], [▼] buttons on the rear side of the DF or ▲, ▼ the buttons on the remote control the calendar can show the next years or leap back to the previous one.
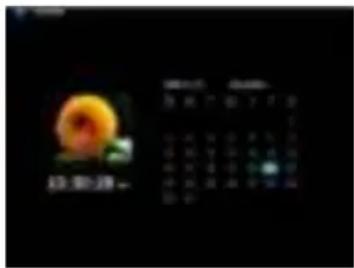
Why is the actual capacity of a memory card less than specified on the packaging?
The storage capacity of a flash storage medium is specified according to capacity specifications for hard drives and is subject to the SI regulations (International System of Units). This system does not use the binary system, which converts 1024 MB into one 1 GB. The SI standard uses the powers of 1000, where 1000 Megabyte make 1 Gigabyte. Due to this different way of calculation, capacity specification might be different.
Why does the DF not display some pictures of my memory card?
Some not so widespread storage mediums are not compatible with the DF. Please use a compatible card. Please bear in mind that this photo frame can only play photos with the file format "JPEG".
A memory card is inserted but the DF cannot read this card. What can I do?
At first please check if this card is actually compatible with Intenso's DIGITAL PHOTOFRAME.
Then, please check if the card is properly inserted into the card slot. Please bear in mind that only the file format "JPEG" is supported.
Please note: Some digital cameras do not save pictures by use of the standard format JPEG. In such a case please refer to the operating manual of your camera.
Why are some pictures loaded faster than others?
Pictures with a high resolution need longer times to be displayed. To increase the loading speed please use pictures with a lower resolution.
Please note: The photo frame supports a resolution of up to 8000*8000 pixels.
Why does the software not start although power supply is ensured and the power switch is in "On" position?
This might be a system error. Please reset the software by cutting off power supply for a few seconds.
Why is the main menu not displayed?
Please check if the DF is properly connected to the power outlet and the power switch is in "On" position.
Can I rotate pictures on the display?
Yes, please use the OSD menu. Press the [OSD] button on the remote control or the [M] button on the DF when watching a picture or a slide show. The OSD menu appears on the display.
Please note: With a new start the rotated picture will be displayed in normal mode again.
Can I adjust the colours of pictures?
No. All colours are set when the picture is being taken. However, you can adjust the brightness and the contrast of the display. However, you can adjust the brightness and the contrast of the display.
What is the ideal resolution to display pictures on the DF?
The ideal resolution for this DF is 800*600 pixels.
Why do the functions: Automatic power-on / off not work although I have enabled them?
Please make sure your time settings are correct. If the set time is in the past, the function will be enabled on the next calendar day for the first time.
Please do not move the slider on the rear side of the DF into POWER OFF position. Only change the status of the DF into standby.
PRODUCT SPECIFICATIONS
| Display | Digital TFT LCDDisplay size: 8 inch (25,4 cm diagonal viewable image)Display modus: 4:3Resolution: 800*600 pixels |
| Mains adapter | Input: 100~240V AC, 50/60HzOutput: 5V 2A DC |
| USB port | USB Host 2.0 & USB Device 2.0Supports USB storage mediums |
| Memory cards supported | SD/SDHCTM (Secure Digital Card), MMCTM (MultiMedia Card), MSTM (Memory Stick) |
| Picture size supported | JPEG, max. resolution:8000*8000 pixels |
| Operating temperature | 0°C ~ +45°C |
| Dimensions | 225.5*185*22 mm |
| Weight | ~ 553 g |
| Accessory | Remote control (incl. battery), foot, mains adapter, quick guides in more languages |
SERVICE AND MAINTENANCE
Service
• To avoid risks of electric shocks please do not remove screws or the housing.
- Do not use the device in the vicinity of water. Do not expose the device to rain or moisture. Do not place any objects in the vicinity of the device that store water or any other liquids.
- Do not install this picture frame in the vicinity of heating systems, ovens or other heat emitting devices.
- Do not open the housing. Do not try to repair the device yourself. Leave any repairs to specialised personnel only.
- Avoid using your device on sandy places.
- Please do properly connect the plug of the mains adaptor to the existing opening of the DF. Thus, you can avoid electro-static charge.
- Plug in all connections correctly and safely.
- Please do not touch the display. Do not expose the display to direct sunlight.
- The picture frame only plays compatible file formats.
- Pictures might be protected by copyright law of third parties. Playing such pictures without licences might represent an infringement of such copyright laws.
- Please do not touch the DF with metallic object during operation.
- Please avoid operation on pillows, sofas or any other heat emitting home appliances since the device might overheat in such cases.
- Please do not remove memory cards while the device is reading. Otherwise this might result in abnormal system ends or loss of data.
- Please do not switch off the device with the slide show running.
- Please do not directly wrap the device after longer operating hours. Please make sure the device has cooled down properly. Otherwise the device might overheat.
• To guarantee better service this operating instruction is subject to alterations.
Device Maintenance
The Device must be switched off.
Never spray or apply liquid substances directly onto the display or the housing.
Cleaning the display / housing / frame
Clean the housing, frame and LCD display carefully with a soft cloth which is free of lint and chemicals. Only use cleaning agents which are suitable for cleaning LCD displays.
Disposal of WEEE (Waste Electrical and Electronic Equipment)
Devices marked with the WEEE logo are subject to the European Community Directive 2002/96/EC.
Waste Electrical and Electronic Equipment must be separated from household rubbish and disposed at sites that collect WEEE.
By orderly disposing WEEE you will avoid damage caused to the environment.
Istruzioni d'uso
Intenso MEDIADIRECTOR
Indice
INTRODUZIONE....1
CARATTERISTICHE GENERALI DEL PRODOTTO 2
RIEPILOGO 3
TELECOMANDO 4
INSERIMENTO DELLA BATTERIA NEL TELECOMANDO....5
I PRIMI PASSI 6
USO DI SCHEDE DI MEMORIA....7
GUARDARE UN DIASHOW....8
MENU PRINCIPALE 9
GUARDARE FOTO....10
natural_image
Simple line drawing of a rectangular frame with no text or symbolstext_image
Technical diagram of a device with labeled components and internal layout, including a central component and side view.natural_image
Line drawing of a flat-screen TV with a cable and power outlet, no text or symbols present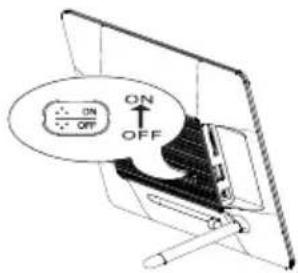
text_image
ON OFFnatural_image
Line drawing of a computer monitor with a screen and stand (no text or symbols)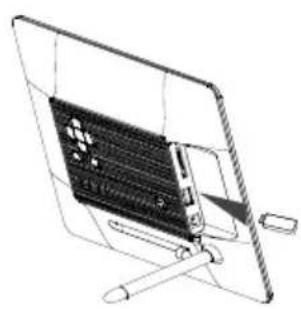
natural_image
Technical line drawing of a flat-screen electronic device with a screen and stand (no text or symbols)Avviso:
text_image
Photo Media Video Flow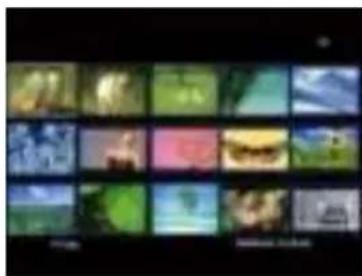
natural_image
Grid of 20 colorful square images showing natural scenes and landscapes, no text or symbols visibleAvviso:
text_image
in Photo: Be too
natural_image
Grid of colorful square images with no visible text or symbolsAvviso:
natural_image
User interface toolbar with playback, music note, refresh, audio, and navigation icons (no text or symbols)text_image
Screenshot of a software interface with menu options and navigation buttons visible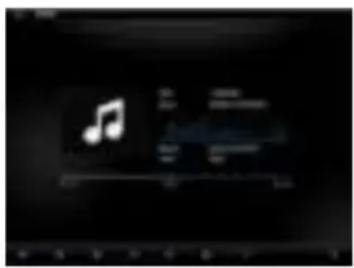
text_image
Digital music player interface showing a musical note with playback controls and track controls
natural_image
User interface bar with playback, pause, and navigation icons (no text or symbols)text_image
Screenshot of a software interface with a dropdown menu and three radio buttons labeled 'admin', 'copy', and 'create'.natural_image
Two people in conversation, one wearing a straw hat and the other in a suit, in an indoor setting (no visible text or symbols)FILE DA CARTELLA
text_image
Screenshot of a software menu with Chinese options, showing dropdown menus and keyboard shortcutsnatural_image
Two-panel image showing a sunflower on a dark background, with a circular overlay and time display (no readable text or symbols)QUESTIONS FREQUEMMENT POSEES.... 32
SPECIFICATIONS DU PRODUIT 34
SOIN ET ENTRETIEN....35
INTRODUCTION
natural_image
Simple geometric diagram of a square frame with no text or symbols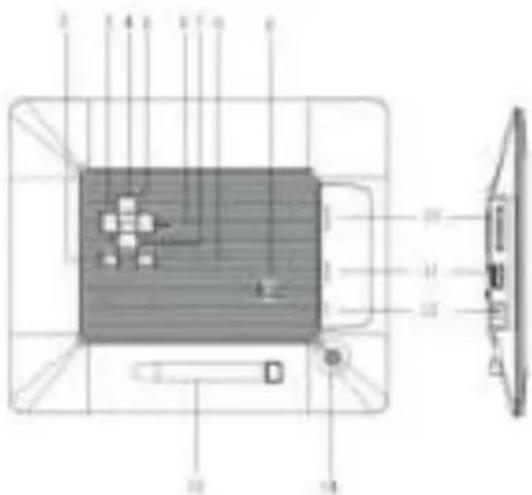
text_image
Technical diagram of a device with numbered components and labeled parts, including a central component and a side view.1 Senseur infrarouge
2 Touche Menu, ouvre le menu OSD
3 Touche Gauche [K]
4 Touche En amont [ ]
5 Touche Play/Pause [▶]
6 Touche Droite ▶]
7 Touche En aval [√]
8 Touche Stop/Fin [→]
9 Power On/Off
10 Fente de cartes SD / MMC / MS
11 Fente USB Host
12 Entrée DC 5V 1A
13 Support
14 Trou fileté pour pied support
TELECOMMANDE
natural_image
Line drawing of a flat-screen TV with a cable and power outlet, no text or symbols present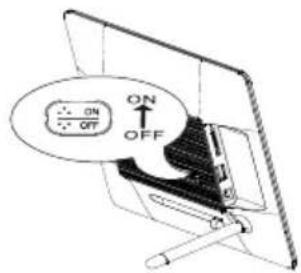
text_image
ON OFF ON OFFnatural_image
Technical line drawing of a flat-panel electronic device with a screen and antenna (no text or symbols)
natural_image
Technical line drawing of a device with a grid and stand, no visible text or symbolsRemarques :
text_image
CONTINUING OK Delete Change Deletetext_image
Photo Music Video Print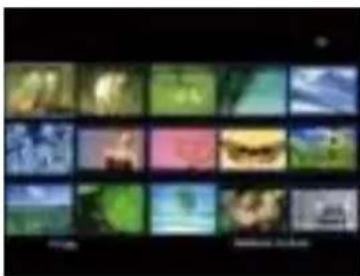
natural_image
Grid of colorful square images showing various natural scenes or objects, no visible text or symbolsRemarque :
text_image
vs. Music Buy Now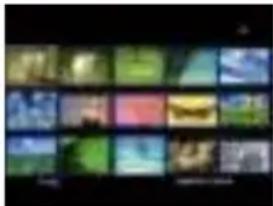
natural_image
Grid of colorful square images with no visible text or symbolsRemarque :
text_image
Screenshot of a media player control bar with playback, audio, refresh, and navigation iconstext_image
Screenshot of a software interface with menu options and buttons, likely from an older application or settings tool.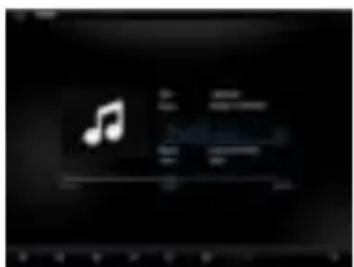
text_image
Digital music player interface showing a musical note with playback controls and track controls
natural_image
Black background with blue play button icons (no text or symbols)text_image
Screenshot of a software interface with a dropdown menu and three action buttons labeled 'OK', 'Cancel', and 'Help'.natural_image
Two people in vintage attire engaged in conversation, one wearing a hat and the other in a suit (no visible text or symbols)DOSSIER DE FICHIERS
text_image
Screenshot of a software menu with Chinese options and a dropdown list showing 'OK' and 'Cancel' buttons.QUESTIONS FREQUEMMENT POSEES
natural_image
Simple geometric diagram of a square frame with no text or symbols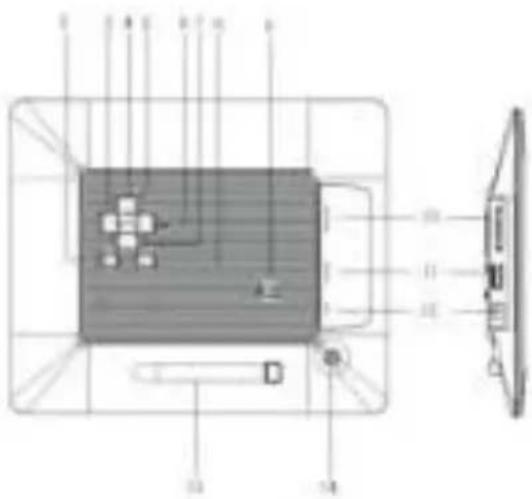
text_image
Technical diagram of a device with labeled components and directional arrows indicating assembly or orientation.natural_image
Line drawing of a flat-screen TV with a cable and an electrical outlet connected to the right (no text or symbols)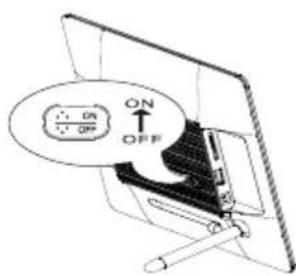
text_image
ON OFFnatural_image
Technical line drawing of a flat-panel electronic device with a screen and antenna (no text or symbols)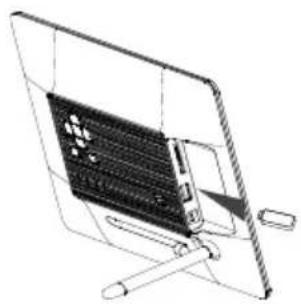
natural_image
Technical line drawing of a flat-screen monitor with a grid and stand (no text or symbols)Advertencias:
text_image
USB CMH COMPOS MEDIAtext_image
TOMATO OK Cancel Cancel CancelCONTEMPLAR FOTOS
natural_image
Grid of 20 colorful square images showing various scenes or objects, no visible text or symbolsAdvertencias:
text_image
16 Photo No no.
natural_image
Grid of colorful square images with no visible text or symbolsAdvertencias:
natural_image
User interface toolbar with playback, music note, refresh, and navigation icons (no text or symbols)text_image
Screenshot of a software interface with menu options and navigation buttons visible
natural_image
Digital audio workstation interface showing a musical note icon and playback controls (no readable text or symbols)
natural_image
User interface bar with playback, pause, and navigation icons (no text or symbols)natural_image
Two people in vintage attire, one wearing a hat and the other in a suit, engaged in conversation (no visible text or symbols)CARPETA NAVIGATION
text_image
Screenshot of a device menu with Chinese options and a highlighted blue section showing 'OK' status.natural_image
Two-panel image showing a sunflower on a dark background, with a circular overlay and a digital clock (no readable text or symbols)Mostrar calendario
text_image
Scanned image showing a calendar with Chinese text and a small photo of a person in a sun-like bloom.CONTROLE REMOTO....4
INSERINDO PILHAS NO CONTROLE REMOTO 5
PRIMEIROS PASSOS....6
natural_image
Simple geometric diagram of a square frame with no text or symbols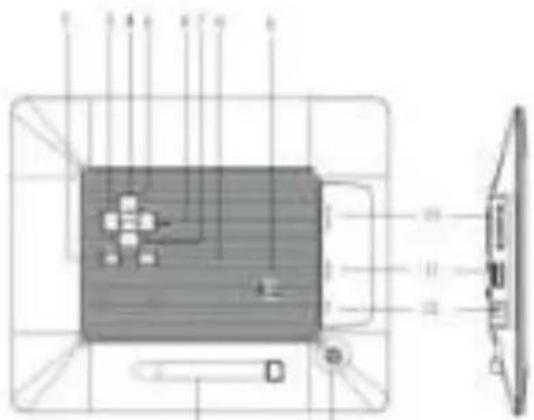
text_image
Technical diagram of a device with labeled components and internal layout, showing front and side views with numbered annotations.natural_image
Line drawing of a device with a cable and power outlet connected to a wall-mounted panel (no text or symbols)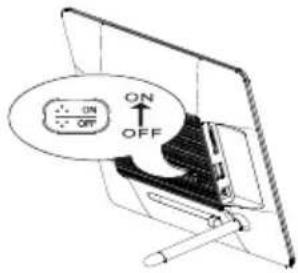
text_image
ON OFFnatural_image
Technical line drawing of a computer monitor with a screen and stand (no text or symbols)
natural_image
Line drawing of a flat-screen monitor with a grid and scroll (no text or symbols)Importante:
text_image
STRAWING OK Cancel Cancel Helptext_image
Photo Music Video Print
natural_image
Grid of colorful square images showing various natural scenes or objects, no visible text or symbolsAviso:
text_image
vs. Music Buy Now
natural_image
Grid of colorful square images with no visible text, numbers, or symbolsAviso:
natural_image
User interface toolbar with playback, audio, refresh, and navigation icons (no text or symbols)text_image
Screenshot of a software interface with Chinese text labels, likely from an older software application.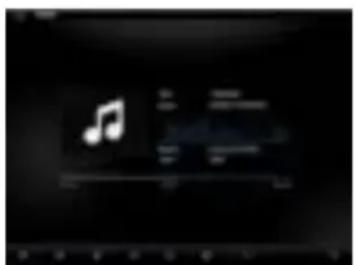
text_image
Digital music player interface showing a musical note with playback controls and track controls
natural_image
Black background with blue play button icons (no text or symbols)text_image
Screenshot of a software menu with options like 'View', 'Add', and 'Delete' in Chinese, alongside a dropdown list showing 'Close' and 'Close' keyboard shortcuts.Posso rotar as imagens no visor?
natural_image
Simple line drawing of a rectangular frame with no text or symbols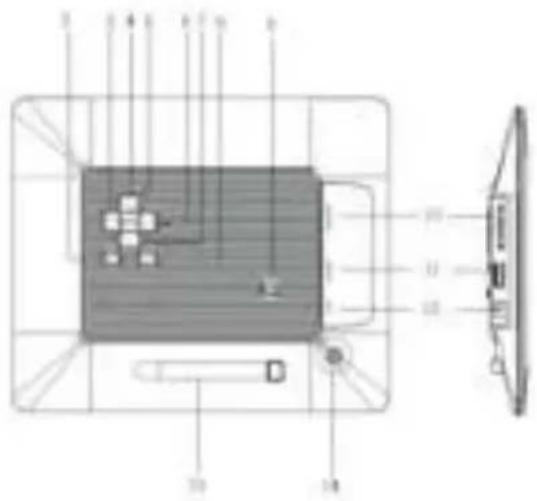
text_image
Technical diagram of a device with labeled components and directional arrows indicating flow or movement.natural_image
Line drawing of a portable electronic device with a power outlet connected to its cable (no text or symbols)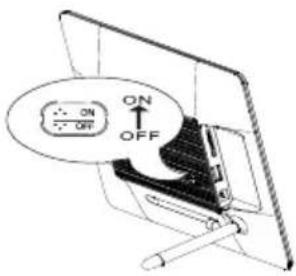
text_image
ON OFFnatural_image
Technical line drawing of a device with a screen and antenna, no visible text or symbols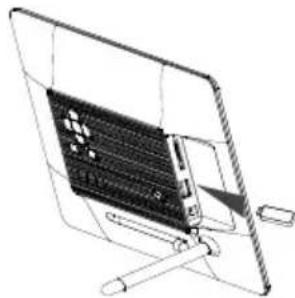
natural_image
Technical line drawing of a computer monitor with visible internal components and a scroll wheel (no text or symbols)Uwaga:
text_image
OK USB Clash Camera Printtext_image
Photo Music Video Print
natural_image
Grid of colorful square images showing natural scenes and landscapes, no text or symbols visibleUwaga:
text_image
in Pho do you.
natural_image
Grid of colorful square images with no visible text or symbolsUwaga:
text_image
Screenshot of a media player control bar with playback, audio, and refresh iconstext_image
Screenshot of a software interface with menu options and navigation buttons, likely from an older application or system.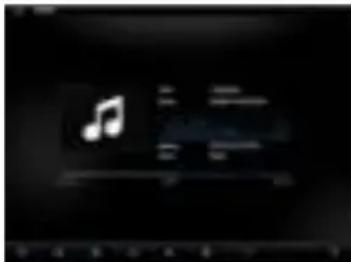
text_image
Digital music player interface showing a musical note with playback controls and status bar
natural_image
Black background with blue play and audio control icons (no text or symbols)text_image
OK Cancel OK Cancel OKKOPIOWANIE PLIKÓW
text_image
Screenshot of a software menu with Chinese options, showing dropdown menus and keyboard shortcutsnatural_image
Two black-and-white photos showing a sunflower on the left and another with a digital clock displaying time (no readable text or symbols)WYŚWIETLANIE KALENDARZA
natural_image
Simple line drawing of a square frame with no text or symbols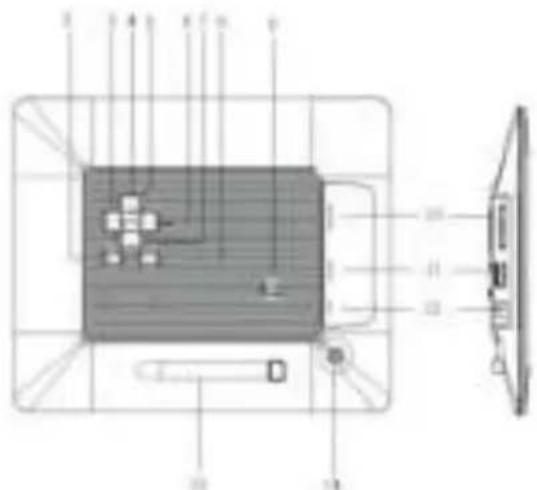
text_image
Technical diagram of a device with labeled components and internal layout, including a central component and side view.natural_image
Line drawing of a flat-screen TV with a cable and power outlet, no text or symbols present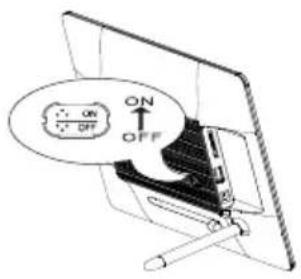
text_image
ON OFFnatural_image
Line drawing of a computer monitor with a screen and stand (no text or symbols)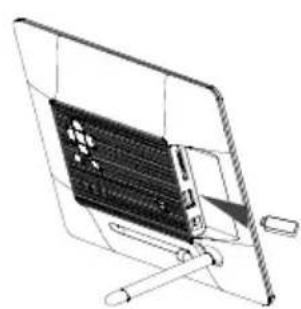
natural_image
Technical line drawing of a computer monitor with a grid screen and stand (no text or symbols)Замечание:
text_image
OK Fail Name Helptext_image
SINNENS USB Clock Calendar Setuptext_image
Photo Movie 100% 75%
natural_image
Grid of colorful square images showing various natural scenes with no visible text or symbolsЗамечание:
text_image
in Pho do you.
natural_image
Grid of colorful square images with no visible text or symbolsЗамечание:
natural_image
User interface toolbar with play, music, refresh, and navigation icons (no text or symbols)text_image
Screenshot of a software interface with menu options and buttons, likely from an older application or settings tool.
text_image
Digital music player interface showing a musical note with playback controls and track controls