
EPH1200LCD - Heating QLIMA - Free user manual and instructions
Find the device manual for free EPH1200LCD QLIMA in PDF.
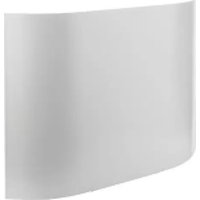
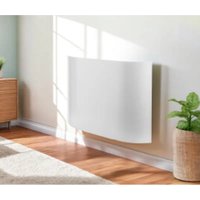
| Product type | Wall-mounted electric heater |
| Brand | Qlima |
| Model | EPH1200LCD |
| Power supply | 230 V ~ 50 Hz |
| Display | LCD with Day/Night icons and temperature |
| Timer | Programmable by day/week and evening/night (1 to 12 hours) |
| Temperature adjustment | Via + and - buttons |
| Installation | Wall-mounted (supports provided) or on floor on stable surface |
| Safety distances | 20 cm from wall, 50 cm from sides, 15 cm front and ceiling |
| Protection | Do not cover; automatic shut-off in case of overheating |
| Cleaning | Soft dry cloth or slightly damp cloth |
| Warranty | Yes, from date of purchase (see conditions) |
| Usage | Indoor use only, dry room |
| Supplied accessories | 2 wall brackets, 4 large screws, 2 small screws, 4 sealing plugs |
| Certification | CE (conforms to European standards) |
Frequently Asked Questions - EPH1200LCD QLIMA
User questions about EPH1200LCD QLIMA
0 question about this device. Answer the ones you know or ask your own.
Ask a new question about this device
Download the instructions for your Heating in PDF format for free! Find your manual EPH1200LCD - QLIMA and take your electronic device back in hand. On this page are published all the documents necessary for the use of your device. EPH1200LCD by QLIMA.
USER MANUAL EPH1200LCD QLIMA
B. MISE AU REBUT DU PRODUIT
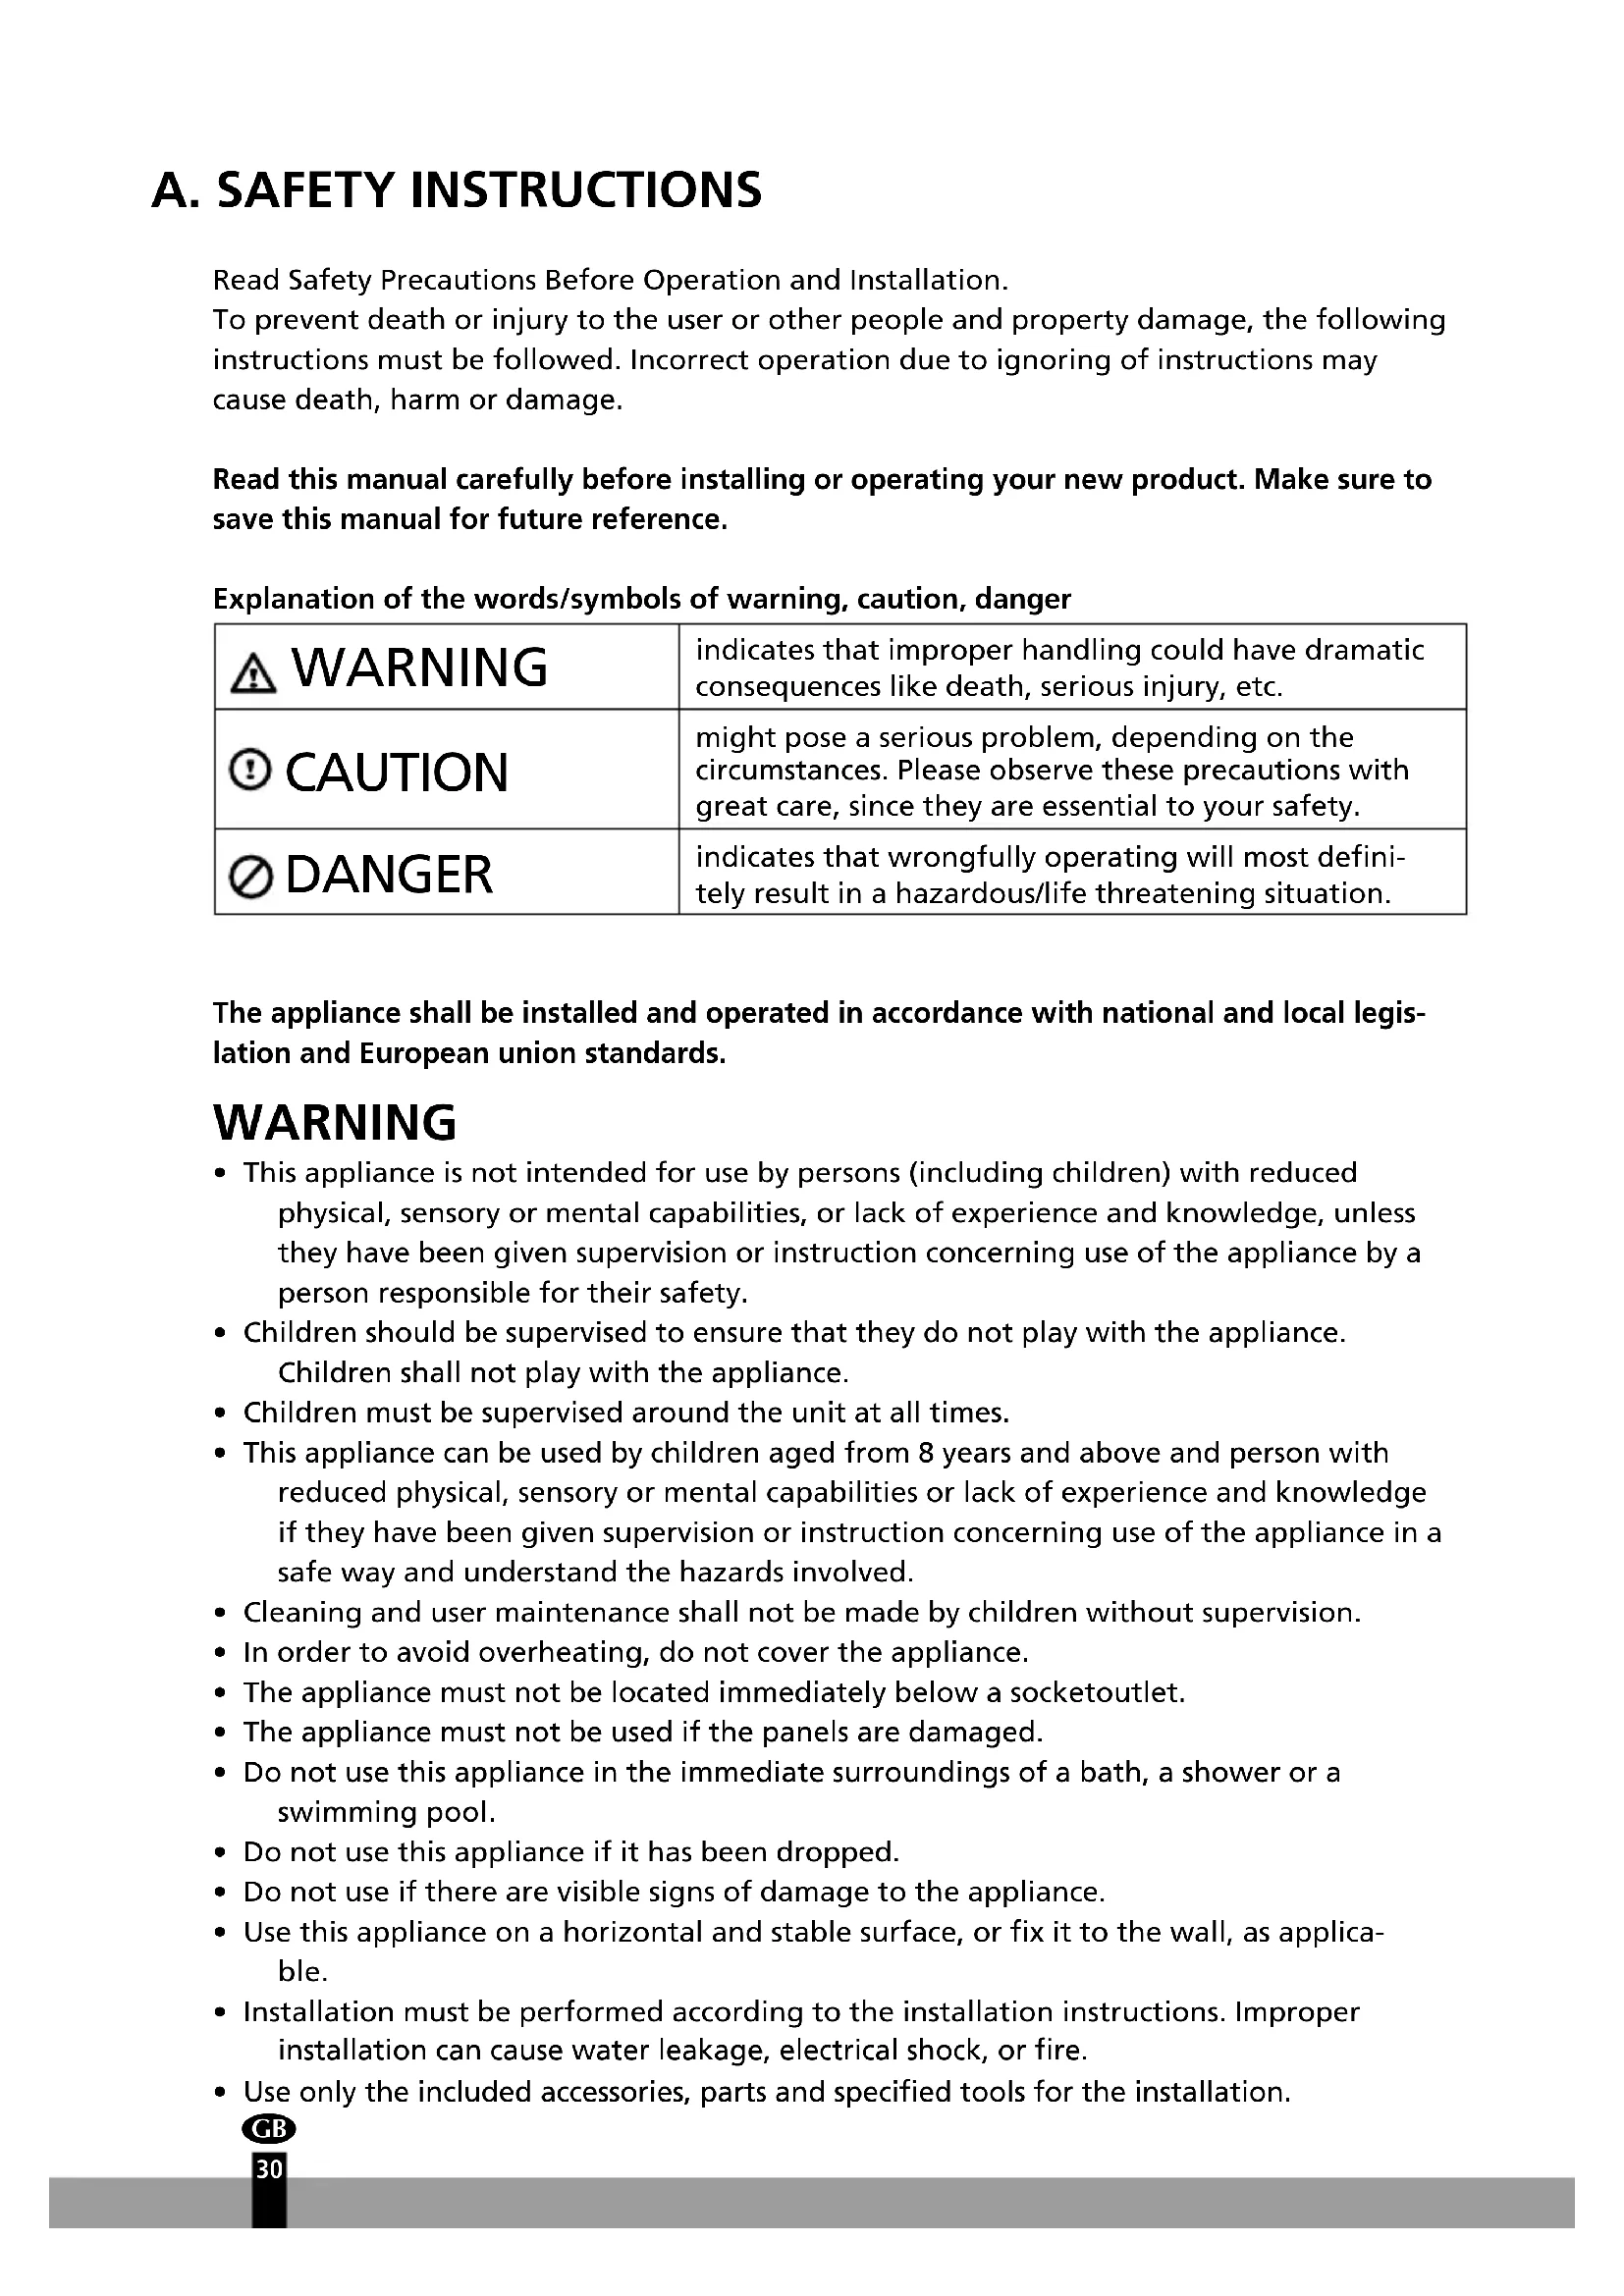
A. SAFETY INSTRUCTIONS
Read Safety Precautions Before Operation and Installation.
To prevent death or injury to the user or other people and property damage, the following instructions must be followed. Incorrect operation due to ignoring of instructions may cause death, harm or damage.
Read this manual carefully before installing or operating your new product. Make sure to save this manual for future reference.
Explanation of the words/symbols of warning, caution, danger
| WARNING | indicates that improper handling could have dramatic consequences like death, serious injury, etc. |
| Caution | might pose a serious problem, depending on the circumstances. Please observe these precautions with great care, since they are essential to your safety. |
| DANGER | indicates that wrongfully operating will most definitely result in a hazardous/life threatening situation. |
The appliance shall be installed and operated in accordance with national and local legislation and European union standards.
WARNING
- This appliance is not intended for use by persons (including children) with reduced physical, sensory or mental capabilities, or lack of experience and knowledge, unless they have been given supervision or instruction concerning use of the appliance by a person responsible for their safety.
- Children should be supervised to ensure that they do not play with the appliance. Children shall not play with the appliance.
Children must be supervised around the unit at all times. - This appliance can be used by children aged from 8 years and above and person with reduced physical, sensory or mental capabilities or lack of experience and knowledge if they have been given supervision or instruction concerning use of the appliance in a safe way and understand the hazards involved.
- Cleaning and user maintenance shall not be made by children without supervision.
- In order to avoid overheating, do not cover the appliance.
- The appliance must not be located immediately below a socketoutlet.
- The appliance must not be used if the panels are damaged.
- Do not use this appliance in the immediate surroundings of a bath, a shower or a swimming pool.
- Do not use this appliance if it has been dropped.
- Do not use if there are visible signs of damage to the appliance.
- Use this appliance on a horizontal and stable surface, or fix it to the wall, as applicable.
- Installation must be performed according to the installation instructions. Improper installation can cause water leakage, electrical shock, or fire.
-
Use only the included accessories, parts and specified tools for the installation.
-
Your unit must be used in a properly grounded wall receptacle. If the wall receptacle you intend to use is not adequately grounded or protected by a time delay fuse or circuit breaker (the fuse or circuit breaker needed is determined by the maximum current of the unit. The maximum current is indicated on the nameplate located on unit), have a qualified electrician install the proper receptacle.
- The unit must be kept free from obstruction to ensure proper function and to mitigate safety hazards.
- Do not modify the length of the power cord or use an extension cord to power the unit.
- Do not share a single outlet with other electrical appliances. Improper power supply can cause fire or electrical shock.
- The appliance is only to be used and installed in residential houses, indoors, and in a dry location. Exposure to water can cause electrical components to short circuit.
- Do not install the unit in a location that may be exposed to combustible gas, as this could cause fire.
- If the appliance has wheels to facilitate moving. Make sure not to use the wheels on thick carpet or to roll over objects, as these could cause tipping.
- Do not operate a appliance that it has been dropped or damaged. Return to an authorized service facility for examination and/or repair or discard the unit.
- Do not touch the appliance with wet or damp hands or when barefoot.
- If the appliance is knocked over during use or layed horizontally, turn off the appliance and unplug it from the main power supply immediately. Visually inspect the appliance to ensure there is no damage and wait 24 hours. If you suspect the appliance has been damaged, contact a technician or customer service for assistance.
- In a thunderstorm, the power must be cut off to avoid damage to the machine due to lightning. Your appliance should be used in such a way that it is protected from moisture. e.g. condensation, splashed water, etc. Do not place or store your appliance where it can fall or be pulled into water or any other liquid. Unplug immediately if it occurs.
- Have any repairs and/or maintenance carried out by a recognized service engineer only.
- The main voltage and frequency must be checked before installation as it must be earthed and conform the connection voltage displayed on the product rating label.
- Do not use harsh detergents, solvents, or similar items to clean the unit. Use a soft cloth for cleaning.
CAUTION
- This appliance incorporates an earth connection for functional purposes.
- If the supply cord is damaged, it must be replaced by the manufacturer, its service agent or similarly qualified persons in order to avoid a hazard.
- Prior to cleaning or other maintenance, the appliance must be disconnected from the supply mains.
- Do not run cord under carpeting. Do not cover cord with throw rugs, runners, or similar coverings. Do not route cord under furniture or appliances. Arrange cord away from traffic area and where it will not be tripped over.
- The appliance shall be installed in accordance with national wiring regulations.
- Do not cover or obstruct the inlet or outlet grilles.
-
Do not use this product for functions other than those described in this instruction manual.
-
Disconnect the power if any irregularities appear, such as strange sounds, smell or smoke.
- Only use your fingers to press the buttons on the control panel.
- Do not operate or stop the appliance by inserting or pulling out the power cord plug.
- Always transport your appliance in a vertical position and stand on a stable, level surface during use.
- Turn off the product when not in use and unplug the appliance.
- Do not use the appliance in places where the humidity level exceeds 95% .
- Do not expose the appliance to extreme heat or cold or to direct sunlight.
- Do not use the appliance outdoors.
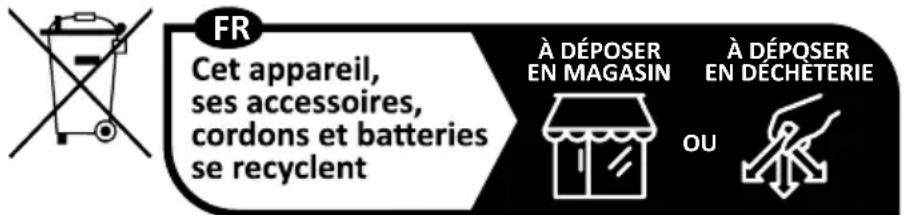
B. DISPOSING OF THE PRODUCT
In the EU this symbol indicates that this product should be disposed accordingly to the EU-WEEE legislation. Do not dispose of electrical appliances as unsorted municipal waste, use separate collection facilities. Contact your local government for information regarding the collection systems available. If electrical appliances are disposed of in landfills or dumps, hazardous substances can leak into the groundwater and get into the food chain, damaging your health and well-being. When replacing old appliances with new once, the retailer is legally obligated to take back your old appliance for disposal at least for free of charge. Please dispose any batteries according to the local collection facilities.
C. INSTRUCTIONS
This appliance is supplied with the following parts/accessoires:
| 1. 2.3. | 4. | ||
| 1 Small screw 2x | |||
| 2 Large screw 4x | |||
| 3 Screw plugs 4x | |||
| 4 Wall bracket 2x | |||
- Carefully remove the appliance from the box.
- Carefully remove all packing material, keeping it out of the reach of children.
- Place the appliance on a solid flat surface. Making sure not to damage the appliance.
-
Only install and use the appliance in a space with a minimum distance of 20cm to the wall, 50cm to the sides, and 150cm to the front side and sealing. Close to an earthed socket.
-
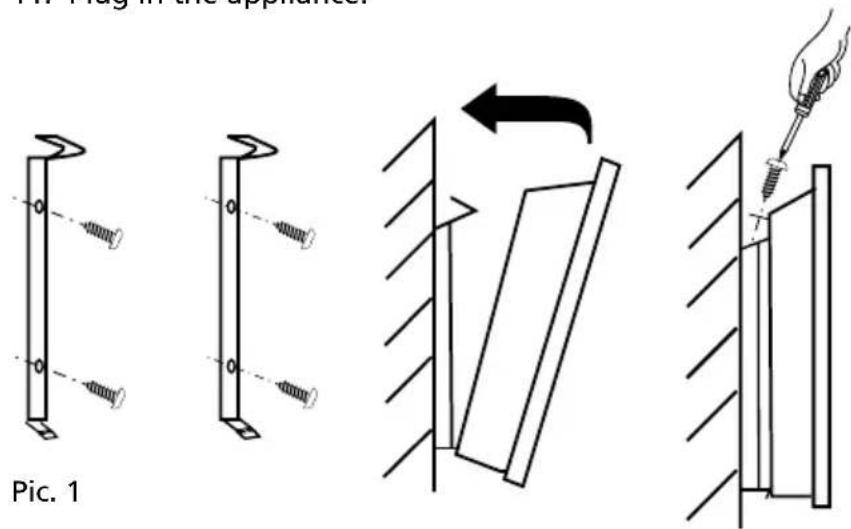
Paste the wall template in position on the wall, ensuring that the reference line is level using a spirit level.
- Use a drill to drill the two holes for each bracket, ensuring that all the holes are aligned with the template.
- Insert the wall plugs and attach the brackets. See pic. 1.
- Ensure that the brackets are securely fastened onto the wall, and that there is no risk of the unit tipping or falling.
- Carefully attach the appliance to the brackets. See pic. 1.
- Lock the up-hook with the screw. See pic. 1.
- Plug in the appliance.
D. USE
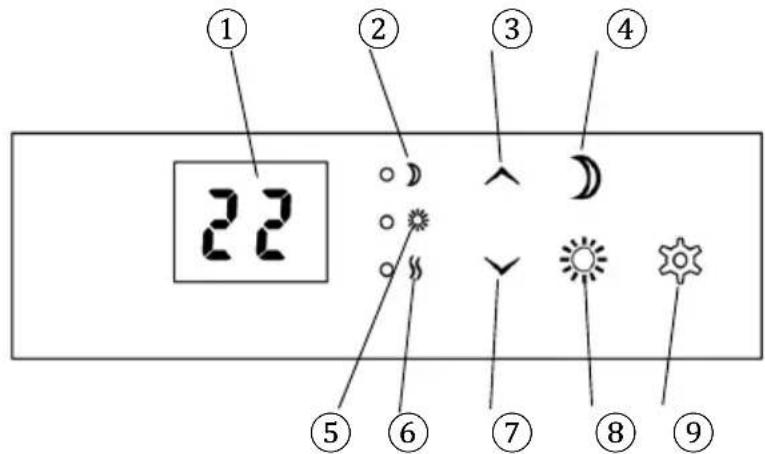
LCD PANEL
- LCD-Display
- Control light - Night function
- Control button up (increase temperature)
- Night function
- Control light - day function
- Power indicator
- Control button down (reduce temperature)
8.Dayfunction - Function button
LCD PANEL
The Night function icon can be used to enter a temperature for the evening/night. The LED near the Control light - Night function lights up during the time a setting is entered. The Day function is used to enter a temperature for daytime. The LED next to the Control Day-function lights up for the time a setting is entered. The Power indicator light comes on when the appliance starts heating according to the entered data. Use the Function button to confirm the entered data. In the LCD-display you will see the set temperature, the number of days or the amount of hours.
FIRSTUSE
- Turn on the appliance by using the ON/OFF switch on the side of the appliance.
- Check if the LCD-display lights up, it will show the set temperature.
- Use the Up-and-Down buttons on the LCD panel to set the desired temperature. The appliance will start heating towards this temperature, this can be checked by the Power indicator LED light which will turn on. If the light is not turned on, the set temperature has been reached.
- Make sure to always turn off the appliance using the ON/OFF switch when not in use.

If the appliance is unplugged, all settings will be reset.
TIMER
The appliance is fitted with a timer. This timer can be set by pressing the Day/Night-function buttons.
DAILY-WEEKLY TIMER:
- Turn on the appliance by using the ON/OFF switch on the side of the appliance.
- Check if the LCD-display lights up, it will show the set temperature.
- Press the Day function button. The LCD-display will now blink "d" for day.
- Choose the day for which you want to set the temperature. For example, 1 is Monday, 2 is Tuesday, etc. This can be done by using the Up/Down buttons.
- Press the Function button for 10 seconds to confirm the day. The LCD-display will now blink "°C" for degrees Celsius.
- Use the Up-and-Down buttons on the LCD panel to set the desired temperature.
- Press the Function button for 10 seconds to confirm the temperature. The LCD-display will now blink "H" for hours.
- Set the amount of hours between 1-12 hours. Confirm by pressing the Function button for 10 seconds.
- Check if the LED light next to the Control Day function has turned on. If it has not, please repeat the steps 1-9.
- Do not turn off the appliance by pressing the ON/OFF button or unplugging. It will delete your set timer.

You cannot set the exact start time using the timer option. The appliance times can only be switched on for 1-12 hours during the day, and 1-12 hours during the evening/night.
- Turn on the appliance by using the ON/OFF switch on the side of the appliance.
- Check if the LCD-display lights up, it will show the set temperature.
- Press the Night function button. The LCD-display will now blink "°C" for degrees Celsius.
- Use the Up-and-Down buttons on the LCD panel to set the desired temperature.
- Press the Function button for 10 seconds to confirm the temperature. The LCD-display
will now blink "H" for hours.
-
Set the amount of hours between 1-12 hours. Confirm by pressing the Function button for 10 seconds.
-
Check if the LED light next to the Control Night function has turned on. If it has not, please repeat the steps 1-7.
-
Do not turn off the appliance by pressing the ON/OFF button or unplugging. It will delete your set timer.
E. MAINTENANCE

Make sure the appliance has been turned off and if applicable detached from any energy source.
CLEANING

Only use a soft, dry cloth to wipe the appliance clean. If the appliance is especially dirty, you can use a cloth soaked in handwarm water to wipe it clean.
Before the start of the season or after the end of the season, clean the exterior surface of the appliance. Always make sure that the product is completely dry before storage or usage.
STORAGE
Store the appliance in a dry clean place. Preferably in its original packaging.
WARRANTY
The appliance is supplied with a guarantee, commencing on the date of purchase.
All material and manufacturing defects will be repaired or replaced free of charge within this period. The following rules apply:
- We expressly refuse all further damage claims, including claims for collateral damage.
- Repairs to or replacement of components within the guarantee period will not result in an extension of the guarantee.
- The guarantee is invalidated if any modifications have been made, non-genuine parts are fitted or repairs are carried out by third parties.
- Components subject to normal wear, such as filters, batteries, lamps and heating elements are not covered by the guarantee.
- The guarantee is valid only when you present the original, dated purchase invoice and if no modifications have been made.
- The guarantee is invalid for damage caused by neglect or by actions that deviate from those in this instruction booklet.
- Transportation costs and the risks involved during the transportation of the appliance or components of the appliance shall always be for the account of the purchaser
- Damage caused by not using suitable spare parts is not covered by the guarantee.
To prevent unnecessary expense, we recommend that you always first carefully consult the instructions for use. Take the appliance to your dealer for repairs if these instructions do not provide a solution.
A. SIKKERHETSINSTRUKSJONER
B. AVHENDE PRODUKTET
TIDTAKER FOR KVELD/NATT
B. HET PRODUCT AFVOEREN
B. UTYLIZACJA PRODUKTU

This appliance is supplied with the following parts/accessoires:
Distributed in Europe by PVG Holding B.V.
Benotigen Sie weitere Informationen oder treten Probleme auf, besuchen Sieitte unsere Website www.qima.com, oder setzen sie sich mit unserem Kundendienst in Verbindung (T: +31 412 694 694).
For alle yderligere oplysninger ell er ved eventuelle problemer med apparatet henvises til www.qlma.com eller det lokale Kundecenter (T: +45 77 34 33 30).
Si necesita informacion o si Tiene algo problema, visite nuestra pagina Web www.qlima.es, o pongase en contacto con el service客户提供 (T: +34 916 113 113).
Si you souhaitez obtenir des informations supplémentaires ou si you refontrez un probleme, rendez-vous sur notre site Web (www.qlima.fr / www.fr.qlima.be) ou contactez notre service client (T: +33 2 32 96 07 47 / +32 (0)3 326 39 39).
Jos haluat huoltoapua, lisatietoja tai laitteen kanssa tulee ongelmia, tutustu verkkosivustoon oositteessa www.qlima.com tai kysy neuva PVG kuluttajapalvelukesukkesta (T: +45 77 34 33 30).
If you need information or if you have a problem, please visit the our website (www.qlima.com) or contact our sales support (T: +31 412 694 694).
Per informazioni e in caso di problemi, visitate il site Web www.qlima.it appure contattate il Centro Assistenza Clienti (T: +39 0571 628 500).
Hvis du trenger informasjon, eller his du har et problem med produkt, kan du gtil nettsidene www.qlima.com. Alternativt kan du kontakte med PVG' forbrukertjeneste (T: +45 77 34 33 30).
Alu inatmatie nodig hebt of als u een probleem hebt, bezoe dan de once website (www.qima.nl / www.qima.be) of neem contact op met de adefeling sales support (T: +31 412 694 694 / +32 (0)3 326 39 39).
Se necessitar de informacoes ou se tiver problemas, visite o Web site www.qlima.es ou contacte o Centro de Assistencia (T: +34 916 113 113).
W przypadku problemów i welu uzyskania szczegolowych informacji odwiedź strone internetowej Qlima dostepnag pod adresem www.qlima.com lub skontakuj sie z Centrum kontaktow Qlima (T: +48 48 613 00 70)
Om du behover service aller information aller har problem med apparaten kan du besoka www.qlima.com eller kontakta Qlima kundtjanst (T: +45 77 34 33 30).
Ce ze lde datne informacije, obici spletno mesto podjetja na naslovu www.qlima.si aliPoklicite na telefonsko (T +386 (0)41 674 139).


- MISE AU REBUT DU PRODUIT
- SAFETY INSTRUCTIONS
- WARNING
- CAUTION
- DISPOSING OF THE PRODUCT
- INSTRUCTIONS
- USE
- LCD PANEL
- FIRSTUSE
- TIMER
- DAILY-WEEKLY TIMER:
- MAINTENANCE
- CLEANING
- STORAGE
- WARRANTY
- SIKKERHETSINSTRUKSJONER
- AVHENDE PRODUKTET
- TIDTAKER FOR KVELD/NATT
- HET PRODUCT AFVOEREN
- UTYLIZACJA PRODUKTU
- Distributed in Europe by PVG Holding B.V.
Brand : QLIMA
Model : EPH1200LCD
Category : Heating