
WS3080 - Weather Station VELLEMAN - Free user manual and instructions
Find the device manual for free WS3080 VELLEMAN in PDF.
| Product type | Wireless weather station with outdoor sensors |
| Brand | Velleman |
| Model | WS3080 |
| Dimensions (station) | 165 x 148 x 27 mm |
| Power supply (station) | 3 R6 batteries (LR6C, 1.5 V) or 6 V power adapter (not included) |
| Power supply (transmitter) | 2 rechargeable R6 batteries (1.5 V, included) |
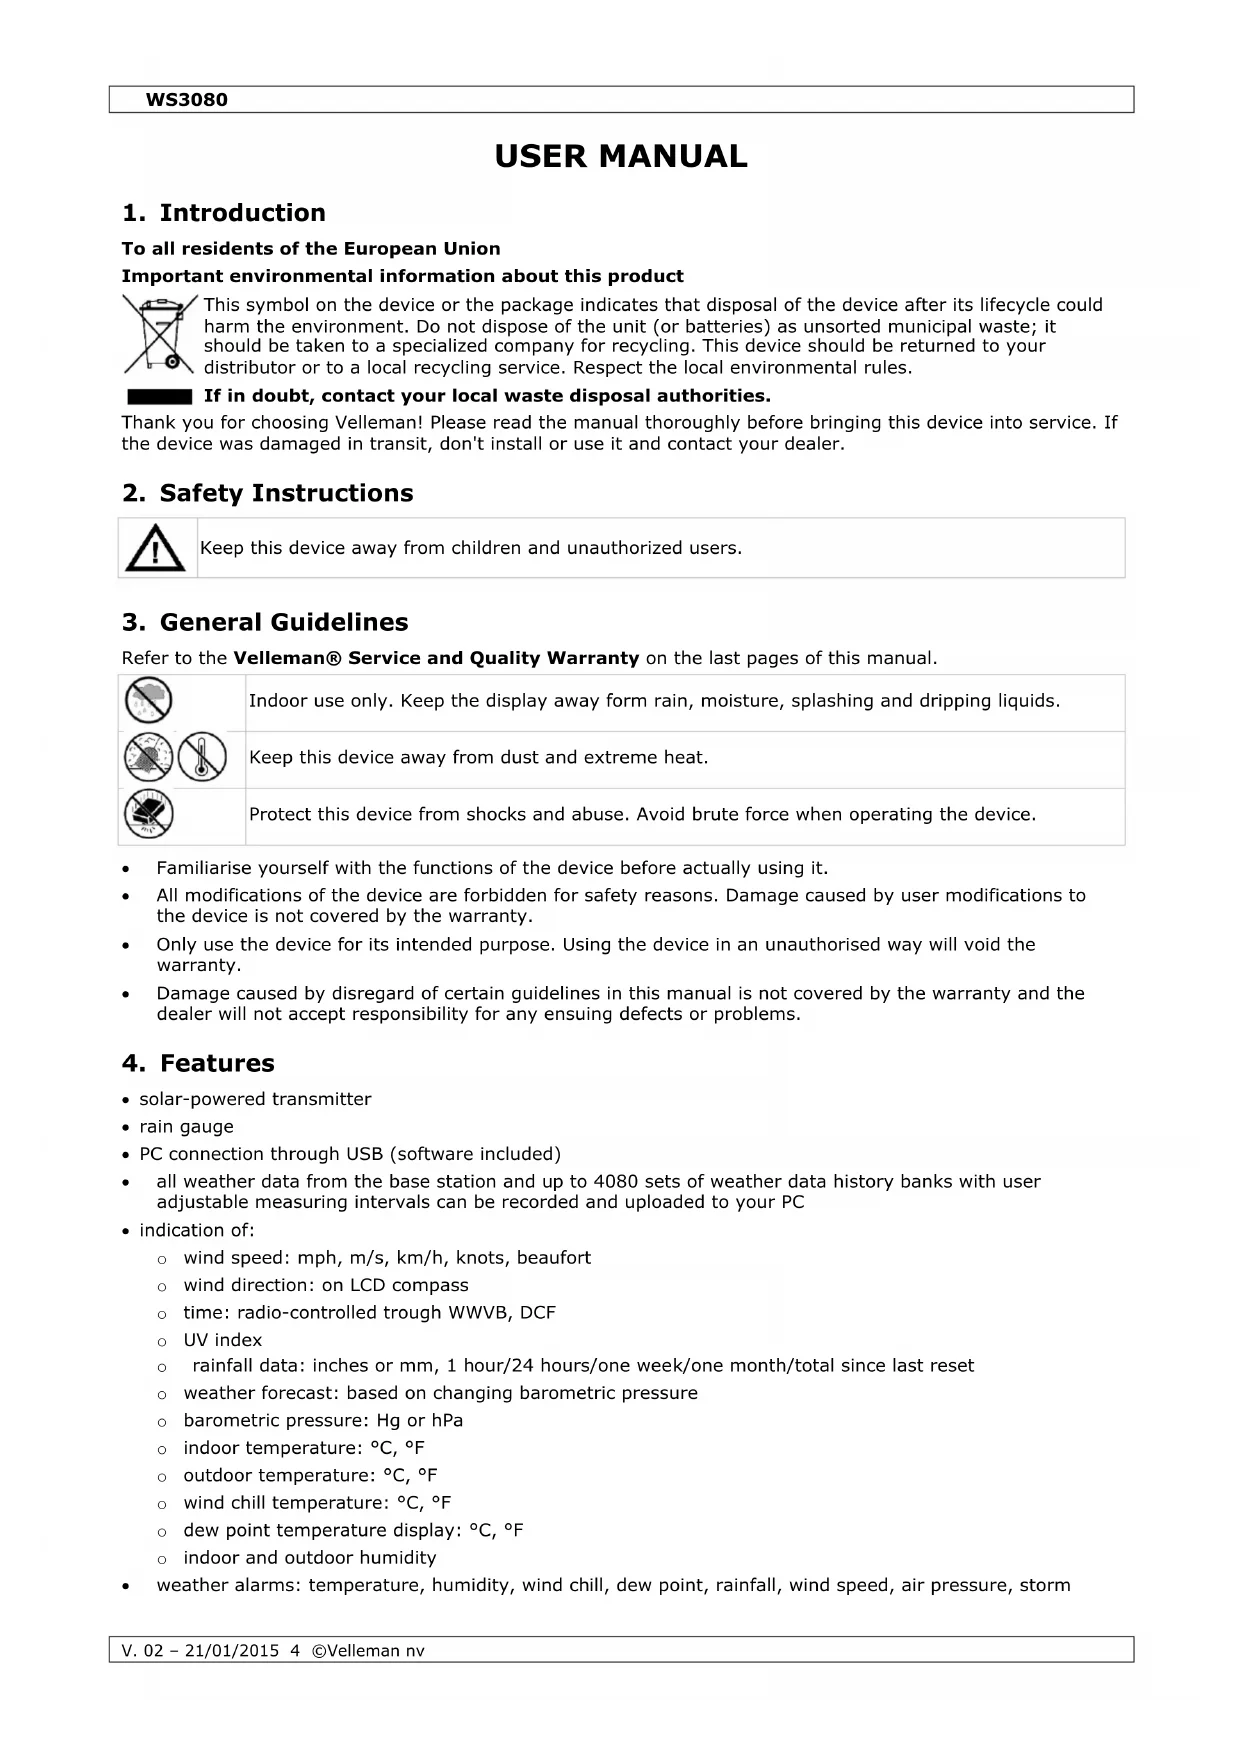
| Outdoor sensors | Anemometer, wind vane, rain gauge, thermo-hygrometer, solar panel |
| Indoor temperature range | 0 °C to 50 °C |
| Outdoor temperature range | -40 °C to 65 °C |
| Temperature accuracy | ± 1.0 °C |
| Humidity range | 1% RH to 99% RH |
| Humidity accuracy | ± 5% (under -20 °C to 65 °C, 20%-98%) |
| Wind speed range | 0 to 50.0 m/s |
| Wind speed accuracy | ± 1 m/s (<10 m/s), ± 10% (>10 m/s) |
| Rainfall range | 0 to 99,999 mm |
| Rainfall accuracy | ± 1.5 mm |
| UV index | Display from 0 to 11+ with color code (green to violet) |
| Display | LCD with LED backlight |
| Functions | Indoor/outdoor temperature, humidity, wind (speed/direction), rain, barometric pressure, weather forecast, UV index, light intensity, radio-controlled time (DCF), alarms, history |
| Connectivity | USB port for PC connection, EasyWeatherPlus software included |
| Memory | Up to 4080 entries with date/time, non-volatile EEPROM type |
| Mounting | Wall or mast mounting (clamps included) |
| Warranty | 24 months (EU consumer), detailed conditions in the manual |
Frequently Asked Questions - WS3080 VELLEMAN
User questions about WS3080 VELLEMAN
0 question about this device. Answer the ones you know or ask your own.
Ask a new question about this device
Download the instructions for your Weather Station in PDF format for free! Find your manual WS3080 - VELLEMAN and take your electronic device back in hand. On this page are published all the documents necessary for the use of your device. WS3080 by VELLEMAN.
USER MANUAL WS3080 VELLEMAN
WEATHER CENTRE WITH SOLAR TRANSMITTER AND PC INTERFACE
WEEKSTATION MET ZENDER OP ZONNE-ENERGIE EN PC-INTERFACE
STATION MÉTÉO AVEC ÉMETTEUR SOLAIRE ET INTERFACE PC
ESTACION METEORLOGÍCICA CON TRANSMISOR SOLAR E INTERFAZ PC
WETTERSTATION MIT SOLARSENDER UND PC-SCHNITTSTELLE
PROFESJONALNE CENTrum POGODOWE Z NADAJINIKIAM SŁONECZYM I
INTERFEJSEM PC
CENTRAL METEORLOGÍCIA COM TRANSMISSOR SOLAR E INTERFACE PC
USER MANUAL 4
GEBRUIKERSHANDLEIDING 17
MODE D'EMPLOI 30
MANUAL DEL USUARIO 43
To all residents of the European Union
Important environmental information about this product
This symbol on the device or the package indicates that disposal of the device after its lifecycle could harm the environment. Do not dispose of the unit (or batteries) as unsorted municipal waste; it should be taken to a specialized company for recycling. This device should be returned to your distributor or to a local recycling service. Respect the local environmental rules.

If in doubt, contact your local waste disposal authorities.
Thank you for choosing Velleman! Please read the manual thoroughly before bringing this device into service. If the device was damaged in transit, don't install or use it and contact your dealer.
2. Safety Instructions

Keep this device away from children and unauthorized users.
3. General Guidelines
Refer to the Velleman® Service and Quality Warranty on the last pages of this manual.
| Indoor use only. Keep the display away from dust and extreme heat. |
| Protect this device from shocks and abuse. Avoid brute force when operating the device. |
Familiarise yourself with the functions of the device before actually using it.
- All modifications of the device are forbidden for safety reasons. Damage caused by user modifications to the device is not covered by the warranty.
- Only use the device for its intended purpose. Using the device in an unauthorised way will void the warranty.
- Damage caused by disregard of certain guidelines in this manual is not covered by the warranty and the dealer will not accept responsibility for any ensuing defects or problems.
4. Features
- solar-powered transmitter
- rain gauge
- PC connection through USB (software included)
- all weather data from the base station and up to 4080 sets of weather data history banks with user adjustable measuring intervals can be recorded and uploaded to your PC
- indication of:
wind speed: mph, m/s, km/h, knots, beaufort
wind direction: on LCD compass
time: radio-controlled trough WWVB, DCF
UV index
- rainfall data: inches or mm, 1 hour/24 hours/one week/one month/total since last reset
weather forecast: based on changing barometric pressure
barometric pressure: Hg or hPa
indoor temperature: ^ C, F
o outdoor temperature: ^ C, OF
wind chill temperature: ^ C, F
O dew point temperature display: ^ C,^ F
indoor and outdoor humidity
-
weather alarms: temperature, humidity, wind chill, dew point, rainfall, wind speed, air pressure, storm
-
synchronized instant reception
12 or 24 hour display
perpetual calendar
time zone setting
alarm clock
LED backlight - wall mount or standing free
5. Overview
Refer to the illustrations on page 2 and 3 of this manual.
| A | upper pole | F | side support |
| B | lower pole | G | rain sensor |
| C | top support | H | solar panel |
| D | anemometer | I | sensor shelter |
| E | wind vane + direction sensor | J | thermo-hygrometer (under shelter) |
| a | MENU button | d | DOWN button (▼) |
| b | ENTER button | e | ALARM ON/OFF button(▲) |
| c | UP button (▲) | f | HISTORY button |
| 1 | Weather forecast | 10 | Outdoor reception signal |
| 2 | Barometric pressure | 11 | Outdoor humidity |
| 3 | Barometric trend | 12 | Outdoor temperature |
| 4 | Date | 13 | Wind direction |
| 5 | Memory | 14 | Wind speed/gust |
| 6 | Time | 15 | UV index |
| 7 | Indoor humidity | 16 | Rainfall |
| 8 | Indoor temperature | 17 | Light intensity |
| 9 | transmitter low battery indicator | 18 | Radio Controlled Clock (RCC) indicator |
6. Setting up the stations
- Connect the lower pole [B] with the upper pole [A].
- Place the anemometer [D] on the top support [C] and fix with a bolt and nut.
- Place the wind vane [E] on the top support [C] and fix with a bolt and nut.
- Place the top support [C] on top of the upper pole [A] and fix with a bolt and nut.
- Mount a side support [F] on the pole [A + B] and place the rain sensor [G] on top. Secure it with a screw.
- Mount the second side support [F] on the pole [A + B] .
- Place the solar panel [H] on top of the shelter [I] and secure it with a bolt and nut.
- Make all necessary connections:
Connect the anemometer [D] to the wind vane [E] phone jacket.
Connect the wind vane [E] to the thermo-hygrometer [J] WIND phone jacket (left).
Connect the rain sensor to the thermo-hygrometer [J] RAIN phone jacket (right).
-
Insert 2 × AA rechargeable batteries (incl.) into the thermo-hygrometer [J] respecting the polarity as indicated inside the casing. Only use rechargeable batteries!
-
To ensure DCF reception, immediately insert 3 × AA batteries into the receiver respecting the polarity. Refer to the section Initialization below for more information on DCF. Note that the receiver is located inside the thermo-hygrometer
- Slide the thermo-hygrometer [J] into the shelter [I].
- Place the thermo-hygrometer [J] on top of the second side support [F] and secure it with a screw.
- It is strongly recommended to test the station before mounting it outdoors.
-
Wait for the two stations to synchronize. This synchronisation may take a couple of minutes. Do not touch any button during synchronisation. Once the synchronisation finishes, make sure that all components work properly.
-
Once testing is completed, you can mount the station on an outdoor pole (not incl.) using the included clamps. Choose a suitable mounting location for the receiver. Commonly, the communication between the two stations can reach a distance of 100m in the open field, provided that there are no obstacles such as buildings, trees, vehicles, high-voltage lines, etc. Radio interference such as from PCs, radios and television sets can entirely cut off the communication. Take this into consideration when choosing a mounting location.
Notes:
- On the edges of the wind direction sensor [E] the direction is indicated ("N" = north, "E" = east, "S" = south and "W" = west). Make sure these inscriptions match the real wind direction. Use a compass (not incl.) when installing the station to position the direction sensor correctly.
- Make sure the solar panel is facing the sun to keep the transmitter batteries sufficiently charged.
7. Basic settings/operation
- Use the MENU button [a] to scroll through the available menus. Use the ENTER button [b] to select a mode or accept a value.
- Change values with the [c] or [d] button
Notes:
- Keep the [c] or [d] button pressed to increase setting speed.
- Exit the menu setting at any time by pressing the HISTORY button [f] or simply wait 30s until the receiver automatically returns to normal display.
- When not in setup, press the HISTORY button [f] to switch on the backlight for ± 10s
- All settings can also be made through the software (see §9 PC connection)
Refer to the table below for an overview of the menu and setting options.
| MENU | Mode | Description |
| Time | LCD contrast | set LCD contrast 0~8 (default = 5) |
| Time zone | set applicable time zone:-1 = GMT / 0 = GMT+1 / 1 = GMT+2 ... (default = 0) | |
| Time format | set time format 12h/24h (default = 12h) | |
| Manual time setting | set hour an minutes manually | |
| Date | display mode | select the desired display mode: day-month-seconds (default) / day-month-day of the week / alarm time |
| date/month format | select between DD-MM or MM-DD format (dM or Md) | |
| year | set year | |
| month/date | set month and date | |
| alarm time | set the alarm timePress the ALARM ON/OFF button to enable/disable the alarm. When enabled, the alarm icon appears. | |
| Pressure history | graph scale | set the bar graph scale to 12h or 24h for pressure history |
| Pressure | pressure display mode | select between relative (rel) or absolute (abs) pressure (default = absolute) |
| pressure unit | select pressure unit: hPa, mmHg or inHg (default = hPa) | |
| relative pressure | set the relative pressure level (only when relative pressure display mode was selected) | |
| high alarm | set the high alarm levelPress the ALARM ON/OFF button to enable/disable the alarm. When enabled, the alarm icon appears. | |
| low alarm | set the low alarm levelPress the ALARM ON/OFF button to enable/disable the alarm. When enabled, the alarm icon appears. | |
| reset max | (both pressure [2] and max icon (between [14] and [15]) are flashing) press and hold the ENTER button for ±3s to reset max value to current measurement | |
| reset min | (both pressure [2] and min icon (between [14] and [15]) are flashing) press and hold the ENTER button for ±3s to reset min value to current | |
| measurement | ||
| Weather forecast tendency | Refer to §8.2 for more information. | |
| tendency | select tendency | |
| pressure threshold | set threshold between 2 ~ 4 hPa (default = 2hPa) | |
| storm threshold | set threshold between 3 ~ 9 hPa (default = 4hPa) | |
| Indoor humidity | high alarm | set the high alarm levelPress the ALARM ON/OFF button to enable/disable the alarm. When enabled, the alarm icon appears. |
| low alarm | set the low alarm levelPress the ALARM ON/OFF button to enable/disable the alarm. When enabled, the alarm icon appears. | |
| reset max | (both indoor humidity [7] and max icon (between [14] and [15]) are flashing)press and hold the ENTER button for ±3s to reset max value to current measurement | |
| reset min | (both indoor humidity [7] and min icon (between [14] and [15]) are flashing)press and hold the ENTER button for ±3s to reset min value to current measurement | |
| Indoor temperature | unit mode | select °C or °F |
| high alarm | set the high alarm levelPress the ALARM ON/OFF button to enable/disable the alarm. When enabled, the alarm icon appears. | |
| low alarm | set the low alarm levelPress the ALARM ON/OFF button to enable/disable the alarm. When enabled, the alarm icon appears. | |
| reset max | (both indoor temperature [8] and max icon (between [14] and [15]) are flashing)press and hold the ENTER button for ±3s to reset max value to current measurement | |
| reset min | (both indoor temperature [8] and min icon (between [14] and [15]) are flashing)press and hold the ENTER button for ±3s to reset min value to current measurement | |
| Outdoor humidity | high alarm | set the high alarm levelPress the ALARM ON/OFF button to enable/disable the alarm. When enabled, the alarm icon appears. |
| low alarm | set the low alarm levelPress the ALARM ON/OFF button to enable/disable the alarm. When enabled, the alarm icon appears. | |
| reset max | (both outdoor humidity [11] and max icon (between [14] and [15]) are flashing)press and hold the ENTER button for ±3s to reset max value to current measurement | |
| reset min | (both outdoor humidity [11] and min icon (between [14] and [15]) are flashing)press and hold the ENTER button for ±3s to reset min value to current measurement | |
| Outdoor temperature | display mode | select whether to show outdoor temperature, wind chill or dew point on the display [12] |
| unit mode | select °C or °F | |
| high alarm | set the high alarm levelPress the ALARM ON/OFF button to enable/disable the alarm. When enabled, the alarm icon appears. | |
| low alarm | set the low alarm levelPress the ALARM ON/OFF button to enable/disable the alarm. When enabled, the alarm icon appears. | |
| the alarm icon appears. | ||
| reset max | (both outdoor temperature [12] and max icon (between [14] and [15]) are flashing) press and hold the ENTER button for ±3s to reset max value to current measurement | |
| reset min | (both outdoor temperature [12] and min icon (between [14] and [15]) are flashing) press and hold the ENTER button for ±3s to reset min value to current measurement | |
| UV index | Refer to §8.2 for more information. | |
| high alarm | set the high alarm level Press the ALARM ON/OFF button to enable/disable the alarm. When enabled, the alarm icon appears. | |
| reset max | (both UV index [15] and max icon (between [14] and [15]) are flashing) press and hold the ENTER button for ±3s to reset max value to current measurement | |
| Wind | wind speed | select between average or gust wind speed (default = average) |
| speed unit | select between km/h, mph, m/s, knots or bft (Beaufort) (default = mph) | |
| high alarm | set the high alarm level Press the ALARM ON/OFF button to enable/disable the alarm. When enabled, the alarm icon appears. | |
| direction alarm | set the wind direction alarm Press the ALARM ON/OFF button to enable/disable the alarm. When enabled, the alarm icon appears. | |
| reset max | (both wind speed [14] and max icon (between [14] and [15]) are flashing) press and hold the ENTER button for ±3s to reset max value to current measurement | |
| Light | light unit | select intensity unit between fc and lux |
| high alarm | set the high alarm level Press the ALARM ON/OFF button to enable/disable the alarm. When enabled, the alarm icon appears. | |
| reset max | (both light intensity [17] and max icon (between [14] and [15]) are flashing) press and hold the ENTER button for ±3s to reset max value to current measurement | |
| Rain | display mode | select between 1h, 24h, 1 week, 1 month or total |
| unit | select between mm and inch (default = mm) | |
| high alarm | set the high alarm level Press the ALARM ON/OFF button to enable/disable the alarm. When enabled, the alarm icon appears. | |
| reset max | (both rain value [16] and max icon (between [14] and [15]) are flashing) press and hold the ENTER button for ±3s to reset max value to current measurement | |
| reset total | (the rain value [16], TOTAL and CLE [4] are flashing) press and hold the ENTER button for ±3s to reset TOTAL value to current measurement | |
- Use the HISTORY button [f] to enter the base station memory.
Note: the default interval for data memory is 30 minutes. This interval can only be changed via the software (refer to the section PC connection). - Use the [d] button to scroll down through the memory, use the [c] to scroll up.
Note: when the end of the memory is reached, the base station returns to normal display.
To clear the complete memory, press the ENTER button [b]. The word CLE [4] and the memory indicator
[5] will start flashing. Press and hold the ENTER button [b] for ± 3s to erase the memory.
Note: to save a copy of the memory on a PC, refer to the section PC connection.
8. Operational notes
8.1 Initialization
RF connection
- When batteries are inserted into the base station, it enters RF receiving mode and tries to connect to the sensor for 144s. When connection is established, it will receive data for temperature, humidity, wind speed and rain each 48s, for light intensity each 60s. Do not press any key until outdoor data is displayed to avoid interrupting the learning process.
If reception fails 8 times in a row, connection is lost and outdoor temperature [12] and humidity [11] indicate "----". The base station enters RF receiving mode again for 144s.
To force RF receiving state manually, press and hold the [d] button for ± 4s
DCF connection
- When batteries are inserted into the thermo-hygrometer (sensor) it will first transmit weather data for 24s.
- Then it will start looking for a DCF signal for about 5 minutes. If no signal is found, it will attempt again every hour until it does. Meanwhile the time can be set manually (see §7).
- Once a signal is received, the sensor transmits the signal to the base station and the time is updated; the RCC indicator [18] is shown.
Notes:
- When your time zone is not UTC+1:00 (GMT + 1:00) you should set the time manually to ensure the time is updated correctly once DCF connection is established.
- Best reception for DCF signals is between midnight and 6:00am.
DCF principle
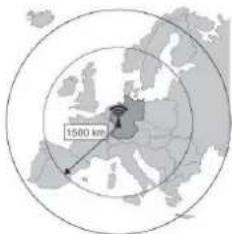
The thermo-hygrometer contains a receiver which receives a radio-signal from a radio station located at Mainflingen near Frankfurt, Germany. This long-wave radio-signal (DCF77, 77.5 kHz) is based on atomic clocks and contains time and date information. For more information refer to www.ptb.de (PTB = Physikalisch-Technische Bundesanstalt). The device automatically synchronizes with this master clock radio-signal.
Due to its nature, the radio-signal can be received indoors. However, it should be noted that the signal is weakened by the presence of concrete and metal. Therefore the clock must not be installed in concrete basements or inside metal cages. In large concrete office buildings or apartments, the clock should be located near a window for better reception. Also avoid installing the clock near strong magnetic fields or other devices that generate a lot of electrical noise (e.g. engines).


8.2 Weather forecast tendency
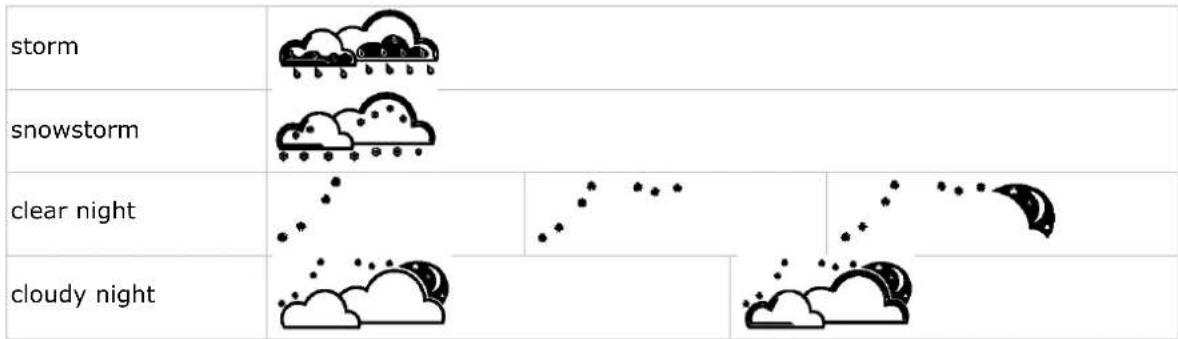
Symbol overview
| sunny | ||
| partly cloudy | ||
| cloudy | ||
| rainy | ||
| snow |
Pressure sensitivity setting
The pressure threshold for weather forecasting can be set from 2 4hPa (default 2hPa). Areas that experience frequent changes in air pressure require a higher hPa setting compared to areas where the air pressure is more stable. For example when 4hPa is selected there must be a fall or rise in air pressure of at least 4hPa to change the weather forecast icon.
Storm threshold sensitivity setting
When a dramatic change in pressure is measured the weather icons (rain and clouds) will begin to flash indicating a storm. Similar to the general pressure sensitivity setting it is possible to adjust the storm threshold sensitivity form 3 9hPa (default 4hPa). When there is a pressure drop higher that the threshold over a period of 3 hours, the storm forecasting will be activated. The clouds, rain icon and tendency arrows will flash for 3 hours indicating the storm warning feature has been activated.
8.3 UV index
| Index | intensity | description | code |
| 0 ~ 2 | low | no danger to average person | green |
| 3 ~ 5 | moderate | little risk of harm from unprotected exposure | yellow |
| 6 ~ 7 | extreme | high risk of harm from unprotected exposure | orange |
| 8 ~ 10 | high | very high risk of harm from unprotected exposure | red |
| 11+ | very high | extreme high risk of harm from unprotected exposure | violet |
Note: table based on average adult persons with pale skin and is for indication only. People with a sensitive skin or children may already suffer from UV-related problems when exposed to even low UV intensities.
8.4 Reset to factory defaults
Press and hold the button [c] for ± 20s to reset the base station to factory default settings.
Note that the memory is also cleared.
9. PC connection
The receiver can hold up to 4,080 weather data entries (with date and time) in its internal memory. This memory is non-volatile (EEPROM) and will be preserved in case of a power failure (e.g. battery replacement). When memory is full, the oldest data sets are overwritten.
It is possible to read, copy, store and print this memory data by connecting the receiver to a PC (not incl.) running the appropriate software.
9.1 Minimum system requirements
- operating system: Windows XP, Vista, 7, 8
- web browser: Internet Explorer 6.0 or higher
- processor: Pentium III, 500MHz
memory: 128MB (256MB recommended) - CD ROM drive + free USB port
9.2 Software installation
- Place the included CD ROM into the reader of a suitable computer. Do not connect the receiver yet.
- When the auto-run feature on the PC is enabled, follow the instructions on the screen. If not, open the drive, locate the file setup.exe and double click it.
Note: make sure you are logged on to the system with an administrator account when installing or running the software.
-
Select the installation language and click next.
-
Click next and select the destination folder (change directory when desired).
- Click next and the software will be installed automatically.
- Press OK to finish the installation process.
- When required, restart the computer.
- Plug the included USB cable into the USB port on the receiver (left side) and plug the other end into the USB port of the computer.
9.3 Software use
- Prior to using the software, make sure the time set on the base station and the PC is the same. This to avoid time discrepancies between actual recording time and the time shown on the PC.
- To start the EasyWeatherPlus software, go to "Start—All Programs—EasyWeatherPlus" and click on the "EasyWeatherPlus" icon.
Note: run the program under an administrator account.
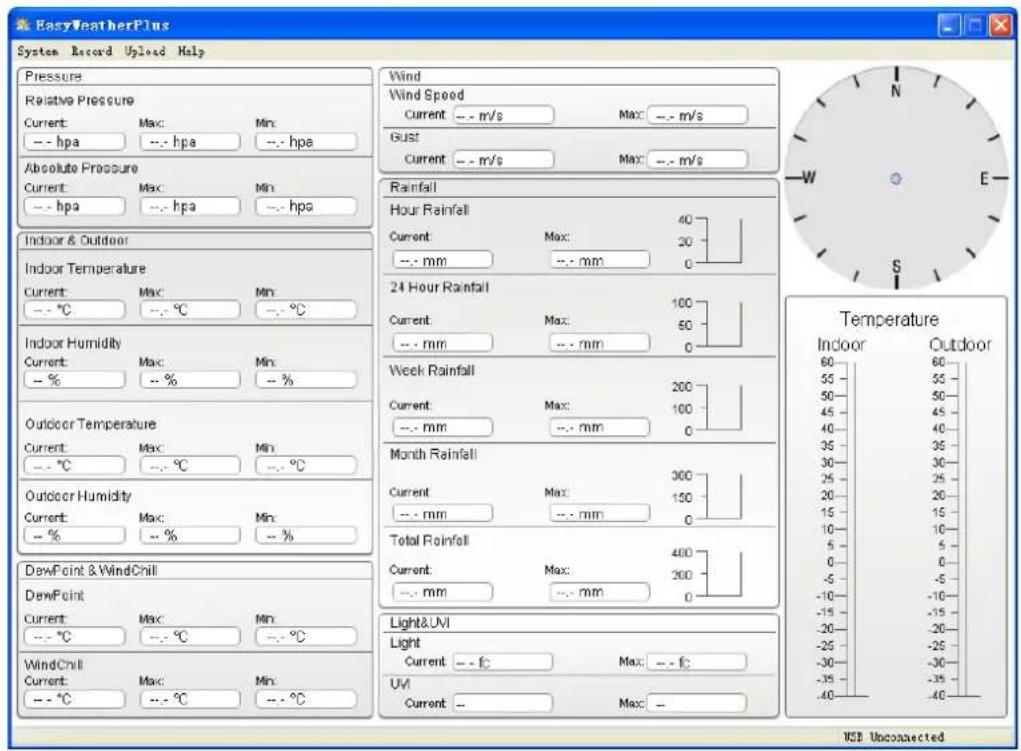
- The computer starts to download all data on the weather station. This might take a few minutes to complete. Do not attempt to change settings during this download or the data transfer will fail.
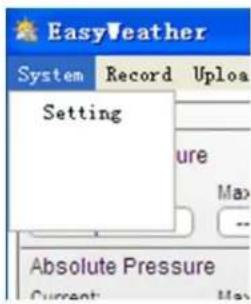
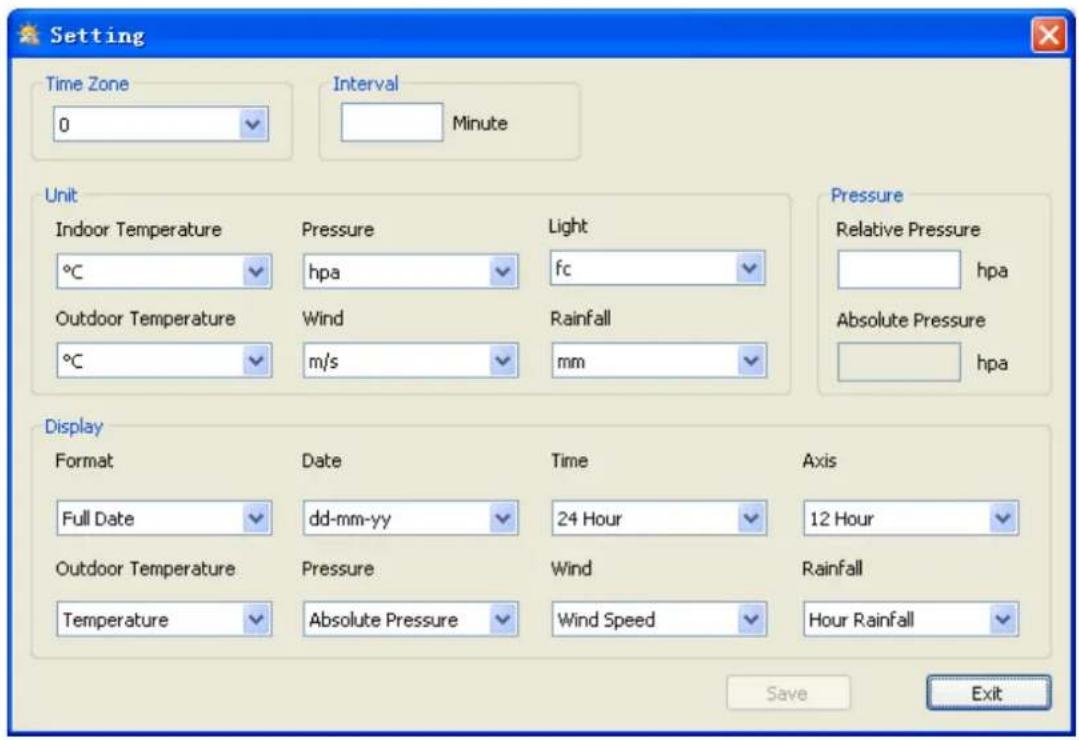
Setup
- Use this menu to change the settings of the base station and enable the alarms.
- When finished, click Save to send the data to the base station. It takes about 1 minute for the update to take effect.
Note: the interval range = 5 240 minutes
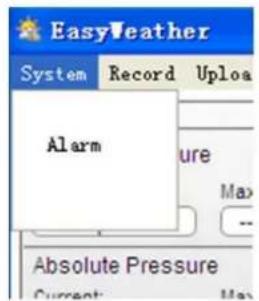
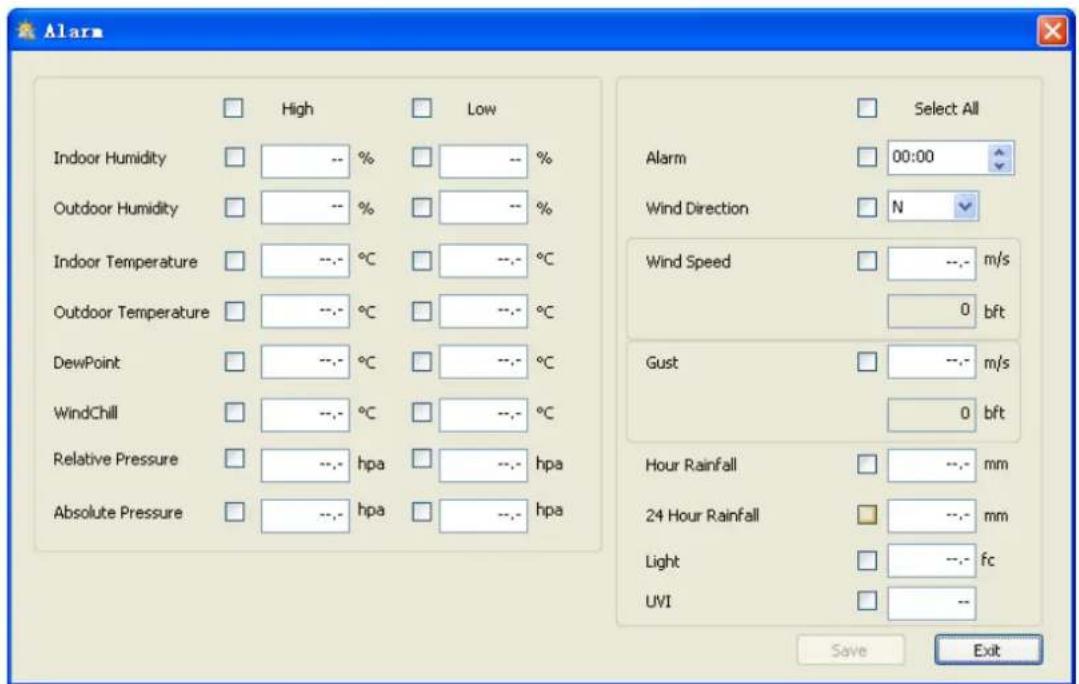
System alarm settings
- Use this menu to set the alarm limits of the base station.
- When finished, click Save to send the data to the base station. It takes about 1 minute for the update to take effect.
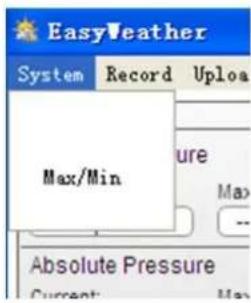
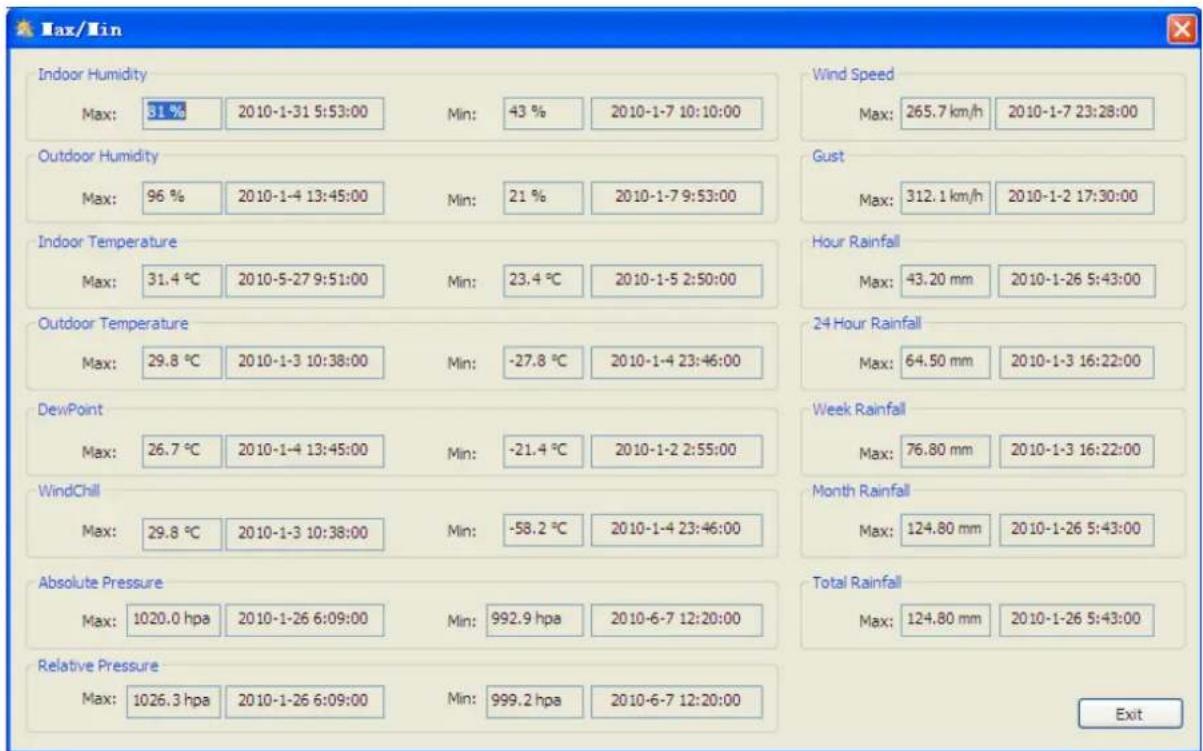
Min. and max. history values
Use this menu to review and reset minimum and maximum measured values.
- Select the desired data entries. It takes about 1 minute for the update to take effect.
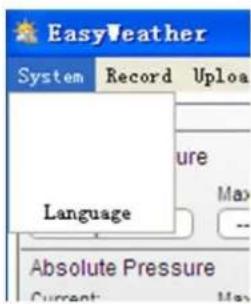
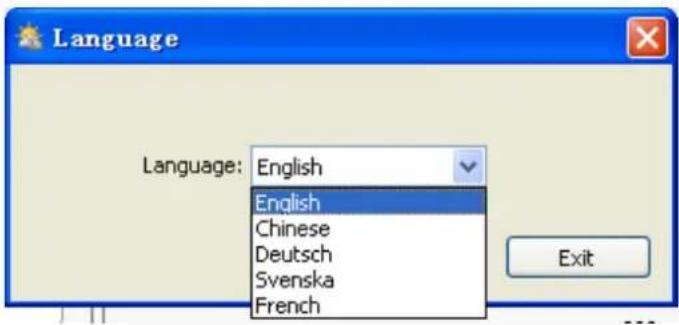
Language selection
- Use this menu to select your language.
- Select the desired language. It takes about 1 minute for the update to take effect.
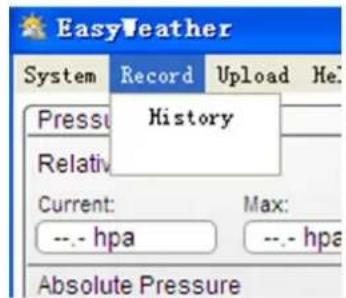
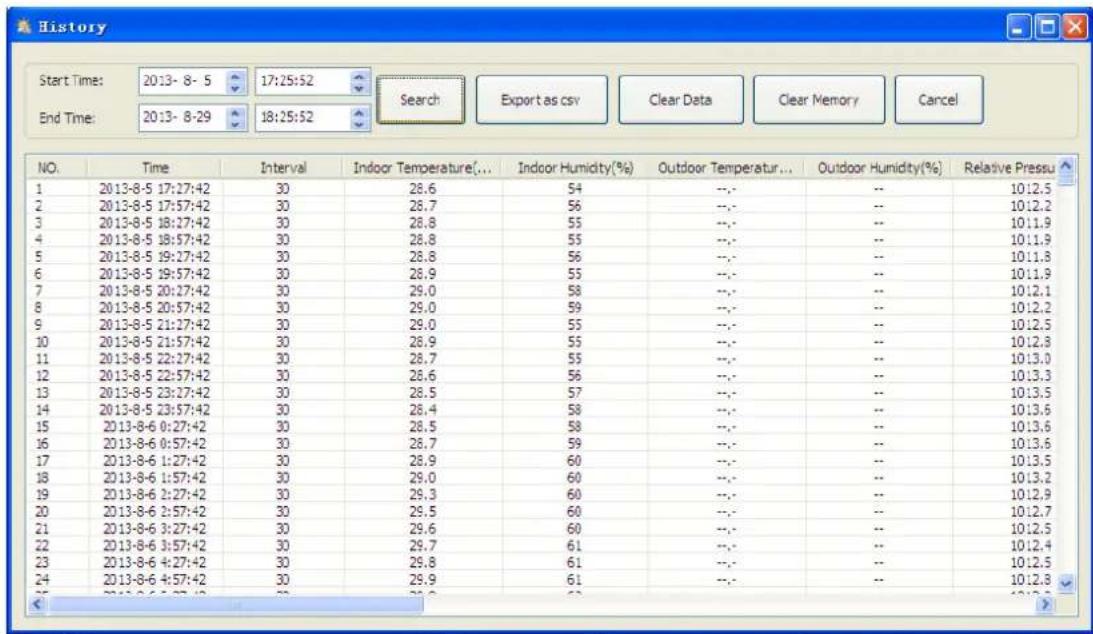
Display history
- Use this menu to see the measurement history list.
- Set the time interval (condition) in the upper left corner of the display (1 hour, 24 hours, a week, a month or user defined). When user defined is selected, set the desired start and end time.
- Click Search to retrieve the data.
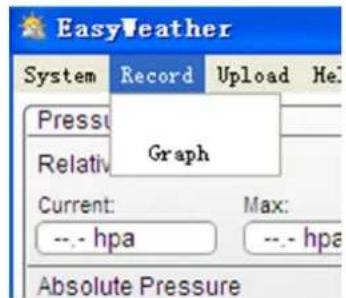
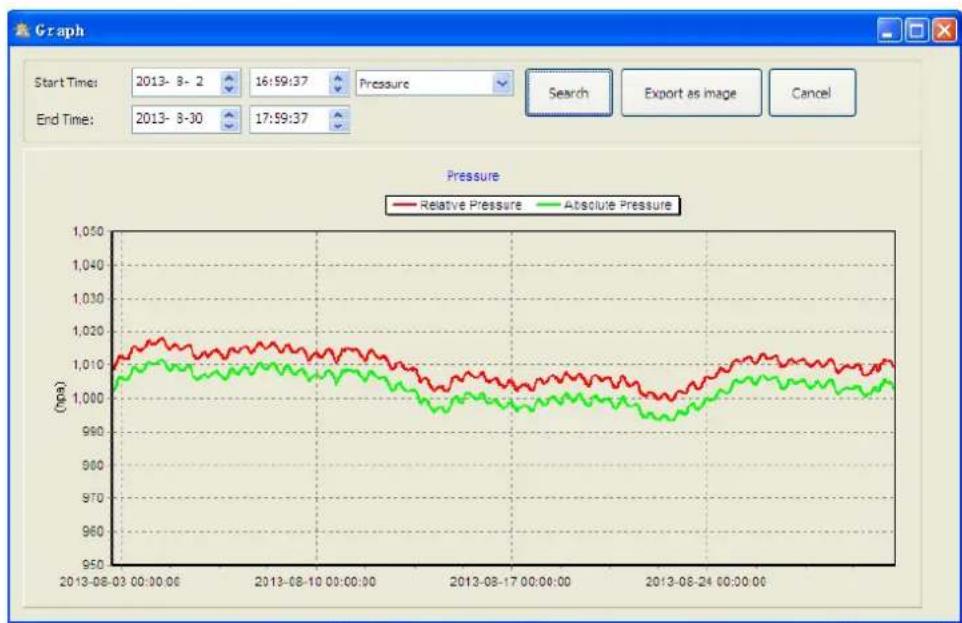
Display graph data
Use this menu to see a graphical representation of the selected data.
- Select the desired data in the drop-down list.
- Set the time interval (condition) in the upper left corner of the display (1 hour, 24 hours, a week, a month or user defined). When user defined is selected, set the desired start and end time.
- Press Export to save the graph as an image file (.JPEG format).
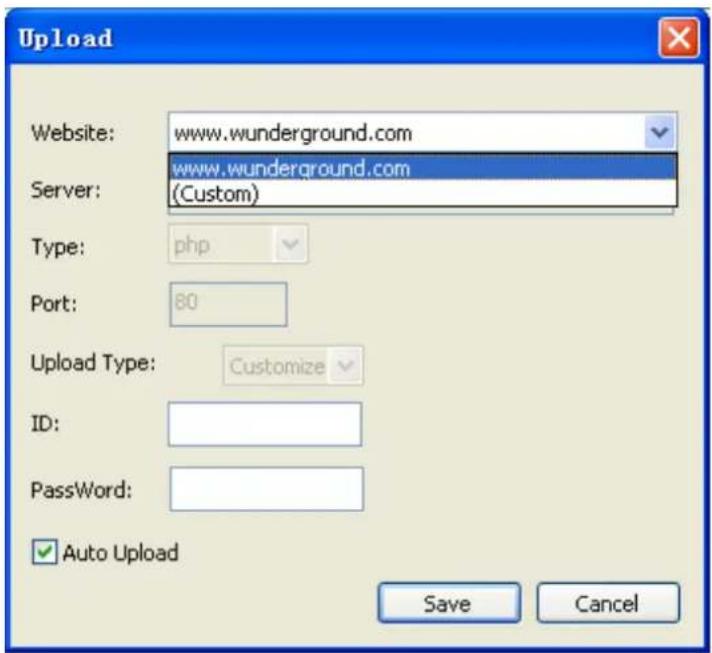
Upload data
Use this menu to upload data.
- Sign up to wunderground.com to upload data to the website.
- Select Custom to upload data to your own website.
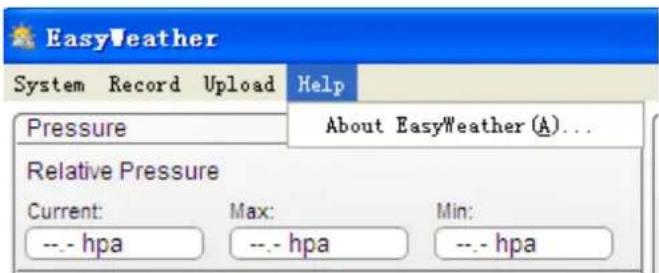
Help option
Use this option to see the release version of the EasyWeatherPlus software.
Troubleshooting
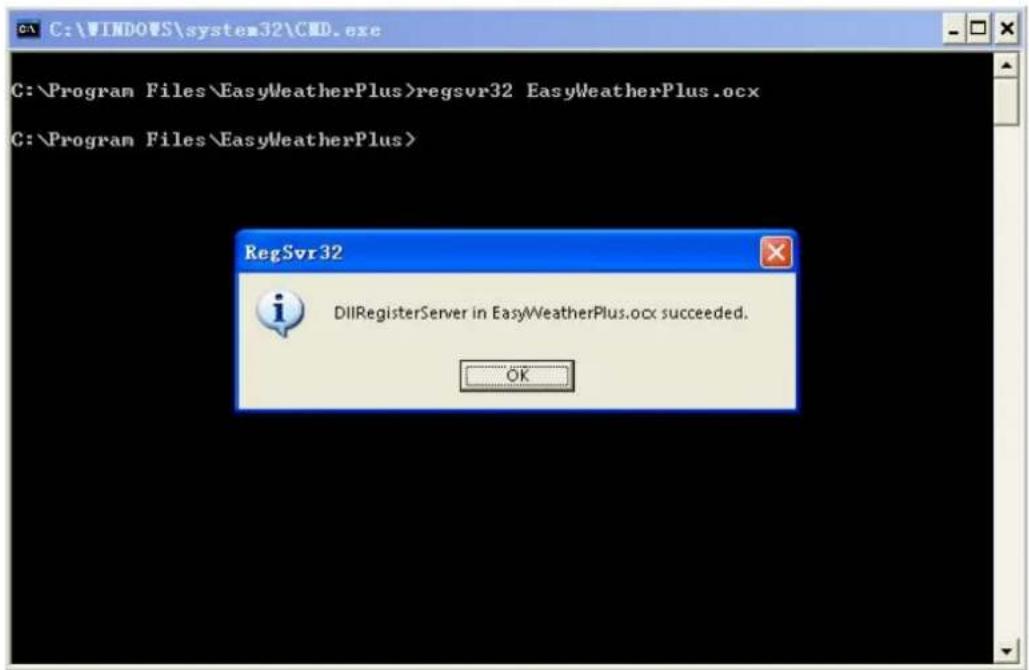
If the graph function is not working properly, perform following steps:
- Locate the folder containing "EasyWeatherPlus.exe".
- Create a text file (using notepad or WordPad) containing following line: regsvr32 easyweatherplus.ocx
- Save the file as reg_graph.bat.
- Double click the file to re-initialize the graphical driver.
10. Technical Specifications
| power supply | base station: 3 x 1.5V AA batteries (LR6C, not incl.), or 6V DC adaptor (not incl.) |
| transmitter: 2 x 1.5V AA rechargeable batteries (incl.) | |
| dimensions (base station) | 165 x 148 x 27mm |
| indoor temperature range | 0°C~50°C |
| outdoor temperature range2 | -40°C~65°C |
| temperature accuracy | ±1.0°C |
| humidity range | 1%RH-99% |
| humidity accuracy | ±5% under -20°C to 65°C & 20%-98% |
| wind speed range | 0~50.0m/s |
| wind speed accuracy | ±1m/s (wind speed <10m/s), ±10% (wind speed >10m/s) |
| rainfall range | 0~99.999mm |
| rainfall accuracy | ±1.5mm |
Use this device with original accessories only. Velleman nv cannot be held responsible in the event of damage or injury resulting from (incorrect) use of this device. For more info concerning this product and the latest version of this manual, please visit our website www.velleman.eu. The information in this manual is subject to change without prior notice.
All registered trademarks and trade names are properties of their respective owners and are used only for the clarification of the compatibility of our products with the products of the different manufacturers. Windows, Windows XP, Windows 2000, Windows Vista, Windows Aero, Windows 7, Windows 8, Windows Mobile, Windows Server are registered trademarks of Microsoft Corporation in the United States and other countries.
© COPYRIGHT NOTICE
The copyright to this manual is owned by Velleman nv. All worldwide rights reserved. No part of this manual may be copied, reproduced, translated or reduced to any electronic medium or otherwise without the prior written consent of the copyright holder.
GEBRUIKERSHANDLEIDING
1. Inleiding
System alarm settings
Declare on our own responsibility that the finished product(s):
constituting the subject of this declaration, conforms with the essential requirements and other relevant stipulations of the R&TTE Directive (1999/5/EC).
Technical data are available and can be obtained from :
Gavere, December 7th 2010
Authorised signatory for the company / Bevoegde ondertekenaar voor de firma / Signataires autorise(e) de la société / bevollmachtigte Person/ Responsible de la entreprise / Responsavel da entreprise / Osoba upoważniona do podpisu w imieniu firmy:
Vince Van Balberghe - Quality Manager

EN
Velleman® Service and Quality Warranty
Since its foundation in 1972, Velleman® acquired extensive experience in the electronics world and currently distributes its products in over 85 countries. All our products fulfil strict quality requirements and legal stipulations in the EU. In order to ensure the quality, our products regularly go through an extra quality check, both by an internal quality department and by specialized external organisations. If, all precautionary measures notwithstanding, problems should occur, please make appeal to our warranty (see guarantee conditions).
General Warranty Conditions Concerning Consumer Products (for EU):
-
All consumer products are subject to a 24-month warranty on production flaws and defective material as from the original date of purchase.
-
Velleman® can decide to replace an article with an equivalent article, or to refund the retail value totally or partially when the complaint is valid and a free repair or replacement of the article is impossible, or if the expenses are out of proportion.
You will be delivered a replacing article or a refund at the value of 100% of the purchase price in case of a flaw occurred in the first year after the date of purchase and delivery, or a replacing article at 50% of the purchase price or a refund at the value of 50% of the retail value in case of a flaw occurred in the second year after the date of purchase and delivery.
Not covered by warranty:
- all direct or indirect damage caused after delivery to the article (e.g. by oxidation, shocks, falls, dust, dirt, humidity...), and by the article, as well as its contents (e.g. data loss), compensation for loss of profits:
- consumable goods, parts or accessories that are subject to an aging process during normal use, such as batteries (rechargeable, non-rechargeable, built-in or replaceable), lamps, rubber parts, drive belts... (unlimited list);
- flaws resulting from fire, water damage, lightning, accident, natural disaster, etc...
- flaws caused deliberately, negligently or resulting from improper handling, negligent maintenance, abusive use or use contrary to the manufacturer's instructions;
- damage caused by a commercial, professional or collective use of the article (the warranty validity will be reduced to six (6) months when the article is used professionally);
- damage resulting from an inappropriate packing and shipping of the article;
- all damage caused by modification, repair or alteration performed by a third party without written permission by Velleman®.
- Articles to be repaired must be delivered to your Velleman® dealer, solidly packed (preferably in the original packaging), and be completed with the original receipt of purchase and a clear flaw description.
- Hint: In order to save on cost and time, please reread the manual and check if the flaw is caused by obvious causes prior to presenting the article for repair. Note that returning a non-defective article can also involve handling costs.
- Repairs occurring after warranty expiration are subject to shipping costs.
- The above conditions are without prejudice to all commercial warranties.
The above enumeration is subject to modification according to the article (see article's manual).
NL


- To all residents of the European Union
- Safety Instructions
- General Guidelines
- Features
- Overview
- Setting up the stations
- Notes:
- Basic settings/operation
- Operational notes
- Initialization
- RF connection
- DCF connection
- DCF principle
- Weather forecast tendency
- Symbol overview
- Pressure sensitivity setting
- Storm threshold sensitivity setting
- UV index
- Reset to factory defaults
- PC connection
- Minimum system requirements
- Software installation
- Software use
- Setup
- System alarm settings
- Min. and max. history values
- Language selection
- Display history
- Display graph data
- Upload data
- Help option
- Troubleshooting
- Technical Specifications
- © COPYRIGHT NOTICE
- GEBRUIKERSHANDLEIDING
- Inleiding
- EN
- Velleman® Service and Quality Warranty
- General Warranty Conditions Concerning Consumer Products (for EU):
- Not covered by warranty:
- NL
Brand : VELLEMAN
Model : WS3080
Category : Weather Station