KW 3052 - Scale CLATRONIC - Free user manual and instructions
Find the device manual for free KW 3052 CLATRONIC in PDF.

User questions about KW 3052 CLATRONIC
0 question about this device. Answer the ones you know or ask your own.
Ask a new question about this device
Download the instructions for your Scale in PDF format for free! Find your manual KW 3052 - CLATRONIC and take your electronic device back in hand. On this page are published all the documents necessary for the use of your device. KW 3052 by CLATRONIC.
USER MANUAL KW 3052 CLATRONIC
Overview of the Components.. 3
7 Instruction Manual. Page 24
Technical Data 25
8 Guarantee
FRANÇAIS
JEZYK POLSKI
Sommaire
Listedesifferentéselementsdecommande.. Page3
Mode d'emploi.. 10
General Safety Instructions
Read the operating instructions carefully before putting the appliance into operation and keep the instructions including the warranty, the receipt and, if possible, the box with the internal packing.
- The appliance is designed exclusively for private use and for the envisaged purpose. This appliance is not fit for commercial use. Do not use it outdoors (except if it is designed to be used outdoors). Keep it away from sources of heat, direct sunlight, humidity (never dip it into any liquid) and sharp edges. Do not use the appliance with wet hands. If the appliance is humid or wet, unplug it immediately. Do not put it in water.
- When cleaning or putting it away, switch off the appliance and always pull out the plug from the socket (pull on the plug, not the cable) if the appliance is not being used and remove the attached accessories.
- Do not operate the machine without supervision. If you should leave the workplace, always switch the machine off or remove the plug from the socket (pull the plug itself, not the lead).
- Check the appliance and the cable for damage on a regular basis. Do not use the appliance if it is damaged.
- Do not try to repair the appliance on your own. Always contact an authorized technician. To avoid the exposure to danger, always have a faulty cable be replaced only by the manufacturer, by our customer service or by a qualified person and with a cable of the same type.
- Use only original spare parts.
- Pay careful attention to the following "Special Safety Instructions".
Children
- In order to ensure your children's safety, please keep all packaging (plastic bags, boxes, polystyrene etc.) out of their reach.
Caution! Do not allow small children to play with the foil as there is a danger of suffocation!
- To protect children from the dangers posed by electrical appliances, make sure that the cable is hanging low and that children do not have access to the appliance.
Special Safety Instructions for this Machine
- The device is intended exclusively for private and not for commercial use!
- Do not repair the device yourself, but rather consult an authorised expert.
- Use the device only for the intended purpose.
- Please do not immerse your kitchen scales in water.
- The kitchen scales are designed for a maximum weight of 3 kg.
- Absolutely no need for maintenance.
- Protect this measuring device against direct sunlight, high temperatures, humidity and dust.
Overview of the Components
| 1 | TIME |
| 2 | °C |
| 3 | TARE/ON |
| 4 | UNIT |
| 5 | LCD |
| 6 | COUNTDOWN |
| 7 | Temperature |
| 8 | Time |
| 9 | Weighing |
| button |
| °F |
| buttc |
| button |
| display |
| di |
| surfa |
Inserting the batteries
- Open the battery compartment on the back.
- Insert 3 batteries of type AM4 ,AAA" 1,5V. Please ensure that the polarity is correct (see the floor of the battery compartment)!
- Close the battery compartment again.
- If the device is not used for a prolonged period of time, please take the batteries out in order to prevent leakage of battery acid.
- A battery symbol in the display indicates that the battery should be replaced.
- Different battery types or new and used batteries must not be used together.
Warning: batteries are not to be disposed of together with domestic wastes. Dispose of the used batteries at the relevant collection bin or at your dealer's.
Never throw batteries into the fire.
Wall Installation
Note: Before initial use please install the device on the wall.
- With the help of the attachment material supplied please attach the kitchen scales to the wall. Hang up the scales where you can use them easily and safely.
- First install the mounting plate, using the plate to help you mark its position. Line the mounting plate up with the help of a spirit level and mark the three holes on the wall. Drill three holes this distance apart, ensuring beforehand that you are not damaging any wires or pipes hidden in the wall!
- Suspend the kitchen scales in the mounting plate (4 hooks) and press them downwards until they lock in place.
Use
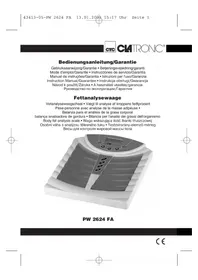
The kitchen balance was developed to display the weight of food and ingredients.
Setting the Time (12 h)
- Press the TARE/ON (3) button to switch the device on in the weighing mode. The display shows 0^ . Every press of a button is confirmed by a beep.
- In order to set the minutes, keep the TIME button (1) pressed down until the minutes display begins to fl ash.
-
When the ^ C F button (2) or the UNIT button (4) is pressed once, the display jumps forwards or backwards by one minute. Keeping the buttons pressed down starts the rapid advance function until the desired time is reached.
-
When the TIME button (1) is pressed again, the hours begin to flash. Press the ^ C F (2) button or the UNIT (4) button until the desired hour figure has been reached. Keeping the buttons pressed down starts the rapid advance function until the desired time is reached.
- To store the time press the TIME button again. The time in the display (5) stops fl ashing.
Changing from Celsius (^) to Fahrenheit (^)
By pressing the ^ C F button (2) you can switch between the temperature display in ^ C (Celsius) and ^ F (Fahrenheit).
UNIT
By pressing the UNIT button in the weighing mode you can select between grams (g) and ounces (oz).
Countdown Timer Function
- To set the timer, please press the TIME button (1) briefly. The minute figure begins to fl ash.
- If the ^ C F button (2) or the UNIT button (4) is pressed once, the display moves forwards or backwards by one minute. Keeping the buttons pressed down starts the rapid advance function until the desired time is reached. When the TIME button is pressed the countdown begins.
- Once 00'00'' has been reached an acoustic signal is heard, which switches off automatically after approximately 30 seconds. The signal can be interrupted with the TIME button. The timer can be set in steps of one minute up to 99 minutes.
Weighing Function
- Fold the weighing surface downwards.
- Press the TARE/ON (3) button to switch the device on. The display shows .0 g" or .0,0 oz".
- Place the item to be weighed on the glass surface. The weight is now shown. If further ingredients are placed on the weighing surface the weights are added together.
- If you would like to use an appropriate vessel, place it on the glass surface and then press the TARE/ON button; the display is set to 0. If the vessel is filled, only the weight of the ingredient is shown.
Weigh-in Function (TARE)
If you would like to weigh further ingredients for example, use the weigh-in function.
- Press the TARE/ON button again.
- Now put a further ingredient on the weighing surface. The actual weight of the second ingredient is now shown in the display. Repeat this procedure if necessary.
- If the scales are not being used, the display (5) changes back to the time automatically after about 30 seconds in order to prolong battery life, or you can keep the TARE/ON button pressed down for approx. 3 sec. Fold the weighing surface upwards.
Handle the balance with care. It is a precision measuring instrument. Do not make it fall and do not load it beyond the maximum weight.
Do not load the appliance with more than 3kg to avoid damaging the device.
If the letters "Eeee" appear, the weight is above 3kg
Cleaning
- Do not immerse the balance in water: the electronic components can be damaged.
- Only use a slightly damp cloth to clean the outside of the unit.
- For simple cleaning remove the glass surface from the mounting in an anticlockwise direction. Use a commercially sold detergent or soap for cleaning. The glass plate is not dishwasher proof.
- Do not use abrasive or aggressive cleaners.
- Dry the device well after cleaning with a dry and soft cloth.
Technical Data
Model: KW3052
Power supply: DC 4.5 V (3 x 1.5V, AAA batteries)
Max. weight load: 3 kg
This device has been tested according to all relevant current CE guidelines, such as electromagnetic compatibility and low voltage directives, and has been constructed in accordance with the latest safety regulations.
Subject to technical changes without prior notice!
Guarantee
The device supplied by our Company is covered by a 24 month guarantee starting on the date of purchase (receipt).
During the life of the guarantee any fault of the device or its accessories ascribable to material or manufacturing defects will be eliminated free of charge by repairing or, at our discretion, by replacing it. The guarantee services do not entail an extension of the life of the guarantee nor do they give rise to any right to a new guarantee!
Proof of the guarantee is provided by the proof of purchase. Without proof of purchase no free replacement or repair will be carried out.
If you wish to make a claim under the guarantee please return the entire machine in the original packaging to your dealer together with the receipt.
Defects to consumables or parts subject to wearing as well as cleaning, maintenance or the replacement of said parts are not covered by the guarantee and hence are to be paid!
The guarantee lapses in case of unauthorized tampering.
After the expiry of the guarantee
After the expiry of the guarantee repairs can be carried by the competent dealer or repair service against the payment of the ensuing costs.
Meaning of the "Dustbin" Symbol
Protect our environment: do not dispose of electrical equipment in the domestic waste.
Please return any electrical equipment that you will no longer use to the collection points provided for their disposal.
This helps avoid the potential effects of incorrect disposal on the environment and human health.
This will contribute to the recycling and other forms of reutilisation of electrical and electronic equipment.
Information concerning where the equipment can be disposed of can be obtained from your local authority.
3NeKtponntaHHe:DC4,5B(36aTapeKn no 1,5B,AAA"
Makc. Becobar Harpy3ka: 3Kr
3To H3JeHHe IPOJLO BCE Heo6xOaHmBle N AkTyAlbHbIe npOBepKn, IpEaHnCaHHbIe DnpeKTHBOI CE, K npIM. Ha 3JIeKTPOMaHTHyO COBMecTUMOCt b COOTBETCTBE Tpe6oBaHnM K Hn3KOBoTbTHOH TEXHKe, OHO 6bJIO TaKKe CCKHOpyPObaHo N IOCTpoEO H CyTeOM NocJeHNX Tpe6oBaHn NTO TexHKe 6e30NaChOCTN.
Mbl octabnem 3a coboi npabo Ha texhueckne n3mehenia!
TapaHTHHOe 683aTeJbCTBO
TapaHTnHbI cpoK h Ta TeppHTopu N PoCCNCKo Feepaunu yCTaHaBnBaEcTcNoHOMOHyBMn PpeDCTaBtEnrMaM.
KaccobbyuekRBnEraTcRAPaTHnHbIM TaHOHm.Be3 Hero HeBO3MOKeH 6ecIaTHbpeMOHTNn 3ameHa N3dJIIN.
B clyae Bo3NKHOBHNN npTeH3n no rapaHTN, npeIbRbTE 3deJIne B noHIOHOMPJIeKTAuIN, C opHnHaNBHO ynaOBKO IN KACCObBM YeKOM TOPOBOI TOKe, IpOdaBSeI 3To H3dJIeNE.
DepeKtBu 3HaWbBaemBix PnHAnEeKHOCTe HIN TpyuNXcR DeTaeN, a TaXKe YnCTKa, Texo6CnyXBaHHe NIN 3aMeHa TpyuNXc ReteTaeN He NoJaAOT NOI rapaHTNo, IN O3Tomy npBOOJrTc3a OTdJeBHyO ONlany!
TapaHTn TepaETc npB BckpbITn H3dJIIN NOCTOPOHHIMN liuamH.
Pocne rapaHTM
Iocne OKOHaHnCpoka rapaHTn,peMOHT n3dEiIN npOn3BODITcra 3a ONlATy,CooTBeTCTByOLUHMM MaCTepCKMN nnNpyHKtAMn CepBnCHOrO O6cnyKbAHnA.
GARANTIE-KARTE
Garantiebewijs · Carte de garantie