
BZ 3233 - Beer dispenser CLATRONIC - Free user manual and instructions
Find the device manual for free BZ 3233 CLATRONIC in PDF.
User questions about BZ 3233 CLATRONIC
0 question about this device. Answer the ones you know or ask your own.
Ask a new question about this device
Download the instructions for your Beer dispenser in PDF format for free! Find your manual BZ 3233 - CLATRONIC and take your electronic device back in hand. On this page are published all the documents necessary for the use of your device. BZ 3233 by CLATRONIC.
USER MANUAL BZ 3233 CLATRONIC
General Safety Instructions
Before using the dispenser, read the operating instructions carefully and retain the same and warranty card, receipt and if possible the packaging. If you give this device to other people, please also pass on the operating instructions.
- This dispenser must only be used for the intended purpose and only for private use. This appliance is not fi t for commercial use. Do not use it outdoors. Keep it away from sources of heat, direct sunlight, humidity (never dip it in any liquid) and sharp edges. Do not use the appliance with wet hands. If the appliance is humid or wet, unplug it immediately.
- Switch off the dispenser and always disconnect the plug from the main socket (do not pull the plug out by the cable) when it is not in use, fitting accessories, cleaning or in the event of a fault.
- Do not use the dispenser without supervision. If you should leave the workplace, always switch the machine off or remove the plug from the socket (pull the plug itself, not the lead).
- Regularly check the dispenser and cable for damage. Do not use the appliance if it is damaged.
- Do not attempt to repair the dispenser, but refer repairs to an authorised specialist. To avoid danger, faulty power cords must only be replaced by the manufacturer, customer service or a similarly qualified person using an equivalent cable.
• Only use original accessories. - Observe the following "Special safety information".
Children and the infi rm
- Keep packaging out of the reach of children (plastic bag, cardboard box, polystyrene, etc.).
WARNING!
- Keep plastic fi Im out of the reach of children. Danger of suffocation!
- Children and the infi rm must be allowed to use the dispenser without supervision after being given adequate instruction as this will allow them to use the dispenser safely and understand the potential risks of incorrect use.
- This is not a toy. Do not allow small children to play with it.
Symbols used in this operating manual
Important information for your safety is specially marked. It is essential to comply with these instructions in order to avoid accidents and prevent damage to the machine:
WARNING!
This could endanger your health and possibly injure you.
ATTENTION!
This might damage the unit or other objects.
i NOTE:
You will find tips and information here.
Special safety instructions
- When transporting the beer dispenser, always carry it holding the bottom edge and not by the beer tap, lid or power cord.
- Only use the dispenser with the correct beer keg.
- The dispenser is not suitable for outdoor use.
- Do not place any objects on the dispenser.
- Do not cover the air vents. Overheating can occur.
- Never remove the dispensing unit from the keg when pressurised. To change the keg before it is empty, proceed as follows:
- Remove the keg together with the dispensing unit from the dispenser.
- Position it so that the beer is able to flow out into a suitable container.
- Pull down the tap handle until no more beer is dispensed.
ATTENTION!
The CO2 cartridge discharges when the dispenser lid is closed!
- Turn the pressure regulator to "0". or
- place a 5 litre party keg in the dispenser.
- Check that the kegs are tight and undamaged!
Safety information for CO2 cartridges
- The CO2 cartridges are pressurised. Store the cartridges in a dry, cool place.
- The cartridges must not be subjected to temperatures above 50°C. Protect from heat sources and direct sunlight.
-
The CO2 cartridges should have room temperature when used.
-
Keep CO2 cartridges out of the reach of children.
- Do not tamper with the cartridge.
- Avoid contact with the cartridge at freezing temperatures (risk of frostbite) and do not use.
- Only use the 16g CO2 cartridges intended for the dispenser. The use of other cartridges will invalidate the warranty.
- Only dispense of the CO2 cartridge when empty.
Technical data
Model: BZ 3233
Power supply: 220-240V AV/50Hz
Power: 72 Watt
Protection class: II
Dimensions (L x W x H
in mm): 480 x 300 x 450
Beer keg: Standard 5 litre party keg
Housing material: ABS
Contents, accessories and technical data subject to changes without prior notice!
List of parts
1 Chiller 12 CO2 cartridge chamber
cover
2 Lid 13 CO2 cartridge holder
3 Lid opener 14 CO2 cartridge holder
4 Keg holder 15 Front tube cover
5 Keg tap 16 Pressure regulator
6 End of dispensing unit 17 Main switch
7 CO2 feed valve 18 LED temperature
indicator
8 Beer tap
19 Tools for removing keg
stopper
9 Tap handle 20 Universal adapter
10 Collecting tray
21 Cleaning balloon
11 Drip tray
22CO2 cartridge
Intended use
This dispenser serves for chilling dispensing beer from standard 5 litre party kegs.
It must be used for this particular purpose only.
It must only be used in the manner described in these operating instructions.
This beer dispenser must not be used for commercial purposes.
Use for any other purpose is considered improper and not for the intended purpose and can result in damage to property and personal injury.
Clatronic International GmbH is not liable for any damage attributed to improper use.
Dear Customer,
Congratulations on the purchase of your beer dispenser. You will now be able to enjoy cool, draught beer in the comfort of your own home.
There are numerous beers to choose from available in 5 litre party kegs.
Before using the dispenser, please read the instructions for use and safety information.
Installation
WARNING!
- Before fitting or removing any parts, always disconnect the plug from the mains socket!
- Remove the beer dispenser from the packaging.
- Place the beer dispenser on a stable, horizontal, level and non-slip surface. Ensure that there is at least 10cm of space around the dispenser for optimal operation.

- Fit the collecting tray/drip tray. Ensure that the collecting tray/drip tray does not protrude beyond the surface.
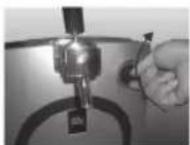
- Fit the silicon ring in the threaded part of the tap. Screw the tap tool below the dispensing unit.

-
Attach the tap handle. When fitting the handle, ensure that the hole in the bottom of the handle fits exactly on the metal pin on the top of the tap.
-
Clean the dispensing unit as described in the instructions in Chapter "Dismantling and cleaning the beer dispenser".
- Check that the main switch at the back of the dispenser is set to "0" and plug the plug into the main socket.
- Set the main switch to "l".
- Check the LED indicator to ensure that the dispenser is on.
Preparation
- Any standard 5 litre party keg can be used.

ATTENTION!
If the keg has been shaken (transport, etc.), the beer must be allowed to stand for a sufficient time prior to use.
- Cool the 5 litre party keg prior to use. The optimal drinking temperature is about 6-8°C. The beer from a warmer keg is less refreshing. Heavy foaming can also result. To cool the keg in the beer dispenser, it is recommended to place it in the connected dispenser the day before. At a keg temperature of about 23°C, it is recommended to wait 16 hours before pulling the first glasses of beer.

IOTE:
- The cooling time in the refrigerator is between 6 and 12 hours depending on the brand and capacity due to the sophisticated cooling technology. This allows the cooling to process to be accelerated. Storing the 5 litre party keg in a refrigerator offers the advantage of always having a second keg ready to use.

ATTENTION!
- Never cool the party keg in a freezer as it can burst. Shock cooling can impair the quality of beer.
- Depending on the 5 litre party keg stopper, it may be necessary to use the supplied tools for removing the stopper and the supplied universal adapter. Described in the following is when the use of tools is necessary and how these should be used.


ATTENTION!
- Before removing the stopper, always first vent the keg as stated on the keg and allow to stand for a sufficient period so that the foam does not escape from the vent opening.
3.1 Rubber stopper
Kegs with rubber stoppers are easy to tap. Rubber stoppers do not require the use of any tools or adapters.
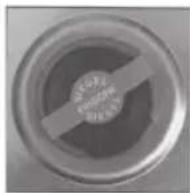
3.2 Combination stopper
The combination stopper is identical to the conventional aerator stopper. The advantage of this stopper shows just before tapping.
The combination stopper must first be aerated and subsequently removed by firmly pulling on the stopper cover. The combination stopper can be easily tapped after removing the stopper cover as described under Item 4 of this chapter. No tools or adapters are required.
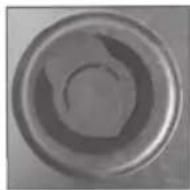
3.3 Aerator stopper
Like the combination stopper, the aerator stopper cover must initially be removed.
The procedure is then as follows. Once the aerator stopper has been identified as such, the aforementioned auxiliary tool must be used. Proceed as described below.
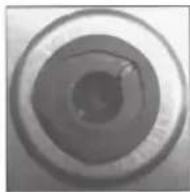
3.4 Plastic aerator stopper
The plastic aerator stopper can be recognised, as with the rubber stopper, on purchasing the keg. However, the plastic aerator stopper cannot be tapped without using the auxiliary tool. Remove the stopper cover and proceed as described below in order to make the keg ready to use.
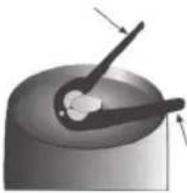
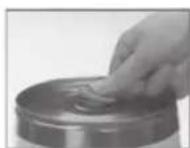
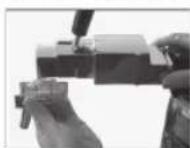
To remove the stopper, apply the auxiliary tool below the sealing ring and squeeze the two handles together until the stopper is cut through.
i NOTE:
The lower half of the stopper which falls into the beer is tasteless and unharmful.
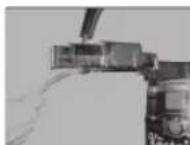
Once the stopper has been removed, the supplied universal adapter can be inserted into the bunghole in the keg and the following carried out.
ATTENTION!
Do not dispose of the universal adapter after emptying the keg, but remove and clean with warm water and a small amount of mild washing up liquid and retain for reuse.
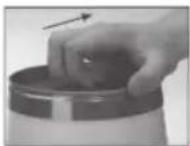
Remove the adapter by gripping the edge of the rubber ring and pulling firmly towards you. Hold the keg firmly with the other hand to ensure that it does not tip over.
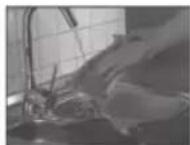
- Take the dispensing unit and place it on the 5 litre beer keg, which should have been allowed to stand for minimum one hour so that no beer sprays out off the bunghole when the keg is tapped.
For this purpose, the tap located at the bottom of the dispensing unit must be moistened with water.
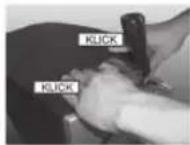
Subsequently place it vertically on the tap opening of the stopper/universal adapter and push it downwards firmly and evenly into the keg.
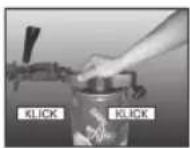
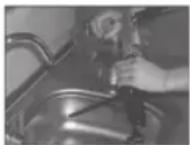
First attach the dispensing unit to the back of the keg. Push down on the front of the unit until it clicks in place. The dispensing unit is now ready to use.
i NOTE:
- After tapping the keg, the beer can be used for one week. A precondition is that the keg remains in the dispenser; the dispenser must remain on with a full CO2 cartridge fitted.
ATTENTION!
- Before using the 5 litre party keg, always check the best before date!
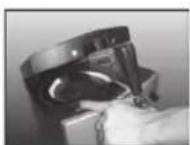
- Ensure that the keg lid is not dented so that the clamps of the dispensing unit can grip under the edge of the lid.
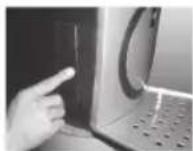
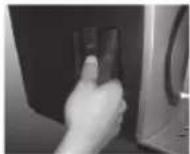
- Open the dispenser lid by pressing the lid open button.

- Lift the dispensing unit (including keg( into the cooling chamber of the dispenser (using the handle provided.
- Attach the end of the dispensing unit to the CO2 feed valve.
ATTENTION!
Never fi II liquid into the CO2 feed valve.
- Close the dispenser lid so that it locks with a click. This opens the CO2 feed.
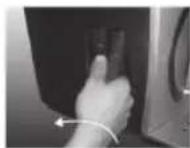
- Open the CO2 chamber cover. The CO2 cartridge holder swings out automatically from the dispenser.
- Screw the CO2 cartridge holder in place.
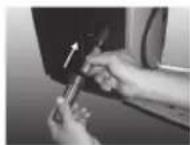
- Place a 16g CO2 cartridge in the CO2 cartridge holder.
ATTENTION!
When a CO2 cartridge is fitted in the dispenser, only close the lid when the 5 litre party keg is in the dispenser or the pressure regulator is set to "0" otherwise the entire CO2 will empty into the dispenser.

- Screw the CO2 cartridge holder quickly, evenly and tightly on to the CO2 cartridge holder. This opens the CO2 cartridge.
i NOTE
The CO2 cartridge holder does not need to be fully tightened after being screwed in place. Subsequently push the CO2 chamber cover shut.
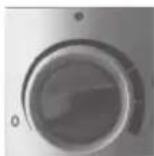
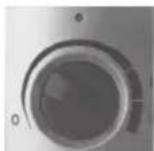
- Select the pressure appropriate for the beer at the pressure regulator. As different beer varieties are carbonated to a differing extent, different pressures (saturation pressure) are required to ensure the quality of the respective beer. If a beer is dispensed with insufficient pressure, for example, it can make the beer taste fl at, whilst too much pressure can make it too fi zzy. If the beer should be too fi zzy or fl at, simply adjust the pressure accordingly. To be noted is that the CO2 content in the beer initially changes over the course of time. The following table serves for adjusting the beer dispenser to the type of beer you have chosen and your personal taste.
Pressure regulator setting
Beer type
CO2 content in %
Pilsner about 0.5
Kölsch about 0.5
Altbier about 0.5
Wheat beer
about 0.6 - 0.8
Required pressure in bar (at about 5°C)
| about 0.8 |
| - 0.9 |
| about 0.8 |
| - 0.9 |
| about 0.8 |
| - 0.9 |
about 1.2 - 1.8
Operation
ATTENTION!
Before switching of the beer dispenser, always ensure that no 5 litre party keg is present in the dispenser as the beer in the keg becomes warm and is no longer fresh.

1. Preparing glasses
Wash the glasses in hot water with a small amount of washing/up liquid. Rinse the glasses thoroughly each time before dispensing with cold, clear water.
Ensure that all grease and residues are removed completely to avoid impairing foam formation.
i NOTE:
The best results can be achieved by using glasses exclusively for beer to ensure that no residues from fat containing drinks (e.g. milk) are present.
2. Dispensing beer
Hold the glass under the beer tap at an angle. The tip of the outlet tube should not come into contact with the glass as this can impair the foam formation.
i NOTE:
The foam produced when dispensing beer can be influenced by changing the angle of the glass.
Pull down the tap handle in one motion.
i NOTE:
- If the tap is only partly open, the beer may foam excessively as it is not able to flow out freely.
- The tap locks in position when the tap is fully open. This enables several glasses of beer to be dispensed simultaneously.
Allow the beer to run down the inside of the glass and slowly straighten the glass while dispensing until it is upright towards the end.
When the foam reaches the rim of the glass, close the beer tap by pushing back the beer tap handle.
Place the glass on the drip plate and wait (about 1 minute) until the foam has settled. Ensure that the glass is not located directly under the beer tap so that no drops fall into the bear foam.
Repeat the dispensing process until the beer and foam are in the correct proportion. This is the case when the head is about two fi nger's breadth high and slightly over the rim of the glass.
Dismantling beer dispenser
To clean the beer dispenser and/or to replace the keg, it is necessary to remove the dispensing unit from the dispenser. The procedure for this is as follows:
- When the installed keg is empty, first remove the CO2 cartridge from the CO2 chamber by opening the same and unscrewing the CO2 cartridge holder.
CAUTION FROSTBITE:
- A residual amount of CO2 may still be present in the cartridge, which suddenly empties and results in the formation of ice.
i NOTE:
- It is recommended to initially fit the CO2 cartridge when preparing the next keg so that the cartridge cannot accidentally empty if the dispenser lid is closed without a 5 litre party keg being present in the dispenser.

- Press the lid opener.
- Detach the end of the dispensing unit from the CO2 feed valve and remove the keg together with the dispensing unit using the handle provided.

i NOTE
- The silicon sealing ring for the CO2 feed valve is a wearing part. If excessive CO2 losses are noticed during use, replace the silicon sealing ring with the supplied spare seal.

Remove the clamps from the rim of the keg and pull the dispensing unit out of the keg quickly and evenly. As the beer tap may not be moist during extraction, removal may take some effort.
The dispensing unit can now be cleaned as described in the chapter "Cleaning" and subsequently installed on a new keg as described in the chapter "Preparations".
ATTENTION!
Never remove the dispensing unit from the keg when pressurised. To change the keg before it is empty, remove the keg together with the dispensing unit from the dispenser. Position it in such a way that the beer is able to flow out into a suitable container and pull the tap handle until no more beer is dispensed.
Cleaning
In order to keep the quality of the dispensed beer at a consistently high level, it is important to clean the dispenser thoroughly. The cleaning intervals are specified in the following.
ATTENTION!
Never use scouring pads, aggressive scouring agents, acetone, benzine, acids, thinner, vinegar or similar for cleaning purposes.
Cleaning after each use
Both the collecting tray and drip tray should be cleaned after each use of the dispenser to ensure perfect hygiene.
For this purpose, remove both the collecting tray and drip tray from the dispenser and pour the collected beer into the drain. Subsequently clean both parts with hot water, using a small amount of washing/up liquid if necessary.
ATTENTION!
The parts are not dishwasher proof.
It is recommended to also clean the tube at the front of the beer tap after each use.
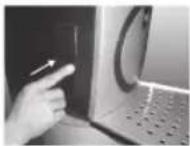
For this purpose, remove the cover at the front below the beer tap and remove the tube. Subsequently rinse out the tube with warm water.
ATTENTION!
If no beer is dispensed over several days, it is recommended to thoroughly clean the tube. The supplied cleaning balloon should be used for this purpose as follows:

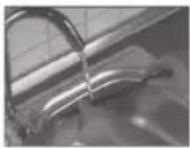
• Position the tube so that the liquid
• is able to flow out while cleaning.
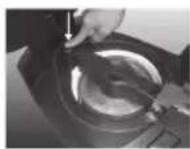
- Insert the tip of the cleaning balloon into the tube in the arrowed direction and place the end of the opposite tube in a suitable container with warm water.
- Thoroughly rinse out the tube repeatedly by firmly squeezing the balloon.
• Refi t the tube and close the cover.
i NOTE:
It is recommended to use hot water and a small amount of washing-up liquid. In this case, the tube should be rinsed again with clear, warm water in order not to prevent impairment of the taste and foam formation.
Cleaning after emptying a 5 litre party keg
Each time a keg is emptied, the dispensing unit must be thoroughly cleaned in addition to the collecting tray, drip tray and tube. The cleaning balloon should be used for this purpose.
- Position the dispensing unit so that the liquid is able to flow out while cleaning.
- Remove the cover located at the front below the beer tap.
- Open the beer tap and fi x it in this position by pulling the tap handle until it locks.
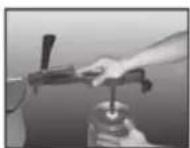
- Insert the tip of the cleaning balloon into the dispensing tube in the arrowed direction and place the end of the opposite tube in a suitable container with warm water.
- Thoroughly rinse out the dispensing tube by firmly squeezing the balloon.
i NOTE:
- It is recommended to use hot water and a small amount of washing-up liquid. In this case, the dispensing tube should be rinsed again with clear, warm water in order not to prevent impairment of the taste and foam formation.
- Disinfectant cleaners in powder form for beer and drinks systems are available from off-licences, which are ideal for cleaning the beer dispenser.
ATTENTION!
• The dispensing unit is not dishwasher proof.
- If the dispenser is not used for an extended period, it should be thoroughly cleaned beforehand.
Regular cleaning
Regularly clean the cooling chamber and all surfaces of the dispenser with a moist cloth and small amount of mild washing-up liquid.
ATTENTION!
- Before cleaning the dispenser, always disconnect the plug from the mains socket and never immerse the dispenser in water!
- The cooling chamber must not be filled with liquid as this can cause permanent damage!
Troubleshooting
| Problem Possible | cause Remedy | |
| The unit does not switch on. | The plug is not plugged into the mains socket.The main switch is set to "0". | Plug the plug into the mains socket.Set the main switch to "I". |
| No beer is dispensed. | The 5 litre party keg is empty or there is not a 5 litre party keg in the beer dispenser. | Place a new 5 litre party keg in the dispenser. |
| The CO2 cartridge is empty. | Change the CO2 cartridge. | |
| The keg tap is not fitted. The keg is not correctly tapped. | Screw the keg tap to the dispensing unit. Tap the keg correctly. | |
| The tap handle is not correctly installed. | Install the tap handle correctly. | |
| Too much foam is produced when dispensing. | The 5 litre party keg is not cold enough. | Cool the 5 litre party keg longer. |
| The 5 litre party keg was shaken. | Allow the 5 litre part keg to stand in the beer dispenser for a while. | |
| The beer does not flow freely out of the tube. | Open the beer tap fully. | |
| The outlet tube touches the glass when dispensing. | Hold the glass slightly further away from the outlet tube. | |
| The glass is held upright when dispensing. | Tilt the glass when dispensing so that the beer is able to run down the side of the glass. | |
| Too much foam is produced while dispensing. | The CO2 pressure in the keg is too high. | Turn the pressure regulator slightly counter-clockwise. |
| Not enough foam is produced while dispensing. | The CO2 pressure in the keg is too low. | Turn the pressure regulator slightly clockwise. |
| The beer is too cold. | Allow the keg to stand in the dispenser for while. The temperature is then corrected by the unit. | |
| There are grease, washing-up liquid or residues in the glass. | Wash the glass thoroughly and subsequently rinse with cold water. | |
| The glass is too warm. | Rinse the glass with cold water. | |
| The glass is dry. Rinse the glass with cold water. | ||
| The beer turns cloudy. | The beer is too cold. | Allow the keg to stand in the dispenser for while. The temperature is then corrected by the unit. |
| The beer tube is not clean. | Clean the dispensing unit. | |
| The beer was incorrectly shock-chilled prior to using the beer dispenser. | Use a correctly chilled keg. | |
| The beer is too warm. | The keg was not chilled long enough. | Chill the keg longer. |
| Problem Possible | cause Remedy | |
| The vents are covered. Insuffi cient space next to and behind the dispenser. | Uncover the vents. Position the dispenser so that there is minimum 10 cm space on all sides. | |
| The beer tastes flat. | The CO2 pressure is too low. | Turn the pressure regulator slightly clockwise. |
| The best before date has expired. | Use a new keg. | |
| The keg has been tapped too long. | Use a new keg. | |
| The beer runs too slowly out of the beer tap. | The CO2 cartridge is empty. | Change the CO2 cartridge. |
| The CO2 pressure in the keg is too low. | Turn the pressure regulator slightly clockwise. | |
| The beer does not flow freely out of the tube. | Open the beer tap fully. | |
| The cooling chamber is covered with frost (slight frost is normal). | The dispenser is standing in a moist environment. | Place the dispenser in a dry environment. |
| The ambient temperature is too low. | Place the dispenser in a warm environment. | |
| The dispenser does not close. | The dispensing unit is not correctly installed and protrudes from the dispenser. | Install the dispensing unit correctly. |
| It is difficult to install the dispensing unit on the keg. | The keg tap was not moistened prior to tapping. | Wet the keg tap with cold water. |
Declaration of Conformity
Clatronic International GmbH herewith declares that the unit BZ 3233 complies with the basic requirements of the European Directive for electromagnetic compatibility (2004/108/EC) and the low-voltage directive (93/68/EEC and 2006/95/EC).
Warranty
The unit is covered by a warranty of 24 months from the date of purchase (receipt).
During the life of the guarantee any fault of the appliance or its accessories ascribable to material or manufacturing defects will be eliminated free of charge by repairing or, at our discretion, by replacing it. The guarantee service does not entail an extension of the life of the guarantee nor does it give rise to any right to a new guarantee!
The receipt is proof of warranty. Without proof of purchase no free replacement or repair will be carried out.
If you wish to make a claim under the guarantee please return the entire appliance in the original packaging to your dealer together with the receipt.
Defects to consumables or parts subject to wear as well as cleaning, maintenance or the replacement of said parts are not covered by the warranty and are therefore not free of charge!
Any unauthorised tampering with the unit will invalidate the warranty.
After the expiry of warranty
After lapse of the warranty period, repairs can be carried out by specialist dealers or our repair service at a charge.
Meaning of the "Dustbin" symbol

Protect our environment: Do not dispose of electrical appliances together with domestic waste.
Use the collection facilities provided for the disposal of electrical appliances.
This will help prevent reduce the impact on the environment and health as a result incorrect disposal.
This is your contribution towards recycling and other forms of utilisation of used electrical and electronic equipment.
Information on disposal facilities can be obtained from your local authority.
Dimensions (L x I x H
