HSM 2659 NE - Hair clippers CLATRONIC - Free user manual and instructions
Find the device manual for free HSM 2659 NE CLATRONIC in PDF.

| Brand | Clatronic |
| Model | HSM 2659 NE |
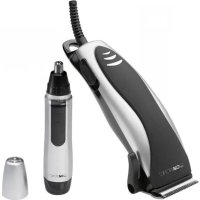
| Product type | Hair clipper with nasal hair trimmer |
| Power supply (clipper) | Mains (230 V ~) |
| Power supply (nasal trimmer) | 1 AA 1.5V battery (not included) |
| Included accessories | 4 cutting combs (3, 6, 9, 12 mm), scissors, blade oil, cleaning brush, nasal trimmer |
| Cutting length adjustment | Progressive from 0 to 12 mm without comb, or with combs of 3, 6, 9, 12 mm |
| Maximum continuous use | 10 minutes, then let cool for 10 minutes |
| Maintenance | Clean blades and accessories with brush; oil blades regularly |
| Cleaning the nasal trimmer | Brush the cutting head with brush; do not clean with water |
| Safety | Unplug before cleaning; do not immerse in water; do not use outdoors |
| Warranty | 24 months from date of purchase |
Frequently Asked Questions - HSM 2659 NE CLATRONIC
User questions about HSM 2659 NE CLATRONIC
0 question about this device. Answer the ones you know or ask your own.
Ask a new question about this device
Download the instructions for your Hair clippers in PDF format for free! Find your manual HSM 2659 NE - CLATRONIC and take your electronic device back in hand. On this page are published all the documents necessary for the use of your device. HSM 2659 NE by CLATRONIC.
USER MANUAL HSM 2659 NE CLATRONIC
-
Oleo para as laminas
-
Pincel
General safety instructions
GB
- Before commissioning this device please read the instruction manual carefully.
- Please keep these instructions, the guaranty certificate, the sales receipt and, if possible, the carton with the inner packaging!
- The device is intended exclusively for private and not for commercial use!
- Always remove the plug from the socket whenever the device is not in use, when attaching accessory parts, cleaning the device or whenever a disturbance occurs. Switch off the device beforehand. Pull on the plug, not on the cable.
- In order to protect children from the dangers of electrical appliances, never leave them unsupervised with the device. Consequently, when selecting the location for your device, do so in such a way that children do not have access to the device. Take care to ensure that the cable does not hang down.
- Test the device and the cable regularly for damage. If there is damage of any kind, the device should not be used.
- Do not repair the device yourself, but rather consult an authorised expert.
- For safety reasons a broken or damaged mains lead may only be replaced by an equivalent lead from the manufacturer, our customer service department or a similar qualified person.
- Keep the device and the cable away from heat, direct sunlight, moisture, sharp edges and suchlike.
- Never use the device unsupervised! Switch off the device whenever you are not using it, even if this is only for a moment.
- Use only original accessories.
- Do not use the device outdoors*.
- Under no circumstances must the device be placed in water or other liquid, or come into contact with such*). Do not use the device with wet or moist hands*).
- Should the device become moist or wet, remove the mains plug from the socket immediately*). Do not reach into the water.
- Use the device only for the intended purpose.
* Please note the following ,Special safety instructions...
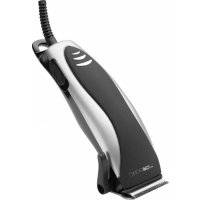
Hair-clipper
Special Safety Instructions
- Use this device to cut dry hair only.
GB
Description of the Parts
Using the Machine
- Adjustment of the cutting length 7a-d. Cutting length accessories
- On/off switch 7a. 3 mm
- Lower blade
7b. 6 mm - Upper blade
7c. 9 mm
5.Blade rail 7d.12 mm - Voltage adjustment 8. Comb (for mains operated machines) 9. Scissors
- Blade oil
11.Brush
Fine Adjustment of the Voltage (Mains operated Machines)
In the case of voltage fluctuations in the mains it may be necessary to adjust the machine.
Switch on the device. Adjust the voltage tuning screw (6) with a screwdriver or a coin until it starts to work as smoothly as possible.
Cutting with Cutting Length Accessory
- Briefly comb the hair.
- Remove the blade protection.
- Slightly oil the blades.
- Mount the cutting length tool necessary for the desired hair length. If you are not certain which length to use, begin with 12mm .
Push the blades into the recess and press the top on to the blade rail.
- Insert the plug into a socket, switch the machine on and comb the hair "the wrong way" slowly and at an even speed with the guide comb. The guide rail should lie flat.
Cutting without Cutting Length Accessory
This is suitable for trimming the hair. The cutting length can be adjusted continuously in the range of approximately 0 - 12 mm.
For areas which are not accessible to the razor it is possible to use the scissors.
IMPORTANT: Do not use the device for more than 10 minutes. Before using it again allow it to cool down for 10 minutes.
Cleaning
- Disconnect the machine from the mains.
- Clean the device after use with a dry cloth. Then wipe off again with a dry cloth.
The blades and accessories should be cleaned with the brush.
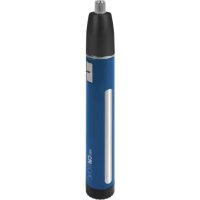
Nose hair trimmer
Special Safety Instructions
- Do not insert the device further than the thin tip of the shearing blade up your nose!
- Do not use the device if the shearing blade holder, the shearing blade or the inner blade are distorted or damaged! DANGER OF INJURY!
- This device is to be used exclusively for the cutting of nose and ear hair! Do not use the device any other purpose!
- The shearing blade and the inner blade are precision-manufactured. Do not exert heavy loads on it and avoid knocking!
- Keep the device away from humidity and liquids!
- Do not remove the shearing head during use! Switch off the device and remove the battery before cleaning!
- Do not insert pointed objects in the shearing head.
Insert Battery
- Open the battery compartment by pushing the cover down and away.
- Insert an AA type 1.5V battery with the positive pole (+) upwards in the battery holder.
- Place the cover back on the battery compartment.
Putting into Service
- Take the protection cap off the shearing head.
- To switch on the device shift the on/off switch towards the shearing head. Warning: Do not switch on the device with the protection cap not mounted on the device!
- Insert the tip of the shearing head in your nose. Warning: remove only the hair coming out of your nose and do not press the device inwards! Do not insert the shearing head too deep and forcefully into your nose: risk of injury!
- If pieces of hair remain in your nose after cutting, remove these simply by cleaning your nose.
- Switch the device off after use with the on/off switch and open the battery compartment.
- Take the cleaning brush out of the holder on the battery compartment cover. Brush the shearing head in a star-shaped manner.
- After cleaning insert the cleaning brush back into the holder and close the battery cover.
ATTENTION: Depending on the quantity of cut hair it is advisable to thoroughly clean the device from time to time as described below in "Cleaning"!
GB
Cleaning
- Before cleaning switch the device off with the on/off switch. Open the battery compartment. Take the cleaning brush out of the holder on the battery compartment cover and remove the battery from the battery compartment.
- Turn the shearing head to the left to loosen it and then pull it out. Pull out the shearing blade with caution. Warning: the cutting blade is sharp! DANGER OF INJURY!
- Brush the shearing head and the clamp in a star-shaped manner. Remove even the smallest bits of hair by blowing.
- Do not dip the device or any parts of it in water!
- Insert the shearing blade starting from the cutting surface back on the shearing head.
- Mount the shearing head back on the drive shaft of the device and screw it on by turning to the right.
- After cleaning insert the cleaning brush back into the holder, insert the battery and close the battery cover.
- Push the protection cap back on the shearing head.
This appliance conforms with the CE directives for radio interference suppression and low-voltage safety and has been built to meet current safety requirements. Subject to technical changes without prior notice!
Warranty
We undertake to guarantee the appliance sold by our company for 24 months as of the date of purchase (cash receipt).
Within the guarantee period we rectify faults to the machine free of charge which result from material or manufacturing faults, either by repairing the machine or, or our discretion, by replacement. Any such repair or replacement associated with the guarantee shall not cause the guarantee period to be extended, nor be deemed to be the start of a new guarantee period!
Proof for the warranty is provided by the purchase document. The replacement and repair will not be performed free of charge without this proof of purchase.
Should the warranty be valid, please consign the complete appliance in its original packing together with the cash receipt to your local dealer.
Defects to the accessories do not entitle to the change of the appliance. These will be replaced free of charge. In this case do not send back the appliance. Just order the faulty accessory! Broken glass parts are replaced at the expense of the owner!
Neither defects to consumables and wearing parts (e.g. motor pistons, kneading
hooks, drive belts, spare remote controls, spare toothbrushes, saw blades, etc.) nor the cleaning, maintenance or change of wearing parts fall under this warranty and hence are subject to payment of costs!
GB
The warranty is terminated in case of handling on the part of Third parties.
After the warranty
Once the warranty has expired, repairs can be carried out by specialized technicians or repair services against the payment of the service.
PL
IpeHOBbIM BkIOueHEm DaHTe emy 10 MInHyT OCTbITb.
Yxoid 3a np6opom
RUS
- OTkIIOUHTe npIbOp ot cETn.
- После Okончаня paBOTы поочитne erO cyхоТ trPknOи npOTpnte hacyxo.
- JIe3BnI n Haca,IKn IpoOnuAaTe KInCTOuKoN.
3nnlaTOpIJHoca
CneuaNbHbIe yka3aHnI NO TexHnke 6e30nacHOCTN
He tonkaTe cTprnyuToJOBky B H03np rIy6xe ee y3koJ qactn!
3anpeaetcnpmeHb np6op, cIe ero le3BnI nn fKcatOp le3Bn IorHytb nnn nobpekdeHb. B npotnbHom cnyae Bo3nkaet ONACHOCTb PONUyEHHa TPABM!
- Pπi6bop cnyknt TOnbko dIydaJIeHnB BOJoc n3 Hoc a n ywe! He npimHeYte erO dIpynx ceJe!
- Ctrnnyua rOJOBka nJe3Bn - 3TO npeu3noHHbI np6Op, KOtOpb I Bontc cnIbHbIX Harpy30K, a TAKKe ydapOB u T.n.!.
- 3aüüuαiTe npi6op ot nonadHnB Hero BlaIg nnJxNkoCTe!
He cHIMaIe CTpIryuIyIO rOJIOBky BO BpeMpaBtI npIbopa! IpeD kaxdoi uCTKO npIbopa BbIKJUoyaIte ero N BbIHMaIte 6aTapeKy!
- PpeDoxpaHnIe CtpnIgUyIO rOJOBky OT nonaHaHnB Hee OCTpbIX npeDmetOB!
BctabJIeHne 6aTaapeek
- OTkpoIe OTCEK IJRA 6aTaapeEK, OTOBbHbY KpbIbKy BHN3.
BCTaBbTe B rHe3do Ondy 6aTapeKky 1,5 B Tnna AA, nIIOcom (+) BBepx.
3akpoTKeKpbIuKyOTceKa.
Poirotovka npnbopa k pa6ote
- CHIMITE 3auntbI KONnak CO Ctpnpye I ROJOBKn.
2.ДяВКЛIOUeHЯпибopaДВИнБTe BBKJIIOuAteJBBCSTOPHYCTPnIryuei roIobKn.BHMaHHe!CHaJeTbIM3aUHTbIMKOJINaKOM npi6Op He BKNIOUaETcra! - BCTaBbTe KOHcK CTrpNryuSeI rOJOBKn B HO3dpiHOca. BHImaHne! YdaJIyTe TOJbKO BOJOCbI TOPaUe I3 HO3dpeN H N B KOeM cIyuae He ToJkaTe npi6Op C yCnJIInEM BHyTp b HOca! PpIMHeHne CINbl MoXeT HaHeCTn TpaBMbl!
- Ecni nocJe 3nnlaun B Hocy eue octaHcB cpe3aHbIe BOIOcbl, To ydaJInte INx npOCTO npOuHCTNB HOC.
- NocIe npOceDpybI BvIKJIIOUHTe npN6Op npN NOMOuBvIKJIIOUaTeJn OTKpoIe OTcEK dJa 6aTaapeek.
- BbHbTe KnCTOky n3 DepeXaTeIy, HaxoJaIeROcHa KpbIuKe OTCeKa. IpoUcHTte CtpnryuIyo RoIOBky 3Be3IOO6pa3HbIMn DBNXeHnMn KnCTOUY.
- После чистк Вставы Te КИСТОЧКУ образно в Держатель И закову OTсЕ Кдябатаразек.
RUS
ПРИМЕЧАН!ВЗвсимостиOTВремен3КСПУаТAUIM,PEKOMEHДуETСВремOTВремENПОВODITbOCHOBAteЛьнючNTКУпбopa,KaK3TOONICAHOBI"ЧИСТKAппбopa".
Чистka пибopa
- Перацяков Вькючпс пибор пи пошьькючateл. OTKpoite OTCEK ДЯ батаpeeK, Вьньт КИСТОЧКУ n3 DepxaTeJ, HaxODISeROcЯ Ha KpbIшke OTCEKa, a TAKKe 6atapeiKy n3 rHe3da.
-ПовернITE CTPNIpyUIO TOLOBky BJIeBO NO Kpyry I CHIMITE ee. OcTOpOxHo CHIMITE pexyUne Jle3BnB. BhImaHne! Jle3BnA OChb ocTpbl! ONACHOCTb IOJUYEHNr TPABM! - PpOCHNTe CTPnryuIyIOJOBky 3Be3DOo6pa3HbIMN DBNXeHNrMNI KNCTOCKN. YdaJIte OCTaTKn BOLOC CO CTPnryuIe IOBKN, npOdyB ee.
- Hn B koem clyuae He norpjukaite npnbop nIe ero Detaln BVody!
BCTaBbTe cTpyuJeIe3Bn, OcTpo KpOMKo BnpeE, O6paTHOBrOJbKy. - HanaeHbTe cTprnryuIyroIobKy Ha npnbOJHOB BaI npnbOpa I KpeNko NOBepHInTe ee BnpaBO nKpyr.
- Послсянистки заразице КИСТОЧКУ в Держате, ВСТаБТЕ сатугку в Гиздо и заразице OTСЕД РЯбсageek.
- HaendeThe 3aunTHbI KOJIpaK Ha CTpRgammaIO rOJOBky.
3TOT np60p COOTBETCTBye TnpeKtNBAM CE no NCKpo3aunTe n TexHnke 6e30NaCHOCTN Dn Hn3KOBOJbTHbIX np60pOB; OH COKHCTpynpOBaH B COOTBETCTBn C HOBeuSHmN PpeDncaHnMn NO TexHnke 6e30NaCHOCTN. Mbl octabJem 3a coboi npabo Ha texHnueckne n3MeHeHHa!
TapaHTnHoe 06a3aTeJbCTBO
Bo Bpemra rapaHTn Mbl 6ecnlaTHO yCTpaHReM BCE HenoJaKn npnbopa, KOtOpbIe BO3HnKIn NO npuHne DeΦeKTOB MaTePnAna IIN NO BNHe 3aBOdaN3rTOBNTeJI, NytEm peMOHTa INI, Ha HsE ycMOTpeHne, 3aMeHO np6opa. TapaHTnHbI peMOHT He ydInHReT cPok rapaHTn I He BO306HOBJAEt ee!
DokymeHTOMДЯ rapaHTnClyxNt KaccOBbIчEk.Бe3 npeIbYBLeHnA 3TOrO DOKyMeNTa6ecPJIaTHbIpeMOHTIIN3aMeHa npi6Opa HeBO3MOXHbI.
B clyae noIomkn npnbopa npocim BepHyb erO B mara3nB nolHOKOMJIeKTAuN I opunHaJbHOYpaKOBKe, npNJIOXNB KACCObiYek.
DeTANI C DeΦeKTAH N He ABJIOCTC PrnHNO JINB3BpaTa Pn6bopa, OHN 6ydy T PnncIaHbI BecnIaTHO B3aMeH DeΦeKTHbIX. B NOIObHOM cIyuae He OTcbJIaIte BeCb Pn6Op, a 3aKa3bIaIe ToIbKO DeΦeKTHbIe DeTANI! Pa3bIbIe CTekJIaHHbIe DeTANI MeHIOCTC, KAK nPaBnlo, TOIbKO 3a ONIaTy!
IepeKtblnHaHbAembIX npHaJdEJXHcTe Nll TpyuXxCJeTalei (HaNPIMep KOHTaKTHbIe 5eTKMOTOPOB, NIIbHbIe NOJOTHa, CMEcITbHbIe KpIKN, pINBOHbIe peMHN nT.D.), a TaKxe YNCTKa, TexO6cnyKbAHne Nll 3aMeHa TpyuXxCJe DeTaJIe He IonoJaIoT NoI rapaHTNU, INo3TOMy npOBoYrTcA 3a OTdeJIbHyIO ONlaTy!
TapaHTnA TepaETc npB BCKpbITn np6opa NOCTOpHHmN JIuCaMn.
ПО OKOHЧАнг rapaHTи
IIO nCTeueHn cpoKa rapaHTn npi6Op MOxHO cdaTb Ha peMOHT B CneuaJIIN3InPOBaHHbIMaRa3IN HII INpeMOHTHyIO MaCTepCKyIO 3a ONlaTy.
Technische Daten
Model: HSM 2659 NE