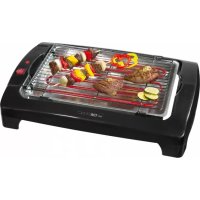
TYG 3027 - Electric grill CLATRONIC - Free user manual and instructions
Find the device manual for free TYG 3027 CLATRONIC in PDF.
| Product type | Electric grill |
| Brand | Clatronic |
| Model | TYG 3027 |
| Power supply | 230 V ~ 50 Hz |
| Power | Approx. 1500 W |
| Temperature range | From keep warm to max (approx. 100 °C to 250 °C) |
| Heating plate | Non-stick coating |
| Capacity | Up to 4 persons (depending on recipes) |
| Dimensions (L x W x H) | Approx. 45 x 30 x 15 cm |
| Net weight | Approx. 2.5 kg |
| Included accessories | Thermostat with dial, grease drip tray, feet |
| Functions | Grilling, cooking, frying, keep warm |
| Control type | Rotary temperature dial |
| Indicator light | Yes (heating indicator) |
| Material | Steel and plastic |
| Cable length | Approx. 1 m |
| Cleaning | Plate: sponge with soapy water, drip tray: clear water, chassis: damp cloth, thermostat: dry paper towel |
| Safety | Do not immerse, safety distance 30 cm, safety thermostat |
| Warranty | 24 months (2 years) |
| Spare parts available | Thermostat, grease drip tray, heating plate |
| Disposal | Do not dispose with household waste, take to recycling center |
Frequently Asked Questions - TYG 3027 CLATRONIC
User questions about TYG 3027 CLATRONIC
0 question about this device. Answer the ones you know or ask your own.
Ask a new question about this device
Download the instructions for your Electric grill in PDF format for free! Find your manual TYG 3027 - CLATRONIC and take your electronic device back in hand. On this page are published all the documents necessary for the use of your device. TYG 3027 by CLATRONIC.
USER MANUAL TYG 3027 CLATRONIC
natural_image
Black grating table setup with various food items including bacon, shrimp, and instant noodles (no text or labels visible)TYG 3027
DEUTSCH
NORSK
Inhalt
Overview of the Components ......Page 3
Instruction Manual......Page 31
Technical Data Page 32
Guarantee Page 33
FRANÇAIS
JE, ZYK POLSKI
Sommaire
text_image
Labeled diagram of a portable electric cooker with numbered parts and a separate electrical plug shown.Consommation: 2000 W
Classe de protection: I
General Safety Instructions
Read the operating instructions carefully before putting the appliance into operation and keep the instructions including the warranty, the receipt and, if possible, the box with the internal packing.
- The appliance is designed exclusively for private use and for the envisaged purpose. This appliance is not fit for commercial use. Do not use it outdoors (except if it is designed to be used outdoors). Keep it away from sources of heat, direct sunlight, humidity (never dip it into any liquid) and sharp edges. Do not use the appliance with wet hands. If the appliance is humid or wet, unplug it immediately. Do not put it in water.
- When cleaning or putting it away, switch off the appliance and always pull out the plug from the socket (pull on the plug, not the cable) if the appliance is not being used and remove the attached accessories.
- Do not operate the machine without supervision. If you should leave the workplace, always switch the machine off or remove the plug from the socket (pull the plug itself, not the lead).
- Check the appliance and the cable for damage on a regular basis. Do not use the appliance if it is damaged.
- Do not try to repair the appliance on your own. Always contact an authorized technician. To avoid the exposure to danger, always have a faulty cable be replaced only by the manufacturer, by our customer service or by a qualified person and with a cable of the same type.
- Use only original spare parts.
- Pay careful attention to the following "Special Safety Instructions".
Children
- In order to ensure your children's safety, please keep all packaging (plastic bags, boxes, polystyrene etc.) out of their reach.
Caution! Do not allow small children to play with the foil as there is a danger of suffocation!
- To protect children from the dangers posed by electrical appliances, make sure that the cable is hanging low and that children do not have access to the appliance.
Special safety notes for this unit
- Place the unit on a fl at and heat-resistant surface. In the case of sensitive surfaces please place a heat-resistant board under the pan.
- Only the supplied thermostat (7) may be used. No other regulator should be used under any circumstances!
-
Before inserting or removing the thermostat (7) please ensure that the scale of the temperature regulator (11) is turned to 0 (off). Otherwise the device may fail to operate or overheat.
-
When inserting the thermostat (7) please ensure that it is inserted correctly. The regulator (11) should be facing upwards. When removing the thermostat, do not pull the cable, but pull on the plug of the thermostat. Do not use excessive force or bend the thermostat when inserting or removing it.
- Please keep the temperature sensor (8) and the pins of the holder clean.
- Warning: Danger of fi re! Keep the unit at a safe distance from easily infl ammable objects such as furniture, curtains, etc. (30 cm). Oil and fat preparations may burn if overheated.
- Please ensure that the mains lead does not come into contact with the hot sections of the device. Do not touch the hot sections of the device; please use the buttons and handles provided.
- Never pour water into hot fat.
- Allow the unit to cool down before you put it away.
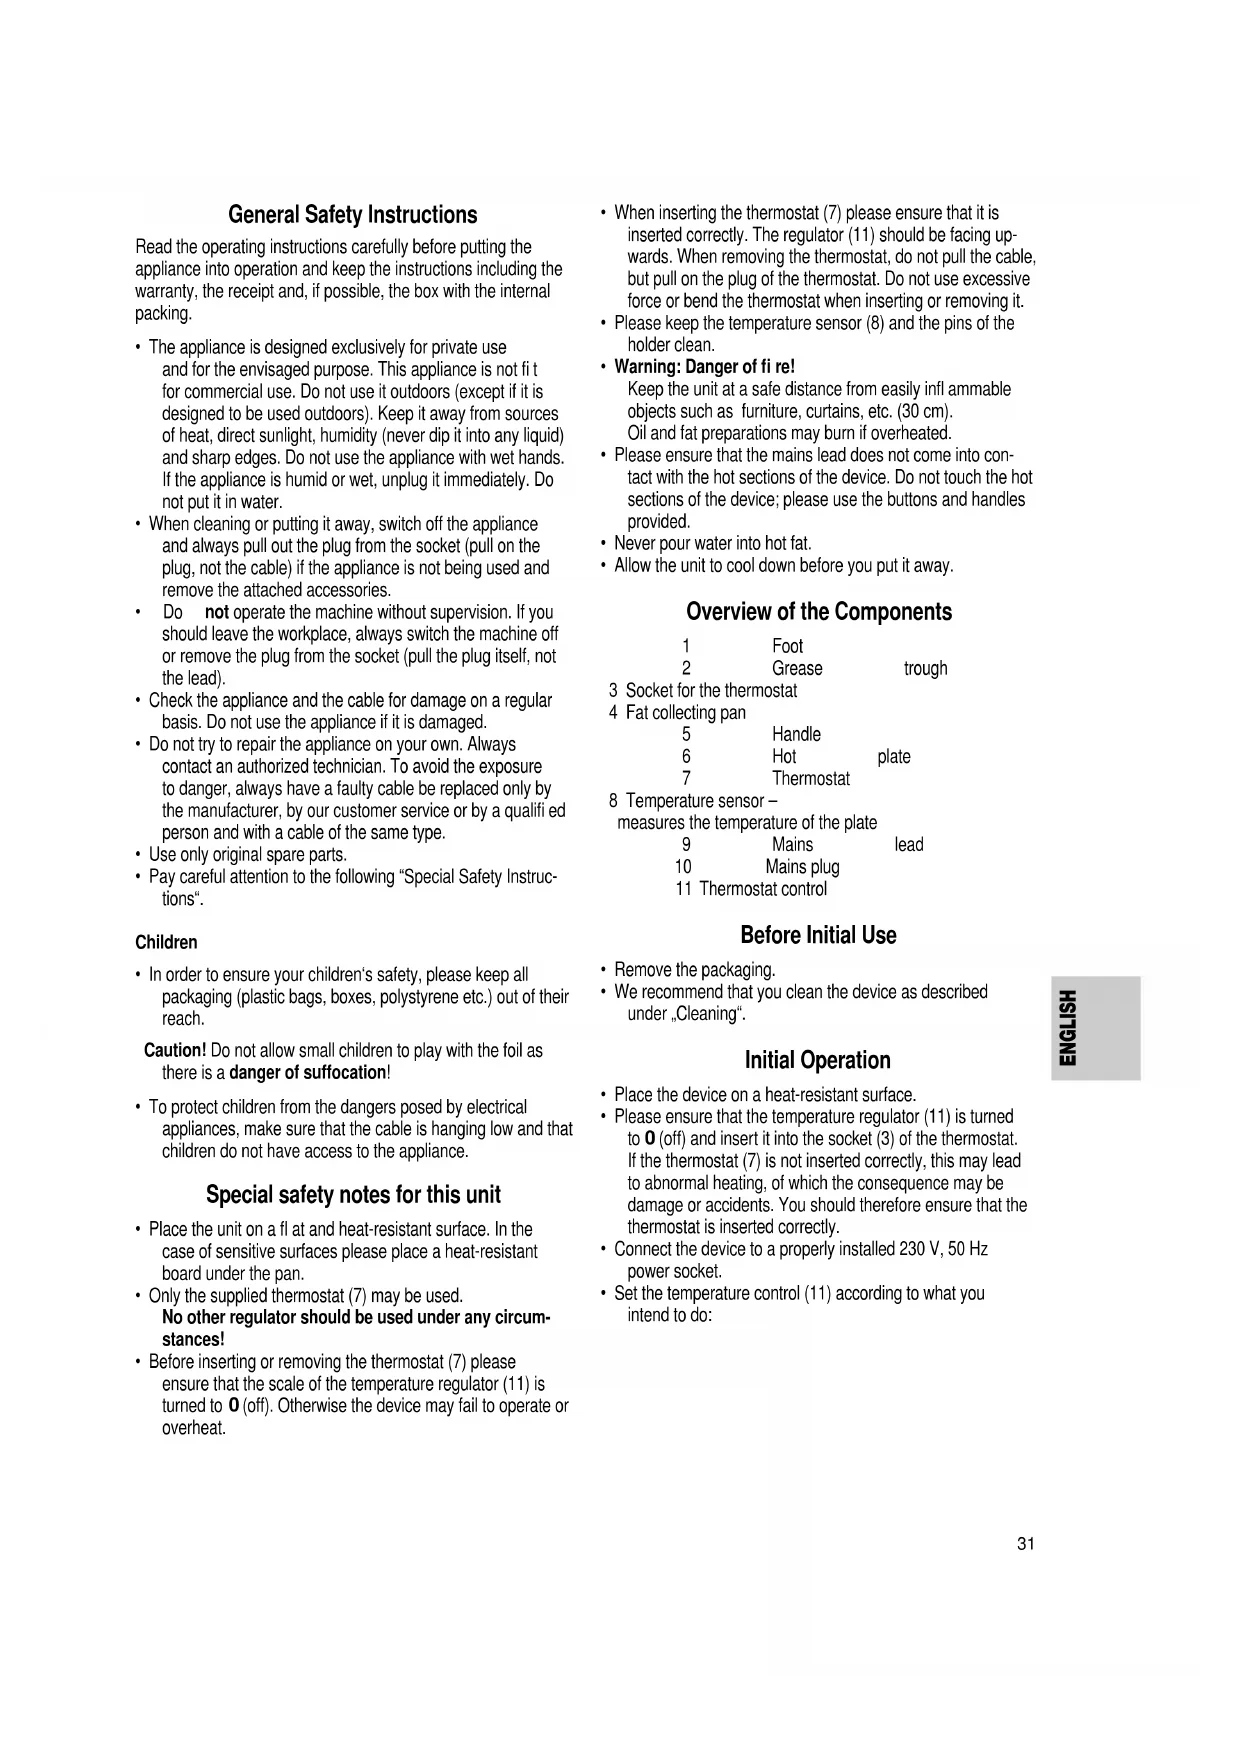
Overview of the Components
| 1 | Foot | |
| 2 | Grease | trough |
3 Socket for the thermostat
4 Fat collecting pan
| 5 | Handle | |
| 6 | Hot | plate |
| 7 | Thermostat |
8 Temperature sensor – measures the temperature of the plate
| 9 | Mains | lead |
| 10 | Mains plug |
11 Thermostat control
Before Initial Use
- Remove the packaging.
- We recommend that you clean the device as described under „Cleaning“.
Initial Operation
- Place the device on a heat-resistant surface.
- Please ensure that the temperature regulator (11) is turned to 0 (off) and insert it into the socket (3) of the thermostat. If the thermostat (7) is not inserted correctly, this may lead to abnormal heating, of which the consequence may be damage or accidents. You should therefore ensure that the thermostat is inserted correctly.
- Connect the device to a properly installed 230 V, 50 Hz power socket.
- Set the temperature control (11) according to what you intend to do:

gauge
| Position | Value | |---|---| | A | 0° | | B | 0° | | C | 0° | | D | 0° | | E | 0° | | F | 0° | | G | 250° | | H | max. || Range | Temperature adjustment in °C approx. | Use |
| A | Keeping warm | |
| B | up to 100°C Cooking | |
| C-D | over 100°C Simmering | |
| E-G | 150° - 250° Stir-frying | |
| H | maximum Grilling | |
Please note: The stated temperatures are only reference values.
- The device has reached the correct temperature when the control lamp on the thermostat (7) goes off. During operation the control lamp goes on from time to time to show that the correct temperature is being maintained.
Using the unit
- Preheat the grill for approximately 5 minutes. When the control lamp goes off the grill is ready for use.
- The cooking time depends on the type and quantity of food that is to be cooked as well as the degree of cooking. Please base these times on your own experience.
- When turning the food that is being cooked, please use wooden or Tefl on utensils so as not to damage the non-stick layer.
- When cooking is finished the food may be kept warm by turning the controls to 1.
Fat Collecting Pan (4)
Please note! The pan under the heating plate must be inserted. This is where excess fat collects. When grilling you should check the contents regularly and empty the pan when necessary.
Caution: The grill is hot during use!
After Use
To switch the device off, fi rst turn the temperature regulator to 0 (off) and remove the plug from the socket. Do not remove the thermostat from the device until the device has cooled down, as the temperature sensor is still very hot after use.
Cleaning
• Always pull out the plug from the mains socket before cleaning and wait until the unit has cooled down.
- Do not use any wire brush or other abrasive objects.
- Do not use any acidic or abrasive detergents.
• Under no circumstances should the device be immersed in water for cleaning.
Heating Plate
- Please remove any food residues while they are still warm with a damp cloth or paper towel.
- Clean the heating plate with a soft sponge and soapy water. Then wipe off with clear water and dry thoroughly with a soft cloth. After drying please apply a thin film of edible oil to the surface.
Fat Collecting Pan
Pull out of the fat collecting pan. Shake the contents out and clean the drawer in soapy water.
Housing
Clean the housing after use with a slightly damp cloth.
Thermostat
- Please clean the thermostat with a soft paper towel or a soft try cloth.
- Never clean the regulator with damp items, as otherwise this might result in an electric shock or fire.
- Never immerse the cable loom in water!
Technical Data
Model: TYG 3027
Power supply: 230 V, 50 Hz
Power consumption: 2000 W
Protection class:.... I
This device has been tested according to all relevant current CE guidelines, such as electromagnetic compatibility and low voltage directives, and has been constructed in accordance with the latest safety regulations.
Subject to technical changes without prior notice!
Recipe Suggestions
Grilled Scampi Spit
| Ingredients for 1 portion: | 4 | scampis, |
| peeled and cooked | ||
| 4 rashers of bacon | ||
| 1 | ||
| 1 |
Preparation:
Remove the core from the pepper and cut up into eight parts. Then cut the onion into quarters and separate the individual parts from one another.
Roll the scampis in the bacon and put them on shashlik spits, alternating with the onions and the pepper. Then roast the spits on the grill.
Preparation time: 20 minutes
Level of diffi culty: easy
Asian-Style Meatballs
| Ingredients for 4 portions: 500 g minced meat |
| 1 |
| 1 |
50 g sesame, peeled
1 tablespoons oil (sesame oil)
1 ½ chilli pod, red, cut into fine strips
1 chopped garlic clove
1 piece of chopped ginger,
hazelnut-size 1 teaspoon of mustard 1 teaspoon pesto (basil pesto)
2 tablespoons chopped parsley
salt, pepper, nutmeg,
paprika powder, sweet
tabasco, if required
breadcrumbs, if required
3 tablespoons oil
Preparation:
Soak the role in water. Then roast the sesame golden brown in a pan that does not contain fat.
Squeeze the roll thoroughly and then knead the minced meat with the egg, sesame, sesame oil, onions, garlic, ginger, parsley, strips of chilli, mustard, pesto and spices. Season to taste; adding further spices as required.
The meat should taste a little overseasoned, as during baking it becomes somewhat milder. If the meat dough is not solid enough, add a few breadcrumbs. Then make small balls or larger rissoles out of the meat dough and then roast these gently on both sides on the grill in a little oil and cook thoroughly.
Preparation time: 30 minutes
Level of diffi culty: normal
Salmon spits
Ingredients for 4 portions: 400 g salmon fillet
3 tablespoons lemon juice
4 tablespoons oil (olive oil)
1 teaspeppenustard
salt and pepper
onion
1 sprig of basil
1 sprig of thyme
16 cherry tomatoes
4
1 clove of garlic
Preparation:
Rinse the salmon fi llet, dab off until dry and cut into mouth-sized pieces. Mix the lemon juice with the olive oil and mustard and add salt and pepper to taste. Mix in the chopped herbs and marinate the pieces of salmon in this for 30 minutes.
Wash the tomatoes, then peel and halve the shallots. Place the fish on eight spits, alternating with the two prepared ingredients and then coat with the marinade (particularly the vegetables).
Cook the spits on the grill for approximately 12 minutes, turning frequently. egg
Preparation time: 30 minutes
Level of diffi culty: easy
stale
fi nely chopped
onion arant
The device supplied by our Company is covered by a 24 month guarantee starting on the date of purchase (receipt).
During the life of the guarantee any fault of the device or its accessories *) ascribable to material or manufacturing defects will be eliminated free of charge by repairing or, at our discretion, by replacing it. The guarantee services do not entail an extension of the life of the guarantee nor do they give rise to any right to a new guarantee!
Proof of the guarantee is provided by the proof of purchase. Without proof of purchase no free replacement or repair will be carried out.
If you wish to make a claim under the guarantee please return the entire machine in the original packaging to your dealer together with the receipt.
*) Damage to accessories does not mean automatic free replacement of the whole machine. In such cases please contact our hotline. Broken glass or breakage of plastic parts are always subject to a charge.
Defects to consumables or parts subject to wearing as well as cleaning, maintenance or the replacement of said parts are not covered by the guarantee and hence are to be paid!
The guarantee lapses in case of unauthorized tampering.
After the expiry of the guarantee
After the expiry of the guarantee repairs can be carried by the competent dealer or repair service against the payment of the ensuing costs.

Meaning of the "Dustbin" Symbol
Protect our environment: do not dispose of electrical equipment in the domestic waste.
Please return any electrical equipment that you will no longer use to the collection points provided for their disposal.
This helps avoid the potential effects of incorrect disposal on the environment and human health.
This will contribute to the recycling and other forms of reutilisation of electrical and electronic equipment.
Information concerning where the equipment can be disposed of can be obtained from your local authority.
In many EU countries the disposal of electrical and electronic equipment in the domestic waste has been prohibited since August 13, 2005.