
Special 311 - Garage door MARANTEC - Free user manual and instructions
Find the device manual for free Special 311 MARANTEC in PDF.
| Product Type | Manual release system for garage door |
| Brand | Marantec |
| Model | Special 311 |
| Compatible door type | Sectional, non-overhead tilt-up, industrial door |
| Main function | Manual external release in case of power failure or motor malfunction |
| Included components | Drive carriage, sheathed cable, sheath, lock brackets, adjustment screw, interior handle, cable clamp, fixing collars |
| Materials | Sheathed steel cable, zinc-plated metal parts, plastic (red sliding piece) |
| Installation | Requires drilling on some door models (diameter 5.5 mm, spacing 48 mm from lock edge) |
| Cable length | Adjustable, cut to required length (leave 50 mm overhang) |
| Estimated weight | Approximately 0.5 kg |
| Power supply | None (mechanical system) |
| Maintenance | Regular check of operation, absence of mechanical play, lubrication of moving parts if necessary |
| Safety | Release can only be performed after manual unlocking of the lock; the carriage must return to its initial position; the red sliding piece must be pushed back manually |
| Spare parts | References: Trigger Special 311 (art. 152 115), Special 302 (art. 564 453), Special 301 (art. 564 452), Special 315 (for industrial version) |
| Manual | 44 pages, available in multiple languages (FR, EN, DE, etc.) |
Frequently Asked Questions - Special 311 MARANTEC
User questions about Special 311 MARANTEC
0 question about this device. Answer the ones you know or ask your own.
Ask a new question about this device
Download the instructions for your Garage door in PDF format for free! Find your manual Special 311 - MARANTEC and take your electronic device back in hand. On this page are published all the documents necessary for the use of your device. Special 311 by MARANTEC.
USER MANUAL Special 311 MARANTEC
Special 301, 302, 311, 315
D Einbauanleitung
Notentriegelung
GB Installation Instructions
Emergency Release
F Notice de montage
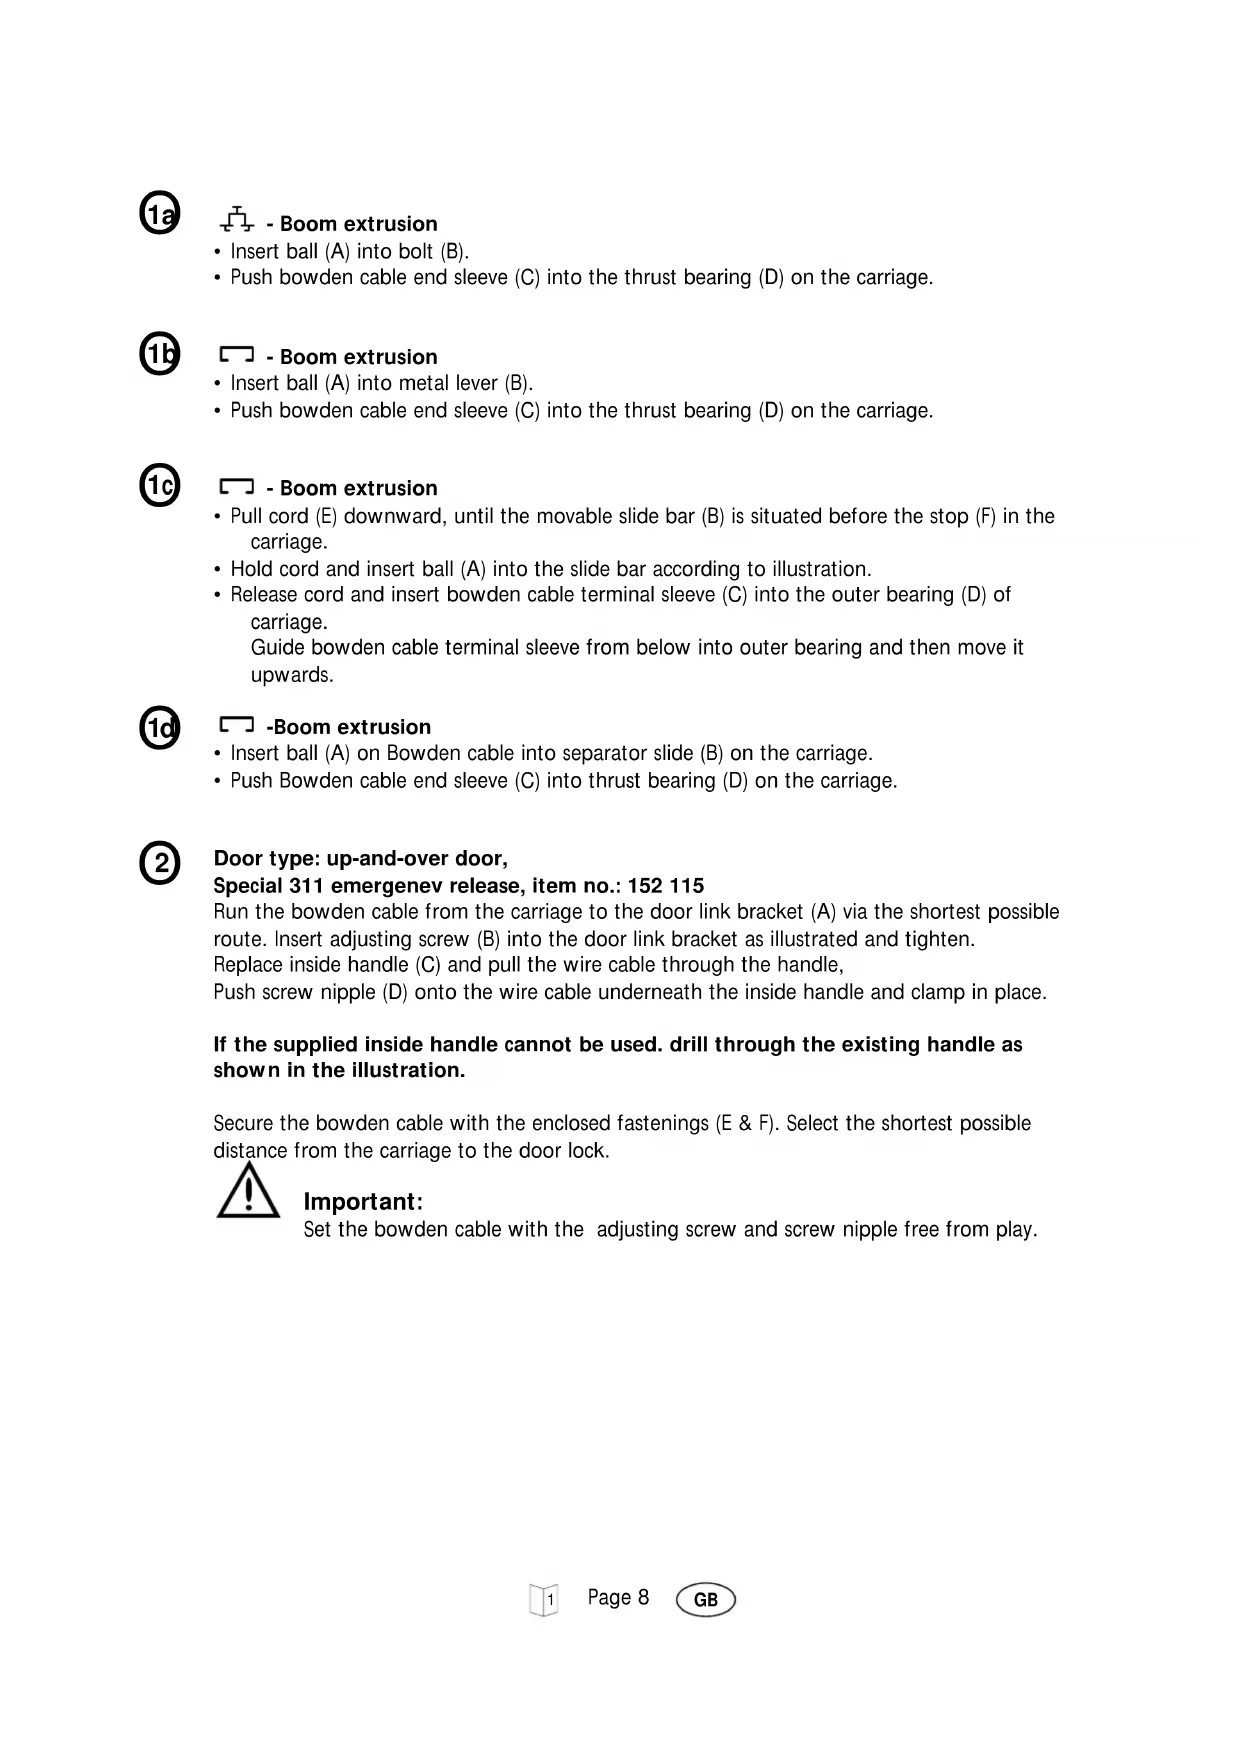
- Insert ball (A) into bolt (B).
- Push bowden cable end sleeve (C) into the thrust bearing (D) on the carriage.

- Boom extrusion
- Insert ball (A) into metal lever (B).
- Push bowden cable end sleeve (C) into the thrust bearing (D) on the carriage.

- Boom extrusion
- Pull cord (E) downward, until the movable slide bar (B) is situated before the stop (F) in the carriage.
- Hold cord and insert ball (A) into the slide bar according to illustration.
- Release cord and insert bowden cable terminal sleeve (C) into the outer bearing (D) of carriage.
Guide bowden cable terminal sleeve from below into outer bearing and then move it upwards.

-Boom extrusion
- Insert ball (A) on Bowden cable into separator slide (B) on the carriage.
- Push Bowden cable end sleeve (C) into thrust bearing (D) on the carriage.

Door type: up-and-over door,
Special 311 emergenev release, item no.: 152 115
Run the bowden cable from the carriage to the door link bracket (A) via the shortest possible route. Insert adjusting screw (B) into the door link bracket as illustrated and tighten.
Replace inside handle (C) and pull the wire cable through the handle,
Push screw nipple (D) onto the wire cable underneath the inside handle and clamp in place.
If the supplied inside handle cannot be used, drill through the existing handle as shown in the illustration.
Secure the bowden cable with the enclosed fastenings (E & F). Select the shortest possible distance from the carriage to the door lock.

Important:
Set the bowden cable with the adjusting screw and screw nipple free from play.

Door Type: Sectional Door, Special 302 emergenev release, item no.: 564 453 Lock version with side locking bolts
Push the angle bracket (A) onto the left bolt of the door lock (B). Shorten the bowden cable (if necessary) and secure to the angle bracket with the adjusting screw (C).
From behind insert the hexagon screw of the screw nipple (D) through the drill hole of the lock bolt and screw into the screw nipple. Push the cable through the screw nipple and screw tight.
With some door makes, the hole in the lock bolt will require drilling. Drill at a distance of 48mm from the left edge of the lock case, using a 5.5mm drill bit.
Using the supplied fixings (E), fix the bowden cable to the door connector attachment (F) and centre hinges (G). Choose the shortest distance from the carriage to the door lock, avoiding overtaut windings.

Important:
Set the bowden cable with adjusting screw (C) so that the lock angle bracket fits snugly against the lock case!

Door type: sectional door, Special 302 emergency release, item no. 564 453, lock version without side locking bolts.
(Shown is the inside right lock version.)
Remove inside door handle (A) and moving bar (B) from the door lock (four-edge pin) and screw the mounting angle (D) onto the lock body by using the fixing screw (C) of the lock.
If necessary, shorten the bowden cable and fix it to the mounting angle with adjusting screw (E). Push moving bar (B) and unlocking lever (F) onto the four-edge pin.
Run the hexagonal screw of the screw nipple (G) through the unlocking lever (F) (according to drawing). Push the wire through the drill hole of the screw nipple and fix it. Attach the inside door handle again and screw it on.
Use enclosed fixings (H) to fix the bowden cable to the door connector attachment (I) and to the centre hinges (J).
Choose the shortest distance from the carriage to the door lock. Avoid overtaut windings.

Important:
Set the bowden cable with the adjusting screw (E) and screw nipple without play.

Important:
The red plastic slide bar (drawing 1c, position E) of the flat carriage has to be put back into it's front operating position after adjustment of the bowden cable (symbol 'door closed'). Please also see point 7.

Door type: retractable up-and-over door, Special 301 emergenev release, item no.: 564 452
Change the inside handle and a self-tapping screw 4,2 × 9,5 , screw the thrust bearing (A) onto the left-hand side of the lock case (B). With some door makes, the hole fixing the thrust bearing to the lock case will still need drilling. Drill at a distance of 60~mm from above the centre of the handle, using a 3,5mm drill bit.
Shorten the bowden cable (if necessary) and secure to the thrust bearing with adjusting screw (C). Remove the screw nipple (D). Feed the cable through the cable through the drill hole of the inside handel, and from underneath the handle push the screw nipple back onto the cable and screw tight.
Fix the bowden cable (E) to the inside of the door leaf using two clamping ears (F). Avoid taut wi findings.

Important: Set the bowden cable with adjusting screw free from play.

Door Type: Industrial Doors (Sectional Doors), Special 315 Emergency Release, item no.: 46007; 5 m long item no.: 46008; 6 m long item no.: 46009; 7 m long item no.: 46010; 8 m long
Push angle bracket (A) onto left locking bolt (B). Shorten the Bowden cable (if necessary) and secure to the angle bracket with adjusting screw (C).
From behind insert the hexagon screw of screw nipple (D) through the drill hole of the locking bolt and screw into the screw nipple. Pull the Bowden cable wire through the screw nipple and screw tight.
With some door makes, the hole in the locking bolt will require drilling.
Drill at a distance of 48mm from the left edge of the lock case, using a 5.5mm drill bit.
Fix the Bowden cable to door connector attachment (F) using one clamping ear (E) and to centre hinges (G) using further clamping ears. Choose the shortest distance from the carriage to the door lock, avoiding overtaut windings.
For securing the Bowden cable to the door sections, the supplied nylon binders and adhesive clips can be used in addition to the clamping ears.

Attention: Set the Bowden cable with the adjusting screw so that the angle bracket fits snugly against the lock case!

Shortening the Bowden Cable: (If necessary)
With the door open, establish the exact length.
Remove end sleeve from the bowden cable mantle, pull the wire cable far enough back to allow the outer mantle to be cut through at the appropriate point. Replace the end sleeve.
Push the screw nipple onto the wire cable and shorten the remaining length to approx. 50mm

Tip:
Before cutting through the wire cable, wrap with insulation tape to prevent the cable from splicing.

On completing the installation and having checked the function, the door must be locked. If the emergency release is required, the door must first be unlocked.
After having used the emergency release, make a test run to make sure that the motor operates the door again.
The bolt (picture 1a / position B), the metal lever (picture 1 b / position B) and the dividing bolt (picture 1 d/ position B) in the carriage must be removed to their rear operating position.
The red disengagement pin (picture 1C/ Position G) of the flat carriage has to be pushed back manually in direction of the arrow.
The symbols (pictograms) on the downward side of the carriage indicate the actual state according to illustration:
Door is separated from operator.
- The front edge of the movable slide bar (B) is above the arrow symbol 'lock open'.
Door is connected to operator or will be reconnected automatically after next door travel.
- The front edge of the movable slide bar (B) is above arrow symbol 'lock closed'.

Attention:
Check the function of the emergency release regularly.

- Formedurrailguide
No part of this manual may be reproduced without our prior written approval.
We reserve the right to alter details in the interests of progress.
FRANÇAIS Copyright


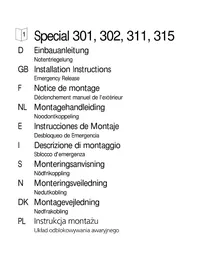
- Special 301, 302, 311, 315
- D Einbauanleitung
- GB Installation Instructions
- F Notice de montage
- - Boom extrusion
- -Boom extrusion
- Door type: up-and-over door,
- Special 311 emergenev release, item no.: 152 115
- If the supplied inside handle cannot be used, drill through the existing handle as shown in the illustration.
- Important:
- Door Type: Sectional Door, Special 302 emergenev release, item no.: 564 453 Lock version with side locking bolts
- Door type: sectional door, Special 302 emergency release, item no. 564 453, lock version without side locking bolts.
- (Shown is the inside right lock version.)
- Door type: retractable up-and-over door, Special 301 emergenev release, item no.: 564 452
- Shortening the Bowden Cable: (If necessary)
- Tip:
- The red disengagement pin (picture 1C/ Position G) of the flat carriage has to be pushed back manually in direction of the arrow.
- Door is separated from operator.
- Attention:
- - Formedurrailguide
Brand : MARANTEC
Model : Special 311
Category : Garage door