
UM 1354 CB - Mixer BOMANN - Free user manual and instructions
Find the device manual for free UM 1354 CB BOMANN in PDF.
| Product type | Blender |
| Brand | Bomann |
| Model | UM 1354 CB |
| Power supply | 220-240 V~, 50/60 Hz |
| Power consumption | 600 W |
| Protection class | II |
| Maximum capacity | 1.5 liters |
| Minimum capacity | 0.5 liter |
| Net weight | Approximately 3.1 kg |
| Number of speeds | 2 (slow and fast) + pulse function |
| Continuous operation time | 1 minute maximum |
| Required cooling time | 2 minutes |
| Bowl material | Glass |
| Blade material | Stainless steel |
| Included accessories | Measuring glass cap (50 ml), safety disk, O-ring, blade block, screw cap |
| Pulse function | Yes, position "P" |
| Safety switch | Yes, safety disk |
| Bowl cleaning | Dishwasher or hot water |
| Housing cleaning | Slightly damp cloth |
| Cable storage | Compartment under the base |
| Professional use | No, household use only |
Frequently Asked Questions - UM 1354 CB BOMANN
User questions about UM 1354 CB BOMANN
0 question about this device. Answer the ones you know or ask your own.
Ask a new question about this device
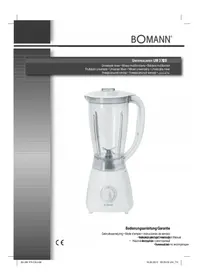
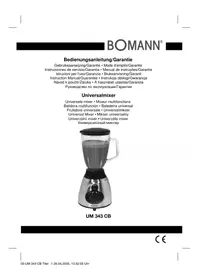
Download the instructions for your Mixer in PDF format for free! Find your manual UM 1354 CB - BOMANN and take your electronic device back in hand. On this page are published all the documents necessary for the use of your device. UM 1354 CB by BOMANN.
USER MANUAL UM 1354 CB BOMANN
natural_image
BOMANN ESTATE blender with clear glass and black handle, no visible text or symbols on the device itself.Overview and Assembly of the Components ......Page 3
Instruction Manual......Page 30
Technical Data......Page 33
B
natural_image
Line drawing of a blender with handle and spool, no text or symbols presentC
natural_image
Line drawing of a blender being placed into a smaller stand (no text or symbols)D
natural_image
Line drawing of a blender with a lid and handle, showing a drop from top to bottom (no text or symbols)E
natural_image
Line drawing of a blender with handle and spout (no text or symbols)Bedienungsanleitung
Thank you for choosing our product. We hope you will enjoy using the appliance.
Symbols in these Instructions for Use
Important information for your safety is specially marked. It is essential to comply with these instructions in order to avoid accidents and prevent damage to the machine:

WARNING:
This warns you of dangers to your health and indicates possible injury risks.

CAUTION:
This refers to possible hazards to the machine or other objects.

NOTE: This highlights tips and information.
General Notes
Read the operating instructions carefully before putting the appliance into operation and keep the instructions including the warranty, the receipt and, if possible, the box with the internal packing. If you give this device to other people, please also pass on the operating instructions.
- The appliance is designed exclusively for private use and for the envisaged purpose. This appliance is not fit for commercial use.
- Do not use it outdoors. Keep it away from sources of heat, direct sunlight, humidity (never dip it into any liquid) and sharp edges. Do not use the appliance with wet hands. If the appliance is humid or wet, unplug it immediately.
- When cleaning or putting it away, switch off the appliance and always pull out the plug from the socket (pull the plug itself, not the lead) if the appliance is not being used and remove the attached accessories.
- Do not operate the machine without supervision. If you leave the room you should always turn the device off. Remove the plug from the socket.
- The device and the mains lead have to be checked regularly for signs of damage. If damage is found the device must not be used.
- Use only original spare parts.
- In order to ensure your children's safety, please keep all packaging (plastic bags, boxes, polystyrene etc.) out of their reach.

WARNING:
Do not allow small children to play with the foil as there is a danger of suffocation!
Special Safety Precautions for this Appliance

WARNING:
- Do not reach into the mixing container during operation! You could be hurt by the rotating knives.
- Risk of cuts! The mixer blades are sharp!
- Before replacement of accessories or additional parts which move during operation, the device must be switched off and cut off from the mains.
- Do not touch moving parts.
- Always check that the accessories are seated solidly and securely before switching the device on.
- CAUTION: Ensure that the blender is switched off before removing it from the stand.
- Always disconnect the appliance from the supply if it is left unattended and before assembling, disassembling or cleaning.

WARNING:
- Do not try to repair the appliance on your own. Always contact an authorized technician. If the supply cord is damaged, it must be replaced by the manufacturer, its service agent or similarly qualified persons in order to avoid a hazard.
• This appliance shall not be used by children. - Keep the appliance and its cord out of reach of children.
• Children shall not play with the appliance. - Appliances can be used by persons with reduced physical, sensory or mental capabilities or lack of experience and knowledge if they have been given supervision or instruction concerning use of the appliance in a safe way and if they understand the hazards involved.
-
Do not immerse the motor housing into water for cleaning. Please observe the instructions that we have included for you in the chapter "Cleaning".
-
Do not use the appliance if the mixing vessel is empty.
- Do not operate the appliance for more than 1 minute. Leave it to cool down for about 2 minutes before using it again.
- The machine should only be used under supervision.
- Do not manipulate any of the safety switches!
- Do not remove the lid during operation!
- Do not put your fingers into the filler opening.
- Objects like spoons or scrapers never may be in the mixing vessel during operation.
Overview of the Components
1 Filling slot seal / Measuring jug
2 Lid
3 Mixer vessel (carafe)
4 Safety disc
5 Sealing ring
6 Knife block
7 Screw top
8 Motor housing
9 Rotary switch
10 Illuminated switch ring
11 Panel
12 Mains Lead
Installation
Mains Lead
Remove the mains lead from the storage compartment in the bottom section.
Mixing Vessel
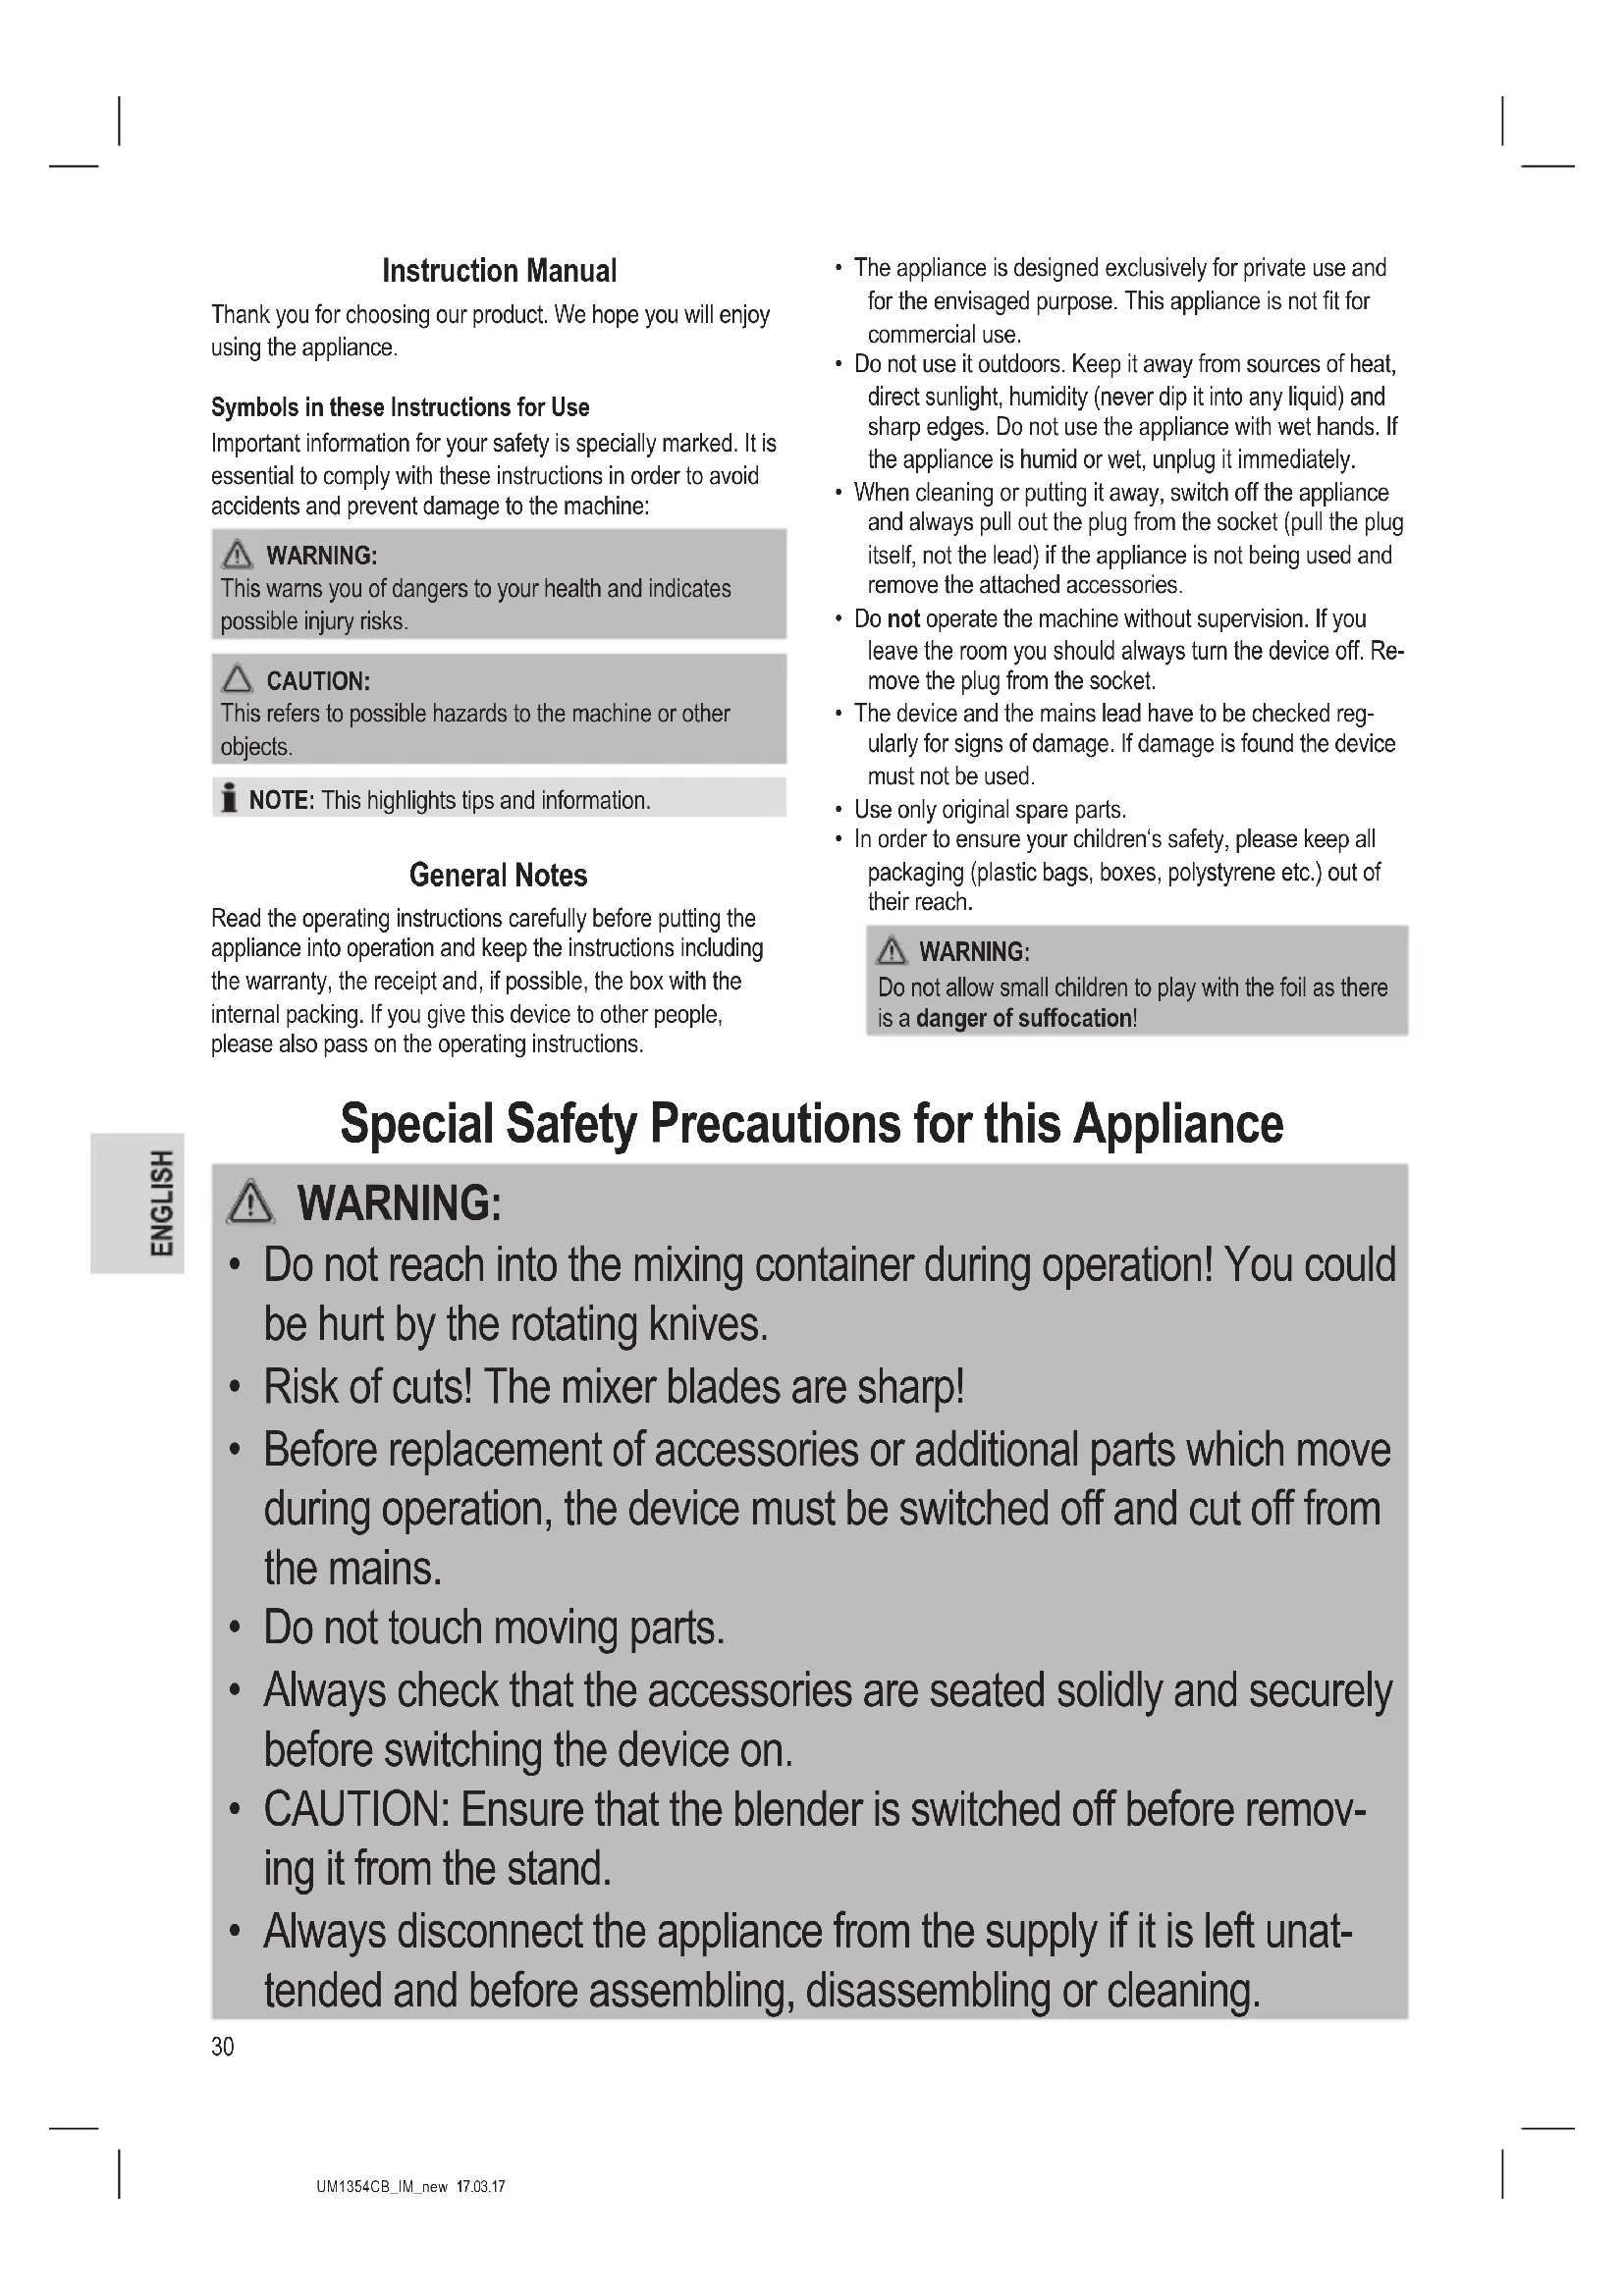
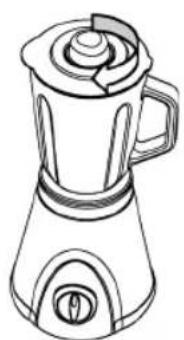
- Check any preassembled parts! (Fig. A + B) The safety disc (4), sealing ring (5), blade block (6) and screw top (7) must be assembled in the correct order.

CAUTION:
- Do not forget to insert the sealing ring as otherwise the carafe will leak.
• Always place the sealing ring on the blade block. - The screw top must be straight when screwed into place.
-
The three guide mechanisms of the safety disc must lie in the recesses of the screw top.
-
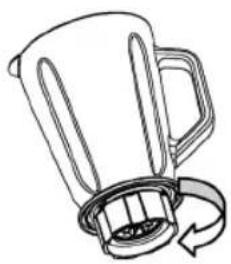
Place the carafe on the motor housing (8) (Fig. C). You can select whether the handle of the carafe should point to the left or right.

NOTE:
When the carafe is placed in position the assembled safety disc presses on the safety switch of the motor housing. If incorrectly installed the mixer cannot be operated.
Notes on Use
- Please clean the mixer vessel, the lid and seal before initial use in warm soapy water.
- Please cut the items that are to be mixed into small pieces beforehand.
- Ingredients: Do not put any hot items into the mixing vessel.
- Seal: The seal can also be used as a measuring jug (full to the brim = 50 ml).
- Short-term operation: The device is suitable for short-term operation of not more than 1 minute. After this time it should be switched off.
- Pulse operation: Pulse mode is turned on by turning the switch to the "P" position and releasing it again. The device should not be used in this mode for more than 1 minute. Allow it to cool down for 2 minutes before using it again!
- Chopping up Ice Cubes: The blade in the mixing vessel is also suitable for chopping up ice cubes. Please only fill the carafe up to 1/3 full with ice cubes. Only pulse mode "P" should be used for chopping up ice cubes.
Operation
Electrical Connection
Check whether the electrical voltage that you intend to use is the same as that of the machine. Details are to be found on the label on the base.
Preparation
- Ensure that the function switch (9) is in the "0" position.
- Place the mixing vessel in position.
- Now put the ingredients that are to be mixed into the mixing vessel (max. 1.5 litres).
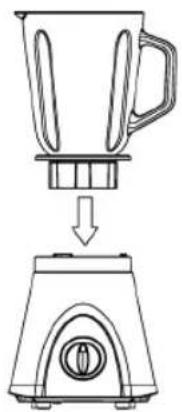
- Press the lid (2) tightly onto the carafe (Fig. D). It must tightly seal the mixer vessel.
- Close the lid with the seal (1) (Fig. E). Note the recesses on the inside of the lid. Turn the seal tight in a clockwise direction.
- Connect the mains lead to a properly installed safety power socket. The switch ring (10) lights up.
- Please hold the carafe firmly during mixing.
Mixing
- For constant mixing (continuous mode): If the device is operated on levels 1 and 2 the switch locks in place in the respective position.
Level 1 = low rpm
Level 2 = high rpm
Shift the selector to "0" to switch off the appliance.
3. For pulse mode (mixing at brief intervals):
Move the switch to the "0" position. The switch snaps into place. The appliance is off now. Turn the switch now to position "P". The switch must be kept in this position for the desired interval. When the switch is released, it returns automatically to "0" position.
Adding further ingredients to be mixed
Please switch off the machine before doing so. Spices or other ingredients that are to be mixed can be inserted through the hole in the seal.
Stopping Operation
- Turn the switch to the "0" position.
- Remove the mains plug from the socket. The illumination goes off.
- Remove the mixing vessel.
• Take off the lid before pouring.

IMPORTANT NOTE:
Citrus juices and food containing acids should never be stored in metal vessels.
- The mains lead can be stored in the bottom section.
Cleaning

WARNING:
• Always remove the plug before cleaning!
- Do not immerse the motor housing in water for cleaning in any case. Otherwise this might result in an electric shock or fire.
- The blades on the knife block are very sharp. A risk of injury exists!

CAUTION:
- Do not use a wire brush or any abrasive items.
- Do not use any acidic or abrasive detergents.

NOTE: Preliminary Cleaning
Half fill the mixing vessel with water and turn the switch to "P" for approximately 10 seconds. Then pour out the liquid.
- For thorough cleaning, please remove the mixing vessel.
• Always disassemble the mixer after use.

WARNING: Danger of injury!
The blades on the blade block are sharp. Please be careful when dismantling, cleaning and reassembling the individual parts.
- Unscrew the screw top in a clockwise direction from the carafe. Remove the blade block and the sealing ring from the screw top. When removing the safety disc, use the thread on the carafe.
Carafe
The carafe can be cleaned in the dishwasher or warm soapy water.
Safety Disc, Sealing Ring, Blade Block and Screw Top
• These parts should only be briefly rinsed off with hot water.
• After all parts have been cleaned and dried, assemble your mixer as described under Installation.
Housing
Only a moderately moist cloth should be used for cleaning the outside of the device.
Troubleshooting
| Problem Possible Cause Remedy | ||
| The device is not working. | The device has no power supply. | Check the socket with another appliance. |
| Plug in the mains plug correctly. | ||
| Check the main circuit breaker. | ||
| Wrong switch setting. | Check the position of the rotary switch. | |
| The device is fitted with a safety switch. This prevents the motor from starting up unintentionally. | Check that the mixer vessel and safety disc are firmly installed. | |
Technical Data
Model:......UM 1354 CB
Power supply: 220 - 240 V\~, 50 / 60 Hz
Power consumption: 600 W
Protection class: II
Short-term operation:....1 Min.
Filling quantity: 0,5-1,5 Litre
Net weight: ....approx. 3,1 kg
The right to make technical and design modifications in the course of continuous product development remains reserved.
This device has been tested according to all relevant current CE guidelines, such as electromagnetic compatibility and low voltage directives, and has been constructed in accordance with the latest regulations.
Disposal
Meaning of the "Wheelie Bin" Symbol
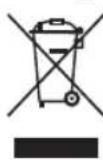
Take care of our environment; do not dispose of electrical appliances via the household waste. Dispose of obsolete or defective electrical appliances via municipal collection points.
Please help to avoid potential environmental and health impacts through improper waste disposal.
You contribute to recycling and other forms of utilization of old electric and electronic appliances.
Your municipality provides you with information about collecting points.
Instrukcja obsługi
CTC Clatronic Sp. z o.o
Ul. Brzeska 1
45-960 Opole
Usuwanie


- Bedienungsanleitung
- Symbols in these Instructions for Use
- WARNING:
- CAUTION:
- General Notes
- Special Safety Precautions for this Appliance
- Overview of the Components
- Installation
- Mains Lead
- Mixing Vessel
- NOTE:
- Notes on Use
- Operation
- Electrical Connection
- Preparation
- Mixing
- For pulse mode (mixing at brief intervals):
- Adding further ingredients to be mixed
- Stopping Operation
- IMPORTANT NOTE:
- Cleaning
- NOTE: Preliminary Cleaning
- WARNING: Danger of injury!
- Carafe
- Safety Disc, Sealing Ring, Blade Block and Screw Top
- Housing
- Technical Data
- Disposal
- Meaning of the "Wheelie Bin" Symbol
- Instrukcja obsługi
- Usuwanie
Brand : BOMANN
Model : UM 1354 CB
Category : Mixer