
KM 1373 CB - Food Processor BOMANN - Free user manual and instructions
Find the device manual for free KM 1373 CB BOMANN in PDF.

| Brand | Bomann |
| Model | KM 1373 CB |
| Product type | Food processor (kneader, mixer, meat grinder) |
| Power supply | 220-240 V~, 50/60 Hz, 1000 W |
| Net weight | Approx. 6.75 kg |
| Protection class | II |
| Mixing bowl capacity | Max 3.0 kg for light dough, max 1.75 kg for heavy dough |
| Blender capacity | Max 1500 ml (liquid) |
| Number of speeds | 6 speeds + pulse mode (P) |
| Main functions | Kneading, mixing, whipping, chopping, blending, making sausages, cookies, pasta, kebbe |
| Included accessories | Whisk, dough hook, mixing hook, stainless steel mixing bowl, glass blender with lid, meat grinder with 3 plates, sausage, kebbe, cookie, 4 pasta attachments |
| Main materials | Stainless steel mixing bowl, glass blender, plastic body |
| Safety | Safety switches on the arm and blender lid, motor stops when opened |
| Cleaning | Hand washable parts; do not use dishwasher or abrasive products |
| Intended use | Household use only |
| Max operating time | Heavy dough kneading: 4 min then 10 min rest; Grinder: 15 min then 10 min rest; Blender: 2 min then 1 min rest |
| Repairability | Contact after-sales service; do not attempt repair yourself |
Frequently Asked Questions - KM 1373 CB BOMANN
User questions about KM 1373 CB BOMANN
0 question about this device. Answer the ones you know or ask your own.
Ask a new question about this device
Download the instructions for your Food Processor in PDF format for free! Find your manual KM 1373 CB - BOMANN and take your electronic device back in hand. On this page are published all the documents necessary for the use of your device. KM 1373 CB by BOMANN.
USER MANUAL KM 1373 CB BOMANN
P P P P P P P P P P P P P P P P P P P P P P P P P P P P P P P P P P P P P P P P P P P P P P P P P P P P P P P P P P P P P P P P P P P P P P P P P P P P P P P P P P P P P P P P P
WAARSCHUWING: Verwondingsgevaar!
WAARSCHUWING: Verwondingsgevaar!
WAARSCHUWING: Verwondingsgevaar!
WAARSCHUWING: Verwondingsgevaar!
WAARSCHUWING: Verwondingsgevaar!
Tabla detipsode masay accessories. 37
Interrumpir el funciona.. 37
Thank you for purchasing our product. We wish you much pleasure with the appliance.
Symbols in this Instruction Manual
Important safety information is explicitly marked. Please follow these instructions exactly in order to avoid injuries and damages to the unit:

WARNING:
Warns against health hazards and indicates possible risks of injury.

CAUTION:
Indicates possible damage to the unit or to other objects.

NOTE: Highlights tips and information for you.
Contents
Overview of the Components. 3
Assembly of the Mixing Bowl. 4
Assembly of the Meat Grindera 5
General Notes 52
Special Safety Instructions for This Appliance. 52
Intended Use 53
Overview of the Components / Scope of Delivery.54
Unpacking the Appliance 54
Electrical Connection 54
The Kneading Machine. 54
Installation and Operation of the Kneading Machine ....54
Table of Dough and Tools 55
Interruption of Operation 55
Completion of operation and removal of the bowl. 55
Recipes 55
MeatGrinder 56
Application notes for the meat grinder 56
Preparation 56
Assembly of the Meat Grindera 57
Assembly of the Sausage Attachment. 57
Assembly of the "Kebbe" Attachment 57
Assembly of the Cookie Attachment 57
Assembly of the Pasta Attachments 57
Operation of the Meat Grindera 57
Complete operation 57
The Mixer 57
Application Instruction for the Mixer. 57
Assembly of the Mixing Bowl 58
Operation of the Mixer 58
Complete operation 58
Cleaning 58
Motor housing 59
Accessories of the kneading machine and the meat grinder 59
Accessories of the mixer 59
Storage 59
Troubleshooting 59
Technical Data 59
Disposal 59
Meaning of the symbol "dustbin" 59
General Notes
Before operating this appliance, read the operating instructions carefully, and keep them on file, including the warranty receipt and, if possible, the box with the internal packing. If you pass the appliance on to a third party, please pass on the manual.
- Use the appliance privately and only for its intended purpose. This appliance is not intended for commercial use.
- Do not use the appliance outdoors. Keep it away from heat, direct sunlight, moisture (never dip it into any liquid), and sharp edges. Do not use the appliance with wet hands. Unplug the appliance if it is exposed to moisture or liquid.
- The appliance and the power cord must be regularly inspected for signs of damage. If damage is detected, the appliance may no longer be used.
- Use only original accessories.
- In the interest of child safety, do not leave any packaging components (plastic bags, cardboard, polystyrene, etc.) lying around.

WARNING:
Do not let little children play with foil. Danger of suffocation!
Special Safety Instructions for This Appliance

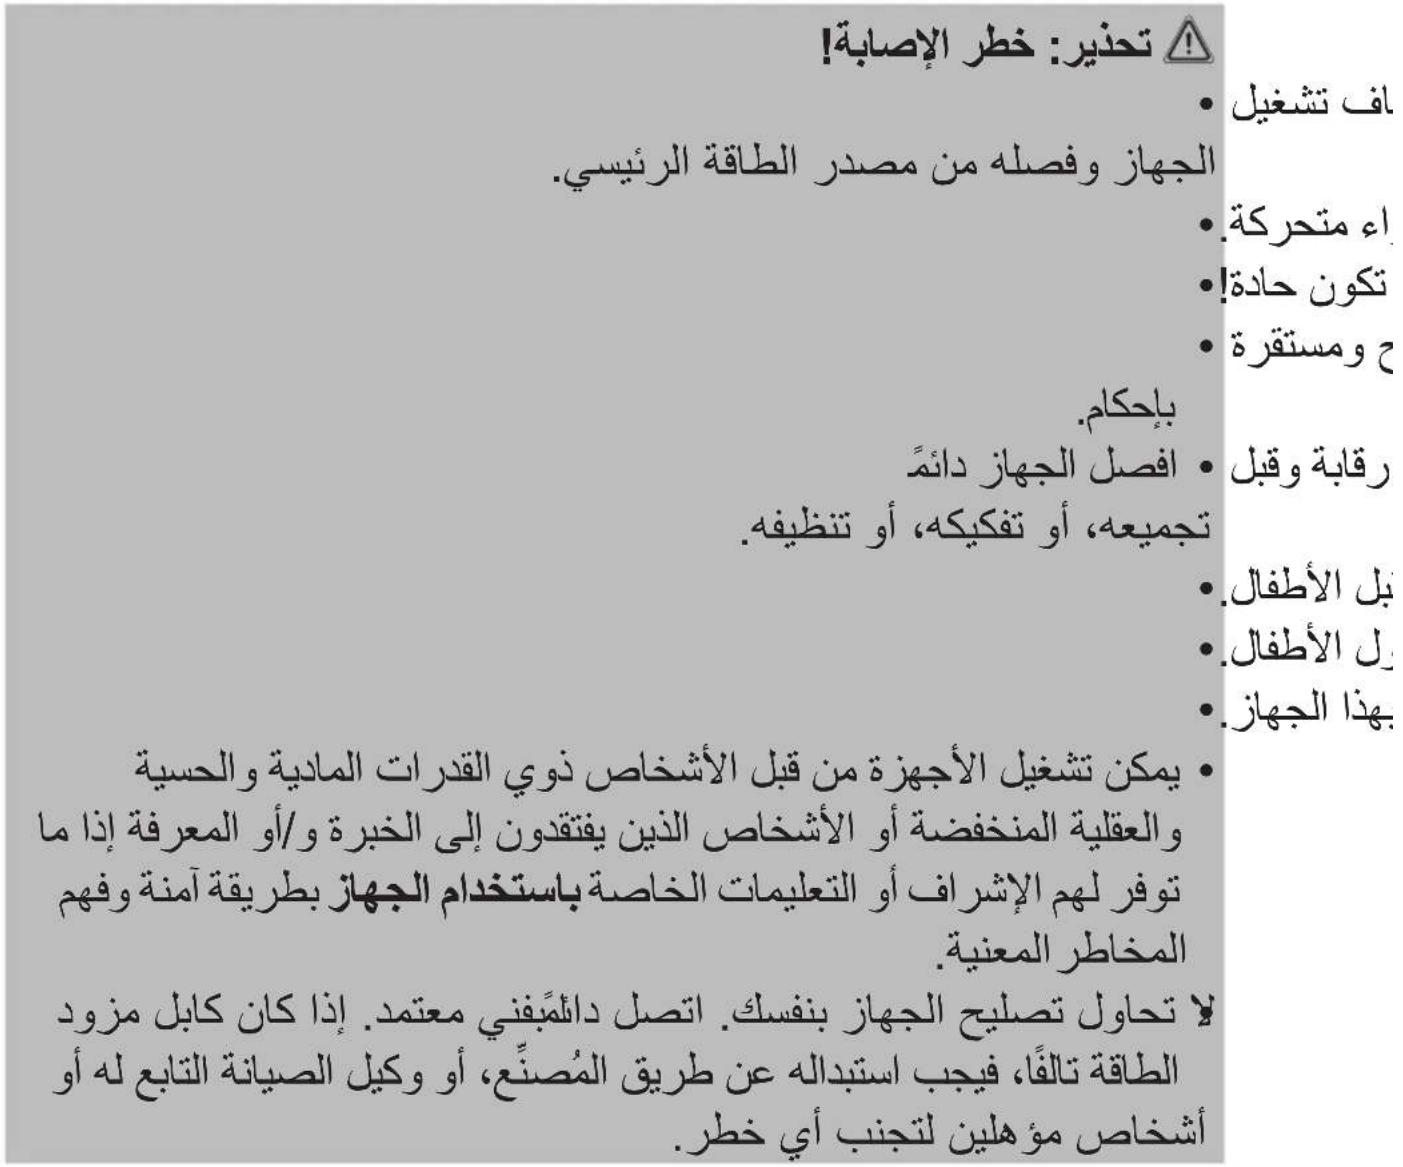
WARNING: Risk of injury!
- Prior to replacing accessories or attachments that are moved during operation, the appliance must be turned off and unplugged.
- Do not touch any moving parts.

WARNING: Risk of injury!
- The knives in the mixing bowl and the meat grinder are sharp!
- Before switching on the appliance, make sure that the accessory attachment is mounted correctly and firmly seated.
- Always disconnect the appliance from the supply if it is left unattended and before assembling, disassembling or cleaning.
- This appliance shall not be used by children.
- Keep the appliance and its cord out of the reach of children.
Children shall not play with the appliance. - Appliances can be operated by persons with reduced physical, sensory, or mental capabilities or lack of experience and / or knowledge if they have been given supervision or instruction concerning the use of the appliance in a safe way and understood the hazards involved.
- Do not try to repair the appliance on your own. Always contact an authorized technician. If the supply cord is damaged, it must be replaced by the manufacturer, its service agent or similarly qualified persons in order to avoid a hazard.

CAUTION:
Do not immerse the device into water for cleaning. Please follow the instructions as stipulated in the chapter "Cleaning".
- Do not manipulate any safety switches.
- Use this machine only for the processing of food.
- The abuse for any other purposes may result in injury.
Intended Use
This appliance serves as
- kneading / mixing machine for making dough, creams, cream, whipped egg whites:
- mixer for pureeing, beating, mixing:
- meat grinder for crushing of food. You can form a paste or dough with different attachments.
It is exclusively intended for this purpose and must only be used for that.
It may only be used in the manner described in this manual. Use the appliance as either a kneading / mixing machine or a mixer or meat grinder. Never use multiple functions simultaneously.
You may not use the appliance for commercial purposes.
Any other use is considered improper and may result in material damage or even personal injury.
The manufacturer is not liable for damages caused by improper use.
Overview of the Components / Scope of Delivery
Page 3:
1 Mixing bowl
2 Safety cover for mixing engine
3 Swivel arm
4 Release button for lowering / raising the arm
5 Knob
6 Motor housing
7 Mixing bowl
8 Splash guard
9 Cover for meat grinder engine
10 Meat grinder with filling tray and damer
11 Whisk
12 Stirring hook
13 Dough hook
14 Protection shield
Page 4: Assembly of the Mixing Bowl
1 Glass carafe
1a Cap of the lid (measuring cup)
1b Lid
1c Security ring
1d Sealing ring
1e Knife block
1f Screw-on top
Page 5: Assembly of the Meat Grinding
15 Spiral housing
16 Spiral
17 Knife
183 sieves (fine, medium, coarse)
19 Locking ring
20 Adapter for sausage attachment
21 Sausage attachment
22 2-part attachment "Kebbe"
23 Adapter for cookie attachment
24 Biscuits attachment
25 Biscuits cutter form
26 4 pasta attachments (different pasta shapes)
Unpacking the Appliance
- Remove the appliance from the package.
- Remove all packaging material such as films, filler, cable holders and cardboard.
- Check the delivery contents for completeness.
- Should the package contents be incomplete or damages be found, do not take the appliance into operation. Take it immediately back to the dealer.

NOTE:
Dust or production residues can be located on the appliance. We recommend you to clean the machine as described under "Cleaning".
Electrical Connection
Check whether the power supply that you want to use coincides with that of the appliance. The information can be found on the nameplate.
The Kneading Machine
Installation and Operation of the Kneading Machine

CAUTION:
Never press the release button (4), if you have placed the mixing bowl! The mixing bowl tilts.

NOTE:
A safety switch prevents operation without cover for the mixing engine.
Unless you have previously used the mixer or meat grinder, cover the drive shaft of the mixing engine and the spiral housing with the respective safety cover.
- Open the swivel arm: Press the release button (4). Move the arm by hand to the highest position.
- If you need the splash guard, fix it now from the bottom of the swivel arm. Position the splash guard (8) so that the filling opening is in front of you. Press the splash guard on to the swivel arm.
- If you want to use the dough hook (13) or the stirring hook (12), mount previously the protection shield (14). It prevents the drive shaft from coming into contact with the dough.
Hold the protection shield the way you hold a bowl. Insert the dough hook or the stirring hook from below through the recess of the protection shield and turn it firmly by a quarter turn.
4. Use of a tool:
At the upper end of the tool you see an opening for the drive shaft and the cotter pin. Slide the tool over the drive shaft.

Press and rotate the tool simultaneously clockwise so that the cotter pin of the drive shaft locks into the tool.
- Mixing bowl: Put the bowl into its holder. Turn the bowl toward LOCK until it stops.
- Fill your ingredients into the mixing bowl.
NOTE:
If you knead heavy doughs, do not put all the ingredients at once into the mixing bowl. Start the kneading with flour, sugar and eggs. Add fluids slowly during the kneading.
- Check whether the knob is set on "0".
-
Press the release button (4) to lower the arm. You now need to press on the arm from above until it snaps into the lowest position.
-
Plug the power cord into an approved mains socket.
- Select a speed using the following table.
Table of Dough and Tools
| Doughs Tool Levels Quantity Max. Operating time | ||||
| Heavy doughs (e.g. bread or short pastry) | Dough hook | 1-4 | Max. 1.75kg | 4 minutes |
| Moderate doughs (e.g. cake mix) Stirring hook 3-4 | min. 0.5kg max. 3.0 kg | 2-4 minutes | ||
| Light doughs (e.g. waffle or crêpe batter, pudding) | Whisk 4-5 | min. 0.5kg max. 3.0 kg | 2-4 minutes | |
| Cream | Whisk 6 | min. 200 ml max. 1 litre | 4 minutes | |
| Beaten egg whites | Whisk | 6 | 4-10 egg white | 3-4 minutes |
NOTE:
- Short-term operation: Operate the appliance with heavy doughs no longer than 4 minutes, and allow the appliance to cool down for 10 minutes.
- Level P for pulse mode: Turn the engine briefly at highest speed by holding the knob in this position.
Interruption of Operation

WARNING: Risk of injury!
Always set the knob to "0" if you want to interrupt the work.
- Disconnect the power plug if you want to change the tool.
- Wait for the standstill of the tool!
If you use the release button during operation (4) to pivot up the arm, a safety switch will shut off the motor.
- You can only continue operating if you have previously set the knob to "0".
Completion of operation and removal of the bowl
- Set the knob to "0" after completion of the work. Disconnect the power plug.
- Press the release button (4), the arm raises.
- Remove the tool.
- Turn the bowl with a brief clockwise rotation to remove it.
- The finished dough can be removed from the mixing bowl with the help of a dough scraper.
- Clean the parts used as described under "Cleaning".
Recipes
Cake Mix (basic recipe)
Level 3-4
Ingredients:
250 g soft butter or margarine, 250 g sugar, 1 pack. Vanilla sugar or 1 sachet lemon flavor, a pinch of salt, 4 eggs, 500 g flour, 1 sachet baking soda, about 13 I milk.
Preparation:
Add wheat flour with the remaining ingredients into the mixing bowl, stir with the stirring hook for 30 seconds at level 2, then 3 minutes at level 3. Apply a thin layer of grease to the baking tin or line it with baking paper, pour in the batter and bake it. Before removing the pastry from the oven, perform a readiness test: pierce with a pointed wooden stick in the center of the pastry. If no dough sticks to it, the cake is done. Overthrow the cake on a wire rack and let it cool.
Conventional oven:
Loading height: 2
Heating: electric oven top and bottom heat 175-200°, gas oven: level 2-3
Baking time: 50-60 minutes
This recipe can be modified depending on your taste, e.g. with 100g raisins, nuts, or grated chocolate. There are no limits to your imagination.
Flaxseed bread rolls
Level 1-2
Ingredients:
500 - 550 g wheat flour, 50 g flaxseed, % l of water, 1 cube of yeast (40g), 100 g low-fat chesse, well drained, 1 teaspoon salt.
To glaze: 2 tablespoons water
Preparation:
Soak flaxseed in 18 I lukewarm water. Fill the remaining lukewarm water ( 14 ) into the mixing bowl, crumble the yeast into it, add curd and mix well with the dough hook at level 1. The yeast should be completely dissolved. Add the flour with the soaked flaxseeds and salt to the mixing bowl. Knead at level 1, then switch to level 2 and knead for another 3 - 5 minutes. Cover the dough, and let it rise in a warm place for 45 - 60 minutes. Knead the dough once again, remove it from the bowl and shape it into 16 rolls. Line a baking sheet with wet baking paper. Position the rolls on the sheet, let them rise for 15 minutes, sprinkle them with lukewarm water and bake them.
Conventional oven:
Loading height: 2
Heating: electric oven: top and bottom heat 200 - 220^ (5 minutes preheating), gas oven level 2-3
Baking time: 30-40 minutes
Chocolate Mousse Level 4-5
Ingredients:
200 ml whipping cream, 150 g semisweet chocolate couverture, 3 eggs, 50 - 60 g sugar, a pinch of salt, 1 sachet vanilla sugar, 1 tablespoon cognac or rum, chocolate leaves.
Preparation:
Whip the cream in the mixing bowl with a whisk to stiff peaks, remove it from the bowl and store it in a cool place. Melt the chocolate couverture according to package instructions, or in the microwave at 600 W for 3 minutes. In the meantime, beat eggs, sugar, vanilla sugar, cognac or rum and salt in the mixing bowl with the whisk at level 4 until it is foamy. Add the melted chocolate couverture and stir it well at level 4 - 5. Set aside some of the whipped cream for garnishing. Add the remaining cream on the creamy mass and stir briefly by selecting the pulse function. Garnish with chocolate cream garnish and serve well chilled.
MeatGrinder
Application notes for the meat grinder

WARNING:
The blade of the meat grinder (17) is sharp!
Handle the knife of the meat grinder with the necessary care during assembly and cleaning. There is a risk of injury!
- Do not mince any hard objects, such as bones or shells.
- Cut the meat into 2.5cm pieces. Ensure that there are no bones or tendons in the meat.
-
To shred the meat coarsely, use the disc with the largest holes.
-
In a second step, select the disc with the finer or center holes. Depending on how finely you want to shred the meat.
- Before you start, lightly coat the sieves with vegetable fat.
- If you mince meat, place a container under the outlet.
- With the help of the "Kebbe" attachment (22) tubes of meat or dough can be formed.
- Use the meat grinder as pasta maker, prepare an area where you can lay out the pasta later.
Making sausage
- You can use both natural and synthetic casings.
- If you have opted for a natural casing, soak this casing some time in water before using it.
- Tie a knot at one end of the casing.
- Slide the casing over the sausage attachment.
- Feed the sausage meat through the sausage attachment and fill the sausage casing.
- Make sure that the sausage meat is "loosely" stuffed into the casing as the sausage expands in volume during cooking or frying and may cause the casing to burst open.
- When the first sausage reaches the desired length, squeeze the sausage at the end of the sausage attachment together with your fingers.
- Turn the sausage once or twice around its own axis.
- Until you have established some exercise routine, you can turn off the appliance after each sausage length.
Shaping biscuits
- Prepare a surface on which you can lay the cookies afterwards.
- With the cookie cutter form (25) you can create different cookie shapes.
After having mounted the spiral housing with the cookie attachment (24) onto the appliance, slide the cookie cutter form into the cookie attachment. - Select the desired cookie form.
- Hold the dough strand in your hand at the opening and cut off the desired length.
Preparation
Please refer to our overviews on page 3 and 5.
- Assemble the bowl without tools.
- Cover the drive shaft of the mixing drive with the safety cover (2).
- The spiral housing uptake on the appliance is protected with a cover (9). Remove the cover by turning it into the direction OPEN.
- Place the filling tray on the filler neck so that the uptake of the tablet is on the engine block.
- Slide the spiral (16) in the horizontal part of the spiral housing until the axle mechanically locks.
The assembly of the accessories is described in the following sections. Prepare the meat grinder according to your desired application.
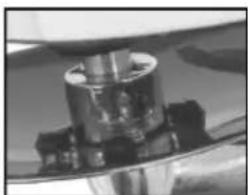
Assembly of the Meat Grinder (see fig. A)
Proceed as described under "Preparation".
- Place the blade (17) with the sharpened sides outwards onto the axis of the spiral.
- Select a sieve (18). Pay attention to the notches on the spiral housing, while inserting the sieve.
- Screw the locking ring (19) clockwise onto the spiral housing.
Read further instructions under "Operation of the Meat Grinding".
Assembly of the Sausage Attachment (see fig. B)
Proceed as described under "Preparation".
-
Use a finished sausage mass, proceed as follows:
-
Firstly, insert the adapter (20) on the axis of the spiral.
- Insert the sausage attachment (21) into the locking ring (19).
-
Screw the locking ring with the sausage attachment clockwise onto the spiral housing.
-
If you want to shred pieces of meat and produce sausages in a single operation, mount the knife and a sieve at first as described under "Assembly of the Meat Grinding", points 6 and 7. Then insert the sausage attachment into the locking ring.
-
Screw the locking ring with the sausage attachment clockwise onto the spiral housing.
Read further instructions under "Operation of the Meat Grinding".
Assembly of the "Kebbe" Attachment (see fig. C)
Proceed as described under "Preparation".
- Insert the "Kebbe" attachment (22a) to the axis of the spiral. Pay attention to the notches on the spiral housing.
- Insert the "Kebbe" attachment (22b) in the locking ring (19).
- Screw the locking ring with the "Kebbe" attachment clockwise onto the spiral housing.
Read further instructions under "Operation of the Meat Grinding".
Assembly of the Cookie Attachment (see fig. D)
Proceed as described under "Preparation".
- Firstly, insert the adapter (23) on the axis of the spiral. Pay attention to the notches on the spiral housing.
- Plug the cookie attachment (24) in the adapter. Pay attention to the notches on the cookie attachment.
- Screw the locking ring (19) clockwise onto the spiral housing.
- Slide the cookie form cutter (25) through the slots on the cookie attachment.
Read further instructions under "Operation of the Meat Grinding".
Assembly of the Pasta Attachments (see fig. E)
Proceed as described under "Preparation".
- Select a pasta attachment (26).
- Place the attachment on the axis of the spiral. Pay attention to the notches on the spiral housing.
- Screw the locking ring (19) clockwise onto the spiral housing.
Read further instructions under "Operation of the Meat Grinding".
Operation of the Meat Grinding
WARNING: Risk of injury!
- Once you turn on the appliance, the drive shaft of the kneading machine starts rotating. Do not reach into the rotating drive shaft during operation!
Always mount the bowl for your safety.
Always use the supplied pusher. Never put fingers or tools into the filler neck!
CAUTION:
Never use the meat grinder with attached bowl! Cover the drive shaft of the mixing drive with the safety cover (2).
- Put the pieces of meat (meat paste / sausage mass or dough) on the filling tray and into the filler neck.
- Plug the power cord into a properly installed earthed socket.
- You can select a speed from level 3 to 5.
- Stuff, if necessary, the meat respectively the dough with the stuffer.
NOTE:
Short-term operation: Operate the appliance with the meat grinder no longer than 15 minutes and allow the appliance to cool down for 10 minutes.
Complete operation
- Set the knob to "0" after completion of the work.
- Disconnect the power plug.
- Disassemble all parts of the meat grinder.
- Clean the parts used as described under "Cleaning".
- Cover the uptake for the spiral housing with the cover (9).
The Mixer
Application Instruction for the Mixer
WARNING: Risk of injury!
- The knife in the mixer is sharp! Handle the blades of the mixer with the necessary care, especially when emptying and cleaning the mixing bowl!
- Once you turn on the appliance, the drive shaft of the kneading machine starts rotating. Do not reach into the rotating drive shaft during operation!
Always mount the bowl for your safety.

CAUTION:
- Never press the release button (4), if you have placed the mixing bowl! The mixing bowl tilts.
- Do not operate the mixer without food!
- The glass could crack at high temperatures! Do not fill in liquids over 60^ .
- Do not overfill the mixing bowl! Fill in a maximum of 1500 ml (fruit and liquid).
- Foam takes a lot of volume. Reduce the capacity for liquids that foam vigorously.
- Cut the food into small pieces before operating the machine.
- Do not fill any hard ingredients such as nuts or coffee beans into the mixing bowl.

NOTE:
The knives in the mixing vessel are also suited to crush small amounts of pure ice. Remember, however, that the operation may blunt the knife.
Recommendation:
If you want to prepare drinks with crushed ice, add the ice cubes during mixing. The ice is crushed during mixing.
Place the mixing bowl on a stable level surface when filling it. So you can better place the cover afterwards.
Assembly of the Mixing Bowl
Please refer to our overviews on page 3 and 4. Check the pre-assembly! The sealing ring (1d), the knife block (1e) and the screw (1f) must be fitted in the correct order.

CAUTION:
- Never forget to place the sealing ring on the knife block. Otherwise, the mixing bowl will leak.
- The screw lock should be tightened properly, making sure that it goes on straight, not askew.
Operation of the Mixer
- Fill in the crushed ingredients into the mixing bowl.
- Press the lid firmly on the mixing bowl.
- Close the refilling opening with the lock. Insert the lock into the refilling opening and tighten it clockwise.
- Set the knob to "0".
- Make sure that the arm is lowered and locked.
- Remove the safety cover (2) from the drive shaft of the mixing engine. Press onto the ribbed surface.
- Place the mixing bowl on the drive shaft of the mixing engine.
- Plug the power cord into an approved mains outlet.
- Select a speed level.

NOTE:
- Short-term operation: Operate the appliance no longer than 2 minutes when mixing. Allow it to cool down for 1 minute before using it again.
- To refill ingredients, turn off the appliance. Remove the lock or lid. Continue the operation only with the properly positioned lid and the refilling opening closed.
Complete operation
- Set the knob to "0".
- Disconnect the power plug.
- Remove the mixing bowl.
- Lift the lid before pouring out the contents.
- Clean the parts used as described under "Cleaning".
- Cover the drive shaft of the mixing engine with the safety cover.

IMPORTANT NOTE:
Never keep citrus juices or acidic foods in metal bowls.
Cleaning

WARNING:
- Always disconnect the power plug before cleaning.
- Never immerse the appliance in water for cleaning. It could cause an electric shock or fire.
- The knives in the mixing bowl and the meat grinder are sharp! There is a risk of injury! Proceed carefully when disassembling, cleaning and assembling the individual parts.

CAUTION:
- Do not use wire brushes or other abrasive objects.
- Do not use any sharp or abrasive cleaning agents.
Motor housing
For cleaning of the housing, only use a damp cloth and mild detergents.
Accessories of the kneading machine and the meat grinder

CAUTION:
The components are not suitable for cleaning in the dishwasher. Under the influence of heat and strong detergents, they could deform or discolour.
- Components that have come into contact with food, can be cleaned in soapy water.
- Allow the parts to dry thoroughly before assembling the appliance again.
Accessories of the mixer

NOTE: Pre-cleaning
Fill the mixing bowl halfway with water and turn on the appliance for about 10 seconds. Empty out the liquid afterwards.
- For proper cleaning, remove the mixing bowl.
- Disassemble the mixing bowl after each use.
- Unscrew the screw lock of the mixing bowl.
- Remove the knife block and the sealing ring from the screw lock.
- You can clean the glass carafe of the mixing bowl and lid together with the lock in warm soapy water. Rinse with clear water and dry it.
Sealing ring, knife block and screw lock
- Rinse these parts briefly with hot water.
- After cleaning and drying all parts, assemble your mixing bowl in reverse order again. Please also refer to our picture on page 4.
Storage
- Clean the appliance as described. Let the accessories dry completely.
- We recommend that you keep the appliance in the original packaging, if you do not want to use it for a longer period.
Always store the appliance out of reach of children in a well ventilated, dry place.
Troubleshooting
| Problem Possible cause Solution | ||
| The appliance does not turn on or stops operating. | The appliance has no power supply. | Check the outlet with another appliance. |
| Plug in the mains plug correctly. | ||
| Check the house fuse. | ||
| Your appliance is equipped with safety switches. They prevent accidental starting of the motor. | Check the correct position - of the swivel arm (3) - the mixing bowl (1) or - the safety cover (2) | |
| The appliance is defect. | Consult our service department or an expert. | |
Technical Data
Model: KM 1373 CB
Power supply: 220-240V\~,50/60Hz
Power consumption: 1000 W
Protection class: II
Net weight: approx. 6,75kg
The right to make technical and design modifications in the course of continuous product development remains reserved.
This device has been tested according to all relevant current CE guidelines, such as electromagnetic compatibility and low voltage directives, and has been constructed in accordance with the latest safety regulations.
Disposal
Meaning of the symbol "dustbin"
Protect our environment; electrical appliances do not belong in household waste.
Use the collection points for the disposal of electrical equipment and submit your electrical and electronic equipment to these points that you will no longer use.
You help reduce the potential impact of incorrect disposal on the environment and human health.
You contribute to recycling, and other forms of recycling of electrical and electronic equipment.
Information concerning the disposal of appliances can be obtained from your local or municipal authorities.
Instrukcja obslugi
Ipepepa60ToC yctpoCTBOM BHNMaTeNbHO npOHTe pyKOBOCTBO nO 3KcNpyatauIN, COxpaHnTe erO BMecTe C rapaHTnHbIM TaIOHOM N, ECNI BO3MOxHCO, CynaKOBKO. Pnppepaue yctpoCTBa DpyIM Nuaam, pnpIoXnTE K Hemy pyKOBOCTBO nO 3KcNpyatauIN.
- IcnoIb3yIte yCTpoIcTBo 6epeXHo n ToIbKO nIa CEneBOrO Ha3HaueHnry. YCTpoIcTBO He npEHa3HaueHO nIa KOMMepueCKoro IcNoJIb3ObaHnry.
He nOJIb3yIte yCTpoIcTB O BHe NOMEuHn. 3aUu- UaITe erO OT Bo3deIcTBn Tenn, npMoro CoJHcHOro CBeta, BnaXHoCTN (3anpeuaeTcN IORpyKaTb B XnKIOCTb) n OCTpbIX npEdMeTob. He noJIb3yIteCb yCTpoIcTBOM, ecnn y Bac bNaXHbIe pyKn. Ecnn yCTpoIcTBo NOdBepRTOCBO3dEChTBnIO KINKOCTn,OTKJIIOHTe erO OT cETn. - UcTpoCTBO u Hyp nITaHn cIeIyET peYIpaHOp npOBepaTb Ha hAmUHe NOBpeXdHn. PpN oShApYKeHn IOBpeXdHn, 3aPpeSaeTcB D aJIbHeM IcNoIb3O-BaTb yCTpoCTBO.
- TOnb3yTeCb ToIbKO opuHaHbHbIMn npHaAdneKHOCTaMI.
Buey oecneeyn 6eonacnoctn He octabnTe BOKpy ynaKOBouHbIe MaTePnAJIbI (PiactNKOBblie NaKeTbI, KAPTOH, NOINCTNPOJ N T. n.) ecnB NOMEUeHne IMeHT DoCTyn Detn.

IPEyIPEKDEHNE:
He n03BOJnIe TeTm IrpTaB c NpNtINHeBOHnnEHHo. Onachocb ydyueHna!
CneuNbHbIe yka3aHnNo 6e3OpacHOCTN dIy 3TOrO yCTpoiCTBa
I P E D U N P E X D E H N E: O n a c h o c t b n o l y u e H N A T p a B M b I!
- Пераць ameнов BCNOMORATEJBHbIX BpaUOUXCЯ BO BpeMЯ pa60tbi npncnocobleni n HacaDOK Heo6xOIMO BbIKIQUaTb yCTPOICTBO N BbldeprnBaTb shHyp n3 p03eTKn.
3anpeaetc npkaacbca K IIObIM BpaauoumcyaCTaM.
Buahe dIy cMeunBaHnI Mscopy6Ke haoTc8 ocTpblE HOxN! - Перацькшуюченим устpoиства убадипесь, чTo пинадлжноCTи и насадки установленьы правильно и 3akpenпеньы.
Bcerda otknioaute yctpoicTBO n3 cetn, KOrda C HIM HIKTO He pa6oTaET, a TAKKe nepei hauanom pa36opKn, c6opKn u nCTKN.
-ДетямЗапецаetсЯпьзOBаТьСаданнвIM yctpoiCTBOM.
XpaHnTe yCTpoiCtBO n erO shHyp B MeCTax, HeIOCTyINhBIX dIЯ dete.
-Дети He DoJxHbI nrgaTb C yCTpoiCTBOM. - UcTpoIcTBo MoKET NcNoJIb3OBaTbcra JIOdBMN C NOHIXeHHbIMN cIN3UHeCKIMN, CeHCOPHbIMN INJN yMCTBeHHbIMN cNOco6HOCTaMn INI C HeIOCTaTKOM ONbITa N/INJN 3HaHNI, B CInyae ecIN OHN HaXODaTc IOD pINCMOTpOM INJN pPOJIN INHCTpykTaX B OTHOWeHm6e3ONaCHOrO NcNoJIb3OBaHnA yCtpoIcTBa N IOHIMaIOT CBra3aHbIE C HIM ONaCHOCTN.
He nbitaTe OTpeMOHTnpOBaTb yCTpoiCTBO cAmOCToTeIbHo. O6raTeJIbHO CBJXITecb C aBTOpN3OBaHHbIM MaCTepOM. PnIOBpeKdEHN CeTEBOrO shHpa, BO n36eXaHne onaCHocTn nopAKeHn 3JIeKTPnueckm TOKOM, shHyp cJIeDyET 3aMeHNTb y n3ROTOBtEJIa, cepBnCHOrO pPeIcTaBnteJI nII dpyrNX KBaIINΦnUpoBaHHbIX IInC.

BHUMAHNE:
3anpeaetcnopykaTb yctpoiCTBO B Body dIra OuncTk. Ipocm BaC co6IIOaTb IHCTpyKcH, npBedeHHbIe B pa3dJe "OuncTkA".
EcIn BbI He NcIOJIb3OBAJIIN MIKCEP INN MmCpOy6Ky, 3aKpoI-Te pIINBOJHO BAI DnIRaTeJI MIKCEPA IN KOpNyc UHeKa COOTBETCTBYUeJ 3aUNTHoN KpbIshKoN.
- OTKPOInTe NOBOPOTbI pyKaB:HaKMnTE KHOInKy (4). NODHMnTE pyKaB Ha MaKcImaJIbHyIO BbICOTy.
-
EcnH Heo6xOIMO nCnOJIb3OBAt 3aunTHyKpblKy ot pa36pbI3rBaHn, npNKpeINTe ee K HIXKHeuactn NOBOPOTHO pyKaBa. Pa3MeCTIne 3aunTHyKpblKy ot pa36pbI3rBaHn (8) TaKIM oBa3OM, YTO6bI OTBepCTne IJRA HAnOIHeHn paCNoIarANOCb NepeD BamN. PpIKMnTe 3aunTHyK pblKy K nobOpOTHomy pyKaBy.
-
Ecni Heo6xOIMMO nCOnb30BaTb HacaIky IyB36nBAHnRA TeCTa (13) mN MeuAky (12), npEdbapntelbHO yCTAHOBITE 3aHTbI NHTOK (14).TO npEdoTbpATNT KOHTaKT TcTa C pINBOHbIM BaONM.
ДерхиTe ДИСТAK КЕ,ΚАДерхиTe YaUy ДЯ СмELINBAHIN.ВCTaBte Hacadky ДЯ B3bNAHIN TeCTA ИпМeшanky CHN3Y,ЧЕЗ OTBepCTne BДИСКЕ И NOBEPHInTeHa YeTBeptb OБОРOTA.
KeKc (OCHOBHOn peuent) Pexm3-4
HnrrpeJeNeHTbI:
250 r márkoro macna nImaprapnHa, 250 r caxapa, 1 naketnk BaHnlbHoro caxapa nn 1 naketnk lmOHoro apomatn3atopa, uenotka coII, 4 mya, 500 r mykn, 1 naketnk pa3pbixnnteIy, okoIoo 125 mI moJoka.
TOTOBKa:
IomeCTNe INHPeDneHTbI B CaUy DnA CMEuINBaHmN I 3aMeuBaiTe B TeueHe 30 cekynd C NOMOuBo MEuaKn Ha CKoPoCTN 2,3aTEM 3 MInHyTbI Ha CKoPocTn 3.CmaXbTe fOpMy TOhKIM CIOe MACna UIN BbICTeNTe ee nekapcKo ByMaRo, BblNOxKtTe TcTo N BbINEKaIte. Ipeed TEM, KAK BbIHyTb 6JIoDo n3 dYxoBKn, pOBepBeTe erO rTOBHOCTb C NOMOuBu DEpeBraHHo nAnOCHN. BotKHITe ee B ceHTp BblneKn.
Ecnn Tecto He npinnnaet K nanoKhe, 6IIO do roTOBO. NocTaBbTe npOttBeHb Ha peWetky I daTe 6IIOy OCTbITb.
CtanhapthanyxOBka:
Bbicota 3arpy3kn:2
HarpeB: 3neKtpnuecka DyXOBka C BepxHIM HNDKHIM NOOrpeBOM
175-200°,ra3oBaJdyXOBka:pexim 2-3
BpemBaIeKaHn:50-60MnHyT
PeueNT MoKHO N3MeHЯTb NO JKeJHaHIO, HAnpIMep, MoKHO do6aBnTb 100 rN3HOMA, opexOB uIN TepTOrO IkoKaJa. Bce orpaHnueHo ToIbKO BaUIM Boo6paXeHHeM.
JbHHeIpeporaIKn Pekm1-2
InhpeDneHTbl:
500-550r nIeHnHm MyKn, 50 r cemH nbHa, %IITpa BOdbI, 1 Ky6nk dpoJxKei (40 r), 100 r xopoOIO npocyuHoi, HeKpHOn cbHyXKn3aKBaCkN, 1 aaiHaa loKka coII.
BbIOnHnTe IaI, OIIcaHbIe B pa3dene "IoiIroTobka".
- OeHbTe Hacaiky IJIa Ke66e (22a) Ha ocb WHeka.
O6paTInTe BHHMaHHe Ha BbiEKMn Ha Kopnyce WHe - BctaBbTe HacaIky IJIg Ke66e (22b) B npJHKMHyIO raIKy (19).
- HakpyTIne npOTnB YacOBoN CTpeJIKN pIINHMHyIO rAIky C HacaIKo DnA Ke6Be Ha KOpIyC UHeKa.
C6opka HacaKn dna npiroTOBneHn neeHb (cm.pnc.D)
BbInolHnTe 1aarn, onncanHbIe B pa3dene "PiOdrToBka".
- Oendehe aanaTep (23) Ha ocB uHeka. ObpaTne BnHaHne Ha BbIeMKn Ha Kopnyce uHeka.
- Bctabte HacaKy dny npiroTOBneHn neeHb8 (24) b aanTep. Obpatnte BHMaHHe Ha BbIeMKn Ha HacaKe.
- HabNTte npKMMHyO raKy (19) Ha Kopnyc uHeKa no Yacoboi CTpeJIke.
- HauBnHbTe HaCaAky dny pa3pe3aHna neyeHbY (25) Yepe3 OTBepCTy, IMeIoUneCeHa Ha cAaKe dny neyeHbY.
Pn3aONHeHm YaHn Dn CMeuBaHn, NomeCTte ee Ha yCTOuHyoPoBHyIO NOBepxHOCTb. Blaorapr 3Tomy yD06hee 6yDet ODeTB KpbIiKy.
C6opka yaun nna CmeunbaHn
Cm. 06uio HOpmaHIO HA cTpaHnE 3 n4.
PpOBepTe npaBnIbHocTb npEdBapnteHc6bpKn! YnnoTHHeHne (1d), y3en HOxKe (1e) n BuHToBoi (1f) KOnnak DOJXHb6bITb CO6paHb B npaBnIbHOM NopAKe.

BHIMAHHE:
-Ob3aTeIbHOyctAHabnBaIte yIIOTHHeHne Ha y3e HOKeB. B IpoTINBHOM CNYae KIOKcTB N3 YauN dIg CMEuINBAHMOXET IPOTEKaTb.
BnHTOBOJ KOJIaK DOJIKeH 6bITb npaBUNbHO 3aTHyT. Y6eNTecb, yTO OH yCTaHOBHeN POBHO, 6e3 nepekoCA.
Pa6oTa C MmKcepom
- HanoJIHInTe YaUy DnA CMeUINBaHNr N3MeNbYeHHbIMN INHrpEduHNTAMN.
2.ПOTHO pINKMTe KpbIshky Ha yaSe DmCEMUNBaHnA - 3akpoTe 3aTbOpOM OTBepCTne IIN HAONHeHHBCTabTe 3aTbOp B OTBepCTne IIN HANONHeHHN NOBepHHTe erO no YacOBn CTpeJIke.
- YctaHOBInTe peryIaTOp B NOIOXKeHne "0".
- Y6eIntecb, yTO NOBOPoTHbI pyKaB OnyuIeH I 3aФNK CnPOBaH.
- CHIMITE 3aunTHyIO KpbIuKy (2) c npBODHO Bana MIKCEPA.HaKIMTE Ha peOpCTVIO NOBEXHOCTb.
7.YCTaHOBInTe YaJy DnA CMeINBaHnHa npNBOHn Bn MUKCEpa.
8.BCTaBbTe Wtencenbceteboro shypa B noDxOJauyo CteEByIO p03eTKV. - Bblbepnte ckopocTHo peKIM.

ПОНМЕЧАНЯ:
KpaTkoBpeMeHHa pa6oTa: MInKcp DOnKeH pa6OtaTb He 60nee 2 MNHyT. NpeD nobTOpHbIM nCnONb3OBaHNem DaTe yCTPOcTBy OCTbTb B TeueHne 1 MNHyTbl.
YTO6bI CHOBa HANOHNTHaUHrpEHNHTAMN, BbIKIOHNTe yCTPOINCTBO.CHMnTe 3aTBoP INN KpbIuKy. IpOIOJXaIte CMeuINBaHne TOJIbKO c npaBnJIbHO YcTAHOJIeHHo KpbIuKoN 3aKpbITbIM OTBepCTHeM dIra HANOHNHEH.
3aBepeHne pa6oTbI
- YctaHOBInTe peryIaTOp B IonoJKeHHe "0".
- BbIepHnTe Wtencenb n3 po3eTkn.
- CHIMMITE yauy dIy cMeunBaHnA.
4.ПОДИМITE KpbIshky npei TEM, KaK BblnBaTb COepeJXIMOe. - OuCTNTe BCE IcnoIb3OBaBwneCg Yactn, KaK OINCAHO paadene "OuCTKa".
- 3akpoIte 3aunTHoN KpbIuKoINpInBOM MKNcepa.

BAXHOE 3AMEUAHNE:
HnKOrJa He XpaHnTe COKUHTpyCOBbIX NIN KNCbIe NIIUEBbIe PNOyKbI B METaJIINHECKNX EMKOCTX.
Ounstka

ПЕДУПЕЖДЕНЕ:
Bcerda otKlouaTe ceTeBOI wTeNCeJIb nepeI ouNCTKOJ.
He onyckaIte yctpoiCTBO B BODy IJIa OUHCTKN. 3TO MOXeT Bbl-3BaTb NopaxeHne 3JIeKTPnueckm TOKOM ININ NOxap.

ПЕДУПЕЖДЕНЕ:
B yaae dIy cMeunBaHnI Mscopy6Ke haoTc8 ocTpblE HOxN! Onacnoctb noIyueHn TpaBMbl! Pa360pky, ouNCTky n cbopky OTdeJIbHbIX y3IOB BbINOJHnTe C BHImaHnecTbIO.

BHIMAHNE:
He nCnoJIb3yIte MeTALIIHueCKne UeTKn IINn DpyrIe abpa3nBhIe npEIMTeI.
He npmeHnTe eKne nnaabpa3nBhIe YnctTae CpeDCTBa.
Kopnyc DvuraTeMa
IIOUCTKIN KOPNYCA INCNOB3yHTe TOnbKO MRAKyTOKaHbN ⅢAIAIUE NCTTAEBEECECTBA.
PpHaJnEJXHOCTTeCTOMEaIKN MRCOPY6Kn

BHIMAHNE:
PnHaNEXKHOHeB3aMbITbNocyDOMoeHou MaHInHe. POn DeIeCTBnEM BbICOKoTempeAtypblnn CnBHOeCTBByUOxN XnCTraux CpeCTB OH N MOrYT deOpMnPoBaTBcR nN ObecuBetNTbcR.
- YactuycTroponCTBa, cponkacabwneec C nuiueBbIMn npOdyKTAMM, MOxHO OCHUaTB BMbIbHOB BOe.
JaTe npHaJnEeXHOCTM NOHOCbIO BbICOXHyTb nepei TEM, KAK cO6npaTb yCTpOuCTBO.
PnHaJnxHocTmMKcepa

PIMMEUHNA: PpeBapnteNBHa YnCTka
3aONHnTe yawy dny cmeunBaHHa HANONOBHy BOoN BKNOHTe yCTpoCTBO npMepHO Ha 10 cekyHd. BbneTe KIKKOCTb N3 aWu DNRA CMeUNBaHHa.
-ⅡTuaTeBHOOCHTKaUyDnCMeuBaHnHeo6-XODMO CHrTb.
Pa36npaIte yauy dIa CMeunBaHn noCne KaKdOro nCIONb3OBAHn.
OTBnHTe BnTOB0KoNnKaaIN DnCMeuBaHna.
- CHIMITE c Bala y3eI HOKe I yPiOTHeHMe.
CTeKnHbI KyBUnH qaun dnn CMeUINBaHHN KpbUHKy BMECTe C 3aTbOpOM MOXHO MbITB TENIOI MblBOH BOJe. OOnIOCHHTe YHCTOIN BOOIN N BbICUYNTe.
YnnomHeue, y3en HoKeu u BuHmo8o Konnak
-ПомecntteДетаи КраТКOBрЕмнноюгорув Bodу.
- Pocne ouctkn npocuykn Bcex qacte coebpntyauy dTcmeuBaHnB o6paTHOM nopdke. Cm.pucyHK Ha ctp.4.
XpaHeHne
OuHCTHe ycTPOIcTBo B COOTBETCTBn C INHCTpyKlJMaM. DaIte npHaJIeXHOCTm IIOJIHOCTbIO BbICOXHYtB.
EcnBbXOTNE npOINITb cPcK Cnyk6bl yCTPOICTBA, peKOMeHdyETc XpaHNTb EBO pOINHnHLbHON yNAKOBE.
BceTgxaPHTe yCTPOINCTBO HHeIOCTyHOMIaTei, xopoio npOBETpnaEMOM n CyXOM MeCTe.
PeueHne npo6Jem
Jalil jiai
"0" 1
.2
.3
.4
.5
.6
aale aalaa
A 1
blll jai
blll c 1 a g y gall llgall ayy p.1
blll c 1 g 1c 1s 1cbll baii .2
blj y aia i
glal Jd 1d 1a 1a 1a 1a 3
aclll b joc oil
"0" 4
a 4
cll l a 5
lc bial l bial (2) 6
cll l chll
bail m y y dgc ac bial c 7
laia bila ia y ta ball Js .8
acr w s
a
:
laill e 11 jy a 11 11 11 11 11 11 11 11 11 11 11 11 11 11 11 11 11 11 11 11 11 11 11 11 11 11 11 11 11 11 11 11 11 11
Jauall jaojaiil kss yuill aiai all 1 Jauclay jaojai oabal .
blll c0 gaoy jaojai yuill .
gall oos
J 1
4
a
a a a a a a a
A 1
ai a ai 分母最小值为 k .
a111 10 jiee Jia pi clly aai iin bll c, xai

5-3 11
.(16) 12
45 = x_0^2 - 1
a + b = 1
A
(4) | x,y| = 1
y
jglal 2 jlll jll
60 60
- 123456789011234567890123456789012345678901234567890123456789012345678901234567890123456789012345678901234567890123456789
( 12g + 12g) =
gill gall aew no jil aalw no ykll gic gii
bj = Si
jai jia jia jia jia jia jia jia jia jia jia jia jia jia
biJ1
4ab = 2a
a a
J 1
:
aaii i 1
aiee aee
diay gaiiui jiu jiuji bai jie biliie e, gia
aill 1
15 16
.433
(1d)y
jll (1f) jll, (1e)
e" 1iie iie gaaas Ls aalil sall
a 76
有 SE = y_1
gaaalll gaae aell llae alley
yglzglg
"pall a jdo Jiai" Jiae cai Laiaill jao jai ljil
(C
"Jusill" jie ci jiuall gill
(22a)"sll
Jgall 2001
(19) 23 < 2( 22b) " 23 " 23 " 23 " 23 " 23 " 23 " 23 " 23 " 23 " 23 = 0.
j"11" jao aclll 8e olal yol
- g2d 2. g2d C 3.
"paill a jao Jauo" Juae cai Jaaill jao jall
(D)
"Jyssill" 1sie Cai jnssll gill de gil
laalbcl. 200 (23) jaoai jiai .6
j 2 gall 3gall
jlll lal 1. jall (24) 1111111111111111
S OBC = S COD + S BOC - S BOC
C 19)
2g ≤ m < 5g ②
g j 25)
.1aS1 1
"paiaa Jaa Juaa Juae Cai Cai aai jao jao
(Ejai jai) iigaaia
"Jusill" jieic cui nssll gill
(26) 4,5,6,7,8,9,10,11,12,13,14,15,16.
jolal 1. jglal 2. gall ygai jgalal .7
- 1 , 2 , 3 , 4
C 19)
"paill a jao Jauo" Juae cai Colajail jao jai jai
a 1
S OBC = S COD + S BOC - S BOC
2gac wai 2. jglal gag lgl glg 1jgl 2
jiaiill ciil jaiial jaiil
L 1
gi jai jai jai 8.0j gai plalal pi a
1420 5
a + b = 1
(A Jil) pll aeg
"Jill" 1200000000000000000000000000000000000000000000000000000000000000000000000000000000000000
(B JJIJI) jai 1
"Jusil" Uge Cn nn aal gai Ie 1
:glill gllg lglg jaj glai li k .
.20) Jgall 6
(19) (21) 7
gai i 8
j 5-3 2
60-45 6
16 j 15
15 j 15
15 j 15
15 j 15
15 j 15
15 j 15
15 j 15
15 j 15
15 j 15
15 j 15
15 j 15
15 j 15
15 j 15
15 j 15
15 j 15
15 j
5-4 g
:cligall 3.150 200 slll 60-50
S OBC = S COD + S_ BOC
a a a a a a a a a a a a a a a a a a a a a a a a a a a a a a a a a a a a a a a a a a a a a a a a a a a a a a a a a a a aaa
a
aaiia aiaaa aiinaii Cbiy
15 17) p a 8
. j 111 111 111 111 111 111 111 111 111 111 111 111 111 111 111 111 111 111 1
"0" gall l bgsnna nll 15 la Ls .7
le bai jy.8i (4) ydl 8
.8
.9
i
S
S
S
S
S
S
aall aaiiaaiai 8/1 aii 8/1 aii 8/1 aii 8/1 aii 8/1 aii 8/1 aii 8/1 aii 8/1 aii 8/1 aii 8/1 aii 8/1 aii 8/1 aii 8/1 aii 8/1 aii 8/1 aii 8/1 aii 8/1 aii 8/
452 = a
a 10 aal jall g 4 2j y jai
ae jie jg jial all jai P gannl .
Juiiui 1
S_ OBC = S_ COD + S_ BOC - S_ BOC
"0" 15
15
15
15
15
15
15
15
e 111111111
Jaaell 0"gall lai Jauil a.1
aill jia
(4) jj 2
sll jy j
4
#
4-3 ginaa (aa)
:
Lj5s 250 jn jn jn 250
p>500 4 11 11 11 11 1
.8/1 8/1
24
25
(aizaiyjSaoJsc)zjSall 426
g
1blll c, C, 4 (4) jail
4
S BCA = S COD + S_ BDO
1511 1
:
1
a aaiy 1000000000000000000000000000000000000000000000000000000
1.
1 2
(13)jzlll 14.(12)
aal cll blae e aag lgy aai ydl aal
.82
- | x - 2| = 1 | y - 3| = 2 .
aaiiiaai iaii iai
2g 2g 2g 2g 2g 2g 2g 2g 2g 2g 2g 2g 2g 2g 2g 2g 2g 2g 2g 2g 2g 2g 2g 2g 2g 2g 2g 2g 2g 2g 2g 2g 2g 2g 1 g
a
0.12 = 2 : 11 2^2 = 21
Jollol jol 5
Iaillle 5g CllSall aaiy 6
#
jieell 12
jzjjll
15.
1
aliso llopo 1
Jaaalalalaiiul jia jiall lIbuaa paaa jieall Jlll llae gssll aai jally jieall plaiilnne gnn
y. pal aia bblal bala ayla lal jai
yjzjj jzjj
y
Aaasaaaljai jzglalj
a
jbi/ ciigai 1e aale jbi
3
biell
2
13 × 2 = 16
4
a1^2 + a2^2
S ACD = S COD + S DCE - S CDE
Isell 7
8
9
10
11
12
jzll 13
14
biell ceg aai:4 ai
a_i a j 若 i = 1 j .
(a+b) (c) (c+d) 1a
16 × 16
1c
1d
1e
w_0 = 2
15 5
glial glial 15
16
17
(a)abwjiaeui) 318
3^ 且 k1 < k2 < k_3 < 0, < 0, > 0
20
21
S OBC = S COD + S BOC - S BDO
aJ 23
jglal lgl aolal ylll


3
90
90.
90. Billie
89.
89.
89.
89.
89.
89.
89.
88.
88.
a_i = 1n _j = 0^mc_ij
E 150
150
150
150
J 1
jglal jlll jil 1s0j glal pssu 2
g l jglal y 2) gblg, gdlall aai, gdl
jol. jilil g jilal gai 2. dall al gll (Jilw s
jlll g ai gai
Jsslln 10000000000000000000000000000000000000000000000000
1()
y 1
L
jaiyduiyu jia gaiui jgol liqiu dui jie k
123 1
Jy 1

4
1
i
#
-
4.
- 93.
5^2 + 3 × 2 = 9B_3
95.
94.
. 10981.112al.aaB.5gau pruuiu.11nall aySlo yu, u
92.
92.
92.
91.
91.
91
91.
91.
90.
90.
90.
90.
90.
1
1
一
一
1
1
一
一
GARANTIEKARTE
warranty card · garantiekaart · carte de garantie · schedadi garanzia · tarjeta de garantia · cartao de garantia · garantikort karta gwarancyjna · zaru.cnli list · karta jamstva · carte de garantie · fapaunonHa Kapta · zaru.cnly list · garancijski list garanciajegy · rapahtiHnHnΦOpMynp · RapaHTnHbI TaON ·
KM 1373 CB
24 Monate Garantie gemäß Garantiererklarung - 24 months warranty according to warranty declaration - 24 maanden garantie volgens garantieverklarung - 24 mois de garantie selon la déclaration de garantie - 24 mesi di garanzia secondo la dichiarazione di garanzia - 24 meses de garantia de acuerdo con la déclaración de garantía - 24 meses de garantia, de accordo com a déclaration de garantia - 24 mandes garanti
1 henhold til garantibeteingense - 24 misiez guarancji na podstawie owsiadczenia
gwarancyjneo - zaruka 24 mEscu podle prohlasei o zaruke - 24 mesecno jamstvo
u skladu s jamstvenom deklaracionj - 24 luni garantie conform declariei de garantie - 24 mecaea rapanuza a cbtoaetctbne c rapanuhoHHata deknapaua - 24-mesaena
zaruka podla vhyhlasieno o zaruke - 24-meisecnagarcija, skladno z garancjskjo Izavoj - 24 honaparacia garanciafeletetelekben leitart szerint - rapaHTHn Ha 24 Miciu
Biodinai npn npa rapanio - rapanTHn 24 mecaua cornaco hao 3aBBNEHHM
rapanTtHMM npaVIM am - jao JyJy JyJy 24 niv
Kaufdatum, Handlsterpmel, Unterschied: - date of purchase, dealer stamp, signature - sankoepodium, deaterpmel, handtendenke - date d'achal, tampon du concessionaire, signature - data del acquisto, timbo del hivendlore, firma - fecha de compia, seio del distribuidor, firma - data del compia, carimdo do distribuidor, asinatura - kapsdato, forhandenderpmel, signature - data zakupu, prezct, sprzedawcy, podispis - datum zakupenil, radiklo pradecej, podispis - datum kupovino, zig trovica, potispis - data del achitiroi, lamploma functorum, semnaturia - Dara na novemria, Neueur na Ipojeanaia, Iogneic - datum nukiu, pebata obchodniki/produciu, podispis - datum nukiu, zigtrovica, podispis - viakiana datum, kereskeds blyegjde alalaris - da rna npnoanov, neuvra npojauun. nugnc - Data npnoopenerin. LrAwn npnoasa, Iognncs
BOMANN®
www.bomann.de
BOMANN®
C. Bomann GmbH
Internet: www.bomann.de


- WAARSCHUWING: Verwondingsgevaar!
- Symbols in this Instruction Manual
- WARNING:
- CAUTION:
- Contents
- General Notes
- Special Safety Instructions for This Appliance
- WARNING: Risk of injury!
- Intended Use
- Overview of the Components / Scope of Delivery
- Page 3:
- Page 4: Assembly of the Mixing Bowl
- Page 5: Assembly of the Meat Grinding
- Unpacking the Appliance
- NOTE:
- Electrical Connection
- The Kneading Machine
- Installation and Operation of the Kneading Machine
- Use of a tool:
- Interruption of Operation
- Completion of operation and removal of the bowl
- Recipes
- Cake Mix (basic recipe)
- Ingredients:
- Preparation:
- Conventional oven:
- Flaxseed bread rolls
- Chocolate Mousse Level 4-5
- MeatGrinder
- Making sausage
- Shaping biscuits
- Preparation
- Assembly of the Meat Grinder (see fig. A)
- Assembly of the Sausage Attachment (see fig. B)
- Assembly of the "Kebbe" Attachment (see fig. C)
- Assembly of the Cookie Attachment (see fig. D)
- Assembly of the Pasta Attachments (see fig. E)
- Operation of the Meat Grinding
- Complete operation
- The Mixer
- Application Instruction for the Mixer
- Recommendation:
- Assembly of the Mixing Bowl
- Operation of the Mixer
- IMPORTANT NOTE:
- Cleaning
- Motor housing
- Accessories of the kneading machine and the meat grinder
- Accessories of the mixer
- NOTE: Pre-cleaning
- Storage
- Troubleshooting
- Technical Data
- Disposal
- Instrukcja obslugi
- IPEyIPEKDEHNE:
- CneuNbHbIe yka3aHnNo 6e3OpacHOCTN dIy 3TOrO yCTpoiCTBa
- I P E D U N P E X D E H N E: O n a c h o c t b n o l y u e H N A T p a B M b I!
- BHUMAHNE:
- KeKc (OCHOBHOn peuent) Pexm3-4
- HnrrpeJeNeHTbI:
- TOTOBKa:
- CtanhapthanyxOBka:
- JbHHeIpeporaIKn Pekm1-2
- InhpeDneHTbl:
- C6opka HacaKn dna npiroTOBneHn neeHb (cm.pnc.D)
- C6opka yaun nna CmeunbaHn
- BHIMAHHE:
- Pa6oTa C MmKcepom
- ПОНМЕЧАНЯ:
- 3aBepeHne pa6oTbI
- BAXHOE 3AMEUAHNE:
- Ounstka
- ПЕДУПЕЖДЕНЕ:
- BHIMAHNE:
- Kopnyc DvuraTeMa
- PpHaJnEJXHOCTTeCTOMEaIKN MRCOPY6Kn
- PnHaJnxHocTmMKcepa
- PIMMEUHNA: PpeBapnteNBHa YnCTka
- YnnomHeue, y3en HoKeu u BuHmo8o Konnak
- XpaHeHne
- a
- = a
- Juiiui 1
- S_ OBC = S_ COD + S_ BOC - S_ BOC
- e 111111111
- #
- 4-3 ginaa (aa)
- :
- g
- jbi/ ciigai 1e aale jbi
- biell ceg aai:4 ai
- 5
- jglal lgl aolal ylll
- a_i = 1n _j = 0mc_ij
- L
- GARANTIEKARTE
- KM 1373 CB
- BOMANN®
Brand : BOMANN
Model : KM 1373 CB
Category : Food Processor