
DBS 783 CB - Iron BOMANN - Free user manual and instructions
Find the device manual for free DBS 783 CB BOMANN in PDF.
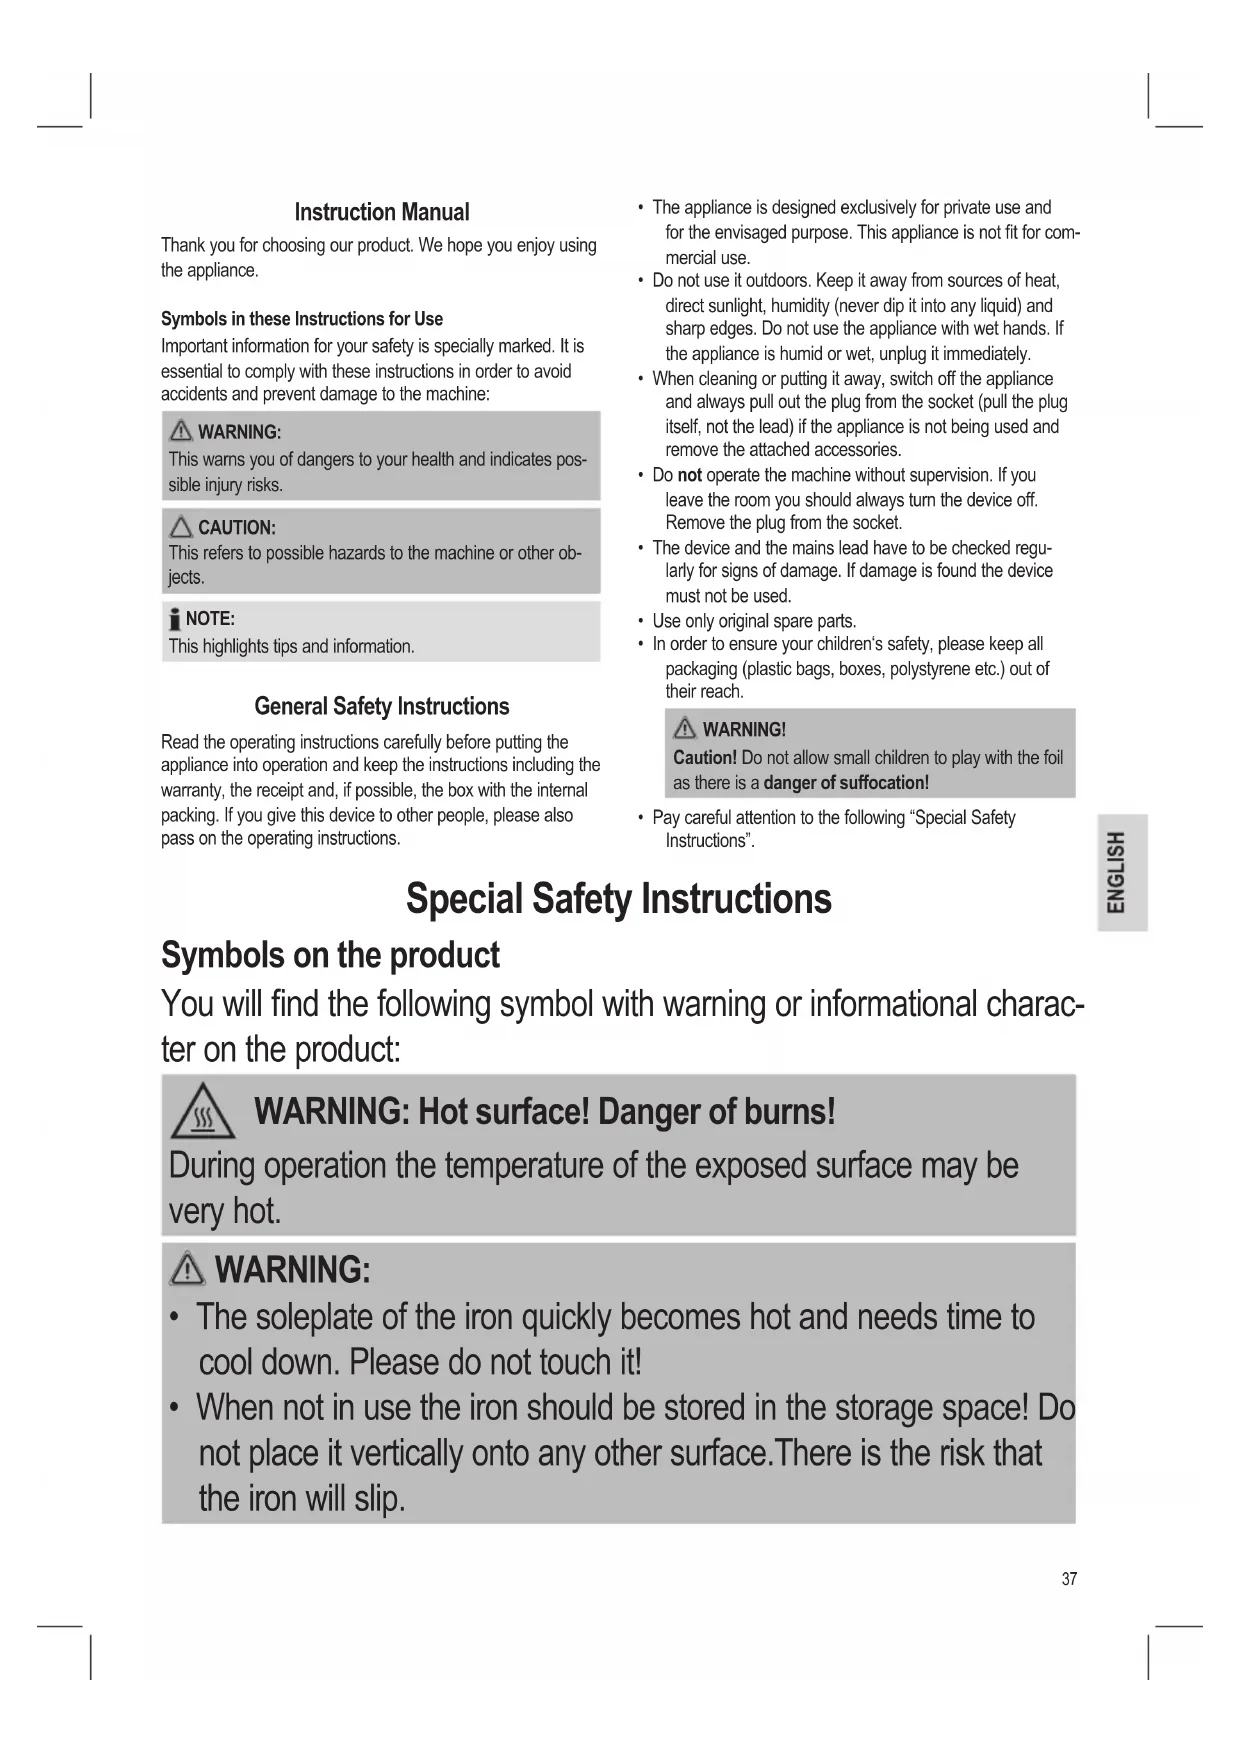
| Product type | Steam station |
| Brand | Bomann |
| Model | DBS 783 CB |
| Power supply | 220-240 V~, 50/60 Hz |
| Power | 2400 W |
| Protection class | I |
| Net weight | Approx. 3.3 kg |
| Water tank capacity | 1.0 liter |
| Continuous steam function | Yes, with steam jet button lock |
| Vertical steam function | Yes |
| Automatic shut-off | Yes, after 20 minutes of inactivity |
| Temperature selection display | Yes, electronic with LED indicator |
| Anti-scale filter | Yes, replaceable descaling cartridge |
| Connection hose | Yes, flexible |
| Iron rest surface | Integrated on the base |
| Transport handle | Yes, retractable with lock |
| Power cord length | Approx. 1.8 m (estimated) |
Frequently Asked Questions - DBS 783 CB BOMANN
User questions about DBS 783 CB BOMANN
0 question about this device. Answer the ones you know or ask your own.
Ask a new question about this device
Download the instructions for your Iron in PDF format for free! Find your manual DBS 783 CB - BOMANN and take your electronic device back in hand. On this page are published all the documents necessary for the use of your device. DBS 783 CB by BOMANN.
USER MANUAL DBS 783 CB BOMANN
DAMPFBÜGELSTATON DBS 783 CB
Stoomstrijkijzer · Station fer a repasser · Estacion para planchar a vapor
Sistema stirante a vapore • Steam Ironing Unit • Želazko z generatorem pary
Gózolós vasalo · Napoba npacka · Pnup6op dny rnajkeHn c o6pa6oTko napom
Maximale Füllmerge des Wassertanks: 1,0 Liter
EMARQUE RELATIVES AU REPASSAGE A LA VAPEUR:
Consommation: 2000-2400 W
Thank you for choosing our product. We hope you enjoy using the appliance.
Symbols in these Instructions for Use
Important information for your safety is specially marked. It is essential to comply with these instructions in order to avoid accidents and prevent damage to the machine:

WARNING:
This warns you of dangers to your health and indicates possible injury risks.

CAUTION:
This refers to possible hazards to the machine or other objects.

OTE:
This highlights tips and information.
General Safety Instructions
Read the operating instructions carefully before putting the appliance into operation and keep the instructions including the warranty, the receipt and, if possible, the box with the internal packing. If you give this device to other people, please also pass on the operating instructions.
- The appliance is designed exclusively for private use and for the envisaged purpose. This appliance is not fit for commercial use.
- Do not use it outdoors. Keep it away from sources of heat, direct sunlight, humidity (never dip it into any liquid) and sharp edges. Do not use the appliance with wet hands. If the appliance is humid or wet, unplug it immediately.
- When cleaning or putting it away, switch off the appliance and always pull out the plug from the socket (pull the plug itself, not the lead) if the appliance is not being used and remove the attached accessories.
- Do not operate the machine without supervision. If you leave the room you should always turn the device off. Remove the plug from the socket.
- The device and the mains lead have to be checked regularly for signs of damage. If damage is found the device must not be used.
- Use only original spare parts.
- In order to ensure your children's safety, please keep all packaging (plastic bags, boxes, polystyrene etc.) out of their reach.

WARNING!
Caution! Do not allow small children to play with the foil as there is a danger of suffocation!
- Pay careful attention to the following "Special Safety Instructions".
Special Safety Instructions
Symbols on the product
You will find the following symbol with warning or informational character on the product:

WARNING: Hot surface! Danger of burns!
During operation the temperature of the exposed surface may be very hot.

WARNING:
- The soleplate of the iron quickly becomes hot and needs time to cool down. Please do not touch it!
- When not in use the iron should be stored in the storage space! Do not place it vertically onto any other surface. There is the risk that the iron will slip.

WARNING:
- Choose a secure surface for the stand! The surface must be level and stable. Check the surface again for stability.
- The iron must be used and rested on a stable, heat-resistant surface.
- Before filling the water tank remove the mains lead.
- The iron must not be left unsupervised while it is connected to the mains.
- Do not use the iron if it was dropped, has visible damages or leaks.
- Do not try to repair the appliance on your own. Always contact an authorized technician. To avoid the exposure to danger, always have a faulty cable be replaced only by the manufacturer, by our customer service or by a qualified person and with a cable of the same type.
- While the iron is switched on and while it cools down, the iron and its connection cable must be outside the reach of children younger than 8 years.
- This appliance can be used by children aged from 8 years and above and persons with reduced physical, sensory or mental capabilities or lack of experience and knowledge if they have been given supervision or instruction concerning use of the appliance in a safe way and understand the hazards involved.
Children shall not play with the appliance. - Cleaning and user maintenance shall not be made by children without supervision.
- The tank should only be filled up to the maximum mark. Do not overfill! Maximum water filling quantity: 1.0 litres.
- Do not bend the connecting hose (2)!
Intended Use
This appliance is intended for ironing of clothing and textiles.
It is intended for use in households.
Any other use shall be considered as not intended use and can lead to material damage or even personal injury.
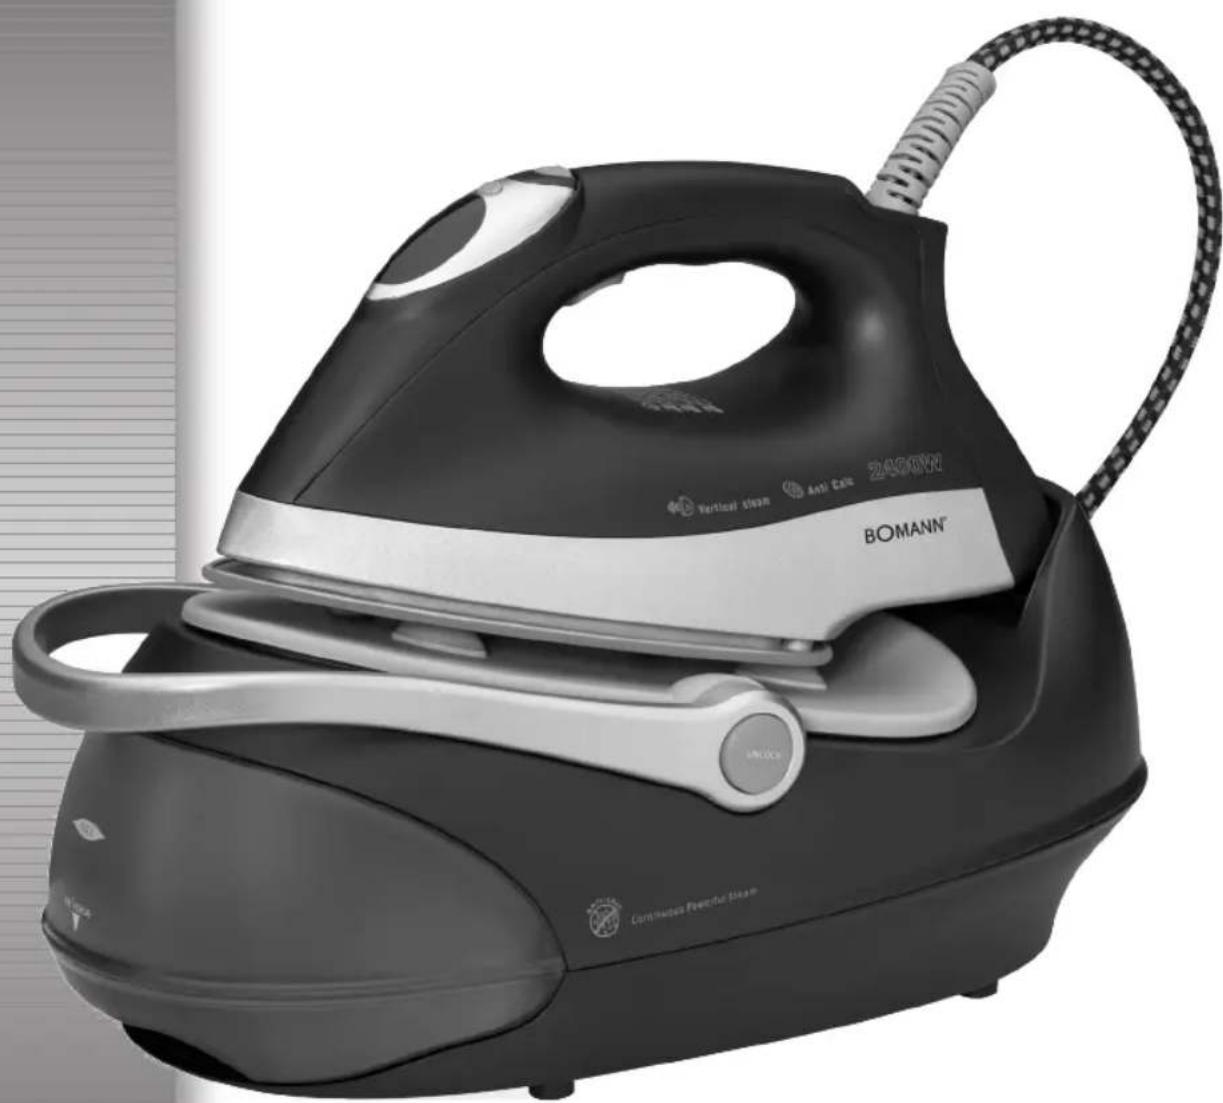
Overview of the Components
1 Steam jet button
2 Connecting tube
3 Mains lead
4 Base
5 Iron rest
6 Releasing device for handle "UNLOCK"
7 Water tank with lime filter
8 Handle
9 Lock for continuous steam
10 Steam jet button
11 Selector button SET
12 Control lamp
13 Temperature selection display
14 Lime filter cartridge
not shown
RELEASE button below the water tank. Releasing device of the water tank
Instructions
Unpacking
- Remove any protective foils and stickers from the soleplate.
- Please unwind the lead completely.
Electrical connection
- Make sure that the iron voltage (see name plate) and the line voltage match.
- The mains plug should only be inserted into a correctly installed socket with earthing contact.
Power Requirements
The station has a total maximum wattage of 2400 W. With this connected load a separate supply line protected by a 16 A household circuit breaker is recommended.

CAUTION: Overload!
If you use extension leads, these should have a cable cross-section of at least 1.5mm^2
- Do not use any multiple sockets, as this device is too powerful.
Turn on and off
Turn on: Connect the mains plug to a properly installed safety socket. The appliance is immediately switched to operating mode. This is indicated by the red control lamp in the display.
Turn off: Press the selector button SET (11) repeatedly until the red control lamp appears in the display. Disconnect the mains plug from the socket. The light in the display goes out.
Automatic shut-off function
The appliance has an automatic shut-off function.
- If the iron station is not in use it will shut off after 20 minutes. The red control lamp in the display flashes.
- Use the selector button SET (11) to reset the desired temperature, if you want to continue ironing.
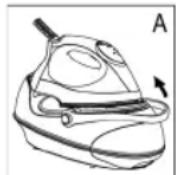
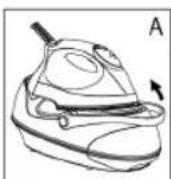
Function of the Handle (8)
The handle attached to the base serves for carrying the appliance when the mains plug has been pulled from the outlet.
- To carry the appliance, raise the handle until it engages (Fig. A). A "click" confirms that the handle has been locked. You can use the handle for transport of the appliance.
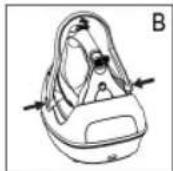
To unlock the handle lock, press both buttons "UNLOCK" (6) at the same time and lower the handle (Fig. B).

Electronic temperature adjustment using the selector button SET (11)
- Observe the ironing instructions on the clothes label.
- Select the temperature setting according to the following table.
- Turn woolen clothes inside out to avoid shiny spots on the fabric due to steam ironing. In addition, lay a thin cotton cloth onto the fabric.
- The instructions in the table only refer to fabrics with no additional surface treatment (gloss, impregnation, wrinkles, etc.). Select a low temperature setting for fabrics with additional surface treatment and iron them inside out.
- Press the selector button SET (11) to set the desired temperature.
| Display | ||||
| Fabric Synthetics Silk Nylon Acrylics Acetate | Wool Polyester | Rayon Cotton Linen | Rayon Cotton Linen | |
| Temperature | Low Medium High Highest | |||
| Symbol on clothes label | ● | ●● | ●●● | ●●● |
| Ironing instruction | Iron without steam inside out | Steam ironing on the left with a cloth | Iron while the fabric is still damp | Iron with steam |
| Steam selection | — | ●● | ●● | ●● |
NOTE:
The iron heats up faster than it cools down. Start ironing with the lowest temperature setting.

CAUTION:
When changing from a higher to a lower temperature the blue indicator starts flashing fast. This means that the temperature is too high for the setting. Do not singe your laundry! Only continue ironing after the blue indicator stops flashing and an acoustic signal is emitted.
Water Tank (7)
- The water tank has a recessed grip on the bottom so that it can be removed.
- The lock of the water tank is also the lime filter cartridge. Take out the lime filter cartridge to fill with water. With this, proceed as described under "How can I replenish the water during operation?"
- The tank volume is 1.0 litres.
- The tank illumination lights once the mains plug has been inserted into the outlet. It indicates readiness for steam ironing when the lime filter cartridge and the water tank have been set correctly.
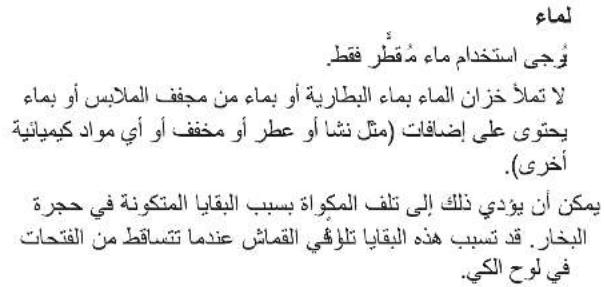
Water
Use only tap water or distilled water.
Do not fill battery water, water from the clothes dryer and water containing additives (such as starch, perfume, softener or other chemicals) into the water reservoir.
This could damage the iron due to residues forming in the steam chamber. These residues may cause impurities to the fabric when dropping out of the holes in the soleplate.
Operation
Before Initial Use
- Clean the ironing base with a slightly damp cloth.
- In order to remove all residues before initial use, please pass the iron a few times over an old clean cloth.
Ironing without steam
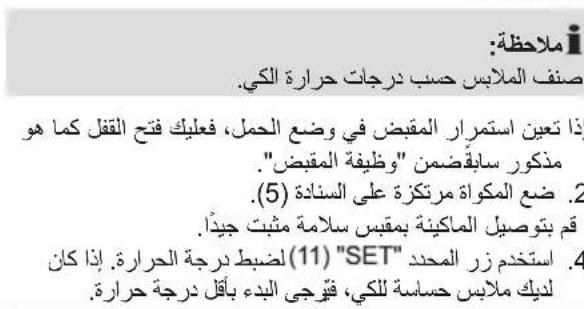
NOTE:
Sort out the garments according to their ironing temperatures.
- If the handle should still be in the carrying position, unlock the lock as described above under "Function of the Handle".
- Place the iron on the rest (5).
- Only connect the machine to a properly installed safety socket.
- Use the selector button SET (11) to set the temperature. If you have sensitive items to iron, please begin with the lowest temperature.
NOTE:
- The selected temperature lights up blue and flashes slowly. The iron heats up. The operating temperature is reached as soon as the blue display stops flashing and a beep sounds. Now you can start ironing.
- The iron is electronically held at a constant temperature during use. If the blue indicator in the display flashes slowly, the appliance is in the process of heating up.
- If the blue indicator flashes quickly in the display, the temperature for the set position is still too high. Do not scorch your washing! Only continue to iron if the blue indicator stops flashing and a beep sounds.
After use press the selector button SET (11) repeatedly until the red control lamp flashes in the display. Disconnect the mains plug from the socket.
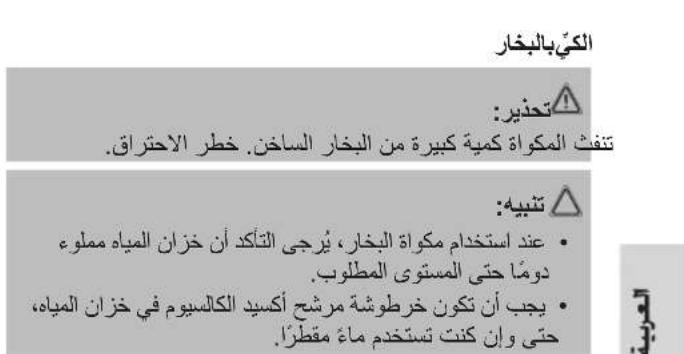
Steam Ironing

WARNING:
The iron expels a large quantity of hot steam. Danger of burns.

CAUTION:
- When using the steam iron please ensure that the water tank is always filled to the required level.
- The lime filter cartridge always has to be positioned in the water tank, even if you use distilled water.

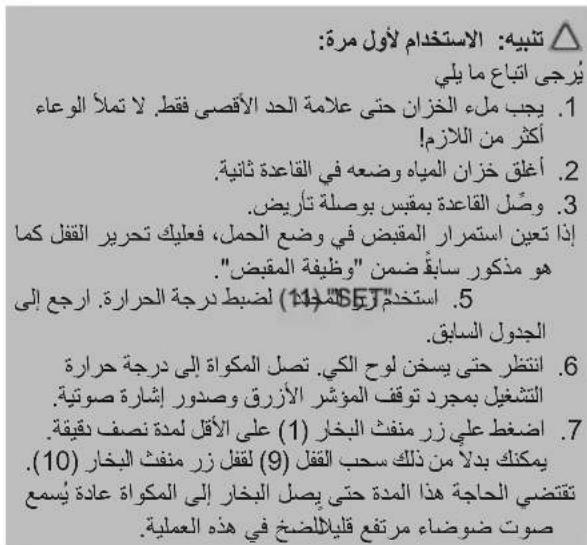
CAUTION: Initial use:
Please proceed as follows:
- The tank should only be filled up to the maximum mark. Do not overfill!
- Close the water tank and place it back in the base.
- Connect the base station to a socket with earthing contact.

CAUTION: Initial use:
- If the handle is still in the carrying position, release the lock as described under "Function of the Handle".
- Use the selector button SET (11) to set the temperature. Refer to the table above.
- Wait until the sole plate has heated up. The operating temperature is reached as soon as the blue indicator stops flashing and a beep sounds.
- Press the steam jet button (1) for at least ½ minute. As an alternative, you can pull back the lock (9) to lock the steam jet button (10). This time is needed for the steam to reach the iron. A slightly louder noise of the pump is normal with this.

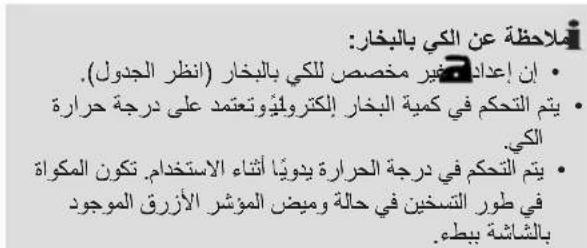
OTE ON STEAM IRONING:
- Setting is not intended for steam ironing (see table).
- The amount of steam is electronically controlled. It is based on the ironing temperature.
- The ironing temperature is electronically controlled during use. The device heats up if the blue indicator on the display starts flashing slowly.
After use, press the selector button SET (11) repeatedly until the red control lamp appears in the display. Disconnect the mains plug from the socket.
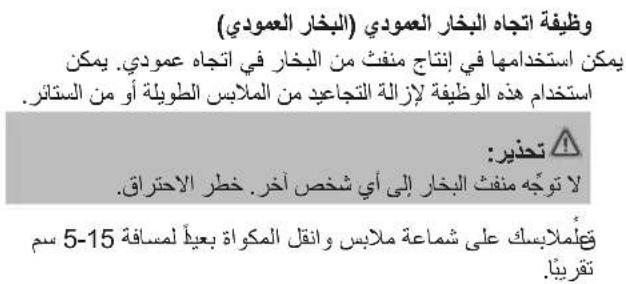
Vertical Steam function (Vertical Steam)
This can be used to produce a jet of steam in a vertical direction. This function can be used to remove creases from hanging clothes or from curtains.

WARNING:
Never point the steam jet at other people. Danger of bums.
Hang your laundry on a clothes hanger and move the iron to approximately 5-15 cm away.
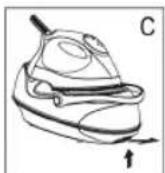
How can I replenish the water during operation?
Refill with water before the tank is completely empty. A loud noise of the pump during operation indicates that the water level is too low.
- Place the iron on the rest (5).
- Press the selector button SET (11) repeatedly until the red control lamp appears in the display.
- Remove the mains plug from the socket.
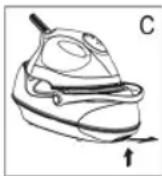
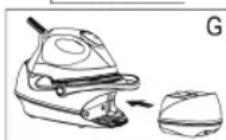
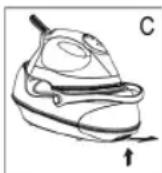
- In order to remove the tank, press the RELEASE button below the water tank. (Fig. C).
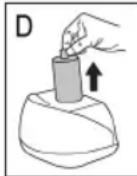
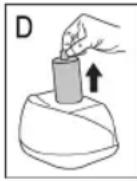
- Remove the lime filter cartridge (Fig. D).

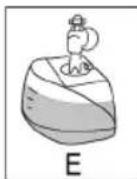
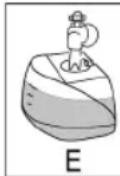
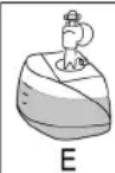
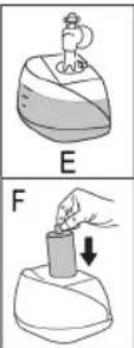
- Fill the tank up to the maximum mark (Fig. E). Do not overfill!
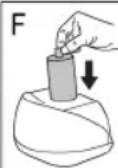
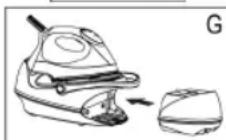
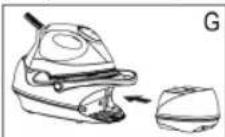
- Reinsert the lime filter cartridge and push the tank back into the base (Fig. F + G). A "click" confirms that the water tank has been set correctly.
- You can now continue ironing.


IOTE:
The tank illumination lights once the mains plug has been inserted into the outlet. If it does not light, the lime filter cartridge or the water tank has not been set correctly. Check both positions.
When you have finished
- Press the selector button SET (11) repeatedly until the red control lamp appears in the display. Remove the mains plug from the socket. The light on the display goes out.
- Allow the device to cool down before you put it away.
Anti-scale filter
Your steam iron station is fitted with an anti-scale filter. The antiscale filter cartridge becomes spent after filtering approximately 18 litres of water, depending on the hardness of your water. It then loses its effectiveness and must be replaced.
- Tum off the appliance.
- Disconnect the mains plug from the mains.
- Remove the water tank.
- Remove the anti-scale filter cartridge.
- Fill the tank up to the maximum mark. Do not overfill!
- Insert a new anti-scale filter cartridge.
- Before turning on the appliance, wait a few minutes until the new filter cartridge is saturated with water.

NOTE:
If you do not have a new anti-scale filter cartridge, you can still iron with the used cartridge and distilled water.
Cleaning

WARNING:
Always remove the mains lead before cleaning!
- Wait until the machine has cooled down completely.
- Under no circumstances should you immerse the device in water for cleaning purposes. Otherwise this might result in an electric shock or fire.

CAUTION:
- Do not use a wire brush or any abrasive items.
- Do not use any acidic or abrasive detergents.
Children shall not perform cleaning without supervision.
- Clean the casing with a slightly damp cloth.
- Clean the sole plate and the rest with a slightly damp cloth.
- Any residual water can remain in the water tank, but should be poured out if it has been in the tank for a prolonged period.
Troubleshooting
| Fault Possible Cause Remedy | ||
| Device does not work | Faulty mains socket | Try another socket. |
| The red control lamp lights up in the display. | Select the desired temperature of the iron. | |
| The device suddenly stops working during operation | Is the electric circuit overloaded? | Check the house fuse |
| The blue indicator on the display is flashing fast | The temperature is too high for the selected position. | Wait until the iron has cooled down (the blue indicator stops flashing). |
| The tank illumination does not light after heating and no steam is generated | The lime filter cartridge is mission or has not been set correctly. | Check the position of the lime filter cartridge. |
| The water tank has not been installed correctly. | A "click" confirms that the water tank has been set correctly. | |
| Loud noises during steam operation | The tank is empty. | Check the tank. Fill tank with water. |
Technical Data
Model: DBS 783 CB
Power supply: 220-240 V~, 50/60 Hz
Power consumption: 2000-2400 W
Protection class:
Maximum filling quantity of the water tank: 1.0 Litre
Net weight: approx. 3.3 kg
The right to make technical and design modifications in the course of continuous product development remains reserved.
This device has been tested according to all relevant current CE guidelines, such as electromagnetic compatibility and low voltage directives, and has been constructed in accordance with the latest safety regulations.
Disposal
Meaning of the "Dustbin" Symbol
Protect our environment: do not dispose of electrical equipment in the domestic waste.
Please return any electrical equipment that you will no longer use to the collection points provided for their disposal.
This helps avoid the potential effects of incorrect disposal on the environment and human health.
This will contribute to the recycling and other forms of reutilisation of electrical and electronic equipment.
Information concerning where the equipment can be disposed of can be obtained from your local authority.
Instrukcje obstugi
CTC Clatronic Sp. 20.0
YbIMKHeHHH i BmKHeHHH
YbIMKHeHH:Пд'EDHaIte WTeKeR Ka6eHIO XmBNeHHdo HAnEJHO BCTaHOBJIeHOi po3ETKn.Прлад He- raHNO YbIMKHeTcB CpeXIMi po6OTn.Ha Ze Bka3yBaTIme YepBOHNI KOHTpoJIbHNI IHdNkA- TOP Ha DInCnPeI.
BnMKHeHHa:HaTnCKaIeCeJIeKTop SET (11),doNOKn Ha DInCnPeI He BiIObpa3NTbc8 YepBOHm iHNiKaTOp.BIMiTb WTeKeP Ka6eJIIO XINBHeHHa 3 po3ETKn.IHDnKaTOp Ha DInCnPeI BnMKHeTbc8.
Функья abTomatHOrO BIMKHeHHA
PnnaDoaHaHao FyHKJcEO ABOTMaTHHO BIMKHeHHA.
- RaKIO npacka He BnKOpncTObYeTbC8 6IbSe 20 XBnHn, BOHa BmKHeTbCra. Ha DnCpIe' 6Bye 6NMaTn YepBoHn iHNkAtop.
- RaKIO noTpi6H NO pOoOBKHTn npacyBaHHa, 3a DOnOMorOceneKToPA SET (11) 3HOBy BCTaHOBITb noTpi6Hy Tempea-tpy.
ynkui pykn (8)
Pyka, zo npinkinnaHa do 6a3n-niDCTaBKn, cnjKntb nIpepeheceHH npnndy, KOJI KabeNB XINBHeHH BID'EDHaHm BiDpo3eKn.
Дпя nepheceHн npiNaу niiHiMiTb pyKу,doNOKBoHa He 3aФikCyETbcr (MaI.A).ЯкsoNoyEcTBcR"KnaaHH"zeO3Haue,zoPyKa 3a6nokobHa.PyKу MoXHa BuKopnCTOByBatn dny nepheceHn npiNaу.
Lio6 po36nokyBatn pyky, oJHOaCHO HATNCHTb KHONKY ,UNLOCK" (6) Ta onycTITb pyky (MaI. B).


EneKtpoHHe HanaaTyBaHHa TeMnepaTpy 3a DonomoroO ceNeKtopa SET (11)
- DToPmMyIteC8 Bkazibok i3 npacyBaHHa RaPmky OJry.
BctahOBITb HanaUtyBaHHa Tempeatpyn BiNobiHDo daHnx y Ta6nui Bn3y.
BnBepHbBoBNHmOJr,I063ano6iITnNoRBI 6nckyUHXIIaMHaTKAHNHi ypaizi npacyBaHNHa 3napoIO.KpIM TORO,NOKlaIDbHaTKAHHy TOhky6abOBHnyTKAHHy.
I HCTpykii B Ta6nui CTocyHbC8 TINbKn TKaHH, NOBepxH RAHX He Mae DoaTKBOOi Obo6Kn (6nnck, 3axnCT BiD BOJIO, CKIAKn Ta IH.).ДЯ TKAHH, NOBepxH RAHX Mae DOaTKOBY Obo6Ky, Bu6epItb Hn3bky TemnepaTy i npacyiTe II HABNOpit. - ⅢO6 BCTaHOBHTN NOPTi6Hy TEMNEpaTyP, HATNCHITb ceJIeKTop SET (11).
| Вizioобра- ЖECHТЯ | ||||||||
| Тканниа СИ | Нтетика Шовс Чеб就医 Акрп АцетаT | Вовна ПолICTер | Вickоза Бавовна Льон | Вickоза Бавовна Льон | ||||
| Tempe- тура | Низык Сеpeяня Вись Сацета | Воредnia Вись Налд Налд Налд Налд Налд Налд Налд Налд Налд Налд Налд Налд Налд Налд Налд Налд Налд Налд Налд Налд Налд Налд Налд Налд Налд Налл Налл Налл Налл Налл Налл Налл Налл Налл Налл Налл Налл Налл Налл Налл Налл Налл Налл Налл Налл Налл Налл Налл Налл Налл Налу | Вадь Балов Дьог Балов Балов Балов Балов Балов Балов Балов Балов Балов Балов Балов Балов Балов Балов Балов Балов Балов Балов Балов Балов Балов Балов Балов Балов Балов Балov Балов Балов Балов Балов Балов Балов Балов Балов Балов Балов Балов Балов Балов Балов Балов Балов Балов Балов Балов Балов Балов Балов Балов Балов Балow Балов Балов Балов Балов Балов Балов Балов Балов Балов Балов Балов Балов Балов Балов Балов Балов Балов Балов Балов Балов Балов Балов Балов Балов Балowed Балowed Балowed Балowed Балowed Балowed Балowed Балowed Балowed Балowed Балowed Балowed Балowed Балowed Балowed Балowed Балowed Балowed Балowed Балowed Балowed Балowed Балowed Балowed Балowed Балadow Балadow Балadow Балadow Балadow Балadow Балadow Балadow Балadow Балadow Балadow Балadow Балadow Балadow Балadow Балadow Балadow Балadow Балadow Балadow Балadow Балadow Балadow Балadow Балadow Балadows Балadows Балadows Балadows Балadows Балadows Балadows Балadows Балadows Балadows Балadows Балadows Балadows Балadows Балadows Балadows Балadows Балadows Балadows Балadows Балadows Балadows Балadows Балadows Балadows Балadow Балadow Балadow Балadow Балadow Балadow Балadow Балadow Балadow Балadow Балadow Балadow Балadow Балadow Балadow Балadow Балadow Балadow Балadow Балadow Балadow Балadow Балadow Балadow БалADOW | Bickоза Бавов Дьог Балов Балов Балов Балов Балов Балов Балов Балadow Балadow Балadow Балadow Балadow Балadow Балadow Балadow Балadow Балadow Балadow Балadow Балadow Балadow Балadow Балadow Балadow Балadow Балadow Балadow Балadow Балadow Балadow Балadow Бал Morrow Балadow Балadow Балadow Балadow Балadow Балadow Балadow Балadow Балadow Балadow Балadow Балadow Балadow Балadow Балadow Балadow Балadow Балadow Балadow Балadow Балadow Балadow Балadow Балadow БалShadow Балadow Балadow Балadow Балadow Балadow Балadow Балadow Балadow Балadow Балadow Балadow Балadow Балadow Балadow Балadow Балadow Балadow Балadow Балadow Балadow Балadow Балadow Балadow Балadow Бал寞 Балadow Балadow Балadow Балadow Балadow Балadow Балadow Балadow Балadow Балadow Балadow Балadow Балadow Балadow Балadow Балadow Балadow Балadow Балadow Балadow Балadow Балadow Балadow Балadow БалCow Балadow Балadow Балadow Балadow Балadow Балadow Балadow Балadow Балadow Балadow Балadow Балadow Балadow Балadow Балadow Балadow Балadow Балadow Балadow Балadow Балadow Балadow Балadow Балadow БалArrow БалArrow БалArrow БалArrow БалArrow БалArrow БалArrow БалArrow БалArrow БалArrow БалArrow БалArrow БалArrow БалArrow БалArrow БалArrow БалArrow БалArrow БалArrow БалArrow БалArrow БалArrow БалArrow БалArrow БалArrow Бал Arrow БалArrow БалArrow БалArrow БалArrow БалArrow БалArrow БалArrow БалArrow БалArrow БалArrow БалArrow БалArrow БалArrow БалArrow БалArrow БалArrow БалArrow БалArrow БалArrow БалArrow БалArrow БалArrow БалArrow БалArrow Бал arrow БалArrow БалArrow БалArrow БалArrow БалArrow БалArrow БалArrow БалArrow БалArrow БалArrow БалArrow БалArrow БалArrow БалArrow БалArrow БалArrow БалArrow БалArrow БалArrow БалArrow БалArrow БалArrow БалArrow БалArrow Балarrow БалArrow БалArrow БалArrow БалArrow БалArrow БалArrow БалArrow БалArrow БалArrow БалArrow БалArrow БалArrow БалArrow БалArrow БалArrow БалArrow БалArrow БалArrow БалArrow БалArrow БалArrow БалArrow БалArrow БалArrow Бал arrows БалArrow БалArrow БалArrow БалArrow БалArrow БалArrow БалArrow БалArrow БалArrow БалArrow БалArrow БалArrow БалArrow БалArrow БалArrow БалArrow БалArrow БалArrow БалArrow БалArrow БалArrow БалArrow БалArrow БалArrow БалCow БалArrow БалArrow БалArrow БалArrow БалArrow БалArrow БалArrow БалArrow БалArrow БалArrow БалArrow БалArrow БалArrow БалArrow БалArrow БалArrow БалArrow БалArrow БалArrow БалArrow БалArrow БалArrow БалArrow БалArrow БалAuthority | Bickоза Бавов Дьог БалArrow БалArrow БалArrow БалArrow БалArrow БалArrow БалArrow БалArrow БалArrow БалArrow БалArrow БалArrow БалArrow БалArrow БалArrow БалArrow БалArrow БалArrow БалArrow БалArrow БалArrow БалArrow БалArrow БалArrow БалRow БалArrow БалArrow БалArrow БалArrow БалArrow БалArrow БалArrow БалArrow БалArrow БалArrow БалArrow БалArrow БалArrow БалArrow БалArrow БалArrow БалArrow БалArrow БалArrow БалArrow БалArrow БалArrow БалArrow БалArrow БалOW БалArrow БалArrow БалArrow БалArrow БалArrow БалArrow БалArrow БалArrow БалArrow БалArrow БалArrow БалArrow БалArrow БалArrow БалArrow БалArrow БалArrow БалArrow БалArrow БалArrow БалArrow БалArrow БалArrow БалArrow Бал箭 БалArrow БалArrow БалArrow БалArrow БалArrow БалArrow БалArrow БалArrow БалArrow БалArrow БалArrow БалArrow БалArrow БалArrow БалArrow БалArrow БалArrow БалArrow БалArrow БалArrow БалArrow БалArrow БалArrow БалArrow БалArray БалArray БалArray БалArray БалArray БалArray БалArray БалArray БалArray БалArray БалArray БалArray БалArray БалArray БалArray БалArray БалArray БалArray БалArray БалArray БалArray БалArray БалArray БалArray БалArray БалArrow БалArrow БалArrow БалArrow БалArrow БалArrow БалArrow БалArrow БалArrow БалArrow БалArrow БалArrow БалArrow БалArrow БалArrow БалArrow БалArrow БалArrow БалArrow БалArrow БалArrow БалArrow БалArrow БалArrow БалAr row БалArrow БалArrow БалArrow БалArrow БалArrow БалArrow БалArrow БалArrow БалArrow БалArrow БалArrow БалArrow БалArrow БалArrow БалArrow БалArrow БалArrow БалArrow БалArrow БалArrow БалArrow БалArrow БалArrow БалArrow БалBow HeiNoH Akpnil Aztat | Bickоза Бавов Дьог БалArrow БалArrow БалArrow БалArrow БалArrow БалArrow БалArrow БалArrow БалArrow БалArrow БалArrow БалArrow БалArrow БалArrow БалArrow БалArrow БалArrow БалArrow БалArrow БалArrow БалArrow Bolow Bolow Bolow Bolow Bolow Bolow Bolow Bolow Bolow Bolow Bolow Bolow Bolow Bolow Bolow Bolow Bolow Bolow Bolow Bolow Bolow Bolow Bolow Bolow Bolow BolOW BolOW BolOW BolOW BolOW BolOW BolOW BolOW BolOW BolOW BolOW BolOW BolOW BolOW BolOW BolOW BolOW BolOW BolOW BolOW BolOW BolOW BolOW BolOW BolOW BolW BolW BolW BolW BolW BolW BolW BolW BolW BolW BolW BolW BolW BolW BolW BolW BolW BolW BolW BolW BolW BolW BolW BolW BolW Bolw BolW BolW BolW BolW BolW BolW BolW BolW BolW BolW BolW BolW BolW BolW BolW BolW BolW BolW BolW BolW BolW BolW BolW BolW BolL BolL BolL BolL BolL BolL BolL BolL BolL BolL BolL BolL BolL BolL BolL BolL BolL BolL BolL BolL BolL BolL BolL BolL BolL BolW BolW BolW BolW BolW BolW BolW BolW BolW BolW BolW BolW BolW BolW BolW BolW BolW BolW BolW BolW BolW BolW BolW BolW BolZycka Bilowk Кишою Проб�ын Нянь Вороть Сацета | Bikоза Бавов Дьог БалArrow БалArrow БалArrow БалArrow БалArrow БалArrow БалArrow БалArrow БалArrow БалArrow БалArrow БалArrow БалArrow БалArrow БалArrow БалArrow БалArrow БалArrow БалArrow БалArrow БалArrow БалArrow | Bikоза Бавов Дьог БалArrow БалArrow БалArrow БалArrow БалArrow БалArrow БалArrow БалArrow БалArrow БалArrow БалArrow БалArrow БалArrow БалArrow БалArrow БалArrow БалArrow БалArrow БалArrow БалArrow БалArrow Bolow |
ITPIMITKA.
Ipaacka HarpiaBcTbC uBnDue, HIX OXIOJxyeTbC. NOnHnAte npacyBatN, BCTaHOBUN MihimaJIbHe 3HaueHHa Tempepatyn.
YBATA.
Ypasi 3miHn TemnepaTpyn 3 BnOoi Ha HnKHy CnHi iHnKaTOp noHnAe 6bnMaTH WbNdiue. Lc O3NaHae, 10 Te tempea Tpa 3aHaTO BnCoka i He BiNobiae HanaTuBaHHo. He cnanItb 6iN3Hy!
IpoD8kyIte npacyBaTn TINbKn TOni, KOIn CNHn IHnKAtop nepeCTaHe 6nMaTn I npOyHae 3BykOBn CmHan.
EMHicTh DnB OBDn (7)
- PeεeρByapДЯВоиMaE BnH3y BnIMkyДЯЗуHOrO Bn- mHaHHaT, TAK UO Bu MoKTe 3HrTn NOrO 3 MlZI.
Kpuiuka pe3epByapa Ira BOn OndHocHo e TaKoK pInb- Tpom npOTn BanHa.
BnIMtB nATPOH pINbTy DnI 3axNCTy npOTn BANHa, Uo6 DoaTN BOu N pe3epByap. BnKoHaTe II BIDNOIBINO Do 3a3NaHeHO B po3dini "Jk DoaTN BOu N EMHicTB niD qac npacyBaHHa?".
EMHICTBBMiuye1,0nitrpu.
- RaTbKn 1IeKep XnBHeHn BCTaBnTn B po3eTkY, 3acBiTbCn IHnKaTOp pe3epByapa nra BOnn. Lc E Bka3yE Ha roTOBHiCtB DnI npacyBaHHn 3 npao, kNIO pifIbTp BiD HAKIny Ta pe3epByap nra BoOn BCTaHOJI npabINbHo.
Boga
3aTocOByTe TINbKn BOy i3 BOJOpBoOy a6o nIcTnIbObaHy BOy.
Boy 3 6atapei, i3 cywapkn a6o BoY 3 doaHnM ximikaTIB (Taknx kKpOxMaJIb, npdpyMN, do6aKn dIg 3m'kUeHHBOyn a60 iHsi) 3a6opOHcTBc4 3aNbATN B EMHcTB npackn.
PnIJaMoKe 6yTN NIOKoJKeHnOckIbKn BnapoBm Kamepi MoKyTcBOPOBaTncs OcaHn. Lc OcaHn MoKyTb 3aIIuata TcIiHa TKAHHi, KOIN BHXODITMMyTb Hepe3 OTBOpN dI npn.
06cIyroByBaHHa
Ipeepnepmm3actocybaHHM
Ouchitb DnHue npackboIoroIO TKAHHOIO.
- Ⅲб Видалип поед пошим Застocуваши М bci 3a-6bydнення, cniД npacybaTи соатку CTapy Chtvy TkaHnHy.
П配电ьаньбз napn
IIPIMITKA.
BicopTyIe 6inn3Hy 3a TnnaMn TkaHHN dny pi3Hnx Tempeatyp npacyBaHH.
- 阿卡图 puyka 3haxoindbce B noIooJIHII nIpeHeceHHa, po3bIOkyte 3amok, kOINCAHO b po3dini "FyHKii pyKn".
- BičtaBte npackу ha njćtəbky (5).
- BkIIOHITbBNIkyBpo3eTKy,IIOpiKIOHcHaHAnEKMUM HOMIBIDNOBIDAcTEXIHUMBMORMAM.
- Κοδ BCθaHOBιn TMηρεραTyPy, HαTιcHιb cεηκTOp SET (11).Якso Bn npacyBaTmTe 6iN3Hy, loучтлвdo BvCOKoi TMηρερaTyPi, NOuHαηTe 3 MihimaiNbHOI TMηρερaTyPi.
IIPIMITKA.
Bn6pahe 3naueHnra Tempepatyn nobinbno 6nmae cnHim konlboporm. Ipacka noue Harpibatncr. KOni 6yde doocrHyto po6ooyi Temepaatpyn, cHni iDnkaTOp nepeCTane He 6nmatn, i np03ByuHTb 3BykOBn ciHan. Tenerp MoKHa po3noUHnat npacyBaHHa.
Пд уac npacybaHHа npacui eNeKtpoHNo NiItpmMyBAtnmetbca Stana Tempepatya.ЯкоHa nucnnei nobBilho 6nmae cnH iHdkatop, ue O3haac, zu npnaHarpibaetcbc.
JaKoHaDnCnIeWbNIO6bnMaCcnHinIHnKaTOp,Ce 03Naue,IIO TemnepatypaIINBnBpaHoropeKIMy BCE Ⅲe3aHaToBnCoka.He npacyteOioHO BnPapHi peHi! PpOdoBxNyTe npacyBatNIbKn Toi,KOnn CnHIn IHnKaTOppeCaHe6bnMaTn,i npO3ByuHTb3ByKOBmCnHaJ.
PicnBnKOpNCTaHnHaTnCKaIte CeIeKTop SET (11),DOnOKn Ha DnCnPeI He NoUHe 6nMaTn YepBOH nIHnKaTOp.BmIMt b WTeKeP Ka6EnIO XmBnEHHr 3 Po3ETKn.
IpacyBaHHa 3 npao
TIOPEJIXEHNA
IpaKa Bnpo6nE BeNky KInbKicTb rapYoi nap. IcHye He- 6e3neKa onikiv.
YBATA.
KoIN Bn npaOeTe B pexmI napOBoro npacyBaHn, 3BepTaIte yBary Ha Te, O6E mHiCTb 3 BOIO 3abXn 6yna 3anOBHeHOIO DoCTaTHbOIO KInbKiCtHO BOIN.
- NaTPOH φiNbTp y nIra 3axncty npOTn BaHa Mae 3aBxKn 3hAxOHTnC Bpe3epByapi, TAKOX y TOMy BInaKky, KOnn Bn 3actocobyete nCTINbObaHy BOH.
YBAGA. NpauK npaui.
TounhaIte npaIOBAtn B TaKOMy nopAky:
- 3anOBHITb EMHicTb Do nO3HaKn MaKcMMy. He nepe6iJbIyIe KInbKiCtB BOn!
- 3akpntpeepbyap Inra BOni nocTaBte NOro Ha niCTaBky.
3.Плкючыбаоув CTahцio do po3etkn 3axnchIMN KOHTaKTAMN. - JIyka 3haxoMTbC B nIOxKeHHI dHnpeHeceHH, po36NoKyIe 3AMOK, kONICAHO B po3dini "FyHKii pyKn".
- Μιος Βαταθουβητη Εμπηρεραγργ, Ματικίβτι Βεπεκτόρι ΣΕT (11). Μινιβίση ἀναβεδημήν Βινητι Αβαλίημι.
- 3aekaiTe, nKi niOoBa HarpieTbcra. KoIyde DocarHyTo pobooTo TEMpepatyn, cnH iHdkatop nepectaHe 6nmatn, i np03ByuHTb 3ByKOBm CnHan.
- Hatncitb i ytpmmyte KnaBiy imnylbcnoi noaipn (1) BnpoDBK npHaMHI ½ xBNHIN. A60 k nocyhte 3amok (9) hazan, 5o6 3abNkByTu KnaBiy imnylbcnoi noaqi napn (10). Ceyac e HeobxidnM, o6 npapa Notpanna do npackn. He3NaHnn 3Byk npictpoio noaipn -ce HopmaIbHo.
BKA3IBKA IO IPIPACYBAHHRA 3ACTOCYBAHHRIMIAPN.
HanaityBaHH He npn3HaHeO nIpya-BaHH 3 npoIO (DVB. Ta6nio).
KilbKiCTb napn KOHTpOJIcEbC eNEKTPOHIKOIO.BoHa BN3HaHaCTbC TEmNepaTpyoI npn.
PiIac BnKOpNCTaHn TemnepaTpy npacyBaHH KOHTpOIOEcbc eIEKTPOHO CXeMO. JkUo CnHi iINkaTop Ha DnCnPei NOiBbHO 6mMa, npNCptpi HarpBaetbC.
PicnBnKOpNCaHHHaNTCKaTe ceNekTop SET (11),DOnOKn Ha DnCnPeI He BiO6pa3ntbCra YepBOHn IHnKaTOp.BmMiTb 8TEKeK Ka6eIIO XINBLeHHr 3 p03eTKN.
Функьа Верпкальноюдуни napu (Vertical Steam)
Ley peKIM dae MOxJIbICtB NOaBaTn napy B BepTKaIbHomy Hanpmi. LIO cyHKUIO MOxHa BnKOpNCToBvBaTn dIra yCyHeHHcCKnaDOK Ha OJ3i, JAKN BnCtB, aOo Ha 3aHaBickax.
IONEPEIXEHNA.
Hikon He cnpmOByTe ctpymiHa napHa IHOe. IChye He6e3neKa onIKB.
ToroBn NobicnOgHa nnHka, npoBeiTpacko Hb iDctahi 5-15 cm Bid nobepxhi.
JIKdoatnBOINBEMHICTbniac npacybaHHa?
IodabaiTe BovyB EMHicb 3abXJn Do TORo MOMHTy, NOKI BOa He 3akHUnacr NobHicTIO. JkuO Ni d Yac pobOTuYtbcr UymN 3 npictpo IOnaui napi, ue O3Naue, zoPiBeHb BoDn 3aHaTO Hn3bKni.
- BiDCTaBTe npacky Ha nIDCTaBky (5).
- HatnckaTe ceIeKToP SET (11), DOnOKn Ha dncPiEi He BiOboPa-3NtbcyHepBOHm iHNkAtop.
- BnTnHtB nNky 3 po3eTKn.
- Μιοῦν BΗΝΑΤη πεεργυρ, ὄτις Κλάβιω RELEEASE, ζύθα 3Ηακούπιντός πίδ πεεργυρόμω (Maj. C).
- Bnimitb natoh pijbtpy npotn BarHa (mI.D).
- 3aONBHnIe EMHCTb TiNbKn Do No3HaKn MaKcHmMy (MaI.E). He nepenOBHnIe EMHICTb BO-DoIO!
- NocTaBTe NaTPOH fInbTpPy npOTn BAnHa Ha MicSe B KpnUcI, pe3epByap nIa BoNIOCTaBte 3HOB Ha 6a3yniOCTaBky (MaI. F + G). "KnaaHn" niTbEpJxye Te, zo pe3epByap nIa BoN BCTaHOBJIe- HO npabINbHO.
- Bn moKeTe npoDobKHTn npacyBaTn.
IIPIMITKA.
K-TiNbKn WTeKeP XnBnEHH BCTaBnTn B po3eTkY, 3acBtntbCra IHdkatop pe3epByapa dna BODn. Raio Bin He Cbitntbcra, ce O3Naue, zo pfIbTp BiD hakiny afo pe3epByap dna BODn BCTaHOHeHnPaBnBHO. IpeBipTe noloxehn o60 KOMTOHEHTIB.
3aikinHnnpaui
- HatnckaTe ceIeKToP SET (11), donokn Ha dncnnei He BiDobpa3ntbCay cepBoHn iHdkaTOp. BnTnHiB bNkky 3 po3-etKn. IHdkaTOp Ha dncnnei BmKhHeTcR.
2.ПepeTmЯкSTaBtN npackyHa Micue,de BOHa 36epira-ETbCra,CnID OCTyDHTN II NOBHCIO.
ΦinbTp BiD Hakiny
IiDCTABKy dny napoBo npackn 6bnHaHO fipbTpOM BjH KaNny. Ype3 pfIbTp BiD hakiny MoXHa npOnyCTtN pIn6bn3Ho 18 nitrB Odn 3aJexHOb BiD JxopCtKocTi BoDn. PicnZ cIbor peCypc pfIbTpBaHepnyetbcra I NOrO cnIzamHHTn.
- BumkhHb npncTpii.
- Bmmitb uTekep Ka6eHIO XIMBIIeHHa 3 pO3ETKIN.
- Bič'eɪdhaɪte peʒeːpBvap ἀπλ Bɔʊn.
4.BinimtbkaptpnJXqjInbtpaBIDHakiny. - 3aIOBHiTb pe3epByap BOIO IO Do MAKcIMMaIbHOI N03HaQKn. He 3aINBaIte HaITo 6arato BOi!
- BCTABTe HOBNI KAPTpIIX KIbIbTa BiHaknny.
7.Першн Вмкати писчтій,заужай Te Kjltka XBJIINH,ДОПКИ HOВИΚ KapTpДЖ Флтpa He 3aONOBHTbcr BOYOIO.

TIPMIMITKA.
KuOyBACHMeAHOBOKAPTpNJaDNaPbTaBHaKnIy,MOKHaBNOPcTObByBaTnnpacky3iCTapIMKAPTpNJxEM,ODHAKTOIDcIid3aINBaTNDCNTNbOBaHyBOy
OuHcEHn

NONEPEDXEHNA.
- PpeD TmM JK NOnaTn OOnuIeHn Ipaackn, cnId o6oB'3koBO BNTaTHyTN BNtky 3 po3EtKn!
-Поуекайт,поки прлад He ДОСгн HeHopmaльноI TeMnepepatур!
KateropnH0 3a6oPohTbC8 Onyckatn npnnaB B Ody, 06 ouHCTnI no. Lc MoKe Pn3Bectn do ydApy enekTpNHm CTpyMOM a6o do nokeKi.

YBAGA.
-Дя Oушьн He 3aCTOCOByTe 3IITK 3dpTy a6o iHui MaTepiAn, lo MoKyTb N0UKOHTN NOBepxHIO.
He 3actocobyTe 3acobn Dn OunueHH, kmi MicrTaB iDki a6o abpa3nBHi CknaObi YacTHNI.
- DITn He NOBHHI YIcTITN npiJaD 6e3 Harny.
OuHuaTe KOpNyc 3a DonomorOIO cyXoi TKAHNH.
OuHuaTe DnHue npacki nndTabKn 3nerKa BONORo TKAHINHO.
OcTaToUHa BOna MoKe 3aIiNuaTnCBA EMHocTi, aNe II Kpa- Ie BNdaITn, RaIO Bn He PNaHyTe KopncTyBaTnC npacKOHO Hn6mKuH yac.
YcyHeHHH HEnoJaOK
IpeDynpexJaetobnacHocTINJN3dOpOBbI BO3MOxHOM pncke IOnyuHnI TpaBMbl.
BHIMAHINE:
O6o3NaHaeT Bo3MOxHbIe OaChbIe ycNoBnI nI npi6opa nn OkpyKaIOuXn PpeDMeTOB.
ITPIMEYAHNA:
ObpaaaetBnHMaHneHa peKoMeHdaaunuN HcOpMaunio.
06uHcTpyKunnoTexnke 6e3onacHOCTN
Ipeed nCnOlb30BaHmE npBopA BNMaTeIbHO npOHTne IHCTpyKmN IO 3KcNpyatauM IN COxpaHNTe IHCTpyKmN BMe-CTe C rapaHTme N KBtAHaUe M I, NO BO3MOXHOCTN, yNaKOBky C BHyTpeHHM cOdePXMblM. Ppi nepeaue npBopA dpYrIM TaKepedaTe IHCTpyKmN IO 3KcNpyatauM.
-Пиббрп徳нанчehнИКЛЮЧТЕьНДЯИСПОБЗOBAHЯВБыNTYИДЯп徳уСМOTpeHHbIXцELI.Он He paccHTaH NaKOMMEpueckoe ИСПОБЗOBAHNE.
He noIb3yItecb bHb NomeuHn. IpeoxpaHnTe np6op OT nCTOCHNKOB TeTnla, npMbx COJIeHbIX LyeH, BO3JeCTBnB BnaXHOCTN (HkoRda He nOrpykaTe B KNDKOCTb) nOcTpbix KpOMok. He pa6oTaIe C np6Opom MOKpbIM pykAMn. EcIn np6op cTAHET BnaXHbIM nIN MOKpbIM, HEmeJNeHNO OTKIOHnTE erO OT cETn.
ДячNTииуборкHa xpaHHe BbIKIOHTe np6Op n BbIHbTe BILKy N3po3ETKn(BbIHMaIte BILKy 3a KOpNyc, a He 3a npOBoD).EcIn np6Op He 6ydet NcNoIb3ObaTbcr, OTcoEINHITe BCE npHaIaNEXHOCTN.
He octabJnIe np6op 6e3 npncmToPa. EcnBb BbIXOHTe N3 KOMHaTbI,TO BcERda BbIKIOuAte np6Op.BbIHbTe BNkY N3 pO3ETKn.
- PeryIaRHO npOBepraTe np6Op n ceTeBoi Ka6eB ha npI3HaKIO NOBpeXdHNI. PnO sbHApUkeHNI NOBpeXdHNI He pONb3yITcB np6Opom.
- IcnoJb3yIte 3aIaChIbe DetaiIN ToJIbKO OTn3rTOBHTeIa.
-ДябezоианохocTN BaIINx DeTei DePKeHITe BCE ynaKOBOHTbIe MaTePnAIIbI (ПЯСТИКOBБIe MEUKN, Kopo6Kn, NOJIInCTIPOJN T.D.) B HeIOCTyINHom DЯ NIX MecTe.
PENyPENKDEHNEI
BnHMaHne! He pa3peuAte MaIeHbKm DeTm IrgaTb c nHeKo, TAK KaC cyUecTByeT. OnachocTb ydyWeHnra!
Oco6eHNO c6nI0aJTe «CneuaIbHbIe IHCTpyKcIIN IO TEXHKe 6e3oNaCHOCTN».
CpeuaJIbHbIe HnCTpyKcII N O TexHnke 6e3OpacHOCTN CmBOLbI Ha n3dEJIIN
Ha n3dennn nmeotc r cneyuoune npedynpejdaoune n nHopma- zuOHhie CNMBOJIbI:

PPEyPExEHNHe:
Topraya nobepxhoctb! Onacnoctb oxorob!
Bo Bpemra pa6oTbI TemnepaTypa OTKpbITOn NOBepXHOCTN MOKeT 6bITb OueHb BBICOKOJ.
I PEPdUYPEXKDEHNE:
- Побшва утюга бicitpo harpeBaetcЯ Tpe6yeT BpemeHи дя oxлжденя. He npikacaiTeCb K He!
I PEPdUYPEXKDEHNE:
Korda yTIOr He nCNoIb3yETcR, XpaHnTe erO B HaNExHOM MecTe! He CTaBbTe erO BEpTKaJIbHO Hn Ha KaKyHO NOBepXHOCTb. YTOr MoXeT npNJINHyTb!
- Bыбираіte 6e3oNAcHyNo nobepxHocTb ДЯ 6a3bl! NobepxHocTbdoJXHa 6bITb POBHOu yCTOuYBOu. Y6eINTecb B HaNEXHOCTNOnOPHOJ NOBEPXHOCTu.
- YTROGM Heo6xOIMO NOIb3OBaTbCn I DepxKaTb Ha yCTOuHBOI TepMOCTOIKo NOBepxHOCTn.
- Перацлелем Воряноу бачka OTcoeINHITE ceTeBOJ Ka-6eNB.
He octabnIte ythor 6e3 npncMOtpa, KOrda OH BkJIIOueH B po3etky.
He noIb3yITeCb yTIOROM, ecn OH naIaI nMeet 3aMeTHbIe NOBpeKdEHHa IJI N Teu.
He nbitaTecb peMOHTPOBAtb np6Op camocToTeIbHo. Bcerda obpaaiaTecb K cneuaHncty. Bo n36eXaHne onacNbix cnTyauCNI BcERda 3aMeHnTe NOBpeJdeHHbIK Ka6JIb TOJbKO y n3rTOBNTeJIa, B peMOHTHOcLyKBe nII y cneuaHnCTa Ha Ka6JIb TORO JKe TIna.
- Пoka утог вкlioочен пи oxлajdaeTCя, He попускай Te DeTei Do 8 leT K yTuRy I erO coeDInHITeIbHOMy Ka6eJIIO.
- ΘТИМ Рпбором могут NOьБ3OBaTbСя DeTи OT 8 Лет И Лиca C оранчehнblIMN ФиЗИЧЕCKIMN, OсЯЗTeЛьнblIMN ИЛП ПСИХИЧЕCKIMN cNoC6HOCrIMN, a TAKKE C HeДОCTaTOUHbIM ONbITOM И 3HaHЯМN, TOЛьКо NOД НадзOPOM ИЛП NOСЛЕ NOЛУЧЕНЯ INHCTpyKцI N0 6e3O-NaCHOЯ pa6OTE C Рпбором И CBЯЗAHьIM C 3ТИМ OnaCHOCTeI.
He no3B0JTe DeTm nIgpaTb c np6opom.
-ЧИстку и обслужиманые п résбора DeTи MOrTy BbIOnHЯТь TOЛьКОпд писмOTpOM.
3aONHnTe 6aOK TOnbKO Do MaKcImaJIbHOJ OTMeTKn. He nepeonHnTe erO! MaKcImaJIbHbI Osbem BoDbl: 1,0 nITpa.
He neperebaiTe coeHHntbHbI shnaHr (2)!
Ha3naYeHne
3TOTnpnbop nppeHa3HaueHdIgIJIaKeHnOeJdxblNtkaHei.
Oh npedha3HaueH nTnCNoJIb3OBAHnB DomauHHx ycnoBnIax.
JIIO6oe Dpyoe npIMeHHe IOnKHO CHITaTbCnICNoIb3OBAHNEM He NoHa3HaehHIO N MOKe TpINBeCTN K NOpYe MaTePnaJIOB ININ DaKe K JINuHOr TpaBMe.
Oncahne KOMNOHETOB
1 KhoIIka noaun ctpyn npap
2 CoeHnHTeBnaT py6ka
3 CTeBoi Ka6eJIb
4 Ba3a
5 Póndctabká dny ythora
6 UcTpoIcTBo OcB6OckDeHnpyuKUn"UNLOCK
7BodJHO6aOOKC pOTUBON3BcCTKOBbIM mNtPOM
8 Pyka
9 Φικατορ ἀπη ἡνερβυHθΟ ποδαύνη παρα
10 KhoIka noaHn cTpyn npa
11 Khonka Bb6opa SET
12 KoHTpOJIbHbI INdIkaTOp
13 Ducnnn Bb6opa TempepaTpyb
14 NaTPOH npOTINBOON3BecCTKOBTO qnIbTpA
He NOKa3aHo
KhONka OCBO6OxKeHnRELEEASE HaxoDITcN IOd BOJHbIM 6auchom. UCTPOIcTB OCB6OxKeHn BOJHOrO 6aUka.
Hnctpykqnn
PacnaKOBka
- Y6epnte BCE 3aunTHbIe nJIeHKn I NaKJIeKn C NOoWbI.
-ПОЛНOCТьpo pa3MOTaIte Ka6eIb NITaHnA.
IopKJIIOUcHHe N K 3JIeKTPocetN
- Y6eIntecb B COOTBeTCTBn HAnpJKeHn IITaHn yTHOra (Ha nacIopTHoT Ta6mUke) n HApJKeHn CETn IITaHn.
Ceteyu Bnky Heo6xOIMO BKJIOaTb B npaBnIbHO yCTAHOBJIeHHyIO p03ETKyc 3a3eMJIHOUcIM KOHTAKTOM.
Tpe6oBaHnK NcTOUHmKy nHTaHn
O67a MaKcMmaIbHaMaOuHocTb CTAHmCocTaBnAET 2400 Bt. TaKoH HApU3Kn peKOMeHdyetc OTeNbHa JINHnIITAHn, 3aunueHHa 6bITOBbIM aBTOMaTOM 3auNTbI cenn 16 A.
BHIMAHHE: Neperpy3ka!
- Pn Heo6xOaIMOCtN IcNoIb3OBAHnry yIINHTeJIeON HJOLXHbI IMETb CeHeHne XInIb He MeHee 1,5 MM2.
He nIcNoJIb3ayIte HeckOJIbKOpo3eTOK,TaK KaK 3To yCTPOINCTBO CnIIUKOM MOUHoe.
BkJIIOUeHHe N BbIKJIIOUeHn
BkIIOUeHHe: BkIOUHTe CeTeByIO BVInKy B npaBnIbHO yCTa-HOBnEHHyO 3a3EmneHHyIO po3eTKy. PpIbOp cpa3y BKIOUHTcR B pa6oN pyexIM. 3To IOKa3bIBaEtCRA KpaCHbIM INDnKaTOpOM Ha dinC-nnie.
BbIKHoueHne: HaxmMaTe KhoNky BbIbopa SET (11), noka KpaChbIn INDnKATOp Ha DnCnIe He HaHHeT MIRaTb. BbIHbTe BnKy n3 po3eKn. IocCBetKa DnCnIe NOracHT.
ФункшаВАТOMATNUECKOROBБИКПУЕн<|im_start|>
Pnp6Op IMeET cyHKIIO ABTOMaTHueCKTOBbIKIOHeHNA.
- Ecni ctaun yIora He nCIOB3yETc, To OHa BbIKIOHTcyepez 20 MNHT. KpaChbIn HnDnKATOp Ha DnCnnee 3aMnraet.
- YTO6bI npOIoJNtB IaXeHHe, KHOJIKO BbIbOpa SET (11) yCTaHOBInTe HxKHyIO TEMIIepaTpy.
Ha3haeHne pyuK (8)
Pyka, npKneHnHa K 6a3e, cnyknt dna nepeHock np60pa B OTKHOHeHHOM OT CETn COCTOHN.
-ПЯпенихочи рибoga рогнIMITEpyknydoФИКСАИN(pnc.A).ФИКСАИNGyKINCOPIBOXKaAETcY"цELHcOM".Pyka moKet nCNoIb30BaTbCЯДЯпенихочи рибoga.
-ДЯOCBO6OxJdEHnpyHKnHa-XMNTeHaKHOKNOCBO6OxJdEHn"UNLOCK"(6)OndOBpeMeHnOn onyCTnTe pyky(pnc.B).


3NeKtpoHHa peryHnpoBkA TeMnepaTpybI C nOmoBIO KhoNKn BbI6opa SET (11)
C6JIIOaIe INCTpyKcHn NO rnaKeHHo Ha Ta6NIuKe TkaHei.
- YctaHaBJIbBaIte TemnepaTyP B COOTBeTCTBn CO CneDyIouSeI Ta6nIeI.
- WepctTbIe TkaHb BbIbOpaHbAitte Han3HaHky, YTo6bI N3-6ExKaTb IIOBHeHn IIOChraUxCn PTeH B pe3yIbTaTe rJaXeHn C napom. KpOme TOrO, NoD ToHKe XNoHataO6ymaxK HbIe TKAHn PoKnIaBbAitne O6bIHyTO KaHb.
- INCTpyKuBn B Ta6nue OTHocTcK T KaHm 6e3 DOONHHTeHbHOI OTdEKNIOBepxHOCTN (NoeHN, npOnNTKn,CKnaDOK n T. d.)ДЯ TKAHeC DOONHtBuHOBOTdEKNOBbupaIte Hn3kyo TEMpepatpyu ngaIbTe IN C n3HaKN.
- Khonkoi Blybopa SET (11) yctaHOBITE HxKHyTe Tmpepa-typy.
- PnB KJIIOUeHm CTeBOB BNIKn B PO3ETky IOcCBtKa 6aKa NaHHaET CBETNbCRA. 3TO NOKa3bIbAeT rOToBHOCTb npi60pa K ImaXeHIO C O6pAbOTKO napOM, eCNI nATPOH npoTINBOUN3BeCTKOBOrФnIbTpArN BOJHOH 6aOc YcTaHOBNeHbI npaBnIBHO.
Boda
IcnoIb3yIte ToIbKO BOIOnpoBOdHyIO IIN DiCTnIIpOBAHHyIO BDOy.
He 3anonHnIte BoaHoi 6aOcK BODo n3 BaTapeu OTOnneHn, BOoN i3 cyuINKn dnn 6bIy N BODo, codepkauei doabK (HaNPmep, KpaxMaJ, npFOMepu, yMraHTeB u Dpyrne XMMKAtbl).
3TO MOKET NOBPeDnTb yTOr B pe3yIbTaTe 6pa3oBaHnO cAkoB B napOBou Kamepe. 3TN OCAkN MOrTy 3aRpy3HrTv TKAhB npi NoJaDaHN N3 OTBepCTM B NOIOUBe.
IcnoJb30BaHne
IpeepnepBbIM nCNoJIb3OBAHnEM
- PtoptnTe OCHOBAHne yTOHa CJIeKb BnAaKHO TKAHbIO.
ДяудаленьсхoctaTKOB nepedepBBIM NcNoJIb30BaHnEM npOrnaDbTe yTHORm HeckoIbKO pa3 CTapyUuCTyIO TKAHb.
TlaXeHne 6e3 npa

PIMEYAHNA:
PaccopTpyIte npedMeIbI OeKdbI cornaHcO TemnepaTy- pam dIraIgKeHH.
- Ecπu pyka eue haxoDntcB nOxKeHn dIe nepeHoCKn, onyctnte ee, kak oNcaHO bpa3dene "Ha3haHeHne pyKn".
- NocTabbte ythor ha noctabky (5).
- BkIIOuAaTe npIbOp TOnbKO B npaBnIbHO yCTaHOBNeHHyIO pO3eTKy.
4.ДЯ yctahOBKIN TemnepaTpybl NcNoJIb3yIte KHOJky BbyIOpa SET (11).EcIn ecTb DeNkAthBle BeuN dJa rnaKeHnHauchHnte C cAmO Hn3KoI TemnepaTpybl.

PIMEYAHNA:
- Bb6paHnHa TemnepaTpya CBETTCs CnHM CBeTom MeDnEHHo Mnaet. YTOr HArpeBaeTcR. IIO DoCTNKeHm pa6Oey TemnepaTypbI CNHIN INDnKATOp NpecTaet Mnratb N IOaEtC3ByKOBo CnHaI. MoXHO NaHnHaTb TlJaKeHne.
BoBpempa60bI 3neKtpoHHa CXema NoDepkNBAeT NocToHHyTO TempeAtpy. Ecnn CnHn INHnKaTOp HcHET MIRatb,TO 3TO O3HaAeT, YTO npN6op HArpeBaTeCra.
EcnHn HnDnKaTOp HaHaet 6bICTpo MIRaTB,TO 3TO O3Haayet, YTO TEmnpaTypa eue CnNtKOM BbICoKa dIy BblpaHHoro nIOxKeHn. He noJaJIte BaJe 6eIbe! IpoJOnKITE rnaKeHne, ToIbKO KOrDa CnHn HnDnKaTOp NepeCTaHET MIRaTB, IN Bbl ycBbIWIte 3ByKOBoi CNHAn.
IIO OKOHaHm pa60tI haxMaTe KhONky Bb6opa SET (11), noka KpaChbI INDnKATOp He NaHT MfArTaH Ha DCnIee. BbHbTe cTeByIO BNkY 3 pO3ETKn.
TnaxKeHne cnapom
PENyPENKDEHNE:
YTHG BbIyckaET 60nbOe KOINueCTBO ropHero npa. OnachocTb oKorOB!
BHIMAHINE:
-Перд Исплььоганем утога с napом убенистов в Воряном бачke писутctbyet вда в Нeoхом мокинистve.
- PAnPOn InpOTnBOUN3BecTkoBOrO pInNbTaPc BcERda DOnJKeH 6bIb yCTaHOBnE H BOJaHOH 6aQK, DaKe ecNn NcNoJIb- 3yeTcIINIIINPOBaHHa B0a.
BHIMAHHE: NepBoe nCnoB3oBaHne:
BbIOnHnTe cneJeUoUee:
- BaoyokdoJiKeH6bItb3aOJIHeH Do MaKcMaJIbHOI OT-MetKn.He nepenONHnTe 6ayok!
- 3akpoIte BoaHOn 6aOcN uYCTAHOBNTe ero Ha 6a3y.
- BkHouHte 6a3OByIO CTaHcIIO B po3eTKy C 3a3emJIIOUIM KOHTAKTOM.
- Ecni pyka eune HaxoDITcB NIOJKeHmI dJI nepe-HockN,OCBO6OInde pKCaTOp,KaK OINcAHO Bpa3JeNe "Ha3NaHeHne pyKn".
5.ДяуctaHOBkTNempepatpyI INTOJIb3yTe KHOJky Bbl-6opa SET (11).CM.TabniCy Bblwe. - IopoKdnte, noka nooWba ythora He harpeetc. KOrpa6oohay temnepatya doctnHyta, cnHn HnDnKaTOp nepectaet MrrbN noDAeTc 3ByKOBo CnHan.
- HaximMaTe Ha KhoNky Npaun Ctpyn napa (1) B teYeHne He MeHee ½ MNHyTb. TaKke MoXHO OTYHyTb FHKcatop (9) DnA FkCaun KhoNkn Npaun Ctpyn napa (10).3To Bpemr Heo6xOuMo, YTObI nap DoWen Do yTHora.Pn3OM HEMHOro NOBbIeHHbI uym Hacoca RaJIaETcHOPMaJIbHbIM.
3AMEYAHNIOITJAXEHNNCIAPOM:
-Положене Heпгдназнayeho Дяглжени с пapom (см. tabиу).
KoJIueCTBO npapa perynipyecr3neKtpOnHc CXemOH. OHO 3aBnCtOT TempePAtpyI rnaKeHn.
BoBpempa60tI Temnepatypa IJaxKeHmKoHTpOInpyeTc3JIeKTPoHHcXEmoE. EcIN CINH INDkATOp Ha DnCnIee HauHET MeIeHHO MIRaTb, 3TO O3HaaeT, YTO yCTPOINCTBO HArpeBaetc.
IIO OKOHaHIM pa60tI haxImaTe KhONky Bb16opa SET (11), IOKA KpaCHbI INDkaTOp He NaHT MfATb Ha DmCnIee. BbIbTe CeTeByIO BuNKy I3 po3eKIN.
Функия Верпкально па (Vertical Steam)
3TaФунклЯ NO3BOJЯET NOIyHITb CTpyO npa B BepTnKaJIb-HOM HAnpaBNeHIM. OHa MoKet NcNoIb3OBaTbCЯДЯydaJIeHNYCKlaDOK Ha BucIcx OdeJdax IINI WToPax.
IPEDYIPEXEHEHIE:
HnKorda He HanpaBnaIte cTpyIO npa Ha IIOe. OnaChocb oxorob!
IobecBe 6enbe Ha BeWanky Ira OeJkbI n nepeMeaTe yTnHa 5-15cmBpa3HbIe cToPOhbl.
KakdoINTbBOyBOBpempa60tb?
BoBpEmIdoJIbAaTe BODy, noka 6aOKe He onycteN. CnIbHbI UyM HAcoca Bo BpeM pa6oTbI Noka3bIbaET, YTO ypoBeHb BOdbl Man.
- NocTabBte yTIOH Ha nOIOCTABKy (5).
- HaximmaTe KhoNky BbIbopa SET (11), noka kpaChbH uHdNkaTOp He HaHTe MrtaTb Ha dncnnee.
- BbIbTe ceTeByIO BUNKy N3 po3eTKN.
4.ДЯСТЯ6aЧаHαKMITE KHOПКу OCSOБKDEHЯ RELEEASE NOBBOYHBIM 6aKOM (pnc.C). - BbHbTe nIaTPOH nIPOTNBOIN3BecTkoBOrO pInNbTa (PNC.D).
- 3aJIeIte BODy B 6aHOK IO MaK-CIMMaJIbHOJ OTMeTKN (PNC.E). He nepeNoJIHnTe 6aHOK!
7.BCTaBbTe naTPOH npOTnBOUN3- BECTKOBOrO fInIbTpna u yCTaHO-BNTe 6aOH Ha 6a3y (pnc. F + G). "UeHcOK" noka3bBaet, YTO BOJHON 6aOH yCTaHOBNeH npabINb-HO. - Tenepb MOxHo npoDoJIKNtB rna-KeHne.

I PIPMEUHNA
PnBKNIOUeHm CTeBOB BNIKN B PO3eTKy NOcCBeTKa 6aKa HauHnaet CBETNbC. Ecn OHa He CBeNTc,TO NaTPOH npOTBON3BecTKOBO FInbTa nN BOJHO 6aOK yCTaHOBHe HnPaBnBHO. PpOBepTe oBe No3uNN.
Pocne3aBepueHnpa6oTbI
- Haxmamte KhoNky Bb6opa SET (11), noka kpaChbinyHnDnKATOp He HaHET Mrratb Ha dncnnee. BbHbTe cTeByIOBnKy n3 pOeTkn. POnCBetKa dncnner norachet.
2.ДаиTe npi6bopy octbIb nepeD y6bpKo Ha xpaHHeHne.
PpOtnBOn3BeCTKOBbIΦnJIbTp
IapOBa BA OOpUOBAHa IpoTbON3BecTKOBbIM PnIB- TpOM. NaTPOHa npOTbON3BecTKOBOro PnIBtpa XBaTaET DnA PnIBTpauMn pIImepHO 18 NITPob BObl B 3aBNCIMOCTN OT ee JceKTcN. IocNe 3TORO OH CTAHOBITc He3ΦΦeKTHBEH IN DOJIKeH 6bITb 3aMeHeH.
- BbiknHouHTe np6op.
- BbHbTe cTeBvIu BnIky n3 pO3eTkn.
- CHIMNTE BOJHOH 6aOH
- BbHbTe natoH npOTnBOIN3BecTKOBOrO fNJIbTpa.
- 3aONHnTE 6aOK BOoJ DO MAKcMaJIbHOJ OTMeTKn. He nepenONHnTE 6aOK!
- BCTaBtHe HOBBI NaTPOH nPOTINBOUN3BecTKOBORO fNJIbTaPa.
- IpeD BKIOHHeM pIbOp nOIOJdnte HeCKoJIbKO MHyT, YTO6bI HOBbI NaTPOH cINbTpA npOnITaNC BDOI.
IIPIMEYAHNA:
Ecnn y Bac HET HOBOrO npoTnBOm3BecTKOBOro 0nIbTpA, Bbl eJe MOKET npOJIOKNITB TnaKeHHe C NcNOJIb3OBaHMe CTaporo NaTPOHa N DCNTNIIIMPOBAHHO BObI.
UNTka
TPEUYTPEJKDEHNE:
- Bcerda otknioaute ceTeBOKabeI nepeJ uNCTko!
- Doxdntecb noHoro octbHaHn npi6opa.
HnB KOem cnyae He norgykaite npnbop B Bodyn TnA CTKN.3To MoKET npNBecT N nopakHeNIO 3JIeKTpHuECKIM TOKOM IIN BO3ropaHIO.
BHIMAHINE:
He nCnoJIb3yIte npOBOnOHyIO 1eTky IIN a6pa3nBhIe cpeCTBa.
He nCnoB3yIte KNCIOHTbIe IIN abpa3nBbIe YnCTaIe CpeIcTbA.
- YIcTky npi6bopa dETn MOryT pOn3BODITb TOnbKO nOd, npICMOTpOM.
- Pnpntpe Kopnyc CnEgKa BnaJxHoi TkaHbIo.
- PpOtpnTe pIoOuBy yTOra nIooCTabKy cIeRka BnaXHoi TKAHbIO.
OCTaTKI BOdI MOXHO OCTaBnTb B BOdHOM 6aYKe, HO ee CNeDuYET BblNTb, eCNI OHa HaxoDInacb B 6aYKe DInTeJIb-Hoe Bpemr.
YcTpaHHeH HeHcnpaBHOte
| HéncnPаВ- HOCTh | Bo3MoXHЯ npUHnHa | YcTpaHEnHe |
| YcTpoIcTBо He pa6OtaeT | HéncPapBHa cTe- Bary po3etKa | ПОпрбуITE ИСПОЛь- 30ВаТь дpyгю рo3eT- KИ. |
| KpacbIй кОТРоЛь- Hый ИнДиКaTOр на ДИсПЕС CBETNTСЯ. | Быберпte Нухкун TeMpepAtpу утOra. | |
| YcTpoIcTBо ВЕЗАПно пеpe- cTaet pa6OtaeT | Пeperpy3ka элек- TrpUeCKоN сeТи? | П探测ьte сeТeВоиnpedoxpaHITeIb. |
| СинIHи ИнДиКa- TOP на ДИсПЕС БыICTPO MИraeT | TempepaTypa cIMIIшКOM BbICOKA ДЯу BыбpaHnOro ПОLOжEHЯ. | ПОдождITE, пoka утOr He octbIeHT (СИнIHи ИN-ДиKaTOр пepeCTaHET MИraTb). |
| ПосLE NarpeBa- NHyЯ ПОсCBETKa bachka He cBe- TITCSI и nap He npOn3BODiTcS | ПатонПрOTиВОИЗ- BeCTKOBOrO ФИль- Tра OTCyTCTByeT ИПи уСТановлEN HePpavBILHо | П探测ьte ПОLOжЕ- Иne ПатрonaПрOTиВО- ИЗВeCTKOBOrO ФИль- Tрa. |
| ВODaHон bAчOK uCTaHOBJIEN HePpα- BIVIbHо | При правиль"HоJy cTа- HOBKE ВОДЯНО Г bAчka DoIgKeH b6bITb сblIshen "шELЧOK". | |
| СиMbHь IшУМ BO ВЕмя обра- 6OTKNI NapOM | ВODaHон bAчOK nuct. | П探测ьte bAчOK. HaneIte BODI y B6a- YOK. |
TexHnueckne daHHbIe
Modenb: DBS 783 CB
IcToHnK nHTaHnR: 220-240 B\~, 50/60 T
Iotppe6JIeMaMoUHocb: 2000-2400BT
Klacc 3aunmbi:
MaKcImaJIbHaN eMKoCTb BoDAHOro 6aUka:1,0IITpa
YnctbI BEc: np6JI.3,3K
CoxpaHEno npaBO Ha Texnueckne I KOHCTpyKIOHOHBle 13MeHeHnB pamkax npoDoJkaIoUeIcR pa3pa6OTrN npOdyKta.
3ToI3dJIeHHe IpoIIO BCE Heo6XoIMbIe N aKTuaIbHbIe npOBepKn, IpEaINcAHbIe InpKeTbOi CE, K npM. Ha 3JIeK-TPomarHHTHyIO COBMeCTUMOCTb N COOTBeTCTBne Tpe6OBAHnM K H3KOBoNtBOThOH TexHnke, OHO 6blIO TaKke COKHCTpyuPobAoH IO NoCTpOeHO C yUeTOM IocNeDHNx Tpe6OBAHnNo TEXHnke 6e3OpacHoCTn.
A
A
gaii jia xie gai jia jial 61
jss 1000
10 > x < 11
j 7
| x - 2x| = 12x^2 + 15x + 1
aill 1i
",(F+G)
buaa aall jia baae 5j
1
8
:abla
- g. jll l 10
aill j j g wsiil 1
y
a
j 11
Jn Jnnnnnnnnnnnnnnnnnnnnnnnnnnnnnnnnnnnnnnnnnnnnnnnnnnnnnnnnnnnnnnnnnnnnnnnnnnnnnnnnnnnnnnnnnnnnnnnnnnnnnnnn
aalil g aagall gail
.2
cIa.bblgglg 2
a 1
a a a a a a a a a a a a a a a a a a a a a a
1
alall 1
J 2
all jjjjj .3
aill jil glll l 4
jia jie ale gai liai y. gaiyai jia xue jiu jial 5
- j 个
Caiyall 0sll gaoell sall sbj jz.6
aaiiie 7
clldy
:
i 1
aalall al, aiaianll aaiy jll plilni yll alal
a
AED = AED = 3
i 1
1
aii iiaii jai jai clll jai jai yae
y
.
1111 1111 1111 1111 1111 1111


#
J 1
1

11"SET" 111111111111111111111111
Jie 1sall Jai 1sll sall oxay jaiy jaiy Jaiy
jaiall jy jay jol all jaj
jai (A kill) jay jai
jai all jai jai all jai jai all jai jai all jai jai all jai jai all jai jai all jai jai all jai jai all jai jai all jai jai all jai jai all jai jai all jai jai all jai jai all jai jai all jai jai all jai jai all jai jai all jai jai all jai jai all jai
(11)"SET" 23
aal aal al aal
a a 1
J 1
1
.
J 1
j 1
iYyBnJrJrJrJrJrJrJrJrJrJrJrJrJrJrJrJr
!i 1

i 1
:
jil jbi. jilcbw y 1c ydgc ojjl gnny!p
i j 1 1 1 1 1 1 1 1 1 1 1 1


- EMARQUE RELATIVES AU REPASSAGE A LA VAPEUR:
- Symbols in these Instructions for Use
- WARNING:
- CAUTION:
- OTE:
- General Safety Instructions
- WARNING!
- Special Safety Instructions
- Symbols on the product
- WARNING: Hot surface! Danger of burns!
- Intended Use
- Overview of the Components
- not shown
- Instructions
- Unpacking
- Electrical connection
- Power Requirements
- CAUTION: Overload!
- Turn on and off
- Automatic shut-off function
- Function of the Handle (8)
- Electronic temperature adjustment using the selector button SET (11)
- NOTE:
- Water Tank (7)
- Water
- Operation
- Before Initial Use
- Ironing without steam
- Steam Ironing
- CAUTION: Initial use:
- OTE ON STEAM IRONING:
- Vertical Steam function (Vertical Steam)
- How can I replenish the water during operation?
- IOTE:
- When you have finished
- Anti-scale filter
- Cleaning
- Technical Data
- Disposal
- Meaning of the "Dustbin" Symbol
- Instrukcje obstugi
- YbIMKHeHHH i BmKHeHHH
- Функья abTomatHOrO BIMKHeHHA
- ynkui pykn (8)
- EneKtpoHHe HanaaTyBaHHa TeMnepaTpy 3a DonomoroO ceNeKtopa SET (11)
- ITPIMITKA.
- YBATA.
- EMHicTh DnB OBDn (7)
- Boga
- 06cIyroByBaHHa
- Ipeepnepmm3actocybaHHM
- П配电ьаньбз napn
- IIPIMITKA.
- IpacyBaHHa 3 npao
- TIOPEJIXEHNA
- YBAGA. NpauK npaui.
- BKA3IBKA IO IPIPACYBAHHRA 3ACTOCYBAHHRIMIAPN.
- Функьа Верпкальноюдуни napu (Vertical Steam)
- IONEPEIXEHNA.
- JIKdoatnBOINBEMHICTbniac npacybaHHa?
- 3aikinHnnpaui
- ΦinbTp BiD Hakiny
- TIPMIMITKA.
- OuHcEHn
- NONEPEDXEHNA.
- YBAGA.
- BHIMAHINE:
- ITPIMEYAHNA:
- 06uHcTpyKunnoTexnke 6e3onacHOCTN
- PENyPENKDEHNEI
- CpeuaJIbHbIe HnCTpyKcII N O TexHnke 6e3OpacHOCTN CmBOLbI Ha n3dEJIIN
- PPEyPExEHNHe:
- Topraya nobepxhoctb! Onacnoctb oxorob!
- I PEPdUYPEXKDEHNE:
- Ha3naYeHne
- Oncahne KOMNOHETOB
- He NOKa3aHo
- Hnctpykqnn
- PacnaKOBka
- IopKJIIOUcHHe N K 3JIeKTPocetN
- Tpe6oBaHnK NcTOUHmKy nHTaHn
- BHIMAHHE: Neperpy3ka!
- BkJIIOUeHHe N BbIKJIIOUeHn
- ФункшаВАТOMATNUECKOROBБИКПУЕн<|im_start|>
- Ha3haeHne pyuK (8)
- 3NeKtpoHHa peryHnpoBkA TeMnepaTpybI C nOmoBIO KhoNKn BbI6opa SET (11)
- Boda
- IcnoJb30BaHne
- IpeepnepBbIM nCNoJIb3OBAHnEM
- TlaXeHne 6e3 npa
- PIMEYAHNA:
- TnaxKeHne cnapom
- PENyPENKDEHNE:
- BHIMAHHE: NepBoe nCnoB3oBaHne:
- 3AMEYAHNIOITJAXEHNNCIAPOM:
- Функия Верпкально па (Vertical Steam)
- IPEDYIPEXEHEHIE:
- KakdoINTbBOyBOBpempa60tb?
- I PIPMEUHNA
- Pocne3aBepueHnpa6oTbI
- PpOtnBOn3BeCTKOBbIΦnJIbTp
- IIPIMEYAHNA:
- UNTka
- TPEUYTPEJKDEHNE:
- TexHnueckne daHHbIe
- A
- :abla
- cIa.bblgglg 2
- :
- AED = DE AED = 3
- #
- (11)"SET" 23
Brand : BOMANN
Model : DBS 783 CB
Category : Iron