HDM 462 EK CB - Fondue, raclette and wok appliance BOMANN - Free user manual and instructions
Find the device manual for free HDM 462 EK CB BOMANN in PDF.

| Product type | Multi-function appliance: hot dog cooker, egg cooker, and bun warmer |
| Brand | Bomann |
| Model | HDM 462 EK CB |
| Power supply | 230 V~, 50 Hz |
| Power | 350 W |
| Protection class | I |
| Net weight | Approx. 0.75 kg |
| Water tank capacity | 60 ml max |
| Steamer capacity | Up to 14 sausages (diameter 2.5 cm, max length 13.5 cm) |
| Number of eggs | Up to 3 eggs (thanks to the 3-tier egg basket) |
| Main functions | Cooking sausages, cooking hard/medium/soft-boiled eggs, warming buns |
| Included accessories | Steamer, lid, egg basket (3 tiers), measuring cup with piercer |
| Housing material | Heat-resistant plastic |
| Care and cleaning | Clean after cooling; steamer, lid, and basket washable with water; tank cleaned with soft cloth; regular descaling with citric acid-based agent |
| Safety | Automatic shut-off via thermostat if tank empty; hot surfaces indicated; do not touch heating rod; do not immerse in water |
| Repairability | Do not repair yourself; contact customer service or qualified technician; power cord only replaceable by manufacturer |
| Warranty | Compliant with European directives; subject to technical modifications |
Frequently Asked Questions - HDM 462 EK CB BOMANN
User questions about HDM 462 EK CB BOMANN
0 question about this device. Answer the ones you know or ask your own.
Ask a new question about this device
Download the instructions for your Fondue, raclette and wok appliance in PDF format for free! Find your manual HDM 462 EK CB - BOMANN and take your electronic device back in hand. On this page are published all the documents necessary for the use of your device. HDM 462 EK CB by BOMANN.
USER MANUAL HDM 462 EK CB BOMANN
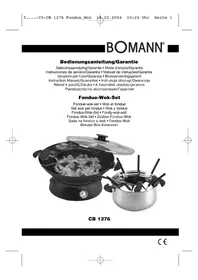
natural_image
White BOMANN blender with a golden food item on top, showing its side profile and body structure (no text or symbols visible)Overview of the Components ......Page 3
Instruction Manual Page 34
Technical Data Page 37
Disposal - Meaning of the "Dustbin" Symbol ...... Page 37
JEZYK POLSKI
Spis treści
- in bed & breakfast.
Thank you for choosing our product. We hope you enjoy using the appliance.
General Safety Instructions
Read the operating instructions carefully before putting the appliance into operation and keep the instructions including the warranty, the receipt and, if possible, the box with the internal packing. If you give this device to other people, please also pass on the operating instructions.
- The appliance is designed exclusively for private use and for the envisaged purpose. This appliance is not fit for commercial use.
Do not use the appliance outdoors. Keep it away from sources of heat, direct sunlight, humidity (never dip it into any liquid) and sharp edges. Do not use the appliance with wet hands. If the appliance is humid or wet, unplug it immediately. - When cleaning or putting it away, switch off the appliance and always pull out the plug from the socket (pull the plug itself, not the lead) if the appliance is not being used and remove the attached accessories.
- Do not operate the machine without supervision. If you leave the room you should always turn the device off. Remove the plug from the socket.
- The device and the mains lead have to be checked regularly for signs of damage. If damage is found the device must not be used.
- Do not try to repair the appliance on your own. Always contact an authorized technician. To avoid the exposure to danger, always have a faulty cable be replaced only by the manufacturer, by our customer service or by a qualified person and with a cable of the same type.
- Use only original spare parts.
- Pay careful attention to the following "Special Safety Instructions".
Symbols in these Instructions for Use
Important information for your safety is specially marked. It is essential to comply with these instructions in order to avoid accidents and prevent damage to the machine:

WARNING:
This warns you of dangers to your health and indicates possible injury risks.

CAUTION:
This refers to possible hazards to the machine or other objects.

NOTE:
This highlights tips and information.
Children and Frail Individuals
- In order to ensure your children's safety, please keep all packaging (plastic bags, boxes, polystyrene etc.) out of their reach.
Caution! Do not allow small children to play with the foil as there is a danger of suffocation! - This device is not intended to be used by individuals (including children) who have restricted physical, sensory or mental abilities and/or insufficient knowledge and/or experience, unless they are supervised by an individual who is responsible for their safety or have received instructions on how to use the device.
- Children should be supervised at all times in order to ensure that they do not play with the device.

WARNING!
Special Safety Instructions for this Machine
Symbols on the product
You will see the following warning and information symbols on the appliance:

WARNING: Hot surface!
When in use, the temperature of the touchable surface may be very high.
• After use, always hold the lid and the steamer by the handles.
- Do not touch the vertical spike during and immediately after use. During use, it can reach temperatures of 110^ to 130^ C.

WARNING: Risk of injury!
- Fill the water tray with water only up to the MAX mark. Too much water may boil over and may lead to burn
- Do not move the appliance when in use.
• Always use the appliance with the lid on. - Hot steam escapes from the opening in the lid during use. Turn the opening in the lid in a direction where the steam can do no damage.
- Be careful when opening the lid. Hot steam escapes.
- Be careful when using the measuring cup. This has an egg pricker on the base.

CAUTION:
- Only switch on the appliance if you have filled the water in the water tray and the steamer with lid is correctly attached.
- Do not use the appliance without water.
- Do not fill the water tray with liquids other than water.
- Only fill the water tray with cold water.
- During use make sure that the power cord is not touching the hot parts of the appliance.
Intended Use
The appliance is designed for
• the preparation of hot sausages;
- boiling eggs;
- warming bread rolls.
It is intended for domestic use and similar applications such as
• in staff kitchens in shops, offices and other workplaces;
- in farm properties.
It is not intended for the following use:
• by guests in hotels, motels and other accommodation;
• in bed & breakfast facilities.
The appliance is only to be used as described in the user manual. Do not use the appliance for any commercial purposes.
Any other use is not intended and can result in damages or personal injuries.
The manufacturer assumes no liability for damages caused by improper use.
Supplied parts
1 Hot dog maker appliance
1 Steamer
1 Lid
1 Egg holder (in 3 parts)
1 Measuring cup with egg pricker
Unpacking the appliance
- Remove the appliance from its packaging.
- Remove all packaging materials such as films, filler material, cable clips and carton.
- Check the contents for completeness.
i NOTE:
Production residue or dust may have collected on the appliance. We recommend cleaning the appliance according to chapter "Cleaning".
Controls
1 Lid handle
2 Steamer handles
3 Steamer
4 Egg holder
5 Locking pins
6 Water tray
7 Function selector
8 Indicator lamp heater
9 Housing
10 Vertical spike
11 Steam outlet
Not shown:
Measuring cup with egg pricker
Instructions
Location
Stand the appliance on a level, damp and heat resistant surface. Stand the appliance up in such a way that it cannot topple over.
Electrical connection
Check whether the mains voltage which you want to use matches that of the appliance. The details can be found on the information plate of the appliance.
Function of the selector
0 Appliance is off
1 Water tray with steamer is warming up
2 Vertical spike warming up
3 Water tray with steamer and vertical spike is being warmed up
Function of the indicator lamp
The indicator lamp indicates the heating process.
Settings 1 and 3:
If the water tray is empty, the appliance is switched off via the thermostat. The indicator lamp goes out. If you do not switch the appliance off, a keep-warm phase begins. The temperature of the steamer is controlled and retained. This is shown by the indicator lamp. The temperature of the vertical spike drops to around 40^ C.
Measuring cup
The measuring cup is an accessory to be used when you use the appliance as an egg boiler.
Decide how soft or hard you want your boiled eggs to be. Select the volume of water with the measuring cup. The markings on the cup mean the following:
soft / weich for soft-boiled eggs
medium / mittel for half-boiled eggs
hard / hart for hard-boiled eggs.
Using the appliance as a hot dog maker
- Ensure that the mains plug is not plugged in that the function selector is on "0".
- Fill the water tray with water up to the MAX mark (Maximum fill level: 60 ml).
- Place the steamer (without the egg holder) onto the water tray. In doing so, check the locking pins: These must snap into the notches on the steamer. Press the steamer securely onto the locking pins.
- Put a maximum of 14 sausages with a diameter of 2.5 cm into the steamer. The sausages must not be longer than 13.5 cm, so that the lid seals the steamer properly. Do not overfill the steamer since otherwise the appliance cannot function properly and the sausages will not become hot.
-
Place the lid onto the steamer.
-
Push the bread roll onto the spike.
- Connect the mains plug to a properly installed 230 V \~, 50 Hz earthed socket.
- Move the function selector to position 3. The indicator lamp lights up.
i NOTE:
• The cooking process begins after around 2 minutes.
• The sausages are done after around 10 minutes.
- If the indicator lamp goes out, the water in the water tray has boiled off. The keep-warm phase begins.
- Carefully lift the lid from the steamer. Remove a sausage from the steamer using a fork or sausage tongs. Close the lid.
- Pull the bread roll from the spike. Push the hot sausage into the cavity in the bread roll.
- If you want to warm up more bread rolls, move the function selector to position 2. Process as described above.
WARNING: Risk of burning!
The vertical spike is very hot.
Using the appliance as a egg boiler
- Assemble the 3 parts of the egg holder. Also refer to our figure on page 3.
- Ensure that the mains plug is disconnected and move the function selector to position "0".
- Fill the measuring cup with cold water. Use the markings on the measuring cup.
- Fill the water tray with the correct volume of water.
- Place the steamer (without the egg holder) onto the water tray. In doing so, check the locking pins: These must snap into the notches on the steamer. Press the steamer securely onto the locking pins.
- Prick each egg on the blunt end. To do so, use the pricker on the base of the measuring cup. Carefully push the egg on until the pricker has pierced the shell.
- Place the eggs into the egg holder with the pricked end at the top.
- Place the egg holder into the steamer: In the bottom of the steamer you will see a hole in the centre of it. Insert the stem into this hole so that the egg holder sits securely.
- Place the lid onto the steamer.
- Connect the mains plug to a properly installed 230 V \~, 50 Hz earthed socket.
- Move the function selector to position 1. The indicator lamp lights up.
i NOTE:
The eggs are done if the water in the water tray has boiled off. The control lamp goes out. There is no other signal for the end of the boiling time.
- Carefully lift the lid from the steamer. Remove the egg holder.
- Quickly rinse the eggs under cold water so that they do not continue to boil.
When you have finished
- Set the function selector to position 0.
- Disconnect the mains plug.
- Allow the appliance to cool for 20 minutes before cleaning it.
Cleaning
WARNING:
- Before cleaning, always remove the mains plug and wait until the device has cooled down.
- Do not touch the vertical spike and water tray immediately after use. Risk of burning!
- Do not immerse the device in water. Otherwise this might result in an electric shock or fire.
CAUTION:
- Do not use a wire brush or any abrasive items.
-
Do not use any acidic or abrasive detergents.
-
The exterior of the device should be cleaned as necessary with a slightly damp cloth – without any additives.
- Rinse the steamer, the lid and the egg holder clean in water. You may add a mild detergent. Dry the parts well.
- Wipe out the water tray with a damp cloth or sponge. To dissolve burnt-on grease, fill the water tray with some water and a few drops of dishwashing liquid. Place the steamer with the lid onto it. Boil the water for around 2 minutes (Function selector to position 1). Allow the appliance to cool. Wipe out the water tray again.
Removing limescale
- The intervals at which you should remove limescale depend on the hardness of water and the frequency of use. We recommend regular removal of limescale.
- Do not use vinegar, but a standard citric acid-based limescale remover. Follow the manufacturer's dosage instructions.
Storage
- Clean the appliance as described and let it dry completely.
- For longer periods of non-use we recommend storing the appliance in its original packaging.
• Always store the appliance in a well-ventilated and dry place out of reach of children.
Troubleshooting
| Problem Possible cause | Solution | |
| The appliance does not work. | The appliance is not connected to mains power. | Check the wall outlet with a different appliance. |
| Insert the plug properly in the wall outlet. | ||
| Check the fuse. | ||
| The appliance is defective. Contact our service or a repair center. | ||
| The sausages burst. Too much water in the tray. Fill the water tray with a little less cold water. | ||
| The sausages do not become hot enough. | Too little or not enough water in the tray. | Fill the water tray with a little more cold water, but only up to the MAX mark. |
| Too many sausages in the steamer. Fill the steamer with a max. of 14 sausages of 2.5 cm in diameter. | ||
| The lid is not on properly. Close the steamer with the lid. | ||
| The eggs burst. | The eggs were not pricked. | Use the pricker on the measuring cup to prick the eggs before boiling. |
| The eggs are too soft. Too little or not enough water in the tray. | Fill the water tray with a little more cold water. Use the supplied measuring cup. | |
| The lid is not on properly. Close the steamer with the lid. | ||
| The appliance switches off before the end due to excessive limescale. Remove limescale from the appliance regularly. The limescale layer is only becomes too difficult to remove if it is too thick. | ||
| The eggs are too hard. Too much water in the tray. Fill the water tray with a little less cold water. Use the supplied measuring cup. | ||
| Watch the indicator lamp. Boiling is finished when the lamp goes out. | ||
Technical Data
Modell:......HDM 462 EK CB
Power supply: 230 V\~, 50 Hz
Power consumption: 350 W
Steamer capacity:..... approx 60 ml max.
Protection class: I
Net weight:..... approx 0.75 kg
Subject to technical changes without prior notice!
This device has been tested according to all relevant current CE guidelines, such as electromagnetic compatibility and low voltage directives, and has been constructed in accordance with the latest safety regulations.
Disposal - Meaning of the "Dustbin" Symbol
Protect our environment: do not dispose of electrical equipment in the domestic waste.
Please return any electrical equipment that you will no longer use to the collection points provided for their disposal.
This helps avoid the potential effects of incorrect disposal on the environment and human health.
This will contribute to the recycling and other forms of reutilisation of electrical and electronic equipment.
Information concerning where the equipment can be disposed of can be obtained from your local authority.