
SKM 550 B1 - Food Processor SILVERCREST - Free user manual and instructions
Find the device manual for free SKM 550 B1 SILVERCREST in PDF.
| Product type | Multifunction food processor |
| Brand | SilverCrest |
| Model | SKM 550 B1 |
| Mixing bowl capacity | 3.8 L |
| Blender capacity | 1 L |
| Included accessories | Dough hook with scraper, wire whisk, flat beater, mincer with pusher, reversible slicing disc (fine/thick), reversible grating disc (coarse/medium), fine grating disc, blender with lid and measuring cup, mixing bowl with lid, accessory holder |
| Power supply | 220-240 V ~ 50/60 Hz |
| Protection class | II |
| Food contact materials | Approved for food contact |
| Main functions | Kneading, whisking, mixing, mincing, slicing, grating, granulating, blending |
| Safety | Automatic shutdown in case of overheating, overload protection, safety lock |
| Cleaning of bowl and accessories | Dishwasher safe (except blender) |
| Cleaning the blender | By hand with warm water and dish soap |
| Warranty | 3 years |
| Customer service (France) | 0800 919270, kompernass@lidl.fr |
| Use | Domestic only |
| Number of speeds | Variable (rotary switch with positions 1-4 and pulse) |
Frequently Asked Questions - SKM 550 B1 SILVERCREST
User questions about SKM 550 B1 SILVERCREST
0 question about this device. Answer the ones you know or ask your own.
Ask a new question about this device
Download the instructions for your Food Processor in PDF format for free! Find your manual SKM 550 B1 - SILVERCREST and take your electronic device back in hand. On this page are published all the documents necessary for the use of your device. SKM 550 B1 by SILVERCREST.
USER MANUAL SKM 550 B1 SILVERCREST
Operating instructions
NL BE
KEUKENMACHINE
Gebruiksaanwijizing
ES
Before reading, unfold both pages containing illustrations and familiarise yourself with all functions of the device.
FR BE
KOMPERNASS HANDELS GMBH
BURGSTRASSE 21
44867BOCHUM
GERMANY
www.kompernass.com
Safety instructions 17
First use 20
Operating positions 20
Working with the kneading hook, beater and whisk 21
Refilling with ingredients 21
After you have finished using your appliance 2 2
Working with the continuous shredder 22
After using your appliance 23
Working with the blender 23
Adding more ingredients 23
After you have finished using your appliance 24
Cleaning and care 24
Cleaning the appliance 24
Cleaning the mixing bowl with lid, continuous shredder, lid with pusher,
blender lid and all accessories 24
Cleaning the blender 25
Storage. 25
Troubleshooting 25
Technical data. 25
Warranty and service 26
Disposal 26
Importer 26
Recommended filling quantities 27
Introduction
Congratulations on the purchase of your new appliance.
You have selected a high-quality product.
The operating instructions are part of this product.
They contain important information on safety, use and disposal. Before using the product, familiarise yourself with all handling and safety guidelines.
Use this product only as described and only for the specified areas of application. Please also pass these operating instructions on to any future owner(s).
Proper use
This appliance is intended exclusively for processing foodstuffs in normal household quantities.
This appliance is intended solely for use in private homes. It is not suitable for commercial use!
This appliance is intended only for private use in enclosed, dry spaces. It must not be used outdoors.
The appliance may only be used with original accessories.
Package contents
Food processor
Mixing bowl with lid
Blender with lid and measuring jug
Continuous shredder with pusher
Rotary cutting disc (thick and thin)
Rotary shredding disc (coarse and medium-fine)
Grating disc (fine)
Kneading hooks with dough deflector
Beater
Whisk
Accessories holder
2 screws (3.5× 22mm)
2 wall plugs (6 mm)
Operating instructions
NOTE
One of the discs for the continuous shredder is pre-fitted inside the shredder on purchase!
Check contents for completeness and damage immediately after unpacking.
Contact Customer Services if necessary.
Appliance description
Fold out the flaps on the front and rear covers of this operating manual.
Image E:
1 Kneading hook with dough deflector
Whisk
3 Beater
4 Blender with lid and measuring jug
5 Accessories holder
6 Mixing bowl with lid
7 Continuous shredder
8 Shredding disc
Grating disc
10 Drive shaft for continuous shredder
10 Rotary cutting disc
12 Lid with pusher for the continuous shredder
Image H:
13 Release button
Rotary switch
15 Pivoting arm
16 Drive unit
17 Recesses for the mixing bowl
18 Cable storage compartment
Safety instructions
The appliance must only be connected to a correctly installed and earthed mains power socket. Ensure that the rating for your local power supply corresponds with the details on the rating plate of the appliance.
- Ensure that the power cable does not become wet or moist during use. Route the cable in such a way that it cannot be crushed or damaged.
- Keep the power cable away from hot surfaces.
- Do not perform any repairs on the appliance. All repairs must be performed by our Customer Service Unit or by a qualified specialist technician.
- Remove the plug from the mains power socket when the appliance is being cleaned or in the event of a fault. It is not sufficient to switch off the appliance, as the appliance is subject to mains voltage for as long as the plug is connected to the mains power socket.
Always remove the plug from the mains power socket when the appliance is not in use.
- To avoid risks, have defective plugs and/or power cables replaced immediately by a qualified specialist technician or our Customer Service Department.
The appliance and its connecting cable must be kept away from children.
Never submerge the appliance in water or other liquids.
WARNING! RISK OF INJURY!
Always disconnect the appliance from the mains power supply when fitting or removing accessories. This will prevent unintentional activation of the appliance. The appliance will begin running again after any power outage is over!
The appliance should always be disconnected from the mains when unattended and before assembly, disassembly or cleaning.
This appliance should not be used by children.
- Use only the original accessory parts for this appliance. Accessory parts from other manufacturers may not be suitable, and this may lead to risks!
- This appliance can be used by persons with reduced physical, sensory or mental capabilities or lack of experience and knowledge if they have been given supervision or instruction concerning safe use of the appliance, and if they are aware of the potential risks.
Children must not use the appliance as a plaything.
The grating, cutting and shredding discs and the blender blades are very sharp!
Take care when inserting and removing the grating, cutting and shredding discs, as well as during cleaning!
WARNING! RISK OF INJURY!
- Warning - the cutting blade is very sharp! For this reason, take great care when removing the blender jug.
- Never use the appliance for purposes other than those described in these instructions. Otherwise there is a risk of serious injury!
- Do not change accessories unless the drive unit is entirely at a standstill and the blender is unplugged from the power supply! The appliance will run on for a short time after being switched off!
Never leave the appliance unattended!
Before changing any accessories or additional parts that move during operation, the appliance must be switched off and disconnected from mains power. - While the appliance is in operation, do not put anything other than the ingredients to be processed into the mixing bowl, continuous shredder or blender.
- Do not put hands and foreign objects into the filling shaft or the blender to avoid the risk of injury or damage to the appliance.
ATTENTION! PROPERTY DAMAGE!
- Do not operate the appliance without ingredients. Risk of overheating!
Never fill the appliance with hot ingredients!
First use
1) Take all the parts out of the box and remove the packaging material and any protective wrapping or stickers.
2) Clean all components as described in the section "Cleaning and Care". Ensure that all parts are completely dry.
3) Place the appliance on a clean and level surface.
4) Secure the appliance to the surface using its four suction discs.
5) Pull the power cord out of the cable storage compartment 18.
6) Insert the plug into the mains power socket.
NOTE
You can store the kneading hook 1, the whisk 2, the beater 3 and the shredding disc 8, the grating disc 9 and the rotary cutter disc 11 in the accessories holder 5.

DANGER - ELECTRIC SHOCK!
If you want to attach the accessories holder 5 to the wall using the mounting materials provided, you should make sure before you start drilling that there are no electric cables, wires or pipes running behind the wall surface where you want to drill!
7) Mark the drill holes on the wall using the accessories holder 5.
8) Use a 6 mm bit to drill holes at the pre-marked positions on the wall.
9) Push a wall plug into each hole.
10) Screw the screws into the wall plugs so that they stand proud of the wall just enough to allow you to hang the accessories holder 5 on them.
11) Place the accessories holder over the screws and push it downwards so that the accessories holder fits firmly on the screws.
Operating positions
ATTENTION! DAMAGE TO PROPERTY!
Only operate the appliance with the accessories correctly inserted and in the operating positions shown in this table. NEVER operate the appliance without ingredients.
| Position Accessories | ||
| 1 | ||
| 2 | ||
| 3 | ||
| 4 | Positioning the mixing bowl ⑥ Using the kneading hook ①, beater ③ and whisk ② | |
| 5 | Insertion of large quantities of foodstuffs for processing | |
Working with the kneading hook, beater and whisk
WARNING!RISKOFINJURY!
Under no circumstances should you place your hands or fingers in the mixing bowl during operation! Danger of injury due to rotating parts!
- Switch from one accessory to another only when the drive unit 16 is at a complete standstill! After being switched off, the drive unit 16 will continue to run for a short time.
In cases of malfunction, switch the appliance off and remove the plug from the wall socket. This will prevent the appliance from becoming switched on again unintentionally.
NOTE
The appliance may only be used when the drive hubs not being used are fitted with their protective covers.
Proceed as follows to prepare the appliance for operation using the kneading hook 1, beater 3 and whisk 2:
1) Press down the release button 13 and move the pivoting arm 15 into operating position 4 (see the section "Operating positions") (Image A).
2) Set the mixing bowl 6 into place. Check that the base of the mixing bowl 6 is inserted fully into the recesses 17 provided for it on the blender.
3) Press down the release button 13 and move the pivoting arm 15 into operating position 1 (Image A).
4) Set the rotary switch 14 to P and hold it in this position until the drive unit 15 settles in its "Park" position (Image B). If the drive unit 16 doesn't move, it is already in its park position (Fig. 2).
5) Press down the release button 13 and move the pivoting arm 15 into operating position 4 (Image A).
6) If you want to use the kneading hook 1, insert the dough deflector into the drive unit 16 (Image D). Ensure that the hole through which the kneading hook 1 is inserted is lying over the mounting hole on the drive unit 16.
7) Depending on the task to be performed, insert the kneading hook 1, beater 3 or whisk 2 so that they firmly click firmly into the drive unit 16.
8) Add the ingredients you wish to process into the mixing bowl 6.
NOTE
While kneading and/or mixing, please note that the dough in the mixing bowl will increase in volume or will be pressed upwards by the tool. Take note of the table in the section "Recommended filling quantities".
9) Press down the release button and move the pivoting arm 5 down into operating position 1 (Image A).
10) Slide the lid onto the mixing bowl ⑥ so that the catches on the pivoting arm ⑤ click into place.
11) Turn the rotary switch to the required setting.
Refilling with ingredients
- Add the ingredients through the hole in the lid during operation.
Or:
1) Switch the appliance off using the rotary switch 14.
2) Set the rotary switch 14 to P and hold it in this position until the drive unit 16 comes to a standstill (Image B).
3) Remove the lid.
4) Press down the release button 3 and move the pivoting arm 15 into operating position 5.
5) Add the ingredients.
After you have finished using your appliance
1) Switch the appliance off using the rotary switch 14.
2) Set the rotary switch 14 to P and hold it in this position until the drive unit 16 comes to a standstill (Image B).
3) Remove the lid.
4) Press down the release button 13 and move the pivot arm 15 into operating position 4.
5) Remove the attachment you have been using from the drive unit 16.
6) Remove the mixing bowl 6
7) Clean the appliance (see section "Cleaning and care").
Working with the continuous shredder
WARNING!RISKOFINJURY!
To avoid personal injury and damage to the appliance, never insert or place your hands or any foreign objects into the feed tube.
Always use the pusher and no other implement or body part to push ingredients into the appliance. Danger of injury due to rotating parts!
- Switch from one accessory to another only when the drive unit is at a complete standstill! After being switched off, the drive unit will continue to run for a short time.
In cases of malfunction, switch the appliance off and remove the plug from the wall socket. This will prevent the appliance from becoming switched on again unintentionally.
NOTE
The appliance may only be used when the drive hubs not being utilised are fitted with their protective covers.
Make sure that neither the kneading hooks 1, the whisk 2, or the beater 3 are attached to the pivot arm 15.
Proceed as follows to prepare the appliance for operation using the continuous shredder 7:
1) Press down the release button 13 and move the pivot arm 15 into operating position 4 (see the section "Operating positions").
2) Set the mixing bowl 6 into place. The base of the mixing bowl 6 must click into the recesses 17 on the appliance.
3) Press down the release button 13 and move the pivot arm 15 into operating position 2.
4) Remove the protective cover from the drive for the continuous shredder (Image C).
5) Insert the continuous shredder into the hub socket (aligning the marking "6" on the continuous shredder with the marking "on the pivoting arm 15). Turn it in an anti-clockwise direction until the continuous shredder clicks firmly in place and the marking "9" on the continuous shredder is aligned with the marking "2" on the pivoting arm 15).
6) Set the drive shaft into place.
7) Depending on the task you want to perform, place the cutting 11, shredding 9 or grating disc 8 onto the drive shaft 10 of the continuous shredder 7.
8) Place the lid with the pusher 12 onto the continuous shredder 7 (so that the marking "▼" on the lid 12 is lined up with the marking "●" on the continuous shredder 7) and lock the lid in (marking "▼" on the lid 12 is lined up with the marking "●" on the continuous shredder 7).
9) Turn the rotary switch 14 to the required setting.
NOTE
Do not press too much food into the continuous shredder 7. Take note of the table in the section "Recommended filling levels".
10) Add the ingredients through the opening in the lid with the help of the pusher.
After using your appliance
1) Switch the appliance off using the rotary switch 14.
2) Turn the continuous shredder anti-clockwise and remove it.
3) Disassemble the continuous shredder 7 and clean all parts as shown in the section "Cleaning and care".
Working with the blender
WARNING!RISKOFINJURY!
- Allow hot fluids to cool to a lukewarm temperature (approx. 30 - 40^ ) before pouring them into the blender.
WARNING! RISK OF INJURY FROM SHARP KNIFE/ROTATING DRIVE!
- Never put your hand into the attached blender while it is running!
- Remove the blade from the blender 4 only when it is at a complete standstill.
Only use the blender 4 with the lid firmly in position.
In cases of malfunction, switch the appliance off and remove the plug from the wall socket. This will prevent the appliance from becoming switched on again unintentionally.
Proceed as follows to prepare the appliance for operation using the blender 4:
1) Press down the release button 13 and move the pivot arm 15 into operating position 3 (see the section "Operating positions").
2) Remove the protective cover for the blender drive hub (turn so that the marking "▼" on the protective cover for the blender drive hub is in line with the marking "●" on the appliance itself) (Image F).
3) Position the blender 4 on top of the appliance (so that the marking "▼" on the blender 4 lines up with the marking "●" on the appliance). Turn the blender anti-clockwise until the stop (so that the marking "▼" on the blender 4 lines up with the marking "●" on the appliance itself) (Image G).
4) Add the ingredients.
Maximum fill quantity: approx. 1 litre;
- Foaming liquids, maximum 0.5 litre;
- Ideal processing quantity for solids: 50 - 100 g.
NOTE
Take note of the table in the section "Recommended filling quantities".
5) Place the lid onto the measuring jug slightly offset and then turn it until the lid clicks into place (Image I).
6) Turn the rotary switch 14 to the required setting.
Adding more ingredients
1) Switch the appliance off using the rotary switch 14.
2) Rotate the lid of the blender a little (Image I), remove the lid and add the ingredients you want to mix.
or
3) Rotate the measuring jug, which is placed in the lid of the blender 4, by 90^ and remove it. Then gradually add the solid ingredients using the opening provided for this purpose.
After you have finished using your appliance
1) Switch the appliance off using the rotary switch 14.
2) Turn the blender 4 clockwise and remove it.
NOTE
- Ideally, you should clean the blender 4 immediately after use (see the section "Cleaning and care"). This makes food residues easier to remove.
Cleaning and care

DANGER - ELECTRIC SHOCK!
Before cleaning the appliance, disconnect the plug from the mains power socket! Risk of electric shock!

NEVER immerse the appliance in water or any other liquid!
ATTENTION! DAMAGE TO PROPERTY!
Do not use abrasive or aggressive cleaning materials. These may damage the surfaces of your appliance.
TIPS
It is best to clean the appliance directly after use. This makes food residues easier to remove.
- Processing foodstuffs containing strong pigments, such as carrots, may cause staining of the plastic parts. Such stains can be removed using a little cooking oil.
Cleaning the appliance
Wipe the appliance with a damp cloth. For stubborn soiling use a mild detergent on the cloth. Wipe off any detergent residue using a cloth moistened with clean water. Then carefully dry the appliance.
Cleaning the mixing bowl with lid, continuous shredder, lid with pusher, blender lid and all accessories
Clean all accessories, the mixing bowl with its lid 6, the blender lid 4 and measuring jug, the protective cover for the drive hub, the continuous shredder 7 and its lid with the pusher 12 as well as the shredding disc 8, grating disc 9 and the rotary cutting disc 11 in warm water with a little detergent. Any residues can be removed with a washing-up brush. Rinse all parts with warm clean water and make sure that all parts are dry before re-using them.
NOTE
The accessories, the mixing bowl with its lid 6, the blender lid 4 and measuring jug, the protective cover for the drive hub, the continuous shredder 7 and its lid with the pusher 12 as well as the shredding disc 8, grating disc 9 and the rotary cutting disc 11 are also suitable for cleaning in the dishwasher.
If you clean them in the dishwasher, please ensure that no plastic parts become trapped under pressure between other objects. This may cause them to become deformed.
- Wherever possible, place all plastic parts in the top basket of the dishwasher.
Cleaning the blender
WARNING!RISKOFINJURY!
Do not handle the blender knife with your bare hands.
ATTENTION! DAMAGE TO PROPERTY!
The blender 4 is not suitable for cleaning in a dishwasher. Cleaning it in a dishwasher will cause irreparable damage to the blender 4.
Clean the blender in warm water with a little mild detergent. Afterwards, rinse all parts with clean water so that no detergent residues remain.
In most cases, you an also achieve sufficiently hygienic cleaning directly after use in the following way:
1) Put some water containing a little detergent into the fully assembled blender 4.
2) Place the lid onto the measuring jug slightly offset and then turn it until the lid clicks into place (Image I).
3) Switch on the blender 4 for a few seconds.
4) Pour out the washing water. Any residues can be removed with a washing-up brush.
5) Afterwards, rinse out the blender with plenty of clean water, so that all detergent residues are removed.
Storage
Place the mains cable in the cable storage compartment 18 when storing the appliance.
Store the cleaned appliance in a clean, dust-free and dry location.
Troubleshooting
If the appliance suddenly stops working:
The appliance has overheated and triggered the automatic safety cut-out.
Turn the rotary switch 14 to O.
- Remove the plug from the wall socket.
-Allow the appliance to cool for 1.5 minutes.
-If the appliance has not yet cooled off completely after 15 minutes, it will not start.
Wait a further 15 minutes and try switching on again.
If the appliance does not switch itself on:
- Check that the plug is correctly connected to a wall socket.
- Check to make sure the protective cover for the drive hub for the blender 4 and for the continuous shredder 7 and the mixing bowl 6 are all positioned correctly and clicked into place.
- Check to see if the pivoting arm 15 is in the required position (see section "Operating positions").
If the steps described above do not solve the problem, then the appliance is defective. Arrange for it to be repaired by a qualified specialist technician or by the Customer Service Department.
Technical data
Input voltage: 220 - 240 V ~/50 Hz
Power consumption: 550 W
Max. capacity
Mixing bowl: approx. 3.8 I
Blender: approx. 1 I
Protection class: II /

All of the parts of this appliance that come into contact with food are food-safe.
Warranty and service
You are provided a 3-year warranty on this appliance, valid from the date of purchase. This appliance has been manufactured with care and inspected meticulously prior to delivery. Please retain your receipt as proof of purchase. In the event of a warranty claim, please call your local Customer Service centre. This is the only way to guarantee free return of your goods.
The warranty only covers claims for material and manufacturing defects, not for transport damage, parts subject to wear and tear or for damage to fragile components such as switches or batteries. This appliance is intended solely for private use and not for commercial purposes.
The warranty shall be deemed void if this product has been subjected to misuse or improper handling, use of force or any interventions not carried out by one of our authorised service centres.
Your statutory rights are not restricted by this warranty.
The warranty period is not prolonged by repairs effected under the warranty. This also applies to replaced and repaired components. Any damage and defects present at the time of purchase must be reported immediately after unpacking, but no later than two days after the date of purchase. Repairs effected after expiry of the warranty period shall be subject to charge.
GB Service Great Britain
Tel.: 0871 5000 720 (£ 0.10/Min.)
E-Mail: kompernass@lidl.co.uk
IAN274393
IE Service Ireland
Tel.: 1890 930 034
(0,08 EUR/Min., (peak))
(0,06 EUR/Min., (off peak))
E-Mail: kompernass@lidl.ie
IAN 274393
Disposal

Under no circumstance shc the appliance be disposed of as standard domestic waste. This product is subject to the provisions of European Directive 2012/19/EU.
Dispose of the appliance via an approved waste disposal company or your municipal waste disposal facility. Please observe applicable regulations. Please contact your waste disposal centre if you are in any doubt.

The packaging for this product is made from environmentally friendly material and can be disposed of at your local recycling plant.
Importer
KOMPERNASS HANDELS GMBH
BURGSTRASSE 21
44867 BOCHUM
GERMANY
www.kompernass.com
Recommended filling quantities
| Attachment | Accessories Food | Amount Time | Level | ||
| Blender 4 | - Juice | 400 g ingredients + 600 ml water | 30 sec. 3, 4 | ||
| - | Nuts, almonds | 100 g 20 sec. 3, 4 | |||
| - Ice cubes | 110 g 10 sec. | 3, 4 | |||
| - Liquids | 1000 ml 10 sec. | 3, 4 | |||
| Continuous shredder 7 | carrots, potatoes, cucumber | 500 g *1 | 25 sec. | 2, 3, 4 | |
| carrots, potatoes, cucumber | 500 g *2 | 50 sec. | 2, 3, 4 | ||
| carrots, potatoes, cucumber | 500 g 25 sec. | 2, 3, 4 | |||
| carrots, potatoes, cucumber | 500 g *1 | 25 sec. | 2, 3, 4 | ||
| carrots, potatoes, cucumber | 500 g *2 | 40 sec. | 2, 3, 4 | ||
| Mixing bowl 9 | Yeast dough | 500 g flour, 1 egg, 80 g oil (at room temperature), 80 g sugar, 200-250 ml warm milk, 25 g fresh yeast or 1 sachet of dry yeast, 1 pinch of salt *3 | 1st mixing process: 2 min. | 1 | |
| 2nd mixing process: 10 min. | 2 | ||||
| Spritz cookie pastry | 125 g butter (at room temperature), 100-125 g sugar, 1 egg, 1 pinch salt, 250 g flour *4 | 1st mixing process: 30 sec. | 1 | ||
| 2nd mixing process: 6 min. | 2, 3, 4 | ||||
| Meringue | 8 egg whites | 2-3 min. | 4 | ||
| Double cream (30% fat content) | 600 ml | approx. 3 min. | 4 |
- 1: Use the coarse side of the rotary shredder disc or rotary cutting disc ①.
*2: Use the fine side of the rotary shredder disc or rotary cutting disc 10. - 3: The maximum volume for yeast dough is about one and a half times the quantities given in the recipe.
*4: The maximum volume for spritz cookie pastry amounts to about one and a half times to twice the quantities given in the recipe.
Table des matieres
Introduction 30
Usage conforme 30
Matériel livre 30
Tension sector: 220 - 240 V ~/50 Hz
Puisance absorbee:550W
Capacité max.
KOMPERNASS HANDELS GMBH
BURGSTRASSE 21
44867 BOCHUM
GERMANY
www.kompernass.com
WAARSCHUWING! LETSELGEVAAR!
WAARSCHUWING! LETSELGEVAAR!
WAARSCHUWING! LETSELGEVAAR!
WAARSCHUWING! LETSELGEVAARI!
WAARSCHUWING! LETSELGEVAAR!
WAARSCHUWING! LETSELGEVAAR!
KOMPERNASS HANDELS GMBH
BURGSTRASSE 21
44867 BOCHUM
GERMANY
www.kompernass.com
KOMPERNASS HANDELS GMBH
BURGSTRASSE 21
44867 BOCHUM
GERMANY
www.kompernass.com
CZ Servis Cesko
Tel.: 800143873
KOMPERNASS HANDELS GMBH
BURGSTRASSE 21
44867 BOCHUM
GERMANY
www.kompernass.com
Cantidades recomendadas
| Función Acceosorios Alimento Cantidad Tiempo Nivel | ||||||
| Batidora 4 | - Zumo | 400 g de ingredientes + 600 ml de agua | 30 s 3, 4 | |||
| - | Frutos secs, almendras | 100 g 20 s 3, 4 | ||||
| - | Cubitos de hielo | 110 g 10 s 3, 4 | ||||
| - Líquidas | 1000 ml 10 s | 3, 4 | ||||
| Picadora 7 | Zanahorias, patatas, pepinos | 500 g *1 | 25 s | 2, 3, 4 | ||
| Zanahorias, patatas, pepinos | 500 g *2 | 50 s | 2, 3, 4 | |||
| Zanahorias, patatas, pepinos | 500 g 25 s | 2, 3, 4 | ||||
| Zanahorias, patatas, pepinos | 500 g *1 | 25 s | 2, 3, 4 | |||
| Zanahorias, patatas, pepinos | 500 g *2 | 40 s | 2, 3, 4 | |||
KOMPERNASS HANDELS GMBH
BURGSTRASSE 21
44867 BOCHUM
GERMANY
www.kompernass.com
Quantidades de enchimento recomendadas
| Peça Acessório Alimento | Quantidade Tempo Nível | ||
| Liquidificadora | - Sumo | 400 g de ingredientes + 600 ml de água | 30 seg. 3, 4 |
| - Nozes, amêndoas | 100 g 20 seg. 3, 4 | ||
| - Cubos de gelo | 110 g 10 seg. 3, 4 | ||
| - Líquidos | 1.000 ml 10 seg. 3, 4 | ||
| Picadora | Cenoura, batata, pepino | 500 g *1 | 25 seg. |
| Cenoura, batata, pepino | 500 g *2 | 50 seg. | |
| Cenoura, batata, pepino | 500 g 25 seg. | ||
| Cenoura, batata, pepino | 500 g *1 | 25 seg. | |
| Cenoura, batata, pepino | 500 g *2 | 40 seg. | |
| Taça | Massa lêveda | 500 g de farinha, 1 ovo, 80 g de áleo (temperatura ambiente), 80 g de acúcar, 200-250 ml de leite quente, 25 g de levedu-ra fresca ou 1 glaciate de levedu-ra seca, 1 pitada de sal *3 | Mexer 1.ª vez: 2 min. |
| Mexer 2.ª vez: 10 min. | |||
| Massa para biscoitos | 125 g de manteiga (tempera-tura ambiente), 100-125 g de acúcar, 1 ovo, 1 pitada de sal, 250 g de farinha *4 | Mexer 1.ª vez: 30 seg. | |
| Mexer 2.ª vez: 6 min. | |||
| Claras em castelo | 8 claras de ovo 2-3 min. | 4 | |
| Natas (30% de gordura) | 600 ml aprox. 3 min. | 4 |
KOMPERNASS HANDELS GMBH
BURGSTRASSE 21
44867 BOCHUM
DEUTSCHLAND/GERMANY
www.kompernass.com
1 Päckchen Backpulver
Ca. 125 ml Milch
Herd:
Einschubhöhe: 2
Tasty recipes for your Food Processor 26
Potato soup with vegetables 26
Danish Remoulade 27
Carrot soup 27
Souffle with Crabmeat 27
Salad plate 27
Filled Chickenbreast with Curry Sauce 27
Tomato sauce 27
Tuna spread 27
Red wine-Red cabbage 27
Potato rosti 27
Traditional Pancake 27
Hazelnut biscuits 27
Sponge pastry 27
Shortcrust pastry 27
Batter 27
Marble cake 27
Yeast dough 27
Poppy seed cake 27
Orange drink 27
Use only cookware suitable for microwaves when you want to cook food in the microwave oven. Pay heed to the instructions in the operating manual for your microwave oven.
Potato soup with vegetables
Ingredients:
125 g Carrots
50g Celeriac
250 g Potatoes
1000 ml Meat broth (Instant)
1 Onion
20 g Butter
1 Beaker Crème fraîche or Cream
1/2 tbsp scharp Mustard
Salt
Pepper
1 stick Leek
1 tbsp chopped Herbs (in season)
Stove:
Heating: Hotplate
Cooking time: 10 Minutes
Microwave:
Power level: 600 Watt
Cooking time: 5 - 7 minutes
Preparation:
- Wash, peel and dice the carrots, celeriac and potatoes.
- Clean and then cut the leek into thin strips with the shredder disc in the food processor.
- Pour 1/3 of the meat broth into the mixer and then start the mixer at the highest level with the lid closed.
- Now add the shredded vegetables through the lid opening in the mixer. Puree it until the desired consistency is reached.
- Pour the remaining meat broth into a large pot and then add the finely pureed vegetables.
- Let the whole cook for 10 minutes covered. (Alternatively, you can also cook the closed vegetable broth for 5 - 7 minutes at 600 watts in the microwave.)
- Meanwhile, saute the onions in butter until they are golden brown and then add them into the soup.
- Now, flavour it to your taste with cream fraiche, mustard, salt and pepper.
Blend in the chopped herbs before serving. Now fill the soup into pre-warmed plates and sprinkle it with the leek strips.
Potato soup with vegetables

Danish Remoulade
Ingredients:
4 tbsp Mayonnaise
1 tbsp Capers in brine
1 tsp Sweet Mustard
1 Shallot
2 tbsp Chives
1/2 sweet Gherkin
1/2 tsp Curry
1 pinch Ginger
1 tbsp Apricot jam
1 tbsp Yoghurt
1/2 Anchovy fillets
(or 3 cm Anchovy paste)
Lemon juice
Preparation:
- Place all ingredients in the mixer and stir them at level 2 until they are well blended.

Carrot soup

Carrot soup
Ingredients:
500 g Carrots
250 ml Water
500 ml Meat stock (glass)
125 ml Cream
125 ml White wine
Salt
Pepper
50 g cold Butter
Fresh Chervil
Stove:
Heating: Hotplate
Cooking time: Carrots approx. 20 minutes
Microwave:
Power level: 600 Watt
Cooking time: Carrots approx. 10 minutes
Preparation:
- Wash and peel the carrots.
- Cut them small enough to fit into the mixer.
- Put the 250ml of water into a saucepan and cook the carrots in it for 20 minutes.
- Then puree all of it in a mixer until no large pieces are left over. Afterwards, put the pureed carrots back into the pot.
- Now add in the meat stock, cream and white wine.
- Heat the soup up and flavour it to taste.
- Blend the butter into the soup in small pieces and then serve it with the chervil.
Souffle with Crabmeat
Ingredients:
40 g Butter
20 g Flour
250 ml Milk
1 pinch Sugar
150 g Gouda cheese
200 g Crabmeat
4 Egg yolks
4 Egg whites
Butter for the mould
Oven:
Shelf height: 2
Heating: E: Top and bottom heat
$$ \text {a t} 2 0 0 ^ {\circ} \mathrm {C} (\text {p r e h e a t e d}) $$
$$ G: \text {M a r k} 3 $$
Baking time: 25 - 30 minutes
Microwave:
Power level: 360 Watt
Baking time: 10 - 15 minutes
Preparation:
- Heat the butter and flour and then add the milk and sugar by stirring.
- Bring the whole to the boil.
- Shred the cheese in the food processor with the grating disc and then stir it into the sauce.
- Now fold in the crab meat.
Whisk the egg yolks and fold them in. - Beat the egg whites until stiff and fold them in.
Grease a baking mould or several small serving moulds and fill them with the mixture. - Bake the souffles immediately and serve them straight away.

Salad plate

Ingredients:
1 fresh Cucumber
1/4 head White cabbage
2 Paprikas
1 Onion
For the marinade:
3-4 tsp Wine vinegar
2 tbsp Cooking oil
Salt
Sugar
Freshly ground pepper
1 tbsp chopped herbs
Preparation time: 15 minutes
Preparation:
- Peel the cucumber and divide the cabbage into pieces such that they fit into the filler tube of the food processor.
- Now slice the cucumber, cabbage, prepared peppers and onions with the food processor at the highest level using the cutting disk.
- Stir the ingredients for the marinade in a mixer.
- Combine the vegetables with the marinade and flavour to taste.
Filled Chickenbreast with Curry Sauce
Ingredients:
4 chicken breasts, each approx. 150g
Salt
Freshly ground pepper
For the filling:
150 g minced pork (raw)
1 Onion, diced
China Spices
1 pinch of Ginger powder
for the Sauce:
250 ml White wine
2-4 tbsp Cream
Sal, 1 tbsp Curry powder
Possibly some gravity thickener
Stove:
Heating: Hotplate
Total cooking time: 25 - 30 minutes
Preparation:
-
Salt and pepper the chicken breasts and then cut them up using a sharp kitchen knife.
-
Process all of the ingredients for the filling into a paste, using the dough hook in the mixing bowl, and flavour to taste.
Now fill the chicken breasts with the filling and sew them to. (Alternatively, you can also use wo-oden pins.)
-
Heat the fat and fry all the chicken breasts in it.
-
Pour in the wine and then let the chicken breasts braise for 10-15 minutes.
-
Remove the chicken breasts from the pan and place them where they can stay warm.
Flavour the sauce with cream, salt and curry powder and thicken the sauce as desired with gravy thickener.
Now serve the chicken breasts with the sauce on, for example, rice.

Tomato sauce
Ingredients:
5 tbsp Cooking oil
1 large Onion
1 large tin (800 g) peeled tomatoes
Salt, Pepper, 1 pinch Sugar Pr, 1 pinch Thyme,
1 Pinch Chili powder
1/2 bunch Parsley, chopped
1 bunch Basil, finely chopped
40 g cold Butter or 100 ml sweet Cream
Stove:
Heating: Hotplate
Cooking time: 25 - 30 minutes
Microwave:
Power level: 600 Watt for 5 minutes
180 Watt for 5 minutes
Cooking time: approx. 10 minutes
Preparation:
- Peel the onions and roughly dice them.
- Heat the oil and fry the onions in it or use the microwave for 2-3 minutes at 600 watts.
- Add the tomatoes with the juice and stir in all of the spices.
- Let the sauce simmer covered for 20 minutes or gently cook it all in the microwave.
- Allow the tomato sauce to cool (to lukewarm) and then puree it in a mixer.
- Then pour the sauce back into a pot and cook it until it has reduced a little.
- Now stir in the butter or cream.
- Sprinkle on the herbs and flavour it to taste.

As a side dish with noodles and all kinds of grated cheese.

Tuna spread

Tuna spread
Ingredients:
1 can of Tuna in sauce with vegetables
3 tbsp Yoghurt
1 tsp Lemon juice, freshly pressed
1 Pinch Salt
Freshly ground pepper
2 hard-boiled Eggs, diced
To serve:
Whole wheat bread in slices
Butter for smearing
1 hard boiled Egg, diced
Chives, sliced
Preparation:
- Blend all ingredients in the mixer at the highest level until the desired consistency is reached (approx. 15 seconds) and then flavour to taste.
- Spread the bread with butter and tuna cream and sprinkle the whole with chopped egg and chives.
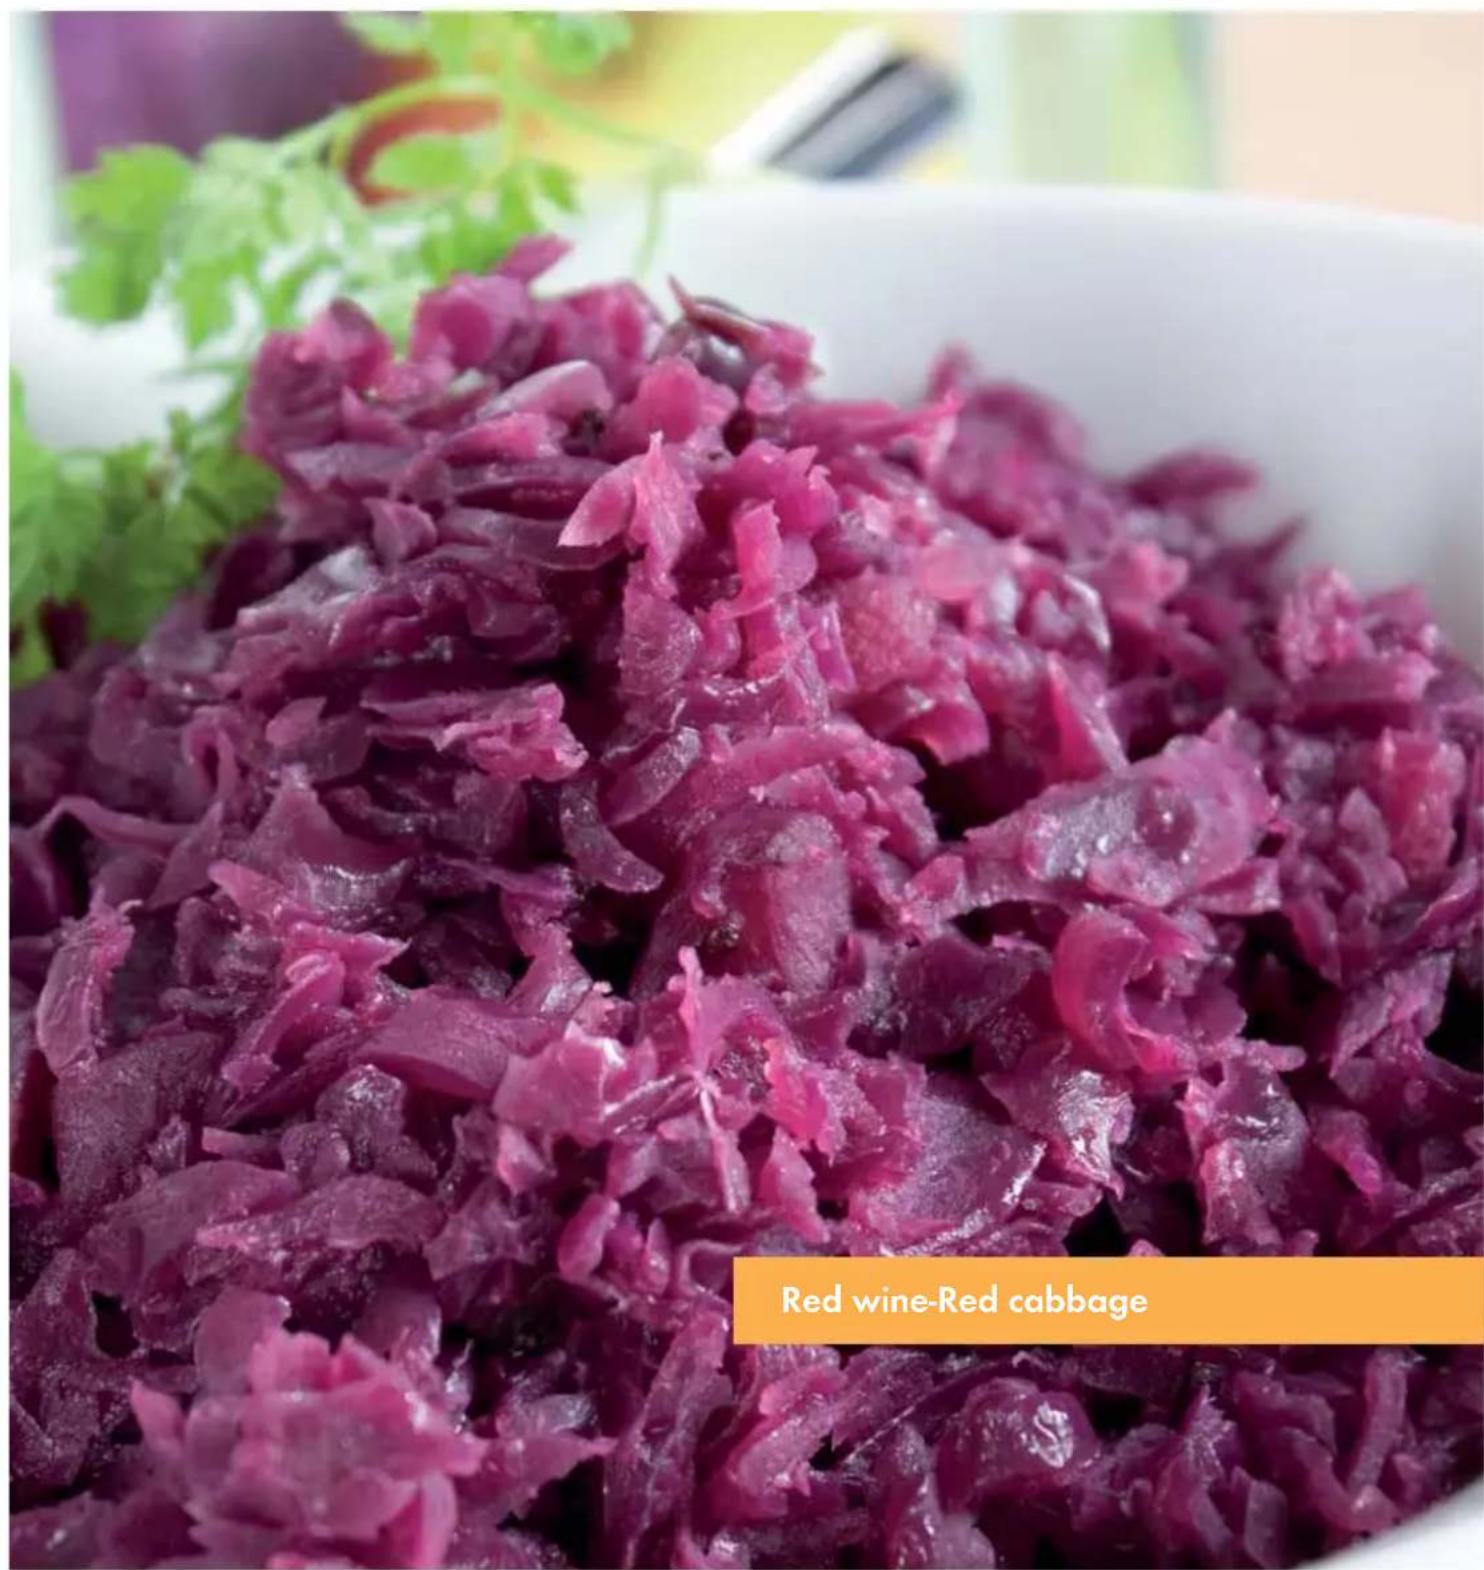
Red wine-Red cabbage
Ingredients:
1 Red cabbage, approx. 1 kg
60 g pork or goose fat
1 large Onion
3 Apples
2 tbsp Sherry vinegar
2 tbsp. Lemon juice
250 ml Red wine
2 tbsp Red currant jelly
Salt
1 tbsp. Sugar
2 Bay leaves
1 Clove
1 Tbsp Flour
2 Tbsp Water
Stove:
Heating: Hotplate
Cooking time: 50 - 60 minutes
Preparation:
- Peel the onions, cut them into quarters and then chop them using the cutting disc in the food processor.
- Remove the outer leaves and quarter the red cabbage.
- Chop the red cabbage in the food processor with the fine shredder disc.
- Peel, core and dice the apples.
- Put the fat into a pot and let it melt.
- Saute the chopped onion in it until it is glassy and then add the red cabbage, apples and all other ingredients except the flour and water.
- Stir it and bring it to the boil.
-
Then let the red cabbage simmer covered for 60 minutes.
-
Should there still be too much fluid in the cabbage afterwards, mix the flour with the water and then add it to the red cabbage to bind the liquid.
Flavour to taste with salt, sugar and vinegar.
Suitable as an accompaniment to meat, poultry and game.
Tip: You can also prepare the cabbage a day before cooking and marinate it in wine and vinegar.
Potato rosti

Ingredients:
4 potatoes, large, floury cooking
Salt
Pepper
Nutmeg, ground
80 g Butter or Margarine
Stove:
Heating: Hotplate
Total roasting time: 15 - 20 minutes
Preparation:
- Wash and peel the potatoes and cut them into strips with the shredder disc.
- Wrap the potato mass in a cloth and squeeze the liquid out.
- Sprinkle the spices on the potato mass and mix everything together.
- Using a small ladle, put some of the potato mass into the hot fat and press it flat with a spatula. Now fry the rostis on both sides until they are crispy.

Suitable as an accompaniment to meat and game dishes.
Traditional Pancake
Ingredients:
2-3 Eggs
375 ml Milk
1 Pinch Salt
250 g Flour
Fat for frying
Preparation:
- Mix the eggs, milk and salt with the beater.
- Sift the flour through and then add it to the mixture.
Mix everything together with the beater until you have a smooth batter.
- Allow the batter to swell for 20 minutes.
- Heat the fat and, with a small ladle, place some batter in the pan. (Only as much as is needed to thinly cover the pan bottom.)
- Fry the pancakes until golden brown on both sides and serve hot.

Hazelnut biscuits
Ingredients:
300 g Hazelnuts
90 g Cane sugar
2 Egg whites
2 2 tsp Honey
Approx. 75 g of Plum or Rose hip jam
50 g each of Semisweet and Milk chocolate
Couverture
Oven:
Shelf height: 2
Heating: E: Circulation 200^
(preheated for 5 minutes)
G:Mark1-2
Baking time: 6-8 minutes
Preparation:
- Grind the nuts medium fine with the grating disk in the food processor and set four tablespoons of it aside.
- Process the remaining nuts, sugar, egg white and honey with the beater to a firm pastry.
- Sprinkle the remaining nuts onto a work surface and roll the pastry out to about a quarter inch thick.
- Now cut out the biscuits and place them on a baking tray lined with baking paper.
- Join the cooled biscuits together in pairs with the rose hip or plum jam and then coat them with some milk chocolate and semisweet chocolate.
- Melt for both types separately.
Dip the biscuits up to half way in and let them dry on a kitchen grid.
Hazelnut biscuits
Sponge pastry
Ingredients:
3 Eggs
3-4 tbsp Water, hot
150 g Sugar
1 pkt of Vanilla sugar
100 g Flour of type 405
100 g Corn starch
2-3 levelled tsp of Baking powder
Oven:
Shelf height: 2
Heating: E: Upper and lower heat
175-200°C
G:Mark2-3
(preheat for 5 minutes)
Baking time: 20 - 30 minutes
Preparation:
- Line the bottom of a springform pan (diameter: 28 cm) with baking paper.
- Do not grease the edge, as the surface will then not be evenly smooth and browned..
- Whisk the whole eggs in the mixing bowl and add the hot water.
- Then beat the mixture at the highest level with the whisk for about 1 minute until fluffy.
- Stir in the sugar and vanilla sugar and beat the mixture for a further two minutes at the highest level.
- Mix the flour, cornstarch and baking powder together and sift half of it onto the creamed eggs, then briefly stir everything at Level 1.
- Then stir in the remaining flour in the same way and fill the pastry into the prepared springform.
- Bake it at once.
Shortcrust pastry
Ingredients:
250 g Wheat flour
1/2 levelled tsp of Baking powder
100-125g Sugar
1 Packet of Vanilla sugar
1 pinch Salt
1 Egg
125 g Butter
Oven:
Shelf height: 3
Heating: E: Upper and lower heat
200-225°C
(preheat for 5 minutes)
G:Mark3-4
Baking time: 15 - 20 minutes
Preparation:
- Mix the flour and baking powder in the mixing bowl and then add all of the other ingredients.
- Knead everything with the kneading hook first for about 1 minute at level 1, then for about 3 minutes at level 2 - 3.
- Do not knead the pastry for too long, the pastry could otherwise be too soft.
- Let the pastry rest in the refrigerator for half an hour and then process it into a pie crust or small pastries.
- For a pie shell, roll out 2/3 of the pastry and place it in a greased springform.
- Roll the remaining pastry into a roll.
- Place this roll as a boundary on the pastry and press it with two fingers on the edge so that an about 3cm edge is created.
- Pierce the pie crust several times with a fork and then place it in the oven.

Batter
Batter

Ingredients:
250 g soft Butter or Margarine
250 g Sugar
1 pkt of Vanilla sugar
1 Pinch Salt
4 Eggs
500 g Wheat flour
1 pkt Baking powder
Approx. 125 ml Milk
Oven:
Shelf height: 2
Heating: E: Upper and lower heat
175-200°C
G:Mark 2-3
Baking time: 50 - 60 minutes
Preparation:
- Put all ingredients into the mixing bowl and stir everything with the beater for 1/2 a minute at level 1, then for 30 seconds at level 2 and then for about 5 minutes at level 4.
Grease a baking mould or line it with baking paper. - Fill the baking mould and bake the pastry.
- Before you take the cake from the oven, you should make a readiness test: Insert a pointed wooden stick into the middle of the cake. If no pastry is sticking to it, the cake is baked.
- Then tip the cake onto a wire rack and allow it to cool.
Marble cake
Ingredients:
125 g soft Butter or Margarine
125 g Sugar
3 eggs
1/2 Packet of Vanilla sugar
1 pinch Salt
250 g Wheat flour
Butter for the mould
Oven:
Shelf height: 1
Heating: E: Circulation
$$ 1 5 5 - 1 7 5 ^ {\circ} \mathrm {C} $$
$$ G: \text {M a r k} 2 $$
Baking time: 55 - 65 minutes
Preparation:
- Put all ingredients except the chocolate and baking cocoa into the mixing bowl and mix everything with the whisk for 1/2 a minute at level 1, then for 30 seconds at level 2 and then for about 5 minutes on level 4.
- Break the chocolate into chunks and grind it with the coarse grating disc in food processor.
Grease a Bundt cake-shape (diameter: 20 - 22cm) or a loaf pan (30cm long). - Fill half of the pastry into the mould and then stir the cocoa and grated chocolate into the remaining pastry.
Now place the dark pastry on the light pastry and fold the pastry in with a fork in a spiral form.
Tip: If you wish, you can also cover the cake with 100g of semi-sweet chocolate and then decorate it with cream dabs and chocolate biscuits.

Yeast dough
Ingredients:
500 g Wheat flour
25 g Fresh yeast or 1 pack Dry yeast
approx. 1/4 liter lukewarm Milk
80 g Butter or Margarine (room temperature)
80 g Sugar
1 egg
Preparation:
- Place the flour, dry yeast or crumbled yeast and all other ingredients (not directly on the yeast) into the mixing bowl.
- Slowly mix everything, starting with the dough hook at level 1, then for 3 - 4 minutes on level 2.
- Cover the bowl with a dish towel, place it in a warm place and let the dough rise until it has visibly increased its size.
- Then knead the dough through once again.
After that, the dough is finished and you can process it further.
Yeast dough

Poppy seed cake
Ingredients:
For the dough:
100 g Buckwheat flour
200 g Wheat flour
100 g Hazelnuts, ground
1 cube of Yeast (40g) or 1 pack Dry yeast
Approx. 125 ml Milk
1 pinch Salt
75 g Sugar
1 Egg
150 g Soft butter
1 btl. Citro-bake
1 btl. Rum-bake
100 g Orange peel, diced
50 g Lemon peel, diced
For the filling:
1 btl. (200 g) Poppy-bake
For the coating:
100 g Butter for spreading
Powder sugar for dusting.
Oven:
Shelf height: 1
Heating: E: Upper and lower heat
180-200°C
(preheat for 5 minutes)
G:Mark 2-3
Baking time: 40 - 50 minutes
Preparation:
- Make from the specified ingredients, except the orange peel and lemon peel, a yeast dough (see "Yeast Dough").
- Knead the orange and lemon peel in at the end.
- Roll the dough out (about 20 × 25cm ) and spread the poppy mix on to it.
- Then fold and beat the dough together into a stollen shape.
- Grease a stollen mould and place the stollen inside for baking.
- Spread the remaining butter onto the still hot stollen and sprinkle it with the powdered sugar.
Orange drink

Ingredients:
500 ml Orange juice
2-4 tbsp. Lemon juice
300 g tinned Apricots
15-20 Ice cubes, crushed
4 tsp Sugar or Honey
Preparation:
- Put the juice, the apricots and the ice cubes in the mixer and mix everything for about 20 seconds at the highest level.
- Now add the sugar or honey to taste and serve the juice ice cold.
Tip:
The apricot juice can be frozen in ice cube trays and used later as ice cubes.
Enjoy your meal!
These recipes are provided without guarantee. All ingredients and preparation information are guiding values. Expand these recipe suggestions based on your personal experiences. We hope you enjoy the recipes and wish you "bon appetit".
Puissance: 600 watts 5 minutes
180 watts 5 minutes
KOMPERNASS HANDELS GMBH
BURGSTRASSE 21
44867 BOCHUM
DEUTSCHLAND/GERMANY
www.kompernass.com
Stand der Informationen · Last Information Update · Version des informations
Stand van de informatie · Stav informacion · Estado de las informaciones · Estado das informacoes:
04/2016 · Ident.-No.: SKM550B1-042016-1