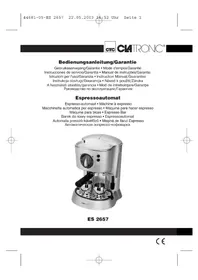
ES 2657 - Coffee machine CLATRONIC - Free user manual and instructions
Find the device manual for free ES 2657 CLATRONIC in PDF.



| Product Type | Espresso Machine |
| Brand | Clatronic |
| Model | ES 2657 |
| Power Supply | 230 V, 50 Hz |
| Power | 1050 W (estimated) |
| Dimensions (W x D x H) | 30 x 25 x 30 cm (estimated) |
| Weight | 4 kg (estimated) |
| Water Tank Capacity | 1.2 L (estimated) |
| Pump Pressure | 15 bars (estimated) |
| Main Functions | Espresso, cappuccino, hot water |
| Coffee Type | Ground coffee |
| Filter Holder | With special lever, for 1 or 2 cups |
| Steam Nozzle | Swiveling, for frothing milk |
| Hot Plate | For preheating cups |
| Indicators | POWER (on) and READY (ready) |
| Water Level | Indicator on the tank |
| Drip Tray | With level indicator (red float) |
| Safety | Anti-overflow, manual shut-off |
| Maintenance and Cleaning | Regular cleaning of the nozzle, filter holder and tray; do not wash in dishwasher |
| Spare Parts Available | Filters (small and large), filter holder, water tank, steam nozzle, drip tray |
| Warranty | 24 months |
Frequently Asked Questions - ES 2657 CLATRONIC
User questions about ES 2657 CLATRONIC
0 question about this device. Answer the ones you know or ask your own.
Ask a new question about this device
Download the instructions for your Coffee machine in PDF format for free! Find your manual ES 2657 - CLATRONIC and take your electronic device back in hand. On this page are published all the documents necessary for the use of your device. ES 2657 by CLATRONIC.
USER MANUAL ES 2657 CLATRONIC
General Safety Instructions
GB
- Read the operating instructions carefully before putting the appliance into operation and keep the instructions including the warranty, the receipt and, if possible, the box with the internal packing.
- The appliance is designed exclusively for private use and for the envisaged purpose. This appliance is not fit for commercial use. Do not use it outdoors (except if it is designed to be used outdoors). Keep it away from sources of heat, direct sunlight, humidity (never dip it into any liquid) and sharp edges. Do not use the appliance with wet hands. If the appliance is humid or wet, unplug it immediately. Do not put it in water.
- When cleaning or putting it away, switch off the appliance and always pull out the plug from the socket (pull on the plug, not the cable) if the appliance is not being used and remove the attached accessories.
- Never leave the appliance unsupervised. To protect children from the dangers posed by electrical appliances, make sure that the cable is hanging low and that children do not have access to the appliance.
- Check the appliance and the cable for damage on a regular basis. Do not use the appliance if it is damaged.
- Do not try to repair the appliance on your own. Always contact an authorized technician. To avoid the exposure to danger, always have a faulty cable be replaced only by the manufacturer, by our customer service or by a qualified person and with a cable of the same type.
- Use only original spare parts.
- Pay careful attention to the following "Special Safety Instructions".
Overview of the Components
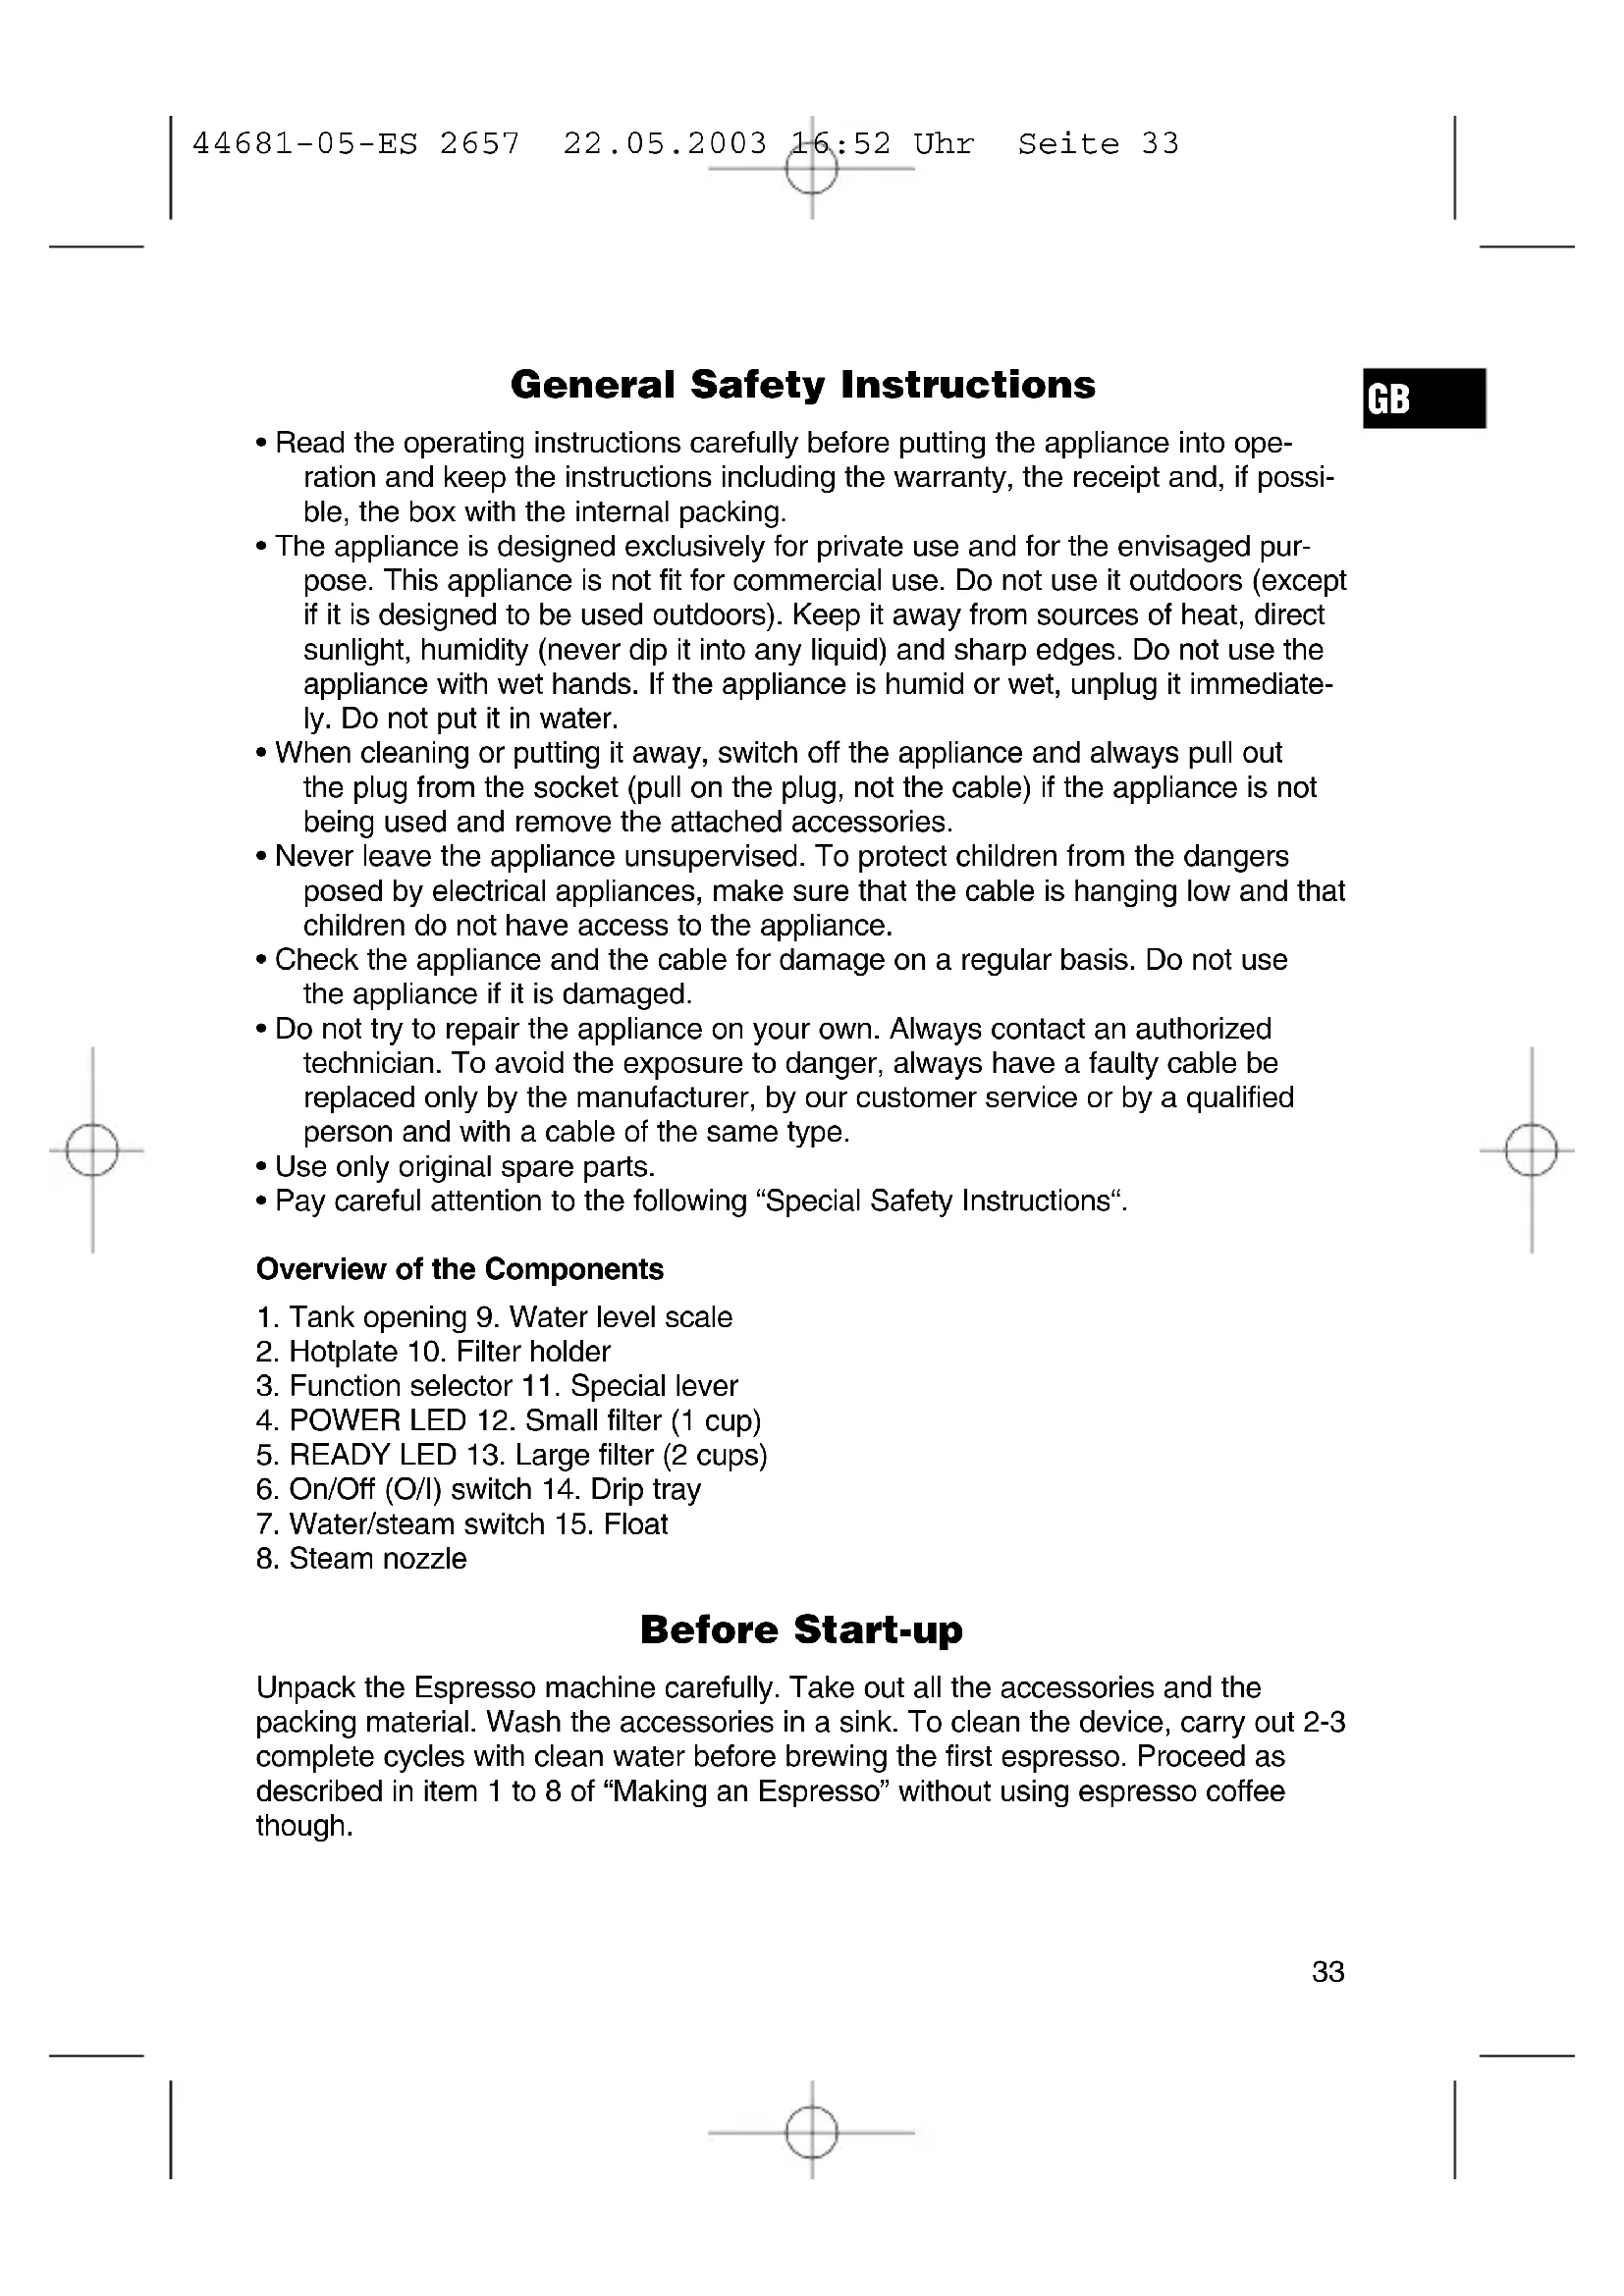
- Tank opening 9. Water level scale
- Hotplate 10. Filter holder
- Function selector 11. Special lever
- POWER LED 12. Small filter (1 cup)
- READY LED 13. Large filter (2 cups)
- On/Off (O/I) switch 14. Drip tray
- Water/steam switch 15. Float
- Steam nozzle
Before Start-up
Unpack the Espresso machine carefully. Take out all the accessories and the packing material. Wash the accessories in a sink. To clean the device, carry out 2-3 complete cycles with clean water before brewing the first espresso. Proceed as described in item 1 to 8 of "Making an Espresso" without using espresso coffee though.
GB
Making a Espresso
- Connect the machine to a correctly installed 230 V, 50 Hertz safety socket.
- Ensure that the on/off switch (O/I) (6) is in the O position.
- Place the draining grid in the indentation of the draining tray.
- Open the lid and remove the water tank by the handle.
- Fill the required amount of fresh clear water into the tank.
- Release the filter holder (10) by turning the handle to the left (INSERT).
- Place the filter (12 or 13) into the filter holder (10). Now add one to two level measuring spoons of coffee. Distribute the coffee evenly and press the coffee powder lightly with a measuring spoon or other spoon. The aim of pressing the coffee powder with the spoon is to distribute it evenly in the coffee bowl rather than compressing it. We recommend a flat surface plunger. Ensure that the filter holder is firmly fixed in the percolating head.
- In order to preheat your espresso cups, place them on the warming plate (2) above the percolating head.
- Switch the machine on using the on/off switch (O/I) (6). The control lamps (4+ 5) located on the right and left in the function control light up.
- When the water has reached the required temperature, the control lamp (5) on the right-hand side (READY) switches off. Note: if the control lamp lights up again before percolation is finished, the water temperature is no longer high enough. Turn the function selection switch (3) to O and wait for the lamp to go out again. You can now continue preparing the espresso.
- Remove the espresso cup(s) from the warming plate (2) and place them under the percolating head.
- Turn the function switch (3) to the symbol showing the espresso cup.
- The espresso is now ready and is poured into the cup(s).
- When percolation is finished, turn the function switch (3) back to the O position.
- Switch the machine off using the on/off switch (O/I) (6).
- After brewing wait for a few seconds before removing the filter. Turn the handle of the filter holder from right to left. Pay attention to the steam! To remove the used coffee, hold the filter by using the special lever (11) on the handle in the relevant position. Turn the filter holder (10) and knock out the used coffee. Remove the filter holder (10) after making an espresso. By doing so, you will extend the service life of the rubber seal in the brewing head. To make other espressos, fill the coffee bowl (12 or 13) with coffee powder again and carry out the brewing procedure as described above.
Making a Cappuccino
To make a cappuccino, you must first make an espresso. Proceed as described under "Making an Espresso" from steps 1 to 13. To froth the milk, proceed as follows:
- Make sure that the function selector (3) is in O position.
-
Swing the steam nozzle (8) out so that you can position the container (please use a heat-resistant container) comfortably under the nozzle.
-
Fill the container up to a 1/3 with fresh cold milk (warm, hot or stale milk does not froth).
- Switch the steam function switch (7) on.
- Dip the steam nozzle (8) slightly below the surface of the milk in the container and turn the function selector (3) to the left (Steam symbol).
- Move the container slightly up and down. Once the milk reaches the desired volume, you can warm the milk more by lowering the steam nozzle (8) to the bottom of the container. Do not make the milk boil or the froth will be ruined.
- Turn the function selector (3) back to the O position and switch the device off with the On/Off (O/I) (6) switch.
- Scoop out the froth into the espresso. Add liquid milk. A cappuccino is usually composed of 1/3 coffee, 1/3 hot milk and 1/3 frothed milk.
Your cappuccino is now ready. Improve the flavor by adding some cinnamon or chocolate powder.
Hot Water
You can even use the Espresso machine to make tea, hot drinks and meat soups.
Make sure that the tank has enough cold water.
- Switch on the device with the On/Off (O/I) (6) switch. Both LED's (4 - 5) to the left and right of the function selector light up.
- Switch the steam function button (7) to the liquid symbol.
- Swing the steam nozzle out so and position a heat-resistant container under the steam nozzle.
- When the READY LED (5) is off, the water has reached the right temperature and the function selector (3) can be turned to the left to Steam position.
- The hot water now flows into the container.
- Once this procedure is over, Turn the function selector (3) back to the O position and switch the device off with the On/Off (O/I) (6) switch.
Cleaning
After frothing milk, the steam nozzle is to be immediately cleaned from all milk residues.
If the milk dries, it becomes difficult to remove. Soak the steam tube in a container with water over night so that the milk residue softens. Place a heat-resistant container full of water under the nozzle so that the nozzle is dipped in the water. Turn the function selector to Steam position. Wipe the steam nozzle with a moist cloth to remove the milk residue before it hardens. The water tank, drip tray, drip tray cover, filter, filter holder and the hotplate can be washed by hand in a sink with warm water. Do not use abrasive detergents. Wash the parts regularly. If the filter's holes are clogged, clean it with a fine brush.
Do not wash the machine.
Never wash the parts or accessories in a dishwasher. The drip tray has an overflow protection. A red-marked "float" is found in the tray. The more water the drip tray
GB
contains, the higher the float rises. To empty the tray you can remove the drip tray completely and lift the grid.
This appliance conforms with the CE directives for radio interference suppression and low-voltage safety and has been built to meet current safety requirements. Subject to technical changes without prior notice!
Warranty
The device supplied by our Company is covered by a 24 month warranty starting on the date of purchase (receipt).
During the life of the warranty any fault of the device or its accessories *) ascribable to material or manufacturing defects will be eliminated free of charge by repairing or, at our discretion, by replacing it. The warranty services do not entail an extension of the life of the warranty nor do they give rise to any right to a new warranty!
Proof of the warranty is provided by the proof of purchase. Without proof of purchase no free replacement or repair will be carried out.
For repairs or replacement during the life of the warranty return the device in its original packing together with the proof of purchase to your dealer.
*) Accessories are subject to the legally envisaged warranty obligation (6 months) and do not entitle to the free replacement of the entire device. In this case, only the faulty accessory will be sent in or ordered with the agreement of our customer service! Damages to glass parts are not free of charge!
Defects to consumables or parts subject to wearing (e.g. motor pistons, kneading blades, drive shafts, spare remote control, spare toothbrushes, saw blades, etc.) as well as cleaning, maintenance or the replacement of said parts are not covered by the warranty and hence are to be paid!
The warranty lapses in case of unauthorized tampering.
After the expiry of the warranty
After the expiry of the warranty repairs can be carried by the competent dealer or repair service against the payment of the ensuing costs.
PpuroToBJIeHne KoΦe-3cnppecco
- BctaBbTe BnIky Bpo3eKy C haPjaKeHem cTeu 230 V, 50 Hz, yCTaHOBJIeHHyIO B COOTBeTCTBUN C npeJnncAHnA M.
- Y6eIITecb B TOM, yTO nepeKIOUaTeJIb "O/I" ("BKJ/BblIKJI") (6) HaxoIITcB NOLOXKeHIN "O" ("BbIKJ").
- BcTaBbTe ceTky-kanneynobnteIb ByrnybneHne noDoHa (14).
- OtkpoTe KpbIuKU N BblbTe 3a pyKU BOJHOB 6aOK.
- HanoJIHnTe BOJAnHOB 6aOcK Heo6xoIIMbIM KOJIuYeCTBOM CBexOJ, YNCTO BOnbl.
- Pa36bokpyuTe IepkaTeIb nIbTpa (10), nobepHyB pyKoRTky BJeBO (INS-ERT).
- BCTaBbTe fInbTp (12 nnn 13)ВДePkaTeIb (10).HacbIbTe B Hero Ondny nII nDe IImePteIbHbIe loXkN MoIOToro KoFe,6e3 rOpKn.PacnPpeIeIte KOFe paBHomepHo nO fInbTpU n CJIerKa npIaBnTe ero npI pOMOnuI n3MepntelHOJIOKNNI INNECTNa.CMbICn 3ToI npOceDpyI leXHT He B TOM, YTObI yNlOTHnTb NopOwOK,a CKOpeE B TOM, YTObI paBHomepHei pacPpeIeINb ero nO fInbTpU.PekOMeHdyETcNolb3OBaTbcNLOCKIM neCTNKOM.IPoCLeIte 3a TeM,YTObI DePxaTeIb fInlbTp a NIoTHO CnIeN B KINPTINbHOI rONOBKe.
8.Дяпологрева кофейньх чашек IX MOЖно NOCTaВиТь Ha ПИNTКу-гpeЛКу (2),pacnoLOXeHHyIO Ha.KINЯТиьHОI ROJOBKOI. - Bклioчnte Koфеварky, haba Hа bblKIOUaTeIb "BKЛ/BblIKJI" ("O/I") (6). KoHTpoJIbHbIe IamnoKn (4+5) cnpaba n CJIeBa OT nepeKIOUaTeIЯ peXIMOB pa60tBI NaHHaIOT CBETNTbcr.
- KaK ToJIbKO BOJa HaIpeETcA Do Heo6xOJIMMoT EMeNepaTpby, KOHTpoJIbHaJ lamNoUka (5) "TOTOBHOCTb" ("READY") c npabOi CTOpOnbI NOTyXHeT. PnimeuHne: ecIn 3Ta KOHTpoJIbHaJ lamNoUka 3aGopNTcB BO BpeMn IPOueCCA 3aBapINBaHn, TO 3TO YBJIeTcA pPn3HaKOM TOrO, YTO BOJa HArpeJaCb Do HyxHoi Tempeatpyb. B 3Tom Clyuae NOBepHnTe nepeKIOUaTeIb peXIMoB pa6Otbl (3) B nOLOXeHne "O" n IOdoXdnte, noka lamNoUka ONaTb NoTyXHeT. PocJe 3tOrO MoXHo npOdoJXItb npIrOToBJIeHne KoΦe-3cnpcecco.
- ChnMnte KofoeHyIO(bie) yauKy(u) c nnTkn-rgpeKn (2) u noctabBte ee(nx) NOI KINPTNJIbHyIO rOJOBky.
- ПовернITE посяклочаелpeхимов pa60ты (3) Ha cIMBOJ vaшкиэспесо.
RUS
- BkIIOHTe KofoBapKy, HaxaBa Ha BbIKIOUaTeJb "BKJI/BblIKJ" ("O/I") (6).
KoHTpoJIbHbIe IaMIOUcN (4+5) cnpaba n CJIeBa OT NepeKJIIOUaTeJRA peXIMOB pa6Otbl HaUNHaOT CBETNTbcra.
- YctaHOBInTe KhoNkny nepeKJIIOUaTeIa I npa (7) Ha cIMBOJ "XnIDKOCTb".
- OTBepHnTe napOBoe cOIIo B CTOpOHy I NOCTaBBte IOD HeO YaShKy I3 JapocToKOro MaTePnAna.
- KaT ToJIbKO BODa HaIpeeTcRd NO Heo6XoDmOu TeMnpeaTypbI, KOHTpOJIbHaJ lamnoUka (5) "TOTOBHOCTb" ("READY") c npaBoi CTOpOHbI nOTyXHET.
IobepHnTe nepeKIOuateJIb peXIMOB pa6OtBI (3) BJIeBO Ha cIMBOJ "nap".
- TOpraaBa Oda HaunHaet Noctynatb B NOCTabJeHHyO YaShky.
- ПО OKOHuaHnnpoceDypbI NOBepHInTe NepeKJIIOuAteJb peXIMOB pa6Otbl 6paTHo B noIoxKeHne "O" n BbIKIOUHTe KoΦeBapKy, HaxaB Ha BbIKIOUaTeJb "BKJI/BbIKJI" ("O/I") (6).
UcTka
Iocne BCnEHBaHnM OJOKa Heo6xOIMo He3aMeiNTbHO ONUCTNtB napOBoe COJIIO OT npIKIneBwero MOJOKa.
Ecn moIOKO npIKnIIT K cOnIy, To ero TpydH OuNCTIb. B 3TOM cIyuae 3aMOHTe Tpy6ky napOBOrO cOna Ha HOyb B NocSyde C BODo, IJa pa3MraHHeHna.
Iodctabte no napOBoe conno yauki u3 jaooctoko rmaepnana
HaonHeHHy BOdo n OnyCTnte B Hee napOBoe coNIO. NobepHnte
peeklouateJIb peKIMOB pa6Obl Ha cMBOJ "nap". Nocne 3Toro npotpnte
napOBoe cNO BnaXHO TprNKo, YTObI ydaJIITb npKINeBUnE ocTaTKU
MOLOKA. BoaHO B6aOK, NOIOH, CETKY-KaIIeYIOBHTeJIb, fNtBtp, DePkaTeJIb
fNtBtpa I PNTKU-rgkny npOMOIte BpyHyIO B TeNLOM MOIOSeM pactBOpe. He
npimEnrte CInlbHomIOUme cpeDcTBa. MoTe BCE DetAIn peryLrpHo. B
Clyae, ecIn nepOpauia fNtBtpa 3a6bETcra, IpOuHCTnTE erO ueTKoI C
MRAKIM, TOHKIM BOPCOM.
Camy KoΦeBapKy He MbITb.
HnB Koem Cnyuae He MoIte DeTaN KoΦeBapKn NIN PpINHaIeXHOCTN KHei B NOcyDOMOKe. KoΦeBapKa He rOITcra IJRA NOcyDOMOKn. PoIOHO KoΦeBapKn OCHaUeH 3aunTHbIM pncNOcO6JIeHNEM OT nepenONHeHry. B npeDHe Yactn POdOna HaxODNTcR KpaChbI "NONLAbOK". Yem BoJIbe BObl B IOdIOHe, TEm BBIIe BCIIbIBaet NOpLaBOK. JIra TORO, UTObI CInTB BOy, BByHbTe NODOn H3 KoΦeBapKn uYdaJInte IN3 Hero CETKy-KanJIeYNoBHTeJIb.
RUS
3TOT npn60p COOTBETCTBye TnpeKTHBaM CE no NCKpo3aunTe n TexHnke 6e3ONaCHOCTN Dn Hn3KOBOJbTHbIX np60pOB; OH CkOHCTpynpOBaH B COOTBETCTBnC HOBeuShmMn PpeDnucAHmN NO TexHnke 6e3ONaCHOCTN. Mbl OcTabIeM 3a c6oB npaBO Ha TexHnueckne n3MeHeHnra!
TapaHTnHoe 06a3aTeJbCTBO
Ha npoDAHbIe HAMn n3dEJIraJaTc8 24-x MeCyaHaj rapaHTy, HauHaj C daTbI NOKyn (KaccOBbl Yek).
Bo Bpemra rapaHTM Mbl 6ecnlaTHO yCTpaHREM BCE HeIOCTaTKN 3dJIIN I npHaJdxKHOCTe K HIM, BO3HNIKUHe NpPUNHE DeΦeKTHbIX MaTePnaIbON IIN NO BnHE 3aBODa-n3rTOBnTEJI, PyTEM peMOHTA INI, Ha NaIe YCMOTpeHne, NyTem 3aMeHbI n3dJIIn. rapaHTnHbI peMOHT He ydJIINHReT cPok rapaHTM IN He BO306HOBJrEe!
KaccobByek YBnEeTcra rapaHTnHbIM TaHOHOM. Be3 HrO HeBO3MOXeH 6ecnlaTHbI peMOHT nN 3aMeHa n3dEIny.
B cnlyae nolomkn n3dJIyra Bo Bpemra rapaHTnHoro cpoKa, npeIbYBNTe erO npoDaBcy BOpunHaJIbHOyNAKOBE BmecTe C KaccOBbIM YeKOM.
*) Ha npinhaIeJXHocTn DaETcT OIbKO npedncaHHbI 3aKOHm CpOK rapaHTNI (6 MeCraueB), IN DeΦeKTbI He YBJIaOTcR npuHNO JIg 6ecPiataHOH 3aMeHbI BCero n3dEInna. B noIObHOM clyuae OTcbJaAte NII 3aKa3bBaIte He BCE n3DeJIne, a TOlbKO, B COrIacOBaHN C HauIm NepCOHaJOM, DeΦeKTHyIO npinhaIeJXHocTb! Pa3bNTbIE CTekJIaHHbIe n3deJIIN MHeIAOTcR, KaK npaBnlo, TObKO 3a ONlAty!
DeΦeKtIи3HaunBaembIX npHnadJnxHOCTe NIN TpyuxxCa DeTaJIe (HanpIMep KOHTaKTbIe 5eTkn MOTOPOB, CMEcNTeJIbHbIe KpIOKN, pNIBOANDbIe peMHN, 3aNaChbIe NylbTbI ynpabJIeHnA, 3aNaChbIe 3y6HbIe 5eTKN, NIIbHbIe NOJOTHa n T.D.), a TaKke YnCTKa, Texo6CnyXnBaHne NIN 3aMeHa TpyuxxCa DeTaJIe H e NONaDAIOT NOI rapaHTNI, I NO3TOMy npOBODrTc 3a OTdJIbHyIO ONlaTy!
TapaHTnA TepaETc npB BCKpbITn N3dJIIna NOCTOpHHMn JINLAmN.
Pocne rapaHTn
Iocne OKOHaHncaPoka rapaHTn, pemOH Tn3deJn npOn3BOIDTCra 3a OnlaTy, COOTBETCTByIOUIMM MaCTepCKmN IIN NpHKtAmN CepBnCHOrO O6CnyKnBaHnA.
Technische Daten
Modell: ES 2657



Brand : CLATRONIC
Model : ES 2657
Category : Coffee machine