PerfectCare Elite Plus GC9671 - Iron PHILIPS - Free user manual and instructions
Find the device manual for free PerfectCare Elite Plus GC9671 PHILIPS in PDF.
User questions about PerfectCare Elite Plus GC9671 PHILIPS
0 question about this device. Answer the ones you know or ask your own.
Ask a new question about this device
Download the instructions for your Iron in PDF format for free! Find your manual PerfectCare Elite Plus GC9671 - PHILIPS and take your electronic device back in hand. On this page are published all the documents necessary for the use of your device. PerfectCare Elite Plus GC9671 by PHILIPS.
USER MANUAL PerfectCare Elite Plus GC9671 PHILIPS
© 2021 Philips Domestic Appliances Holding B.V.
All rights reserved
4719.00118753(15/07/2021)


natural_image
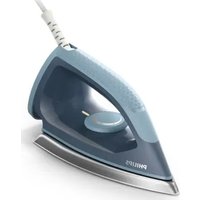
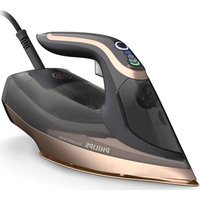
Exterior view of a modern steam iron (no text or symbols visible)| EN | User Manual 6 | |
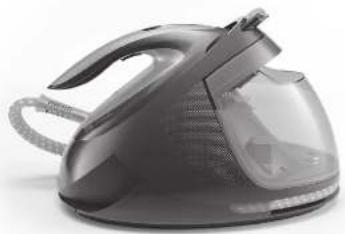
| DA | Brugervejledning 17 | |
| DE | Bedienungsanleitung 28 | |
| ES | Manual de usuario 40 | |
| FI | Käyttöopas 51 | |
| FR | Mode d'emploi 61 | |
| IT | Manuale per l'utente 72 |
| NL | Gebruiksaanwijzing | 83 |
| NO | Brukerhändbok | 94 |
| PT | Manual do utilizador | 105 |
| SV | Användarhandbok | 116 |
| EL | Εγχειρίδιο χρήσης | 127 |
| HE | υπωνην γιτηση | 148 |
text_image
Diagram of an electric steam iron with numbered parts and a close-up inset showing internal components.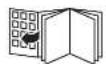


EN IMPORTANT: Perform descaling regularly for great steam and prolonged life. Let the appliance cool down completely, before you remove the EASY DE CALC KIND.
Welcome to the future!
Say hello to your new powerful smart friend and learn how to use it in this booklet.
natural_image
Hand pointing at a circular object with a lightning bolt symbol (no text or labels visible)EN Intelligent automatic steam
Enabled by the DynamiQ sensor, steam is released automatically when the iron is moved.
Congratulations on your purchase and welcome to Philips! To fully benefit from the support that Philips offers, register your product at www.philips.com/welcome.
Read the separate important information leaflet and the user manual carefully before you use the appliance. Save both documents for future reference.
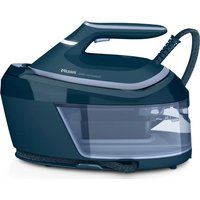
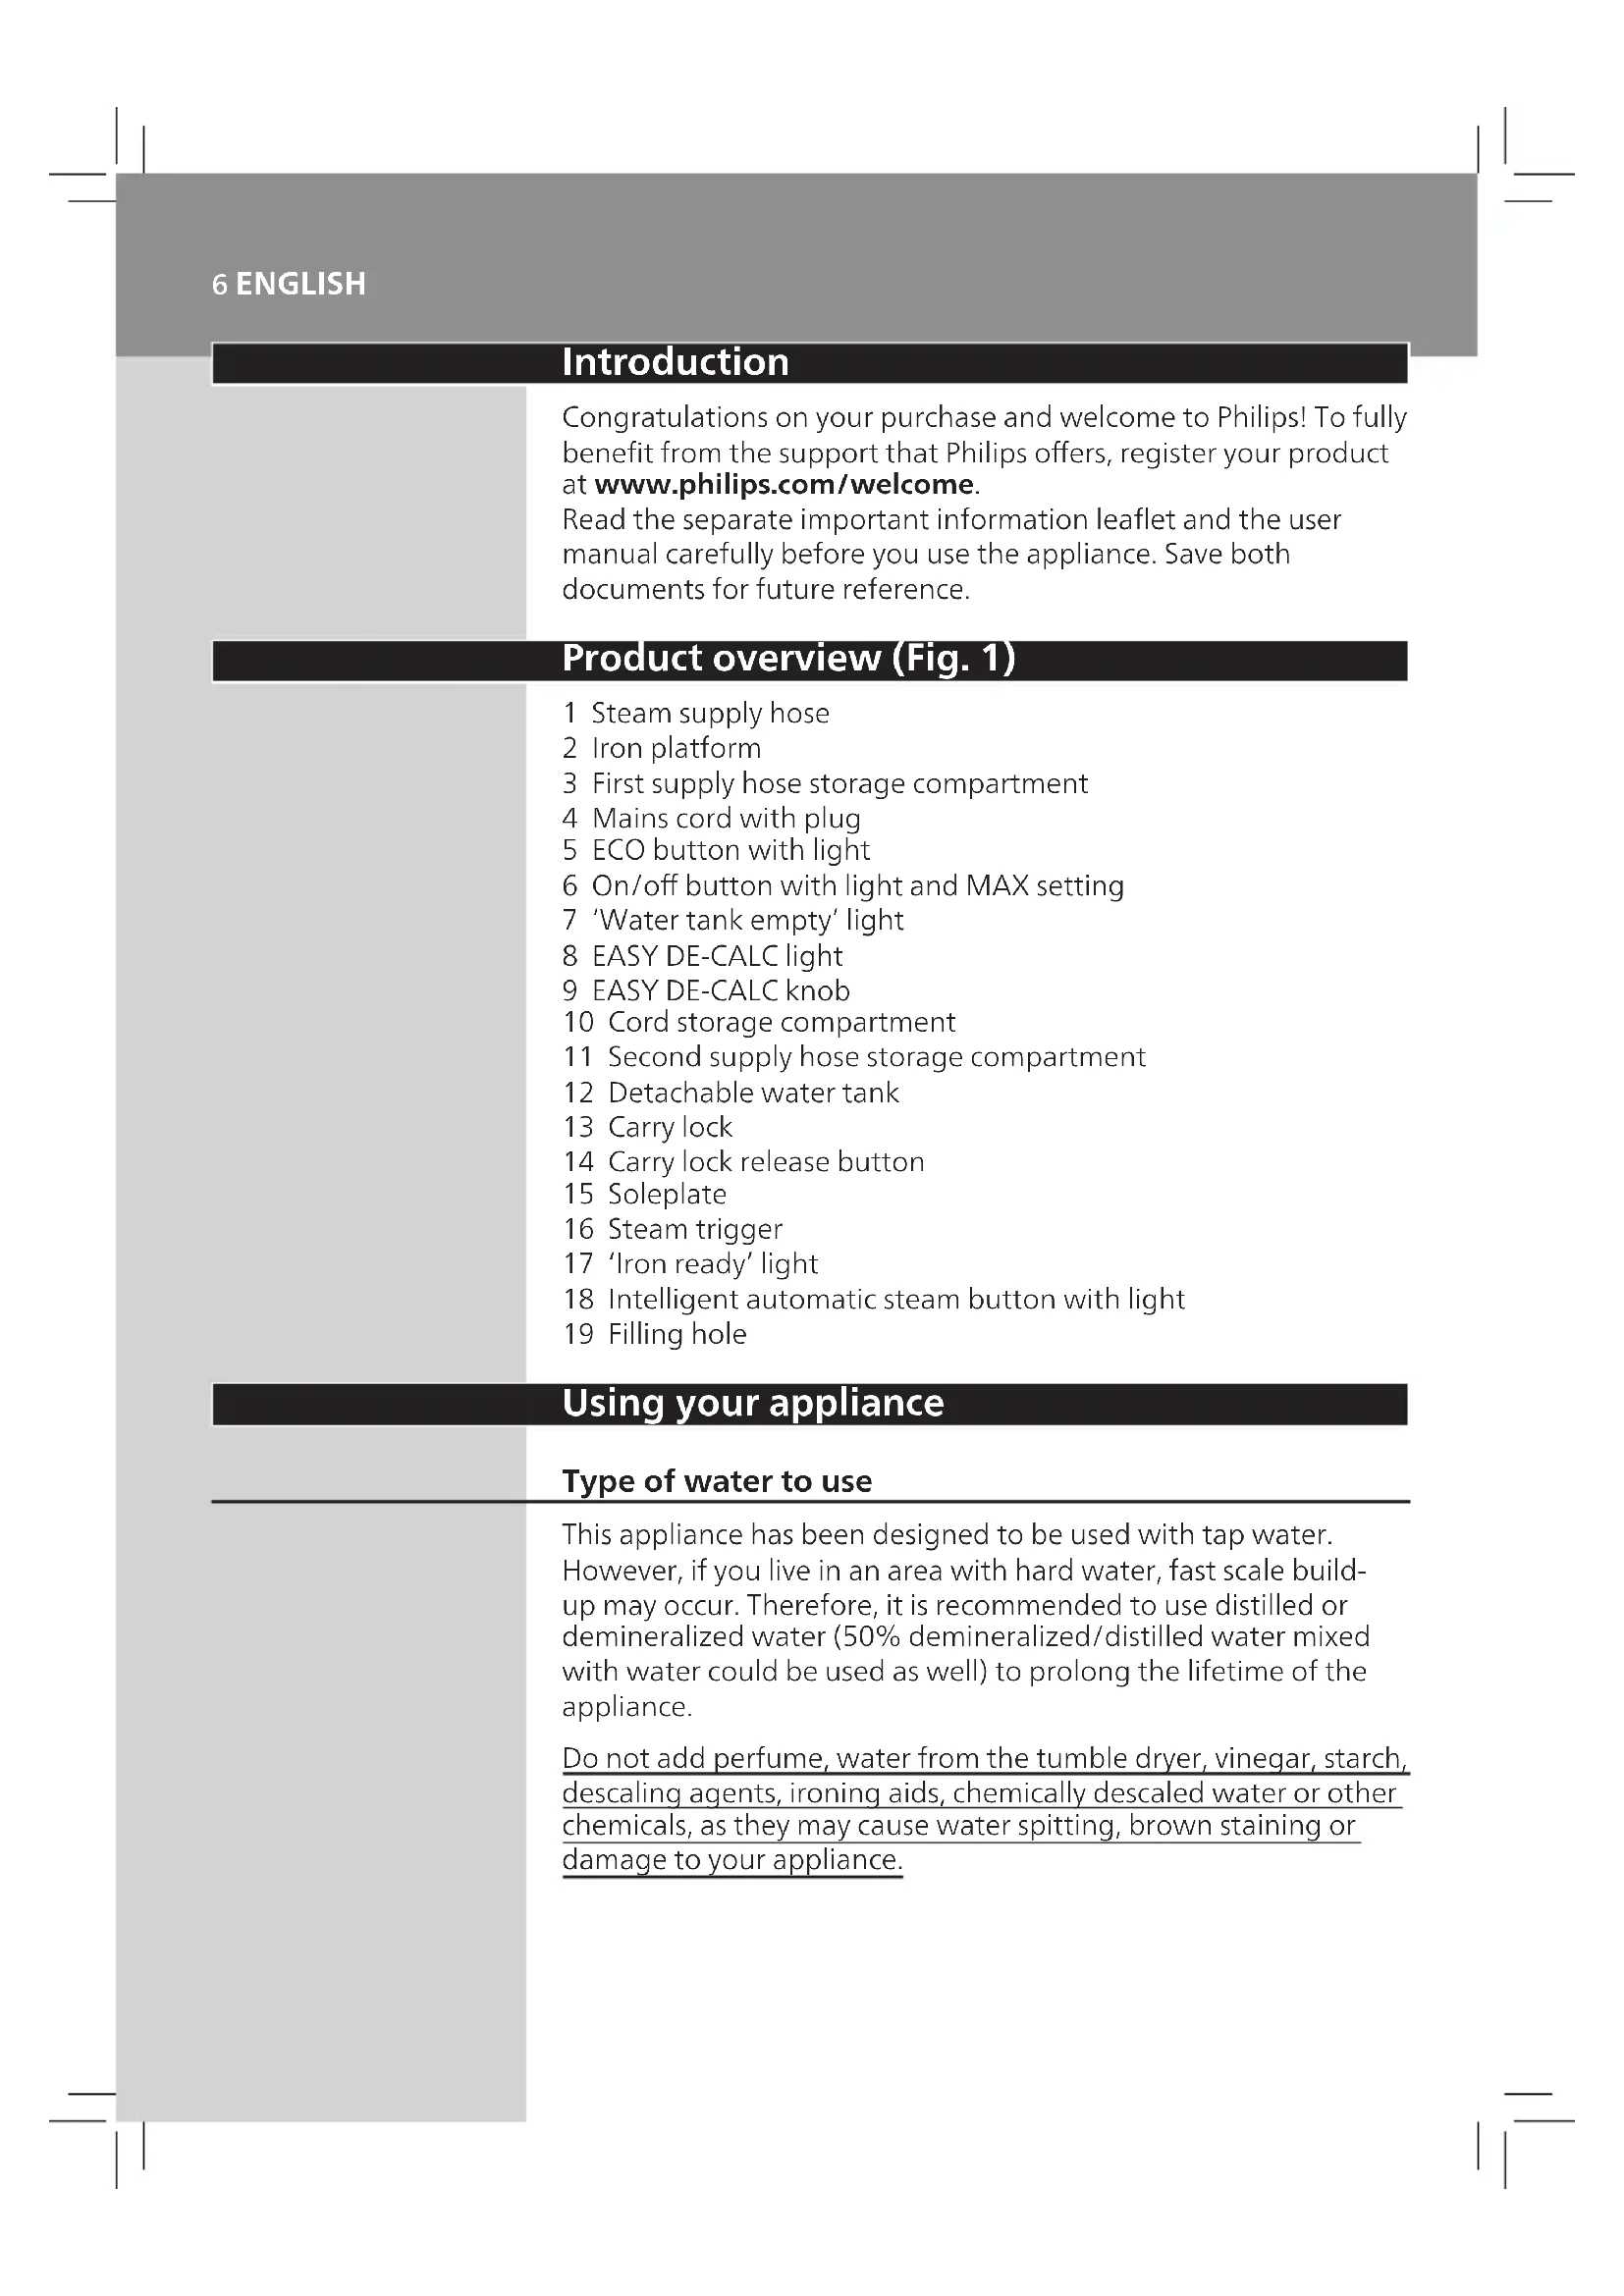
Product overview (Fig. 1)
1 Steam supply hose
2 Iron platform
3 First supply hose storage compartment
4 Mains cord with plug
5 ECO button with light
6 On/off button with light and MAX setting
7 'Water tank empty' light
8 EASY DE-CALC light
9 EASY DE-CALC knob
10 Cord storage compartment
11 Second supply hose storage compartment
12 Detachable water tank
13 Carry lock
14 Carry lock release button
15 Soleplate
16 Steam trigger
17 'Iron ready' light
18 Intelligent automatic steam button with light
19 Filling hole
Using your appliance
Type of water to use
This appliance has been designed to be used with tap water. However, if you live in an area with hard water, fast scale build-up may occur. Therefore, it is recommended to use distilled or demineralized water (50% demineralized/distilled water mixed with water could be used as well) to prolong the lifetime of the appliance.
Do not add perfume, water from the tumble dryer, vinegar, starch, descaling agents, ironing aids, chemically descaled water or other chemicals, as they may cause water spitting, brown staining or damage to your appliance.
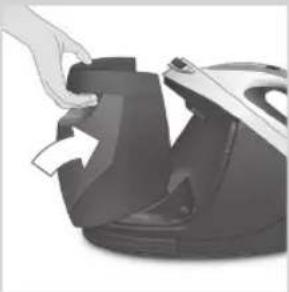
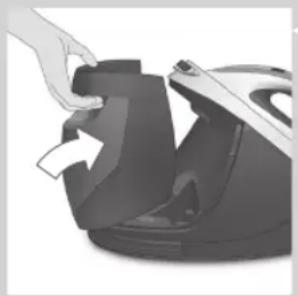
Filling the water tank
natural_image
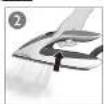
Illustration of a mechanical device with hands operating a seatbelt (no text or symbols visible)Fill the water tank before every use or when the 'water tank empty' light flashes. You can refill the water tank at any time during use.
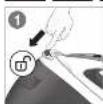
1 Remove the water tank from the appliance and fill it with tap water up to the MAX indication.
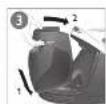
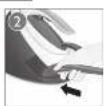
2 Put the water tank back into the appliance by fitting the bottom part into the appliance first.
natural_image
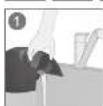
Hand placing a black plastic component into a steam iron (no text or symbols visible)3 Push the top part until it locks into place.
'Water tank empty' light
When the water tank is almost empty, the 'water tank empty' light flashes. Fill the water tank and press the steam trigger to let the appliance heat up again. When the 'iron ready' light lights up continuously, you can continue steam ironing.
OptimalTEMP technology
text_image
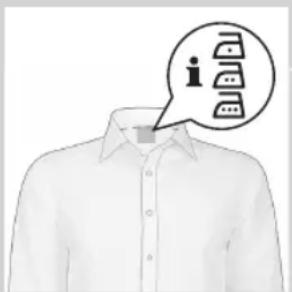
Diagram showing a shirt with a speech bubble containing three icons labeled 'i', 'i', and 'i' pointing to a device.The OptimalTEMP technology enables you to iron all types of ironable fabrics, in any order, without adjusting the iron temperature setting.
Fabrics with these symbols are ironable, for example linen, cotton, polyester, silk, wool, viscose and rayon.
8 ENGLISH
text_image
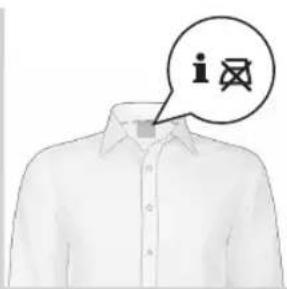
iFabrics with this symbol are not ironable. These fabrics include synthetic fabrics such as Spandex or elastane, Spandex-mixed fabrics and polyolefins (e.g. polypropylene), but also prints on garments.
natural_image
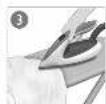
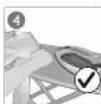
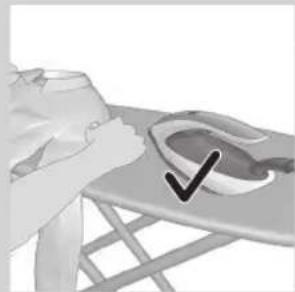
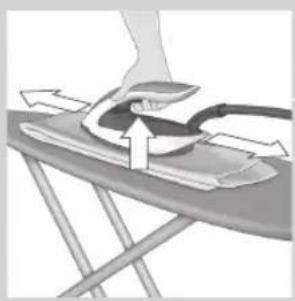
Illustration of a person using a checkmark on an iron table (no text or symbols present)During ironing, you can place the iron either on the iron platform or horizontally on the ironing board. Thanks to the OptimalTEMP technology, the soleplate will not damage the ironing board cover.
natural_image
Illustration of a hand pressing down on a device component, partially overlaid by a close-up of the device (no text or symbols visible)Ironing
1 Place the steam generator on a stable and even surface.
2 Make sure that there is enough water in the water tank (see section 'Filling the water tank').
3 Put the mains plug in an earthed wall socket and press the on/off button to switch on the steam generator. The blue power-on light on the appliance and the 'iron ready' light start to flash to indicate that the appliance is heating up (this takes approx. 2 minutes).
When the appliance is ready for use, the 'iron ready light' and the power-on light stop flashing and light up continuously. Additionally you hear a short beep.
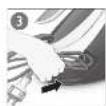
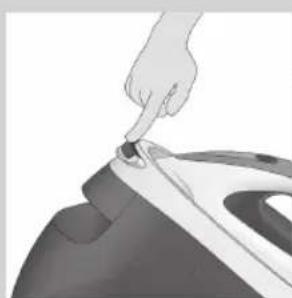
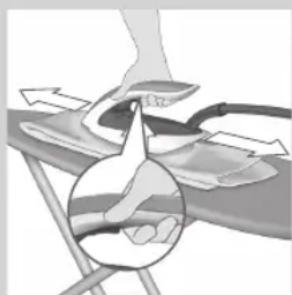
4 Press the carry lock release button to unlock the iron from the iron platform.
natural_image
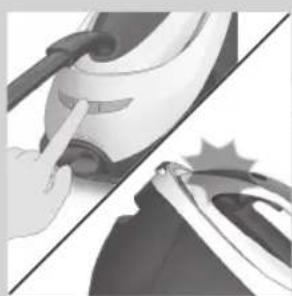
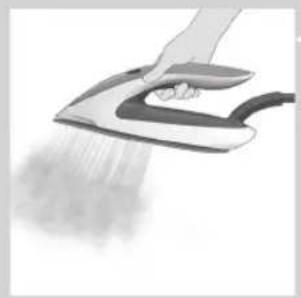
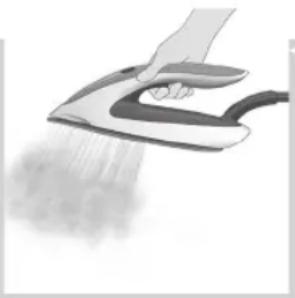
Close-up of a hand pressing down on a small iron iron (no text or symbols visible)5 Press and hold the steam trigger to start ironing.
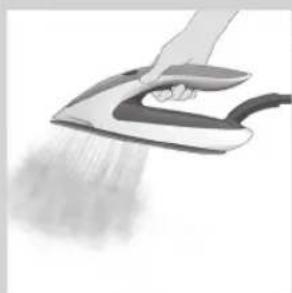
natural_image
Hand using a hand iron on an iron, spraying mist (no text or symbols visible)Never direct steam at people.
Note: For best result on tough fabrics such as cotton, linen and jeans, keep the steam trigger pressed continuously when you move the iron over the fabric. Then move the iron over the same area a few more times without steam to dry the fabric.
Note: For the best results on silk and shiny synthetic fabrics, it is recommended to keep the steam trigger pressed continuously while ironing.
DynamiQ sensor and intelligent automatic steam mode
The intelligent Dsenson inside your iron knows exactly when and how your iron is moving. When you activate intelligent automatic steam mode, the Dsenson will start recognizing the movements of your iron and will enable your iron to release the right amount of steam automatically without you having to press the steam trigger. This will help you to get great results faster and easier.
natural_image
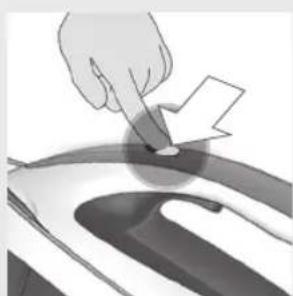
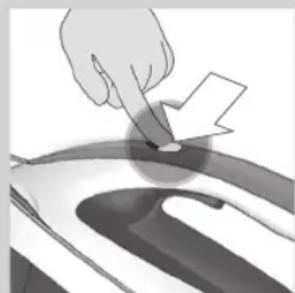
Illustration of a hand pointing at a circular object with an arrow, no text or symbols present- To activate the intelligent automatic steam mode, press the intelligent automatic steam button on top of the iron handle. The intelligent automatic steam light turns on.
- The 'iron ready' light moves back and forth when the iron is moving.
natural_image
Illustration of a hand pressing down on a surface with directional arrows indicating movement (no text or symbols)Note: in intelligent automatic steam mode, steam comes out automatically when you move the iron and stops when you stop moving the iron. You can still press the steam trigger in this mode to activate the steam when the iron is not moving.
- You can use the intelligent automatic steam mode in all steam settings, including ECO and MAX.
Note: for your safety, in intelligent automatic steam mode, the steam stops when the soleplate is tilted.
- To exit the intelligent automatic steam mode, press the intelligent automatic steam button. The intelligent automatic steam light turns off. You need to press the steam trigger to continue your ironing.
Steam boost function
text_image
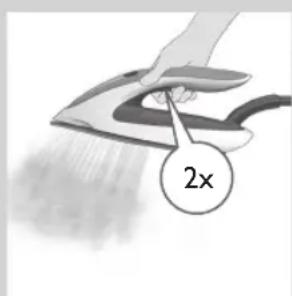
2xThe steam boost function is designed to help tackle difficult creases.
- Press the steam trigger twice quickly to activate the steam boost function. The appliance releases 3 powerful shots of steam.
10 ENGLISH
Vertical ironing
natural_image
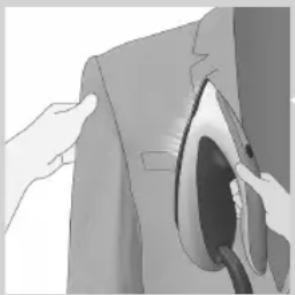
Illustration of a hand inserting a hair into a jacket (no text or symbols visible)Hot steam is emitted from the iron. Never attempt to remove creases from a garment that someone is wearing. Do not apply steam near your or someone else's hand.
You can use the iron in vertical position to remove wrinkles from hanging fabrics.
1 Hold the iron in vertical position, press the steam trigger and touch the garment slightly with the soleplate.
Note: for your safety, the intelligent automatic steam mode is not available for vertical ironing.
ECO setting

natural_image
Illustration of a hand holding a small object, possibly a device or tool, with no visible text or symbols.By using the ECO setting (reduced amount of steam), you can save energy without compromising on the ironing result.
- Press the ECO button. The green ECO light turns on.
- To deactivate ECO setting, press then ECO button again. The green ECO light goes off.
MAX setting
text_image
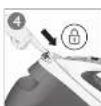
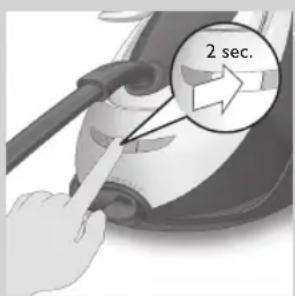
2 sec.For faster ironing and a higher amount of steam, you can use MAX setting.
1 Press and hold the on/off button for 2 seconds until the light turns white.
2 To deactivate MAX setting, press and hold the on/off button again for 2 seconds until the white light turns blue
Auto shut-off
natural_image
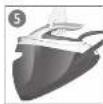
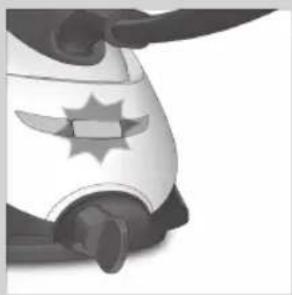
Close-up of a stylized white object with a star-like emblem on its side, possibly a helmet or device (no text or symbols visible)- The appliances enters the standby mode if it has not been used for 10 minutes. The light in the on/off button starts to flash.
- To activate the appliance again, press the on/off button. The appliance starts to heat up again.
- The appliance switches off automatically if it has not been used for another 10 minutes after it enters the standby mode. The light in the on/off button goes off.
Ironing tips
Minimising wrinkles while drying
Start wrinkle removal early in the drying process by spreading out your laundry properly after washing and by putting garments on hangers to make them dry naturally with fewer wrinkles.
Best practice shirt ironing
Start with the time-consuming parts like collar, cuff links and sleeves. Next, iron the bigger parts like front and back to prevent wrinkling the bigger parts when you are busy ironing the time-consuming parts.
Collar: When you iron a collar, start on its underside and work from the outside (the pointy end) inwards. Turn over and repeat. Fold down the collar and press the edge for a more crisp finish.
Buttons: Iron on the reverse side of the buttons for more effective and faster ironing.
Cleaning and maintenance
natural_image
Illustration of a person using a iron on an air conditioner (no text or symbols)To properly maintain your appliance, clean the iron and the appliance regularly.
1 Clean the appliance with a moist cloth. To remove stubborn stains, you can use a small amount of washing-up liquid.
2 To easily and effectively remove stains from the soleplate, switch on the appliance and let it heat up. When the appliance has heated up, move the iron over a moist cloth while you press the steam trigger.
Tip: Clean the soleplate regularly to ensure smooth gliding.
12 ENGLISH
IMPORTANT - EASY DE-CALC
It is very important to use the EASY DE-CALC function as soon as the EASY DE-CALC light starts to flash and the appliance beeps continuously.
The EASY DE-CALC light flashes and the appliance beeps continuously after about a month or 10 ironing sessions to indicate that the appliance needs to be descaled. Perform the following EASY DE-CALC procedure before you continue ironing.
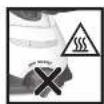
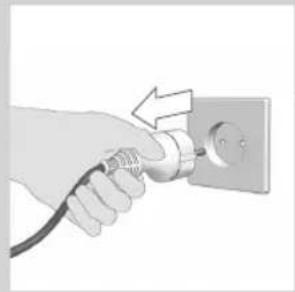
To avoid the risk of burns, unplug the appliance and let it cool down for at least two hours before you perform the EASY DE-CALC procedure.

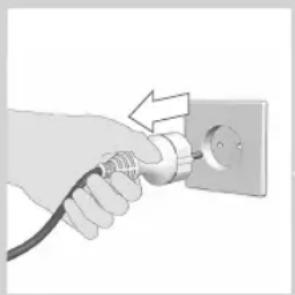
natural_image
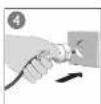
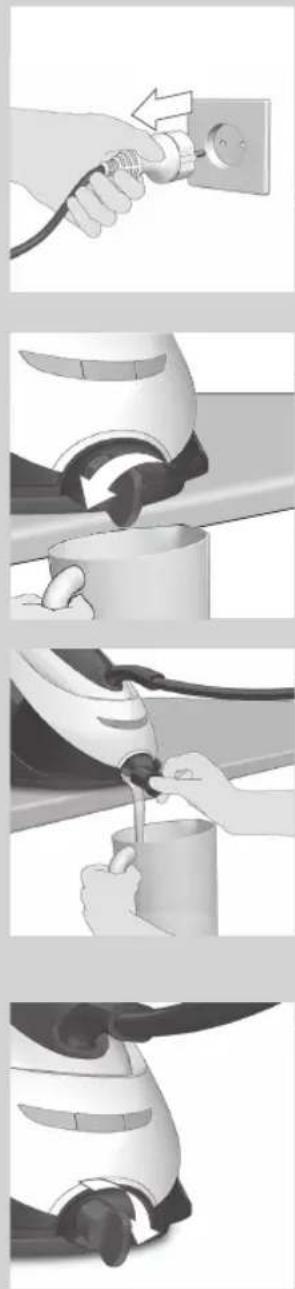
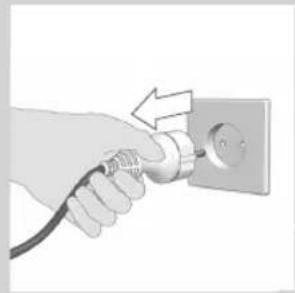
Hand holding a plug inserted into an electrical outlet socket (no text or symbols visible)1 Remove the plug from the wall socket.
natural_image
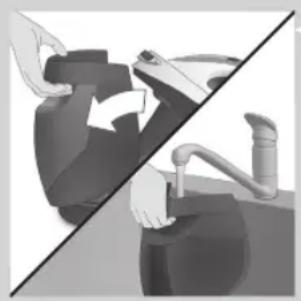
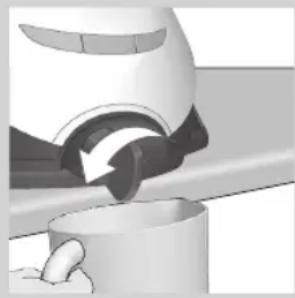
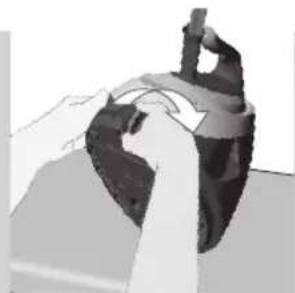
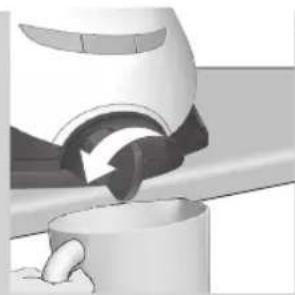
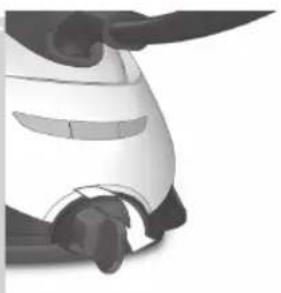
Close-up of a mechanical component with a curved arrow indicating motion or force (no text or symbols visible)2 Place the appliance on the edge of the tabletop.
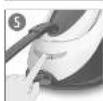
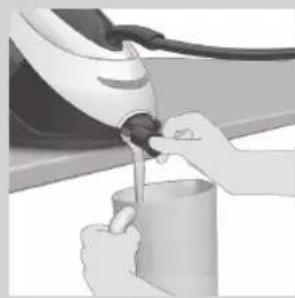
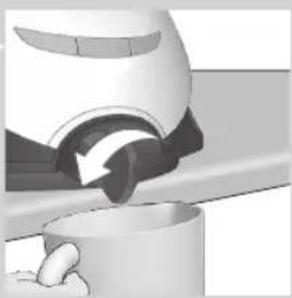
3 Hold a cup (with a capacity of at least 350ml) under the EASY DE-CALC knob and turn the knob anticlockwise.

natural_image
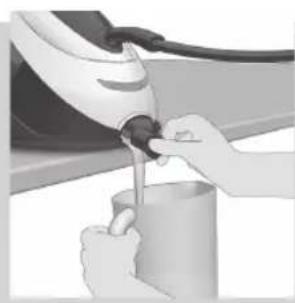
Person using a handheld tool to add liquid into a container (no text or symbols visible)4 Remove the EASY DE-CALC knob and let the water with scale particles flow into the cup.
natural_image
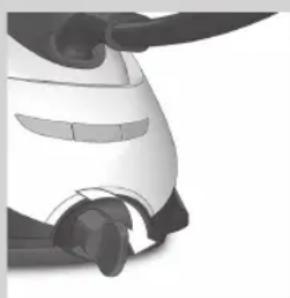
Close-up of a robotic arm joint (no text or symbols visible)5 When no more water comes out of the appliance, reinsert the EASY DE-CALC knob and turn it clockwise to fasten it.
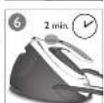
6 You can continue using your iron immediately after completing the EASY DE-CALC procedure.
IMPORTANT – Descaling the soleplate
natural_image
Hand inserting a plug into an electrical outlet (no text or symbols visible)If you do not use the EASY DE-CALC function regularly, scale particles may build up in the soleplate and brown stains may come out of the soleplate during ironing. In this situation, you need to descale the soleplate by following the procedure below. We advice you to repeat the procedure twice to better clean the soleplate.
To avoid the risk of burns, unplug the appliance and let it cool down for at least two hours before you descale the soleplate.
1 Remove the plug from the wall socket.
2 Place the appliance on the edge of the tabletop.
3 Make sure that the water tank is empty.
4 Hold a cup (with a capacity of at least 350ml) under the EASY DE-CALC knob and turn the knob anticlockwise.
5 Remove the EASY DE-CALC knob and let the water with scale particles flow into the cup.
6 Hold the appliance in the position that EASY DE-CALC opening is facing up and pour 900ml distilled water into the opening.
Note: Be mindful on the heavy weight of the appliance when you tilt it.
14 ENGLISH
natural_image
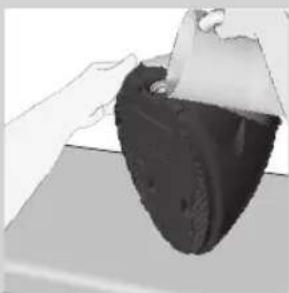
Close-up of hands performing a mechanical press or stamping operation on a dark object (no visible text or symbols)7 Keep the EASY DE-CALC opening facing up, reinsert the EASY DE-CALC knob and turn it clockwise to fasten it.

natural_image
Close-up of a hand using a brush to press down a small object, possibly a vacuum cleaner or filter (no text or symbols visible)8 Put the appliance back on a stable and even surface. Plug in the appliance and switch it on.
9 Wait for 5 minutes for the appliance to heat up.
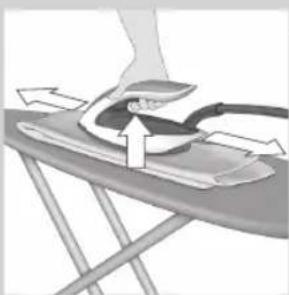
natural_image
Illustration of a person using a computer to press down an air conditioner on an iron stand (no text or symbols visible)10 Keep the steam trigger pressed continuously while you move the iron on a piece of thick cloth for 3 minutes.
Warning: hot, dirty water comes out of the soleplate.
11 Stop moving the iron when no more water comes out or when steam starts coming out.
12 You can continue to use the appliance immediately. Otherwise unplug the appliance after the descaling is completed.
Storage
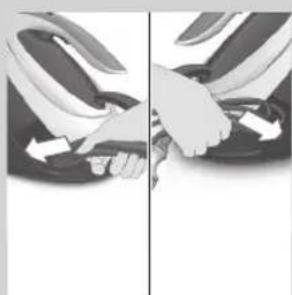
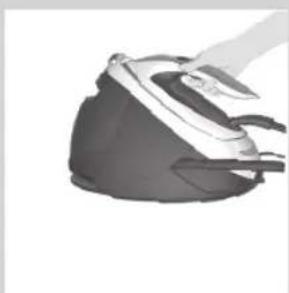
natural_image
Close-up of hands adjusting a seatbelt between two views (no text or symbols visible)1 Switch off the appliance and unplug it.
2 Remove the water tank and empty it.
3 Put the iron on the iron platform. Push the carry lock to lock the iron onto the platform.
4 Fold the supply hose and mains cord. Put them in their respective storage compartments.
natural_image
Illustration of a steam iron with black and white casing (no text or symbols)5 You can carry the appliance with one hand by the handle of the iron.
Do not carry the appliance by holding the water tank release lever.
Troubleshooting
This chapter summarises the most common problems you could encounter with the appliance. If you are unable to solve the problem with the information below, visit
www.philips.com/support for a list of frequently asked questions or contact the Consumer Care Centre in your country.
| Problem Possible cause Solution | ||
| The ironing board cover becomes wet or there are water droplets on the garment during ironing. | Steam has condensed on the ironing board cover after a long ironing session. | Replace the ironing board cover if the foam material has worn out. You can also add an extra layer of felt material under the ironing board cover to prevent condensation on the ironing board. You can buy felt in a fabric shop. |
| You have an ironing board cover that is not designed to cope with the high steam rate of the appliance. | Put an extra layer of felt material under the ironing board cover to prevent condensation on the ironing board. You can buy felt in a fabric shop. | |
| Water droplets come out of the soleplate. | The steam that was still present in the hose has cooled down and condensed into water. This causes water droplets to come out of the soleplate. | Steam away from the garment for a few seconds. |
| Steam and/or water come out from under the EASY DE-CALC knob. | The EASY DE-CALC knob is not tightened properly. | Switch off the appliance and let the appliance cool down for 2 hours. Unscrew the EASY DE-CALC knob and screw it back onto the appliance properly. Note: Some water may escape when you remove the knob. |
| The rubber sealing ring of the EASY DE-CALC knob is worn. | Contact an authorised Philips service centre for a new EASY DE-CALC knob. | |
| Dirty water and impurities come out of the soleplate or the soleplate is dirty. | Impurities or chemicals present in the water have deposited in the steam vents and/or on the soleplate. | Clean the soleplate with a damp cloth. |
| Too much scale and minerals have accumulated inside the appliance. | Descale the appliance regularly (see chapter 'Important - DESCALING'). | |
| The iron leaves a shine or an imprint on the garment. | The surface to be ironed was uneven, for instance because you were ironing over a seam or a fold in the garment. | PerfectCare is safe on all garments. The shine or imprint is not permanent and will come off if you wash the garment. Avoid ironing over seams or folds or you can place a cotton cloth over the area to be ironed to avoid imprints at seams and folds. |
| The appliance does not produce any steam. | There is not enough water in the water tank (the 'water tank empty' light flashes). | Fill the water tank (see chapter 'Using your appliance', section 'Filling the water tank'). |
| The appliance is not hot enough to produce steam. | Wait until the 'iron ready' light on the iron lights up continuously. | |
| You did not press the steam trigger. | Press the steam trigger and keep it pressed while you iron. | |
| The water tank is not placed in the appliance properly. | Slide the water tank back into the appliance firmly ('click'). | |
| The appliance is not switched on. | Insert the plug in the wall socket and press the on/off button to switch on the appliance. | |
| The appliance has switched off. The light in the on/off button flashes. | The auto-off function is activated automatically when the appliance has not been used for more than 10 minutes. | Press the power on/off button to switch on the appliance again. |
| The appliance produces a pumping sound. | Water is pumped into the boiler inside the appliance. This is normal. | If the pumping sound continues nonstop, switch off the appliance and remove the plug from the wall socket. Contact an authorised Philips service centre. |
Introduktion
natural_image
Illustration of a person performing a manual task with hands on the back (no text or symbols visible)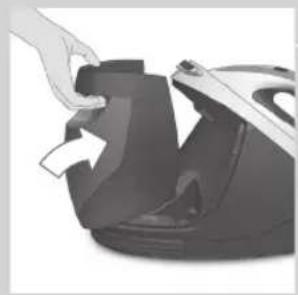
natural_image
Hand placing a component into a black plastic or plastic housing (no text or symbols visible)text_image
Diagram showing a person in a shirt with a speech bubble containing icons of people and clothing, likely indicating a communication or categorization system.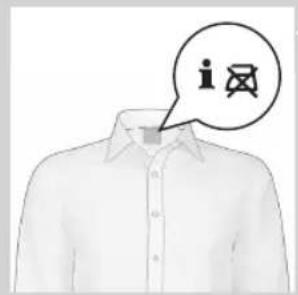
text_image
i反natural_image
Illustration of a person using a checkmark on a table with a magnifying glass (no text or symbols)natural_image
Illustration of a hand using a tool to press down a helmet, with another hand adjusting the helmet (no text or symbols visible)natural_image
Close-up of a hand pressing down on a steam iron (no text or symbols visible)5 Hold dampudløseren nede for at begynde strygning.
Ret aldrig dampstrålen mod personer.
natural_image
Hand ironing a steam iron with visible steam emission (no text or symbols)natural_image
Hand pointing at a small object on a curved surface, no visible text or symbolsnatural_image
Illustration of a hand pressing down on an iron iron with a magnified inset showing the contact area (no text or symbols)natural_image
Illustration of a hand using a steam iron to clean or brush the air, with a magnified circular annotation showing 2× speed (no text or symbols on the diagram itself)natural_image
Illustration of hands inserting a plug into a suit (no text or symbols visible)natural_image
Hand holding a small electronic device with a scroll wheel (no visible text or symbols)natural_image
Close-up of a cartoon character's helmet with a star emblem (no text or symbols visible)natural_image
Illustration of a person using an iron on an air conditioner stand (no text or symbols)VIGTIGT - EASY DE-CALC
natural_image
Hand inserting a plug into an electrical outlet (no text or symbols visible)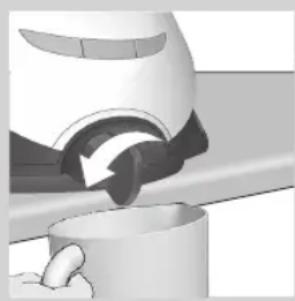
natural_image
Close-up of a mechanical component with a curved arrow indicating motion or force (no text or symbols visible)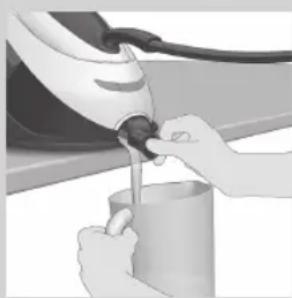
natural_image
Person using a handheld tool to clean or prepare a cup (no text or symbols visible)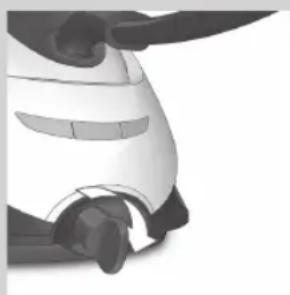
natural_image
Close-up of a robotic arm joint (no visible text or symbols)natural_image
Hand inserting a plug into an electrical outlet (no text or symbols visible)natural_image
Illustration of a mechanical device with a rotating arrow and a cup (no text or symbols)natural_image
Person using a handheld electric vehicle to add fuel into a cup (no text or symbols visible)5 Fjern EASY DE-CALC-knappen, og lad vandet med kalkpartikler flyde ned i koppen.
natural_image
Illustration of a hand holding a black object over a surface, with no visible text or symbols.natural_image
Illustration of hands performing a mechanical or ergonomic operation on a dark object (no text or symbols visible)natural_image
Close-up of a hand using a power tool to press down a white object (no text or symbols visible)natural_image
Illustration of a person pressing down on an iron cutting board (no text or symbols visible)natural_image
Close-up of hands adjusting a seatbelt between two vertical panels (no text or symbols visible)natural_image
Illustration of a steam iron with handle and blade (no text or symbols)natural_image
Illustration of a person performing a split-down maneuver on a chair (no text or symbols)natural_image
Hand placing a black plastic component into a steam iron (no text or symbols visible)text_image
Diagram showing a person in a shirt with a speech bubble containing icons of people and documents, likely illustrating a user interaction or service.natural_image
Illustration of a person using a checkmark on a table (no text or symbols present)natural_image
Illustration of a hand using a tool to clean or inspect a helmet (no text or symbols visible)natural_image
Close-up of a hand pressing down on a small iron iron (no text or symbols visible)natural_image
Hand using a steam iron to clean or spread air (no text or symbols visible)natural_image
Hand pointing at a circular object with a white arrow, no visible text or symbols
natural_image
Illustration of a hand performing a manual press or massage technique on a chair (no text or symbols visible)natural_image
Illustration of hands using a hairdryer to clean a jacket (no text or symbols visible)natural_image
Close-up of a hand pressing down on a white object (no text or symbols visible)natural_image
Close-up of a stylized cartoon character's head with a star emblem (no text or symbols visible)natural_image
Illustration of a person using a power iron on an iron (no text or symbols)natural_image
Hand inserting a plug into an electrical outlet (no text or symbols visible)natural_image
Close-up of a mechanical component being cut with a tool, no visible text or symbolsnatural_image
Close-up of hands using a handheld tool to adjust or install a cylindrical object (no visible text or symbols)natural_image
Close-up of a robotic arm with visible joints and control buttons (no text or symbols)natural_image
Hand inserting a plug into an electrical outlet (no text or symbols visible)natural_image
Close-up of a mechanical component with a curved arrow indicating motion or force (no text or symbols visible)natural_image
Person pouring liquid from a white electric shaver into a cup (no text or symbols visible)natural_image
Illustration of a hand holding a black object over a surface, with no visible text or symbols.natural_image
Close-up of hands performing a mechanical press or stamping operation on a dark object (no visible text or symbols)natural_image
Close-up of a hand using a screwdriver to press down a small object (no text or symbols visible)natural_image
Illustration of a person pressing down on an iron (£) using a tool, with arrows indicating motion (no text or symbols)natural_image
Close-up of a hand adjusting a seatbelt between two views (no text or symbols visible)natural_image
Illustration of a hand ironing an iron on a steam iron (no text or symbols visible)natural_image
Illustration of a person using a desktop computer to interact (no text or symbols present)natural_image
Close-up of a hand pressing down on a black industrial machine component (no visible text or symbols)text_image
Diagram showing a person's shirt with an icon of a computer monitor and a speech bubble containing an 'i' symbol.natural_image
Illustration of a person using a tool on a table with a checkmark (no text or symbols present)natural_image
Illustration of a hand using a tool to clean or store items, showing a close-up of a person's face and a jacket (no text or symbols visible)natural_image
Close-up of a hand pressing down on a garment with a pointed tip (no text or symbols visible)natural_image
Hand using a hand iron on an iron, emitting steam or dust (no text or symbols visible)natural_image
Hand pointing at a circular object with an arrow, possibly part of a diagram or mechanical component (no text or symbols visible)natural_image
Illustration of a hand pressing down on a chair with a magnified inset showing hand positioning (no text or symbols)natural_image
Illustration of a hand adjusting a garment with a curved seam (no text or symbols)natural_image
Close-up of a hand holding a small electronic device (no visible text or symbols)natural_image
Close-up of a cartoon-style character's helmet with a star emblem (no text or symbols visible)natural_image
Illustration of a person using a iron on an ironboard, showing mechanical components and motion arrows (no text or symbols)IMPORTANTE: EASY DE-CALC
natural_image
Step-by-step illustration of a hand using a power plug to adjust a cup, showing mechanical components and tool path (no text or symbols)natural_image
Hand holding a plug inserted into an electrical outlet (no text or symbols visible)natural_image
Close-up of a mechanical component with a rotating arrow and base, no visible text or symbolsnatural_image
Person using a handheld electric vehicle to lift a cup (no visible text or symbols)natural_image
Illustration of a hand holding a black object over a surface, with no visible text or symbols.natural_image
Illustration of a person performing a hand massage on a mechanical component (no text or symbols visible)natural_image
Close-up of a hand using a brush to press down a small object, no visible text or symbols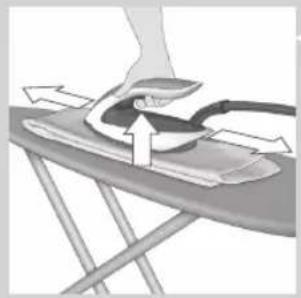
natural_image
Illustration of a person using a computer to press down an iron on a flat surface (no text or symbols visible)natural_image
Close-up of hands adjusting a seatbelt mechanism (no text or symbols visible)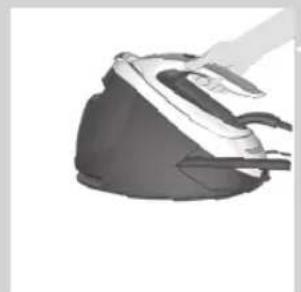
natural_image
Illustration of a steam iron with a handle, shown in grayscale (no text or symbols)natural_image
Illustration of hands performing a manual task on a mechanical component (no text or symbols visible)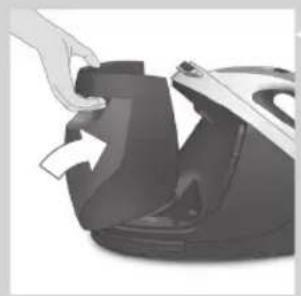
natural_image
Close-up of a hand placing a black plastic cover into a white airfoil (no text or symbols visible)text_image
Diagram showing a person in a shirt with a speech bubble containing three icons labeled 'i', likely indicating a notification or message.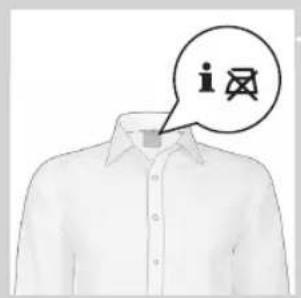
text_image
i员natural_image
Illustration of a person using a checkmark on a table with a bird (no text or symbols)natural_image
Illustration of a hand using a tool to clean or install a device, with no visible text or symbols.natural_image
Close-up of a hand pressing down on a car airfoil (no text or symbols visible)natural_image
Hand using a steam iron to clean or smoke (no text or symbols visible)natural_image
Illustration of a hand pointing at a circular object with a lightning bolt, no text or symbols present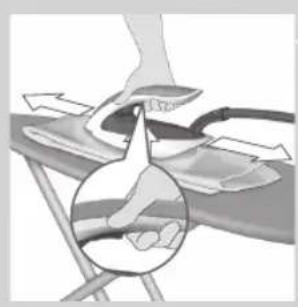
natural_image
Medical illustration showing a hand performing a procedure on a patient's arm, with an inset magnified view of the hand holding a patient's arm (no text or symbols present)natural_image
Illustration of a hand inserting a medical device into a coat (no text or symbols visible)natural_image
Illustration of a hand holding a small electronic device (no text or symbols visible)natural_image
Close-up of a stylized helmet with a star emblem and shield design (no text or symbols visible)natural_image
Illustration of a person using an iron on an air conditioner (no text or symbols)natural_image
Hand inserting a plug into an electrical outlet (no text or symbols visible)natural_image
Three-step illustration showing a hand using a tool to adjust or install a cylindrical object, with no visible text or symbols.natural_image
Hand holding a plug inserted into an electrical outlet (no text or symbols visible)natural_image
Close-up of a mechanical component with a curved arrow indicating motion or force, partially submerged in a cylindrical container (no text or symbols visible)58 SUOMI
natural_image
Person using a hairdryer to clean or store items (no visible text or symbols)natural_image
Close-up of hands holding a dark, curved object against a light background (no text or symbols visible)natural_image
Close-up of hands performing a task on a dark object, possibly a device or machine (no visible text or symbols)natural_image
Close-up of a hand using a brush to press down a small object, no visible text or symbolsnatural_image
Illustration of a person pressing down on an iron cutting board with arrows indicating motion (no text or symbols)natural_image
Two-panel illustration showing hands adjusting a seatbelt, no text or symbols present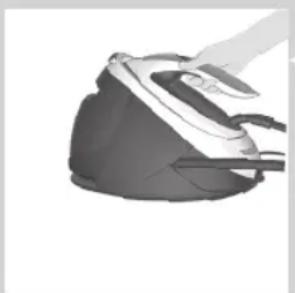
natural_image
Close-up of a steam iron with black and gray casing (no visible text or symbols)natural_image
Two-panel illustration showing a person adjusting a seatbelt, with no visible text or symbols.
natural_image
Close-up of a hand pressing down on a black industrial machine component (no visible text or symbols)natural_image
Illustration of a person using a checkmark on a wooden table (no text or symbols)natural_image
Illustration of a hand pressing down on a device component, with no visible text or symbolsnatural_image
Close-up of a hand pressing down on a piece of iron, showing the cutting edge (no text or symbols visible)natural_image
Hand ironing a steam iron with visible steam emission (no text or symbols)natural_image
Hand pointing at a circular object with a white arrow, no visible text or symbols
natural_image
Illustration of a hand pressing down on a chair with a magnified inset showing the hand holding a finger (no text or symbols present)natural_image
Illustration of hands installing or adjusting a garment with a curved seam (no text or symbols visible)natural_image
Illustration of a hand pressing down on a small electronic device (no text or symbols visible)natural_image
Close-up of a stylized helmet with a star emblem and shield design (no text or symbols visible)natural_image
Illustration of a person pressing down on an iron (£) using a curved tool, with arrows indicating motion (no text or symbols)IMPORTANT – EASY DE-CALC
natural_image
Step-by-step illustration of a hand using a power adapter to adjust a cup (no text or symbols present)natural_image
Hand inserting a plug into an electrical outlet (no text or symbols visible)natural_image
Close-up of a mechanical component with a curved arrow indicating motion or force (no visible text or symbols)natural_image
Close-up of hands using a hairdryer to clean or store items (no visible text or symbols)natural_image
Illustration of a hand holding a dark object over a surface, with no visible text or symbols.natural_image
Close-up of hands performing a task on a mechanical component (no visible text or symbols)natural_image
Close-up of a hand using a power tool to press down a white surface (no text or symbols visible)natural_image
Illustration of a person using an iron on an ironboard, with arrows indicating motion direction (no text or symbols)natural_image
Close-up of hands adjusting a seatbelt in a car seat (no text or symbols visible)natural_image
Illustration of a hand using a steam iron (no text or symbols visible)natural_image
Illustration of a person adjusting a seatbelt, showing hand positioning and seatbelting (no text or symbols)natural_image
Close-up of a hand pressing down on a black industrial machine component (no visible text or symbols)text_image
Diagram showing a person in a shirt with a speech bubble containing icons of food items, likely indicating a menu or information.natural_image
Illustration of a hand pressing down on a device while another person's arm is inserted (no text or symbols visible)natural_image
Close-up of a hand pressing down on a garment with a zipper, no visible text or symbolsnatural_image
Hand using a steam iron to clean or smoke (no text or symbols visible)natural_image
Illustration of a hand pointing at a circular object with a downward arrow, no text or symbols presentnatural_image
Medical illustration showing a hand performing a procedure on a patient's abdomen, with an inset magnified view of the procedure (no text or symbols present)natural_image
Illustration of a hand adjusting a garment with a curved seam or collar (no text or symbols visible)natural_image
Close-up of a hand holding a small electronic device with a scroll wheel (no visible text or symbols)natural_image
Close-up of a stylized cartoon character's head with a star emblem (no text or symbols visible)natural_image
Illustration of a person using a iron on an ironboard, showing mechanical components and motion arrows (no text or symbols)IMPORTANTE - EASY DE-CALC
natural_image
Hand holding a plug inserted into an electrical outlet (no text or symbols visible)natural_image
Close-up of a mechanical component with a curved arrow indicating motion or force, partially submerged in a cylindrical container (no text or symbols visible)natural_image
Close-up of hands using a hairdryer to clean or prepare food (no text or symbols visible)natural_image
Close-up of a white and black robotic device with curved joints (no visible text or symbols)natural_image
Hand inserting a plug into an electrical outlet (no text or symbols visible)natural_image
Close-up of a mechanical component being cut or opened, showing a curved tool interacting with a cylindrical base (no text or symbols visible)natural_image
Person using a hairdryer to add liquid into a container (no text or symbols visible)natural_image
Illustration of a hand holding a dark, irregularly shaped object against a light background (no text or symbols)natural_image
Illustration of hands performing a task on a mechanical component (no text or symbols visible)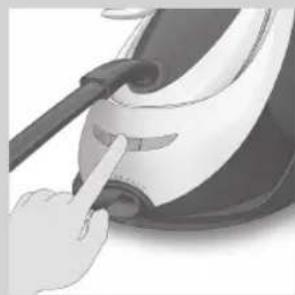
natural_image
Close-up of a hand using a vacuum cleaner to press down a surface (no text or symbols visible)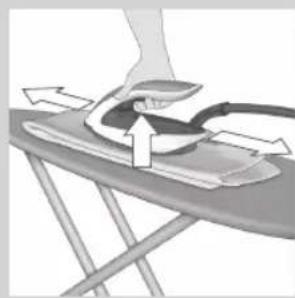
natural_image
Illustration of a person pressing down on an iron cutting board (no text or symbols visible)natural_image
Close-up of hands adjusting a black shoe seatbelt, showing the mechanism (no text or symbols visible)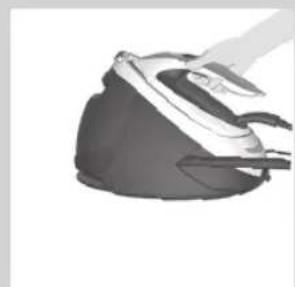
natural_image
Illustration of a steam iron with a handle, shown in grayscale (no text or symbols)natural_image
Illustration of a person adjusting a seatbelt, separated by a diagonal line (no text or symbols)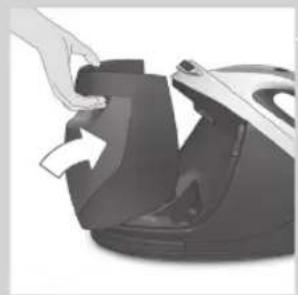
natural_image
Close-up of a hand opening a black industrial machine component (no visible text or symbols)text_image
Diagram showing a person in a shirt with a speech bubble containing icons of people and food containers, likely illustrating a user interaction or labeling system.
text_image
i风natural_image
Illustration of a person using a checkmark on a table (no text or symbols present)natural_image
Illustration of a hand using a tool to press or inspect a device, with no visible text or symbols.natural_image
Close-up of a hand pressing down on a car airfoil (no text or symbols visible)natural_image
Hand using a steam iron to clean or spread material (no text or symbols visible)natural_image
Hand pointing at a circular object with a lightning bolt, possibly part of a device or tool (no text or symbols visible)
natural_image
Illustration of a hand performing a medical procedure on a patient's abdomen, with an inset showing internal anatomy (no text or symbols)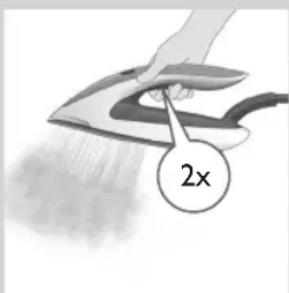
text_image
2xDynamiQ-sensor en intelligente automatische stoommodus
natural_image
Illustration of hands using a hairdryer to clean or wear a garment (no text or symbols visible)natural_image
Illustration of a hand holding a small object, possibly a device or tool, with no visible text or symbols.natural_image
Close-up of a cartoon-style robot's head with a star emblem (no text or symbols visible)natural_image
Illustration of a person using a power iron on an iron (no text or symbols)natural_image
Hand inserting a plug into an electrical outlet (no text or symbols visible)natural_image
Close-up of a mechanical component with a curved arrow indicating motion or force, partially submerged in a cylindrical container (no text or symbols visible)natural_image
Person using a handheld device to add liquid into a container (no text or symbols visible)natural_image
Close-up of a robotic arm joint (no text or symbols visible)natural_image
Hand inserting a plug into an electrical outlet (no text or symbols visible)natural_image
Close-up of a mechanical component with a curved arrow indicating motion or force (no text or symbols visible)natural_image
Close-up of hands using a tool to spark or store items from a cup (no visible text or symbols)natural_image
3D rendered illustration of a hand holding a dark, irregular object against a light background (no text or symbols)natural_image
Close-up of hands performing a mechanical press or stamping operation on a dark object (no visible text or symbols)natural_image
Close-up of a hand using a brush to press down a small object, no visible text or symbolsnatural_image
Illustration of a person pressing down on an iron cutting board with arrows indicating motion (no text or symbols)natural_image
Close-up of hands adjusting a seatbelt, showing mechanical components (no text or symbols visible)natural_image
Illustration of a steam iron with a hand operating it (no text or symbols visible)natural_image
Illustration of a person adjusting a car seatbelt, divided by a diagonal line (no text or symbols)natural_image
Hand placing a black plastic bag into a steam iron (no text or symbols visible)Lampe for tom vannbeholder
natural_image
Illustration of a person using a checkmark on a wooden table (no text or symbols)natural_image
Illustration of a person adjusting a helmet with a finger pointing at the nose (no text or symbols)natural_image
Close-up of a hand using a tool to press down a small object on a surface (no text or symbols visible)natural_image
Hand ironing a steam iron with steam emission (no text or symbols visible)natural_image
Hand pointing at a small object with a downward arrow, no visible text or symbols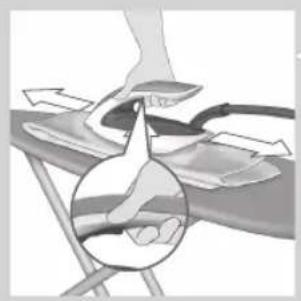
natural_image
Illustration of a hand performing a medical procedure on a patient's arm, with no visible text or symbols.DynamiQ sensor og modus for intelligent automatisk damp
natural_image
Illustration of a hand adjusting a garment with a curved seam (no text or symbols)natural_image
Illustration of a hand holding a small object, possibly a device or tool, with no visible text or symbols.natural_image
Close-up of a cartoon-style character's head with a star emblem (no text or symbols visible)natural_image
Illustration of a person using a iron on an ironboard, showing mechanical components and motion arrows (no text or symbols)VIKTIG – EASY DE-CALC
natural_image
Hand holding a plug inserted into an electrical outlet socket, with a white arrow indicating the insertion direction (no text or symbols present)natural_image
Three-step illustration showing a hand pouring liquid into a container, with no visible text or symbols.natural_image
Hand holding a plug inserted into an electrical outlet, with an arrow indicating the insertion direction (no text or symbols present)1 Ta ut støpselet av stikkontakten.
2 Plasser apparatet på enden av bordplaten.
3 Kontroller at vannbeholderen er tom.
natural_image
Close-up of a mechanical component being cut or opened, showing a curved tool interacting with a cylindrical base (no text or symbols visible)4 Plasser en kopp (med en kapasitet på minst 350 ml) under EASY DE-CALC-knotten, og vri knotten mot klokken.
natural_image
Person using a handheld device to clean or prepare a cup (no text or symbols visible)natural_image
Illustration of a hand holding a dark object over a surface, possibly a container or mechanical part (no text or symbols visible)natural_image
Close-up of hands performing a task on a dark object (no visible text or symbols)natural_image
Close-up of a hand using a brush to press down a small object, no visible text or symbolsnatural_image
Illustration of a person using a iron on an ironboard (no text or symbols visible)10 Hold inne dampbryteren kontinuerlig mens du drar strykejernet over et tykt plagg i tre minutter.
natural_image
Illustration of a person adjusting a seatbelt, showing hand placement and angle marking (no text or symbols)natural_image
Close-up of a steam iron with black and gray casing (no visible text or symbols)natural_image
Two-panel illustration showing a person performing a seatbelt switch and a leg presser, separated by a diagonal line (no text or symbols)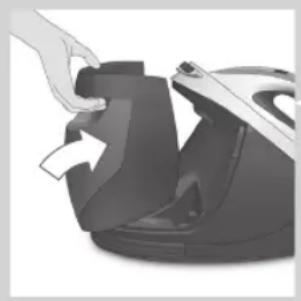
natural_image
Hand placing a black plastic component into a machine (no text or symbols visible)text_image
Diagram showing a person in a shirt with a speech bubble containing three icons labeled 'i', 'e', and 'f'.natural_image
Illustration of a person using a checkmark on a table with a bowl (no text or symbols)natural_image
Illustration of a hand using a device to interact with a helmet, showing no text or symbolsEngomar
natural_image
Close-up of a hand pressing down on a garment with a small object on the side (no text or symbols visible)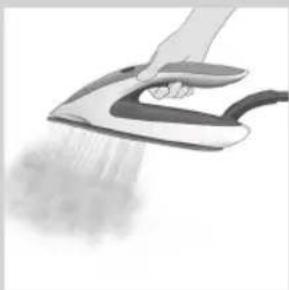
natural_image
Hand using a steam iron to clean or smoke (no text or symbols visible)natural_image
Hand pointing at a small object on a curved surface (no text or symbols visible)natural_image
Illustration of a hand performing a medical procedure on a patient's abdomen, with no visible text or symbols.natural_image
Hand using a steam iron to spread material, with a magnified inset showing 2x speed (no text or symbols on the iron itself)natural_image
Illustration of hands installing or adjusting a garment with a circular opening (no text or symbols visible)natural_image
Illustration of a hand using a handheld device to interact with a tool (no text or symbols visible)natural_image
Close-up of a cartoon character's head with a star emblem (no text or symbols visible)natural_image
Illustration of a person using an iron on an air conditioner (no text or symbols)IMPORTANTE - EASY DE-CALC
natural_image
Hand inserting a plug into an electrical outlet (no text or symbols visible)natural_image
Close-up of a mechanical component with a curved arrow indicating motion or force (no text or symbols visible)natural_image
Person pouring liquid from a bottle into a container (no text or symbols visible)natural_image
Close-up of a robotic arm joint (no visible text or symbols)natural_image
Hand inserting a plug into an electrical outlet (no text or symbols visible)natural_image
Close-up of a mechanical component being cut with arrows indicating motion (no text or symbols visible)natural_image
Illustration of hands using a hairdryer to lift a cup (no text or symbols visible)natural_image
Hand holding a dark object with a small object above it, possibly part of a mechanical or electronic component (no visible text or symbols)natural_image
Illustration of hands performing a task on a mechanical component (no text or symbols visible)natural_image
Close-up of a hand using a power tool to press down a small appliance (no text or symbols visible)natural_image
Illustration of a person using a curved tool on an iron cutting board (no text or symbols visible)natural_image
Close-up of hands adjusting a black seatbelt, showing mechanical adjustment (no text or symbols visible)natural_image
Illustration of a steam iron with handle and blade (no text or symbols)natural_image
Illustration of two hands performing a seatbelt maneuver, one seated and one standing (no text or symbols)natural_image
Close-up of a hand pressing down on a black plastic or plastic component with an arrow indicating motion (no text or symbols visible)text_image
Diagram showing a person in a shirt with a speech bubble containing three icons labeled 'i', suggesting a notification or message.natural_image
Illustration of a person using a checkmark on a wooden table (no text or symbols)natural_image
Two-panel illustration showing a hand inserting a device into a device, separated by a diagonal line (no text or symbols)natural_image
Close-up of a hand pressing down on a garment with a small piece, no visible text or symbolsnatural_image
Hand using a hand iron to clean or spread air, no text or symbols visiblenatural_image
Illustration of a hand pointing at a small object on a curved surface, with a lightning bolt symbol (no text or symbols present)natural_image
Illustration of a hand performing a medical procedure on a patient's abdomen, with an inset showing the hand holding the abdomen (no text or symbols present)natural_image
Illustration of a hand using a steam iron to brush a 2x speed, with no text or symbols present.natural_image
Illustration of hands adjusting a suit jacket with a magnified inset showing the blade (no text or symbols)natural_image
Illustration of a hand holding a small object, possibly a device or tool, with no visible text or symbols.natural_image
Close-up of a stylized helmet with a star emblem (no text or symbols visible)natural_image
Illustration of a person pressing down on an iron (£) with arrows indicating motion (no text or symbols)natural_image
Step-by-step illustration of a hair styling or hairpin application procedure, showing hand positioning and tool path (no text or symbols)1 Ta ut stickkontakten ur vägguttaget.
2 Placera apparaten på bordskanten.
natural_image
Hand inserting a plug into an electrical outlet (no text or symbols visible)natural_image
Close-up of a mechanical component being cut with arrows indicating motion (no text or symbols visible)natural_image
Person using a hairdryer to add liquid into a cup (no text or symbols visible)natural_image
Illustration of a hand holding a dark, irregular object against a light background (no text or symbols)natural_image
Illustration of hands performing a task on a dark object (no text or symbols visible)natural_image
Close-up of a hand using a power tool to press down a small electronic device (no text or symbols visible)natural_image
Illustration of a person pressing down on an iron (£) using a curved tool, with arrows indicating motion (no text or symbols)natural_image
Illustration of a person adjusting a seatbelt, showing hand placement and angle marking (no text or symbols)natural_image
Illustration of a steam iron with a handle, shown in grayscale (no text or symbols)natural_image
Two-panel illustration showing a person adjusting a seatbelt, divided by a diagonal line (no text or symbols)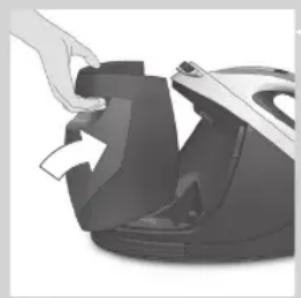
natural_image
Hand placing a dark plastic cover into a steam iron (no text or symbols visible)text_image
Diagram showing a person in a shirt with a speech bubble containing three icons labeled 'i', likely indicating a notification or message.natural_image
Illustration of a person standing on an iron table with a checkmark symbol (no text or labels present)natural_image
Illustration of a hand pressing down on a device while another shows a close-up of a jacket (no text or symbols visible)Σιδέρωμα
natural_image
Close-up of a hand pressing down on a garment with a pointed tool (no text or symbols visible)130 ΕΛΛΗΝΙΚΑ
natural_image
Illustration of a hand using a steam iron to spread material (no text or symbols)natural_image
Hand pointing at a small object on a curved surface, possibly part of a vehicle or mechanical component (no text or symbols visible)natural_image
Medical illustration showing a hand performing a procedure on a patient's abdomen, with an inset magnified view of the procedure (no text or symbols present)natural_image
Illustration of hands installing or adjusting a garment with a circular component (no text or symbols visible)natural_image
Hand holding a small object with a curved line, possibly part of a device or tool (no visible text or symbols)natural_image
Close-up of a cartoon character's helmet with a star emblem (no text or symbols visible)natural_image
Illustration of a person using a power iron on an iron (no text or symbols)natural_image
Hand inserting a plug into an electrical outlet (no text or symbols visible)natural_image
Close-up of a mechanical component with a curved arrow indicating motion or force, partially submerged in a cylindrical tank (no text or symbols visible)natural_image
Two-step illustration showing a hand using a brush to press or adjust a cup of liquid, with no visible text or symbols.natural_image
Two-step diagram showing hand holding a power outlet plug and then applying a tool to a cup (no text or symbols)natural_image
Person using a hairdryer to clean or prepare a cup (no text or symbols visible)natural_image
Illustration of a hand holding a dark, textured object over a surface (no text or symbols visible)natural_image
3D rendered mechanical component with hands operating a curved tool (no visible text or symbols)natural_image
Close-up of hands using a power tool to press down a whiteboard (no text or symbols visible)natural_image
Illustration of a person using a power tool to press down an iron on a flat surface (no text or symbols)natural_image
Two-panel illustration showing hands adjusting a seatbelt, no text or symbols present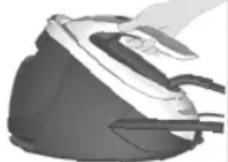
natural_image
Illustration of a steam iron with handle and blade (no text or symbols)תְרָה בַרִי הַעֹן
natural_image
Illustration of a hand holding a dark, textured object against a light background (no text or symbols)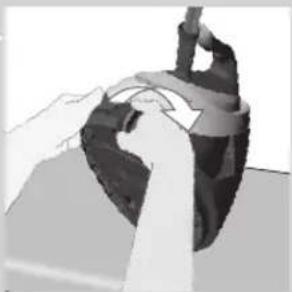
natural_image
Close-up of hands operating a mechanical device with a handle and circular motion indicator (no text or symbols visible)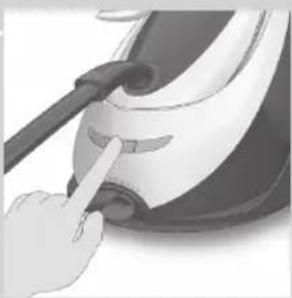
natural_image
Close-up of a hand using a power tool to press down a white and black air conditioner cover (no text or symbols visible)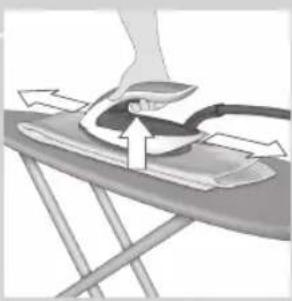
natural_image
Illustration of a person using a computer to press down an iron on a flat surface (no text or symbols visible)lionx
natural_image
Close-up of hands adjusting a black leather buckle (no text or symbols visible)142
EASY 5
EASY DE- 6. CALC
natural_image
Close-up of a stylized white object with abstract black patterns, possibly a helmet or mask (no text or symbols visible)natural_image
Hand inserting a plug into an electrical outlet (no text or symbols visible)EASY 4.
natural_image
Illustration of a hand pouring liquid into a cup (no text or symbols visible)natural_image
Close-up of hands using a tool to dispense liquid into a container (no text or symbols visible)natural_image
Illustration of a person using a lathe machine to press down an iron on a flat surface (no text or symbols)Easy De-calc – אַרְשׁ
Easy Disput is Easy De-calc Disput is Disput
natural_image
Hand inserting a plug into an electrical outlet (no text or symbols visible)natural_image
Close-up of a mechanical component with a curved arrow indicating motion, partially submerged in a cup (no text or symbols visible)natural_image
Person using a hairdryer to lift a cup (no text or symbols visible)natural_image
Illustration of a hand holding a small electronic device (no text or symbols visible)MAX
natural_image
Abstract grayscale graphic with curved shapes and a sphere (no text or symbols)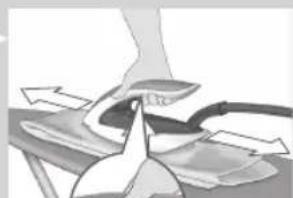
natural_image
Illustration of a hand using a tool to lift a surface, with arrows indicating motion direction (no text or symbols)natural_image
Illustration of a hand pressing down on a garment with a circular object partially visible (no text or symbols)146
natural_image
Illustration of a person using a checkmark on a table with a computer (no text or symbols visible)natural_image
Close-up of a hand using a power iron to press down a component, with no visible text or symbols.natural_image
Close-up of a hand pressing down on a small iron iron (no text or symbols visible)natural_image
Hand ironing a steam iron with visible steam emission (no text or symbols)natural_image
Two-panel illustration showing hands performing a mechanical task: one on a chair, the other on a bench (no text or symbols)