
SO210 - Radio SONORO - Free user manual and instructions
Find the device manual for free SO210 SONORO in PDF.
| Product type | Clock radio with CD player, Bluetooth, USB, AUX, DAB+ |
| Brand / Model | Sonoro / SO210 (sonoroCD) |
| Dimensions (W x D x H) | Approx. 210 x 257 x 140 mm |
| Weight | Approx. 3.2 kg |
| Power supply | Power adapter 15.5 V DC, 2.9 A (model S048CM1550290) |
| Backup battery | CR2032 coin cell battery, 3 V |
| FM radio | 87.5 – 108 MHz, RDS, 50 kHz tuning step |
| DAB/DAB+ radio | 174.928 – 239.2 MHz |
| Bluetooth | Version 3.0 (EDR), profiles AVRCP 1.0, A2DP 1.0 |
| CD player | Audio CD, CD-R, CD-RW, MP3, WMA |
| AUX input | 3.5 mm jack, sensitivity 300 mV |
| USB port | MP3/WMA playback, charging 5 V / 1 A, FAT16/32, max 32 GB |
| Headphone output | 3.5 mm jack |
| Alarm functions | 2 independent alarms, snooze, repeat, source (FM, DAB, CD, relaxation, chime) |
| Sleep function | Sleep timer up to 120 minutes |
| Relaxation sounds | 6 sounds: surf, whale, birds, rain, chime, fireplace |
| Display | LCD screen with brightness adjustment (8-15 levels high, 1-8 low) |
| Remote control | Included, CR2032 coin cell battery |
| Package contents | Unit, remote control, 2 coin cell batteries, power adapter with CE/UK adapters, FM/DAB antenna, gloves, manual |
| Safety | Class 1 laser, overvoltage protection, detailed safety instructions |
| Warranty | 2 years (1 year North America/Australia) |
Frequently Asked Questions - SO210 SONORO
User questions about SO210 SONORO
0 question about this device. Answer the ones you know or ask your own.
Ask a new question about this device
Download the instructions for your Radio in PDF format for free! Find your manual SO210 - SONORO and take your electronic device back in hand. On this page are published all the documents necessary for the use of your device. SO210 by SONORO.
USER MANUAL SO210 SONORO
natural_image
Black and white photo of a sonoro microwave oven with control panel and speaker grille (no visible text or symbols on main body)

Bluetooth®
Bedienungsanleitung Bedieningshandleiding Operating manual Mode d'emploi Instrucciones de manejo Manuale operativo Betjeningsvejledning
natural_image
Black and white photo of a Sanoro microwave oven with control panel and speaker grille (no visible text or symbols on main body)Inhaltsverzeichnis
1 Einführung.... 9
text_image
SLEEP RELAX FM AM CD AUX OPTICAL USB zzzz 18:00 AM 88:88 19 PRESET EQ PM 88:88Abb. 6: Anzeige
natural_image
Illustration of a hand inserting a plug into two connected electrical plugs (no text or symbols)natural_image
Hand holding a remote control panel with a circular dial and an arrow indicating rotation (no text or symbols)text_image
10:45 AM PMtext_image
A TT tt.mm.jjjj B TT mm.tt.jjjj C TT Mmm tt.jjjjtext_image
10:45 BassB

text_image
10:45 Höhentext_image
1 SLEEP FM 10:45 106.70 MHztext_image
SLEEP FM 10:45 Sleep 30minnatural_image
Front view of a sonoro audio recording device with playback controls and a circular dial (no text or symbols on the device body)natural_image
Symbol of a trash bin crossed with no text or labelsnatural_image
Black and white photo of a Sanoro microwave oven with control panel and speaker grille (no visible text or symbols on main body)Inhoudsopgave
1 Inleiding.... 41
text_image
SLEEP RELAX FM AM CD AUX OPTICAL USB zzzz 18:00 AM 88:88 19 PRESET EQ PM 88:88Afb. 6: Weergave
natural_image
Illustration of a hand inserting a plug into two connected electrical plugs (no text or symbols)natural_image
Hand holding a remote control device with a rotary dial and circular dial (no text or symbols visible)[Tune to FM RDS station to set time & date (Voor auto tijd/datum RDS-zender selecteren)].
i
text_image
10:45 Set DateAfb. 11: Datum instellen
text_image
10:45 AM PMtext_image
A 10:45 Light High 10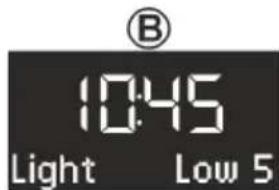
text_image
⑧ 10:45 Light Low 5Afb. 19: Dimmer instellen
text_image
10:45 BassB

text_image
10:45 Trebletext_image
1 SLEEP FM 10:45 106.70 MHztext_image
SLEEP FM 10:45 Sleep 30mintext_image
7:00 WeekdaysAfb. 26: Wekherhaling instellen
text_image
7:00 Snooze 10min 1 1:00 zzz 1Afb. 27: Snooze instellen
natural_image
Front view of a sonoro audio recording device with playback controls and a circular dial (no visible text or symbols)Afb. 28: Volume instellen
text_image
FH 106.70 Auto Tuningtext_image
FM 10:45 FM Preset Listtext_image
1 2 3 10:45 Track 1 01:30 6 5 413 Bluetooth-weergave
natural_image
Symbol of a trash bin crossed with no text or labelsnatural_image
Black and white photo of a Sanoro microwave oven with control panel and speaker grille (no visible text or symbols on main body)

Bluetooth®
Table of contents
1 Introduction.... 73
2 For your own safety.... 73
2.1 Symbols in this manual.... 73
2.2 Intended use.... 73
2.3 Children and persons with limited cognitive abilities.... 73
2.4 Power supply.... 73
2.5 Batteries.... 74
2.6 Laser.... 74
2.7 Transport.... 74
2.8 Ambient conditions.... 74
2.9 Operation.... 74
2.10 Headphone use.... 75
2.11 Defect.... 75
2.12 Cleaning.... 75
3 Scope of delivery.... 75
4 Compatible formats.... 75
5 Controls and ports.... 76
6 Display.... 81
7 Unpacking the device and commencing operation.... 82
7.1 Unpacking the device.... 82
7.2 Inserting the battery.... 82
7.3 Connecting the power supply.... 83
7.4 Connecting the antenna.... 83
7.5 Preparing the remote control.... 83
7.6 Connecting the headphones.... 83
8 Setting the basic functions.... 84
8.1 Switching on the device for the first time.... 84
8.2 The Standby menu.... 84
8.3 The Settings menu.... 85
8.4 Setting the dimmer.... 86
8.5 Setting the sound.... 86
8.6 Setting the Sleep Timer.... 86
9 The wake-up function.... 87
9.1 Setting the alarm time.... 87
9.2 Setting the alarm source.... 87
9.3 Setting the alarm volume.... 88
9.4 Setting the alarm repeat frequency.... 88
9.5 Switching on/off the alarm clock 88
9.6 Switch off the alarm clock after the alarm sounds.... 88
9.7 Setting the Snooze function.... 88
10 General audio playback functions.... 88
10.1 Setting the volume.... 89
10.2 Muting the audio playback.... 89
10.3 Selecting a playback mode.... 89
11 Radio playback.... 89
11.1 FM Radio.... 89
11.1.1 Searching an FM station.... 89
11.1.2 Storing FM stations.... 90
11.1.3 Retrieving saved FM stations.... 90
11.2 DAB radio.... 90
11.2.1 Searching a DAB station.... 90
11.2.2 Storing a DAB station.... 91
11.2.3 Retrieving stored DAB stations.... 91
11.2.4 Retrieving DAB info.... 91
11.2.5 Setting the DRC.... 91
12 CD playback.... 92
13 Bluetooth playback.... 93
13.1 Connecting Bluetooth devices.... 93
13.2 Playing music via Bluetooth.... 93
14 AUX playback.... 93
15 USB playback.... 93
16 Relax Music playback.... 94
17 Demo Sound playback.... 94
18 Troubleshooting.... 95
19 Cleaning.... 96
20 Technical Data.... 97
21 Disposal.... 97
22 Declaration of Conformity.... 98
23 Warranty.... 98
1 Introduction
Thank you for purchasing a sonoroCD.
This manual and the safety instructions provide all the information required for trouble-free and safe operation of the device.
- Read these operating instructions in their entirety before using the device.
- Keep this manual for future reference.
If you pass the device on to a third party, please provide them with the operating instructions and safety instructions as well.
■ Failure to follow these instructions can result in serious injury or damage to the device.
■ We assume no liability for damage resulting from failure to observe the instructions in this manual.
The images in this manual are intended to illustrate the necessary actions to operate the device.
Enjoy your device!
Contact data
| Address sonoro audio Gmb | HNordkanalallee 9441464 NeussGermany |
| Phone +49 2131 88 34 141 | |
| FAX +49 8000 76 66 76 | |
| e-mail support@sonoro.de | |
| Internet www.sonoro.de |
2 For your own safety
2.1 Symbols in this manual
Safety instructions
Important information for your safety is highlighted. Always make sure to observe these instructions to avoid accidents and damage to the device:

WARNING!
Indicates a potentially hazardous situation that may result in death or serious injury.

CAUTION!
Indicates a potentially hazardous situation that may result in minor or moderate injury.

NOTICE!
Indicates a potentially hazardous situation that may result in material and environmental damage.
Helpful tips and recommendations
i
Highlights information and useful recommendations.
2.2 Intended use
The device is for personal use only. It is not intended for commercial use. The device is solely intended for the following tasks:
■ Playback of FM/DAB radio stations.
■ Playback of Audio CDs and MP3/WMA CDs.
■ Audio playback from external USB devices.
■ Audio playback of external devices connected via AUX.
■ Audio playback of Bluetooth-enabled devices (e.g. mobile phones).
■ Charging function for external devices that are connected via USB.
i
Regarding the charging function, please note the specifications described in the manufacturer's operating instructions.
Any other use is considered improper use and is prohibited. We assume no liability for damages from improper use.
2.3 Children and persons with limited cognitive abilities
■ Do not leave the device unattended and do not use it when children or persons who cannot estimate the associated risks are nearby.
■ Persons (including children) who are not able to safety operate the device due to their physical, sensory or mental capabilities or lack of experience or knowledge regarding the device, should not operate this device without proper supervision or instruction by a responsible person. Please keep it safely out of their reach.
■ Remember that packaging materials should not be toyed with. Risk of suffocation!
2.4 Power supply
The device is electric powered, so there is always a risk of electric shock. Therefore pay particular attention to the following:
■ Never touch the power plug with wet hands.
■ When you want to pull the power plug from the wall outlet, always pull directly on the plug itself. Never pull on the cable. It could break.
■ Ensure unobstructed access to the power outlet so that the power plug can be pulled out immediately in case of an emergency.
■ Make sure that the power cord is not bent, pinched or run over. Lay the power cord in such a way that it is not a tripping hazard or within reach of children.
■ Only use extension cords that are rated for the current of the device.
- Keep the device away from rain and moisture and any heat sources.
■ Only operate the device if the electrical voltage indicated on the device nameplate and the power plug matches the voltage of your power outlet. Incorrect voltage may destroy the device.
■ To avoid a fire hazard, disconnect the device completely from the power supply when you are not using the device for a long time. Do this by unplugging the power cord from the AC outlet.
2.5 Batteries
■ Remove the batteries/rechargeable batteries from the battery compartment as soon as they are empty or if you do not intend to use the device for a period of time.
- Don't throw the batteries/rechargeable batteries into fire and never expose them to high temperatures.
■ Do not attempt to recharge the batteries. Do not attempt to open or short circuit the batteries/rechargeable batteries. Explosion hazard!
■ Fluid that leaks from the batteries when these are used incorrectly can cause skin irritation. In case of contact, wash off the fluid with plenty of water. If the fluid gets into your eyes, do not rub eyes but immediately flush these for 10 minutes with water and consult a physician immediately.
2.6 Laser
text_image
LASER KLASSE 1 PRODUKT CLASS 1 LASER PRODUCT APPAREIL LASER DE CATEGORIE 1Fig. 1: Laser
This device is classified as a Class 1 laser device. Laser beams can injure your eyes. So please observe the following:
■ Do not attempt to disassemble the device.
■ To avoid risks: All maintenance and repair work must only be performed by the manufacturer or its customer service department.
2.7 Transport
■ To avoid damage to the inserted medium, remove it from the device before transporting/shipping the device.
■ Whilst driving in a vehicle, store the device so as not to endanger its occupants.
If you ship the device, please stow it in its original packaging. Keep the packaging for this purpose.
2.8 Ambient conditions
Safe operation of the device implies maintaining appropriate ambient conditions for the device. So please observe the following:
■ Protect the device from the elements. Never use it outdoors and never place it in areas with increased exposure to sunlight.
■ Never place the device on or in the immediate vicinity of fire and heat sources, such as burning candles, stove tops, ovens, etc.
Place the device in such a way that adequate ventilation is ensured. This prevents heat build up inside the device. Always keep a minimum distance of 10 cm from other objects or walls.
■ Protect the device from strong mechanical vibrations and place it on a solid surface.
■ Protect the remote control from the weather, humidity and high temperatures (e.g. from direct sunlight).
■ Protect the device from splashing or dripping water. Never place objects containing liquids on or next to the device.
2.9 Operation
- Do not insert any object into the CD slot of the device other than the permitted CDs. Special formats damage your device.
■ Do not use any media other than those specified in this manual.
■ The rubber feet of the device may produce stains on certain surfaces. So use a suitable surface.
2.10 Headphone use
■ Always decrease the volume of the device before putting on the headphones. Increase the volume to the desired level only after the headphones are in the correct position.
- Do not adjust the volume too high when listening on headphones. If you hear permanent noise or background noise in your ears (ringing), immediately decrease the volume or stop using the headphones altogether.
■ Even if your headphones are designed in such a way that you can hear outside noises, remember to never adjust the volume so high that you are no longer aware of your immediate surroundings.
2.11 Defect
Should the device be defective, do not attempt to repair it on your own.
If the power plug, the adapter, or the power cord of this device is damaged, they must be replaced by the manufacturer or the manufacturer's customer service department to avoid the risk of electric shock.
■ Should any fluid enter the device or if the device was dropped or otherwise damaged, have it checked by an authorised dealer. Immediately disconnect the device from the power supply and contact an authorised dealer as soon as possible.
2.12 Cleaning
■ Clean the device only from the outside with a soft, dry cloth. Never use abrasive or solvent-based cleaning agents as these may damage the surface of the device.
■ If the device is extremely dirty, wipe it with a slightly damp cloth and dry it with a soft, dry cloth.
3 Scope of delivery
Many additional components that you need to receive radio frequencies and connect additional devices are part of sonoroCD's scope of delivery.
■ sonoroCD with protective cover
■ Remote control
■ Two button cells (CR2032, 3 V)
■ AC adapter with universal adapter (CE and UK)
■ FM/DAB antenna
Gloves
■ Operating instructions
4 Compatible formats
Compatible CD formats
NOTICE!
Material damage from using an incorrect CD format
Inserting a mini-disc can damage the device. - Only use compatible CD formats.
■ Compact Disc Digital Audio CD-DA
CD-R
CD-RW
Compatible audio formats
CD-DA
MP3
WMA
5 Controls and ports
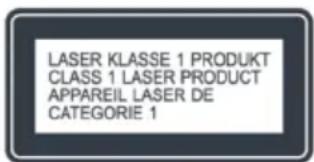
sonoroCD front view
text_image
1 2 3 4 5 6 NEMU MODE 1 2 sonoro 13 12 11 10 9 8 7Fig. 2: sonoroCD front view
| Item(Fig. 2) | Designation Function | ction |
| 1 Play/Pause CD/USB: start | /pause playback. | |
| 2 Stop CD/USB: stop playback. | DAB and FM: info button | |
| 3 LCD display Displays current time and date when the device is switched off. Provides mode-related information when the device is switched on. | ||
| 4 MENU Open and save/close | se the menu entries. | |
| 5 Click wheel | Turn: set volume, FM/DAB station, and alarm, and to navigate.Press: confirm the individual submenus. | |
| 6 MODE Switch to the next | playback mode. | |
| 7 Alarm 2 |  | Press: switch the Alarm 2 on/off, stop the alarm.Press and hold: set the alarm. |
| 8 Eject Eject the | ||
| 9 Alarm 1 |  | Press: switch the Alarm 1 on/off, stop the alarm.Press and hold: set the alarm. |
| 10 CD slot | Loads the CD when the device is switched on or in Standby mode. | |
| 11 Next |  | Press: navigate the menu entries; search FM/DAB stations, next track in CD, USB, Relax Music, Demo Sound modesPress and hold: fast forward |
| Item(Fig. 2) | Designation Function |
| 12 Standby | Switch the device on/off. Stop the alarm. |
| 13 Previous | Press: Navigate the menu entries. Search FM/DAB stations, previous track in CD USB, Relax Music, Demo Sound modesPress and hold: fast forward |
sonoroCD top view
text_image
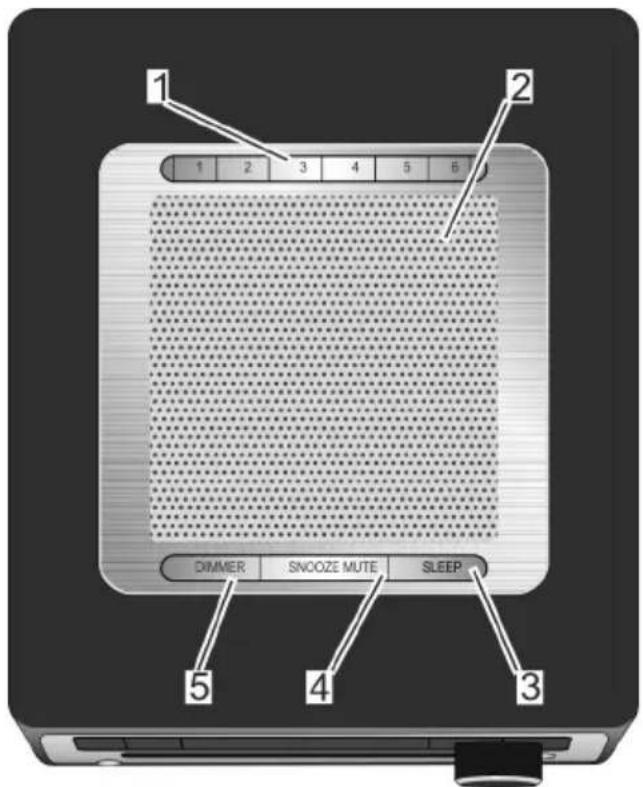
1 2 3 4 5 6 DIMMER SNOOZE MUTE SLEEP 5 4 3Fig. 3: sonoroCD top view
| Item(Fig. 3) | Designation Function | |
| 1 Memory | 1–6 Station memory. | |
| 2 Speaker | Speaker opening. | |
| 3 SLEEP | Press briefly: switch the auto disconnect (Sleep Timer) function on/off.Press and hold for a while: [Sleep Timer] menu to set the time the device will be switched off automatically. | |
| 4 SNOOZE | MUTE | Press briefly (in playback mode): Switch audio playback (Mute) on/off.Press briefly (in Alarm mode): Start the snooze function (Snooze).Press and hold for a while: [Snooze Setting] menu to set the snooze time. |
| 5 DIMMER | Press briefly: The display is illuminated at higher brightness level for 3 s.Press and hold for a while: [DIMMER] menu to set the display's brightness level. |
sonoroCD rear view
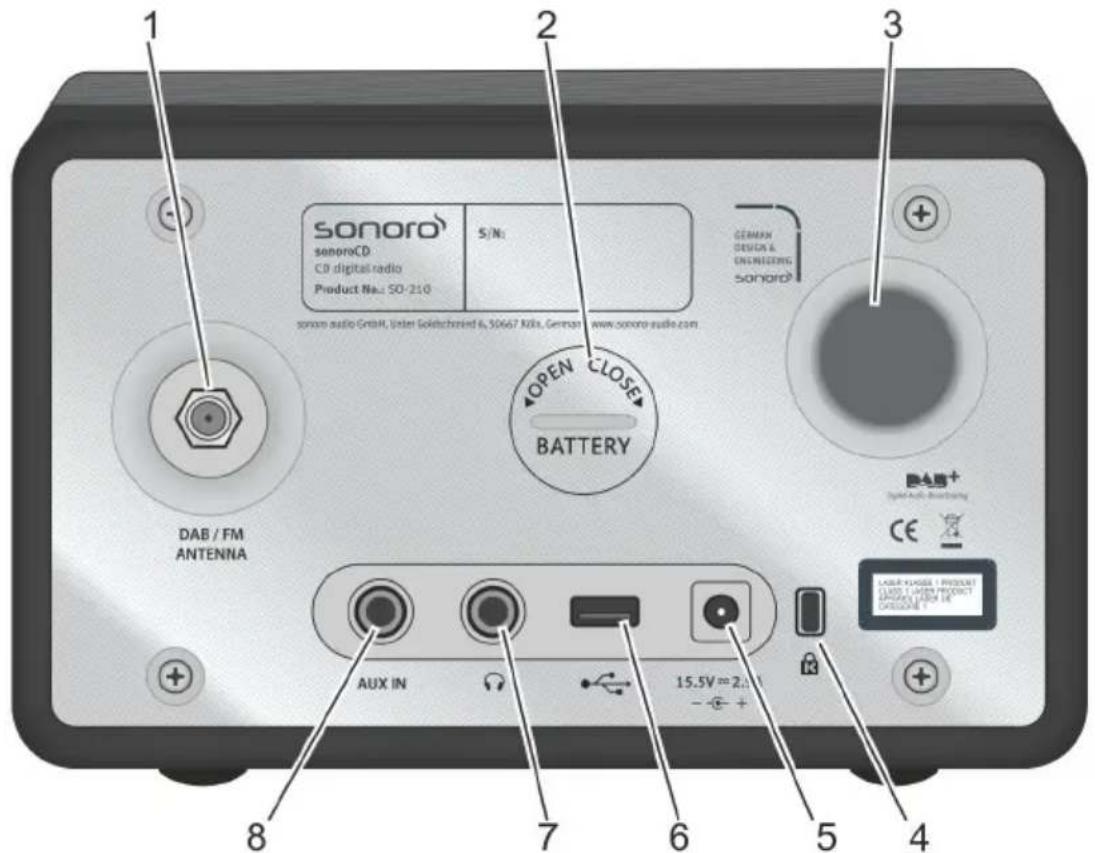
text_image
SONORO sonoroCD CD digital radio Product Nau. SO-210 S/N: SONORO audio GmbH, Listen Goletzschmidt 6, S0667 Kinks, German: www.sonoro-audio.com OPEN CLOSE BATTERY DAB / FM ANTENNA CE Digital Audio Streaming 8 7 6 5 4Fig. 4: sonoroCD rear view
| Item(Fig. 4) | Designation Function | |
| 1 DAB/FM | antenna | Port for the antenna (included) or an external antenna. |
| 2 Battery | compartment | The battery (CR2032 button cell, 3V) ensures continued operation of the clock in case of power failure. |
| 3 Bass reflex | opening | Bass response is enhanced.The distance to the next wall should measure at least 3 cm. |
| 4 Keylock | Anti-theft protection port. | |
| 5 AC adapter | port | 15.5 V connection for the AC adapter (included). |
| 6 USB charger & playback | playback | Port for a USB stick or a USB cable.Port for charging external devices from a USB cable (DC 5 V, 1 A). |
| 7 Headphones | Port for headphones. | |
| 8 AUX IN | Port for external audio devices. | |
Remote control
text_image
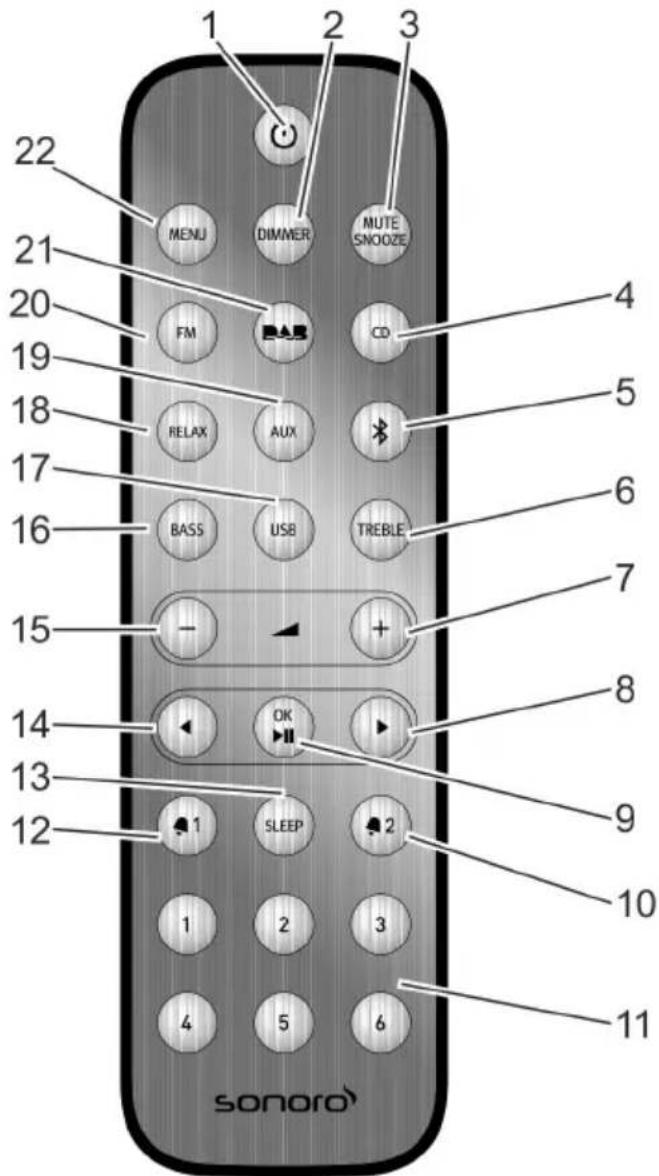
1 2 3 22 MENU DIMMER MUTE SNOOZE 21 FM CD 4 20 RELAX AUX 5 19 BASS USB 6 17 + TREBLE 16 - + 7 15 8 14 OK 9 13 SLEEP 1 2 3 12 4 5 6 sonoroFig. 5: Remote control
| Item(Fig. 5) | Button Function | |
| 1 Standby | Switch the device on/off. | |
| 2 DIMMER | Switch the dimmer on/off. Adjust the dimmer settings. | |
| 3 MUTE | SNOOZE | Press briefly (in playback mode): Switch audio playback (Mute) on/off.Press briefly (in Alarm mode): Start the snooze function (Snooze).Press and hold for a while: [Snooze Setting] menu to set the snooze time. |
| 4 CD Switch | CD playback on/off. Press briefly (in the mode): display ID3 tags. | |
| 5 Bluetooth | Switch Bluetooth on/off. | |
| 6 TREBLE | Adjust the treble. | |
| 7 VOL + All playback modes: Increase the volume. | ||
| 8 Next Channel can and menu navigation | ||
| 9 OK, Play | /Pause Confirm the selected settings in the menu. Play or pause the selected track. | |
| 10 Alarm | 2 [yw3y] | ■ Press: switch the Alarm 2 on/off, stop the alarm.■ Press and hold: set the alarm. |
| 11 Memory | 1-6 Station memory. | |
| 12 Alarm | 1 [ɒkDʒ] | ■ Press: switch the Alarm 1 on/off, stop the alarm.■ Press and hold: set the alarm. |
| 13 SLEEP | ■ Switch the auto disconnect (Sleep Timer) function on/off.■ Press briefly (in Standby mode): The device switches itself on. | |
| 14 Previous | Scan channels and navigate the menus. | |
| 15 VOL | - All playback modes: decrease the volume. | |
| 16 BASS Adjust the bass. | ||
| 17 USB Switch USB on/off. | Switch between artist and track infos (if available). | |
| 18 RELAX Switch the stored | Relax Music on/off. | |
| 19 AUX Switch AUX on/off. | ||
| 20 FM | ■ Switch the FM radio on/off.■ Press briefly (in FM mode): switch RDS on/off. | |
| 21 DAB | [ɪDHY] | ■ Switch DAB radio on/off.■ Press briefly (in DAB mode): switch DAB info. |
| 22 MENU | Open the menu. | |
6 Display
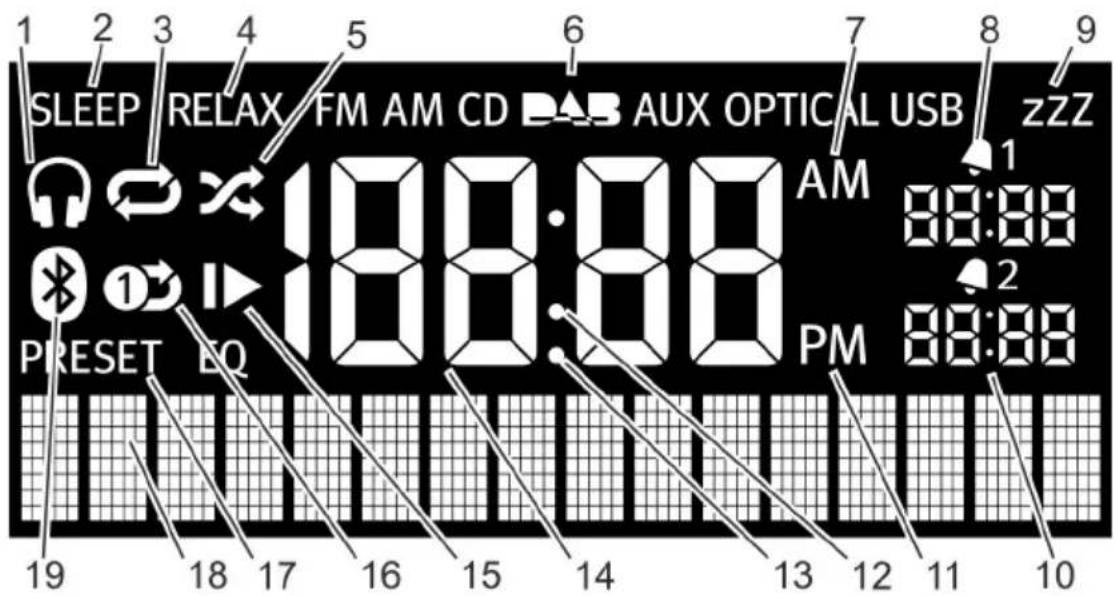
text_image
SLEEP RELAX FM AM CD AUX OPTICAL USB zzz 1 2 3 4 5 6 7 8 9 100:00 AM 00:00 1 PRESET EQ PM 00:00 19 18 17 16 15 14 13 12 11 10Fig. 6: Display
| Item(Fig. 6) | Symbol Function | |
| 1 Headphones | Headphones are connected. | |
| 2 Sleep The Sleep Timer is on. | ||
| 3 Repeat CD: repeat all tracks on the CD. | ||
| 4 Relax The Relax mode is on. | ||
| 5 Shuffle CD: shuffle the play order of individual tracks. | ||
| 6 FM/CD/DAB/AUX/USB | Displays the selected operating mode. | |
| 7 AM Time suffix in the 12-hour setting. | ||
| 8 Alarm 1 | Displays the set Alarm 1 time. | |
| 9 Snooze The Snooze function is on. | ||
| 10 Alarm 2 | Displays the set Alarm 2 time. | |
| 11 PM Time suffix in the 12-hour setting. | ||
| 12 Colon Flashes to indicate seconds. | ||
| 13 Period For the FM frequency range. | ||
| 14 Time Displays the current time. | ||
| 15 Resume CD: resume playback. | ||
| 16 Repeat One CD: repeat one track. | ||
| 17 Preset Station memory | ||
| 18 Lower display section | Display for date, menus, frequencies, etc. | |
| 19 Bluetooth Bluetooth is on. | ||
7 Unpacking the device and commencing operation
Only use connection cables and external devices that comply with the electromagnetic compatibility and insulation quality of this device.
7.1 Unpacking the device
All parts of the device are delivered in a single cardboard box.

WARNING!
Risk of suffocation when you toy with the packaging!
The packaging material presents a choking hazard.
- Keep the packaging material out of reach of children and people who can not estimate the hazard involved.
- Unpack the device and all accessories and check the contents for completeness and integrity.
i
Should you detect any damage, contact your dealer immediately or sonoro support (see 'Contact data' on page 73).
- Place the device in a suitable location and remove the protective film from the display.
i
Observe the safety instructions regarding the ambient conditions ( Chapter 2 'For your own safety' on page 73).
7.2 Inserting the battery
The battery ensures the clock functions in case of power failure.

WARNING!
Risk of injury from improper handling of batteries!
Risk of injury from explosions from improper handling of batteries!
- Never attempt to recharge, open or short-circuit the batteries. Explosion hazard!
- Never damage or warp the batteries.
- Never throw the batteries into an open fire or expose them to high temperatures.
- Kepp batteries out of reach of children. Risk of suffocation!
- Fluid may escape from misuse, which can cause skin irritation. In case of contact:
– Wash off the fluid with plenty of water. - Do not rub your eyes, but flush eyes with plenty of water for 10 minutes and seek immediate medical attention.

NOTICE!
Material damage from improper handling of batteries!
The device may become damaged from improper handling of batteries.
- Do not insert the batteries the wrong way. Observe the correct polarity.
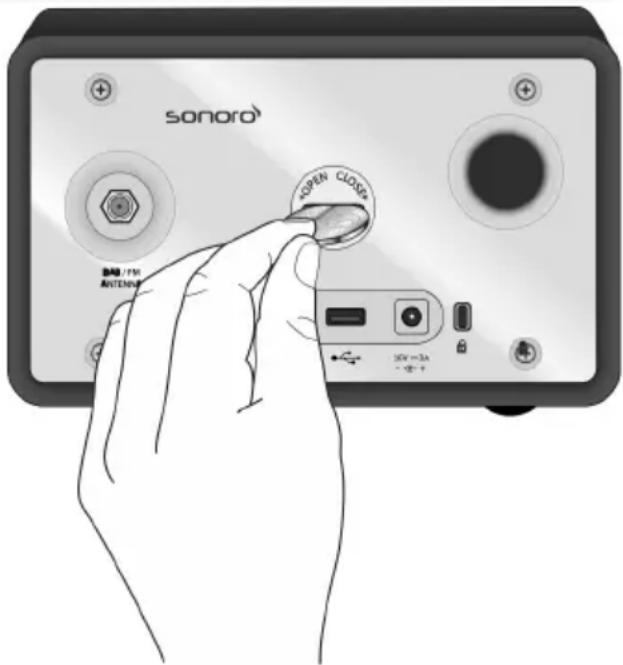
text_image
sonoro OPEN CLOWS 静動 / PM ANTENOP 30V ~ 3A - - +Fig. 7: Inserting the battery
- Open the battery compartment cover on the back of the device with a small coin (Fig. 7).
- Insert the supplied battery with the label side up.
- Insert the battery compartment cover and close with a small coin.
7.3 Connecting the power supply
Power is supplied to the device via the AC adapter (included). The AC adapter with universal adapter must be connected before use.

WARNING!
Risk of injury from incorrect handling!
Risk of electric shock from improper handling of the AC adapter with universal adapter.
- Make sure that the AC adapter and universal adapter are always firmly connected to each other.
- Pull the AC adapter straight out of the socket so that the adapter does not break off the mounting bracket.

NOTICE!
Material damage occurs from an incorrect voltage connection!
Connection values that exceed the maximum allowable values of the device can destroy the device.
- Only use the AC adapter (included).
- Only operate the device if the electrical voltage indicated on the AC adapter matches the voltage of your power outlet.
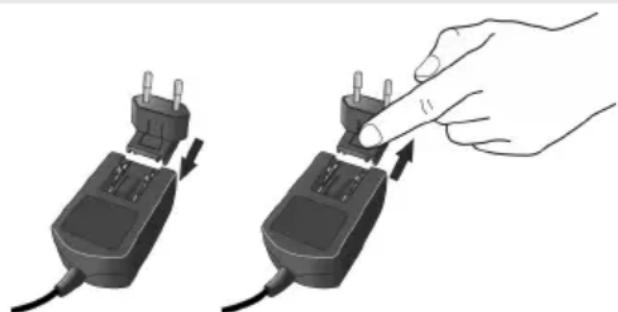
natural_image
Illustration of a hand inserting a plug into two connected electrical plugs (no text or symbols present)Fig. 8: Installing and disconnecting the universal adapter
- Slide the universal adapter onto the AC adapter until it engages (Fig. 8).
- Plug the AC adapter's connector plug on the back of the device into the 15.5 V, 2.9 A DC port.
- Plug the power plug into an electrical outlet.
7.4 Connecting the antenna
The antenna (included) is needed for radio reception in the FM frequency range and for DAB radio stations.
-
Screw the FM/DAB antenna located on the back of the device to the DAB/FM antenna connector.
-
Unfold and align the antenna so that you have the best possible reception.
i
For good FM/DAB radio reception, the two ends of the antenna should form a "T" (dipole) with the connecting cable.
For even better reception, attach the cable to a suitable house antenna.
7.5 Preparing the remote control
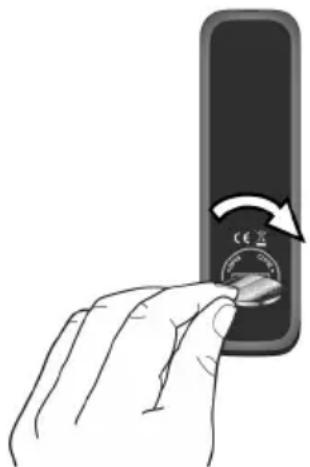
natural_image
Hand holding a remote control device with a rotary dial and circular buttons (no text or symbols visible)Fig. 9: Insert the battery into the remote control.
- Open the battery compartment on the remote control (Fig. 9).
- Insert the supplied button cell (CR2032, 3 V) with the label side (+) up.
- Close the battery compartment.
7.6 Connecting the headphones
The headphones can be connected to the device with the 3.5 mm stereo jacks (not included in the package).

WARNING!
Risk of injury from improper headphone use!
Improper use of headphones can lead to serious injuries and health hazards.
- Do not set the volume too high when using the headphones.
-
Turn the click wheel to the left to set the volume to minimum.
-
Insert the headset jack into the headset port at the back of the device.
- Slowly turn the click wheel to the right to increase the volume.
8 Setting the basic functions
The individual menus let you select the functions and settings of the device.
8.1 Switching on the device for the first time
After you have switched the device on for the first time, the LCD display shows the clock display and the [Tune to FM RDS station to set time & date]message.
i
In FM/DAB mode, time and date are set automatically as long as this has not been disabled.
8.2 The Standby menu
You can adjust the following settings in the Standby menu:
■ Manually set the time.
■ Manually set the date.
■ Switch on/off the date on the display.
The procedure for setting the individual functions is the same.
Setting the time manually

text_image
10:45 Set TimeFig. 10: Setting the time
- Press the [MENU] button on the device or the remote control in Standby mode.
⇒ The display shows the [Set Time] menu (Fig. 10).
- Press the click wheel to set the hours.
→ The hour display flashes.
-
Turn the click wheel to set the hours.
-
Press the click wheel to confirm the setting.
→ The minute display flashes.
- Turn the click wheel to set the minutes.
- Press the click wheel to confirm the setting.
→ The time is set.
i
Use the [Next] or [Previous] button to switch between the hours and minutes display.
i
After 10 seconds of inactivity, the device automatically goes into Standby mode without saving the settings.
Setting the date manually

text_image
10:45 Set DateFig. 11: Setting the date
- Press the [MENU] button in Standby mode on the device or the remote control.
⇒ The display shows the [Set Time] menu (Fig. 10).
- Press the [Next] button.
⇒ The display shows the [Set Date] menu (Fig. 11).
- Press the click wheel.
→ You can now set the date according to the same procedure as described in ☑ 'Setting the time manually' on page 84.
Switching on/off the date

text_image
10:45 Display DateFig. 12: Switching on/off the date
- Press the [MENU] button of the device or the remote control in Standby mode.
⇒ The display shows the [Set Time] menu (Fig. 10).
- Press the [Next] button twice.
⇒ The display shows the [Date] menu (Fig. 12).
- Press the click wheel.
δ You can now switch the date on or off.
8.3 The Settings menu
In operating mode, you can make the following configurations in the [Settings] menu:
n Set the time format.
n Set the date format.
n Set the automatic time/date update function.
n Set the display language.
n Activate/Deactivate Demo Sound.
n Reset the device to the factory settings.
To adjust the settings, proceed as follows:
-
Press the [MENU] button on the front of the device or the remote control to enter the corresponding submenu.
-
Press the [Next] or [Previous] button or turn the click wheel to scroll through the individual menu items.
-
To open the selected menu item, briefly press the click wheel or the [OK] button on the remote control.
-
To exit the menu, briefly press the [MENU] button on the device or on the remote control
i
If you do not make any further entries, the menu will close and the display switches to the initial mode.
Setting the time format

text_image
10:45 AM PMFig. 13: Setting the time format
You can choose between the 24-hour and 12-hour formats. In the 12-hour format, the time of day is indicated by [AM] and [PM].
Setting the date format
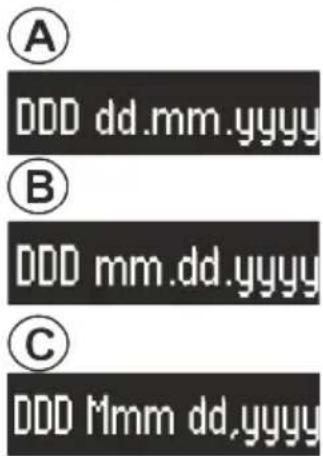
text_image
A DDD dd.mm.yyyy B DDD mm.dd.yyyy C DDD Mmm dd.yyyyFig. 14: Setting the date format
You can set three different date formats (Fig. 14/A, B and C) as well as the current day. The configuration options are:
n A: Current day, month, year.
n B: Current month, day, year.
n C: Current month (in words), day, year.
Setting the automatic time/date update function

text_image
10:45 Clock updateFig. 15: Setting the automatic update function
You can select the automatic update function in the [Set Time] submenu (Fig. 15). Switching on this function automatically synchronizes the time and date in the FM radio and DAB radio operating modes.
Setting the display language

text_image
10:45 LanguageFig. 16: Setting the language
You can set the menu language and playback display (Fig. 16). The following languages are available:
n English and
n German.
Switching on/off Demo Sound

text_image
10:45 Demo MusicFig. 17: Switching on/off Demo Sound
The Demo Sound function can be switched on or off (Fig. 17).
Resetting the device to the factory setting

text_image
10:45 ResetFig. 18: Resetting to the factory setting
If necessary, you can reset all specified settings, such as language and time formats and saved stations, to the default factory setting (Fig. 18).
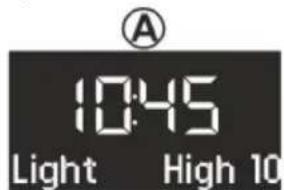
8.4 Setting the dimmer
You can use the dimmer setting to adjust the display brightness.
text_image
A 10:45 Light High 10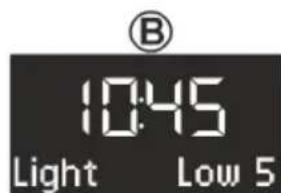
text_image
⑧ 10:45 Light Low 5Fig. 19: Setting the dimmer
- Press [DIMMER] button on the top of the device or the remote control for approx. 3 seconds.
⇒ [Light High] appears in the display (Fig. 19/A).
-
Adjust the brightness level from 8–15 by turning the click wheel or pressing the [Next] or [Previous] buttons.
-
Confirm the setting by pressing the click wheel.
[Light Low] appears in the display (Fig. 19/B).
-
Adjust the brightness level from 1–8 by turning the click wheel or pressing the [Next] or [Previous] buttons.
-
Confirm the setting by pressing the click wheel.
→ The initial screen appears.
i
The backlight is adjusted automatically depending on the ambient lighting.
8.5 Setting the sound
The audio playback's sound can be adjusted via the bass and treble settings.

text_image
A 10:45 Bass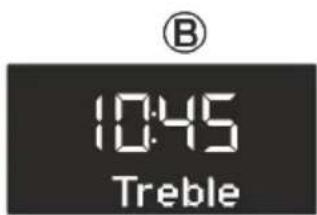
text_image
⑧ 10:45 TrebleFig. 20: Setting the sound
-
Go to the corresponding submenu or press the corresponding button on the remote control.
-
To adjust the bass, select [Bass] (Fig. 20/A) and turn the click wheel. To adjust the treble, select [Treble] (Fig. 20/B) and turn the click wheel.
i
Alternatively, you can also use the [Next] or [Previous] buttons to adjust the values.
- Press the click wheel or wait 10 seconds to confirm the setting.
8.6 Setting the Sleep Timer
The Sleep Timer is an automatic power-off function that switches the device to Standby mode after the specified time has expired.
Setting the Sleep Timer
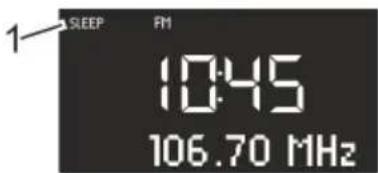
text_image
SLEEP FM 10:45 106.70 MHzFig. 21: Switching on/off the Sleep Timer
- Press [SLEEP] button on the top of the device or the remote control.
⇒ The [SLEEP] symbol appears in the display (Fig. 21/1).
Switching off the Sleep Timer
- To switch off the sleep timer, press the [SLEEP] button again.
⇒ The symbol on the display is hidden.
i
If the device was switched off by the Sleep Timer, it will start in the last heard mode when you turn it on again.
Setting the time interval for the Sleep Timer

text_image
SLEEP FM 10:45 Sleep 30minFig. 22: Setting the time interval for the Sleep Timer
- Hold down the[SLEEP] button on the top of the device or the remote control for a while.
⇒ The Sleep Timer appears (Fig. 22) and the Sleep symbol flashes on the display (Fig. 22/1).
- Turn the click wheel to select the desired time interval length (Fig. 22/2). The maximum time interval is 120 minutes.
i
Alternatively, you can also use the [Next] or [Previous] buttons to adjust the values.
- Press the click wheel to confirm the setting.
When the specified time expires, playback gradually fades out.
9 The wake-up function
You can use the radio to wake up with FM/DAB radio, a CD, Relax Music or stored ringtones.
All settings are made by pressing the [Alarm 1] or [Alarm 2] button on the front of the device or the remote control for a while.
The alarm functions can also be set in Standby mode of the device.
The alarm Setup menu is structured as follows:
'Set the Wake-Up Time → Set the Alarm Source
→ Set the Alarm Volume
→ Set the alarm repeat frequency → End'
i
If you do not enter any information for approx. 10 seconds when setting the alarm, the setting is terminated without saving it.
9.1 Setting the alarm time
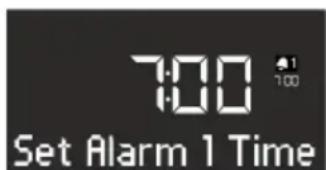
text_image
7:00 Set Alarm 1 TimeFig. 23: Setting the Alarm 1
- Keep the [Alarm 1] or [Alarm 2] button pressed.
⇒ The submenu for adjusting the alarm time is displayed (Fig. 23).
-
Set the hour by turning the click wheel.
-
Press the click wheel to confirm the hours.
→ Minutes are displayed.
-
Set the minutes by turning the click wheel.
-
Press the click wheel to confirm the entry.
i
Use the [Next] and [Previous] buttons to switch between the setting for hours and minutes.
9.2 Setting the alarm source
After you have set and confirmed the wake-up time, you can choose the source for the alarm (Fig. 24).

text_image
7:00 1:00 FM RadioFig. 24: Setting the alarm source
- Select the desired medium you want to wake up with by turning the click wheel and pressing the [MODE], [Next] or [Previous] buttons.
| FM | Select an FM station preset from the station memory that you wish to start the radio with and wake up to. |
| DAB Select a D | DAB station preset from the station memory that you wish to start the radio with and wake up to. |
| CD Select a track | ck from the CD you wish to start the radio with and wake up to. |
| Relax Music Select | a Relax Music sound from the memory you wish to start the radio with and wake up to. |
| Ringtone Select | a ringtone from the memory you wish to start the radio with and wake up to. |
- Press the click wheel to confirm the setting.
The source is displayed on the upper part of the display and the selection is displayed on the left hand side.
9.3 Setting the alarm volume
After you have set and confirmed the alarm source, you can set the alarm volume (Fig. 25).

text_image
7:00 Alarm Volume 10Fig. 25: Setting the alarm volume
-
Select the desired volume by turning the click wheel or pressing the [Next] or [Previous] buttons.
-
Press the click wheel to confirm the setting.
i
The alarm audio playback always starts with the minimum volume and gradually increases to the specified volume level.
9.4 Setting the alarm repeat frequency
After you have set and confirmed the alarm volume, you can set the alarm repeat frequency (Fig. 26).

text_image
7:00 WeekdaysFig. 26: Setting the Snooze function
-
Select the desired interval by turning the click wheel or pressing the [Next] or [Previous] buttons.
-
Press the click wheel to confirm the setting.
9.5 Switching on/off the alarm clock
Switching on the alarm clock
- To switch on the alarm clock, briefly press the [Alarm 1] or the [Alarm 2] button on the front of the device or the remote control.
Switching off the alarm clock
- To switch off the alarm clock, briefly press the [Alarm 1] or [Alarm 2] button again.
9.6 Switch off the alarm clock after the alarm sounds
- To switch off the alarm, press one of the following buttons:
■ [Alarm 1]
■ [Alarm 2]
- Click wheel
■ [Standby]
⇒ The alarm will remain activated for the next day. The non-recurring alarm setting is an exception.
- Press [Snooze] button on the top of the device or the remote control to activate the Snooze function. The remaining snooze time is displayed. After the set time expires, the alarm will sound again.
9.7 Setting the Snooze function
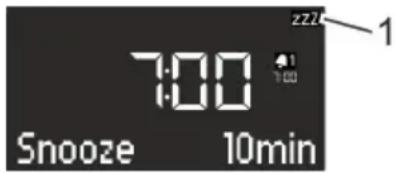
text_image
7:00 Snooze 10minFig. 27: Setting the Snooze function
- Briefly press the [SNOOZE] button in Standby mode. Press and hold the [SNOOZE] button in an operating mode until the Snooze setting appears (Fig. 27).
⇒ The Snooze symbol (Fig. 27/1) appears on the display.
- Turn the click wheel to set the snooze time.
i
Alternatively, you can also use the [Next] or [Previous] buttons to set the snooze time.
- Press the click wheel to confirm the entry.
10 General audio playback functions
To playback audio from different media, select the relevant mode using the [MODE] button on the front of the device or select the relevant mode on the remote control.
10.1 Setting the volume
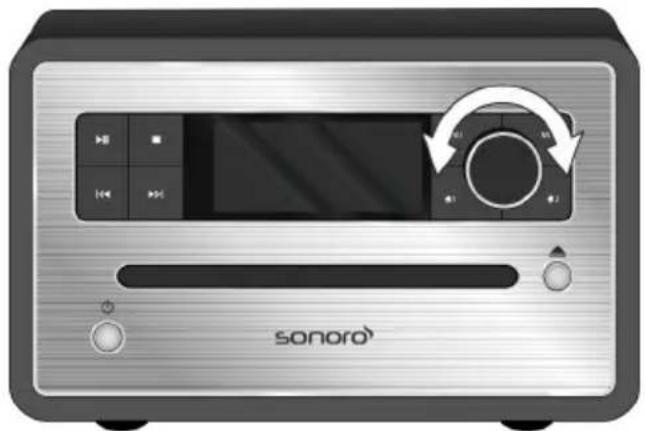
natural_image
Front view of a sonoro TV studio computer with playback controls and a digital screen (no visible text or symbols on the device body)Fig. 28: Setting the volume
- Turn the click wheel (Fig. 28) to increase or decrease the volume.
A volume control is shown on the display.
10.2 Muting the audio playback
Mute

text_image
10:45 Volume MuteFig. 29: Mute
- In playback mode, briefly press the [MUTE] button on the top of the device to turn off the sound during playback. Alternatively, you can also press the [MUTE] button on the remote control.
⇒ The [Volume Mute] Fig. 29 text appears on the display
Switching on the sound
- To turn the sound back on, press the [MUTE] button on the device or the remote control again.
→ The initial screen is displayed.
10.3 Selecting a playback mode
Select the desired mode to playback audio from different media or external devices.

text_image
CD 10:45 CDFig. 30: Selecting a playback mode
-
Switch on the device.
-
Press the [MODE] button on the front of the device or the desired mode on the remote control.
⇒ The selected mode is displayed (Fig. 30).
i
Alternatively, you can also rotate the click wheel after pressing the [MODE] button to toggle through the different modes. Confirm the mode by pressing the click wheel.
11 Radio playback
After you have selected radio playback from FM-DAB, the FM or DAB symbol appears on the display. In radio mode, the display shows the following information:
■ Mode: FM or DAB.
■ Stored programme channel, if the radio station is stored in the programme memory.
■ Station name, if the station transmits RDS text.
■ RDS text transmitted by the station, if the station transmits RDS text.
i
RDS is only available for stations in the FM frequency range and only if the corresponding station transmits RDS data.
If the station does not broadcast RDS text, then the frequency is displayed instead of the station name.
11.1 FM Radio
Searching an FM station
Automatic tuning
Prerequisite:
The DAM/FM antenna is connected.

text_image
FH 106.70 Auto TuningFig. 31: Automatic tuning
- Press and hold the [Next] or [Previous] button in FM playback mode to activate the automatic station search function.
⇒ The display shows the [Auto Tuning] (Fig. 31) text.
Manual tuning
Prerequisite:
The DAM/FM antenna is connected.
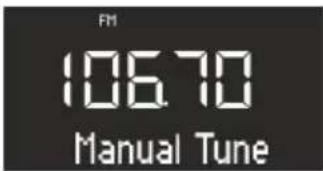
text_image
FM 106.70 Manual TuneFig. 32: Manual tuning
- Press and hold the click wheel to activate the manual station search function.
⇒ The display shows the [Manual Tune] (Fig. 32) text.
-
Turn the click wheel or press the [Next] or [Previous] buttons to change the frequency range.
-
Press the click wheel to confirm your selection.
Automatic tuning
The automatic station search function automatically creates and saves a station list with up to 30 stations. The stations are sorted according to the strongest reception.
Prerequisite:
The DAM/FM antenna is connected.
text_image
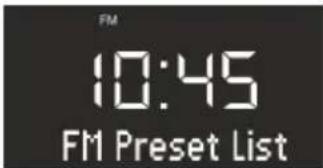
FM 10:45 FM Preset ListFig. 33: FM preset list
- Press the [Menu]button.
⇒ The display shows the [FM Preset List] (Fig. 33) text.
- Press the [Next] button.
⇒ The display shows the [FM Auto Search] text.
- Press the click wheel.
⇒ The display shows the [Auto Search YES] text.
- Press the click wheel again.
⇒ The automatic search function is started. After the search is complete, the device will jump to the first station on the list.
Storing FM stations
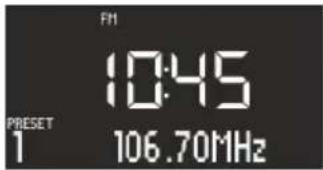
text_image
FN1 10:45 PRESET 1 106.70MHzFig. 34: Storing FM stations
-
Set the radio station as described in ☑ 'Automatic tuning' on page 89 or ☑ 'Manual tuning' on page 90.
-
Press and hold one of the station preset buttons on top of the device or the remote control.
⇒ The station preset is displayed.
i
You can save up to 6 FM stations.
Retrieving saved FM stations
- Briefly press one of the station preset buttons on top of the device or the remote control.
→ The selected station is played.
11.2 DAB radio
Searching a DAB station
Automatic tuning
Prerequisite:
The DAM/FM antenna is connected.
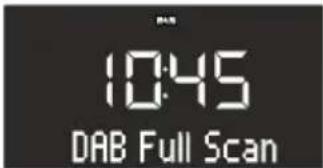
text_image
RAS 10:45 DAB Full ScanFig. 35: Automatically searching a DAB station
- Press the [Menu] button in DAB playback mode.
⇒ [DAB Full Scan] (Fig. 35) appears in the display.
- Press the click wheel on the device or the [OK] button on the remote control to activate.
⇒ The device will now search for available radio stations and play back the first available station.
Manual tuning
Prerequisite:
The DAM/FM antenna is connected.
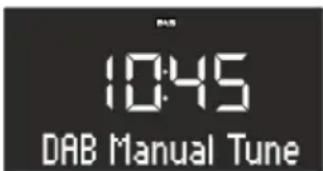
text_image
10:45 DAB Manual TuneFig. 36: Manually searching a DAB station
- Press the [Menu] button in DAB playback mode.
- Press the [Next] button.
[DAB Manual Tune] appears in the display (Fig. 36). - Press the click wheel on the device or the [OK] button on the remote control.
- Turn the click wheel or press the [Next] or [Previous] buttons to change the frequency range.
- Press the click wheel to confirm your selection.
Removing inactive stations – Prune list Prerequisite:
The DAB station list created using the DAB full scan function is out of date (e. g., after a change of address).

text_image
10:45 Prune listFig. 37: Deleting inactive DAB stations
-
Press the [Menu] button in DAB playback mode.
→ [Prune list] (Fig. 37) appears in the display. -
Press the click wheel to confirm your selection.

text_image
10:45 PruningFig. 38: Pruning
- Press the click wheel again to select and delete inactive DAB stations.
⇒ Inactive DAB stations are deleted. In the meantime, [Pruning] is displayed (Fig. 38).
Storing a DAB station
- To store DAB stations, proceed as described in Chapter 11.1.2 'Storing FM stations' on page 90.
i
You can store up to 6 DAB stations.
Retrieving stored DAB stations
- To retrieve a stored DAB station, proceed as described in Chapter 11.1.3 'Retrieving saved FM stations' on page 90.
→ The selected station is played.
Retrieving DAB info
In DAB mode, you can call up information on the station, programme, etc. The information is displayed in the following order:
■ Station name (starting point)
- Broadcaster
■ DLS ("Dynamic Label Service" programme-related information, such as artist, track, etc.)
■ Programme type (e. g. Sport)
■ Station frequency
■ Signal quality
The device is in DAB mode. The display shows the station name.
- To retrieve the different DAB information, press the [STOP] button on the device or on the remote control in DAB mode.
⇒ The display shows the [Broadcaster] text.
- Press the [Stop] button again.
⇒ The display shows the [DLS] text.
- Proceed accordingly to retrieve the remaining DAB information.
Setting the DRC
3 different settings are available for the Dynamic Range Compression (DRC) function:
The device is in DAB mode.
- Press the [Menu]button.
→ The display shows the [DAB Full Scan] text.
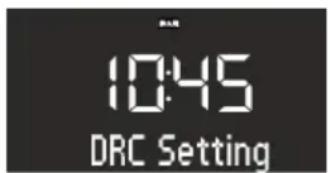
text_image
10:45 DRC SettingFig. 39: Setting the DRC
- Press the [Next] button until the [DRC Setting] text is displayed.
- Press the click wheel on the device or the [OK] button on the remote control.
- Select the desired setting using the [Next] or [Previous] button.
- Confirm the setting by pressing the click wheel.
12 CD playback

NOTICE!
Material damage from improper operation!
Do not insert any recording media that deviate from the standard CD format (e. g. mini-discs, etc.) into the CD player. These may not be played and ejected correctly. Insert only one disc at a time into the CD player.
- Switch on the device.
- Insert the CD into the CD slot with the label side up.
⇒ The CD player will automatically pull in the CD and start playback.
i
If the device is in a different mode, it will automatically switch to CD mode.
In CD mode, the display shows the following information:
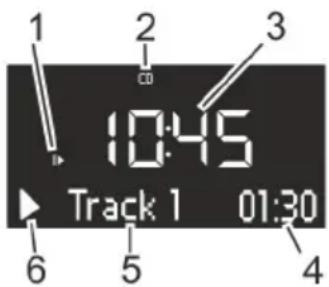
text_image
1 2 3 10:45 Track 1 01:30 6 5 4Fig. 40: Display in CD mode
1 Playback sequence (Repeat, Shuffle, CD Resume)
2 CD mode
3 Time
4 Elapsed time in minutes
5 Track number
6 Playback status (Play/Pause)
■ To pause CD playback, press [Play/Pause].
■ To resume CD playback, press [Play/Pause].
■ To switch to the next track, press [Next] once.
■ To fast forward through a track, press and hold down [Next].
■ To switch to the previous track, press [Previous].
■ To fast reverse through a track, press and hold down [Previous].
■ To stop CD playback, press [Stop].
■ To eject the CD, press [Eject].
Adjusting CD playback
You can choose different playback sequences to play tracks on a CD.
- Press the [Menu] button to open the CD menu. This includes the following functions:
■ Repeat a single track
■ Repeat all tracks on the CD
■ Shuffle
CD Resume
Set bass
Set treble
Settings
- Press the click wheel to select the function.
Repeating a single track
The current track is played repeatedly. This function is terminated when you switch modes or eject the disc.
Repeating all tracks
All tracks on the CD are played repeatedly. This function is terminated when you switch modes or eject the disc.
Shuffle
All tracks on the CD are played in random order. This also happens when you press [Next] or [Previous]. This function is terminated when you switch modes or eject the disc.
CD Resume
The CD will resume playback from the last played position, even if you have switched modes or switch the device to Standby mode. This function is terminated when you eject the CD. This function is intended for audible books, for example.
13 Bluetooth playback
Mobile phones and other Bluetooth-enabled devices can be connected to the radio via Bluetooth.
i
Use the manual of your mobile phone or your device for help.

text_image
10:45 BluetoothFig. 41: Setting the Bluetooth mode
-
Switch on the device.
-
Press the [MODE] button on the front of the device or the [Bluetooth] button on the remote control.
⇒ The Bluetooth mode is now active (Fig. 41).
i
Alternatively, you can also use the [Next] or [Previous] buttons to set the mode.
- Connect your mobile phone or your device to the radio via Bluetooth.
i
Ener code '0000'.
i
The radio can store up to 8 devices and connects itself automatically with previously configured devices if Bluetooth is enabled.
13.1 Connecting Bluetooth devices

text_image
10:45 SearchingFig. 42: Searching for Bluetooth
-
The Bluetooth symbol will flash on the display and the [Searching] (Fig. 42) text appears.
-
After connecting, the display permanently shows the [Bluetooth] text.
13.2 Playing music via Bluetooth
Starting playback
- Press [Play] on the front of the device or on the remote control to start playback.
Pausing playback
- To pause playback, press [Play] again.
14 AUX playback
You can connect and play additional audio devices to the radio via the AUX port on the back of the device.
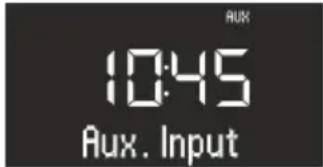
text_image
AUX 10:45 Aux. InputFig. 43: Activating AUX Playback
-
Switch on the device.
-
Press the [MODE] button and select [AUX] mode or press the [AUX] button on the remote control.
i
Alternatively, you can also use the [Next] or [Previous] buttons or the click wheel to select the mode.
⇒ The AUX symbol (Fig. 43) appears on the display
- Turn on the external device and start playback on the external device.
i
You cannot operate an external device using the buttons on the radio.
15 USB playback
You can connect additional devices to the radio and play music through the USB Charge & Playback port on the back.
i
The MP3 and WMA formats can be played.

text_image
USB 10:45 USB DeviceFig. 44: Set USB playback
-
Switch on the device.
-
Press the [MODE] button and select the [USB] mode or press the [USB] button on the remote control.
i
Alternatively, you can also use the [Next] or [Previous] buttons and the click wheel to select the mode.
⇒ The USB symbol appears on the display (Fig. 44).
- Connect an external USB device to the radio.
⇒ The [Search] text appears on the display
- Press the [Play/Pause] button to commence playback.
i
By pressing the [USB button] on the remote control, you can edit the ID3 metadata, if available. The sequence is:
'track → artist → album → elapsed time'
- Press the [Play/Pause] button to stop playback.
Selecting MP3 folders
-
Press the [Preset 1] button to select the previous MP3 folder.
-
Press the [Preset 2] button to select the next MP3 folder.
Stopping USB playback
- Press the [Stop] button on the front of the device to pause USB playback.
16 Relax Music playback

text_image
Relax 10:45 Ocean SurfFig. 45: Setting Relax Music
-
Switch on the device.
-
Press the [MODE] button and select the [Relax] mode. Alternatively, you can also press the [RELAX] button on the remote control.
i
Alternatively, you can also use the [Next] or [Previous] buttons and the click wheel to select the mode.
⇒ The Relax Music menu appears on the display (Fig. 45).
- Press one of the memory keys or the [Next] or [Previous] button to select music:
Ocean Surf
Whales
Birds
Rain
Wind chimes
■ Fireplace
17 Demo Sound playback
Demo Sound can be played in Standby mode to demonstrate the device in a shop, for example.
Activating Demo Sound mode
- Press and hold the click wheel for approx. 3 seconds.
→ Demo Sound mode is activated.
- Press the 1–6 memory keys located on the top of the device or the remote control to select a Demo track.
⇒ The Demo Sound track is displayed.
i
The following buttons are active:
- Play/Pause.
- Mute.
Exiting Demo Sound mode
- Press and hold the [Standby] button or press and hold the click wheel for approx. 3 seconds to exit Demo Sound mode.
18 Troubleshooting
Malfunctions may occur with any electrical equipment. This must not always involve a defect of the device. Therefore, check the following table to see if you can eliminate the problem yourself.
| Malfunction Possible cause Elimination | ||
| Device does not turn on AC adapter | with universal adapter is not properly connected | Properly connect the AC adapter with universal adapter (see Chapter 7.3 'Connecting the power supply' on page 83). |
| No sound Volume is set to minimum | Increase the volume (see | Chapter 10.1 'Setting the volume' on page 89). |
| Sound is turned off Switch on the sound | (see Chapter 10.2 'Muting the audio playback' on page 89). | |
| Headphones are connected Pull the headphones out of the jack. | ||
| Another mode is set Set the correct mode (see Chapter 10.3 'Selecting a play-back mode' on page 89). | ||
| CD playback does not start CD format | is not compatible Insert a different CD into the CD slot. | |
| CD is dirty Clean the CD. | ||
| CD is damaged Insert a different CD into the CD slot. | ||
| CD is upside down in the disc tray Re move the CD and insert it correctly into the disc tray. | ||
| USB playback does not start USB device | ce is not plugged in Insert the USB device into the port on the back of the device (see Chapter 15 'USB playback' on page 93). | |
| USB device is not compatible Check if your USB device is compatible with the radio. | ||
| USB device has no legible audio files. | Check the files on the USB device. | |
| No or poor Bluetooth connection Malfunctions due to other radio transmitters or devices | Increase the distance between the radio and your TV. | |
| Ensure that the current software version is installed on your external Bluetooth device. | ||
| Device does not respond | Error in the device | Switch the device off and then on again. |
| Poor FM/DAB reception FM/DAB antenna | enna is not properly positioned | Change the position of the FM/DAB antenna. |
| Remote control does not work or only sporadically | Distance is too greatBattery is empty Replace the battery | Decrease the distance between the remote control and the device.of your remote control (see ➔ Chapter 7.5 ‘Preparing the remote control’ on page 83). |
| Malfunctions due to other radio transmitters or devices | Increase the distance between the source of interference and the radio. Plug the device into another socket so that the source of interference and the radio are connected to different branch currents. | |
| Alarm does not work Alarm is not switched on | Switch on the alarm (see ➔ Chapter 9.5 ‘Switching on/off the alarm clock’ on page 88). | |
| Alarm volume is set to minimum Increase the volume (see ➔ Chapter 9.3 ‘Setting the alarm volume’ on page 88). | ||
| Headphones are connected Pull the headphones out of the jack. | ||
19 Cleaning

NOTICE!
Material damage from improper cleaning!
Only clean the device from the outside using a dry, soft cloth. Never use abrasive or solvent-based cleaning agents as these may damage the surface of the device.
20 Technical Data
| Specification Value | |
| Dimensions (WxDxH) approx. 210 | x 257 x 140 mm |
| Weight approx. 3.2 kg | |
| Reception range FM 87.5 MHz – 108 MHz | |
| Reception range DAB/DAB+ 174.9 | 28 MHz – 239.2 MHz |
| Tuning range (FM) 50 KHz | |
| AC adapter, power Model: S048C | M1550290Input: 100 – 240 V ~50/60 HzOutput: 15.5 V, DC, 2.9 A |
| Bluetooth Version: 3.0 (EDR) | Profile: AVRCP 1.0, A2DP 1.0 |
| AUX-IN Connection: 3.5 mm jack | Sensitivity: 300 mV |
| Batteries Lithium battery: 3 V, type CR2032 (button cell) | |
| Laser Class 1 | |
| Ports Headphones, AUX-IN, USB | (loading and playing USB) |
| CD Playback formats: Audio CD, M | MP3 CD, WMA CD, CD-R* and CD-RW**Playback depends on the CD and the recording quality) |
| USB Playback formats: MP3, WMA | Output: DC 5V, 1ACompatible systems: FAT 16, FAT 32 (not compatible with NTFS systems)Maximum capacity of the USB device: 32 GBMaximum supported file size: < 2 GBMaximum supported tracks: 999Supports ID3 tag to display track/artist |
21 Disposal

natural_image
Symbol of a trash bin crossed with no text or labelsobtained at your municipality, local waste disposal company and the store where you purchased this device. Proper disposal of old devices prevents environmental damage and does not jeopardise your health.
Batteries/rechargeable batteries may contain toxic heavy metals and are subject to hazardous waste treatment. Return the batteries/rechargeable batteries to a municipal collection point or have them disposed of by a specialist company.
Fig. 46: Do not dispose of in household waste Devices that are marked with this symbol should not be disposed of in household waste but must be returned to a collection point for recycling of electrical and electrotechnical devices. Information regarding the disposal of old equipment can be
22 Declaration of Conformity
Declaration of Conformity

text_image
CEFig. 47: CE mark
Manufacturer: sonoro audio GmbH
We hereby declare that sonoroCD meets the essential requirements of the EMC Directive 2004/108/EC, the Low Voltage Directive 2006/95/EC, the R & TTE Directive 1999/5/EC and the Ecodesign Directive 2009/125/EC, including changes valid at the time of the declaration, due to its design, engineering and build.
23 Warranty
When submitting warranty claims, the following is valid — without restricting — your legal rights:
■ Warranty claims can only be asserted within a period of max. 2 years (1 year in North America and Australia), calculated from the date of purchase.
■ sonoro audio GmbH shall, at its own discretion, repair or replace the device free of charge any defects caused by material or manufacturing defects within the warranty period.
In case of a complaint, please contact our customer service department. You can find contact details ( ✉ 'Contact data' on page 73) or at www.sonoro.de.
No new warranty period begins following repair or replacement of the device. The warranty period of 2 years (1 year in North America and Australia) from date of purchase remains applicable.
■ Excluded from the warranty are batteries, damage caused by improper use, normal wear and tear, as well as defects which only minimally affect the value or usability of the device. The warranty also expires for any modifications not made by our authorised service centre.
natural_image
Black and white photo of a Sanoro microwave oven with control panel and speaker grille (no visible text or symbols on main body)Table des matières
1 Introduction.... 103
natural_image
Illustration of a hand inserting a plug into two connected electrical plugs (no text or symbols)natural_image
Hand holding a remote control panel with a circular dial and an arrow indicating rotation (no text or symbols)text_image
10:45 Set Datetext_image
10:45 AM PMtext_image
A 10:45 Light High 10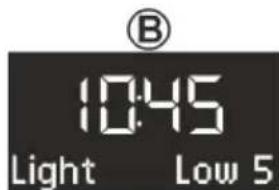
text_image
⑧ 10:45 Light Low 5text_image
10:45 BassB

text_image
10:45 Trebletext_image
1 SLEEP FM 10:45 106.70 MHzFig. 21: Activation/désactivation de la fonction sleep timer
text_image
SLEEP FM 10:45 Sleep 30mintext_image
7:00 Weekdaystext_image
7:00 Snooze 10min 1 2zz 1natural_image
Front view of a sonoro audio recording device with playback controls and a rotary knob (no text or symbols on the device body)Fig. 28: Réglage du volume sonore
text_image
FH 106.70 Auto Tuningtext_image
FM 10:45 FM Preset Listtext_image
BAR 10:45 PruningFig. 38: Pruning
text_image
1 2 3 10:45 Track 1 01:30 6 5 4Fig. 40: Affichage en mode CD
natural_image
Symbol of a trash bin crossed with no text or labelsnatural_image
Black and white photo of a Sanoro microwave oven with control panel and speaker grille (no visible text or symbols on main body)

Bluetooth®
Índice de contenido
natural_image
Illustration of a hand inserting a plug into two connected electrical plugs (no text or symbols)natural_image
Hand pressing a button on a remote control device (no text or symbols visible)text_image
10:45 Set Datetext_image
10:45 AM PMtext_image
A 10:45 Light High 10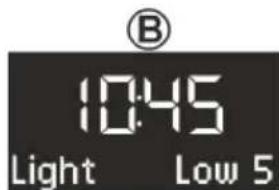
text_image
⑧ 10:45 Light Low 5Fig. 19: Ajuste de Dimmer
text_image
10:45 BassB

text_image
10:45 Trebletext_image
SLEEP FM 10:45 106.70 MHztext_image
SLEEP FM 10:45 Sleep 30mintext_image
7:00 Weekdaystext_image
7:00 Snooze 10min 1 2ZZ 1Fig. 27: Ajuste de Snooze
natural_image
Front view of a sonoro audio recording device with playback controls and a circular dial (no text or symbols on the device body)Fig. 28: Ajuste de volumen
text_image
FH 106.70 Auto Tuningtext_image
FM 10:45 FM Preset Listtext_image
1 2 3 10:45 Track 1 01:30 6 5 4natural_image
Symbol of a trash bin crossed with no text or labelsnatural_image
Black and white photo of a Sanoro microwave oven with control panel and speaker grille (no visible text or symbols on main body)

Bluetooth®
Indice
text_image
SLEEP RELAX FM AM CD AUX OPTICAL USB zzzz 18:00 AM 88:88 19 PRESET EQ PM 88:88Fig. 6: Display
natural_image
Illustration of two hands inserting a plug into a terminal socket, showing pin insertion (no text or symbols)natural_image
Hand holding a remote control panel with a circular dial and an arrow indicating rotation (no text or symbols)[Tune to FM RDS station to set time & date].
i
text_image
10:45 Set Datetext_image
10:45 AM PMtext_image
A 10:45 Light High 10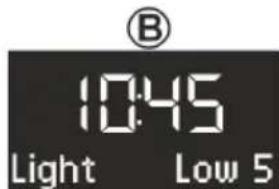
text_image
⑧ 10:45 Light Low 5text_image
A 10:45 Bass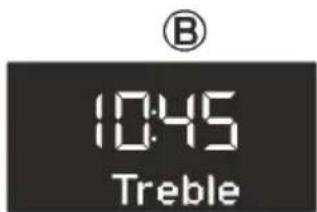
text_image
⑧ 10:45 Trebletext_image
1 SLEEP FM 10:45 106.70 MHztext_image
SLEEP FM 10:45 Sleep 30mintext_image
7:00 Weekdaystext_image
7:00 Snooze 10minnatural_image
Modern sonoro TV studio front panel with playback controls and a circular scroll (no visible text or symbols)text_image
FH 106.70 Auto Tuningtext_image
FM 10:45 FM Preset Listtext_image
1 2 3 10:45 Track 1 01:30 6 5 4natural_image
Symbol of a trash bin crossed with no text or labelsnatural_image
Black and white photo of a Sanoro microwave oven with control panel and speaker grille (no visible text or symbols on main body)Indholdsfortegnelse
1 Indledning.... 201
2 Af hensyn til din sikkerhed.... 201
natural_image
Illustration of a hand inserting a plug into two connected electrical plugs (no text or symbols)natural_image
Hand holding a remote control panel with a circular dial and an arrow indicating rotation (no text or symbols)[Tune to FM RDS station to set time & date] på dis- playet.
i
text_image
10:45 Set DateFig. 11: Set Date
text_image
10:45 AM PMtext_image
A 10:45 Light High 10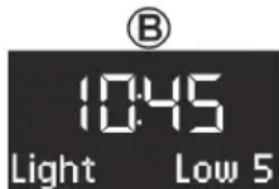
text_image
⑧ 10:45 Light Low 5text_image
A 10:45 Bass
text_image
⑧ 10:45 TrebleFig. 20: Klangindstillinger
text_image
SLEEP FM 10:45 106.70 MHztext_image
SLEEP FM 10:45 Sleep 30minFig. 22: Indstilling of tidsinterval for Sleep Timer
text_image
7:00 WeekdaysFig. 26: Indstilling of Snooze
text_image
7:00 Snooze 10min 1 1:00 zzz 1natural_image
Front view of a sonoro audio recording device with playback controls and a circular dial (no visible text or symbols)text_image
FM 106.70 Auto Tuningtext_image
FM 10:45 FM Preset ListFig. 33: FM Preset List
text_image
1 2 3 10:45 Track 1 01:30 6 5 4Fig. 40: Visning i cd-funktion