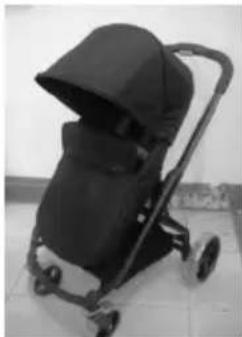
Vision T8040 - Stroller Topmark - Free user manual and instructions
Find the device manual for free Vision T8040 Topmark in PDF.

| Product Type | Travel system (carrycot, seat, car seat) |
| Brand | Topmark |
| Model | Vision T8040 |
| Stroller weight | Approx. 11 kg |
| Maximum weight capacity (carrycot) | 9 kg |
| Maximum weight capacity (seat) | 15 kg |
| Maximum weight capacity (car seat) | 13 kg |
| Maximum basket load | 3 kg |
| Safety standards | EN1888 (stroller), EN1466+A1 (carrycot) |
| Main features | Reversible seat, 3-position backrest, adjustable footrest, 2/3 section canopy, 5-point harness, rear brake, lockable swivel front wheels, compact fold |
| Included accessories | Carrycot canopy, top cover, shoulder and crotch protectors, rain cover, diaper bag |
| Car seat compatibility | Maxi Cosi Cabrio-Fix, Pebble (with adapter), Topmark T8006 |
| Care and cleaning | Clean fabrics with warm water and mild soap, do not machine wash. Lubricate hinges and axles with silicone oil. |
| Safety precautions | Never leave child unattended. Always use the 5-point harness. Engage brake when stopped. Do not overload. |
| Warranty | 2 years (excluding normal wear and misuse) |
| Manufacturer | Top Mark BV, Postbus 308, 8200 AH Lelystad, Netherlands |
Frequently Asked Questions - Vision T8040 Topmark
User questions about Vision T8040 Topmark
0 question about this device. Answer the ones you know or ask your own.
Ask a new question about this device
Download the instructions for your Stroller in PDF format for free! Find your manual Vision T8040 - Topmark and take your electronic device back in hand. On this page are published all the documents necessary for the use of your device. Vision T8040 by Topmark.
USER MANUAL Vision T8040 Topmark
IMPORTANT: KEEP FOR FUTURE REFERENCE.
- Read this instrucons carefully before use and keep for future reference.
- Your child's safety may be aected if you do not follow these instrucons.
- Use only spare parts delivered by importer for replacing parts or reparaon.
- Damages caused by overloading or wrong folding are not granted.
- Prolonged exposure to sunshine may cause changes in the colour of materials and fabrics.
- Do not expose this product to extreme temperatures. Extreme sunshine or temperatures may cause colour changes or bent parts.
WARNING
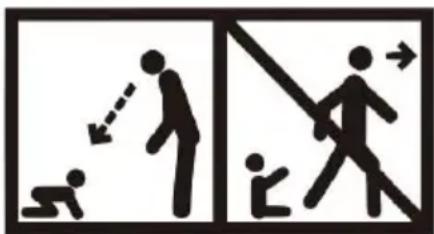
- Never leave you child unaended. It might be dangerous.
- This chassis is compatible with carry cot and/or seat unit of Vision and/or car seat for Vision/T8006 by Top Mark B.V. This chassis is also compatible with car seat Maxi Cosi Cabrio-Fix or Maxi Cosi Pebbles with enclosed adapter.
- The seat unit is not suitable for children under 6 months.
- Conguraon with stroller seats is from 6 months to 15kg .
- Conguraon with carrycot is from birth to 9kg .
- Conguraon with car seat is from birth to 13kg .
- FOR CAR SEAT USED IN CONJUNCTION WITH A CHASSIS: this vehicle does not replace a cot or a bed. Should our child need to sleep, then it should be placed in a suitable pram body, cot or bed.
Always use the restraint system.


WARNING
- Any goods carried in the basket are not to exceed 3kg .
- Do not overload as stroller may become unstable.
-
This product is not suitable for running or skang.
-
Do not carry additional children, bags, goods or accessories in stroller except as recommended in the manufacturer's instrucons.
- To avoid serious injury from falling or sliding out always use the 5 point safety harness.
- Always use the crotch strap in combinaon with the waist belt.
- This vehicle has been designed for maximum of 1 child per seat, per carry cot or per car seat.
- Any load aached to the handle and/or on the back of the backrest and/or on the sides of the stroller acts the stability of the stroller. The stroller may become unstable and p over and can injure you child.
- Pay special aeton when manoeuvring the stroller up or down the pavement, it is best to do it backwards.
- Be aware of the risk of open re and other sources of strong heat, such as electric bar res, gas res, etc. in the near vicinity of the stroller.
- Avoid hot liquids, power cables and other possible dangers may come within range of a child.
- Check that the pram body or seat unit or car seat aachment devices are correctly engaged.
- Do not use this stroller if any screws, nuts, bolts, etc. are missing or any component is damaged or missing.
- Ensure stroller is completely erected and check all locks are engaged before placing child in stroller.
- Before making adjustments to stroller ensure that child's body is clear of any moving parts.
- Do not use on stairs or escalators, fold stroller and carry.
- Put on all the brakes whenever you park the stroller.
- Do not let your child play with this product.
- Do not allow child to stand on seat extender or footrest.
- Parking device shall be engaged when placing and removing the children.
- Do not allow objects on top of canopy as this stroller may become unstable.
- Keep plasc rain cover away from children to avoid suocaoon. Do not use the rain cover if the stroller is not ed with the hood or sun canopy to prevent the risk of suocaoon. To prevent the risk of suocaoon, never leave the stroller with child in it under the sun, with the rain cover ed to it.
- Do not use accessories or replacement parts other than the ones recommended by instrucon manual.
-
Accessories which are not approved by the manufacturer shall not be used.
-
Only replacement parts supplied or recommended by the manufacturer/distributor shall be used.
- To avoid injury ensure that your child is kept away when unfolding and folding this product.
- Never put stroller near steps or stairs.
- Please ensure that you complete regular roune inspecons, maintenance, cleaning of this stroller.
- Regularly care of all metal parts on the stroller is necessary to keep the premium looking. The ends of the axle have to be cleared and oiled, around all 4 weeks.
- Do not place the stroller on parquets-laminate-, linoleum-or carpet oors. The wheels may cause stains on the oor, which cannot be removed.
- Keep this product away from children when not in use.
ASSEMBLING
Check if following spare parts are in the boxes:
1x chassis with basket and 2x front wheels
BOX COLOUR PACK
1x axle
- Canopy for seat unit
2x rear wheels
- Canopy fabric for carry cot
1x seat unit and front bar
- Top cover of carry cot (= foot cover)
1x carry cot body and canopy frame
- Shoulder and crotch strap pads
1x rain cover (for seat unit)
- nursery bag
1x adapter set for car seat (MC)
Oponal car seat T8006 and adapter A8040.
Note that the fabric paerns, colour pictures and stroller accessories on the stroller in this instrucon manual may vary from that of the product that you have purchased.
If one or more of the above menoned spare parts are missing or broken, please contact the store where you bought the product, before using.
WARNING:
Please keep all packaging material away from babies and children, to prevent suocaoon.
ASSEMBLING
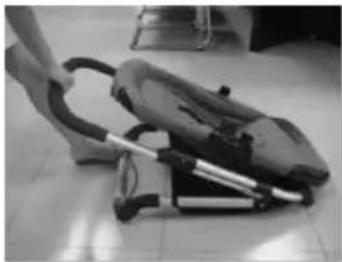
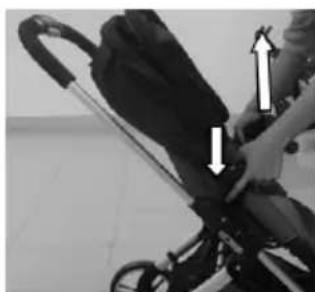
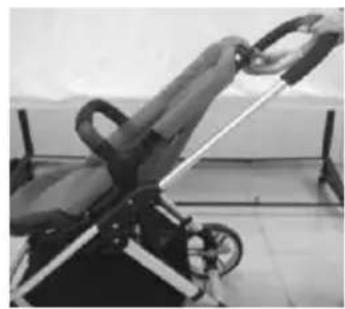
TO OPEN STROLLER
- Push the Secondary Lock to right side.
- Press the buon 2.

Locked

Unlocked
- Step the rear wheel tube then pull the stroller upward.
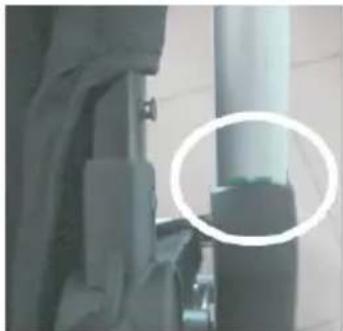
Warning line( green colour)
-if the stroller is opened complete, then you will see the warning line. Otherwise, it is not opened well.
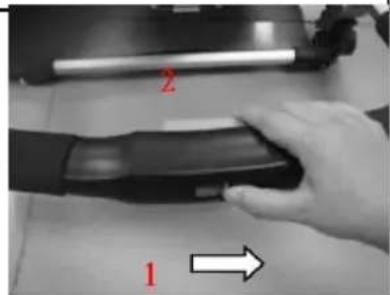
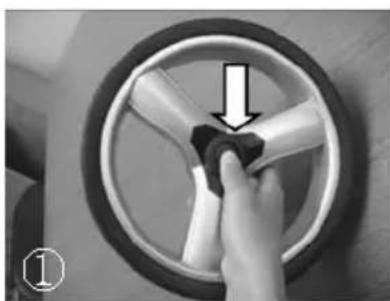
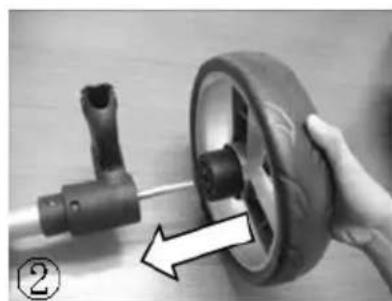
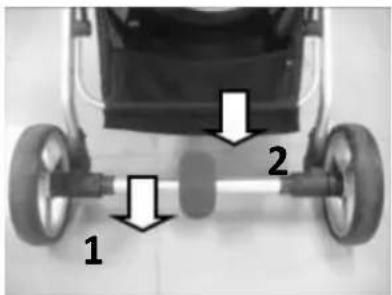
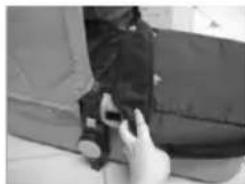
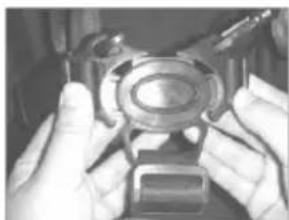
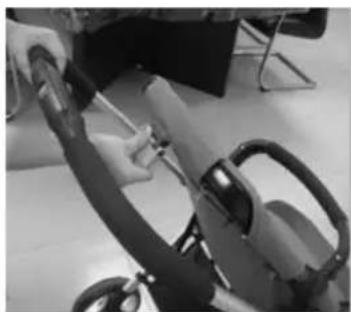
REAR WHEEL ASSEMBLY
Press the release buon in the middle of the rear wheel as in the picture 1 and combine with the axle of rear wheel as in the picture 2.
Follow the same way for the other side.
Put both rear wheel housing on to the chassis, see picture 3.
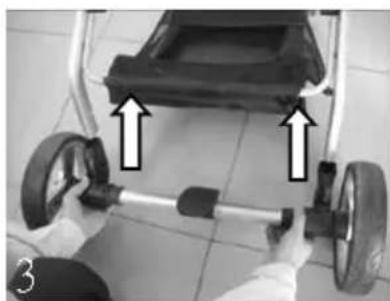
To unlock the rear wheel press on the wheel cap in the middle of the rear wheel.
ASSEMBLING/USING
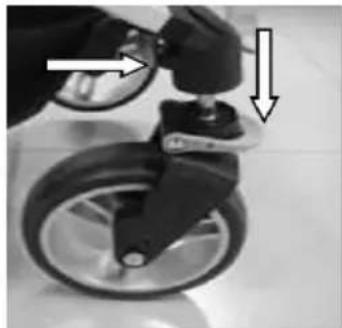
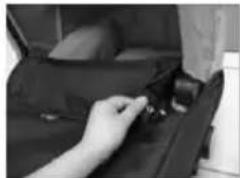
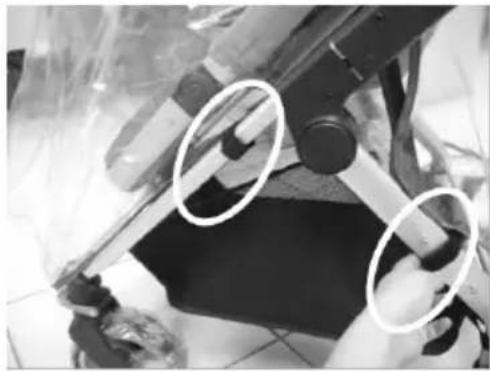
FRONT WHEEL ASSEMBLY
Push the buon on the backside of the upper front wheel block and put the metal pin of the front wheel in to the upper front wheel block unl you hear a click sound. Follow same way for other side.
Press down brake lever for swivel funcon (1).
EN
Li up the brake lever for locking funcon (2).
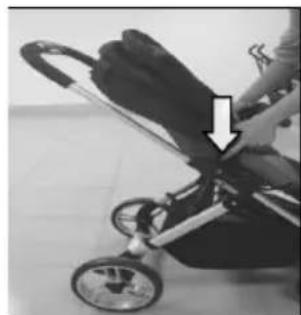
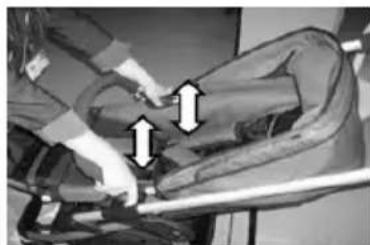
SEAT ASSEMBLY
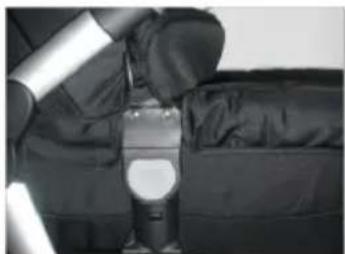
Put the seat 2 sides joints into the connector and push down.
SEAT RELEASE
Press two black buons on both sides to release seat.
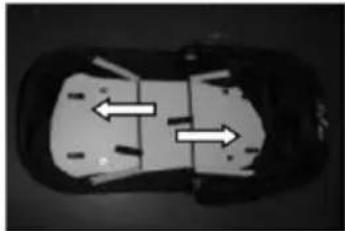
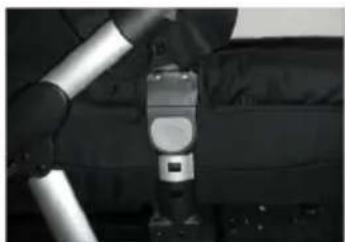
CHANGE SEAT DIRECTION
Press the black buons on both sides to release the seat and reverse.
ASSEMBLING/USING
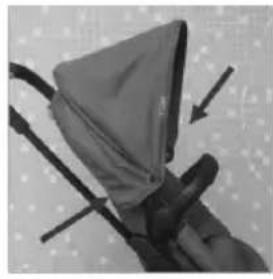
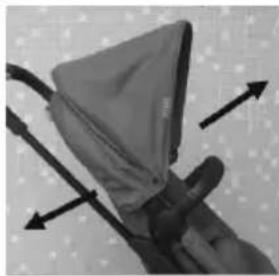
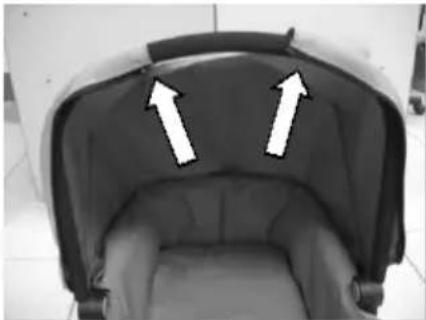
CANOPY ASSEMBLY
Fix canopy into the holder of frame.
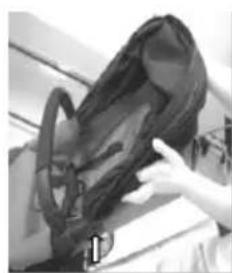
Select 2 seconds or 3 seconds of the canopy.
EN
To remove the canopy pull the canopy aching/detaching lever (L/R) from the frame as shown, then take out the canopy.
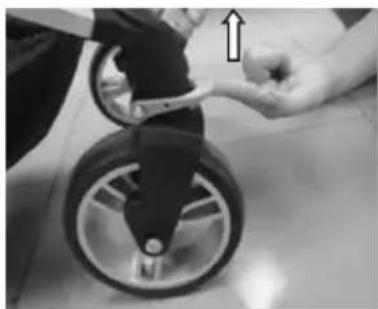
TO USE REAR BRAKE
Brake funcon: press down the brake lever fully to lock the brake 1. and li the brake lever to unlock the brake 2.
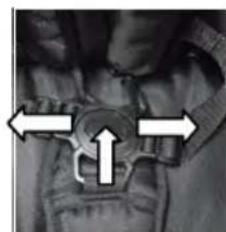
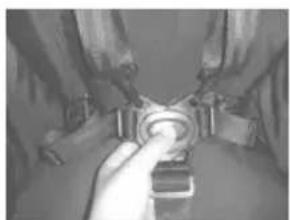
USING 5-POINT SAFETYBELT
WARNING: ALWAYS USE THE CROTCH STRAP WITH SAFETY BELTS.
Ensure shoulder straps are clipped to hip safety belts.
Lock buckle parts of hip belts together into the cross belt (belt between the legs) uncl secure click is heard. Adjust shoulder, hip and crotch belt in right length to t your child. To release belt just press the buon.
To close
To open
For extra safety, "D" rings are provided for the aachment of a separate safety harness approved to EN13210. They are located inside the seat on the le and right side.
ASSEMBLING/USING
ASSEMBLY COLOUR PACK
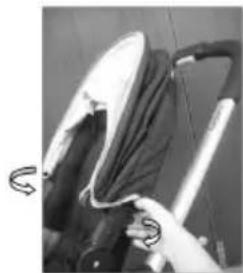
CARRY COT CANOPY ASSEMBLY
Put canopy fabric around the x tube and fasten the zippers.
EN
TOP COVER ASSEMBLY
For carry cot: remove extra fabric part from the top cover, put it into the pocket of the top cover. Pull the cover fabric to carry cot, fasten the Velcro and snap buons.
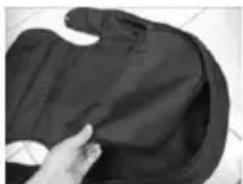

For stroller: put the top cover to the seat and fasten the snap buons.
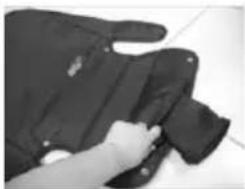
SHOULDER PAD ASSEMBLY
Assemble shoulder pad to the harness with the Velcro.

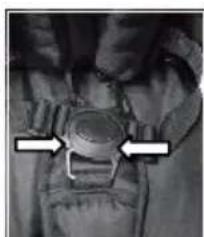
CROTCH STRAP ASSEMBLY
Press the centre of harness buckle. Assemble protect cover to the crotch strap. Final to fasten the harness clip each chest strap onto the waist strap.
ASSEMBLING/USING
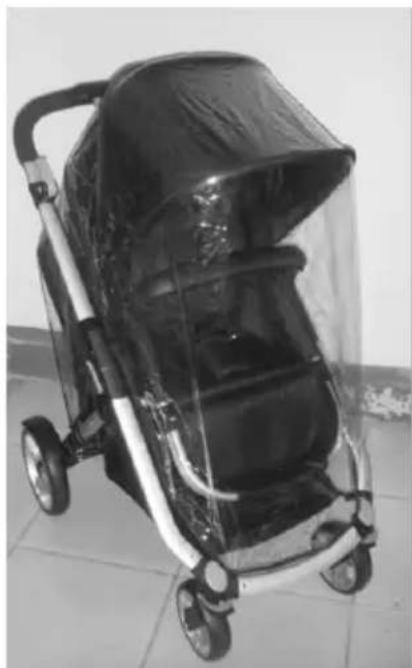
RAINCOVER
Rain cover assembly.
Put rain cover on the stroller and make sure it has been xed by Velcro:
-
to the rear leg/front tube (L/R sides)
-
to the front tube.
EN
WARNING:
Be extremely careful when using the rain cover. Store away from children when not in use. To be used under adult's supervision.
Do not use the rain cover if the stroller is not ed with the hood or sun canopy to prevent the risk of suocacon.
To prevent the risk of suocao, never leave the stroller with child in it under the sun, with the rain cover ed to it.
To prevent your child from overheang, always remove the rain cover when indoor or in warm environments.
USING
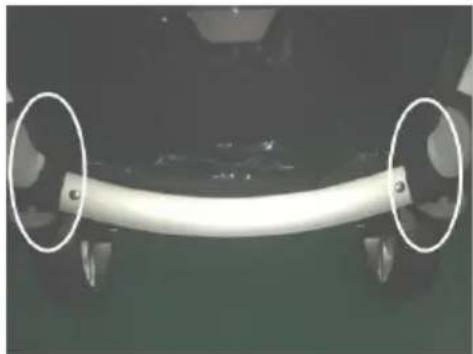
USAGE OF BUMPER BAR
Slide bumper onto brackets unl you hear a click sound.
Press two buons and pull out the bumper bar at the same me.

EN
WARNING: Always secure your child with the seat belt.
The front bumper is not a restraint device.
DO NOT li the stroller by the bumper. Use care when aching the bumper on the stroller with a child in the stroller.
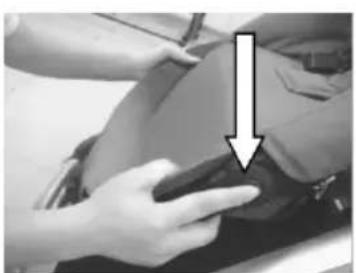
ADJUST BACKREST OF SEAT
Pull the adjuster o the backrest upward or down to adjust the desired posion.
The backrest has 3 posions.
ADJUST FOOTREST
Slightly li up the footrest, press both buons on both sides and lock them into the desired posion.
The footrest has 4 posions.
USING
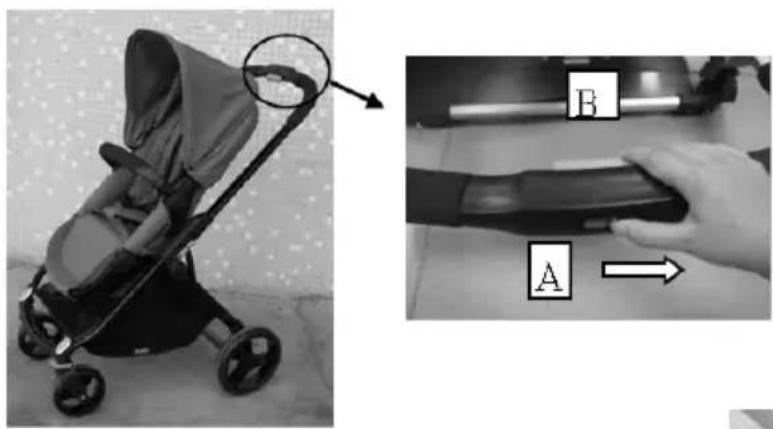
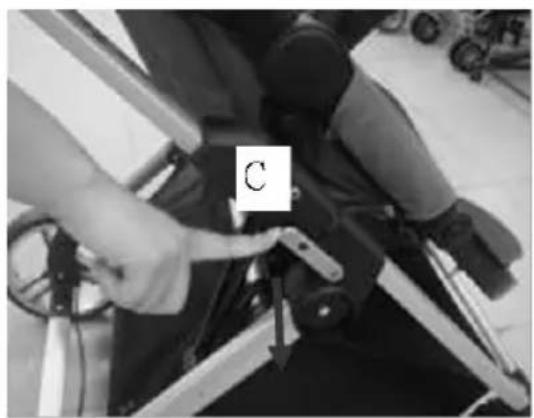
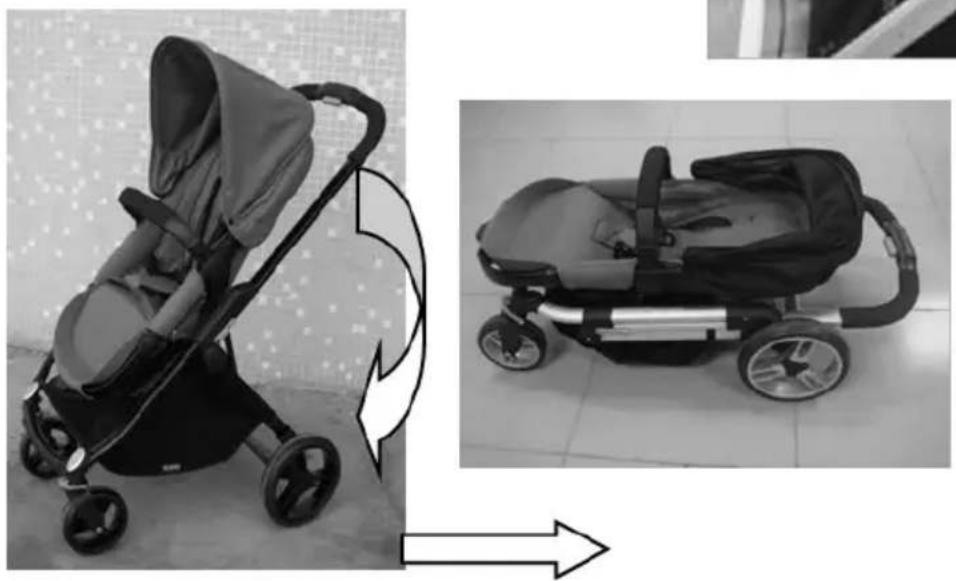
FOLDING STROLER
Make sure the backrest and footrest are in an upright position and canopy is closed before folding the stroller.
- Push the buon A to the right to release the secondary lock, then press buon B.
EN
- Pull outward the up lock "C' to release the Lock, then slightly push.
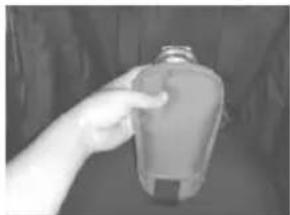
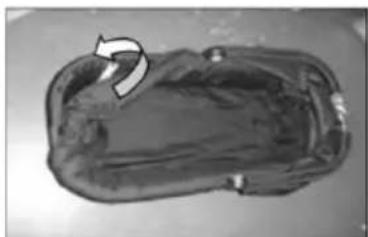
CARRY COT
WARNING
- Do not add additional mares.
- The use of this carry cot is recommended for children from 0-6 months.
- This product is suitable for a child who cannot sit up unaided, roll over and cannot push itself up on its hands and knees. Maximum weight of the child is 9kg .
- This carry cot does not replace a cot or bed.
- Do not let other children play unaended near the carry cot.
- Do not use if any part is broken, torn or missing.
- Use only on a rm ground which is horizontal level and dry.
- Be aware of the risk of open re and other source of strong heat, such as electric bar res, gas res, etc. in the near vicinity of a child.
- Avoid hot liquids, power cables and other possible dangers may come within range of a child.
- Do not allow more than 1 child in the carry cot.
- This product is not suitable for running or skang.
- Handle and the boom should be inspected regularly for signs of damage and wear.
- Never leave your child unaended even for the shortest me.
- Never use the carry cot on a stand.
- Do not use the hard carry cot on an elevated area, for example a table or a chair etc.
- Accessories which are not approved by the manufacturer shall not be used.
- Replace any damaged parts immediately.
- Only replacement parts supplied or recommend by the manufacturer/distributor shall be used.
This carry cot is applicable with chassis of Vision T8040.
ASSEMBLING/USING
- Fix the right and le carry cot adapter by sliding into the joint.
- Pull frame wires out unl it clips into the holder on both sides.
- Fit inner skirt to carry cot ensuring that the canopy holes line up with the hole in the skirt.
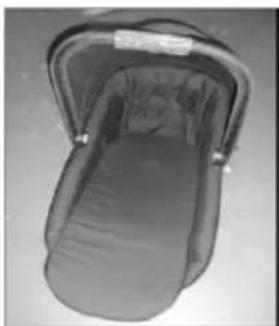
- Put maress into the carry cot.
WARNING: Do not add additional maress.
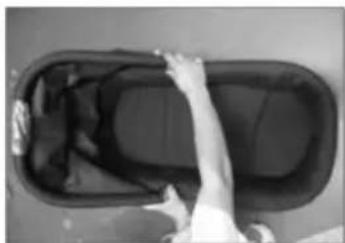
- Press buons on both sides to fold and unfold canopy.
- Insert the carrycot into the stroller.
- Press down the two grey buons on both sides, to li the carry cot.
Before starng operaon, please applies some lubricant silicone free oil Vaseline onto the hinges and joints to ensure smooth funcon.
To prolong the life of your nursery product, keep it clean and do not leave in the direct sunlight for extended periods of me.
Check the wheels regularly for wear and make sure that there is no dust and sand between the axles and wheels.
Removable fabric covers and trims may be cleaned using warm water with a household soap or a mild detergent. Allow it to dry fully in the air, preferably away from direct sunlight.
Do not allow the stroller to come in contact with salt water, this causes the formaon of rust.
Check your stroller regularly. If any parts like bolts, screws, fabric pieces or stching, are found to be loose, broken or damaged, always repair or replace them.
Where damage or dysfuncon occurs, stop using the stroller and contact your dealer. Check and oil caster bolts and wheel axles periodically and replace any damaged parts immediately.
Helpful hints
If the wheels squeak, use a silicon based spray ensuring it penetrates the wheel and axles assembly.
Do not dry clean or use bleach.
Do not machine wash, tumble or spin dry, unless the care labelling on the product permits these methods.
Non removable fabric covers and trims may be cleaned using a damp sponge with soap or mild detergent. Allow it to dry completely before folding or storing it away. In some climates the covers and trims may be aected by mould and mildew. To help prevent this occurring, do not fold or store the product if it is damp or wet. Always store the product in a well ventilated area.
Always check parts regularly for ghtness of screws, nuts and other fasteners, ghten if required. To maintain the safety of your nursery product, seek prompt repairs for bent, torn, worn or broken parts.
Use only parts and accessories approved by the supplier.
GUARANTEE
We grant 2 year guarantee on this product commencing on the date of purchase. Within the guarantee period we will eliminate, free of charge, any defects in the appliance resulting from faults in materials or workmanship, either by repairing or replacing the complete product.
This guarantee does not cover: damage due to improper use, normal wear or use as well as defects that have a negligible eect on the value or operaon of the product.
Damages caused by overloading or wrong folding are not granted.
To obtain service within the guarantee period, hand in the complete product with your sales receipt to the store where the product has been bought. The warranty applies only to the rst owner and is not transferable.
Top Mark B.V.
Postbus 308
8200 AH Lelystad
NETHERLANDS
consument@topmark.nl
www.topmark.nl
Stroller: EN 1888
Carrycot: EN1466 + A1