
Multiroom Receiver - Hi-fi system LOEWE - Free user manual and instructions
Find the device manual for free Multiroom Receiver LOEWE in PDF.

| Product type | Multiroom hi-fi system |
| Brand | Loewe |
| Model | Multiroom Receiver Individual Sound |
| Dimensions (W x H x D) | 330 x 180 x 53 mm |
| Weight | Approximately 1.8 kg |
| Power supply | 220-240 V ~ 50 Hz |
| Power consumption (operation) | 10 W |
| Power consumption (eco mode) | < 1 W |
| Amplification | 2 x 48 W (6 Ω, 10% THD) |
| Wireless connectivity | WiFi 802.11b/g (2.4 GHz) |
| Wired connectivity | Ethernet RJ-45 (10/100 Mbit/s) |
| Audio inputs | AUDIO IN (3.5 mm stereo jack) |
| Audio outputs | AUDIO OUT (3.5 mm stereo jack), speaker output (binding posts) |
| USB port | USB 2.0 (supports up to 10 GB, FAT32) |
| Supported audio formats | MP3, WMA (without DRM), FLAC, AAC, WAV, LPCM, OGG |
| Main functions | Multiroom audio, network playback, Internet radio, alarm, timer, subwoofer |
| Maintenance and cleaning | Soft, slightly damp cloth, without harsh chemicals |
| Safety | Unplug during storms, do not block ventilation, do not open the casing |
| Spare parts and repairability | Contact an authorized Loewe dealer for repairs |
| General information | Manual available as free PDF, support via questions on the website |
Frequently Asked Questions - Multiroom Receiver LOEWE
User questions about Multiroom Receiver LOEWE
0 question about this device. Answer the ones you know or ask your own.
Ask a new question about this device
Download the instructions for your Hi-fi system in PDF format for free! Find your manual Multiroom Receiver - LOEWE and take your electronic device back in hand. On this page are published all the documents necessary for the use of your device. Multiroom Receiver by LOEWE.
USER MANUAL Multiroom Receiver LOEWE
natural_image
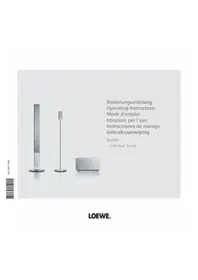
Exterior view of a silver wireless device labeled 'IOCWE. Multimonth Receiver' (no additional text or symbols visible)

Inhalt
Seitenansicht 4
Rückseite 5
Multiroom Receiver Einstellungen
OK bestätigen.
Software Version Multiroom Receiver 3.4
Software Version Assist Media 1.6/01.15
© Loewe Opta GmbH, Kronach
Scope of delivery 30
Accessories 30
Operating requirements 30
Setup 30
For your safety 31
Use for the intended purpose and ambient conditions ....31
Supervision 31
Cleaning....31
About these operating instructions 31
Setting up 32
Suggested setup solution 32
Main room 32
Secondary room 32
Connecting 33
Start-up 34
Switching on/off 34
Pairing 34
Multiroom Receiver Settings 34
Network....35
Wireless network 35
Wired network 36
Automatic (DHCP) 36
Manual input 36
Network status 36
Room name 37
Device name 37
Subwoofer 38
Audio Output 38
Energy saving mode 38
Time....39
Remote access 39
Daily operation 40
General operating functions 40
Select source 40
Audio Server 40
Internet radio 41
USB 41
Mediacenter 42
Music menu 42
Options menu 42
Menu Artist 43
Music menu playback 43
Options menu 43
Sound settings 44
Timer....44
Alarm clock 44
Update....45
Software status and update 45
Software Update via USB/Internet 45
Troubleshooting 46
Technical specifications 47
Company and editorial details 47
Glossary 48
Index 49
Environment ....50
Environmental Protection 50
Cardboard box and packaging 50
The Unit 50
Legal notices ....50
Trademark rights 50
SideView

Back

R - speaker connection right, negative terminal
Welcome
Thank you
for choosing a Loewe product. We are happy to welcome you as our customer. At Loewe we combine the highest standards of technology, design and user friendliness. This is equally true of TV, DVD, video, audio and accessories. Neither technology nor design is an end in itself, but both are intended to provide our customers with the best possible audio and visual experience. Our design is not influenced by short-term, fashionable trends. You have, after all, purchased a high-quality piece of equipment which you do not want to tire of tomorrow or the day after.
Scope of delivery
• Individual Sound Multiroom Receiver
- Bracket support
- Wall mount
• These operating instructions
- Assembly instructions
Accessories
Remote control Assist Media catalogue no. 70230A81
Multiroom Display on Wall catalogue no. 70990U80
Multiroom Display in Wall catalogue no. 70990U81
Adapter cable subwoofer catalogue no. 70495
Operatingrequirements
Before you can use the functions of the Loewe Multiroom Receiver, the following requirements need to be met:
- At least one remote control of the type Loewe Assist Media.
- At least one Multiroom Receiver.
- Connection to a wireless (WiFi) or wired home network, router with Internet access.
- Connection to a Loewe Mediacenter in the home network.
- Per Multiroom Receiver one pair of loudspeakers each and as an option, a Loewe Subwoofer.
Setup
- Please refer to the indications in the enclosed assembly instructions.
- Do not set up the unit near strong heat sources or in direct sunlight.
- If setting up in a shelf or a closed cupboard: Leave at least 2.5 cm clearance around the unit, so that the air can circulate unhindered and there is no heat backup. Do not cover the fan and opening on the back. The device may not be laid on its back during operation. Use only the accompanying bracket support or the wall mount.
- Incorrect voltages can damage the unit. The unit may only be connected to an electricity supply with the voltage and frequency stated on the rating plate and using the enclosed mains cable.
- During thunderstorms, disconnect the mains plug. A voltage surge caused by lightning conducted through the mains could damage the unit.
- If the unit is not to be used for an extended period, the plug should also be disconnected from the mains.
- The mains plug must be easy to reach to ensure that the unit can be disconnected from the mains at any time.
- Position the mains cable in such a way that it can not be damaged. The network ca ble must not be bent or placed on sharp edges, should not be walked on and not be subjected to any che mi ca ls . The latter applies to the entire unit. A mains cable with damaged insulation can cause electric shocks and represents a fire hazard.
- When you want to unplug from the mains, pull on the plug housing rather than on the cable. The cables in the mains plug could otherwise be damaged and could cause a short-circuit when being plugged in again.
- Malfunctions can occur if there are other devices operating in the same frequency range (2.4 GHz) (see page 46).
Please also read and follow the safety advice on the following pages
For your safety
For your safety, and to avoid unnecessary damage to your unit, please read and follow the safety advice below.
Use for the intended purpose and ambient conditions
This unit is intended exclusively for wireless transmission and play of audio signals. It is designed for living or office rooms and may not be used in rooms with a high level of humidity (e.g. bathroom, sauna) or a high dust concentration (e.g. workshops).
The terms of the warranty only cover the intended use of the unit.
If the unit is used outdoors, make sure that it is protected from moisture (rain, drips, spray or dew).
High concentrations of moisture and dust lead to creepage current in the unit which can make it dangerous if a live wire is touched, or it may cause a fire.
If you have moved the unit out of the cold into a warm environment, leave it switched off for about three hours to avoid the formation of condensation.
Always switch off your system (Individual Sound Multiroom Receiver, TV set and any other components which may be connected) before connecting or disconnecting other devices or speakers.
Protect your device from:
• Water, dampness, dripping or sprayed water or steam.
• Knocks and mechanical stress
• Magnetic and electric fields
• Cold, heat, direct sunlight and high temperature fluctuations
- Dust
• Covers that inhibit ventilation
• Interference with the internal workings of the unit

Do not place objects containing liquids on top of the unit.
Candles and other open flames must be kept away from the unit at all times to prevent the spread of fire.
The ventilation slits on the back of the unit must not be covered with magazines or rugs. Pay attention for example to curtains etc.

WARNING: TO PREVENT ELECTRICAL SHOCK, DO NOT REMOVE THE COVERS. THERE ARE NO PARTS INSIDE THE UNIT THAT CAN BE REPAIRED BY THE USER. REPAIRS SHOULD ONLY BE CARRIED OUT BY A LOEWE DEALER.
Only use Ori gi nal accessories and spare parts from Loewe.
Supervision
Do not allow children to use the unit/TV set unsupervised. Do not allow children to play in the im medi ate vicinity of the unit/TV set.
Do not operate the Multiroom Receiver without supervision. If the unit is not to be used for an extended period, the plug should also be disconnected from the mains or switched off.
Cleaning
Only clean your unit with a slightly damp, soft, clean cloth (without any aggressive or scouring cleaning agents).
About these operating instructions
The information in this guide refers to the Loewe product Individual Sound Multiroom Receiver.
Unless stated otherwise, the instructions refer to the operating elements on the Assist Media remote control.
Paragraphs beginning with the ➕ symbol indicate important hints, tips or conditions for perfect operation.
Terms which you will find in the menu or printed on the unit are printed in bold type.
In the functional descriptions, the necessary operating elements are arranged to the left of the text containing the handling instructions.
The diagrams in these operating instructions are only by way of example. The actual display may vary depending on the software versions and availability of services in your system.
Settingup
Suggested setup solution

Connecting
Cabling Individual Sound Multiroom Receiver
Connect the speakers with the Multiroom Receiver. Make sure the connecting cables have the correct polarity.
The connection for the right speaker on the Multi-room Receiver is labelled R+ (red) / R− (black) and for the left speaker with L+ (red) / L− (black).
If a WiFi connection is not wanted or not possible, you can connect the Multiroom Receiver with an RJ-45 network cable (not included in the scope of delivery) with a network connection (e.g. Switch or DSL-Router), ideally with a connection to the Internet.
1) As an option you can connect the "Adapter cable subwoofer" that you can get as an accessory to the Audio Link interface using the jack LINK on the Multiroom Receiver. In this case, connect the speakers to the subwoofer.
Plug the mains cable into a 220-240V 50 Hz wall socket.

Start-up
Switchingon/off
Switch on the Multiroom Receiver using the mains switch (page 29).
First of all, enter the settings as described in the operating instructions for the remote control Assist Media under Start-up (e.g. Language, Time/Date etc.).
Pairing
The Loewe Multiroom Receiver is operated using the remote control Loewe Assist Media via radio link. To do this, it needs to be paired (be assigned) once.
Make sure that the units are set up correctly (page 32). Make the electrical connections as described on page 33.

Press the button ROOM on the remote control Assist Media.


▲ ▼ Select RCU settings.
Confirm with OK.
▲ ▼ Select Pairing.
If no Multiroom Receiver has been paired yet, the search will start right from the first time button ROOM is pressed.


▲ ▼ If several units have been found, select the one you want.
Confirm with OK.
To avoid confusion, if applicable switch other existing Multiroom Receivers off or read the MAC address on the back of the unit.
If the Pairing fails, a message will appear. Repeat the process and reduce the distance between the remote control Assist Media and the Multiroom Receiver to be paired to a max. of 2 m.
If you have the remote control Assist Media and are too far away from the Multiroom Receiver, you will get a message. Reduce the distance and select the displayed option Reconnect.
If you use another remote control Assist Media, then the connection of another Assist Media that has already been paired with the Multiroom Receiver can be taken over. A corresponding message is shown on the display of the first Assist Media.
Multiroom Receiver Settings
Here you can make various basic settings, such as for the network.

Press the ROOM button.

▲ ▼ Select required room.
Confirm with OK.
▲ ▼ Select Receiver settings.
Confirm with OK.

▲▼ Select the desired option. Confirm with OK.
When you select MAC address this unique unit address can be displayed. This address may be necessary for example when setting up Internet radio stations (page 41).
Start-up
Network
Depending on whether the Multiroom Receiver is connected to your home network by wire (Ethernet, Powerline) or wireless (WiFi), different settings have to be made.

Press the ROOM button.
▲ ▼ Select required room.
Confirm with OK.
▲ ▼ Select Receiver settings.
Confirm with OK.
▲▼ Select option Network.
The Multiroom Receiver automatically recognises whether there is a wired or wireless network connection and prompts you to make the necessary settings in menus.
Wireless network
Here you make the settings for a wireless network.


First of all, a search is carried out for wireless networks in your surrounding area.
The wireless networks found are listed.
The network that is currently active is marked blue.
Rescan starts the search again.
WiFi off You can deactivate WiFi (option appears if no LAN is connected). If required, switch WiFi on by repeating the network setting.
If your wireless network is encrypted, then it is necessary to enter the WiFi password that allows access to the network.
Encryption using the standard WEP is no longer considered safe. If possible, use the standards WPA or WPA2. Please make the appropriate settings in your WiFi router.
▲▼ Select required network. Confirm with OK.

If the network is encrypted, enter the numbers and letters of the password using keypad (same as SMS).
Use EPG to switch between upper/lower case.
Use PIP to delete characters to the left of the cursor.
OK Save.
The WiFi password must have a minimum of 8 characters and a maximum of 64 characters.
If you do not know the WiFi password, contact your network administrator.
→ Supported encryption types: page 47.

If the selected wireless network works with WEP encryption, in the pop-up menu, a location still needs to be selected for the password in "Index 1-4".
▲ ▼ Select required Index.
Confirm with OK.
Afterwards, the settings still have to be made as described under "Wired Network" (page 36).
Start-up
Wired network
Here you make the settings for the selected network.

Automatic ( DHCP)
IP address and Subnet mask are automatically issued by a DHCP server on your home network.
A DHCP server has to be set up on a device on the network (e.g. WiFi router).
▲ ▼ Select Option Automatic (DHCP).
Confirm with OK.
Manual input
Input of the static IP address, Gateway, DNS server 1/2.
▲ ▼ Select option Manual input.
Confirm with OK.


Enter numbers using the number keys.
Enter full stop with EPG.
Use PIP to delete characters to the left of the cursor.
OK Save input and call up next menu.
In the same way as for the IP address, the addresses for the Subnet mask, Gateway, DNS server 1 and DNS server 2 are queried one after the other.
Network status
After the input has been saved, an overview of the settings appears on several menu pages.


▲ ▼ Select the option Change settings to open the dialogue for network settings.
Confirm with OK.
◀ ▶ Show previous / next menu.
▲ ▼ Select option To page 2-4 to move to the next page. Confirm with OK.
▲ ▼ Select the option Exit or press the button END, to close the menu Network status.
If you want to change the operating mode of the Multiroom Receiver from "wired network" to "wireless network" (or vice versa), first of all switch the device off using the mains switch (page 29) and remove (or connect, as the case may be) the network cable from/to the RJ-45 socket (page 28). Then use the mains switch to switch the device on again and carryout the settings as described on page 35 under "Network".
→ You can use the menu option Reset network to obtain a restart of the network parameters (e.g. requesting a new IP-address).
Start-up
Roomname
In surroundings with several Multiroom Receivers the individual units can be allocated a unique name so you can differentiate more easily between them.

Press the ROOM button.

▲ ▼ Select Room 1...7. Confirm with OK.
Press the Room button.

▲ ▼ Select Room name. Confirm with OK.
▲▼ Select RCU settings.
Confirm with OK.


Enter the name using the number keys (similar to SMS).

Enter special character using keys 0 and 1 (Choose by pressing several times).

Use EPG to change between upper/lower case.

Use PIP to delete characters to the left of the cursor.

Confirm with OK.
Devicename
In surroundings with several Multiroom Receivers the individual units can be allocated a unique network name so you can differentiate more easily between them.

Press the ROOM button.

▲ ▼ Select Room. Confirm with OK.
▲ ▼ Select Receiver settings.
Confirm with OK.
▲ ▼ Select Device name.
Confirm with OK.


Enter the name using the number keys (similar to SMS).
Enter special character using keys 0 and 1 (Choose by pressing several times).
Use EPG to change between upper/lower case.


Use PIP to delete characters to the left of the cursor.
Confirm with OK.
Start-up
Subwoofer
If you have connected up a subwoofer to the Multiroom Receiver (page 33), then the Limit frequency should be set so that the bass sections are no longer played back by the stereo speakers but by the subwoofer.

Press the ROOM button.

▲ ▼ Select Room. Confirm with OK.
▲ ▼ Select Receiver settings.
Confirm with OK.
▲ ▼ Select Subwoofer.
Confirm with OK.

▲▼ Select option.
Select the option off, if no subwoofer is connected.
Select 20-200Hz, depending on the limit frequency of the stereo speakers connected (refer to their technical data).
Confirm with OK.
Make sure you have switched off the Multiroom Receiver before connection.
Audio Output
You can set a fixed or a variable volume for the audio signal at the port AUDIO OUT.

▲ ▼ Select Receiver settings.
Confirm OK.
▲▼ Select AUDIO OUT.
◀ ▶ Select an option.
fix variable
loudness level fixed loudness level variable, adjustable with V+/-
This option is not available if a subwoofer limit frequency has been set.
Energy saving mode
By activating the energy-saving operating mode, you can save the most energy (see page 47). It will however take somewhat longer to switch on the device. You can set two time periods in which the unit gets automatically switched on at a given time (= energy-saving mode off) and then off again.

Press the ROOM button.
▲ ▼ Select Room.
Confirm with OK.
▲ ▼ Select Receiver settings.
Confirm with OK.
▲ ▼ Select Energy saving mode.
Confirm with OK.

◀ ▶ Select option.
on
energy-saving operating mode active energy-saving operating mode off
off
on+Timer
Automatic switching on/off of the energy saving mode. There are two Start/End times possible. During the times that have been set, the appliance is quickly ready for operation (= energy saving mode off), whereas during the other period, it is in energy saving mode.

Input the time in four digits in 24h format.

Close the menu.
Start-up
Time
The time of the Multiroom Receiver is automatically kept updated from the time server on the Internet (provided your home network has access to the Internet). To keep the time display correct for your region, the deviation from the GMT time (time zone) and the summer/normal time can be set.

Press the ROOM button.
▲ ▼ Select Room.
Confirm with OK.

▲ ▼ Select Receiver settings.
Confirm with OK.
▲ ▼ Select Clock.
Confirm with OK.

▲▼ Select function.
◀ ▶ Set option.

Close the menu.
You can also set the time manually. See in the operating manual for the remote control Assist Media under "Set time/date". The Multiroom Receiver takes on the time of the remote control if there is no Internet connection to a time server.
Remoteaccess
Some playback functions of the Multiroom Receiver can be operated from devices other than the remote control of the Assist Media. This possibility of allowing so-called Media-Control-Points can be disabled.

Press the ROOM button.
▲ ▼ Select Room.
Confirm with OK.

▲ ▼ Select Receiver settings.
Confirm with OK.
▲ ▼ Select Remote access.
Confirm with OK.

◀ ▶ Set option.

Close the menu.
Dailyoperation
General operating functions
The following buttons have general operating functions:

Switch on (if in stand-by mode)
or POWER: Switching off in readiness mode.
If possible the last source set is activated - this takes approx. 40 sec. - the corresponding source flashes.
Start playback of the selected Track, Title, Album.
▲ next track/title
▼ previous track/title
Search run backwards (press several times)
Search run forwards (press several times)
P+/- Scroll page-wise
SOURCE: Switches to the next source.
Enter numbers and letters with number keys (like SMS texting) to limit selection.
Pause.


Stop.
During playback: open menu Options.
During media selection: one level back.
Close current menu.
V+/- Increase/decrease volume.
Sound on / off
▶ Confirm/set selection in the menu.
◄ Move Back in the menu.
Select source
Audio Server List updating/open
Red coloured button: back to playback
For a complete overview of the functions, refer also to the operating instructions of the remote control Assist Media.
Selectsource
For music playback you can select different sources, e.g. a music server on the network or locally connected sources (MP3 files on USB storage media or an audio device connected to AUDIO IN).

Press the ROOM button.
▲ ▼ Select Room.
Confirm with OK.
▲▼ Select the desired source Internet Radio, Audio Server, USB or AUDIO IN.

Confirm with OK.
The Multiroom Receiver switches to the selected source and shows its name on the display of the remote control.
Alternatively, by pressing the button Source on the Multiroom Receiver several times, you can select a music source.
Audio Server
When you select Audio server, another pop-up menu appears from which you can select a service that is available on your home network or on the Internet.

Press the ROOM button.
▲ ▼ Select Room.
Confirm with OK.
▲ ▼ Select Audio Server.
Confirm with OK.
▲▼ Select Service.
Confirm with OK.
In the menu Audio Server you are shown the services currently available on your home network.
Daily operation
Internetradio
If you select Internet Radio a list of available Internet radio stations is shown, provided that your home network has Internet access.

Press the ROOM button.

▲▼ Select Room.
Confirm with OK.
▲▼ Select Internet Radio.

Confirm with OK.
▲▼ Select required overview/list. Confirm with OK.
You can edit entries under Favourites in the Loewe Support Portal. To do so, provide the MAC address of your Multiroom Receiver (page 34). You can find this on the back of the unit as well.
▲ ▼ Select required station. Confirm with OK.

OK Call up list of Internet radio stations.
Enter numbers and letters with number keys (like SMS texting) to limit selection.
▲▼ Call up the next/previous Internet radio station.
USB
Music can be played back from a USB storage medium at the Multiroom Receiver or Mediacenter.

Press the ROOM button.
▲ ▼ Select Room. Confirm with OK.
▲ ▼ Select USB. Confirm with OK.
▲▼ Select required Album (Albums/Folders are identified by a vertical line "|" in front of them).

Confirm with OK.
OK or PLAY to start playback of the selected Title.


MENU opens the menu Options (page 43).
▲ next title
▼ previous title
Search run backwards (press several times)
Search run forwards (press several times)
Pause.
Stop.
OK or ◀ open higher level menu.
The symbol indicates in the colour blue that a USB storage medium is being used at the Multiroom Receiver.

Daily operation
Mediacenter
Upon selecting Audio Server - Mediacenter (40) a list appears of the services available in the Mediacenter if a Loewe Mediacenter is active in your home network.

Press the ROOM button.

▲ ▼ Select Room.
Confirm with OK.
▲▼ Select Audio Server.
Confirm with OK.
▲ ▼ Select the desired server, e.g. Mediacenter.

Confirm with OK.
▲▼ Select required media sources.
Music selection according to criteria, such as Artist, Genre, etc. Other sources: Audio sources connected to the Mediacenter, such as Radio, analogue source to Audio IN, Party Mode, etc.
iPod
iPod docking station of Mediacenter.
Confirm with OK.
Under Audio Server, you can find your Mediacenter under the name that you have defined in the option Mediacenter Network Name (see the operating manual of the Mediacenter). The factory setting is
The diagrams in these operating instructions are only by way of example. The actual display may vary depending on the software versions and availability of units and services in your system.
Music menu
Upon selecting Mediacenter - Music a list will appear for example, from which you can select your music according to certain criteria, e.g. Artist, Genre etc.
Call up menu as described under "Mediacenter".
▲▼ Select Music.

Confirm with OK.
▲▼ Select required criteria.
Genre
Artist
All available titles are sorted and shown by gen
All available titles are sorted and shown by art
Confirm with OK.
If available, album graphics (cover art) are shown for titles being played - otherwise a neutral picture is shown (as for Internet radio, page 41). Album graphics in the formats JPG, GIF and BMP can be displayed. From USB storage media, album graphics can only be shown from MP3 files (Metadata). During playback from the Audio Server (Mediacenter), the system determines whether album graphics are shown or not.
Options menu
You can set the sorting sequence of the titles list.

MENU opens the menu Options.
◀ ▶ Select the desired option.
A-Z
Track
number All the available titles are displayed, sorted ac to the track number
Date
All available titles are sorted and shown by d. All available titles are sorted and shown by s.
Size
The options available in your system depend on the Media server.
Daily operation
Menu Artist
Upon selecting Mediacenter - Music - By Artist a list of the available albums appears, which are shown sorted in alphabetical order.

Call up menu as described under "Mediacenter".
▲ ▼ Select Music.
Confirm with OK.
▲▼ Select Artist (Artists are marked by a preceding vertical like "|").
Confirm with OK.


▲ ▼ Select the desired artist.
Enter numbers and letters with number keys (like SMS texting) to limit selection.
OK opens artists for album selections.

▲▼ Select desired Album.
Enter numbers and letters with number keys (like SMS texting) to limit selection.
OK opens Album for title selection.


P+/- Scroll page-wise
or OK to start playback of the selected title.
Music menu playback
When a Track/Title is played back, various data - where available - are shown, such as Artist, Album, Title, Time elapsed, Total time etc.


MENU opens the menu Options.
or ▼ previous track/title.
or ▲ next track/title.
Pause.
Stop.
OK or ◀ open higher level menu.
Options menu
You can set Shuffle and Automatic repeat.

MENU opens the menu Options.

| ▲▼ Select the desired option. | ||
| Shuffle | on | The Tracks/Titles of the current medium played back in a random order. |
| Shuffle | off | Playback in normal sequence. |
| Repeat | title | Repeat current Track/Title continuously. |
| Repeat | all | Repeat the current album/playback list |
| Repeat | off | The playback stops automatically at the |
▶ Activate desired function.
Confirm with OK.
Daily operation
Soundsettings
When you play back a Track/Title, various sound settings can be made.

Press button.
▲ ▼ select the desired function.

◀ ▶ set the selected option.
Loudness Aurally compensated adjustment of low and high tones at low volume.
AVC Automatic volume control for a loudness that is as uniform as possible between different sources/Internet radio stations
Treble Settings for high frequencies. Bass Settings for low frequencies.
Balance Accentuation of the left/right channel Volume Setting of the volume
Confirm with OK.
Timer
You can have the Multiroom Receiver automatically switched off in a selectable time period.

Press button
▲ ▼ Select the desired time period.

Confirm with OK.
Alarmclock
You can set an alarm from your Multiroom Receiver at a given pre-set time by having music or an audio signal sounded.

Press the ROOM button.

▲ ▼ Select Room.
Confirm with OK.
▲ ▼ Select Alarm clock.
Confirm with OK.

▲ ▼ Select the desired function.
Alarm
Time
Switch alarm clock on or off
Input the alarm time in four digits with the n
keys
Source In case of the option Music, an attempt is mad to play back the last selected source. If this is not possible, the standard alarm signal is used. In the case of the Beep option, you can switch off the alarm signal with the buttons END and OK.
Confirm with OK.
Switch the Multiroom Receiver into Standby mode. At the next alarm time that has been set, it switches on automatically and the beep that has been set is played. The alarm function is repeated daily till the option Alarm is set to off.
After an interruption in the mains supply (e.g. power failure), the alarm function gets disabled. Reset the time (page 39).
Update
Software status and update
The Multiroom Receiver can, if required, be updated by your specialist retailer through a software update.

Press the ROOM button.

▲ ▼ Select Room. Confirm with OK.
▲ ▼ Select Receiver settings.
Confirm with OK.
▲ ▼ Select Software.
Confirm with OK.

The version number and date of the current software version are shown.
▲ ▼ Select the option Exit.
Confirm with OK.
Software Update via USB/Internet
In case of an update via USB: Insert the USB stick with the update file "update.pac" in the root directory in the USB jack on the side (page 28) of the Multiroom Receiver.
Press the ROOM button.


▲ ▼ Select Room. Confirm with OK.
▲ ▼ Select Receiver settings.
Confirm with OK.
▲ ▼ Select Software.
▲ ▼ Select the option Update.
▲ ▼ Select the option USB or Internet.
Confirm with OK.

The software update starts. The red LED flashes.
The process can take up to 30 minutes.
As soon as the LED in the Multiroom Receiver once again glows green continuously (with no red), switch off the unit with the mains switch and then on again.
The unit must not be disconnected from the mains during the update process.
Please also check whether there is a software update available for the remote control Assist Media (see the operating manual for Assist Media). If a software update for Assist Media is necessary, a corresponding message appears in the display unit.
Troubleshooting
| Problem Possible Cause Remedy | ||
| Not working at all Mains cable not plugged in. | Plug the mains cable into a socket 220-240 V 50 Hz. | |
| The Multiroom Receiver cannot find a Media server. | No connection to the media server. Check whether the media server is switched on.Check the network communication with a PC with a ping command.In the case of a wired network, check the cable.In the case of a wireless network, check the distance between the Media server and the Multiroom Receiver. | |
| Although Automatic (DHCP) is set, the Multiroom Receiver does not receive an IP address. | No DHCP server is working on your network. Set up a DHCP server. | |
| With a connection via an encrypted wireless network, you have entered the WiFi password incorrectly. | Correctly enter the WiFi password (page 35). | |
| A displayed media file cannot be played. | The file format is not supported (page 47). On a computer, convert the file into MP3 format, for example, by using an audio converter programme. | |
| No sound. Faulty connections of input or output cables. Connect the cables properly (page 33). If the problem persists, it is possible that the cables are faulty. | ||
| No suitable input signal source has been selected. Select a suitable input source with SOURCE. | ||
| The volume is set at minimum. Turn up the volume. | ||
| The sound is set to mute. | Press or V+ on the remote control to activate audio output again and then adjust the volume. | |
| The adapter cable subwoofer has been plugged in while the Multiroom Receiver was switched on. | Switch the Multiroom Receiver off and then on again. | |
| The unit is not working properly. | Unplug the mains plug from the mains socket and then try plugging it in again after 30 seconds. | |
| The remote control is not working properly. | The battery in the remote control is flat. | Place the remote control in the charging tray. |
| Media on a device connected to USB cannot be played back (e.g. iPod). | Only storage media are supported which log onto a mass storage and are formatted with the file system FAT32. | Use a suitable storage media, e.g. USB stick with compatible file system. |
| Despite there being a connected network cable, the Multiroom Receiver switches only to WiFi. | Network cable faulty or not correctly connected. | Replace network cable or connected it correctly. |
| The energy-saving option of the router/switch is activated for automatic port detection. | Switch off automatic port detection. | |
If there are any problems with operation in a wireless network, such as disruptions during play or devices reacting slowly during operation, you can try the following:
- Keep at least three metres distance from microwave ovens, bluetooth devices, mobile telephones and WiFi compatible devices such as printers and PDAs.
- Change the active channel on the WiFi Router.
Technicalspecifications
General
Multiroom Receiver item no. 68203T/U10
Operating temperature 5 °C... 35 °C
Humidity 5%...90%
Dimensions (approx.) 330 x 180 x 53 mm (W x H x D)
Weight (approx.) 1.8 kg
Electrical Data
Power supply AC 220 - 240V, 50 Hz
Power drawn "On" 10 W
Power drawn "Energy saving mode on" < 1 W
Power drawn "Off" 0 W
Frequency range 2.4 GHz
Amplifier 2x 48 Watt (6 Ohm) / 10 % THD
Transmission range 20 Hz – 20 kHz - 3dB
Interfaces
AUDIO IN Analogue, Stereo 1 V, 10 kOhm, jack bush
| AUDIO OUT | Analogue, Stereo 1 V, 10 kOhm, jack bush |
| LINK | Connection for Loewe subwoofer, Analogue, 1 V, 10 kOhm, jack plug |
| Loudspeaker | 4x terminal R+/R-/L+/L- |
| Network | RJ-45 |
| USB | V 2.0, for storage media < 10 GB, FAT32 |
File formats supported
| Audio | MP3, WMA (without DRM), FLAC, AAC, WAV, LPCM, OGG |
Home networking standard
| Audio | Universal Plug and Play Audio/Video (UPnP AV) |
Wired network
| Standards supported | 10 Mbit/s Ethernet (10Base-T), 100 Mbit/s Fast Ethernet (100Base-T) |
Wireless network (WiFi)
| Supported standards | IEEE 802.11b and 802.11g |
| Frequency range 2400-2483.5 MHz | |
| Encryption WEP, WPA, WPA2 |
Company and editorial details
Loewe AG is a public limited company under German law with its Head Office in Kronach.
Industriestrasse 11, 96317 Kronach
Telephone +49 (0)9261 / 99-0
Fax: +49 (0)9261 / 99-500
Email: ccc@loewe.de
Commercial Registry: District Court of Coburg, No. HRB 42243
Turnover tax identification no.: DE 193216550
WEEE registration no: DE 41359413
Editorial date 06.10.4. edition
Software Version Multiroom Receiver 3.4
Software Version Assist Media 1.6/01.15
© Loewe Opta GmbH, Kronach
All rights reserved including translation.
Design and technical specifications are subject to change without notice.

Glossary
C
Channel (WiFi): Channel is understood to mean a certain part of the WiFi frequency band. Devices that want to communicate with each other have to use the same WiFi channel. In Europe the WiFi frequency band is currently divided into 13 channels.
Client: Also called network client, describes an end device such as your TV set that is connected to the network and gets data from a (media) server to make it accessible to the user.
D
DHCP: Abbreviation for Dynamic Host Configuration Protocol. DHCP allows automatic assignment of IP addresses with the aid of a DHCP server.
DHCP server: Network service which takes care of automatic assignment of IP addresses to clients.
DRM: Digital Rights Management. Processes to control copyright protected data. To be used correctly, DRM protected contents require not only a DRM capable device but also the possession of a license issued by the provider (to be paid for).
E
Ethernet: Cable linked data net technology for local networks (LANs). Also covers standards for e.g. plug connectors and transfer speeds.
H
Host: Computer that the server services are provided from, i.e. that makes data available. Refer also to media server.
|
ID3-Tags: Additional information in the case of MP3-files. Here you can save information on the artist, title, album and album cover. This data is then processed by the PC using an ID3 tag editor.
IP-Address: IP addresses (Internet Protocol Addresses) are used to identify devices in an Internet Protocol (IP) network. IP addresses are made up of four groups of numbers of three digits each.
L
LAN: Abbreviation for Local Area Network. Mainly used as a name for networks with cabling (Ethernet).
M
MAC address: Hardware address of a network adapter, e.g. the network card in the PC. It is issued permanently by the manufacturer and is used to uniquely identify devices in networks.
Mbit/sec: Information about the transfer rate in networks in megabits, i.e. millions of characters per second. With WiFi the maximum speed is 11 (IEEE 802.11b) or 54 (IEEE 802.11g) Mbit/sec, in wired nets 10 Mbit/sec or 100 Mbit/sec (Fast Ethernet).
Media Server: Stands for the device which multimedia contents are stored on, but is also the name for the service provided by the device that makes this data available to the network.
MP3: Data format for compressed audio data.
N
NAS: Abbreviation for Network Attached Storage. The term describes a hard disk which is independently linked to the network (i.e. without a PC).
R
Router: Device for connecting up several networks, e.g. home network and Internet.
S
Switch: Device for connecting several computers to a network.
U
UPnP AV: Abbreviation for Universal Plug and Play - Audio/Video. Is used to control network devices from all manufacturers. Has become a wide spread standard for home networking.
USB: Universal Serial Bus. Serial bus system for connecting external devices (USB card reader, USB stick).
W
WEP: Abbreviation for Wired Equivalent Privacy. Former standard process in the WiFi encryption, now outdated.
Wired network: see LAN.
Wireless network: see WiFi.
WiFi: Abbreviation for Wireless fidelity (Wireless Local Area Network). Also abbreviated as wireless network.
WMA: Abbreviation for Windows Media Audio, Microsoft own audio data format. As with MP3 files, the content is compressed here as well.
WPA: Abbreviation for Wi-Fi Protected Access. Replaced WEP as standard encryption for wireless networks.
Index
A
Accessories 30
Alarm clock 44
AUDIO IN 28
AUDIO OUT 28
C
Cabling 33
Cleaning 31
Company and editorial details 47
D
Daily operation 40
DHCP 36
E
Energy saving operating mode 38
Environment 50
Environmental protection 30
[Non-Text]
Internet radio 41
IP address 36
iPod 42
M
Mains cable 29
Mediacenter 42
Audio Server 40
N
Network 35
Network status 36
0
On-Off 28
Operating requirements 30
Options 42, 43
P
Pairing 34
R
Remote access 39
Room name 34
S
Safety 31
Scope of delivery 30
Select source 40
Setting up 30
Set-up solution 32
Sound settings 44
Source selection 28, 40
Start-up 34
Subwoofer 37, 38
Switching on/off 34
T
Time 39
Timer 44
Trademark rights 50
Troubleshooting 46
U
Unit name 37
Update 45
USB 28,41
W
Wired network 36
Wireless network 35
Environment
Environmental Protection
Cardboard box and packaging
In line with national regulations regarding the disposal of packaging materials, we pay a fee to authorised recyclers who collect packaging from dealers. Nevertheless, we recommend that you keep the original cardboard box and the rest of the packaging materials so that the unit can, if necessary, be transported in the safest possible conditions.
The Unit

Attention: The EU Directive 2002/96 /EC governs the proper return, handling and recycling of used electronic appliances. Old electronic appliances must therefore be disposed of separately. Never dispose of this unit in the normal domestic waste! You can hand in your old unit free of charge at identified collection points or to your dealer if you buy a similar new unit.
Other details about return (also for non-EU countries) are available from your local authorities.
Legal notices
Trademarkrights
The sale of GIFLIB is protected by copyright (c) 1997 Eric S. Raymond.
Any person who gets a copy of the software and the relevant documentation (the "Software"), is hereby granted the permission to use it unrestrictedly, including and without exception, the right to use, copy, change, merge, displace, broadcast, sub-license and/or sell it, and to give persons who receive this software these rights, under the following conditions:
The above copyright notice and this permission notice should be included in all copies or sub-copies of the software.
Contenu
Vue de côté ....52
Face arrière ....53
Câblage du Individual Sound Multiroom Receiver
Réglages du Multiroom Receiver
Validez avec OK.
Encodage WEP, WPA, WPA2
Mentions légales
Câblage du Individual Sound Multiroom Receiver 57
Câble secteur 53
Cablaggio Individual Sound Multiroom Receiver
Docking station per iPod del Mediacenter.
Confermare con OK.

Versione del software Multiroom Receiver 3.4
Versione del software Assist Media 1.6/01.15
© Loewe Opta GmbH, Kronach
Ajustes del Multiroom Receiver 106
Red 107
Red sin cables 107
Red por cable 108
Automático (DHCP) 108
Entrada manual....108
Estado de red 108
Cableado del Individual Sound Multiroom Receiver
Ajustes del Multiroom Receiver
Confirme con OK.
MP3, WMA (sin DRM), FLAC, AAC,
WAV, LPCM, OGG
Software Version Multiroom Receiver 3.4
Software Version Assist Media 1.6/01.15
© Loewe Opta GmbH, Kronach
Multiroom Receiver instellingen 130
Netwerk....131
Multiroom Receiver instellingen
OK bevestigen.
Universele plug and play Audio/Video (UPnP AV)
Software versie Multiroom Receiver 3.4
Software versie Assist Media 1.6/01.15
© Loewe Opta GmbH, Kronach
Multiroom Receiver Indstillinger 154
Network....155
Automatic (DHCP) 156
Manual input 156
Network status 156
Room name 157
Device name 157
Subwoofer 158
Audio out 158
Energy saving mode 158
Klokkeslæt....159
Remote access 159
Daglig betjening ....160
Generelle betjeningsfunktioner 160
Vælg kilde 160
Audio Server 160
Internet Radio 161
USB 161
Mediacenter 162
Menu Music 162
Menu Options 162
Menuen Artist 163
Software Status and Update 165
Software Update via USB/Internet 165

▲ ▼ Vælg RCU settings (FB-indstillinger).
Bekræft med OK.
▲ ▼ Vælg Pairing (Tildeling).

Multiroom Receiver Indstillinger
Automatic ( DHCP)


Indtast navnet med nummertasterne (som for SMS).


Indtast navnet med nummertasterne (som for SMS).
▲ ▼ Vælg funktion.
Under gengivelse: Åbn menuen Options.
Select Source (Kilde)

Opdater/åbn Audio Server-liste
Bekræft med OK.
Bekræft med OK.
Bekræft med OK.
Bekræft med OK.
(Track number) tracknummer
P+/- Bladr en side ad gangen
Software Status and Update
Software Update via USB/Internet
Ved opdatering via USB: Sæt en USB-stick med opgraderingsfilen "update.pac" i rodbiblioteket ind i USB-porten (side 148) på siden af Multiroom Receiveren.

Tryk på tasten ROOM.

Softwareopgraderingen starter. Den røde LED blinker.
Processen kan vare op til 30 minutter.
Software Version Multiroom Receiver 3.4
Software Version Assist Media 1.6/01.15
© Loewe Opta GmbH, Kronach
Select Source (Kilde) 160
Sikkerhed 151
Sound settings 164
Start-up 154
Subwoofer 157, 158
T
Tænd-sluk 148
Tænd/sluk 154
Tilbehør 150
Timer 164
ROOM
Paina Assist Media painiketta ROOM.


◀ ▶ Säädä valinta.

Sulje valikko.
Jokapäiväinenkäyttö

Ohjelmistoversio Multiroom Receiver 3.4
Ohjelmistoversio Assist Media 1.6/01.15
© Loewe Opta GmbH, Kronach
Automatic (DHCP) 204
Manual input 204
Network status 204
Room name 205
Apparatnamn....205
Subwoofer 206
Audio out 206
Energispardrift 206
Tid 207
Fjärråtkomst 207
Inkoppling Individual Sound Multiroom Receiver


▲ ▼ Välj Receiver settings.
Tryck på OK.

▲▼ välj önskat alternativ. Tryck på OK.
▲ ▼ Välj Receiver settings.
Tryck på OK
Automatic ( DHCP)


▲ ▼ Välj Receiver settings.
Tryck på OK.
▲ ▼ Välj Energy saving mode (energispardrift).
Tryck på OK.


◀ ▶ Välj alternativ.
▲ ▼ Välj Receiver settings.
Tryck på OK
▲ ▼ Välj Clock (tid).
Tryck på OK.

▲ ▼ Välj funktion.
◀ ▶ Ställ in alternativ.

Stäng meny.
▲ ▼ Välj Receiver settings.
Tryck på OK.
▲ ▼ Välj Remote access.
Tryck på OK.

◀ ▶ Ställ in alternativ.

Stäng meny.
Allmänanvändning
Tryck på OK.
Tryck på OK.
Tryck på OK.
Tryck på OK.
◄ ► ställ in vald option.
Softwareupdate startar. Röd LED blinkar.
Programvaruversion Multiroom Receiver 3.4
Programvaruversion Assist Media 1.6/01.15
© Loewe Opta GmbH, Kronach
Declaration of Conformity
Document No./Month. Year
68203 / 02.2009
Hersteller:
Loewe Opta GmbH
Manufacturer:
Anschrift:
Address:
Industriestraße 11
96317 Kronach
Germany
Produkt: Kabelloses Multiroom-Audiosystem
Product: Multiroom Wireless Audio System
Product designation:
Handelsname: LOEWE.
Trade mark
The designated product conforms to the provisions of the following European directives:
2006/95/EC
Text: Electrical equipment designed for use within certain voltages limits – LV-Directive
2004/108/EC
Text: Electromagnetic compatibility
1999/5/EC
Text: Radio equipment and telecommunications terminal equipment and the mutual recognition of their conformity
Harmonized European standards:
Referenznummer
Reference number
Ausgabedatum
Date of issue
EN 60065
2002 + A1 2006
Harmonized European standards:
Referenznummer
Reference number
Ausgabedatum
EN 55013
2001 + A1 2003
EN 55020 2002 + A1 2003 + A2 2005
EN 55022
1998
Referenznummer
Reference number
EN 55024
EN 61000-3-2
EN 61000-3-3
Ausgabedatum
Date of issue
1998 + A1 2001 + A2 2003
2006
1995 + A1 2001 + A2 2005
Harmonized European standards:
Referenznummer
Reference number
EN 62311
EN 301489-1
EN 301489-17
EN 300328
Ausgabedalum
Date of issue
2008
V 1.6.1
V 1.2.1
V 1.7.1
Date of the CE marking
Legally binding signature:
ppa. Roland Bohl
Director R&D Product Development
i.V. Wolfgang Vetter
Manager Technical Department
This declaration certifies compliance with the indicated directives but implies no warranty of properties.
The safety instructions of the accompanying product documentation shall be observed.

This equipment is in compliance with the essential requirements and other relevant provisions of Directive 1999/5/EC. It may be operated in all countries in the EU and also in Iceland, Norway and Switzerland. In France and Italy it may only be used indoors.

Kn. Klémentina Street, bl. 193
1618 Sofi a, Bulgaria
Tel +359 - 2 955 63 99
Fax +359 - 2 955 63 99
Email: sac@audio-bg.com
CH
Telion AG
Rütistrasse 26
BASYS CS SPOL. S.R.O
Sodomkova 8/1478
Customer Care Center
Industriestraße 11
Century Court, Riverside Way
Riverside Business Park, Irvine,
Ayrshire
KA11 5DJ, UK
Tel +44 - 1294 315 000
Fax +44 - 1294 315 001
Email: enquiries@loewe-uk.com
GR
EISAGOGIKI EMBORIKI ELLADOS
S.A.
321 Mesogion Av.
152 31 Chalandri-Athens, Hellas
Tel +30 - 210 672 12 00
Fax +30 - 210 674 02 04
Email: christina@bose-onkyo.gr
H
Basys Magyarorszagi KFT
Tó park u.9
Email: loewe@loewe.hr
①
Loewe Italiana S.r.L.
Largo del Perlar, 12
37135 Verona (VR), Italia
Tel +39 - 045 82 51 611
Fax +39 - 045 82 51 622
Email: info@loewe.it
IL
Clear electronic entertainment
(2009) Ltd
13 Noah Mozes St.
Agish Ravad Building
Tel Aviv 67442, Israel
Tel +972 - 3 - 6091100
Fax +972 - 3 - 6961795
Email: yossi@pioneer-il.com
JRL
Origo Ltd
Unit 23 Magna Drive
Magna Business Park, City West
Dublin 24, Republic of Ireland
Tel +353-1-4666700
Fax +353-1-4666708
Email: service@origo.ie
KSA
SALEM AGENCIES & SERVICES CO.
Hamad Al Hagueel Street. Raw-
dah, Jeddah
Kingdom of Saudi Arabia
Tel +966 (2) 665 4616 ext: 666
Fax +966 (2) 660 7864
Email: hkurkjian@aol.com
LT
A Cappella
Ausros Vartu 5, Pasazo skg.
01129 Vilnius, Lithuania
Tel +370 - 52 12 22 96
Fax +370 - 52 62 66 81
Email: info@loewe.lt
M
DONEO CO. LTD
34/36 Danny Cremona Street
Hamrun, HMR02, Malta
Tel +356 - 21 - 22 53 81
Fax +356 - 21 - 23 07 35
Email: info@doneo.com.mt
MA
SOMARA S.A.
377, Rue Mustapha El Maani
20000 Casablanca, Morocco
Tel +212 - 22 22 03 08
Fax +212 - 22 26 00 06
Email: somara@somara.ma
N
PCE. PREMIUM CONSUMER
ELECTRONICS as
Ostre Kullerod 5
International Dynamics (NZ) Pty
Ltd
PO Box 109 317, Newmarket
Auckland, New Zealand
Tel +64 9 379 0179
Fax +64 9 379 0279
Email: enquiries@international
dynamics.co.nz
P
Mayro Magnetics Portugal, Lda.
Email: geral.loewe@mayro.pt
PL
DSV TRADING SA
Plac Kaszubski 8
Email: market@dsv.com.pl
RO
Avitech Co. SRL
1/II Pipera Tunari St.
007190 Voluntari, Ilfov, Romania
Tel +40 - 21 200 64 64
Fax +40 - 21 200 64 65
Email: andrei.silisteanu@avitech.ro
RUS
Service Center Loewe
ul. Verkhnaya Maslovka, d. 29
BaSys Czech & Slovak s.r.o.
Stará Vajnorská 17/A
831 04 Bratislava, Slovakia
Tel +421 2 49 10 66 18
Fax + 421 2 49 10 66 33
Email: loewe@basys.sk
TR
ENKAY ELEKTRONIK SAN. Ve Tic.
Ltd. Sti.
Alemdag Cad: Site Yolu No.: 10
81230 Umraniye/ Istanbul, Türkiye
Tel +90 - 216 634 44 44
Fax +90 - 216 634 39 88
Email: mhatipog@enkaygroup.com
UAE
Dubai Audio Center
P.O. Box 32836, Sheik Zayed Road
Dubai, UAE
Tel +971 - 4 343 14 41
Fax +971 - 4 343 77 48
Email: dacdubai@emirates.net.ae
ZA
THE SOUNDLAB (PTY) LTD
P.O. Box 31952, Kyalami 1684
Republic of South Africa
Tel +27 - 1 14 66 47 00
Fax +27 - 1 14 66 42 85
Email: loewe@mad.co.za
© by Loewe Opta 200110
LOEWE.


- Inhalt
- Seitenansicht 4
- Rückseite 5
- Multiroom Receiver Einstellungen
- SideView
- Back
- Welcome
- Thank you
- Scope of delivery
- Accessories
- Operatingrequirements
- Setup
- For your safety
- Use for the intended purpose and ambient conditions
- Supervision
- Cleaning
- About these operating instructions
- Settingup
- Connecting
- Cabling Individual Sound Multiroom Receiver
- Start-up
- Switchingon/off
- Pairing
- Multiroom Receiver Settings
- Network
- Wireless network
- OK Save.
- Wired network
- Automatic ( DHCP)
- Manual input
- Network status
- Roomname
- Devicename
- Subwoofer
- Audio Output
- Energy saving mode
- Time
- Remoteaccess
- Dailyoperation
- General operating functions
- Selectsource
- Audio Server
- Daily operation
- Internetradio
- USB
- Mediacenter
- Music menu
- Options menu
- Menu Artist
- Music menu playback
- Soundsettings
- Timer
- Alarmclock
- Update
- Software status and update
- Software Update via USB/Internet
- Technicalspecifications
- General
- Electrical Data
- Interfaces
- File formats supported
- Home networking standard
- Wireless network (WiFi)
- Company and editorial details
- Glossary
- C
- D
- E
- H
- |
- L
- M
- N
- R
- S
- U
- W
- Index
- A
- [Non-Text]
- 0
- P
- T
- Environment
- Environmental Protection
- Cardboard box and packaging
- The Unit
- Legal notices
- Trademarkrights
- Contenu
- Vue de côté ....52
- Face arrière ....53
- Câblage du Individual Sound Multiroom Receiver
- Réglages du Multiroom Receiver
- Mentions légales
- Cablaggio Individual Sound Multiroom Receiver
- Cableado del Individual Sound Multiroom Receiver
- Ajustes del Multiroom Receiver
- Multiroom Receiver instellingen
- Multiroom Receiver Indstillinger
- Jokapäiväinenkäyttö
- Inkoppling Individual Sound Multiroom Receiver
- Allmänanvändning
- CH
- GR
- ①
- IL
- JRL
- KSA
- LT
- MA
- PL
- RO
- RUS
- TR
- UAE
- ZA
Brand : LOEWE
Model : Multiroom Receiver
Category : Hi-fi system