CRL300 - Alarm clock radio DENVER - Free user manual and instructions
Find the device manual for free CRL300 DENVER in PDF.

| Product type | Clock radio |
| Brand | Denver |
| Model | CRL300 |
| Dimensions (L x W x H) | 16 x 15.8 x 7.6 cm |
| Main power supply | 6V mains adapter (model PSEA060100V U2) |
| Backup power | CR2032 3V battery |
| Display | Backlit LCD |
| Tuner | Digital PLL tuner |
| FM frequency range | 87.5 MHz - 108 MHz |
| Sound system | Mono |
| Number of presets | 10 |
| Sunrise function | Yes, with adjustable interval (0, 15, 30, 45, 60, 90 min) |
| Sunset function | Yes, with adjustable interval |
| Alarm sound types | Radio, 4 natural sounds, 6 melodies |
| Brightness adjustment | 10 levels |
| Alarm snooze | Every 5 minutes, up to 5 times |
| Date and time display | Year, month, day, weekday, 12h/24h time |
| Maintenance and cleaning | Soft lint-free cloth, no corrosive products |
| Safety | Do not disassemble, do not expose to water, use the supplied adapter |
| Repairability | Servicing by qualified personnel only |
| Manufacturer / Importer | DENVER ELECTRONICS A/S, Stavneagervej 22, DK-8250 Egaa, Denmark |
Frequently Asked Questions - CRL300 DENVER
User questions about CRL300 DENVER
0 question about this device. Answer the ones you know or ask your own.
Ask a new question about this device
Download the instructions for your Alarm clock radio in PDF format for free! Find your manual CRL300 - DENVER and take your electronic device back in hand. On this page are published all the documents necessary for the use of your device. CRL300 by DENVER.
USER MANUAL CRL300 DENVER
denver-electronics.com
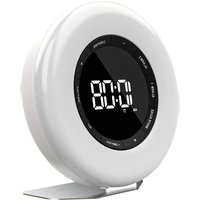
LED WAKEUP LIGHT
CRL-300
USER MANUAL
INTRODUCTION
Thanks for choosing DENVER LED WAKE UP LIGHT. The human body has a biological clock that directs the body to get alert or tired following the change of sun rise and sun set. If you sleep with your curtains down the wake-up light gradually brightens the room to simulate sun rise, which gently wakes you up from deep sleep. When the alarm clock rings, your body is already awake, and the quality of your sleep is improved.
MAIN FUNCTIONS
- Wake-up light (sunrise) - The light is gradually getting brighter, in the time period that you set, before the alarm clock rings.
- Go-to-sleep light (sunset) - The go-to-sleep light turns itself down during the set time period.
- Brightness - You can change the brightness in 10 levels.
- Time function - It shows year, month, date, week and time (in 24 hours or in 12 hours).
- Alarm function / sound - Radio, 4 kinds of nature sound, and 6 kinds of music.
- Radio - PLL radio, can preset 10 stations and li sten your favourite radio station.
- Snooze mode each 5 minutes.
- Keeps your programming when there are power outages using a single battery.
- LED light technology, no heat and low consumption.
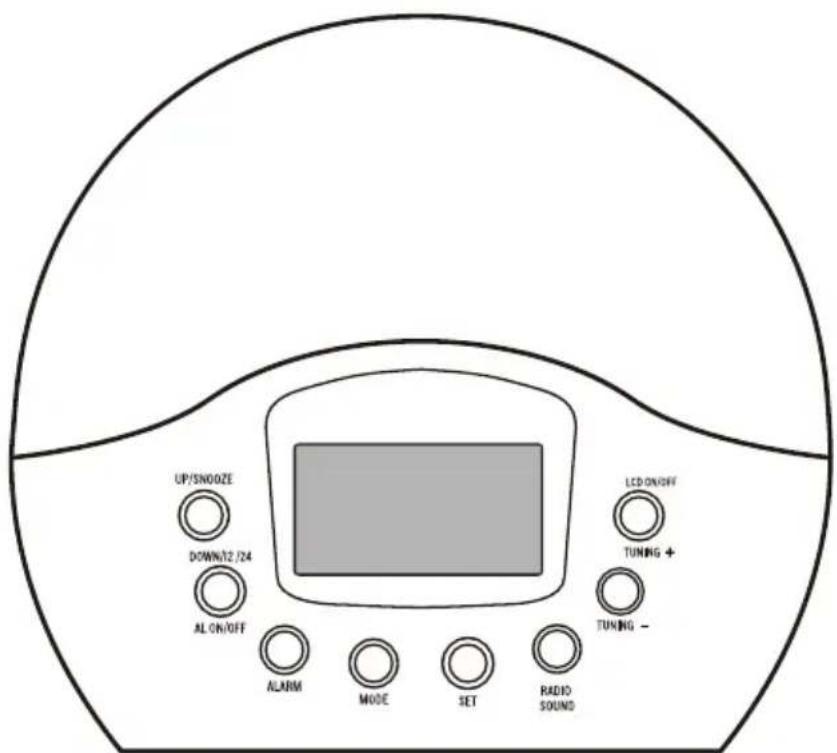
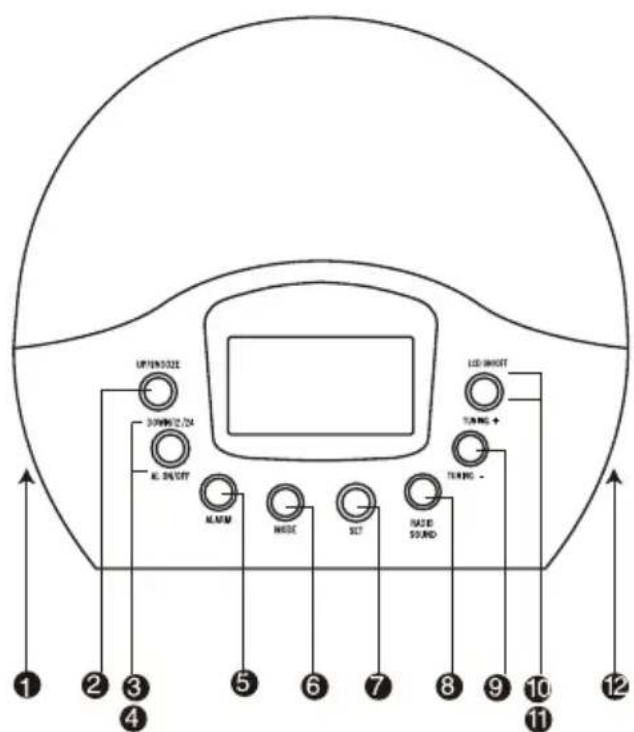
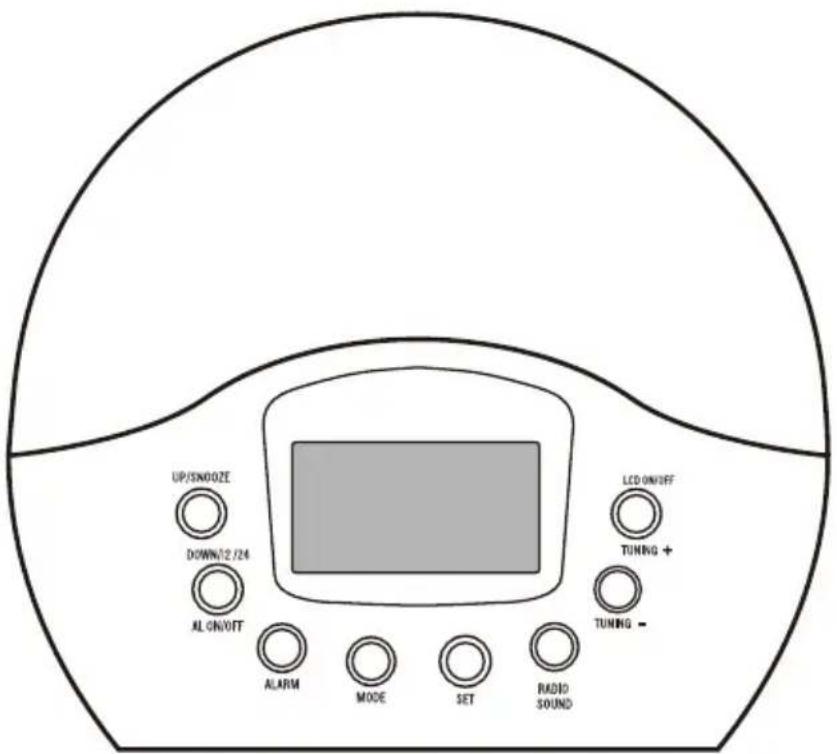
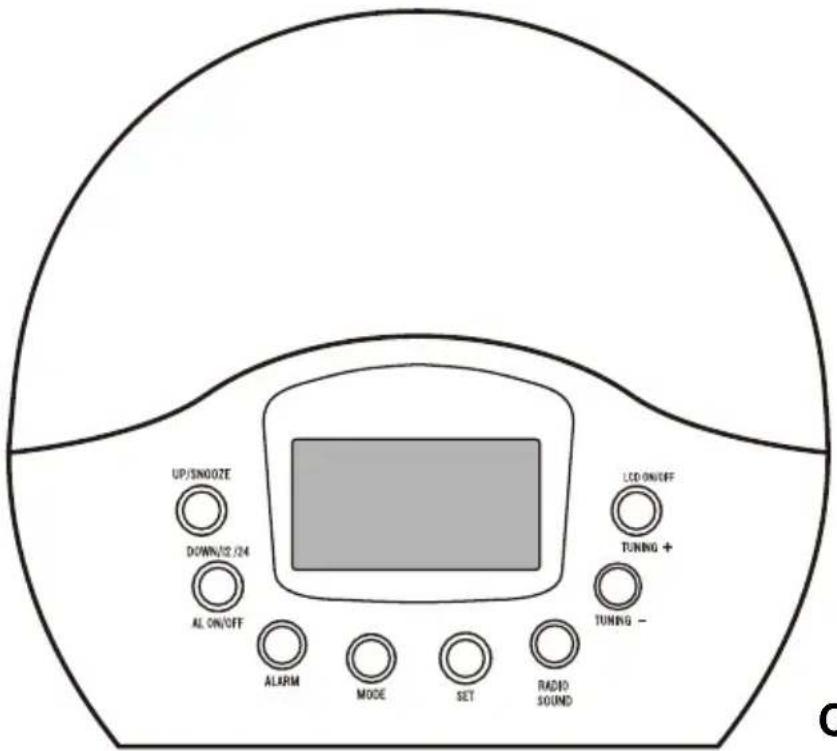
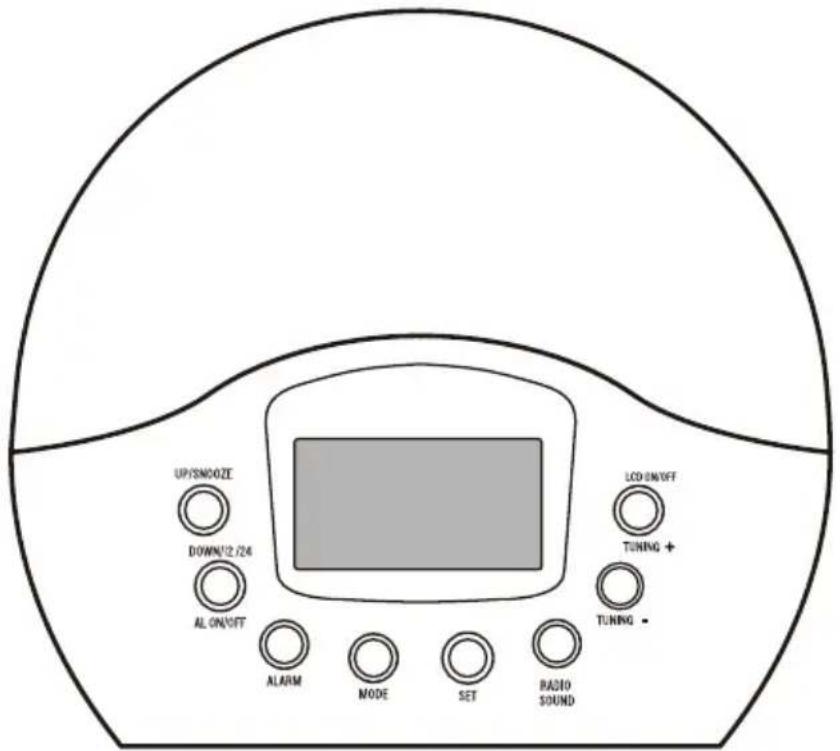
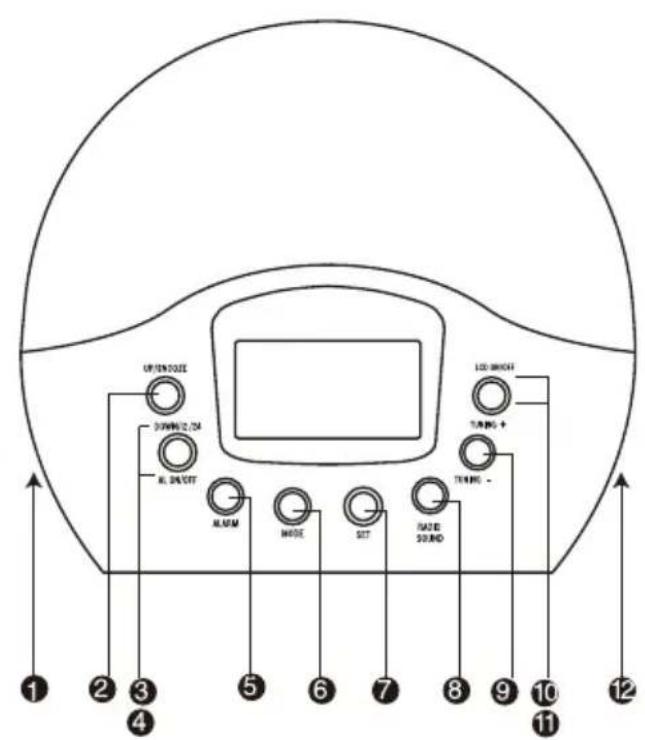
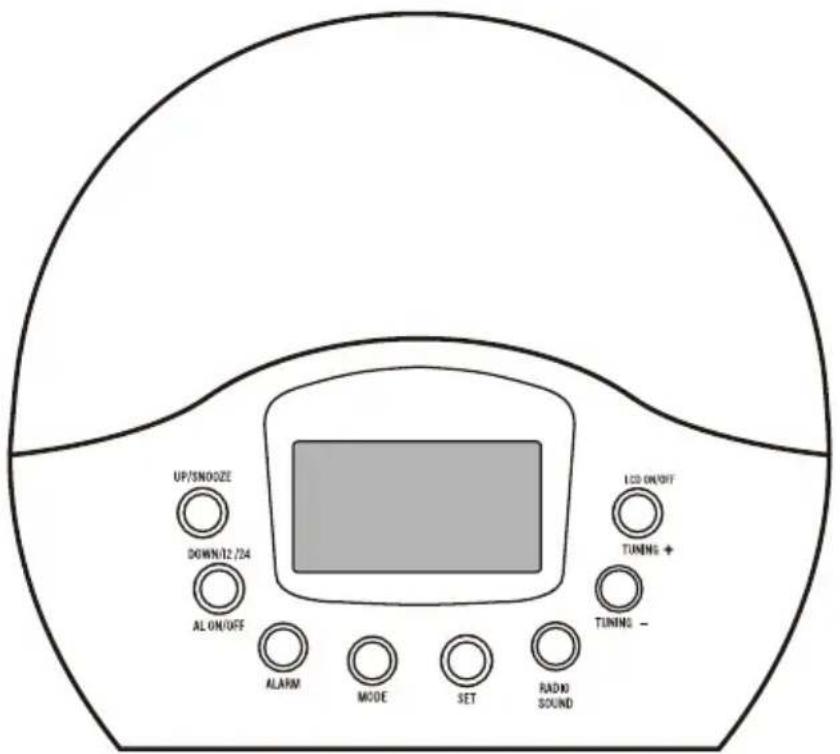
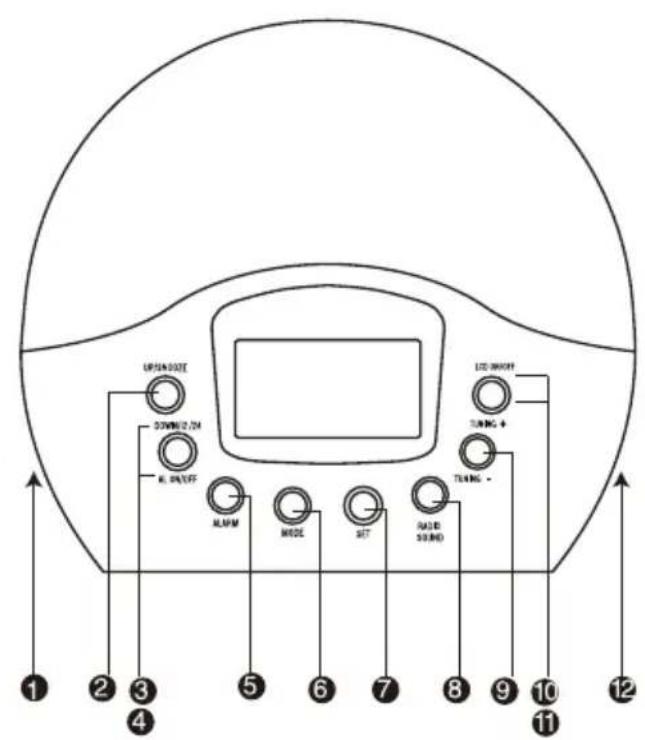
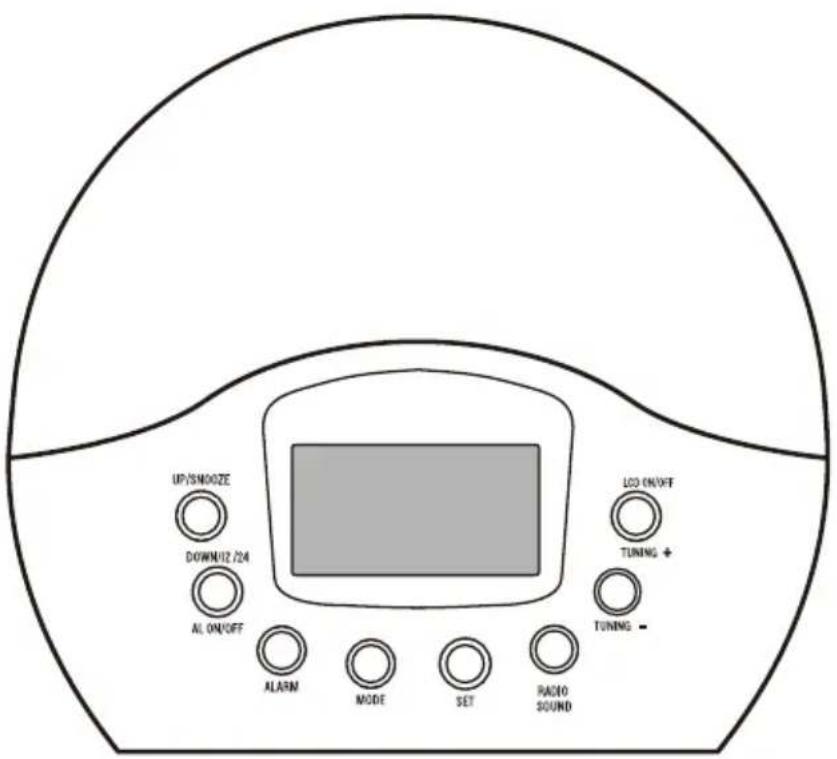
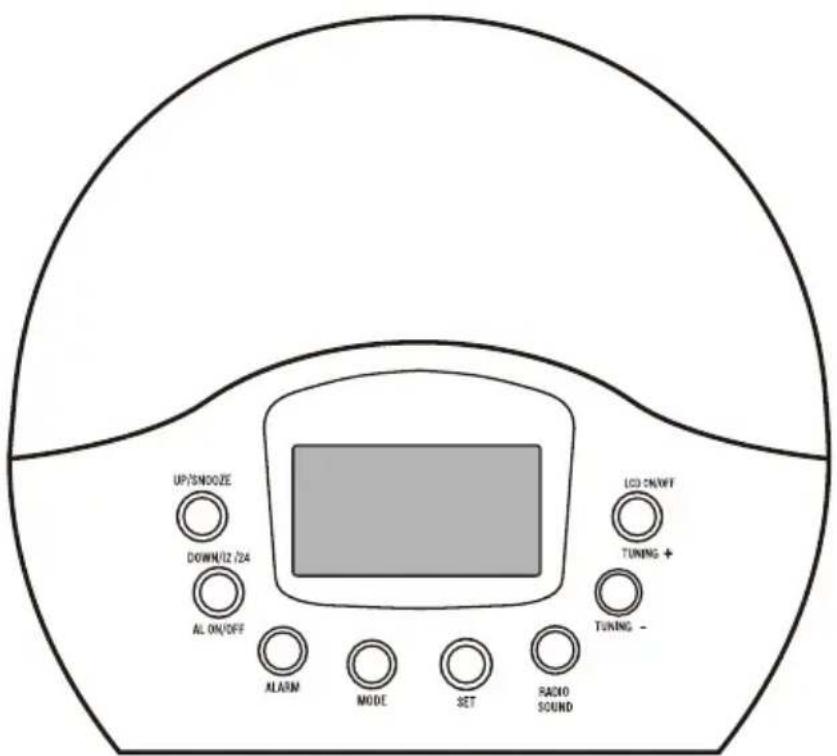
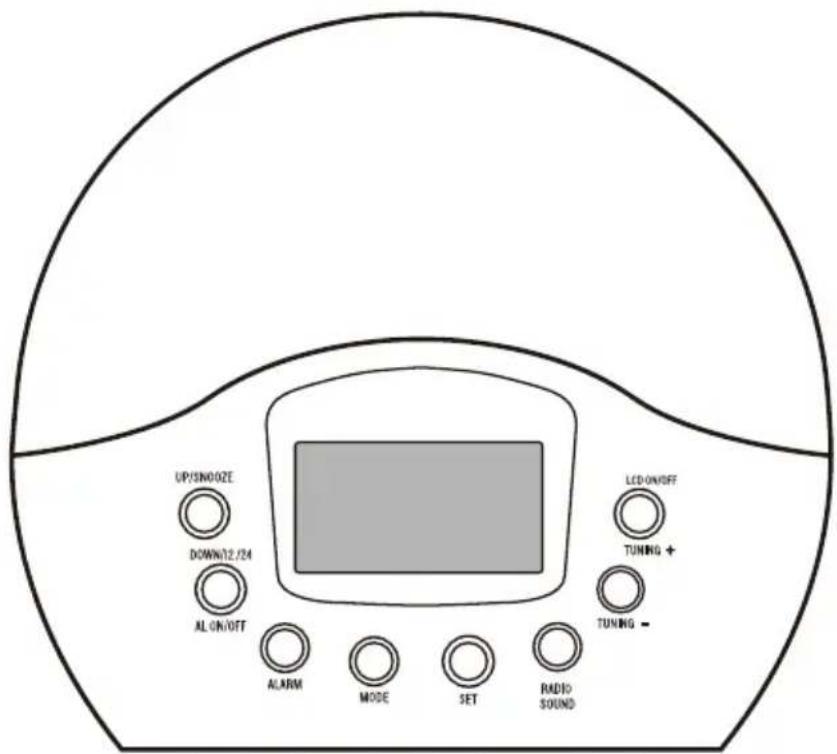
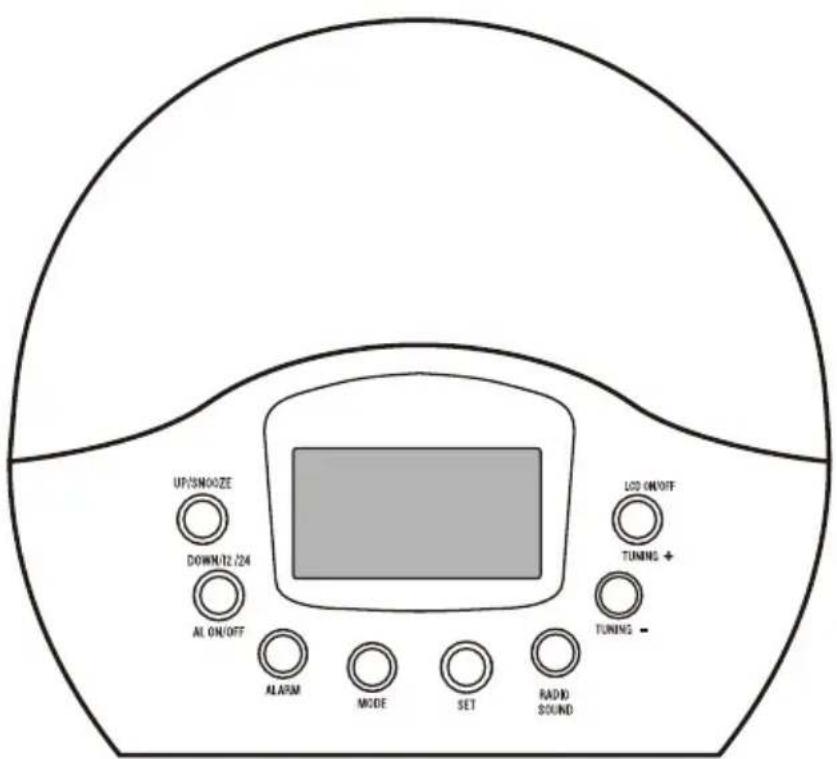
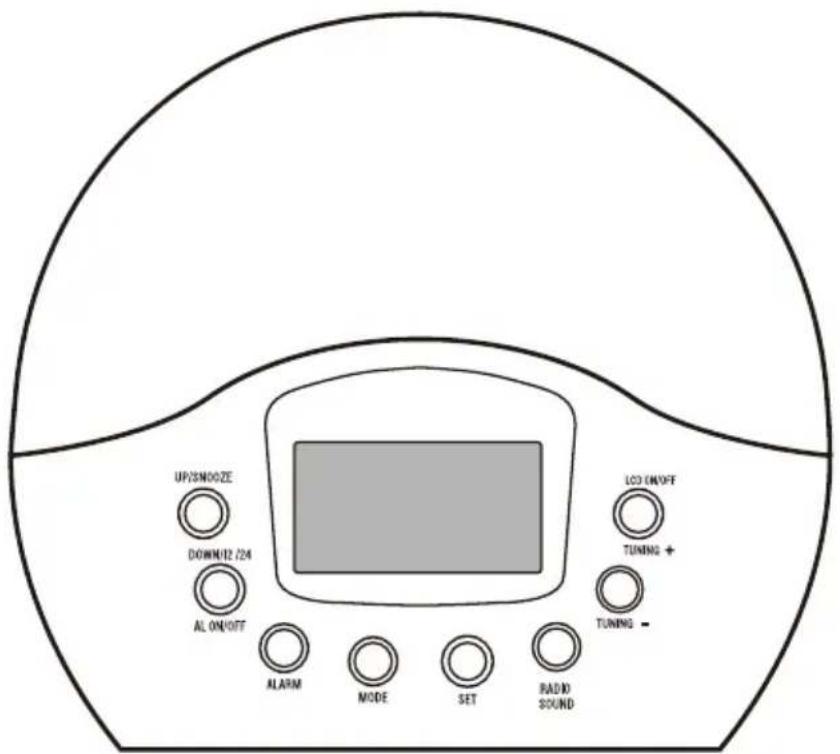
DIRECTIONS OF BUTTONS
ENG-1

Volume adjust
UP/SNOOZE
"UP" used to set the correct alarm and hour.
"SNOOZE" used for the snooze mode.
DOWN/12/24
"DOWN" used to set the correct alarm and hour. "12 / 24" select the AM / PM or 24h format.
ALON/OFF:Turn on/off the alarm.
ALARM: Set the alarm
MODE:Mode selector.
SET: Settings.
8 RADIO / SOUND: Select the natural rounds, radio or the standard buzzer.
TUNING · Turn tuner down.
TUNING +: Turn tuner up.
LCD ON/OFF:Turn on/off the LCD backlight.
Light adjust.
- LCD DISPLAY
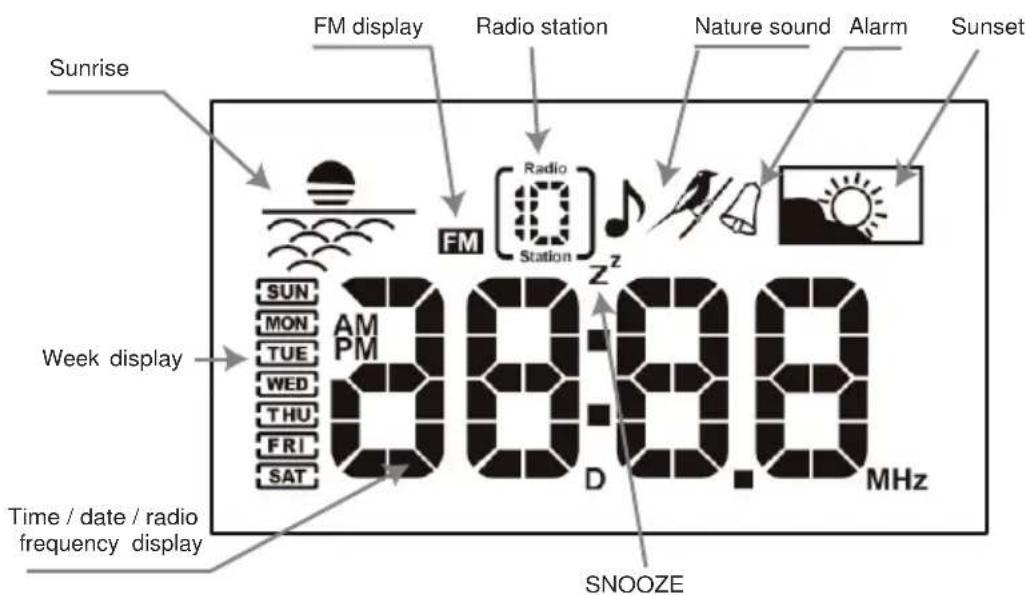
ENG-2
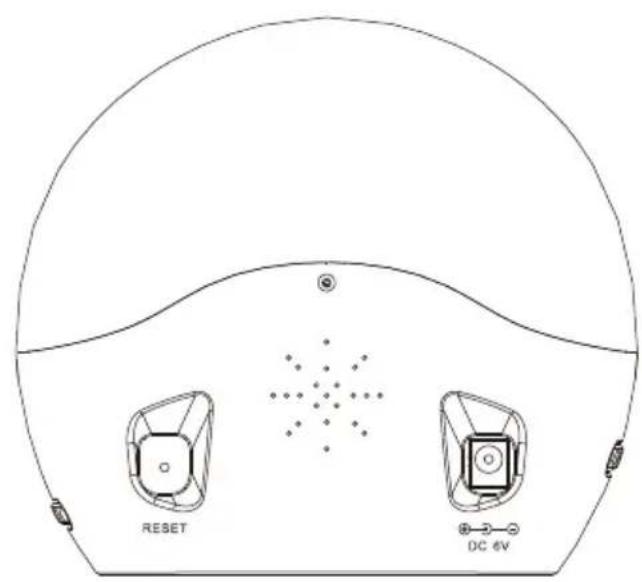
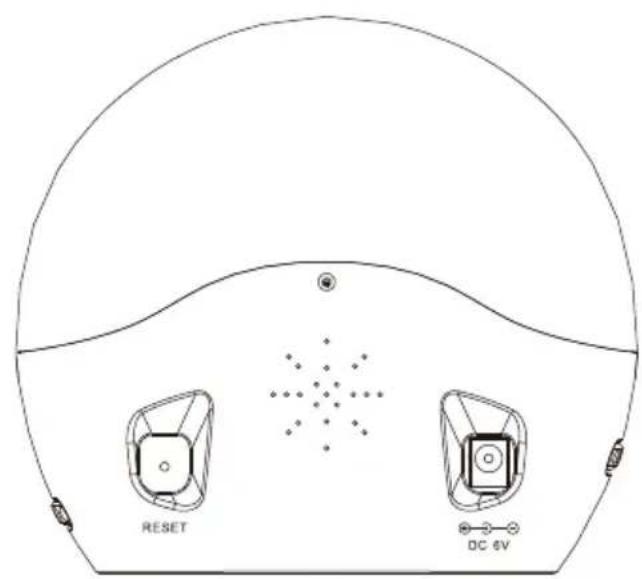
- GETTING STARTED
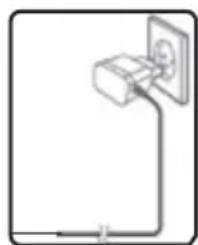
1.AC/DCAdaptor(Included)
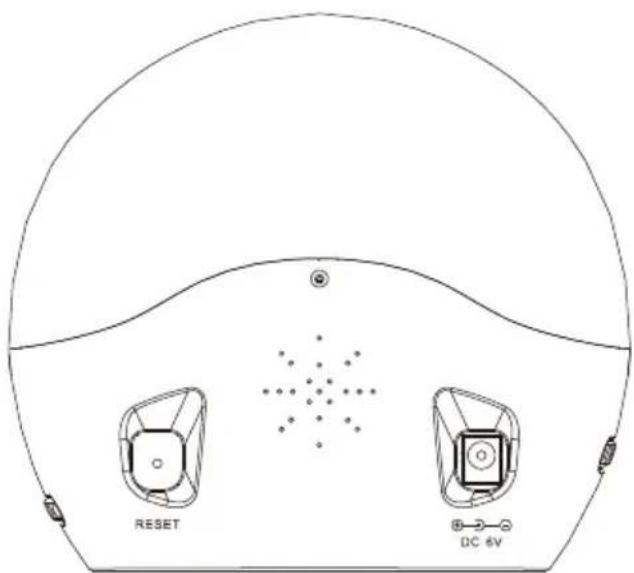
The 6V adapter powers the unit. Plug adapter into socket, making sure the adapter is not obstructed and is easily accessible to the unit.
CAUTION! To take off the wall power connector you have to remove always from the adapter and never from the cable. The main unit and adapter should not be exposed to wet conditions. No objects filled with liquid, such as vases, should be placed on the main unit or adapter.
2. Battery installation
The CR2032, 3V battery can act as a backup power supply for the main unit.
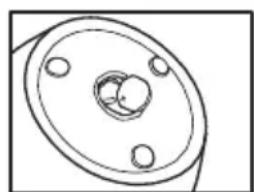
(1) Remove the battery compartment at the bottom of the unit.
(2) Insert the batteries, matching the polarities.
(3) Press RESET after each battery change
CAUTION! Don't let the battery from the reach of children.
Don't try to activate the battery by heat, recharge or any other way.
Don't drop the battery to the fire, disassemble or try to do a short circuit.
Danger of explosion if battery is incorrectly replaced. Replace only with the same or equivalent type.
The battery shall not be exposed to excessive heat such as sunshine, fire or the likeness.
- QUICK USER GUIDE
1. Time & Date
When you power on the Clock Radio, it begins with:
YEAR: 2009 / DATE: 1 / MONTH: 1 / WEEK: Thursday. And the time on 12:00AM (00:00).
To adjust the time and date is necessary:
- Press the SET button; you can see the year place blinks, in that moment you can use the UP / SNOOZE or DOWN / 12 / 24 buttons to select the correct year.
- Press the SET button again; you can see the month place blinks, in that moment you can use the UP / SNOOZE or DOWN / 12 / 24 buttons to select the correct month.
- Press the SET button again; you can see the day place blinks, in that moment you can use the UP / SNOOZE or DOWN / 12 / 24 buttons to select the correct day.
- Press the SET button again; you can see the hour place blinks, in that moment you can use the UP / SNOOZE or DOWN / 12 / 24 buttons to select the correct hour.
- Press the SET button again; you can see the minutes place blinks, in that moment you can use the UP / SNOOZE or DOWN / 12 / 24 buttons to select the correct minute.
- Finally press the SET button to confirm and finish the setting.
2. Alarm
2.1. Set the alarm time
To set the alarm you need:
- Press the ALARM button, by standard the time is 12:00 AM, to set the alarm time you have to press the SET button and use the UP / SNOOZE or DOWN / 12 / 24 buttons to adjust to hour that you wish. Press the SET button again to adjust the minutes.

- When you finish the alarm setting, you can select the best way to waking up natural sounds, the classical buzzer or the selected radio station. Use the RADIO / SOUND button to do the selection.
- Please notice, the natural sounds / melodies will sound for approximately 1 minute, then take a short brake at approximately 1 minute, and then play for 1 minute again. There are 4 natural sounds, and 6 beeper sounds / melodies.
The alarm rings each 24h all the week. If you want to cancel the alarm you have to deactivate it.
2.2. Turnon / off the alarm
- When finished the alarm time setting, the alarm is activated and the icon is displayed.
- In the time display mode, If you want to turn off the alarm function, press ALARM to enter alarm mode and the will flash, then press AL ON / OFF, the icon will not flash, press ALARM again to exit the alarm mode, the alarm is off and the icon will be not shown.
- When the alarm is off, the icon is not shown in the time display mode. If you want to turn on the alarm function, press ALARM to enter alarm mode and the will displayed, then press AL ON / OFF, the icon will flash, press ALARM again to exit the alarm mode, the alarm is on and the icon will displayed.
3. Preset light on (Sunrise)
- The "SUNRISE" mode is when the light of the unit starts with a gradual intensity increase. It turns itself up before the alarm clock rings and gradually brightens up during the period time you set.
To activate the "SUNRISE" mode we have to press the MODE button and then the SET button. Using SNOOZE and DOWN / 12 / 24 you can set the timing that you want, having 00, 15, 30, 45, 60 and 90 minutes as option. - When you choose the 00 option, means that the "SUNRISE" mode is off. In the display you can see that means that the "SUNRISE" mode is activate.
4. "SUNSET" time setting
The "SUNSET" mode is when the light and/or radio turn itself down until it is off.
To activate the "SUNSET" mode you have to press the MODE button two times and then the SET button to program it. Using the SNOOZE and DOWN / 12 / 24 buttons you can adjust the timing, using the options 00, 15, 30, 45, 60 and 90 minutes.
- When the option is 00, means that the "SUNSET" mode is not activate. In the display you can see that means that the "SUNSET" mode is activate.
Note: when setting the sunset function, the light must be turned on.
5. SNOOZE
- When the alarm is turning on, if you press the SNOOZE the sound turns off automatically come on again after about 5 minutes.
It will be off after the ringing for 1 minute, and repeat in 1 minute later. It will repeat 5 times.
If we use the radio as alarm sound, the alarms keeps ringing until you press the RADIO / SOUND button and if you
use the natural sound, the alarm will be off after 20 minutes.
- To turn off the alarm you have to press the AL ON / OFF button.
6. RADIO & NATURE SOUND MODE
- In the normal situation, press RADIO / SOUND to enter the radio mode, and then press Tuning + or Tuning - to select FM radio frequency, hold it for quickly run though the frequency.
- In the radio mode, if you'd like to preset the radio frequency, press SET and the 1 will be flash, press UP or DOWN to preset the radio station (10 stations in total), and then press SET to confirm.
- In the radio mode, if you'd like to choose the preset radio, press UP or DOWN to choose the preset radio station to listen.
- Press RADIO / SOUND 2 times to enter nature sound mode, you can press UP or DOWN to select you liked music and then press RADIO / SOUND to return the normal display situation, the natural sound will be play 20 minutes and then stop.
To adjust the light brightness you have to use the LIGHT adjusts control. You count with 10 intensity levels. (LIGHT +) turn light up; (LIGHT -) turn light down
8. Adjusting sound
Volume control: Controls the volume.
SPECIFICATIONS
| Item Specifications | |
| Display Backlight LCD | |
| Tuner Digital | |
| Sound system Mono | |
| Volume control | Rotatory |
| Input power Supplied | by switching adapter with model PSEA060100V U2. |
| Frequency range | 87.5MHz – 108MHz |
| Unit size | 16 x 15.8 x 7.6 cm |
The label locates on the bottom of main unit.
SAFETY CONSIDERATIONS
- Do not disassemble the device. Any repair work must be performed by qualified technical personnel.
- Do not subject the unit to excessive force, shock, dust, temperature or humidity
- Do not cover the ventilation holes with any items such as newspapers, curtains etc.
- Do not immerse the unit in water. If you spill liquid over it, dry it immediately with a soft, lint-free cloth.
- Do not clean the unit with abrasive or corrosive materials.
- Do not tamper with the unit's internal components. This invalidates the warranty.

- Avoid any drop or hit on the unit.
- Switch off during thunderstorms.
- MAINS plug of adapter is used as the disconnect device, the disconnect device shall remain readily operable.
- The apparatus is only used in moderate climate.
- For applicable power supplies see user instructions.
The only applicable power supply used with main unit: Switching adapter with model PSEA060100V U2, which is made by DongGuan Yingna Electronic Technology co., Ltd.
In case of long inactivity periods we recommend to switch off the unit. - Only use fresh batteries. Do not dispose old batteries as unsorted municipal waste.
Collection of such waste separately for special treatment is necessary.
Images shown in this manual may differ from the actual display.
- When disposing of this product, ensure it is collected separately for special treatment.
- The contents of this manual may not be reproduced without the permission of the manufacturer.
The technical specifications for this product and the contents of the user manual are subject to change without notice.
ALL RIGHTS RESERVED, COPYRIGHT DENVER ELECTRONICS A / S
DENVER
www.denver-electronics.com

Electric and electronic equipment and included batteries contains materials, components and substances that can be hazardous to your health and the environment, if the waste material (discarded electric and electronic equipment and batteries) is not handled correctly.
Electric and electronic equipment and batteries is marked with the crossed out trash can symbol, seen below. This symbol signifies that electric and electronic equipment and batteries should not be disposed of with other household waste, but should be disposed of separately.
As the end user it is important that you submit your used batteries to the appropriate and designated facility. In this manner you make sure that the batteries are recycled in accordance with legislature and will not harm the environment.
All cities have established collection points, where electric and electronic equipment and batteries can either be submitted free of charge at recycling stations and other collection sites, or be collected from the households. Additional information is available at the technical department of your city.
Imported by:
DENVER ELECTRONICS A/S
Stavneagervej 22
DK-8250 Egaa
Denmark
www.facebook.com/denveretelectronics
DENVER®
denver-electronics.com
LED-WECKLIGHT
CRL-300
BEDIENUNGSANLEITUNG
EINLEITUNG
denver-electronics.com
LEDPVÄGNINGSLYS
CRL-300
BRUGERVEJLEDNING
INTRODUKTION
DK-8250 Egaa Denmark
www.facebook.com/denveretelectronics
DENVER
denver-electronics.com
LED VÄCKNINGSLAMPA
CRL-300
BRUKSANVISNING
INLEDNING
- KNAPPARNAS RIKTNING
SWE-1

Volymjustering
UPP/SLUMMER
denver-electronics.com
LED-HERÄTYSVALO
CRL-300
KÄYTTÖOPAS
ESITTELY
PAINIKKEIDEN TOIMINNOT

denver-electronics.com
LED-WEKLICH
CRL-300
GEBRUIKSHANDLEIDING
INTRODUCTION
denver-electronics.com
LUMIÈRE LED DE RÉVEIL
CRL-300
GUIDE D'UTILISATION
INTRODUCTION
denver-electronics.com

SPIA LED RISVEGLIO
CRL-300
MANUALE D'USO
INTRODUZIONE
denver-electronics.com
BUDZIK SWIETLNY LED
CRL-300
PODREÇNIK OBSLUGI
WSTEP
denver-electronics.com
LUZ DE ALARME LED
CRL-300
MANUAL DO UTILIZADOR
INTRODUÇÃO
denver-electronics.com
LUZ DESPERTADOR LED
CRL-300
MANUAL DE USUARIO