
RCD 1445 USB - Radio GRUNDIG - Free user manual and instructions
Find the device manual for free RCD 1445 USB GRUNDIG in PDF.
| Product type | Radio with CD player and USB port |
| Mains power | 230 V ~ 50/60 Hz |
| Battery power | 6 x 1.5 V type R14/UM2/C |
| Maximum power consumption | 14 W in operation, < 0.5 W in standby |
| Radio wave bands | FM (VHF) |
| Frequency response | 20 Hz - 16 kHz |
| CD playback formats | CD-DA, CD-R, CD-RW (audio, MP3, WMA) |
| USB playback formats | MP3, WMA (FAT32/16) |
| Headphone output | 3.5 mm stereo jack socket |
| Antenna | FM telescopic antenna |
| Main functions | Ultra Bass System, music programming (20 tracks), repeat, random play, automatic station search, memory for 10 FM stations |
| Care and cleaning | Soft damp cloth, no detergents |
| Safety | Do not open the casing, unplug during storms, do not expose to moisture or heat |
| General information | Compliant with European directives 2014/53/EU, 2009/125/EC, 2011/65/EU; laser class 1 |
Frequently Asked Questions - RCD 1445 USB GRUNDIG
User questions about RCD 1445 USB GRUNDIG
0 question about this device. Answer the ones you know or ask your own.
Ask a new question about this device
Download the instructions for your Radio in PDF format for free! Find your manual RCD 1445 USB - GRUNDIG and take your electronic device back in hand. On this page are published all the documents necessary for the use of your device. RCD 1445 USB by GRUNDIG.
USER MANUAL RCD 1445 USB GRUNDIG
FM 87,5 ...108,0 MHz
CD-Teil
Freqenzgang: 20Hz 16kHz
To ensure that this device provides you with long-term satisfaction and enjoyment, please observe the following instructions.
This device is designed for the playback of audio signals. Any other use is expressly prohibited.
- Protect the device and the CDs from rain, moisture (dripping or splashing water), sand and heat. Do not leave it next to heaters or inside parked cars in the sun.
Make sure there is adequate ventilation when positioning the device. There must be a free space of at least 10cm behind the device. Do not place objects on the ventilation slots.
- Do not place any objects containing liquids (for example, vases) on the device. Do not insert any foreign bodies in the CD compartment of the device.
- Do not place any objects such as burning candles on the device.
- Bringing the device in from the cold can cause condensation on the CD lens, which prevents it from playing. Give the device time to warm up.
Only use the device in a moderate climate.
The CD unit contains self-lubricating bearings, which must not be oiled or greased.
Thunderstorms are a danger to all electrical devices. Even if the device is switched off, it can be damaged by a lightning strike to the mains. Always remove the mains plug during an electrical storm.
If malfunctions occur due to static electricity charges or fast transient (burst), reset the device. To do this, pull out the power plug and connect it again after a few seconds.
- Do not use any cleaning agent, as this may damage the casing. Clean the device with a clean, moist leather cloth.
Please note when deciding where to put the device that furniture surfaces are covered by various types of lacquer and plastic, most of which contain chemical additives. These may cause corrosion to the feet of the device, thus resulting in stains on the surface of the furniture which can be difficult or impossible to remove.
- Never open the device casing under any circumstances. No warranty claims are accepted for damage resulting from improper handling.

Prolonged listening at loud volumes with the earphones can damage your hearing.
The only way to completely disconnect the device from the mains is to unplug the mains cable.
General information on laser devices
You will find a symbol similar to the one shown here on the bottom of the device.
CLASS 1 LASER PRODUCT
CLASS 1 LASER PRODUCT means that the laser is designed in such a way as to ensure that the maximum permissible emission value
cannot be exceeded under any circumstances.
If operating devices or methods other than those specified here are employed, it may lead to dangerous exposure to emissions.
Invisible laser radiation is emitted if the CD compartment is opened and the safety locking mechanism is shorted. Do not expose yourself to this radiation.
See the figure on page 3.
Controls
General information
OFF CD Switches between CD, USB and
USB RADIO RADIO input sources; switches the device off.
Operation indicator. Lights up red during operation.
VOLUME Adjusts the volume.
UBS Switches the Ultra Bass System on and off.

Headphone jack for connecting a.
headphone set with a jack plug ( 3.5mm)
This automatically switches off the loudspeakers.
AC~ Socket for connecting the power cord (on the back of the device).
Radio unit
ANTENNA Telescopic antenna for FM (VHF) reception.

MONO/ST. Switches between mono and stereo reception.
UP
DOWN
Press briefly to change the frequency up and down in steps. Press and hold down to start a forward or reverse search.
PROG/
For saving radio stations on presets.
MEM
Starts the automatic station search.
ALBUM
Selects the next preset position.
MEMORY UP
Selects the next preset number when saving radio stations.
ALBUM/
Selects the previous preset position.
MEMORY
Selects the previous preset number
DOWN
when saving radio stations.
CD unit
OPEN/CLOSE
Opens and closes the CD compartment.

Starts and pauses playback.
UP
DOWN
Press briefly to select the next or previous track.
Press and hold down to start a forward or reverse search.

Ends playback, deletes track memories.
PROG/MEM
ALBUM
For saving tracks when creating a memory.
MEMORY UP
In MP3/USB mode: selects the next album.
ALBUM
In MP3/USB mode: selects the previous album.
MODE
In CD-DA mode: for repeating a track or the entire CD.
In MP3/USB mode: for repeating a file or track, all the files on an album or all the files.
Selects the function random.
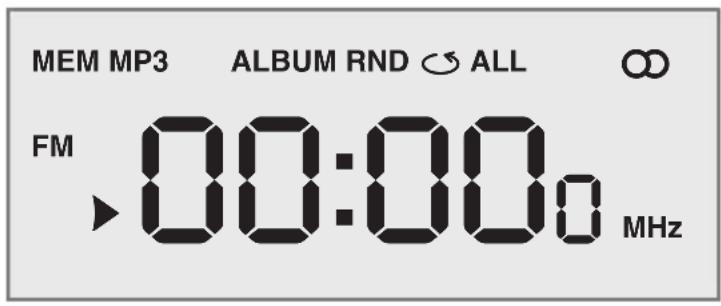
Display

00:00
In radio mode: shows the frequency, In CD mode: the tracks or titles are shows the preset number. played back in random order.
In CD-DA mode: shows the total number of tracks and the current track.
In MP3/USB mode: displays the total number of albums and the current file.
FM In radio mode: FM (VHF) frequency band indicator.

In CD mode: indicates playback, flashes when paused.
MEM In radio mode: flashes when a radio station is saved, lights up when tuned to a stored radio station. In CD mode: flashes when a track memory is created and played back.
MP3 In MP3/USB mode: indicates that an MP3 CD is in use.
ALBUM In MP3/USB mode: shows the album level.
In CD mode: flashes when a track is repeated.
In MP3/USB mode: flashes when a file is repeated.
Lights up when an album is repeated.
ALL In CD mode: lights up when the whole CD is repeated.
In MP3/USB mode: lights up when an album is repeated.
In radio mode: an FM stereo station is being received.
MHz In radio mode: in combination with the FM frequency indicator.
Mains operation
Note:
- Check that the mains voltage on the type plate corresponds to your local mains supply.
If this is not the case, contact your specialist dealer.
1 Plug the mains cable supplied into the AC socket on the radio recorder (back of device).
2 Plug the mains cable into the wall socket.
Caution:
The device is connected to the mains with the power plug. To fully disconnect the device from the mains, pull out the plug.
The mains plug is used to disconnect the device. It shall remain readily operable and should not be obstructed during intended use.
Battery operation
1 Open the battery compartment by pressing the catch and removing the lid.
2 Insert six batteries (6 x 1.5 V/type IEC R14/UM2/C-size), observing the polarity marked on the lid of the battery compartment.
3 Close the battery compartment.
Notes:
- Do not expose the batteries to extreme heat, caused for example by direct sunlight, heaters or fire.
Remove the batteries when they are flat or when you know that the device will not be used for a long period of time.
The manufacturer accepts no liability for damage resulting from leaking batteries.
The batteries are switched off during mains operation.
Environmental note:
Batteries, including those which contain no heavy metal, may not be disposed of with household waste. Please dispose of used batteries in an environmentally sound manner. Find out about the legal regulations which apply in your area.
GENERAL FUNCTIONS
Switching on and off
1 Switch on the device with the required input source by moving the switch to the OFF CD USB RADIO 机 position.
2 Move the OFF CD USB RADIO switch to the OFF position to switch off the device.
Selecting the input source
1 Select the input source (CD, USB or RADIO) using OFF CD USB RADIO.
Adjusting the volume
1 Adjust the volume with VOLUME*.
Switching the Ultra Bass System on and off
This function boosts the bass frequencies.
1 Switch the Ultra Bass System on and off with UBS.
Listening with headphones
1 Connect the headphones to the headphone jack (0 3.5 mm).
- This switches off the loudspeakers.
Note:
Excessive sound pressure from the earphones or headphones can cause hearing loss.
Automatic shutdown
If the device is in the "Stop" position for more than 15 minutes it automatically switches to Stand-by mode. For further using switch on the device again.
Antennas
1 For FM stations (VHF) extend the telescopic antenna. Note:
If the FM signal is too strong, it is advisable to push in the telescopic antenna.
Selecting the radio input source
1 Move the OFF CD USB RADIO switch to the RADIO position.
Setting and storing radio stations Automatic station search
1 Activate the station search by pressing PROG/MEM until the frequency display changes to rapid run-through.
- The device searches for up to 10 radio stations and then saves them. After the search has finished, the station stored in position 01 can be heard.
Automatic station search
1 Activate the station search by pressing DOWN or UP until the frequency display changes to rapid run-through.
- The search stops when a programme is found.
Manual station search
1 To move the frequency forward in steps, briefly press DOWN or UP several times.
- The frequency changes in steps of 50kHz
Storing stations on station positions
Up to 10 stations in the FM band can be stored.
1 Press DOWN or UP to select the station.
2 Press PROG/MEM briefly to activate the memory function.
3 Select the desired station position with ALBUM MEMORY UP or ALBUM MEMORY DOWN.
4 Press PROG/MEM to save the station.
5 To store more stations, repeat steps 1 to 4. Note:
You can replace a station on a preset with a new one by carrying out steps 1 to 4 as described above.
Selecting a preset position
1 Select the station preset position with >ALBUM MEMORY UP « or »ALBUM MEMORY DOWN «.
Stereo/mono reception
If the device receives an FM stereo station, appears in the display. However, if the signal from the FM stereo station is weak, you can improve the sound quality by switching to mono reception.
1 Switch to mono reception by pressing MONO/ST.
2 Switch to stereo reception by pressing MONO/ST. again.

The device is suitable for music CDs displaying the logo shown here (CD-DA) and for CD-Rs and CD-RWs with audio data.
When burning CD-R and CD-RWs with audio files, various problems may arise which could lead to interference in playback. This can be caused by faulty software or hardware settings or by the CD being used. Should such problems arise, contact the customer services of your CD burner or software manufacturer or look for relevant information, for example on the Internet. When you are making audio CDs, observe all legal guidelines and ensure that the copyright of third parties is not infringed.
Always keep the CD compartment closed to prevent dust from collecting on the laser optics. Do not attach adhesive labels to CDs. Keep the surfaces of CDs clean. You can play standard 12cm CDs as well as 8 cm CDs on your device. An adapter is not necessary.
Selecting the CD input source
1 Move the OFF CD USB RADIO switch to the CD position.
2 Press »OPEN/CLOSE« to open the CD compartment.
3 Insert a CD in the compartment with its label facing upwards.
4 Press OPEN/CLOSE to close the lid of the CD compartment.
- The device reads the content of the CD. The total number of tracks appears in the display.
CD playback
Press to start playback.
-Playback begins with the first track.
Display: the current track number.
- Playback stops at the end of the CD.
2 Press to pause playback pause.
3 Press II to resume playback.
4 Press MONO/ST. to end playback.
5 Press OPEN/CLOSE to open the CD compartment and take out the CD.
6 Close the CD compartment.
Repeating the current track
Press DOWN briefly during playback.
- The track is repeated from the beginning.
Selecting another track
1 During playback, keep pressing DOWN or UP until the number of the track you want to hear appears in the display.
- Playback of the selected track starts automatically.
Note:
- You can also select tracks in the stop position. However, you must then start playback of the track with
In stop mode you can press and hold down DOWN or UP select tracks more quickly.
Searching for a passage within a track
1 During playback, press DOWN or UP and hold it down until you find the passage you want to hear.
- Playback starts when you release «DOWN« or «UP «
Note:
During the search the volume is reduced.
Repeating a track (Repeat One)
1 During playback, press MODE once.
- The current track is repeated.
2 To terminate the function, press MODE twice.
Repeating all tracks (Repeat All)
1 During playback press MODE twice.
- The whole CD is played back repeatedly.
2 To terminate the function, press MODE once.
Creating a track memory
You can create a track memory of up to 20 tracks for the current CD in any order you choose and then play them back in that sequence. A track may be stored more than once. Program is only possible in the stop position.
Selecting and storing tracks
1 Press PROG/MEM to call up the function.
2 Select the track by pressing DOWN or UP
3 Press PROG/MEM to save the track.
4 To store more tracks, repeat steps 2 to 3.
Playing back a track memory
1 Start the track memory by pressing
-Playback begins with the first programmed file or track.
2 Press MONO/ST. to end playback.
3 To play the track memory again, press PROG/MEM and afterwards II.
Changing the track selection
1 In stop mode, keep pressing PROG/MEM until the number of the track you want to replace appears in the display.
2 Select the number of the new track by pressing DOWN or UP
3 Press PROG/MEM to save the new track.
Adding tracks
1 In stop mode, press PROG/MEM until the preset number shown in the display is zero.
2 Select the number of the new track by pressing DOWN or UP
3 Press PROG/MEM to save the new track.
Deleting the track memory
The device must be in the stop position.
1 Press >OPEN/CLOSE to open the CD compartment
or
press MONO/ST.while programming.

The device is suitable for CD-Rs and CD-RWs with MP3 and WMA formats.
In MP3 mode, the terms "album" and "file" are very
important. "Album" corresponds to a folder on a PC, "File" to a file on a PC or a CD-DA track. The device reads MP3 files with a maximum of 255 files per album. An MP3 CD may not contain more than 512 files or albums in total.
When burning CD-R and CD-RWs with audio files, various problems may arise which could lead to interference in playback. This can be caused by faulty software or hardware settings or by the CD being used. Should such problems arise, contact the customer services of your CD burner or software manufacturer or look for relevant information, for example on the Internet. When you are making audio CDs, observe all legal guidelines and ensure that the copyright of third parties is not infringed.
Selecting albums and files
1 Select the album during playback by pressing ALBUM MEMORY DOWN or ALBUM MEMORY UP.
2 Select the file you want by pressing DOWN or UP
- Playback of the selected file starts automatically after a short time.
Notes:
- You can also select albums and files in the stop position. However, you must then start playback of the file with .
The root album is shown as number 1. However, you can only select an album if it actually contains MP3 files.
Repeating a file (Repeat 1)
1 During playback, press MODE once.
- The current file is repeated.
2 To quit the function, press MODE until the repeat indicator goes out.
Repeating all the files in an album (Repeat Album)
1 During playback, press MODE twice.
- All the files on the current album are played back repeatedly.
2 To quit the function, press MODE until the repeat indicator goes out.
Repeating all files (Repeat All)
1 During playback, press MODE « until » ALL « appears in the display.
- The whole CD is played back repeatedly.
2 To quit the function, press MODE until the repeat indicator goes out.
Playing back files in random order (Random)
1 In Stop mode, press MODE « until RND « appears in the display.
2 Press II to start random playback.
- All files on the CD are played back once in random order.
3 To end this function, press MODE*.
Creating a track memory
You can store and then play back up to 20 titles from various albums on the disc or USB memory stick in a set order. A track may be stored more than once. Program is only possible in the stop position.
Selecting and storing files
1 Press PROG/MEM to call up the function.
- Display: «000« for the first preset position, «MEM« flashes.
2 Select the album by pressing «ALBUM MEMORY DOWN« or «ALBUM MEMORY UP«.
3 Select the file you want by pressing DOWN or UP
4 Press PROG/MEM to save the file.
- Display: >000 for the second preset position, MEM< flashes.
5 To save more files, repeat steps 2 to 4.
Playing back titles in random order (Random)
1 In stop mode, keep pressing MODE until RND appears in the display.
2 Press to start random playback.
- All tracks on the CD are played back once in random order.
3 To terminate the function, press MODE again.
Playing back a track memory
1 Start the track memory by pressing
- Playback begins with the first programmed file.
2 Press MONO/ST to end playback.
3 To play the track memory again, press
PROG/MEM and afterwards II.
Changing the file selection
1 In stop mode, keep pressing PROG/MEM until the number of the file you want to replace appears in the display.
2 Select the number of the new file or track by pressing DOWN or UP
3 Press PROG/MEM to save the new file or track.
Adding files
1 In stop mode, keep pressing PROG/MEM until the file shown in the display is zero.
2 Select the number of the new file by pressing DOWN or UP
3 Press PROG/MEM to save the file.
Deleting the track memory
The device must be in the stop position.
1 Press »OPEN/CLOSE« to open the CD compartment;
or
press MONO/ST.>while programming.
The device supports most MP3 Player or USB memory sticks.
Note:
The device must be switched off while the USB connection is being made. If it is not switched off, data can be lost.
Connecting a MP3 Player or an USB memory stick
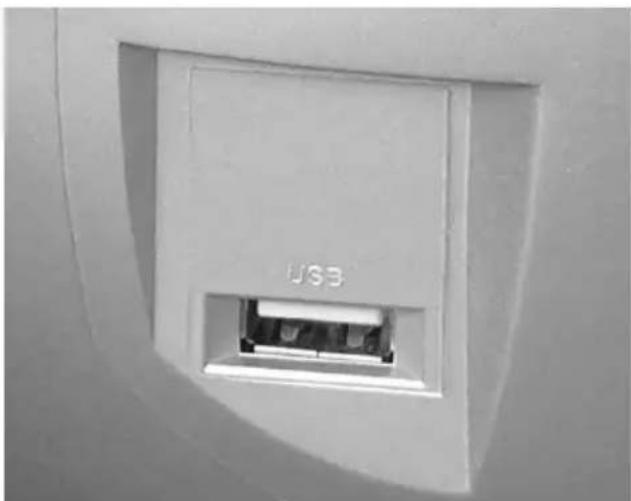
1 Move the OFF CD USB RADIO switch to the OFF position to switch off the device.
2 Connect the USB interface of the MP3 player to the USB socket on the device using a standard USB cable;
or
insert the USB plug of the USB memory stick in the USB socket on the device.
Notes:
To remove the MP3 player or the USB memory stick, switch off the device and pull out the cable for the data medium.
The USB socket on the device does not support a connection for a USB extension cable and is not designed for directly connecting to a computer.
Selecting the USB input source
For MP3/WMA mode with MP3 player or USB memory stick, the same playback and search functions are available as for MP3 mode (see MP3 Mode section).
Note:
The function "Creating a track memory" is not possible in USB mode.
1 Move the OFF CD USB RADIO switch to the USB position.
2 Press II to start playback.
- Playback begins with the first track.
3 Press MONO/ST to end playback.
Notes:
The USB socket of this device is a standard socket. Due to rapid develo ments in technology and new manufacturers appearing every day, the compat i bility of USB memory sticks can only be partially guaranteed. If USB operation is impaired or is not possible, this does not indicate a malfunction of the device.
Caution:
Bi-directional data transfer as defined for ITE devices in EN 55022/EN 555024 is not possible.
USB transfer is not in itself an operating mode. It is only an additional function.
- Never remove memory cards and USB devices during operation. This can damage the memory card, the USB device and the device. This type of damage will invalidate your warranty.
Technical data

This device is noise-suppressed according to the applicable EU directives. This product fulfils the European directives 2014/53/EU, 2009/125/EC and 2011/65/EU.
You can find the CE declaration of conformity for the device in the form of a pdf file on the Grundig Homepage
www.grundig.com/downloads/doc.
Never open the device casing. The manufacturer will not accept any liability for damage resulting from improper handling.
The type plate is located on the bottom of the device.
Power supply
Mains operation: 230V ,50 / 60Hz
Battery operation: 6 × 1.5 V IEC
(R14/UM2/C-Size)
Max. power consumption
Operation: 14 W
Standby: < 0,5W
Output
DIN 45324, 10% THD
Music signal power: 2 × 1.5 ~W
Sine wave power: 2 × 1 ~W
Stereo headphone jack: 3.5 ~mm
Radio unit Frequency bands
FM 87.5 ...108.0 MHz
CD unit
Frequency response: 20 Hz ... 16 kHz
Noise voltage ratio: ≥ 65 dB
MP3 features
Playback format: MP3 and WMA
File system / file management: ISO 9660 Level 1 compatible
USB
FAT32/16 file is compatible with USB 2.0
Dimensions and weight
WxHxL 245×139×245mm
Weight: 1.8 kg
Technical and design modifications reserved.
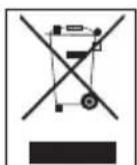
Compliance with the WEEE Directive and Disposing of the Waste Product:
This product complies with EU WEEE Directive (2012/19/EU). This product bears a classification symbol for waste electrical and electronic equipment (WEEE).

This symbol indicates that this product shall not be disposed with other household wastes at the end of its service life. Used device must be returned to official collection point for recycling of electrical and electronic devices. To find these collection
systems please contact to your local authorities or retailer where the product was purchased. Each household performs important role in recovering and recycling of old appliance. Appropriate disposal of used appliance helps prevent potential negative consequences for the environment and human health.
Compliance with RoHS Directive
The product you have purchased complies with EU RoHS Directive (2011/65/EU). It does not contain harmful and prohibited materials specified in the Directive.
Package information

Packaging materials of the product are manufactured from recyclable materials in accordance with our National Environment Regulations. Do not dispose of the packag
ing materials together with the domestic or other wastes. Take them to the packaging material collection points designated by the local authorities.
Troubleshooting
If a fault occurs, first refer to this information before you take the device for repair.
If you are unable to rectify the fault using the information given here, contact your local dealer or service specialist.
Under no circumstances should you attempt to repair the radio recorder yourself, as this would invalidate the guarantee.
| PROBLEM | POSSIBLE CAUSE | REMEDY |
| GENERAL INFORMATION No sound | The volume setting is too low The headphones are connected The batteries are flat The batteries are incorrectly inserted The mains cable is incorrectly connected | Adjust the volume, unplug the headphones Replace the batteries, insert then correctly Connect the mains cable properly |
| The device does not respond to button commands The device suffers malfunctions during playback | Static electrical discharge or electrical fast transient (burst) | Switch off the device, disconnect the mains cable and plug it in again after a few seconds Remove any batteries |
| RADIO Poor radio reception | Weak radio antenna signal Interference from electrical devices such as televisions, video recorders, computers, neon lamps etc. | VHF (FM): tilt and turn the telescopic antenna Keep radio recorder away from electrical devices |
| CD Playback will not start | The CD is damaged or dirty | Replace or clean the CD |
| The CD player skips tracks A stored track | memory is being played The RANDOM function is activated | Switch to normal playback or delete Switch off the RANDOM function |
| CD-Rs or CD-RWs are not being played back, or being played back incorrectly | The CD is faulty or the software or hardware settings were incorrect during burning | Check the components of your CD burner / burner software or change the CD you are using |
| MP3 MP3 CD plays too fast or slowly | The sampling frequency of 44.1 kHz was not used | Burn a new MP3 CD using the correct sampling frequency |
FM 87,5 ...108,0 MHz
Unite CD
FM 87,5 ...108,0 MHz
Unità CD
File System/File Management: ISO 9660 Level 1 compatible
USB
USB 2.0, compatible con sistemi file FAT32/16
Dimensioni e peso
L×A×P: 245×139×245mm
Peso: 1,8 kg
CLASS 1 LASER PRODUCT
Bby yBnDnte cHMBoI, aHaNoTnHybIn TOMy, KOtOpBbYka3aH Ha HxKHei CTOPOHe N3dEINr.
CLASS 1 LASER
PRODUCT (JIA3EPHOE H3DEJNE KJACCA 1) O3-Haayet, YTO JIa3ep cKOHCTpyuPobAH TaKIM o6pa3OM, YTO BEINHnHa MaKcMaJIbHO IOnyCTHMOrO H3NPyehnHe MoXeT 6bIT NpeBbIeHa Hn Pn KaKnx 06CToRrTeNbCTbax.
Ecnn HcnoNb3yOTcJeHCTByUOuNe yctpoiCTBa Hn MeToIbl, OTnuaHUsCeOn Yka3aHHbIX 3Decb, 3TO MoKet npHBecT K ONACHOMY BO3dEeCTBnHO N3NyueHn.
Pn BckpbHttn OTeKa CD Ncnyckaetc HEBNIMOe Ia3epHoe n3nyeHne, a TaKKe npOnCxOJNT 3ambikaHne MExAHn3Ma npedoxpaHntelbHO6NoKIpOBKn. He NoDBepraIte ce6B03JeCTBnO 3TOro n3nyeHn.
Cm. pncyHOK Ha cTp. 3.
3nemteblynpablenna
OshaHΦopMaun
OFF CD NepeKJIIOUaET MeJxIy HCTOuHnKAMn
USB RADIO BxoDa CD, USB RADI;
BbIKJIIOHaETYCTPOINCTBO.
ON INHINKaTOp BkIIOueHn. Bo BpeMa
pa6oTb CBETnTc KpaChbIM CBetOM.
VOLUME Perynpyet rpoMkoctb.
UBS BkHouaET N BbIKHouaet CNTeMy
Ultra Bass System.

THe3nO nIa NpOKnIoueHn ITeKepe
HAYUHNIKOB (03,5MM).
Pn3TOM aBtOMaTHueCKN OTKHoua
IOTcAkyctnueckne CnCTembl.
AC~ He3do nna nooknoueHHn cTeBoro
Hypa nHTAHn(3aHe cTOpohbI yctpoiCTBa).
blok padnoonpneMHnka
ANTENNA Teneckonnuecka aHTeHHa npi-n
ema cTahun FM (VHF).

ONO/ST. IpeeknHouaet MeKdy peKHMAMN
MOHO- N CTepeo npHema
UP
DOWN
KpaTkoBpeMeHHo HaxMnte IJIa
NOWAROBOTO IN3MeHENY qACTOTbI
BBePx IN BHN3.
Haxmte n yapedknbate nn
3anyska nonska BnpeepnnHa3a.
PROG/
MEM
coxpaheHH paIIOCTaHcN.
ALBUM/
MEMORY
DOWN
Bb6npaet npeibinyuee nojoxe
Hne ppeBapntelbno HacpoKn.
BbIbIpaet nppeIbIyuyn HOMep
npeBaPHTeBHOH HAcTpoKn.
npcoxpanenpaanoctaun.
Bnok CD
OPEN/CLOSE
OTkpbiBaET 3aKpbIbAeT OTcEK
CD.

BknioyaeI npnoctaHaBnBa-et BocnpoN3BeJeHne.
UP
DOWN
KpatkoBpeMeHHo HaxMnte IIN
BbI6opa cneDyUoese nn
npebidyuee npoxxkn.
Haxmteu yapedxnbateIЯ
3anycka noncKa Bnpeed nn
Hc3a.
■ MONO/ST.
3aBepwaet BocnpOn3BeJeHne,
yanaTnamTaDopOKeK.
PROG/MEM
IЯ coxpanennoDopoxek
PnCO3aHnn PAMrN.
ALBUM
Bpekme MP3/USB: Bb6npa
MEMORY UP
et cneyuounn aIb6om.
ALBUM
BpeXnMe MP3/USB:
MEMORY DOWN
BbIbIpaET npEbnUyni
anb6om.
MODE
BpeKMe CD-DA: nIra NOBTo-opa IopOxKn HnB Cbero CD.
BpeKmMe MP3/USB:
NOBTOPa aHna HnI DOpOxKN, BCEX aHNOB BAJIb6ome HnBCEX aHNOB.
BbIbpaet yHKuHIO BOC
PpON3BedeHn B PpON3BOJbHOM npOJaKe.
Dincknei
00:00:
Bpexnme paannoepneMnka:MP3
otobpaactoy,Homep npaBapntbHn HacptpoKn.
B pexime CD-DA: oTo6paXaet 06uee uncno dopoxek n TekyuO npoxk.
B pexnme MP3/USB: oTo6paXaet 06uee Yncno aIb6oMoB n Tekyu nn an.
FM Bpekme paHnoPnemHka:
HnIkaTOp YactoTHoro dna3OHa FM (YKB).
MW B pexKIme paAnOpnpHmHnka:
HnHKaTop qactoTHOrO dHaana30Ha MW (cpeHne BOnHbI).

B pexkme CD: yka3bIbaet BocnpoH3BeDeHne, Miraet Bo Bpem nay3bl.
MEM Bpexime paHnoPneMHnka: Mra
et np coxpaehn npaioctanu, 3aropaetc npn HactpoKe Ha coXpaehnyo paioctanu.
PexnM CD: Mraet, KOrda co3aetCn BocnpOn3BOJntc nAmrTb DOpoxkN.
BpeKMe MP3/USB: yKa3bIbaeT, 1TO HcNoJIb3yEtCRA KOMnAKT-DnCK MP3.
BpeKHe MP3/USB: oTo6paXaet ypoBeHb anb6oma.
RND BpeKHe CD:Bce dopoxKn HnN
3aHnCH BOCPON3BOOJTCB B PON3-BOJbHOM NOPJKe.
BpeXnme CD: mHaer Bo BpeM noBtopa IopoxkN.
BpeKHe MP3/USB: MHTaet BO BpEm NOBToPa aHa.
3aropaetc BO BpemnIOBtopa anb6oma.
ALL BpeKHe CD:3aropaeTcB BO BpeMa NOBTopa BCero KOMnAKT- DnCKa.
Bpekme MP3/USB:aropaeTcBO BpemnoBtopa anb6oma.

BpeKMe paHNoPnEmHnKa: npHnMaetc stpeoctaun FM.
MHz BpekHme paHnoHpHMeHHka:B
coyetaHn C nHnKaTopom Yactotbl FM.
Pa6ota ot 3nektpocetn
Ppimmeyane.
Y6eHntecb,TO HAnpJxHeHne 3NeKtpOnHTAHnyaKa3aHHoe Ha nacnOpTHoN Ta6nUKe, COOTBeCTByET HAnpJxHeHIO MeCTHoN 3NeKtpocEtN.
B npotnbHOM cnyae o6paTntecb K cneuaanuHIOPOBaHHOMy dInepy.
1 Bctabbte wtekep whypa nHTAHn, BXoJauero B KOMnnkT, B rHe3IO AC\~MarrHHTOnbl (3aHnnaHnbcyctpoiCTBa).
2 Bctabbte Bnky shypa nntaanB po3eKy.
BHHMaHne!
YcTpoIcTBO NOKIIHouaETcK 3JIeKTpocTeN C noMoUbHO uTeNCeBHo BnIKu. IINr NOnHOrO OTKIOHueHn H3dEHHo OT 3JIeKTpocTeN n3BNeKHTe BnIKy H3 po3EtKn.
山tencehbaBnka hcnno3yetcna otknioeHn yctpoiCTBa OT cetn.Bo Bpemnncno3OBaHnno Ha3HaueHHIO DCtyn K BNKe He DonxKeH 6bITb 3atpydHeH.
Pa6ota ot 6aTaapeek
1 OtkpoTe 6aapeHbI OTceK, Haxab Ha 3aueKy, n CHIMnTe KpbIuKy.
2 Bctabbte wectb 6aapeeK (6 x 1,5 B/Tn IN IEC R14/UM2/pa3mep C), co6nIOaI nonpHocTB, yKa3aHHyo Ha Kpbuike 6aapeHoro orCeka.
3 3aKpoTe 6atapeHbI oTceK.
PnmeuHna.
He noDBeprAte 6atapeKn BO3deNCTBnHO cnIbHoro Tenna, HapnMep, ot npMbx COInHeuHbIXnyeu, oBorpeBaTeNe nnOrHa.
Ecn6atapeKpa3pAINncbHnBAMn3BecTHO,TOyCTPOIcTBoHe6yETNCN0JIb3OBaTbcB TeueHne npOIOJXHTeNbHO BpeMeHH,HI3BNEKITE 6atapeKn.
Pon3BOAnTeIb He Hecet OTBcTBeHHocTH 3a NOBpeKdEHH, Bb3BaHHbI IpoteKaHHeM 6aTaapeek.
Bo Bpempa6oTbIOTcETn6atapeuKnOTKIOUaTOTCR.
PpmeHne no oxpaHe okpykaioe Cpebl
BatapeKn, B TOM Yncne 3JemeHTbI NHTAHH, He coepkaune TjKeNbIX MetaIIIOB, 3anpeuaetcYtINN3HPOBaTb BMeCTe C 6blTOBbIMN OTXODAMN. YtINN3HpyTe HcONb3OBaHHbIe 6atapeKn, He npuHnRA BpeDa 3KOJIOnrN. Y3HaIte O npaBOBbIX HopMax, DeNCTByOUIx B BAWe m perNoHe.
BkIIOUeHne N BbIKIOUeHne
1 BkHouHTe MaHHTOy C HxHbIM NCTOuHNKOM BXoJa, yCTaHOBnB NepeKlnHoyatEnb B NIOJoxKeHne OFF CD USB RADIO*.
2 YTo6bI BBIKNIOHTb yCTpoINCTBO, yCTaHOBInTe nepeKIIHOATeNB>OFF CD USB RADIO « B NOJIOKeHne >OFF<.
BbI6Op nCTouHnKa BXoJa
1 Bb6epnte nctouHnK BXoJa (CD, USB nnRADI) c nOmoaBIO nepeKnioyateTEn »OFF CD USB RADIO«.
PerylnpOBKa rpoMkoCTN
1 Otperynnyte rpoMkoctb peryIaTOpOM VOLUME.
BkIIOUeHne N BbIKJIIOUeHne cNCTeMbI Ultra Bass System
3TaФункияуснINBAeT HN3KHe qaTOTbl.
1 BkHouHTe N BbIKHouHTe CnCTemy Ultra Bass System c NOMOuBIO UBS.
PpocnyuBahnec HauHnKamn
1ПОДКИОЧNTe WTEKEp HAYUHINKOB K rHe3dY » (3,5 MM).
- Pn 3tOM aBtOMaTHueckn OTKJIHOaHOTcAkyCTN-ueckne CnCTembl.
PpimmeuHne.
Upe3MepHoe 3ByKOBoE IaBHeHne HAYuHNKOB HnroIOBbIX TeNeΦoHOB MoXe TpNBecT K NtPepe cnYxa.
ABTOMATNueckoe OTKJIouyehne
ecn yctpoiCTBO HAXOINTCB OCTAHOBHeHHOM NIOXKeHN 6oJee 15 MNHT, OHO aBtOMaTHueCKN nepeKlHouaETcB pexm OxHaHn. IaI daIbHeIwero nCOnb3oBAHn eIe pa3 BkNIOUHTe yctpoiCTBO.
AHTeHHbl
1 IINy FM-CTaHcH (YKB) BbIDBnHbTe TeneckOnnueCKyIO aHTeHHy.
PpimmeaHne.
Ecnn cnHn FM cnNkwom cnNbHbI, peKomeHny-etc BdBHyb TeNECKONHueCKyHO aHTehy.
Bb6op nctouHnka BXoDa paAnOpnemnka
1 YcTahOBnTe nepeKlnOuateIb OFF CD USB RADIO«B NpIoXeHne »RADIO «.
HactpoJa n coxpanHe npepaoc-taHn
ABTOMATNuecknNONCKCTAHCUIN
1 BkIouHte nonck cTahn, Haxab KhoNky PROG/MEM* IO tex nop, Noka qactota Ha dncnnee He hauhet 6bictpo n3MeHrTaC.
- YcpoIcTBO BbINONHReT NOnCK Do 10 paAnocTaHn, 3aTeM coXpaHReT nX. No 3aBepWeHn NOncka MoKHO npocnyawt b CTAHnIO, COxpaHeHHyO Ha no3n0n 01.
ABTOMATNUeCKN PONCK CTAHCUIN
1 BkIIOHTe NONCK CTAHUN, HAXAB KHOKNKy DOWNHnHnUP DoTexnop, noka qactoTa Ha dncnnee He hauhnetbictpo H3MeHrTbcra.
- NOnCK OCTAHABINHBAeTc, KOrHa HauDeHa CTAHU.
PyuHoi nonck tAnzhi
1Ди nowarOBoro H3MeHeHnY qactOtbl BnpeD KpatKOBpeMeHHo HaxMnte KHONKy DOWN IINN UP HeckOJIbKO pa3.
- Yactota MeHareTc C Warom 50 KfL.
CoxpanenHe cTahnHa nO3nax CTAHn
Moxho coxpaHb do 10 cTahn B dHaana3OHe FM.
1 Haxmte KhoNky DOWNHNNUPyTO6bI BbI6paTb cTaHcHIO.
2 KpatKOBpeMeHNO haxMnte KhoNky PROG/MEM«ДЯakTBAuINФуHKuINnAMrTn.
3 Bb6epnte HxKHyIO N03nHIO CTaHcHcN C NOMOcbIO ALBUM MEMORY UP« HIN ALBUM MEMORY DOWN.
4 Haxmte KhoNky PROG/MEM«, yTo6bI coxpaHHTb CTAHcHIO.
5 YTo6bI coxpaHHTb 6oJIbWe cTahuN, NOBTOpHTe deNCTBnC 1 no 4.
Ppmeyane.
BbMOxTe 3aMeHHTb PpeBapnteHbHO HactpoEHHyIO CTAHUHO HOBOI, BbINONHB DeiCTBnC1 NO4, KAK ONHcHo Bblse.
Bb6op npedBaPnteIbHo HactpoEHoHIO3n
1 Bb6epnte no3nHIO npedBapntelbHO hactpoehno cTAHcN C NOMOsbHO ALBUM MEMORY UP>> HINN ALBUM MEMORY DOWN.
Прием ст repeо/моно
Ecn yctpoCTBO npHHMaet FM-CTepeocHaHIO, Ha dncnnee noaBntcra CMBON . OHaKo ecnn cHAn FM-CTepeocTaN Cna6bI, Bb MoXe t yNyUHTb KaueCTBO 3ByaHn, nepeKnIOuHBnCb Ha npHem B peKIMe MOHO.
1 4To6bl nepeKJIIOHcB B peKIm MOHO npHema, HAKMITE MONO/ST.
2 TTo6blpeeknHouHTbcBpekIm Ctepeo npHeMa, CHOBA HAXMITE 四 MONO/ST.

YcTPOINCTBO npeHa3HaueHo IINMy 3bIKaIbHbIX KOMnAKT-DNCKOB C yKa3AHbIM 3deCb NOrOTINOM (CD-DA), a TAKKe DnCKOB CD-R N CD-RW c ayDnO3aPiNCaMI.
Pn «PpOxHraHHN» DnCKOB CD-R n CD-RW c aydno-phiIaAMM MOyT BO3HKnHyTb pa3nnHbIe npo6nEmbl, KOTOpbIe MOyT npHBecTH K npo6nMaC BOCnpOn3BedeHNem. 3To MoKET npoH3OHTn H3-3a HeBepHbIX HAcTpoek nporpaMMHO rnn annapathoro oBecepeHn IIn60 H3-3a HcNoJIb3yEMOrO KOMnAKT-DnCKa. B Cnyae Bo3HNKHOBEHn IOno6HbIX npo6nEM o6patntEc b OTeJn 6CnyXnBaHHn NOKynateNe IpnON3BOIDNTen BaWero YCTPOiCTBa 3AnCh KOMnAKT-DnCKOB INI npoH3BOIDNTeI nporpaMMHO oBecepeHn IIn60 NOnbITaITecb HaHTn COOTBETCTByIOUyIO IHOpMaunIO, HanpImep, B INHTepHete. Pn co3DAHn aYdNOHcKBOD Co6NIOdaIte BCE IopNiDnueckne HopMbI n He IOnyScKaIte HaPyWeHn ABTOPCKNX pab TpeBHX CTOPOH.
OTcEK CDdoJXeH 6bIb noCToHHo 3aKpbIT, yTo6bl nbIb He hakannBaIacb Ha na3epHoN onTKe. He npKnpePnIte K KOMnAKT-DnCKAM KneKNe 3THKeTKn. CoepKInTe B YnCTote NOBepXHOCTN KOMnAKT-DnCKOB. H aBaWeM yCTPOINCTBe Bbl MoKTe npOnrPbIBaTb CTAndaptHble KOMnAKT-DnCKN DnAmETpOM 12 cm, a TAKKe DnCKN dNaMeTpOM 8 cm. AaANTep He tpe6yETc.
BbI6Op nCTouHnKa BXoJa CD
1 YcTaHOBHTe nepeKnHouaTeIb OFF CD USB RADIO« B nOJKeHne CD<.
2 HaxMMTe KONky OPEN/CLOSE, qTO6bl OTKpbITb oTcek CD.
3 BCTaBbTe KOMnAKT-DnCK BOTcEK 3TNKeTKoB BBepX.
4 Haxmte KhoNky OPEN/CLOSE, yTo6bl 3aKpbItb KpbIshky orceka CD.
- YcIpoIcTBo uHTaet coepeXHmoe KOMnakT-DncKa. Ha nCnnee oTo6paXaetcra 6uee yncnoDopoxek.
Bocnpon3BeDHeNkOMnakT-IMCKOB
1 Haxmte KhoNky II, yTo6bHaQaTb BocnpOn3Be- dHeHne.
- BocnpoN3BeHeHne HauHcTc c nepBoOДopoKKn.
-Диспел:Homepe TeKyupei dopoxkn. - BocnpoH3BeDeHHe 3aBepwaetcno OKOHuaHHN CD.
2 HaxMMTe KhoNky II, YTO6bl npHOCTaHOBNTb BOCpOu3BeDeHne.
3 Haxmte KhoNky II, YTO6bI BO3O6HOBnTb BOCnpoIN3BeDeHne.
4 Haxmite KhoNky MONO/ST.,yTO6bl 3aBep- mItb BocnpOn3BeDHeHne.
5 HaxMMte KhoNky OPEN/CLOSE«, YTO6bl OTKpbItbOTcEK CD n 3BneYb KOMnakT-dnck.
6 3akpoTe oTeck CD.
- Bocnpoun3BeHeHne BbI6paHHoI IopOxKn HaayHcRc ABTomatNueCKn.
PnmeaHne.
Bb MoKTe TaKKe BbIbHpaTb DopoXKn BpeKnMe octaHOBKn. OHaKO 3aTeM Bam npuJeTcra Ha- qTaB BocPon3BeHeHne DopoXKn C NOMoUbHO KHOKN >>II<.
B pexnme octaHOBKn Bbl MoXeTe HaxaTb N ydepKHNBaTb KhoNkY DOWN HINN UP HTo6bl BbIbnpatb Iopoxkn 6bIcTpee.
BbI6Op nCTouHnKa BxOJa USB
IpeKMa MP3/WMA c MP3-neeepom nnu USBHAKONHTeMeM IOCTyINbI Te Xe cyHKcN BocnpOn3BeHeHn Hn NnCKa,TO n IpeKMa MP3 (cm. pa3dEn «PeKIM MP3»).
Pnmueyanne.
V3roTOBntenb: Arcelik A.S.
KapaaJxkaIdecn No2-6 34445 CHTNHOJKe CTam6yn, Typuia
HOpnueckn aepc HmnpTepa Ha Teppntopn PΦ:601010, PΦ,
BnaHmnpcka 6nactb, Knpkauchkn paOH, 3aBOJ "Beko"

Ceneno B KHP
AIO 77
CootBcTbHe DnpeKtIbe EC o6 ytnnn3aunn 3neKtpnueckoro n 3neKtpoHoro obOpudobHHa (WEEE) n ytnnn3aunn BbiweJero n3 ynotpe6JIeHHa obOpudobHHa:
Данhoe Идени COOTBETCTBYETИректпьЕ EC 66уTNIN3aUNI 3NEKTPNueCKORO I 3NEKTPoHOrO 6OpyIDOBAHN (2012/19/EU).Данhoe Идени IMeET MAPKIpOBky, yKa3bIBaHOJyHO Ha yTNIN3aUNIO erO KaK 3NEKTPnueCKORO IN 3NEKTPoHOrO 6OpyIDOBAHN (WEEE).
3To H3dennne npOn3BedeHc H3 BbICOKokaeCTBeHHbIX DeTaneH MATEpHAnOB, KOTOpbIe NOJnEkat NOBTOPHOMy HCnONb3OBAHnIO npepea60tke. POnrOMy He BbIbpaCbBaHTe H3dennec O6bUHbIMN 6bITOBbIMN OTXdAMn NocNe 3abepWeHraeroKcnnyatauH.Nero
CneIyET CnATb B COOTBETCTBYOuIN CEHTP NO YTHIN3aUN 3NeKtpnueckoro N 3NeKtpoHHoro O6OpYIOBaHn. O MeCTOHaxOXJDeHN TAKNX CEHTPOB Bbl MOXeTe Y3HaT B MecTbIX OprAHAX BnactH.
CootBcTbHe DnpeKTHBe EC o6 orpaHnueHn coepxAHn BpeHbIX Be-uctB (RoHS):
Pnno6peHHOe BAMn n3dJIne COOTBcTByet NInpeKTHBe EC o npabnax orpaHnueHn coepKaHn BpeHbIX BeueCTB (2011/65/EU). OHO He coepKHT BpeHbIX 3aIpeSeHHbIX MaTePnaNoB, yKa3aHHbIX B NInpeKTHe.
HΦopMaun o6 ynaKOBke

YnakOBKa np6opa n3rotobneHa n3 BTOpHOro CbIpbB, B COOTBeTCTBmC HauHHroCydapCTBeHHbIMN 3aKOHAMn 06 OxpaHe Okpykaioe cpebl. He bIbpaacbBaHTe
yNAKOBOHbIe MaTePnAbI BMeCTe C 6bITOBIMn HIN dpYHMN OTXoJAMN. OTheCHTe INB NyHKtbl npHema yNAKOBOHbIX MaTePnAnOB, YTBepXdEHHbIe MeCTHBIMn OprAHAMn Blactn.
YctpaHHeHne HenoJaIOK
B cnyuae HeHcnpabHocTn Chauana o6patntecb K 3ToHnHOpMaun, npexJe Yem CdaBat yctpoNCTBO B peMOHT.
Ecn n c noo npnBeHHO HOpmaun BAM He ydaetc yctpaHTb HenCnpaBHOCTb, 6pataTecb K MeCTHOMy dIepy nn K cneuaHcy cnX6bl cepBa ca.
Hn npn KaKnx 06ctoTeNbCTbax He cneIyET nbITaTcR OTpeMOHTnPOBAtb MaHHTOny CamOCToTeNbHO, TAK KAK 3TO BeET K aHHynPoBaHnO rapaHTn.
| HENCNPABHOCTb | BO3MOXHAA IPINUHAA | CNOCOB YCTPAHEHNA |
| ОБSHAЯ ИФОМAUÇA ОТСУСТВЕТ 3BYK | ГROMKOOSTь OTRPEGYUNPOBAHA Na OЧEB нИЗКИУРОБЕН ПОДКLOΥЕНИ NaUShNIK БАТAPЕЙС NAPRЯЖЕЛ БАТAPЕЙС NOПРавиLBHOB VCTABJIENH HENPABINHBNo NOДКLOΥECH NCHYP ПИТAHNY | ОТРЕУПУЧЕ ГOMКОСТь, OTKLIQUHTE HAYUSHNIK ЗаменITE 6БАТAPЕЙС, ВСТавы NX ПРAVINьно ПОДКLOΥСТЕ SHYP ПИТAHNY ДOLЖНБIM OБРAZOM |
| Усточь NO He peaIGNPуET Na КOMANДБI KHOПОK ИмеЮТСЯ НЕОДAKNs UcTPOИСТВа ВО ВЕМ BOCIPON3BEDEHNY | Статчески ЗLEKTРИССКП разяд плэLEKTРИССКП 6БICTРь перхODнь PEXKIM (BCblIshka) | ВыклIOчITE ySTPOIСТВО, OTKLIQUHTE cTeBEОI SHUPи ВКLIQUHTE ChOBA Chepe3 HeCKONBJKO секун ИЗВLEКITE Bce 6БАТAPЕЙС |
| RAДNONРИEMHNK Плoxой пriем радиocstанци | Слабий сIHнAL aHTeHNBi радиОрIMENHKA ПOMEXN OT ZLEKTРИССКИ Усточь, TAKH KAK TELEВИЗOPы, ВидомагнITOФОнь, COMlbOTepы, HeOHOBbIe lamblIи T.I. | YKB (FM): HAKLOHITe IN ПОВЕРНITE TELESCONIIUECKYU aHTeHNY Y6ePHTe MaTHOTny PoДалше OT ЗLEKTРИССКИ XySTPOICTB |
| CD ВOCIPON3BEDEHNE He ВКПЮЧАЕТС | КOMПАKT-DINCK ПОВЕХДEN ИП Загг reasonably | ЗаменITE ИПОЧТITE KOMПАKT- ДИСК |
| ПОНТРБIBATIEL KOMПАKT-DINCKOB прОпUCKaET DOROЖК | ВOCIPON3BODITCS COXPAHENHЯ пamЯь ДОРОжЕ ВКПЮЧЕ ФУнКczIЯ BOCIPON3BEDEHNY B прОИЗВOLьнOM ПОДДKE | ПЕКПIOчITEсь Na HopMaJIbHoe ВOCIPON3BEDEHNY ИДАЛNTe БыклIOчITE ФУнКczIЯ BOCIPON3BEDEHNY B прОИЗВOLьнOM ПОДДKE |
| ДИСКИ CD-R ИП CD-RW пЕ ВOCIPON3BODITCS ИП ВOCIPON3BODITCS HEBERHо | КOMПАKT-DINCK ПОВЕХДEN, ИПИ 6blIи 3aДaHbI HeBERHbIe HACTPOJKN II POrpAMMHIOr O ИП AnnapatHoro OБecSNeHЯ BO ВЕМ «ПОЖИГАHЯ» | ПювЕРБte KOMПОЕТы BAшe- у CTPOICTBA 3aПИСН KOMПАKT- ДИСКOB (ero propramMHOe o6e- спeчEHne) ИПЗAMHITE ИСПОЛ- ЗУЕМы KOMПАKT-DINCK |
| MP3 КOMПАKT-DINCK MP3 ВOCIPON3BODITCS CnIshKOM 6blICtrpo ИП MeDInHNo | He 6blIa ИспльЗоваHaЧASTOTA ДИСКРETИЗАЦИ 44,1 KГц | ЗапшITE HOВьй KOMПАKT-DINCK MP3с ИспльЗоваHemправиь- нов чASTOTы ДИСКРETИЗАЦИ |
FM 87,5 ...108,0 MHz
Unidad de CD
CLASS 1 LASER PRODUCT
FM 87,5 ...108,0 MHz
Cd-deel
Frequentiekarakteristiek: 20Hz ... 16 kHz
CLASS 1 LASER PRODUCT
Pâ bunnen av encheten finner du et symbol som ligner pâ det som er vist her.
CLASS 1 LASER
FM 87,5 ...108,0 MHz
CD-enhet
Frekvensrespons: 20Hz ... 16 kHz
Nominell stoyspenning: ≥ 65 dB
MP3-funksjoner
CLASS 1 LASER PRODUCT betyder, at lase
FM 87,5 ...108,0 MHz
Cd-del
Frekvensgang: 20 Hz ... 16 kHz
CLASS 1 LASER PRODUCT
FM 87,5 ...108,0 MHz
CD-spelaren
Frekvensgang: 20 Hz ... 16 kHz
Signal/brusforhallande: 65 dB
MP3
FM 87,5 ...108,0 MHz
CD-osa
Taqjuusalue: 20Hz ... 16 kHz
CLASS 1 LASER PRODUCT
PROG/MEM Onayarl duqmeler radyo is
duraklatildiginda yanip soner.
MEM
FM 87,5 ...108,0 MHz
CD birimi
Frekans tepkisi: 20 Hz ... 16 kHz
Parazit voltaj orani: 65 dB
MP3 özellikleri
Calma formati: MP3 ve WMA
Dosya systemd/
