CL 3639 - Air-conditioner CLATRONIC - Free user manual and instructions
Find the device manual for free CL 3639 CLATRONIC in PDF.

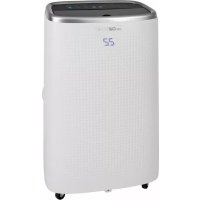
| Product Type | Monoblock mobile air conditioner |
| Brand | Clatronic |
| Model | CL 3639 |
| Net weight | Approx. 27 kg |
| Power supply | 220-240 V ~, 50 Hz |
| Consumption in cooling mode | 875 W |
| Cooling capacity | 8000 BTU (2.3 kW) |
| Energy efficiency class | A |
| Refrigerant | R 410 A |
| Protection class | I |
| Operating modes | Auto, Cooling, Dehumidification, Fan |
| Adjustable temperature range | 16 °C to 31 °C (cooling mode) |
| Recommended room volume | Up to 70 m³ |
| Fan speed | 3 adjustable speeds |
| Programmable timer | 1 to 24 hours (auto on/off) |
| Remote control | Yes, with AAA batteries (2×1.5 V) |
| Flexible exhaust hose | Maximum length 150 cm |
| Window installation kit | Included (3 pieces) |
| Filters | 2 washable filters (side and rear) |
| Filter cleaning | Every 2 weeks, with clean water |
| Condensation water tank | With WATER FULL indicator and drain via hose |
| Safety functions | Overheat protection, auto shut-off when tank is full |
| Reparability | Repair by authorized technician only |
| Supplied accessories | Remote control, batteries, exhaust hose, adapter, window kit, water hose, caps and plugs |
Frequently Asked Questions - CL 3639 CLATRONIC
User questions about CL 3639 CLATRONIC
0 question about this device. Answer the ones you know or ask your own.
Ask a new question about this device
Download the instructions for your Air-conditioner in PDF format for free! Find your manual CL 3639 - CLATRONIC and take your electronic device back in hand. On this page are published all the documents necessary for the use of your device. CL 3639 by CLATRONIC.
USER MANUAL CL 3639 CLATRONIC
natural_image
Exterior view of a modern stainless steel air purifier with control panel and digital display (no visible text or symbols)DEUTSCH
Inhalt
Overview of the Components Page 3
Instruction Manual Page 29
Technical Data...... Page 32
Disposal Page 32
JEZYK POLSKI
Spis treści
Thank you for choosing our product. We hope you enjoy using the appliance.
Symbols in these Instructions for Use
Important information for your safety is specially marked. It is essential to comply with these instructions in order to avoid accidents and prevent damage to the machine:
WARNING:
This warns you of dangers to your health and indicates possible injury risks. risiken auf.
△ CAUTION:
This refers to possible hazards to the machine or other objects.
i NOTE: This highlights tips and information.
General Notes
Read the operating instructions carefully before putting the appliance into operation and keep the instructions including the warranty, the receipt
and, if possible, the box with the internal packing. If you give this device to other people, please also pass on the operating instructions.
- The appliance is designed exclusively for private use and for the envisaged purpose. This appliance is not fit for commercial use.
- Do not use it outdoors. Keep it away from sources of heat, direct sunlight, humidity (never dip it into any liquid) and sharp edges. Do not use the appliance with wet hands. If the appliance is humid or wet, unplug it immediately.
- When cleaning or putting it away, switch off the appliance and always pull out the plug from the socket (pull the plug itself, not the lead) if the appliance is not being used and remove the attached accessories.
- The device and the mains lead have to be checked regularly for signs of damage. If damage is found the device must not be used.
- Use only original spare parts.
- In order to ensure your children's safety, please keep all packaging (plastic bags, boxes, polystyrene etc.) out of their reach.
WARNING:
Do not allow small children to play with the foil. There is a danger of suffocation!
Special Safety Instructions for this Machine

CAUTION: Risk of overheating!
- Keep the ventilation slots free!
-
Do not cover the device!
-
Use the unit in the upright position only.
- Ensure a distance of at least 30 cm between the unit and any walls or other objects to ensure sufficient air circulation during operation.
- Never use the unit without the fi iter.
- Do not leave the unit unattended for hours at a time. Do not leave your home whilst the unit is in operation.
- This unit has been designed for the air-conditioning of residential rooms and must not be used for other purposes.
- Do not operate the unit in rooms where gas, fuel, oil or other easily flammable liquids are present. Do not use sprays such as paint, pesticides or other flammable materials in that room.
- Avoid splashing water or other liquids on the unit.
- Do not insert any objects into the openings of the unit.
- Do not move the device when the mains cable is connected to the wall socket.
• Always turn off the unit first using the POWER button before disconnecting the mains plug. - If operation has been interrupted, wait for approx. 3 minutes before restarting the unit again, in order for the cooling circuit pressure to decrease.
- Do not try to repair the appliance on your own. Always contact an authorized technician. If the supply cord is damaged, it must be replaced by the manufacturer, its service agent or similarly qualified persons in order to avoid a hazard.
- Prevent small children from touching the unit.
- This appliance can be used by children aged from 8 years and above and persons with reduced physical, sensory or mental capabilities or lack of experience and knowledge if they have been given supervision or instruction concerning use of the appliance in a safe way and understand the hazards involved.
• Children shall not play with the appliance. - Cleaning and user maintenance shall not be made by children without supervision.
- Please follow the instructions in the chapter "Cleaning".
Handling batteries
WARNING:
- Do not expose batteries to excessive heat such as sunlight, fire or similar. There is a risk of explosion!
- Batteries are not toys. Keep away from children.
- Do not open batteries by force.
- Avoid contact with metal objects (rings, nails, screws, etc.). There is a risk of short circuit!
- A short circuit could cause the battery to heat up excessively or even to catch fire, resulting in injuries.
- For your own safety, cover the battery terminals with adhesive tape during transport.
- In case of battery leakage, make sure not to rub the liquid into your eyes or mucous membranes. In case of contact, wash your hands and rinse your eyes with clear water. Seek medical attention if any discomfort persists.
CAUTION:
- When not using the remote control for a long period of time, remove the batteries in order to prevent "leakage" of battery acid.
- Different battery types or new and used batteries must not be used together.
- Do not dispose of batteries along with domestic waste. Return used batteries to the relevant collection facilities or your retailer.
Overview of the Components
1 Air inlet on the side of the appliance (Filter)
2 Control panel
3 Mains cable
4 Air outlet (fi ns)
5 Exhaust pipe connector
6 Rear side air inlet (Filter)
7 Exhaust pipe adapter
8 Flexible exhaust pipe
9 Water outlet
10 POWER button
11 TEMP+button
12 TEMP - button
13 IR receiver for remote control
14 Display
15 MODE button
16 SPEED button
17 TIMER button
18 LED WATER FULL
Supplied parts
1 Air conditioning unit
1 Remote control
2 Batteries
1 Flexible exhaust pipe
1 Exhaust pipe adapter (Connection on the appliance)
1 Window kit, 3-piece
1 Water hose, ∅ 10 mm
2 Rubber caps (spares)
2 Plugs (spares)
Unpacking the appliance
- Remove the appliance from its packaging.
- Remove all the packaging material such as plastic bags, filler material, cable ties and cardboard packaging.
- Check that all parts are supplied in the package.
Notes on use
△ CAUTION: Important for initial operation or after transport! Before initial operation, the unit must stay in an upright position for at least 3 hours in order for the cooling agent to sink. The compressor will be damaged otherwise.
CAUTION:
When you interrupt the operation with the POWER button, wait for at least 3 minutes before switching the appliance on again.
i NOTE:
You will find all operating buttons on both the unit and the remote control. Same buttons represent the same functions.
- The appliance operates most effectively with a room size up to 70m^3 .
- The fl exible exhaust hose and the adapter (7) have been manufactured especially for this appliance. In order to avoid incorrect operation, do not replace the pipe with another pipe.
- The exhaust pipe can be extended up to 150 cm. Do not use any extension.
- Ensure free airflow. Make sure not to kink or bend the exhaust pipe. Any blockage can cause the unit to overheat.
- Close all windows and doors in order to prevent outside air from entering the room and thus allowing a more effective operation of the device.
Initial operation
Location
- When installing the device, make sure to keep a distance of at least 30 cm between the unit and any walls or other objects.
• The surface must be fl at and dry.
Assembly of exhaust pipe
i NOTE:
For sliding windows, you may use the window kit provided and install it in a vertical or horizontal position. Adjust the length of the seal plate as desired.
- Turn the adapter (7) to one end of the exhaust pipe.
- Connect the exhaust pipe to the unit using the exhaust pipe connector. Set the adapter first on the left side. Press the adapter on the right side down into the linkage.
- Extend the pipe to the desired length.
- Stick the open end of the pipe into a window.
- Close the window as far as possible. Also lower any external roller blinds, if present, to the end of the pipe.
Remote control
- Open the battery compartment cover on the back of the remote control.
- Insert 2 batteries of type R03 "AAA" 1.5V, observing the correct polarity (see markings on the bottom of the compartment)!
- Close the battery compartment cover.
Mains connection
- Make sure the mains voltage you want to use corresponds to the voltage of the unit. Please check the rating label for detailed specifications.
- Connect the unit to a properly installed grounded socket. A signal will sound indicating that the unit is ready for use. The display will show the current room temperature with low illumination.
Using the Appliance
Turning unit on / off
- Press the POWER button to turn on the unit. When used for the first time, the appliance operates in AUTO mode. If operation has been stopped without disconnecting the plug, all previously set operating mode and temperature settings will be retained. In that case, the display will show these settings instead.
- Press the POWER button again to turn off the device.
Indications on the Display
AUTO
Auto mode

Fan speed

Cooling mode

Indication of the desired room temperature or the hours in case of TIMER operation
°C
Indication of the temperature setting

Indication with TIMER operation

Dehumidifying mode
The unlit segments do not function on this appliance.
Operating modes
Use the MODE button to select one of the following operating modes:
• AUTO
- Cooling
- Dehumidifying
Operating mode "AUTO" (Automatic)
The appliance decides the must suitable operation mode as shown in the following table:
| Room temperature Operating mode Temperature setting | ||
| < 23 °C | Fan | --- |
| ≥ 23 °C – < 26 °C Dehumidifying 23 °C | ||
| ≥ 26 °C Cooling 25 °C | ||
You can set the speed of the fan. The temperature setting cannot be changed.
Operating mode "Cooling"
In this operation mode, you can adjust the fan speed and the temperature as desired. If you want to use the appliance with the fan only but without compressor, set a temperature higher than the actual room temperature.
Operating mode "Dehumidifying"
- This operating mode does not support any further settings.
- The appliance will change the set temperature automatically to room temperature minus 2 °C.
• The fan will operate at the lowest speed setting. - The unit will cool the room and extract the humidity from the air.
Setting the temperature
Use the TEMP+ or TEMP− buttons in “Cooling” ⚙ mode to set the temperature. Select a temperature between 16 °C and 31 °C.
Setting the fan
In "Cooling" and AUTO modes you can set the fan speed with 3 different settings. Press the SPEED button accordingly.
Timer (Automatic timer)
Use the timer function to set the power-on and power-off times of the device. Select a time between 1 and 24 hours.
Using the timer function for automatic power-on
- Press the POWER button to turn on the unit.
- Select the operating mode, temperature and fan speed for the unit to operate in or at when powered on at the pre-set time.
- Press the POWER button to turn off the unit.
- Press the TIMER button. The display shows the previously set operation mode and the symbol ⏻. The number of hours fl ashes.
- You can set the desired number of hours with the buttons TEMP+ and TEMP−. The setting changes rapidly when you hold down the respective button. Confirm your setting with the TIMER button while the display is flashing. Otherwise you will exit the setting mode. In this case, the setting will not be applied.
Using the timer function for automatic power-off
- Press the POWER button to turn on the unit.
- Press the TIMER button during operation. The display also shows the symbol ⏻. The number of hours fl ashes.
- Set the timer as described in the above item 5.
i NOTE:
- Press the TIMER button again if you want to deactivate the TIMER function.
- You may also cancel the timer function at any time by pressing the POWER button to turn the unit on / off.
Emptying the water tank
The unit integrates a water tank for collecting condensation. When the water tank is full, the pilot lamp "WATER FULL" lights up. The display shows "E2". The compressor switches off in each operation mode. The fan keeps running independent of this.
△ CAUTION:
Do not transport the appliance while the water tank is full. Water could get into the appliance.
For continued operation with the compressor, you must empty the water tank. For this, you need a floor cloth, a fl at bowl with a capacity for approx.
1,5 litres of water and the water hose supplied with the appliance.
- Disconnect the mains plug from the wall socket.
- Place the floor towel and the flat bowl underneath the water outlet. If possible, set the bowl on a lower level than the appliance.
- Remove the rubber cap and the plug. Keep the parts for later use.
- Connect the water hose to the water outlet of the appliance. Place the end of the hose in the bowl.
- After the water has been discharged, remove the water hose. Close the water outlet on the appliance again with the plug and the rubber cap to ensure the condensation water cooling circulation.
Terminating operation
- Press the POWER button to turn off the unit.
- Disconnect the mains plug from the wall socket.
Cleaning
WARNING:
- Always disconnect the mains plug from the wall socket before cleaning!
- Make sure no water enters the openings of the unit during cleaning. Otherwise this might result in an electric shock or fire.

CAUTION:
- Do not spray the device with cleaning agents.
- Do not use a wire brush or any abrasive items.
- Do not use any acidic or abrasive detergents.
Filter
When using the unit daily, clean the filter every 2 weeks. If dust in the filters blocks the air circulation, efficient operation of the unit can no longer be guaranteed.
- Remove the exhaust air hose with the adapter.
- Pull out the two filters on the side of the appliance.
-
Remove the two filters on the rear of the appliance. Use a tool (for example, a screwdriver). Attach the tool to the locking tabs and lever the cover off.
-
Vacuum the fi Iters for cleaning.
-
Clean the filters under running water. If necessary, use a mild detergent.
-
Let the filters air-dry in a shady place.
-
Reinstall the filters when completely dry.

CAUTION:
Do not operate the unit without the fi Iter!
Housing
- Use a vacuum cleaner to vacuum the fi ns and ventilation openings.
- Wipe the housing with a slightly damp cloth.
Seasonal cleaning and storage
When not using the unit for a long period of time, proceed as follows:
- Empty the water tank as described above.
-
Operate the appliance for 2 hours in "Cooling" mode with a temperature above room temperature, so that the appliance runs without the compressor and only the fan is used. This dries the appliance from the inside.
-
Press the POWER button to turn off the unit. Disconnect the mains plug from the wall socket.
-
Disconnect the fl exible exhaust pipe from the unit.
-
an the filters and the unit as described above.
-
Cover the unit with foil.
-
Always store the appliance out of the reach of children in a dry, well ventilated place.
Troubleshooting
| Problem Possible cause Solution | ||
| Unit does not function. | No power supply. Check the power connection. | |
| The display shows the symbol 📋. Timer function is activated. | Press the POWER button to turn on the unit. | |
| Unit does not cool suffi ciently. | The unit is exposed to direct sunshine. | Choose another location or shade the windows. |
| Windows or doors are open. | Close any windows or doors. | |
| There are too many people or other heating sources in the room. | Remove portable heat-ers or switch them off. | |
| The fi Iters are dirty. Clean the fi Iters. | ||
| The air inlet or air outlet is blocked. | Remove the blockage. Keep the ventilation openings free from obstructions. | |
| Problem Possible cause Solution | ||
| Unit too noisy during operation. | The unit is not in an upright position. | Place the unit on a fl at surface. Avoid vibrations. |
| Display indication: E2The red LED “WATER FULL” is lit. | The water tank is full. | Turn the appliance off.Pull the power plug.Empty the water tank.You may then restart the unit again. |
| Display indication: E0 | Defective electronics. | Contact our customer service or your dealer. |
Technical Data
Model: CL 3639
Net weight: approx. 27 kg
Power supply: 220 - 240 V\~, 50 Hz
Power consumption: 875 W
Protection class:....T
Energy efficiency class: A
Cooling capacity: 8000 BTU (2.3 kW)
Refrigerant: R 410 A
The right to make technical and design modifications in the course of continuous product development remains reserved.
This device has been tested according to all relevant current CE guidelines, such as electromagnetic compatibility and low voltage directives, and has been constructed in accordance with the latest safety regulations.
Disposal
Battery disposal
As a consumer you are obliged by law to return old batteries/accumulators.
Remove the batteries from the remote control before disposing of the device.
Return the batteries to a collection facility for the collection of old batteries or hazardous waste. Contact your local authority for more information.
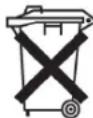
Meaning of the "Dustbin" Symbol

Protect our environment: do not dispose of electrical equipment in the domestic waste.
Please return any electrical equipment that you will no longer use to the collection points provided for their disposal.
This helps avoid the potential effects of incorrect disposal on the environment and human health.
This will contribute to the recycling and other forms of utilisation of electrical and electronic equipment.
Information concerning where the equipment can be disposed of can be obtained from your local authority.
Instrukcja obsługi
CTC Clatronic Sp. z o.o