C56U - Router CONCEPTRONIC - Free user manual and instructions
Find the device manual for free C56U CONCEPTRONIC in PDF.
| Product Type | 56K USB Voice/Fax Modem |
| Brand | Conceptronic |
| Model | C56U |
| Connectivity | USB 2.0, RJ11 (telephone line) |
| Data Rate | 56 Kbps (receiving), 33.6 Kbps (sending) |
| Main Functions | Data modem, fax (send/receive), voice answering machine via Classic PhoneTools |
| Power Supply | USB bus-powered |
| LED Indicators | Data LED (activity), OH LED (off-hook) |
| Included Software | Classic PhoneTools |
| System Compatibility | Windows 7, Windows Vista (drivers may work on other versions) |
| Box Contents | Modem, RJ11 telephone cable, CD-ROM with drivers & software, user manual, warranty card |
| Installation | Driver required before connection; connect USB then install from CD-ROM |
| Maintenance and Cleaning | Unplug before cleaning; use a soft dry cloth; avoid moisture |
| Safety | Do not expose to water or liquids; do not open the case; use only with a standard telephone line |
| Repairability | No user-serviceable parts; contact support for any issues |
Frequently Asked Questions - C56U CONCEPTRONIC
User questions about C56U CONCEPTRONIC
0 question about this device. Answer the ones you know or ask your own.
Ask a new question about this device
Download the instructions for your Router in PDF format for free! Find your manual C56U - CONCEPTRONIC and take your electronic device back in hand. On this page are published all the documents necessary for the use of your device. C56U by CONCEPTRONIC.
USER MANUAL C56U CONCEPTRONIC
Congratulations on the purchase of your Conceptronic 56K USB Voice/Fax/Modem.
This User Manual gives you a step-by-step explanation how to install and use the Conceptronic 56K USB Voice/Fax/Modem.
When you need more information or support for your product, we advise you to visit our Service & Support website at www.conceptronic.net/support and select one of the following options:
- FAQ : Frequently Asked Questions database
- Downloads : Manuals, Drivers, Firmware and more downloads
- Contact : Contact Conceptronic Support
For general information about Conceptronic products visit the Conceptronic website at www.conceptronic.net.
The information in this manual is based on Windows 7 and Vista, but can differ from your computer when you are using a different operating system.
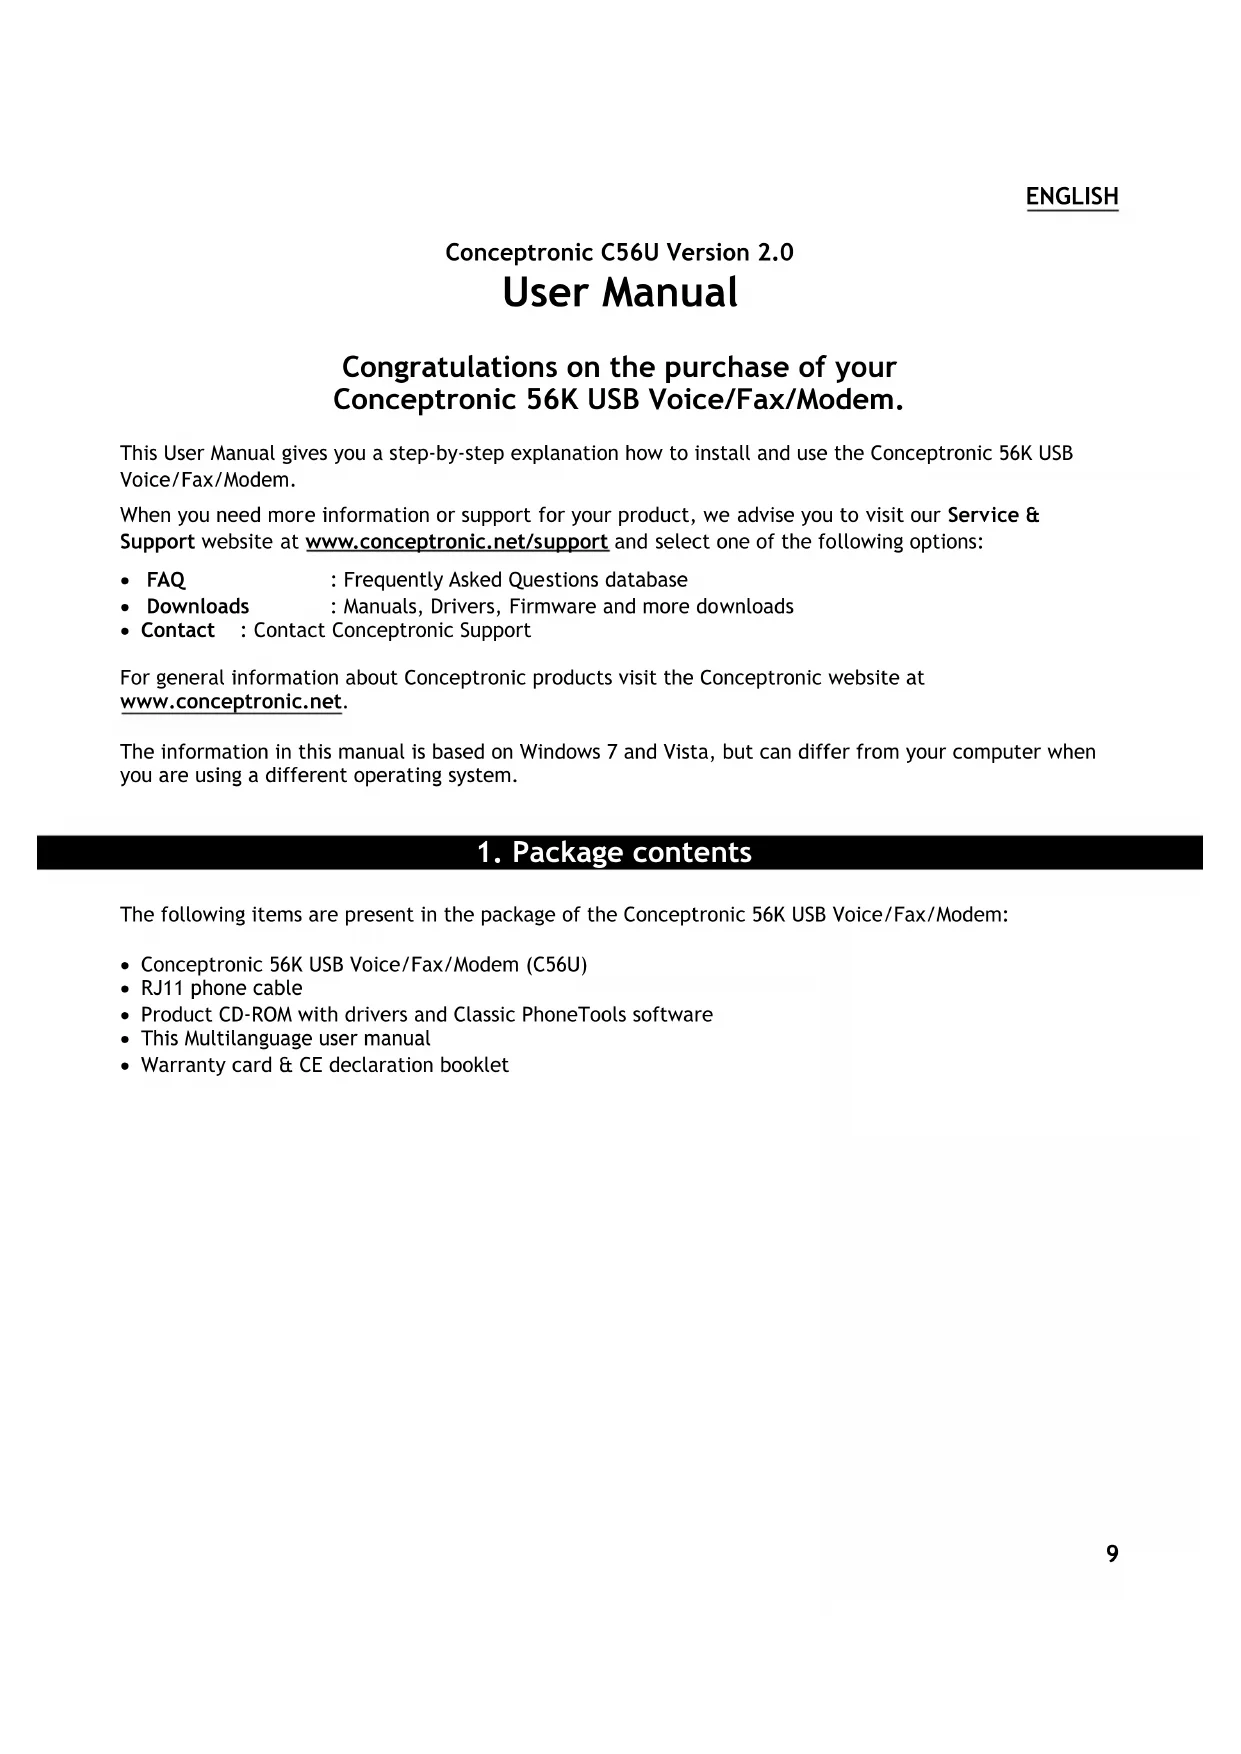
1. Package contents
The following items are present in the package of the Conceptronic 56K USB Voice/Fax/Modem:
- Conceptronic 56K USB Voice/Fax/Modem (C56U)
- RJ11 phone cable
- Product CD-ROM with drivers and Classic PhoneTools software
- This Multilanguage user manual
- Warranty card & CE declaration booklet
2. Device explanation
The device explanation picture below describes all elements of the 56K USB modem:
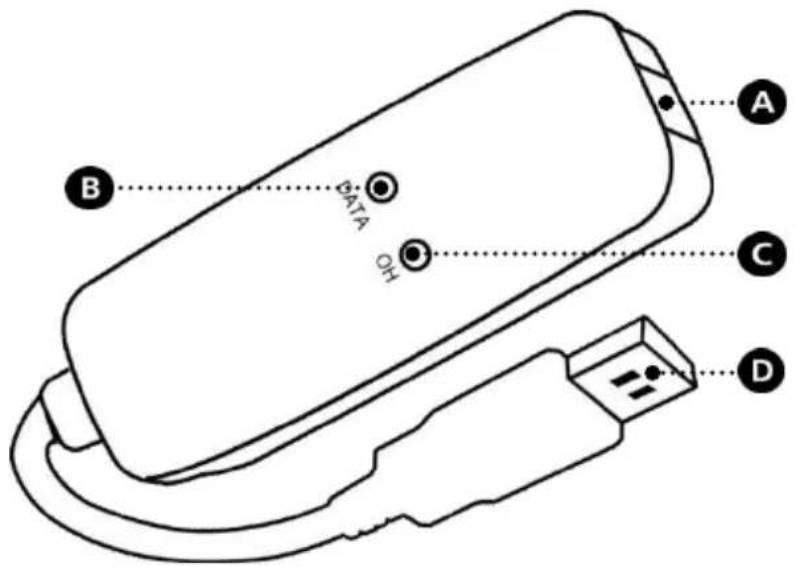
| Nr | Description | |
| A. | RJ11 connector: | RJ11 connector to connect the USB modem to your phone line. |
| B. | DATA LED: | Shows data activity on the created connection. |
| Off | No connection. | |
| On - Blink | Data is send / received through the created connection. | |
| C. | OH LED: | Shows the connection status (Off Hook). |
| Off | No connection. | |
| On - Steady | A data modem connection is made, or being created. | |
| D. | USB connector: | USB connector to connect the USB modem to your computer. |
3. Installation
Before you can use your USB modem, you need to install the drivers.
The drivers can be installed when the USB modem is connected to your computer.
3.1 Hardware installation
- Turn on your computer.
- Connect the RJ11 phone cable to the USB modem and to a free phone wall outlet.
- Connect the USB connector of the USB modem to a free USB port on your computer.
Your computer will automatically recognize the modem and show the 'Hardware Installation Wizard'.
You can ignore this wizard, or close the wizard by clicking "Cancel".
3.2 Driver installation
- Insert the CD-ROM in the optical drive of your computer. The AutoPlay option will be shown automatically. Click on "Run Autorun.exe" to start the autorun menu.
Note: If the AutoPlay option is not shown, you can start the autorun menu by browsing to "Computer" and double clicking on your optical drive.
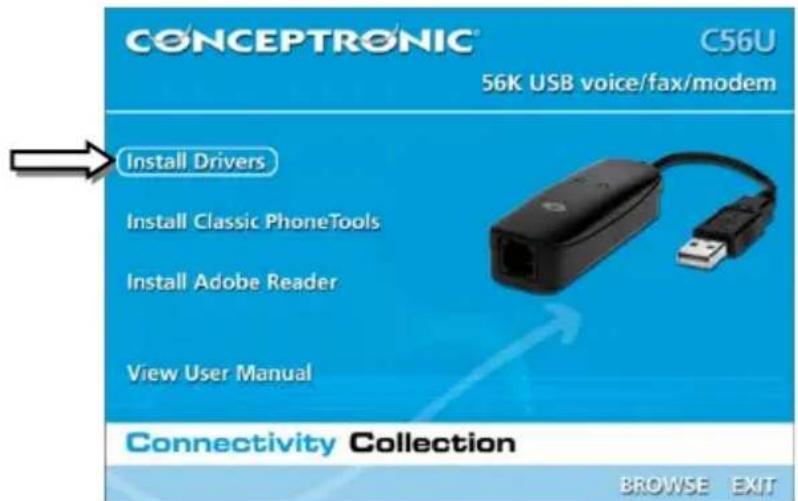
- Select the option "Install Drivers" from the menu.
- Select your operating system from the list with available operating systems.
The driver setup wizard will now be started. Click "OK" to install the drivers for your computer. - When the driver installation is finished, click "OK" to close the driver setup wizard.
The drivers for the USB modem are now installed.
ENGLISH
3.3 Classic PhoneTools installation
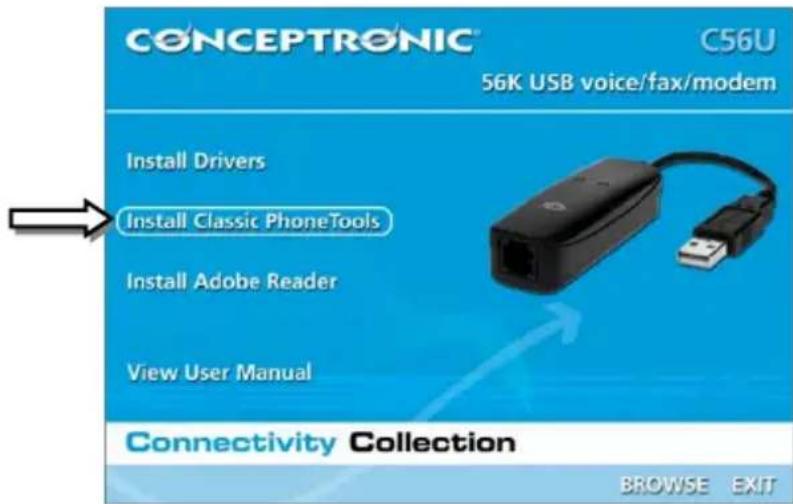
-
Select the option "Install Classic PhoneTools" from the menu.
-
Select the preferred language for the software from the menu.
The setup wizard will appear. Click "Next" to continue.
Accept the License Agreement by selecting "I accept..." and click "Next" to continue.
-
Enter your 'UserID' (required) and 'Company Name' (optional) and click "Next" to continue.
-
Enter a 'Identifier' (optional) for your fax messages, your 'Phone' number (optional) and your 'Fax' number (optional) and click "Next" to continue.
Note: The identifier, phone number and fax number will be shown when you send a fax message with the Classic PhoneTools.
- Select a destination folder for the software with the "Change" button, or keep the default destination. Click "Next" to continue.
- Select a program folder for the software in the start menu, or keep the default folder. Click "Next" to continue.
- The setup wizard will show a summary of the settings. Click "Next" to install the Classic PhoneTools on your computer.
The setup wizard will now install the software on your computer. When the installation is finished, you can select if you want the software to start automatically after the wizard closes, and if a desktop shortcut must be created.
- Click "Finish" to close the setup wizard.
4. Dial-up connection
4.1 Creating a dial-up connection
- Click on "Start", "Connect To".
Windows will open the 'Connect To' window.
- Click "Set up a connection or network".
- Click "Set up a dial-up connection".

- Enter the 'Dial-up phone number', 'User name' and 'Password' for your dial-up connection.
- Enter a 'Connection name' for your dial-up connection, or keep the default name.
- Click "Connect" to test the connection.
Windows will now test the connection. When the connection is OK, you will see the message 'You are connected to the Internet'.
- Click "Browse" now to open your internet browser, or click "Close" to close the connection wizard.
Note: Your dial-up connection is still active. To disconnect, click "Start", "Connect To", select the connection and click "Disconnect".
ENGLISH
4.2 Connect a dial-up connection
- Click on "Start", "Connect To".
Windows will open the 'Connect To' window.
- Select your dial-up connection and click "Connect".
The connection details of the selected dial-up connection will be shown.
- Click "Dial" to connect to the internet by using your dial-up connection.
Windows will now use your dial-up connection to connect to the internet. When the connection is established, the message 'Successfully connected' is shown.
- Click "Close" to close the message.
4.3 Disconnect a dial-up connection
- Click on "Start", "Connect To".
Windows will open the 'Connect To' window.
- Select your dial-up connection and click "Disconnect".
The dial-up connection will now be disconnected. When the connection is disconnected, the message 'Successfully disconnected' is shown.
- Click "Close" to close the message.
5. Classic PhoneTools
With the Classic PhoneTools software, you can use your USB modem as fax machine or answering machine.
5.1 Starting the Classic PhoneTools software
You can start the Classic PhoneTools software in 2 different ways:
- Through the Start menu, by clicking "Start", "All Programs", "Classic PhoneTools", "Classic PhoneTools".
Through the desktop shortcut "Classic PhoneTools".
The main software window will be shown on your screen:
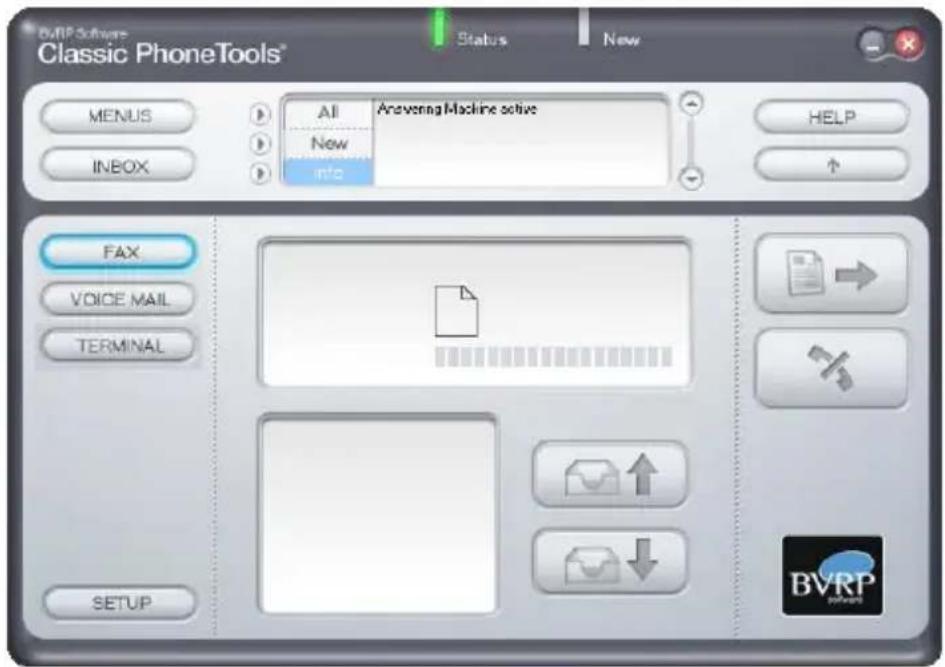
As long as the software is running, your computer can receive faxes and function as answering machine.
Note: When you close the software, your computer is not able to receive taxes or function as answering machine.
ENGLISH
5.2 Sending faxes
- Make sure the "FAX" option at the left side of the software window is selected, and click the "Send Fax" button (indicated by a piece of paper with an arrow) at the right side of the software window:

The fax wizard will be shown on your screen.
- Enter the "Name" (optional), "Company" (optional) and "Recipient Fax#" (required) of your recipient and click "Add" to add the recipient to the 'Recipients list'.
Tip: To add multiple recipients, repeat above step until you have added all recipients for the fax message. - Click "Next" to continue.
- Select a template for your fax message from the dropdown menu and enter your message in the textfield. Click "Next" to continue.
- If you want to add an attachment to the fax message, click the "Attach" button to browse for your attachment. Click "Next" to continue.
The fax wizard is now complete. Click "Finish" to close the fax wizard. - The 'Confirmation Transmission' popup will be shown on your screen. Click "View" to view the fax message before sending, or click "Send" to send the fax message to your recipient(s).
In the center of the main software window, you can see the status of the transmission.
5.3 More features
With Classic PhoneTools, you can do more than sending and receiving faxes, like using your computer as answering machine. All the options of the Classic PhoneTools software are explained in the Help menu of the software.
You can access the Help menu by clicking the "Help" button at the right of the software window.
Enjoy the use of your Conceptronic 56K USB Voice/Fax/Modem!
C56U version 2.0 de Conceptronic
Manual de usuario
Se做不到 all the details of the connection.