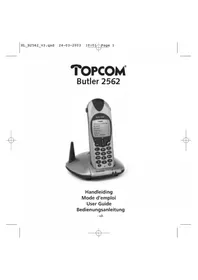
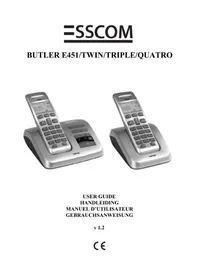
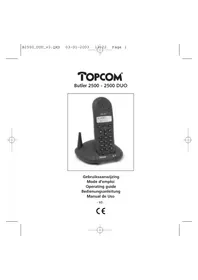
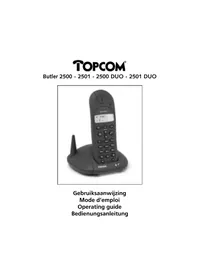
Butler E600 - Phone TOPCOM - Free user manual and instructions
Find the device manual for free Butler E600 TOPCOM in PDF.
User questions about Butler E600 TOPCOM
0 question about this device. Answer the ones you know or ask your own.
Ask a new question about this device
Download the instructions for your Phone in PDF format for free! Find your manual Butler E600 - TOPCOM and take your electronic device back in hand. On this page are published all the documents necessary for the use of your device. Butler E600 by TOPCOM.
USER MANUAL Butler E600 TOPCOM
To use 'Caller ID' (display caller), this service has to be activated on your phone line. Normally you need a separate subscription from your telephone company to activate this function. If you don't have the Caller ID function on your phone line, the incoming telephone numbers will NOT be shown on the display of your telephone.
Belangrijk
Thank you for purchasing this product. This product has been designed and assembled with utmost care for you and the environment. Because we at TRISTAR like to think of the future of our planet and our children, we aim to do our best to help saving the environment. This is why we decided to reduce the number of pages of our user guides and product manuals. If you keep in mind that it takes
up to 24 trees to produce 1 ton of paper, publishing product manuals in 21 languages costs our planet a lot of trees. In this short manual provided with your device you can find a brief explanation of how to install and use your device.

If you would still like to discover all the features of your new device, please visit our website (www.tristar.eu) where you can download the complete user manual in your language. By doing this TRISTAR hopes to do its share to make our planet a better place, but we can only succeed with your help!
1.1 Installing the base
For installation, do the following:
1 Plug one end of the adaptor into the outlet and the other end into the adaptor jack on the back of the base.
2 Connect one end of the telephone cord with the wall phone jack and the other end to the bottom of the base.
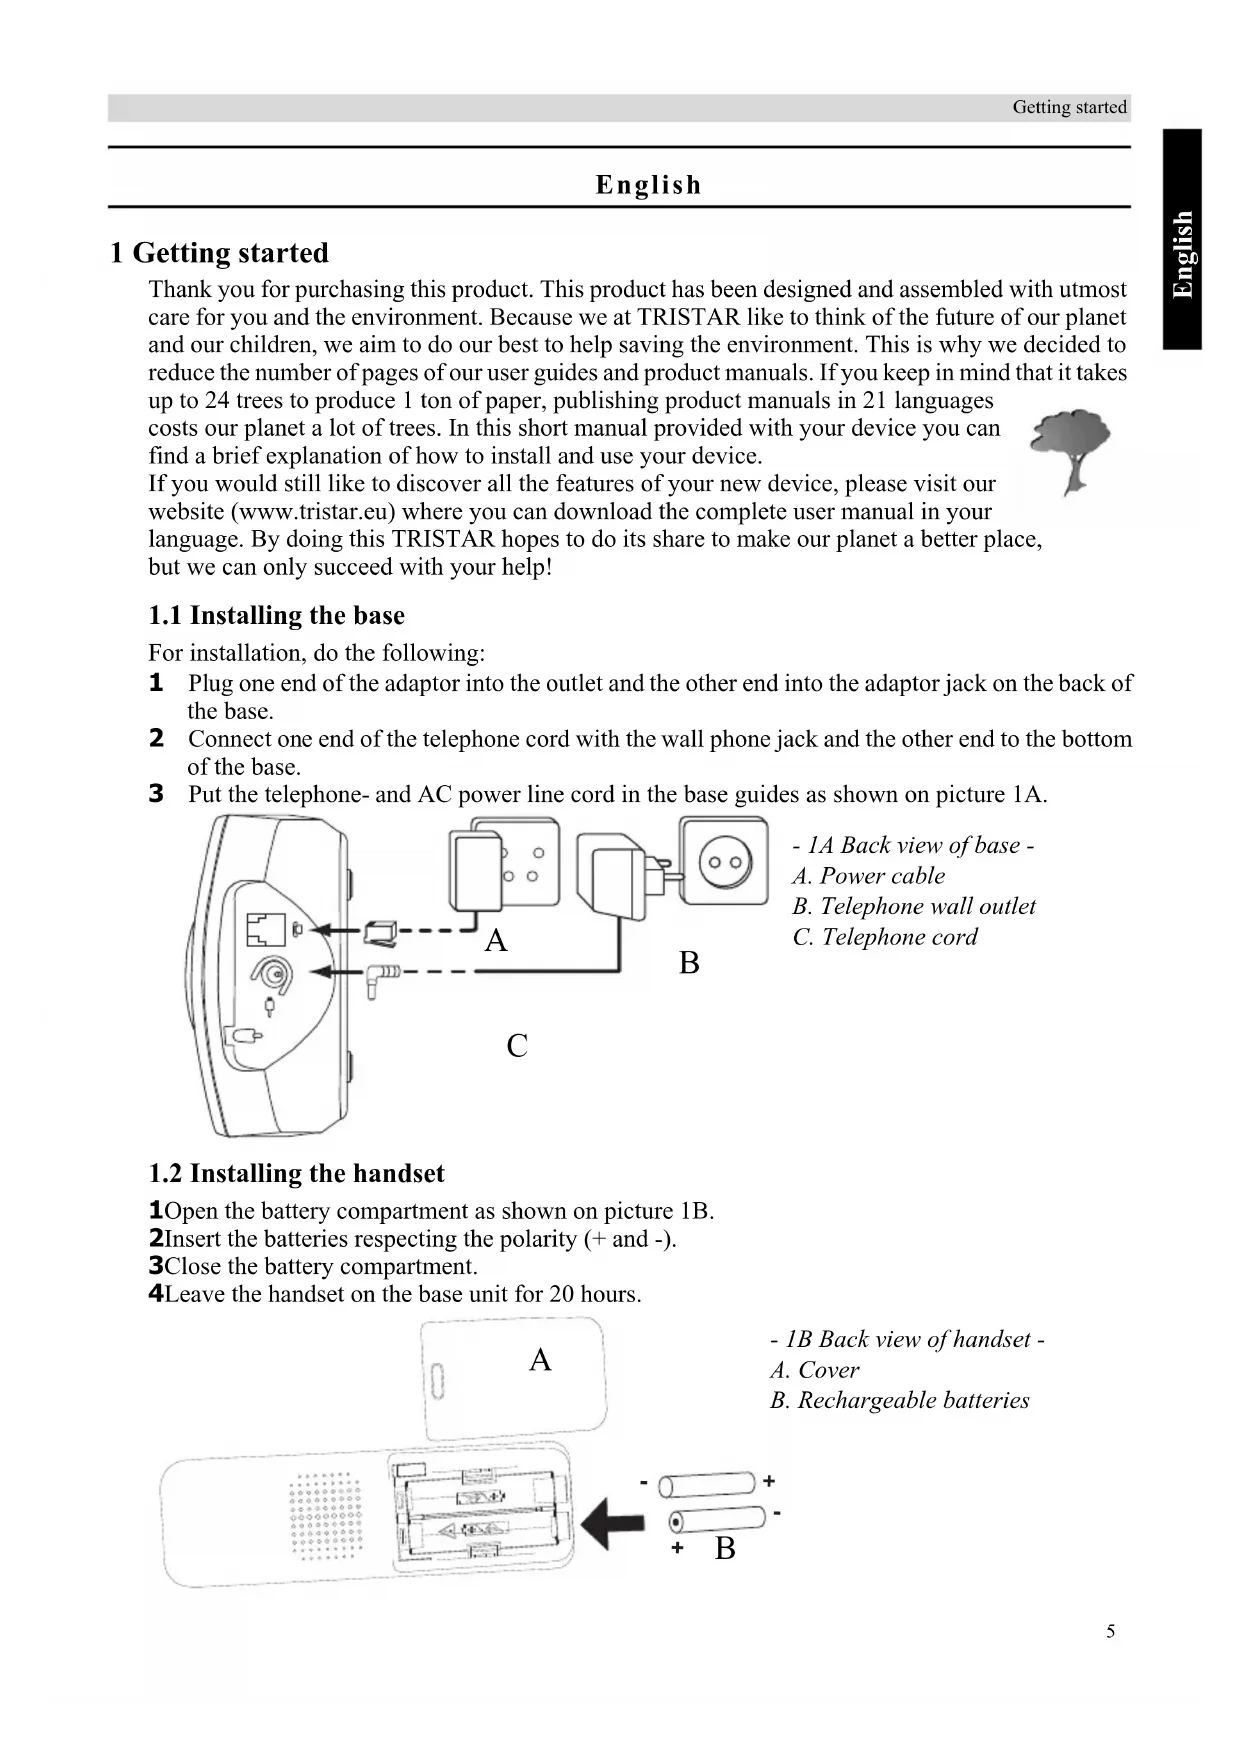
3 Put the telephone- and AC power line cord in the base guides as shown on picture 1A.
- 1A Back view of base -
A. Power cable
B. Telephone wall outlet
C. Telephone cord
1.2 Installing the handset
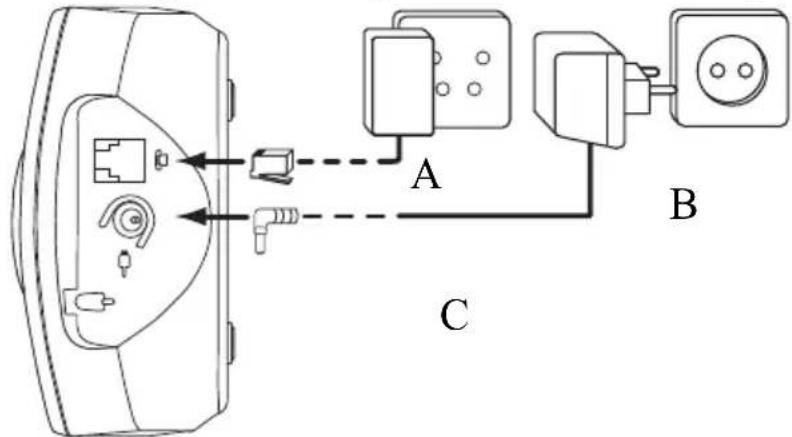
1Open the battery compartment as shown on picture 1B.
2Insert the batteries respecting the polarity (+ and -).
3Close the battery compartment.
4Leave the handset on the base unit for 20 hours.
- 1B Back view of handset -
A. Cover
B. Rechargeable batteries

Before you use the telephone for the first time, you must first make sure the battery is charged for 20 hours. If you do not do this, the telephone will not work optimally.
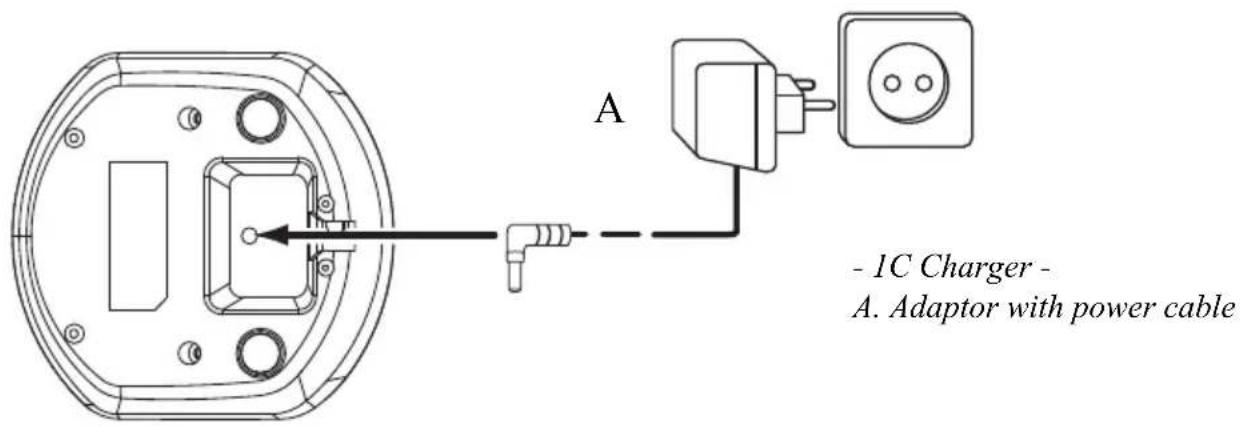
1.3 Installing the charger (Only for Butler E600 Twin/Triple/Quattro)
1 Plug one end of the adaptor in the power outlet and the other end into the adaptor jack at the bottom of the charger.
1.4 Keys/LED's
Handset
- Earpiece speaker
- Display
- Right menu key
- Up / call log key
- Power on-off / on-hook key
- Flash key
- Alphanumeric keys
- Ringer on-off
- Microphone
10.Keypad lock key - Phonebook key
- Handsfree key
- Down / redial key
- Off-hook key
15.Left menu key
Base
- Paging key
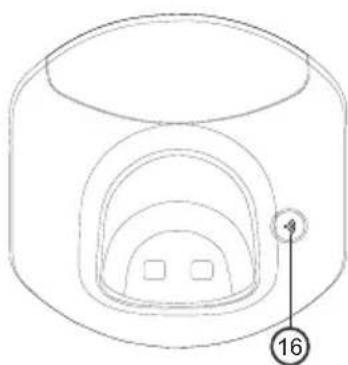
-1EBase-
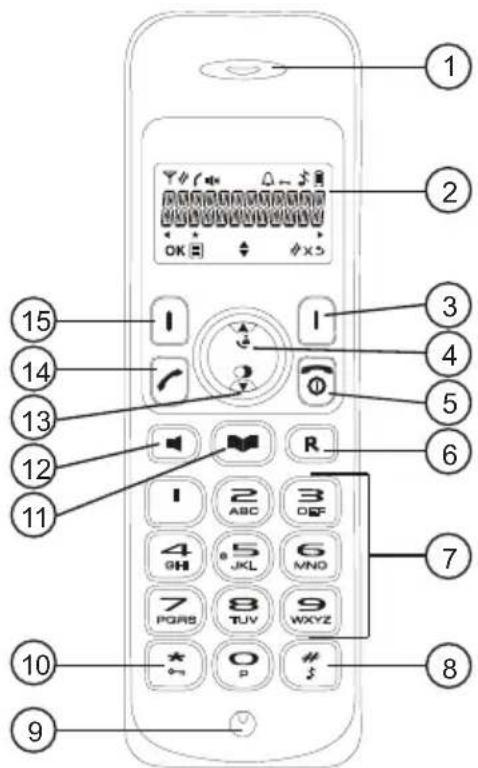
-1DHandset-
1.5 How to use this user guide
In this user guide, following method is used to clarify the instructions:

Text......"DISPLAY".
Text that appears on the display of the phone is shown in the right column between quotation marks.
Key to press.
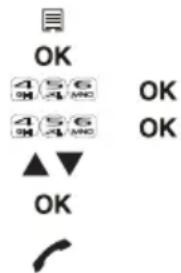
1.6 Navigating the menu
The Butler E600 has a menu system which is easy to use. Each menu leads to a list of options. Display menu keys:
Display menu keys are located directly under the display (3) (15). The functions of these keys change depending on the operation mode. The functions are described below:
目
1To open the menu or to select more menu options.
OK
2To confirm the current selection.
3To make an internal call with other handsets.
4 To go back in the menu selection or to cancel the current operation.
X
5 To clear a character or stop the alarm. Or to mute/unmute the microphone during call.
2 Using the telephone
2.1 Switching the handset on/off
0
1 Press and hold the on/off key on the handset for 3 seconds. The handset will search the base.
0
2 Press and hold the on/off key for 6 seconds. The display will go off.
2.2 Changing the menu language
目
1Enter the menu by pressing the left menu key (15).
2Select "HS SETTINGS" and confirm.
3Select "LANGUAGE" and confirm.
4Select a language and confirm.
2.3 Receiving a telephone call
To take the call:
1Press the off-hook key. OR
Lift the handset off its base if you have activated "Automatic answer". (See "5.3 Automatic answer")
You are connected to your correspondent.
2Press the on-hook key to hang up or put the handset back on the base.
2.4 Making an external telephone call
Direct dialing

1Press the off-hook key to start the call.
2Dial the telephone number.
3Press the on-hook key to hang up or put the handset back on the base.
Predialing

1Dial the telephone number.
2Press the off-hook key to start the call.
3Press the on-hook key to hang up or put the handset back on the base.
4 To correct a number use the delete key to delete an entered digit.
2.5 Making an internal telephone call

1Press the right menu key.
2Enter the number of the internal handset (1 to 5).
3Press the on-hook key to hang up or put the handset back on the base.
2.6 Internal call transfer
Transfer an external call to another handset.


1Press the left menu key during conversation.
2Select "INTERCOM" and press OK.
3 Enter the number of the internal handset (1 to 5), the external caller is put on hold.
4 When the other handset picks up, press the on-hook key to hang up and transfer the call.
If the internal correspondent does not pick-up, press the on-hook key again to reconnect to the external caller on line.
5Press the on-hook key to hang up or put the handset back on the base.
2.7 Speaker volume during call

1 During a conversation, press the up or down key to change the volume accordingly.
2.8 Microphone mute
It is possible to mute the microphone during a conversation.

1 Press the right menu key. You can talk freely without being heard by the calling party.
"MUTED" is displayed.

2Press the right menu key again to return to normal mode.
2.9 Redial memory
You can redial up to 5 of the last numbers called.

1Press the radial key.

2 Select a number. If the number is in the phonebook, the name will be shown.

3Press the off-hook key to start the call.

4Press the on-hook key to return to standby.
2.10 Using the alphanumeric keypad
With your telephone, you can also enter alphanumeric characters. This is useful for entering a name into the phonebook, giving a name to the handset, ...
To select a letter, press the corresponding key as many times as necessary. For example, to select an 'A', press '2' once. To select a 'B', press '2' twice and so on. To select 'A' and then 'B' consecutively, press '2' once, wait until the cursor moves on to the next character, then press '2' twice.

Press '1' to select a space.

Press right menu key to delete a character.
3 Phonebook
Each handset can store up to 30 telephone numbers and names. Names can be up to 12 characters long and numbers up to 24 digits.
To enter alphanumeric characters, refer to the section "2.10 Using the alphanumeric keypad".
3.1 To add an entry into the phonebook
| 1E nter the menu. | |
| 2Select “PHO NEBOOK” and confirm. | |
| 3Press menu. | |
| 4Select “ADD” and confirm. | |
| 5Press menu. | |
| 6Enter the name and confirm. | |
| Press on-hook key to exit the menu without taking any modifications into account. | |
| 7Enter the number and confirm. | |
| 8Select a ring melody (1-8) and confirm. |
3.2 To dial an entry from the phonebook
| 1Press the phonebook key. | |
| 2Sel ect a name or enter the first letter of the name. (The list scrolls in alphabetical order.) | |
| 3Press the off-hook key to start the call. | |
| 4Press the on-hook key to hang up or put the handset back on the base. |
4 Caller Identification

This service only works when you have a Caller ID/Clip subscription. Please contact your telephone company.
When you receive an external call, the telephone number of the caller appears on the handset display. The telephone can receive calls in both FSK and DTMF. You can also see his or her name if it is transmitted by the network. If the name is programmed in the phonebook, the name in the phonebook is displayed!
The caller identity is replaced by the call duration after 15 seconds in communication.
The telephone can store 30 calls in a call list (received and missed calls) that can be reviewed later. This function is only available if your are subscribed to the caller ID information.
When the memory is full, the new calls automatically replace the oldest calls in the memory.
To consult the list of calls:

1Press the call log key.
If there are no calls in the list "EMPTY" will appear.
2 Scroll through the calls. The callers names will be shown if the name is send by the network or is stored in the phonebook. If you are at the end of the list you will hear a beep tone.
When ^* is shown at the centre of the bottom line, the call is unanswered.

3 Press the * key to see the telephone number.
If the telephone number is longer than 12 digits, press the # key again to see the complete number.
4 Press the left menu key to add this entry to the phonebook if it's not already stored. Press OK when "ADD TO PB" is shown on the display.
Enter or modify the name and press OK.
Enter or modify the telephone number and press OK.
Select the melody (1-8) which will be heard when this number is calling. Press OK, the entry will be stored in the phonebook.
5 Press the off-hook key to call back a correspondent, when his telephone number or name is displayed.
You can delete each entry separately:


1 Scroll to the call you want to delete and press the left menu key.


2Select "DELETE" and press OK.
To delete all entries at ones:


1 When you are in the call list press the left menu key.
2Select "DELETE ALL" and press OK.
3Press OK again to confirm.
5 Personalize the handset

Every programmation is confirmed at the end by a double or single long beep. A double beep confirms the validation of your choice.
5.1 Adjusting the ring volume
Handset ring volume internal/external calls
The handset ring volume for internal or external calls cannot be set separately. You can choose from High, mid, low and "OFF".

1Enter the menu by pressing the left menu key.


2Select "HS SETTINGS" and confirm.


3Select "RING SETUP" and confirm.


4Select "RING VOLUME" and confirm.


5Select a volume (HIGH, MID, LOW or "OFF").


6Confirm or return to the previous menu.
5.2 Choosing the ring melody
Each handset can ring with a different melody. The handsets can ring with a different melody according to whether the call is internal or external. You can choose from 8 different ringer melodies:

1Enter the menu by pressing the left menu key.


2Select "HS SETTINGS" and confirm.


3Select "RING SETUP" and confirm.

4 Select "INT RING" to change the internal melody or "EXT RING" to change the external melody and confirm.

5Select a melody (1 to 8).

6Press the OK key to confirm or return to the previous menu.
5.3 Automatic answer
When there is a incoming call and the handset is on the base, the phone automatically takes the line when lifted. This is the default setting, but can be set off:


1Enter the menu by pressing the left menu key.
2Select "HS SETTINGS" and confirm.
3Select "AUTO ANSWER" and confirm.


4Select "ON" to activate or "OFF" to deactivate and confirm.


5.4 Keypad lock
The keypad can be locked so that no settings can be changed or no telephone number can be dialed. The icon will appear on the screen when keypad is locked.
Locking the keypad

1 Press and hold the keypad lock key for 3 seconds. The keypad will be locked. "6 Will appear on the screen.
Unlock the keypad

1Press and hold the keypad lock key for 3 seconds.
2" " will disappear from the screen.
Nederlands
1 A a n d e s l a g
3 Agenda (Phonebook)
Sadan lases tastaturet

1 Tryk og hold på tastaturlåststen i 3 sekunder. Tastaturet er nu LAST. "O" vises i displayet.
Sādan lases tastaturet op