Bistro 11381 - Hand blender BODUM - Free user manual and instructions
Find the device manual for free Bistro 11381 BODUM in PDF.
| Product type | Food processor |
| Brand | Bodum |
| Model | Bistro 11381 |
| Nominal power | 700 W (EU/USA) |
| Rated voltage | 220-240 V~ 50/60 Hz (EU) / 120 V~ 60 Hz (USA) |
| Bowl capacity | 4.7 liters / 160 oz |
| Cord length | Approx. 100 cm |
| Housing material | Plastic |
| Accessory material | Stainless steel |
| Number of speeds | 7 settings |
| Included accessories | Beater, dough hook, whisk, splash guard, bowl |
| Main functions | Mix, knead, whisk, beat |
| Safety | Auto-stop after 5 min, arm raised lock |
| Maintenance and cleaning | Dishwasher-safe accessories, clean housing with a damp cloth |
| Warranty | 2 years |
| Certifications | GS, CE, ETL, CETL |
| Approximate weight | 4.5 kg |
| Dimensions (W x D x H) | 30 x 25 x 35 cm (estimate) |
Frequently Asked Questions - Bistro 11381 BODUM
User questions about Bistro 11381 BODUM
0 question about this device. Answer the ones you know or ask your own.
Ask a new question about this device
Download the instructions for your Hand blender in PDF format for free! Find your manual Bistro 11381 - BODUM and take your electronic device back in hand. On this page are published all the documents necessary for the use of your device. Bistro 11381 by BODUM.
USER MANUAL Bistro 11381 BODUM
text_image
Technical diagram of a stand mixer with numbered parts for identificationA
text_image
bodumB

natural_image
Technical line drawing of a mechanical device with rotating components and red directional arrows indicating motion (no text or symbols)C

natural_image
Technical line drawing of a coconut-shaped device with red arrows indicating motion or movement (no text or symbols)D

text_image
Diagram illustrating the working principle of a bodun mixer, showing rotating and uncoiled components with red arrows indicating rotation direction.Welcome to BODUM®
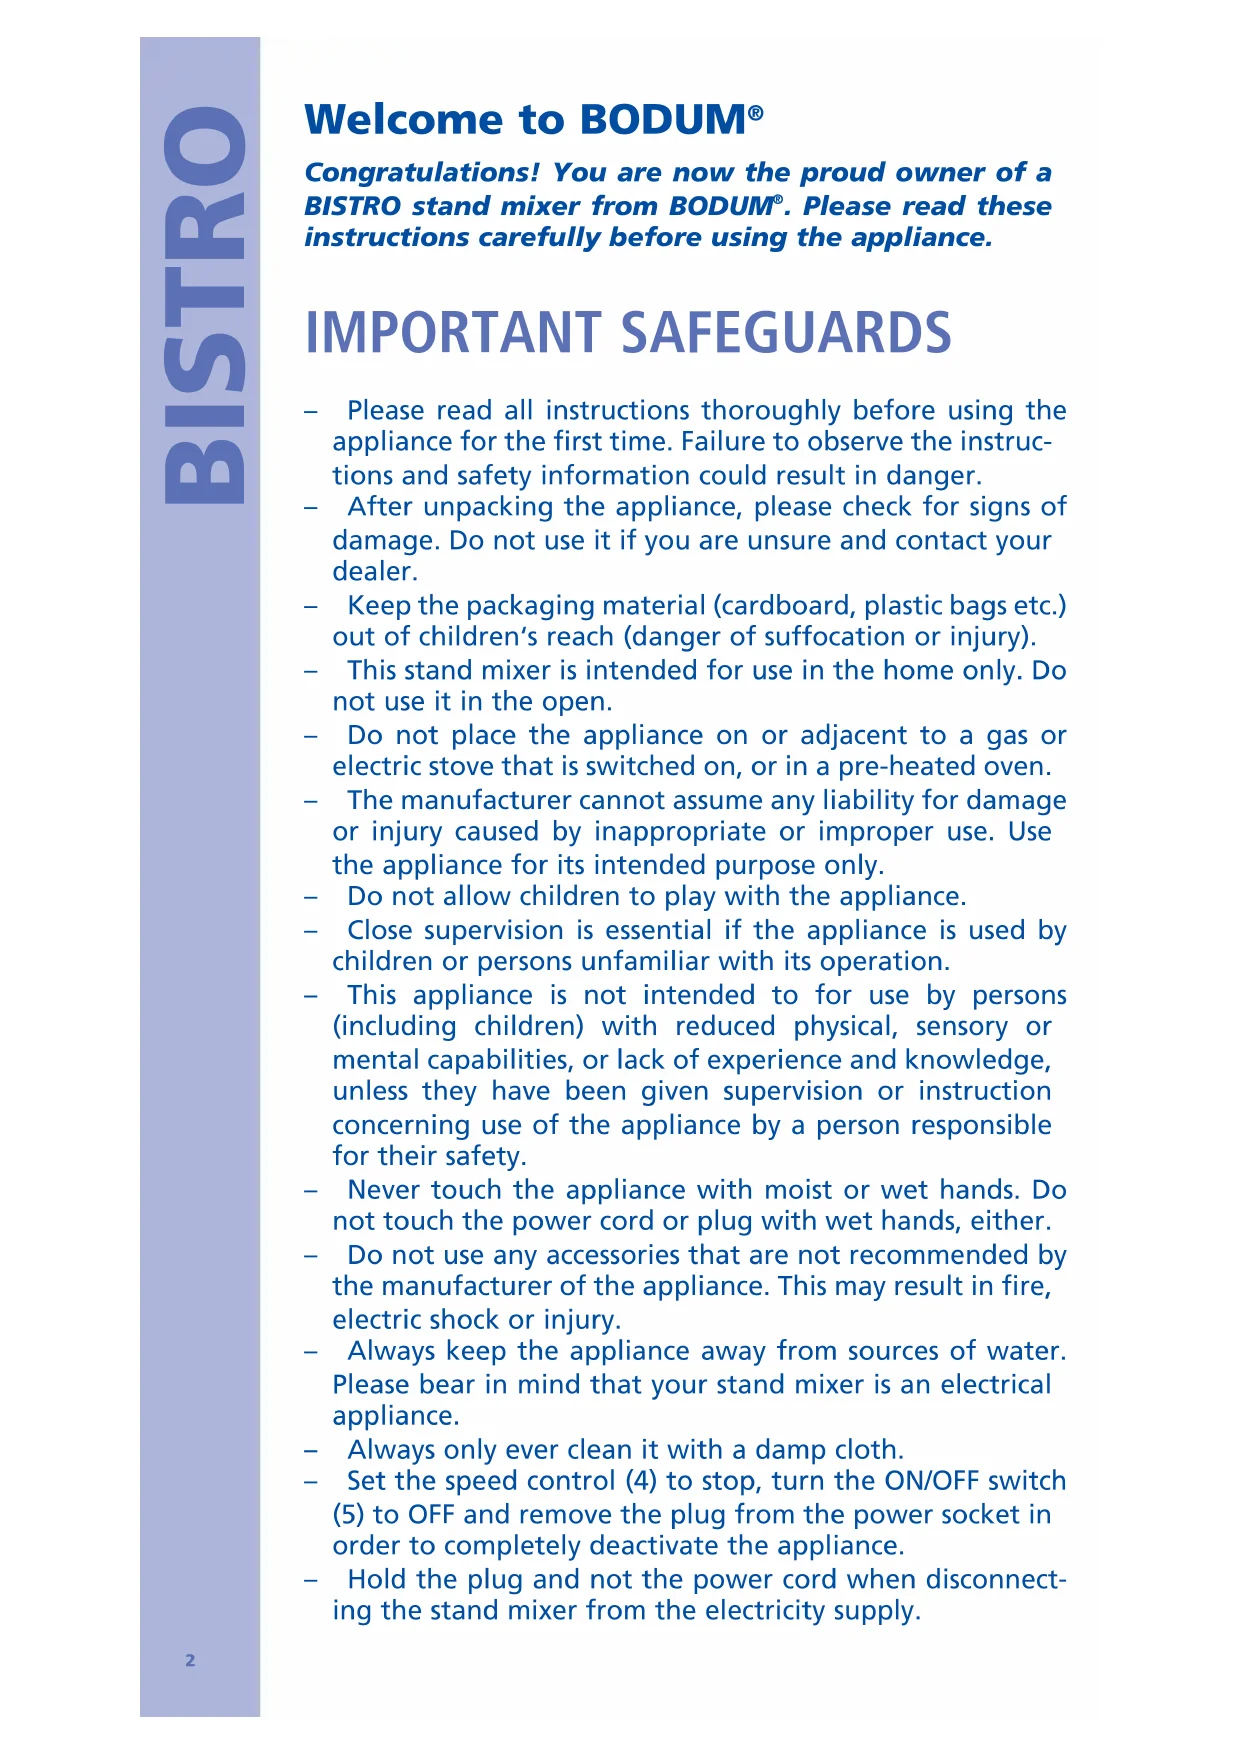
Congratulations! You are now the proud owner of a BISTRO stand mixer from BODUM®. Please read these instructions carefully before using the appliance.
IMPORTANT SAFEGUARDS
- Please read all instructions thoroughly before using the appliance for the first time. Failure to observe the instructions and safety information could result in danger.
- After unpacking the appliance, please check for signs of damage. Do not use it if you are unsure and contact your dealer.
- Keep the packaging material (cardboard, plastic bags etc.) out of children's reach (danger of suffocation or injury).
- This stand mixer is intended for use in the home only. Do not use it in the open.
- Do not place the appliance on or adjacent to a gas or electric stove that is switched on, or in a pre-heated oven.
- The manufacturer cannot assume any liability for damage or injury caused by inappropriate or improper use. Use the appliance for its intended purpose only.
- Do not allow children to play with the appliance.
- Close supervision is essential if the appliance is used by children or persons unfamiliar with its operation.
- This appliance is not intended to for use by persons (including children) with reduced physical, sensory or mental capabilities, or lack of experience and knowledge, unless they have been given supervision or instruction concerning use of the appliance by a person responsible for their safety.
- Never touch the appliance with moist or wet hands. Do not touch the power cord or plug with wet hands, either.
- Do not use any accessories that are not recommended by the manufacturer of the appliance. This may result in fire, electric shock or injury.
- Always keep the appliance away from sources of water. Please bear in mind that your stand mixer is an electrical appliance.
- Always only ever clean it with a damp cloth.
- Set the speed control (4) to stop, turn the ON/OFF switch (5) to OFF and remove the plug from the power socket in order to completely deactivate the appliance.
-
Hold the plug and not the power cord when disconnecting the stand mixer from the electricity supply.
-
Please ensure that the power cord does not hang down over the edge of a table or worktop or come into contact with hot surfaces including the stove.
- Remove the stand mixer's plug from the power supply when it is not in use, when attaching or removing accessories and when you wish to clean it.
- Never put electrical appliances into operation if the power cord or plug is damaged, after malfunctions occur or if the appliance has been dropped or damaged in any way. In this case, have the appliance checked, repaired or adjusted by your nearest service centre.
- Never attempt to replace the appliance's power cord since this requires special tools. Always ensure the appliance is only ever repaired or the power cord replaced by a service centre authorised by the manufacturer in order to ensure its safety.
- Do not immerse the power cord, stand mixer or plug in water or other liquids since this could cause fire, electric shock or injury.
- CAUTION! In order to avoid the risk of the appliance overriding the safety shutdown function, it must never be supplied with power by an external switch such as a timer or connected to a power circuit that is regularly activated and deactivated by the utility company.
- The appliance must not be attached to the power supply during cleaning.
- Keep hands, hair, clothing, as well as spatulas and other utensils away from beaters during operation to reduce the risk of injury to persons, and/or damage to the mixer.
- Keep clothing, jewellery, fingers, hair and other utensils away from rotating parts in order to avoid serious personal injury and damage to the appliance.
- Please use the splash guard with filler opening (11) supplied when mixing liquids, or reduce the quantity in order to avoid splashing.
- Please ensure that the speed control (4) is set to stop, that the ON/OFF switch (5) is turned to OFF and that the plug has been removed from the power socket before cleaning it or putting it away.
– Never allow the appliance to run without supervision. - The maximum rating is based on the dough hook attachment that draws the greatest load (power or current) and that other recommended attachments may draw significantly less power or current.
- Do not use outdoor.
- Remove beaters from mixer before washing.
INSTALLATION
- Always place the stand mixer on a stable, level surface. This may not be hot and must not be near to a source of heat. The surface must be dry. Keep the appliance and the power cord out of the reach of children.
- Check that the voltage indicated on the appliance rating plate matches the voltage of the power supply in your region. Only connect the appliance to a proper socket with a power output rating of at least 6A and a voltage of 220–240V\~ 50/60Hz (EURO) or 120V\~ 60Hz (USA). (Consult an electrician if you are using a residual-current device (RCD).) The socket must be easily accessible in an emergency when the appliance is in operation. The manufacturer cannot assume any liability for accidents caused by faulty or inadequate electrical earthing of the appliance.
- Have a qualified electrician replace the socket if it is not suitable for the appliance's plug.
PLEASE KEEP THESE INSTRUCTIONS SAFE FOR FUTURE REFERENCE
Separate accessories from BODUM are available for this stand mixer on our website or in our stores. For detailed installation and application guideline please refer to the IB of the accessory.
STAND MIXER PARTS LIST
1 Mixing arm
2 Bowl
3 Insertion opening for mixing attachments
4 Speed control
5 ON/OFF switch
6 Release lever for the mixing arm
7 Base
8 Beater attachment (1 piece)
9 Dough hook attachment (1 piece)
10 Whisk attachment (1 piece)
11 Splash guard with filler opening
SPECIAL INFORMATION
POWER CORD
- An extension cable may be used provided all appropriate precautions are taken.
- When using an extension cable, the rated power values of the extension cable must be equal to greater than that of
the appliance. If the appliance is earthed, the extension cable must be a three-core earthed cable. The extension cable must not hang over the edge of a table or worktop, children may not be able pull on it and it must not be possible to trip over it.
For USA and Canada only Grounding instructions
- This appliance must be grounded while in use to protect the operator from electric shock. The Appliance is equipped with a 3-conductor cord and a 3-prong grounding type plug to fit the proper grounding-type receptacle. An adapter should be used for connecting to two-prong receptacles. The grounding tab which extends from the adapter must be connected to a permanent ground such as a properly grounded outlet box. The grounding tab must be properly connected to the ground of the outlet box using a metal screw.
STAND MIXER BEFORE USE
Clean the stand mixer before using it for the first time. Please refer to chapter «MAINTENANCE AND CARE».
USING THE ATTACHMENTS
Your stand mixer comes with the following three mixing attachments: beater (8), dough hook (9) and whisk (10).
BEATER (8)
The beater is suitable for normal mixing tasks such as cakes, biscuits, icing, fillings, eclairs, pastry, sweet dough and creamed potatoes.
DOUGH HOOK (9)
The dough hook is particularly suited for mixing and kneading bread dough, yeast dough and pizza dough.
WHISK (10)
The whisk is suitable for whipping and mixing eggs, cream, thin dough, fat-free sponge, meringue, cheesecake, mousse and soufflés.
SPEED SETTINGS
The stand mixer offers 7 speed settings. Please note that each mixing process should start at the slowest speed before speed is increased to the recommended level as described below.
POSITION STOP
The appliance is turned off in this position. Always set the speed to position stop, turn the ON/OFF switch (5) to OFF and remove the plug from the power socket for cleaning or storing the appliance.
POSITION 1
Position 1 is suitable for mixing flour with liquid and for adding dry ingredients. This speed must not be used for kneading heavy dough types.
POSITION 2
Position 2 is suitable for fast stirring and for mixing and kneading yeast dough and other heavy dough types.
POSITION 3-4
These positions are suitable for mixing medium-heavy dough types.
POSITION 5
This position is suitable for stirring or beating.
POSITION 6
Position 6 is suitable for whipping cream, egg whites and icing. You should use the splash guard with filler opening (11) at this position at the latest. Attach the splash guard with filler opening as described in chapter:
«HOW TO USE YOUR STAND MIXER».
POSITION «MAX»
Position «Max» is suitable for whipping or beating small quantities of cream or egg white.
HOW TO USE YOUR STAND MIXER
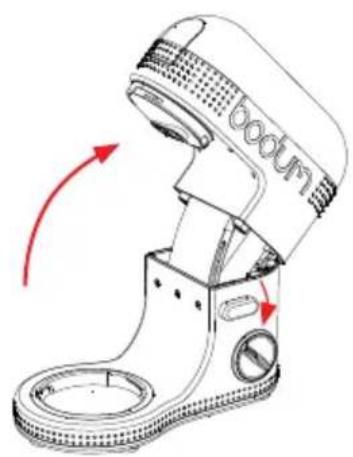
FIGURE A
- Before fitting the mixing attachments (8, 9, 10), splash guard with filler opening (11) or bowl (2), please ensure that the speed control (4) is set to stop, that the ON/OFF switch (5) is turned to OFF and that the plug has been removed from the power socket.
- Press the release lever for the mixing arm (6) down at the same as as raising the mixing arm until it clicks into the open position.
FIGURE B
- Press the splash guard with filler opening (11) onto the mixing arm (1) as far as it will go and lock it in place by turning it gently in a clockwise direction. This bayonet catch fastens the splash guard with filler opening (11) firmly to the stand mixer.
FIGURE C
- Insert the mixing attachment (8, 9, 10) into the opening (3) as far as it will go and then turn it in a clockwise direction.
FIGURE D
- Place the bowl (2) on the base (7), press it down and lock it in place by turning it in a clockwise direction.
- Press the release lever for the mixing arm (6) and lower the mixing arm (11) slowly.
- The stand mixer can be used once the plug is inserted into the power socket and the ON/OFF switch (5) is turned to ON.
REMOVING THE INDIVIDUAL ATTACHMENTS
- Before removing the mixing attachments (8, 9, 10), splash guard with filler opening (11) or bowl (2), please ensure that the speed control (4) is set to stop, that the ON/OFF switch (5) is turned to OFF and that the plug has been removed from the power socket.
- In order to remove the bowl (2) you must first press the release lever for the mixing arm (6), raise the mixing arm (1) and release the bowl (2) from the stand mixer by turning it in an anti-clockwise direction.
- In order to remove a mixing attachment (8, 9, 10) you must first press the release lever for the mixing arm (6), raise the mixing arm (1) and release the mixing attachment (8, 9, 10) from the stand mixer by turning it in an anti-clockwise direction.
- In order to remove the splash guard with filler opening (11) you must first press the release lever for the mixing arm (6), raise the mixing arm (1) and release the bowl splash guard with filler opening (11) from the stand mixer by turning it in an anti-clockwise direction.
HOW TO USE THE SPLASH GUARD WITH FILLER OPENING
- After attaching the splash guard with filler opening (11) as described in «HOW TO USE YOUR STAND MIXER» it will protect worktops and the stand mixer against spattering. You can also use the filler opening to add ingredients to the bowl (2).
CONNECTING THE POWER SUPPLY
- The mixing attachments (8, 9, 10) must always be fitted before connecting the stand mixer to the power supply.
- Before connecting the stand mixer to the power supply, please ensure that the speed control (4) is set to stop and that the ON/OFF switch (5) is turned off.
- Before operating the stand mixer the mixing arm (1) must have been closed and clicked into position. The stand mixer has a safety feature which ensures that the stand mixer cannot start while the mixing arm is raised.
MIXING
- IMPORTANT. The stand mixer must be switched off after 5 minutes permanent operation for a period of 10 minutes to prevent the motor from overheating.
For processing stiff bread dough or pizza dough do not use more than 1 kg of flour. The operation should take no longer than 5 minutes.
- Lower the mixing attachment (8,9,10) into the ingredients in the bowl (2) and click the mixing arm (6) into place. Then use the speed control (4) to select the desired speed. Please refer to chapter «SPEED SETTINGS».
– Use the splash guard (11) to avoid spattering. - When you have finished mixing, set the speed control (4) to stop, turn the ON/OFF switch to OFF and remove the plug from the power socket.
REMOVING MIXING ATTACHMENTS
- Please ensure that the speed control (4) is set to stop, that the ON/OFF switch (5) is turned to OFF and that the plug has been removed from the power socket.
- It is essential that the mixing attachment has stopped rotating. Remove the mixing attachment (8,9,10) from the insertion opening (3) by turning it in an anti-clockwise direction.
MAINTENANCE AND CARE
- Before cleaning, set the speed control (4) to stop, turn the ON/OFF switch (5) to OFF and remove the plug from the power socket.
– Never use scouring powder. - Any other servicing should be performed by an authorized service representative.
CLEANING THE MIXING ATTACHMENTS
- Excess ingredients can be removed from the mixing attachments (8, 9, 10) with a rubber or plastic scraper.
- The mixing attachments (8, 9, 10), splash guard (11) and bowl (2) can be washed by hand or in the dishwasher.
CLEANING THE HOUSING
- The entire housing of the stand mixer may only be cleaned with a damp cloth.
- Never immerse the stand mixer, the plug or the power cable in water. Please bear in mind that it is an electrical appliance.
STORAGE
- Always remove the mixing attachment (8, 9, 10) when the stand mixer is not in use.
- The mixing arm (11) must always be lowered when the stand mixer is stored.
- Always unplug the stand mixer when it is not in use.
TECHNICAL SPECIFICATIONS
| Rated voltage EURO 220–240V~ 50/60Hz |
| Rated voltage USA 120V~ 60Hz |
| Rated power EURO 700 W |
| Rated power USA 700 W |
| Capacity 4.7 litres / 160 oz |
| Power cord length approx. 100 cm / 39 inches |
| Certifications GS, CE, ETL, CETL |
Correct disposal for this product

This marking indicates that this product should not be disposed with other household wastes throughout the EU. To prevent possible harm to the environment or human health from uncontrolled waste disposal, recycle it responsibly to promote the sustainable reuse of material resources. To return your used device, please use the return and collection systems or contact the retailer where the product was purchased. They can take this product for environmental safe recycling.
SERVICE & WARRANTY CONDITIONS
All BODUM ^® products are manufactured from high-quality, durable materials. However, if individual parts do need replacing at any time please contact your BODUM ^® dealer, a BODUM ^® store, the BODUM ^® representative in your country or visit: www.bodum.com.
Warranty. For the «BISTRO» stand mixer, BODUM® provides a 2-year warranty from the date of purchase for all material defects or malfunctions that are due to design or manufacturing flaws. Repair will be effected free of charge provided all warranty conditions are met. It is not possible to refund the purchase price.
Warranty conditions. The warranty certificate must be completed by the seller at the time of purchase. BODUM® will not provide warranty for damage resulting from inappropriate use, improper handling, normal wear and tear, inadequate or incorrect maintenance or care, incorrect operation or use of the appliance by unauthorised persons.
RENG∅RING AF TILBEH∅RET
RENG∅RING AF KABINETTET
CÓMO LIMPIAR LA CARCASA
SERVICE OCH GARANTIVILLKOR
Galerie, Bondi Junction (NSW)
Il Mondo, Townsville (QLD)
Kitchenware-Plus, Loganholme/Brisbane (QLD)
Moda Aroma, Cairns (QLD)
Peters of Kensington (NSW)
Your Habitat, Hobart (TAS)
Your Habitat, Canberra (ACT)
Your Habitat, Launceston (TAS)
Dallimores (WA)
Inside Out (NSW)
Roost (VIC)
Cucina Cucina (NSW)
MYER (NSW)
MYER (QLD)
MYER (SA)
MYER (VIC)
David Jones (NSW)
David Jones (QLD)
AUSTRIA
BODUM® STORE
Marc Aurel Strasse 2 b
A-1010 Wien
T +43 1 925 7999
F +43 1 925 7999
shop.wien@bodum.com
SHOP-IN-SHOP
Cusinarium, Singerstrasse 14, 1010 Wien
shop.maasmechelen@bodum.com
SHOP-IN-SHOP
INNO, Antwerp
Yonge Street, Toronto, ON, M5C 2L7
THE BAY (MONTREAL), 585 Rue
Catherine Ouest, Montreal, QC, H3B 3Y5
THE BAY (YORKDALE), 3401
Dufferin St., Toronto, ON, M6A 2T9
THE BAY (BAYSHORE), 100
Bayshore Dr., Nepean, ON, K2B 8CI
THE BAY (SOUTHCENTER), 100
Anderson Rd. Southeast, Calgary, AB, T2J 3VI
THE BAY (SOUTHGATE), 111 St. &
51 Ave., Edmonton, AB, T6H 4M7
THE BAY (MISSISSAUGA), 100
City Court Drive, Hwy10 and
Burnhamthorpe Road West,
Mississauga, ON, L5B 2C9
BOUTIQUE 1101 LAURIER, 1101
Avenue Laurier Outermont,
Montreal, QC, H2V 2L3
HOMEWERX, 1053 Davie Street,
Vancouver, BC, V6E 1M5
CALL THE KETTLE BLACK, 2294
W. 4th Avenue, Vancouver, BC, V6K 1N8
BRADSHAW'S, 129 Ontario St.,
Stratford, ON, N5A 3H1
JILL'S TABLE, 115 King St., London, ON, N6A 1C3
Champlin, Quebec, QC, G1K 4H5
King Street West, Hamilton, ON,
L8S 1L6
TEA DESIRE, 1232-Barnet Highway,
Coquitlam, BC, V3B 5R5
LE CHEF COMPLET, 447 Brant
Street, Burlington, ON, L7R 2G3
CHINA
SHOP-IN-SHOP
Sogo Department Store, 7/F,
Nanjing West Rd., Shanghai
CitySuper, IFC, B2, LG2, 8, Century
avenue Pudong new district ,
Shanghai
ST Plaza, B1, 22 Jianguamenwai
Avenue, Beijing
Shin Kong Place, 5/F, No. 87,
Jianguo Road, Chaoyang District, Beijing
Emily Coffee, No. 0158A , Zone
C, Chaowai SOHO, 6B, Chaowai
Daijie, Beijing
Music Coffee, 4# New Hope Rd,
CHengdu, Sichuan
Wangfujing Department Store,
No.99, Qinxian North Street, Taiyuan
Parkson Department Store, No.
189, Qinxian North Street, Taiyuan
Chicago Coffee, 36 Times Avenue,
Think UK Apartment Complex, 88
Jiao Ling Road, Kunming
Charter Department Store, 6/F,
No.1255 Chongqing road, Chang Chun, Jilin
Ouya Commercial Capital, 6/F, No.
1128, Gong Nong Da Lu, Chang Chun, Jilin
Nenlu Tea Lounge, 10/F,
Hongyadong, No.88 Jiabin Road,
Yuzhong District, Chongqing
DENMARK
SHOP-IN-SHOP
Inspiration Aarhus, Aarhus
Stockmann Department Store
Helsinki
shop.opera@bodum.com
BODUM® OUTLET
La Vallée Shopping Village
shop.serris@bodum.com
BODUM® SHOPS & SHOP-IN-SHOP
SHOP-IN-SHOP
Paris
105 51, Athinas 48, Kotzia Square
HONG KONG
SHOP-IN-SHOP
Allure Living Central, 109B Caine Road, Mid-Level
Citysuper Harbour City Store, Level 3, Harbour City, Tsim Sha Tsui
Franc Franc, Shop S01-03 & S08-12, 2/F., Hang Lung Center, 2-20
Paterson St., Causeway Bay GOD Causeway Bay, Leighton
Centre, Sharp Street East Entrance, Causeway Bay
GOD Central, 48 Hollywood Road, Central
GOD Tsimshatsui, Shop B02, Basement, Silvercord, 30 Canton Road, Tsim Sha Tsui
Gourmet, Basement, Lee Gardens, Causeway Bay
Great Food Hall, Basement, Two Pacific Place, Queensway
Lane Crawford (Pacific Place), 88
Queensway, Admiralty
Lane Crawford (Times Square), 1 Matheson Street, Times Square, Causeway Bay
Lane Crawford (Tsim Sha Tsui), 3
Canton Road, Tsim Sha Tsui Marc James Design, 16/F Horizon Plaza, Ap Lei Chau
Sogo Hong Kong Co., Ltd., 555
Hennessy Road, Causeway Bay
Today's Living Service Centre, 1/F., 20 Pak Sha Road, Causeway Bay Towngas Avenue, G/F 59-65 Paterson St., Fashion Walk, Causeway Bay
Towngas Cooking Centre, Basement, Leighton Centre, 77
Leighton Road, Causeway Bay Wing On (Main Store), Wing On Centre, 211 Des Voeux Road Central, Sheung Wan
Wing On (Taikoo Shing Store), Cityplaza, Units 074 & 144, 18 Taikoo Shing Road, Taikoo Shing
Wing On Plus (Nathan Road), Wing On Kowloon Center, 345 Nathan Road, Yau Ma Tei
Yata, Phase III, New Town Plaza, 2-8 Shatin Centre Street, Shatin
INDONESIA
SHOP-IN-SHOP
Metro Pondok Indah, Jakarta Metro Senayan, Jakarta Metro Taman Anggrek, Jakarta Grand Lucky, Sudirman Business District, Jakarta
OGO Plaza Senayan, Jakarta Debenhams Senayan City, Jakarta. Metro bandung Supermall, Bandung
ITALY
BODUM® STORE
shop.rinku@bodum.com
BODUM® OUTLET
Gotemba Premium Outlet Section 550
1312 Fukasawa, Gotemba-shi
412-0023 Shizuoka
T +81 550 81 3118
F +81 550 81 3118
shop.gotemba@bodum.com
SHOP-IN-SHOP
Illums Nihonbashi
Illums Umeda
Illums Koriyama
Illums Sapporo
Seibu Department Store Ikebukuro
ONLINE SHOP JAPAN
www.bodum.com
KOREA
Shinsegae Main, 9 F,
52-5 chungmuro Joong-Gu Seoul
Timesquare, 5F, 434-5
Youngdeungpo 4-ga
Youngdeungpo- Gu Seoul
Shinsegae Busan Centerm City,
7F, 1495 Woo-dong Haewundae-gu Busan
Lotte Main, 7F, 1 Joong-gu
Sogong-dong Seoul
Lotte Kangnam, 7 F, 937 Daechidong Kangnam-Gu Seoul
AK Plaza Bundang, 5F, 263
Seohyun-dong, Bungdang-gu Seongnam City, Kyunggi-do
Hyundai Cheonho, 10 F, 455-8
Cheonho-dong Kangdong-gu Seoul
Shinsegae Yeongdeungpo, 6F,
Building B, 434-5 Yeongdeungpo-dong 4ga, Yeongdeungpo-gu, Seoul
Shinsegae Incheon, 5F, 15
Gwangyo-dong, Nam-gu, Incheon
MALAYSIA
SHOP-IN-SHOP
"LIVE IT UP!" Homestore, LG306, One Utama Shopping Centre (New Wing)
Isetan Departmental Store, 3rd floor Kuala Lumpur City Centre
Robinsons Departmental Store, 2nd floor
The Gardens Midvalley
Parkson Pavilion, 6th floor, Pavilion Kuala Lumpur
NETHERLANDS
SHOP-IN-SHOP
DE BIJENKORF, Amsterdam
DE BIJENKORF, Arnhem
DE BIJENKORF, Den Haag
DE BIJENKORF, Eindhoven
DE BIJENKORF, Rotterdam
DE BIJENKORF, Utrecht
RUSSIA
SHOP-IN-SHOP
Bolshoy Gostiny Dvor, St. Petersburg
Studio Detali, Fortuna Grand, Irkutsk
Studio Detali, Irkutsk
Dom nemetskoy posudi, Magnitogorsk
Dom nemetskoy posudi, Gostiny Dvor,
Magnitogorsk
Dom nemetskoy posudi, Magnit, Chelyabinsk
Dom nemetskoy posudi, Tyumen
SINGAPORE
SHOP-IN-SHOP
Tangs, Basement 1, Orchard Road
Tangs (Vivo), Level 2, Vivo City
Takashimaya, Basement 1, Orchard Road
Robinson Centrepoint, Level 5, Orchard Road
Robinsons Raffles City, Level 4, City Hall
Isetan Scotts, Level 4, Orchard Road
Isetan Katong, Level 2, Marine Parade Road
Isetan Nex Mall, Level 3, Serangoon
BODUM® SHOPS & SHOP-IN-SHOP
SPAIN
BODUM® OUTLET
Las Rozas Village - loc. 46
shop.madrid@bodum.com
SHOP-IN-SHOP
ISOLEE, Claudio Coello 55, Madrid
shop.zurich@bodum.com
SHOP-IN-SHOP
GLOBUS: Basel, Luzern
HUBACHER AG: Rössliweg 43,
4852 Rothrist
LOEB AG: Spitalgasse 47-51,
3001 Bern
COOP CITY WARENHÄUSER:
Baden, Bern Ryfflihof, Kriens
Centre commercial, Signy
Tekoe, 1997 Haute-Nedaz
8F, Sogo Department Store,
Chung Hsiao
8F, Shin Kong Mitsukoshi
Department Store Taichung
10F, Far East Department Store,
Banciao
THAILAND
SHOP-IN-SHOP
Isetan 5 Fl., Central world
CDC (Crystal Design Center) B
Building
Emporium
Siam Paragon
Central Chidlom
Robinson Changmai
Central Pattaya
Central Chaengwattana
UNITED KINGDOM
BODUM® OUTLET
Unit 6A
Pingle Drive
Bicester Village
Bicester
Oxfordshire
OX26 6WD
T+441869321209
F+441869321209
shop.bicester@bodum.com
ONLINE SHOP UK
www.bodum.com
USA
SHOP-IN-SHOP
BED, BATH & BEYOND, 555 9th St,
San Francisco, CA, 94103
BED, BATH & BEYOND, 620 6th
Ave, New York, NY, 10011
BROADWAY PANHANDLER, 65
East 8th St., New York, NY, 10003
KITCHEN COLLAGE, 430 E. Locust
Street, Des Moines, IA , 50309
KIM'S HOME CENTER, 2940 W
Olympic Blvd., Los Angeles, CA
90006
ONLINE SHOP USA
www.bodumusa.com
BODUM® SALES OFFICES
AUSTRALIA
Bodum (Australia) Pty Ltd
Suite 39, 26-32 Pirrama Road
Pyrmont NSW 2009
Australia
T +61 2 9692 0582
F +61 2 9692 0586
office.australia@bodum.com
AUSTRIA
Peter BODUM® GmbH
Roseggerstrasse 35
DE 21079 Hamburg
T +49 4191 99830
F +49 4191 2969
office.austria@bodum.com
BENELUX
C/O BODUM® AG
Kantonsstrasse 100
Postfach 463
CH-6234 Triengen
Agent Belgium/Luxemburg
Rombouts BVBA
Brialmontlei 10
BE-2018 Antwerpen
T +32 3 213 16 13
F +32 3 213 16 05
distribution.belux@bodum.com
Agent The Netherlands
Bönkers B.V.
Molenweg 19A
NL-3738 DC Maartensdijk
T +31 346 21 40 23
F +31 346 21 24 30
distribution.netherlands@bodum.com
CHINA
BODUM® Hong Kong Ltd
Shanghai Representative Office
Unit 15A04, Wang Jiao Plaza
No.175, Yan'An Road (E)
Shanghai 200002
T +86 21 6326 5870
F +86 21 6326 5873
office.china@bodum.com
Distribution China
BODUM® Hong Kong Ltd
Shanghai Representative Office
Unit 15A04, Wang Jiao Plaza
No.175, Yan'An Road (E)
Shanghai 200002
T +86 21 6326 5870
F +86 21 6326 5873
office.china@bodum.com
FRANCE
BODUM® France S.A.S
office.germany@bodum.com
GREECE
Distribution Greece
YALCO
9, A Metaxa St. Kifissia
GR 145 64 Athens
T +30 210 629 99 66
HONG KONG
BODUM® Hong Kong Ltd
BODUM® Asia Ltd
Unit 2503, 25/F K. Wah Centre
191 Java Road, North Point
Hong Kong
T +852 25 43 45 55
F +852 25 43 33 23
office.hongkong@bodum.com
Distribution Hong Kong
Carsac Limited
1128, Block B, Sea View Estate
2-8 Watson Road, North Point
Hong Kong
T +852 2968 1088
F +852 2968 5048
distribution.hongkong@bodum.
com
ITALY
C/O BODUM® AG
Kantonsstrasse 100
Postfach 463
CH-6234 Triengen
T 199 30 77 78
F 199 30 77 79
office.italy@bodum.com
JAPAN
BODUM® Japan Co., Ltd
3-25-12 Jingumae
Shibuya-ku
150-0001 Tokyo
T +81 3 5775 0681
F +81 3 5775 0701
office.japan@bodum.com
KOREA
Distribution Korea
Sun Woo Ind. Co., Ltd
465-070
251-6 Hang-Dong
Hanam-City, Kyungki-Do
Korea
T +82 31 793 1172
F +82 31 793 1176
distribution.korea@bodum.com
NEW ZEALAND
Distribution New Zealand
Michael Joyce
19 Westmoreland Street West
Grey Lynn Auckland 1141
T +64 9 376 6667
F +64 9 378 1122
sales@michaeljoyce.co.nz
PORTUGAL
office.denmark@bodum.com
Norway
T +47 66 91 04 72
F +47 22 51 36 36
YEO TECK SENG (S) PTE. Ltd
59 Jalan Pemimpin
# 03-00 L&Y Building
Singapore 577218
T +65 6254 1511
F +65 6251 5415
distribution.singapore@bodum.com
SPAIN
C/O BODUM® AG
Kantonsstrasse 100
Postfach 463
CH-6234 Triengen
T 902 995 604
F 902 996 138
office.spain@bodum.com
Agent Spain
MIM S.I.
distribution.spain@bodum.com
SWITZERLAND
BODUM® (Schweiz) AG
Kantonsstrasse 100
Postfach 463
6234 Triengen
T +41 41 935 45 00
F +41 41 935 45 80
office.switzerland@bodum.com
TAIWAN
BODUM® Taiwan
7th Floor
5 Kwo Kang Road
205 Keelung City
T +886 2 24 58 38 48
F +886 2 24 58 38 36
distribution.taiwan@bodum.com
THAILAND
Distribution Thailand
CAC Pacific Ltd
89 Chalermprakiart Soi 34
Nongbon, Pravet
Bangkok 10250
Thailand
T +662 328 1984
F +662 328 1985
distribution.thailand@bodum.com
UNITED KINGDOM
BODUM® (UK) Ltd
Hill House
1 Little New Street
London
EC4A 3TR
T 0845 40 17778
office.uk@bodum.com
USA (CANADA, SOUTH
AMERICA)
BODUM® USA, Inc.
601 West 26th St.
Suite 1250
New York, NY 10001
T +1 212 367 8844
F +1 212 367 8855
info@bodumusa.com
WARRANTY SERVICE FOR USA - CANADA
For more information or questions, warranty claim and return authorization FREE CALL - 1.800.23.BODUM/WARRANTY@BODUMUSA.COM
WARRANTY CLAIM CAN NOT BE DONE WITHOUT PROOF OF PURCHASE.
BODUM ^® warrants the original purchaser from defects in materials and workmanship (parts & labor) for the period of two years from the date of original consumer purchase. To be eligible for warranty coverage the product must be purchased from an authorized BODUM ^® dealer and proof of purchase must be provided.
2 YEARS LIMITED WARRANTY CERTIFICATE. STAND MIXER CERTIFICAT DE GARANTIE LIMITÉE DE 2 ANS. ROBOT CULINAIRE CERTIFICADO DE GARÁNTÍA LIMITADA DE 2 AÑOS. BATIDORA
| Proof of purchase |
| Firmenstempel |
| Cachet du revendeur |
| Firmastempel |
| Sello de la empresa |
| Timbro del rivenditore |
| Stempel van de zaak |
| Firmastämpel |
| Carimbo da empresa |
| Ostotodistus |
| Доказательство покупки |