
MBW150 Classic Edition - Watch SONY - Free user manual and instructions
Find the device manual for free MBW150 Classic Edition SONY in PDF.
| Product type | Bluetooth connected watch |
| Brand | Sony Ericsson |
| Model | MBW-150 Classic Edition |
| Compatibility | Bluetooth phones (visit www.sonyericsson.com/support) |
| Display | LCD screen with icons |
| Key features | Incoming call management (reject, silent), music playback (play/pause, next/previous track, volume), SMS notification, time and date display, battery level, out of range alert |
| Water resistance | 3 atmospheres (light spray, sweat, rain) |
| Battery | Rechargeable, minimum charging time 2 hours, battery life not specified |
| Power supply | Wall charger (A) + charging clip (B) |
| Package contents | MBW-150 watch, charger, charging clip |
| Dimensions | Approx. 40 x 35 x 12 mm (estimate based on photos) |
| Weight | Approx. 30 g (estimate) |
| Time setting | Mechanical crown (pull and turn) |
| Bluetooth | Version not specified, range varies (obstacles reduce range) |
| Pairing | With one phone at a time, default code 0000 |
| Care | Wipe with a soft dry cloth, avoid chemicals |
| Repairability | Battery replaceable only by an authorized center |
| Reset | Press and hold the upper right and lower buttons in pairing mode |
Frequently Asked Questions - MBW150 Classic Edition SONY
User questions about MBW150 Classic Edition SONY
0 question about this device. Answer the ones you know or ask your own.
Ask a new question about this device
Download the instructions for your Watch in PDF format for free! Find your manual MBW150 Classic Edition - SONY and take your electronic device back in hand. On this page are published all the documents necessary for the use of your device. MBW150 Classic Edition by SONY.
USER MANUAL MBW150 Classic Edition SONY
Declaration of conformity 135
FCC statement. 136

Bluetooth
This user guide is published by Sony Ericsson Mobile Communications AB or its local affiliated company, without any warranty. Improvements and changes to this user guide necessitated by typographical errors, inaccuracies of current information, or improvements to programs and/or equipment, may be made by Sony Ericsson Mobile Communications AB at any time and without notice. Such changes will, however, be incorporated into new editions of this user guide. All rights reserved.
©Sony Ericsson Mobile Communications AB, 2007
Publication number: 1201-3467.3
Some of the services in this user guide are not supported by all networks. This also applies to the GSM International Emergency Number 112.
Contact your network operator or service provider if you are in doubt whether you can use a particular service or not.
The Bluetooth word mark and logos are owned by the Bluetooth SIG, Inc. and any use of such marks by Sony Ericsson is under license. Sony is a trademark or registered trademark of Sony Corporation. Ericsson is a trademark or registered trademark of Telefonaktiebolaget LM Ericsson.
English
MBW-150 Bluetooth™ watch 3
Icons 4
Getting started 5
Using your watch 8
Troubleshooting 12
Declaration of conformity 135
FCC statement 136
MBW-150 Bluetooth™ watch
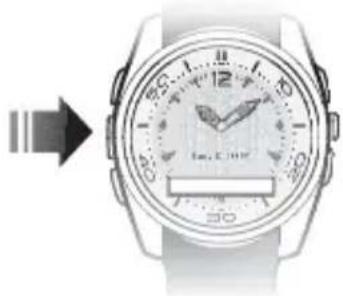
Congratulations on your purchase of the MBW-150 Sony Ericsson Bluetooth™ watch.
The MBW-150 provides you with intelligent control of calls and music through your watch.
You are notified when your phone rings and if you receive a text message. When your phone rings the name or number of the caller is displayed in the watch and you can mute or reject it.
If your phone has a music player you can play, stop and change tracks with your watch. You can change the volume and keep track of date and time. If supported in your phone, you can also see the name of the track currently being played.
The watch can withstand light spray, perspiration, water vapour and rain drops. The level of resistance to water is 3 ATM.
Go to www.sonyericsson.com/support for an overview of which phone models fully support the MBW-150.
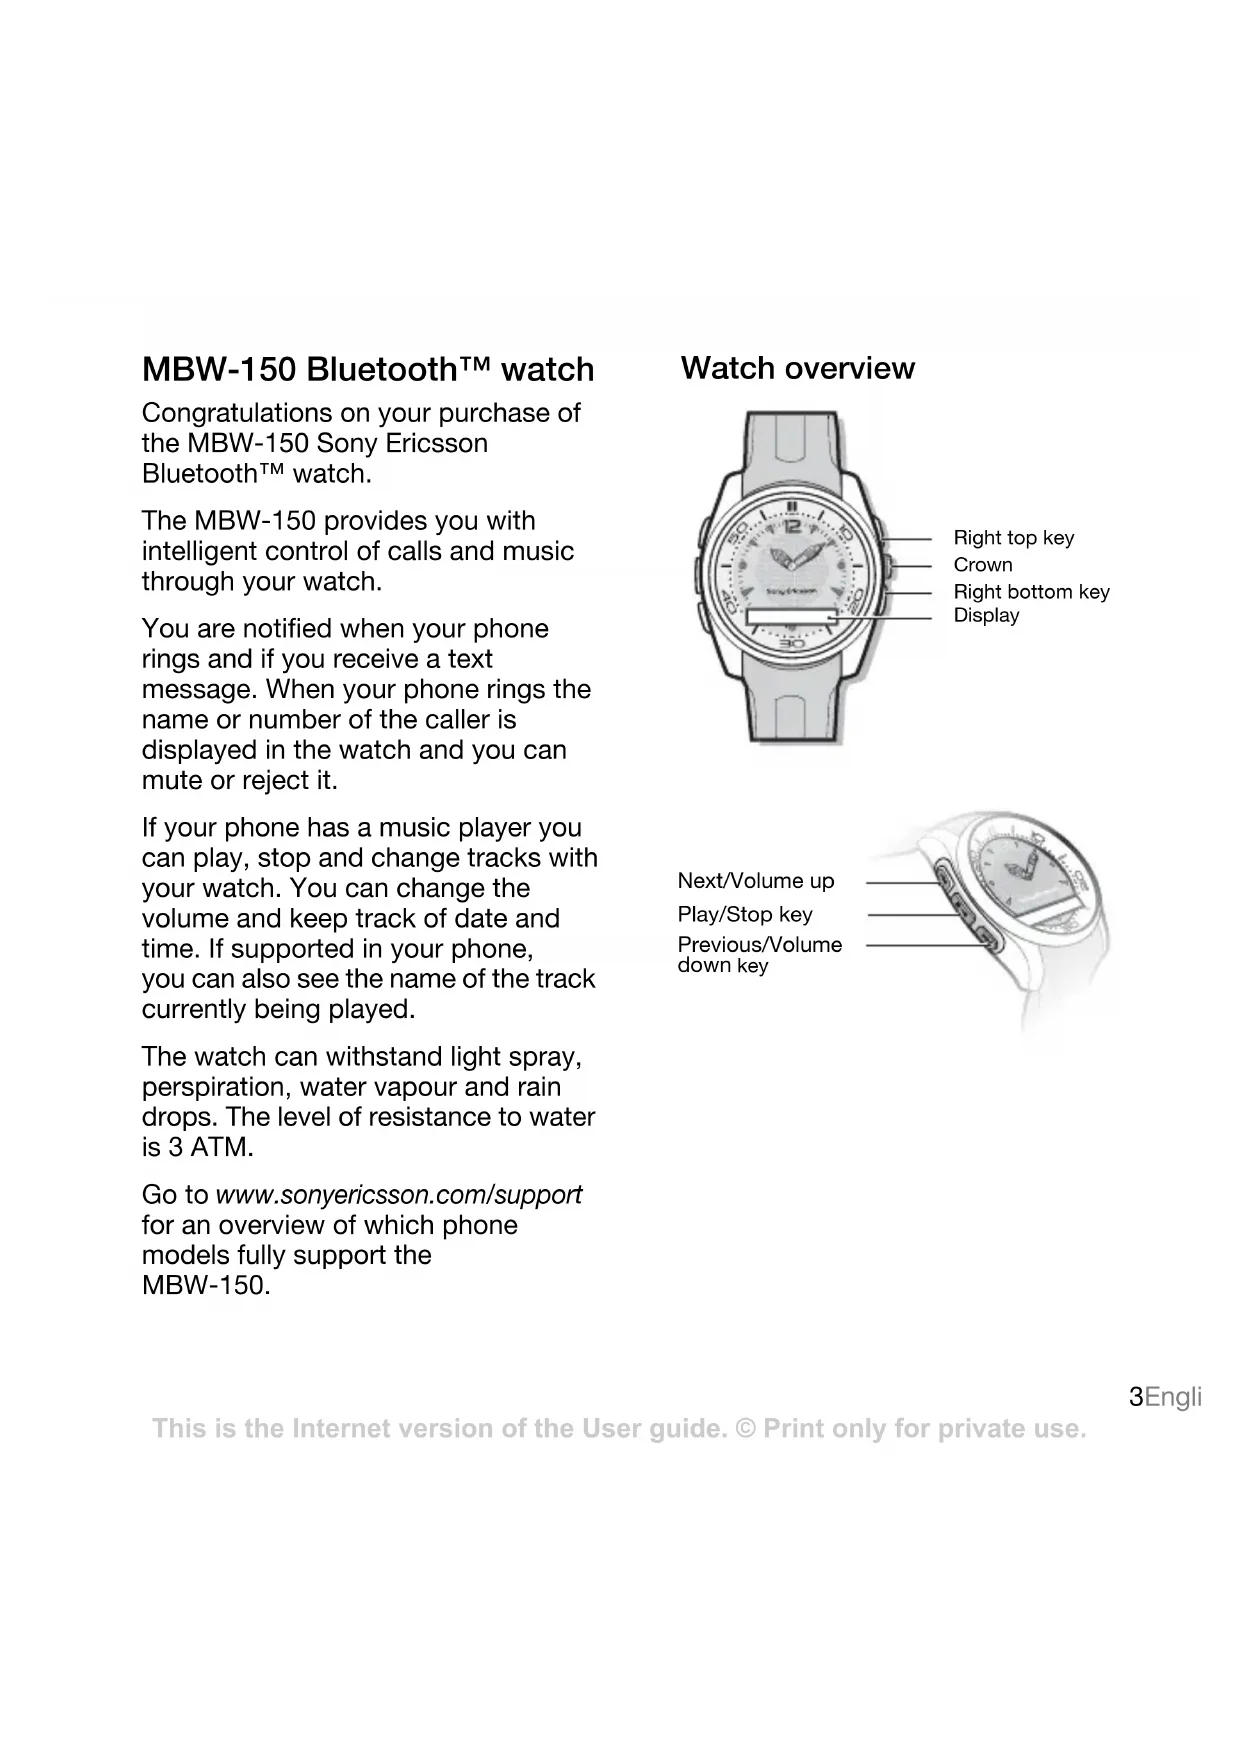
Watch overview
Right top key
Crown
Right bottom key
Display
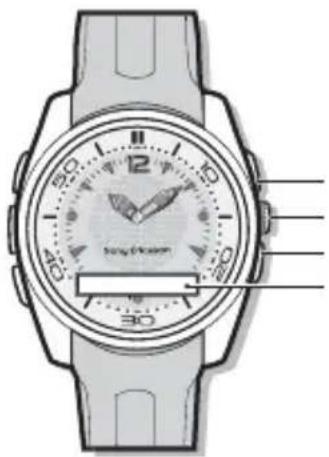
Next/Volume up
Play/Stop key
Previous/Volume down key
Icons
Status icons
| Incoming call | |
| Message received | |
| Bluetooth function on. No connection to phone | |
| Bluetooth function on. Watch connected to phone | |
| Bluetooth function connecting | |
| Bluetooth function off due to low battery level | |
| Battery level | |
| Battery charging | |
| Play | |
| Stop | |
| Next track | |
| Previous track | |
| Adjusting call volume | |
| Adjusting music volume | |
| Pairing succeeded |
| Out of range notification: connection to the phone is lost | |
| Watch in pairing mode | |
| Setting icons | |
| Bluetooth function on | |
| Bluetooth function off | |
| Message notification on | |
| Message notification off | |
| Out of range notification on | |
| Out of range notification off | |
| Start pairing mode |
Instruction symbols
The following symbols appear in the User guide:

Note
See also page...
Getting started
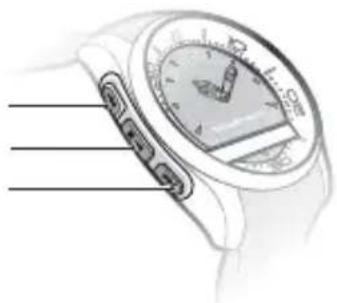
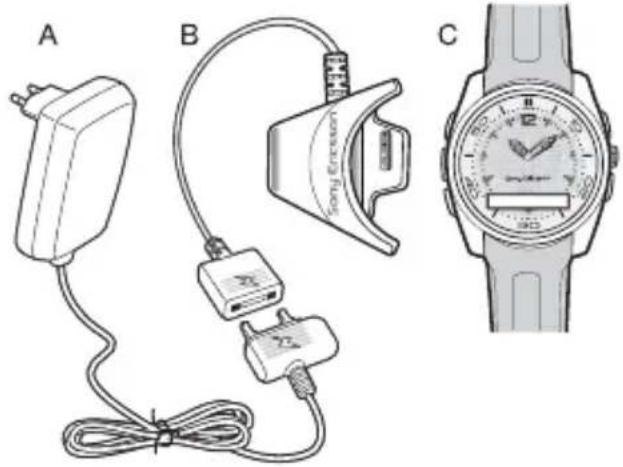
Box content
Before you start using the watch, make sure the following items are in the box:
-Charger (A)
-Charging clip (B)
The MBW-150 (C)
Charging
Make sure your watch battery is fully charged.
Minimum charging is 2 hours.
To charge the battery
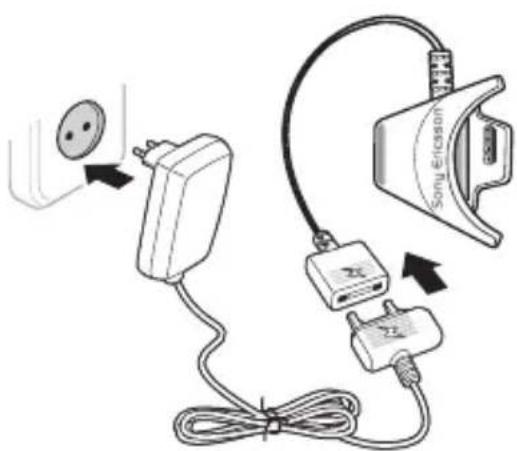
1Connect the charger, without the charging clip, to the mains.
2Connect the charging clip to the watch by pressing the handle to open the clip. Slide the clip over the watch.
3Make sure that the contacts of the clip are connected to the contacts on the back of the watch.

5Engli
This is the Internet version of the User guide. © Print only for private use.
4Connect the charger to the charging clip with the symbols on the charger and clip connector facing the same direction.
5Wait approximately 2 hours or until the battery icon indicates charging is complete.
Setting the time
To set the time
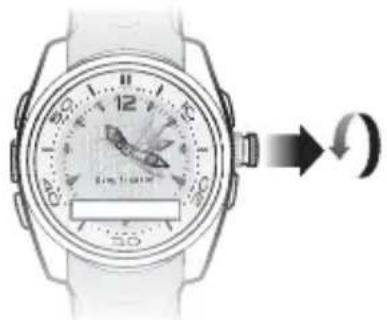
Gently pull out the crown and rotate it to set the time. When the time is set, push the crown back in until you hear a click.
Pairing
Your watch has to be paired with your phone before you can use it. Your watch can only be paired with one phone at a time. Start a new pairing
procedure to use the watch with another phone.
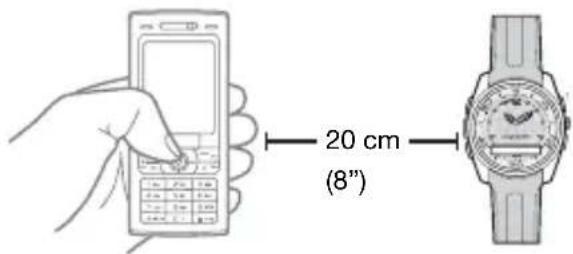
Follow instructions in the phone User guide on how to turn the Bluetooth function on in the phone.
To pair your watch with a phone
1Turn the Bluetooth function on in your phone.
2Turn Bluetooth visibility on in your phone. This makes your phone visible to other Bluetooth devices.
3Press the bottom key on the watch repeatedly to select pairing mode, then press the right top key to turn on pairing mode.
4 Press Yes when Add to my devices? appears in your phone. If Add to my devices? does not appear, go to step 5. For some phones you may need to enter a passcode. The default passcode is 0000.
6 English
This is the Internet version of the User guide. © Print only for private use.
5Prepare your phone according to the phone User guide on how to pair a Bluetooth device.
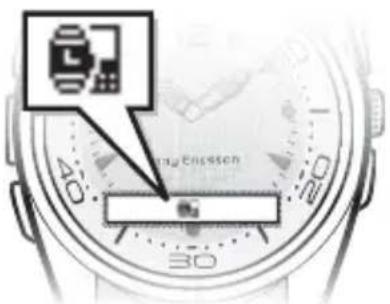
If pairing is successful, the pairing icon appears and the watch vibrates.

To stop pairing, press the right top key.
After you have paired your watch with a phone, the watch will automatically connect to the phone as soon as the phone is on and within range.

If pairing fails, you need to set the watch in pairing mode and repeat the pairing procedure. 6 Pairing
Phone settings
A few seconds after you have paired your watch with the phone you are asked if you want to allow your watch
to connect. You can choose between Always ask and Always allow.
Always ask
If you choose Always ask, you will always be asked if you want to reconnect each time the watch and the phone are within range.
Always allow
If you choose Always allow, the watch automatically reconnects to the phone each time both devices are within range.

Always allow is the preferred setting.
Pairing mode
To pair your watch a second time, for example, with another phone or if the first pairing failed, do this manually by setting the watch to pairing mode.
To set the watch to pairing mode
- Press the bottom key repeatedly to select pairing mode and then press the right top key. An animated pairing icon appears.
Using your watch
Settings
Settings are shown as icons in the display.
To read more about setting icons
4 Setting icons.
To enter the Settings menu
- Press the right bottom key.
To turn a setting on or off
1Press the right bottom key repeatedly until the setting you want is centered in the watch display.
2Press the right top key to turn the setting on or off.
Calls
When the phone rings, the watch vibrates and the name or number of the caller is displayed in the watch. You can mute or reject the call by pressing the right top key.
To mute an incoming call
- Press the right top key.
To reject an incoming call
- Press the right top key twice to reject a call.
8 English
This is the Internet version of the User guide. © Print only for private use.
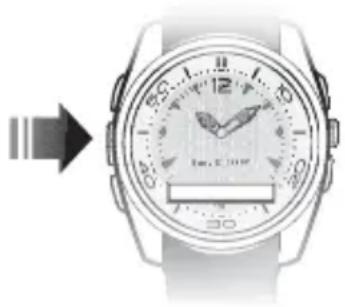
Text messages
When message notification is on, the watch vibrates and pears when you receive a text message. If you have unread messages in your phone inbox, you will not get a notification. Message notification is on by default.
To change message notification status
1Press the right bottom key repeatedly to select
2Press the right top key to change between on and off .
Music
Use the watch to control the music player in the phone. Play, stop and change music tracks by pressing the keys on the left side of the watch.
To listen to music
-
Press and hold the play/stop key to play a track.
-
Press the play/stop key to stop a track.
- Press and hold the next/volume up key to go forward to the next music track.
- Press and hold the previous/volume down key to go to the previous track.
Track info
- Press the right top key three times to display track information from the phone.

Track info is displayed in standby mode when new information becomes available, when you start playing a track, and when you change tracks while playing.
Volume control
Use the volume control keys on the left side of the watch to control music and voice volume in the phone.
To increase and decrease volume
To increase music or voice volume press the next/volume up key.
To decrease music or voice volume press the previous/volume down key.
Battery status
To check the watch battery status
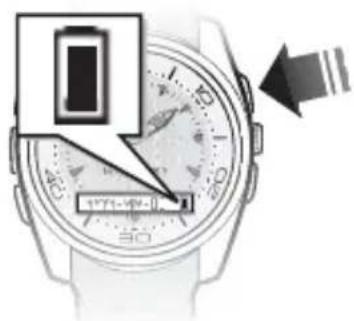
From standby, press the right top key. The phone date is also shown.
Date
To check the phone date
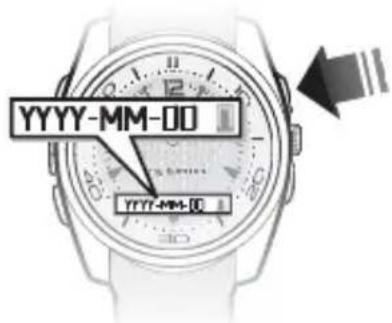
From standby, press the right top key once. The watch battery status is also shown.
The date format shown in the watch is set to YYYY-MM-DD (year, month and day).
Time
To check the phone time
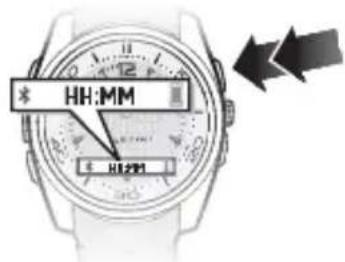
From standby, press the right top key twice. Watch battery status and Bluetooth function status are also shown.
The time format shown in the watch is set to 24-hour, HH:MM (hour and minute).
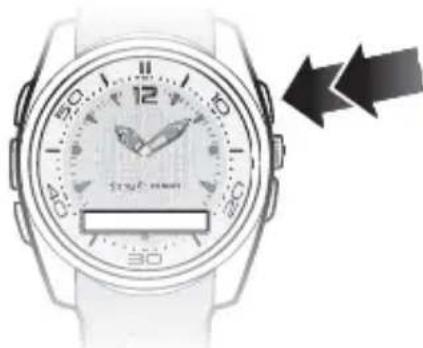
The Bluetooth function
The Bluetooth function makes wireless connection to your phone possible.
You have to turn the Bluetooth function off in sensitive areas like airplanes or hospitals.
10 English
This is the Internet version of the User guide. © Print only for private use.
To turn the Bluetooth function on or off
1 When the display is dimmed, press the bottom key once to select
2Press the right top key to change between on and off .

If battery level is low, the Bluetooth function is automatically turned off. Turn the Bluetooth function on again when the battery is fully charged.
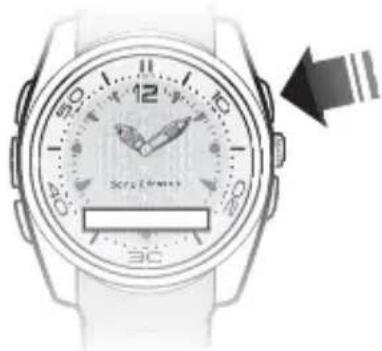
Out of range
When the phone is out of range the watch vibrates and the can appears.
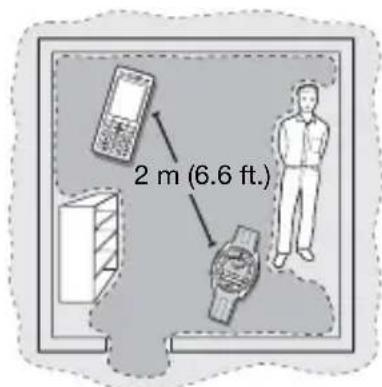

Optimal performance

Limited performance
The out-of-range distance varies and depends where you are. The connection may be improved if there are no solid objects between your watch and phone.
If you are out of range more than 24 hours, reconnect to the phone again by pressing the right top key on the watch.
To change out-of-range notification status
1Press the bottom key repeatedly to select
2Press the right top key to change between on and off .
Master reset
Set the watch to factory default settings and delete changes you have made.
To reset the watch
1 Enter pairing mode 7 Pairing mode.
2Press and hold the right top and bottom key until the display lights up. After a few seconds the display dims again and your watch is reset.
Pairing the watch after master reset To pair your watch with a phone after a master reset 6 Pairing.
Troubleshooting
Music player does not start
If the music player does not start when you press the Play/Stop key to turn the music on using the phone.
Battery capacity
If the battery does not work properly it needs to be replaced by a certified repair centre.
Software version
To check software version
- In pairing mode, press the right bottom key five times. To stop checking software version, press the right top key twice. Ignore pairing request in the phone.
Dashes on the display
If dashes (----) appear on the display when you press the right top key, pair your watch with the phone again, 6 Pairing.
Dial-up networking message
During pairing with some phones you may receive a message about dial-up networking. If this happens, select Accept to continue.
Text message notification
With some phones the text message notification function does not work.
Track info
Track info is not supported in all phones.
Čestina
Hodinky MBW-150 Bluetooth™ .... 14
Ikony 15
Zaciname 16
Použití hodinek 19
Declaration of conformity 135
FCC statement 136
Hodinky MBW-150 BluetoothTM
This is the Internet version of the User guide. © Print only for private use.
Ikony
Ikony stavu
Nabiječka (A)
Nabijec spona (B)
Hodinky MBW-150 (C)
Nabijeni
This is the Internet version of the User guide. © Print only for private use.
This is the Internet version of the User guide. © Print only for private use.
Ovladani hlasitosti
This is the Internet version of the User guide. © Print only for private use.
Declaration of conformity 135
FCC statement 136
MBW-150 Bluetooth™-ur
Tillykke med dit nye MBW-150
Sony Ericsson Bluetooth™-ur!
This is the Internet version of the User guide. © Print only for private use.
This is the Internet version of the User guide. © Print only for private use.
Brug af uret
Indstillinger
This is the Internet version of the User guide. © Print only for private use.
Lydstyrkeregulering
This is the Internet version of the User guide. © Print only for private use.
Uden for rækkevidde
Declaration of conformity 135
FCC statement 136
Bluetooth™-Armbanduhr MBW-150
This is the Internet version of the User guide. © Print only for private use.
This is the Internet version of the User guide. © Print only for private use.
Kopplungsmodus
This is the Internet version of the User guide. © Print only for private use.
So horen Sie Musik:
This is the Internet version of the User guide. © Print only for private use.
Declaration of conformity 135
FCC statement 136
Bluetooth™ poλói MBW-150
This is the Internet version of the User guide. © Print only for private use.
Declaration of conformity 135
FCC statement 136
This is the Internet version of the User guide. © Print only for private use.
Declaration of conformity 135
FCC statement 136
MBW-150-Bluetooth™-kello
This is the Internet version of the User guide. © Print only for private use.
This is the Internet version of the User guide. © Print only for private use.
Declaration of conformity 135
FCC statement 136
Montre Bluetooth™ MBW-150
Nosus you felicitons d'avoir achete la montre BluetoothTM Sony Ericsson MBW-150.
Declaration of conformity 135
FCC statement 136
MBW- 150 Bluetooth™ sat
Čestitamo vam na kupnji MBW- 150
Sony Ericsson Bluetooth™ sata.
This is the Internet version of the User guide. © Print only for private use.
6Priključite punjac na priključak za punjac tako da simboli na punjacu i priključku budu okrenuti na istu stranu.
7Punite oko 2 sata ili dok simbol baterijne pokaže da je punjenje gotovo.
Namješanje vremena
Declaration of conformity 135
FCC statement 136
MBW-150 Bluetooth™ karóra
Jobb felso gomb Korona Jobb also gomb Kijelz
This is the Internet version of the User guide. © Print only for private use.
Declaration of conformity 135
FCC statement 136
123 Italia
Orologic Bluetooth™ MBW-150
This is the Internet version of the User guide. © Print only for private use.
This is the Internet version of the User guide. © Print only for private use.
This is the Internet version of the User guide. © Print only for private use.
Declaration of conformity
We,
Sony Ericsson Mobile Communications AB of Nya Vattentornet
SE-221 88 Lund, Sweden
declare under our sole responsibility that our product
Sony Ericsson type DGA-0002003
and in combination with our accessories, to which this declaration relates is in conformity with the appropriate standards EN 300 328, EN 301 489-17 and EN 60950, following the provisions of, Radio Equipment and Telecommunication Terminal Equipment Directive 99/5/EC with requirements covering EMC Directive 89/336/EEC, and Low Voltage Directive 73/23/EEC.
Lund, June 2007.
C€0682
Vi opfylder kravene i R&TTE-direktivet (99/5/EC).
Jacob Sten, Head of Product Business Unit Accessories
We fulfill the requirements of the R&TTE Directive (99/5/EC).
This device complies with Part 15 of the FCC rules. Operation is subject to the following two conditions:

(1) This device may not cause harmful interference, and (2)
This device must accept any interference received, including interference that may cause undesired operation.
Any change or modification not expressly approved by Sony Ericsson may void the user's authority to operate the equipment.
This equipment has been tested and found to comply with the limits for a Class B digital device, pursuant to Part 15 of the FCC Rules. These limits are designed to provide reasonable protection against harmful interference in a residential installation. This equipment generates, uses and can radiate radio frequency energy and, if not installed and used in accordance with the instructions, may cause harmful interference to radio communications. However, there is no guarantee that interference will not occur in a particular installation.
If this equipment does cause harmful interference to radio or television reception, which can be determined by turning the equipment off and on, the user is encouraged to try to correct the interference by one or more of the following measures:
-- Reorient or relocate the receiving antenna.
-- Increase the separation between the equipment and receiver.
-- Connect the equipment into an outlet on a circuit different from that to which the receiver is connected.
-- Consult the dealer or an experienced radio/TV technician for help.
Industry Canada Statement
This device complies with RSS-210 of Industry Canada.
Operation is subject to the following two conditions:
(1) this device may not cause interference, and (2) this device must accept any interference, including interference that may cause undesired operation of the device.
This Class B digital apparatus complies with Canadian ICES-003.