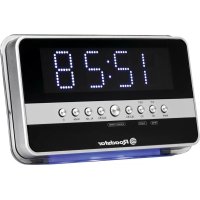
CLR2619 - Radio ROADSTAR - Free user manual and instructions
Find the device manual for free CLR2619 ROADSTAR in PDF.


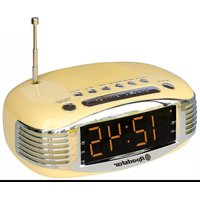
| Product Type | LED AM/FM clock radio with calendar and temperature display |
| Brand | Roadstar |
| Model | CLR2619 |
| Mains power | 230 V ~ 50 Hz |
| Backup battery | 1 flat lithium battery CR3032 (3 V) not included |
| Radio wave bands | AM 522 – 1611 kHz; FM 87.5 – 108 MHz |
| Output power | 350 mW |
| Speaker impedance | 8 ohms |
| Dimensions (approx.) | 20 × 15 × 10 cm |
| Weight (approx.) | 0.5 kg |
| Display | LED digital: time, date, temperature, alarm status |
| Main functions | AM/FM radio, clock, calendar, indoor temperature, dual alarm (buzzer or radio), snooze (9 min), sleep (10-90 min), night light, auxiliary audio input, infrared sensor |
| Time setting | Manual via Mode, <<, >> buttons; year up to 2099; 12/24 h format |
| Alarm setting | Two independent alarms (AL1 and AL2) with buzzer/radio selection and weekend option |
| Alarm duration | Maximum 30 minutes; automatic stop |
| Snooze function | Repeats every 9 minutes (fixed) |
| Sleep function | Programmable sleep timer from 10 to 90 minutes |
| Thermometer | Internal range: 0 °C to +50 °C |
| Infrared sensor | Activates sleep (hand in front for 2 s) or snooze (1 s) |
| Auxiliary audio input | 3.5 mm jack for external source (MP3 player, etc.) |
| FM antenna | Telescopic antenna |
| AM antenna | Internal ferrite antenna |
| Care and cleaning | Soft clean cloth with a mild non-abrasive detergent solution; do not use abrasives or solvents |
| Safety | Do not expose to moisture, rain, heat sources or flames; do not block ventilation; for indoor use only |
| Batteries and repairability | Backup battery replaceable by user; no user-serviceable parts inside – refer to qualified technician |
| General information | Instruction manual available in French; manufacturer's warranty; disposal according to WEEE directive |
Frequently Asked Questions - CLR2619 ROADSTAR
User questions about CLR2619 ROADSTAR
0 question about this device. Answer the ones you know or ask your own.
Ask a new question about this device
Download the instructions for your Radio in PDF format for free! Find your manual CLR2619 - ROADSTAR and take your electronic device back in hand. On this page are published all the documents necessary for the use of your device. CLR2619 by ROADSTAR.
USER MANUAL CLR2619 ROADSTAR
AM/FM LED ALARM CLOCK RADIO WITH 1.2" BLUE DISPLAY,CALENDAR AND TEMPERATURE.
CLR-2619
Instruction manual
Bedienungsanleitung
The exclamation point within the triangle is a warning sign alerting the user of important instructions accompanying the product.
The lightening flash with arrowhead symbol within the triangle is a warning sign alerting the user of "dangerous voltage" inside the unit.

To reduce the risk of electric shock, do not remove the cover. No user serviceable parts inside the unit. Refer all servicing to qualified personnel.
230v~
This unit operates on 230V 50Hz . If the unit is not used for a long period of time, remove the plug from the AC mains.

This unit must not be exposed to moisture or rain.

Ensure all connections are properly made before operating the unit.

This unit should be positioned so that it is properly ventilated. Avoid placing it, for example, close to curtains, on the carpet or in a built-in installation such as a bookcase.

Do not expose this unit to direct sunlight or heat radiating sources.

Make sure all batteries are inserted according to the proper polarity. Do not mix old batteries with new ones.

If the unit is not used for a long period of time (more than 1 month), remove all batteries from their compartment to avoid possible leaking.
2
EnglishEn
CLR-2619 AM/FM LED ALARM CLOCK RADIO WITH 1.2" BLUE LED DISPLAY,CALENDAR AND TEMPERATURE FUNCTION.
LOCATION OF CONTROLS
- MODE SET BUTTON
- ALARM SET BUTTON
- ALARM 1 BUZZER / RADIO SELECT BUTTON
- ALARM 2 BUZZER / RADIO SELECT BUTTON
- Circ / Firc BUTTON
- INFRARED SENSOR
7.<< SET BUTTON
8.>>SET BUTTON - POWER ON/OFF RADIO (ALARM OFF) BUTTON
10.SNOOZE/SLEEP BUTTON - LED DISPLAY
- DIMMER FUNCTION
- AUDIO IN JACK
- VOLUME CONTROL
15.WAVE BAND - TUNING CONTROL
- RESET BUTTON
- TEMPERATURE SENSOR (IN DOOR)
- AC POWER CORD
20.FMANTENNAWI - BLUE NIGHT ILLUMINATION
- BATTERY COMPARTMENT
- SPEAKER
- ON / OFF NIGHT ILLUMINATION
POWER SUPPLY
This unit operates from a main supply of 230V 50Hz . Connect the AC power cord to the AC household main outlet. Ensure that the voltage is as indicated on the rating plate on the rear of the unit.
Battery Back-up Power Failure Protection
This radio has a battery back up circuit that will keep the correct time and alarm settings in the event of a temporary power interruption.
Install 1 x 3-volt CR2032 Flat Lithium battery, not included, into the battery compartment located on the bottom of the unit, making certain that the positive and negative (+ and -) battery terminals are attached to the corresponding terminals on the plate in the battery compartment.
If power is temporarily interrupted the display will blink and the radio will not play. However, the battery back-up circuit will continue to maintain the clock and alarm settings. When power is restored the clock will display the correct time and alarm settings, and no adjustment is necessary.
GETTING STARTED
Press the Reset button (17) located on the back of the unit after plugging in the AC cord.
- The unit will display full segment for 2 seconds, then it will enter the normal mode.
- The Display will light up.
1. TIME AND CALENDAR SETTING
A. Setting Time and Calendar - Press Mode Set button (1) in normal mode and keep pressed over 2 seconds to enter Time Set mode. After entering the setting mode, press Mode Set button (1) to change the mode cycle as follows:
Normal > Year > Month > Day > 12/24H > RTC Hour > RTC Min > Normal
Action (during data adjustment):
- Press >> button (7) to adjust data forward
- Press << button (8) to adjust data backward
- Keep pressed << or >> button for 2 seconds to enable auto forward or backward
4
EnglishEn
a. Year Set Mode
Initial Value : 2009
Year Range: 2000 to 2099
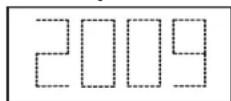
b. Month Set Mode
Display showing Year Set Mode
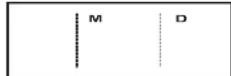
Display showing Month Set Mode
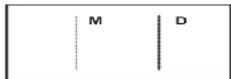
c.Day Set Mode
Display showing Day Set Mode
Remark: Weekday will recalculate when year, month or day is adjusted
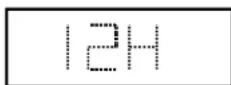
d. 12/24H Set Mode
Display showing 12/24H Set Mode (Select 12H)
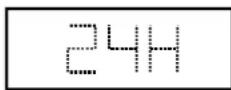
Display showing 12/24H Set Mode (Select 24H)
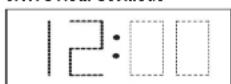
e.RTC Hour Set Mode
Display showing Hour Set Mode
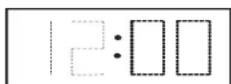
f.RTC Min Set Mode
Display showing Min Set Mode
Remark : Second will reset for every minute adjustment
B. Setting Alarm 1 and Alarm 2 - Press Alarm set button (2) during normal mode and keep pressed over 2 seconds to enter alarm set mode, after enter the setting mode, press Alarm set button (2) to change the mode cycle as follows :
Normal > AL1 Hour > AL1 Min > AL1 Weekend Alarm > AL2 Hour > AL2 Min > AL2 Weekend Alarm > Normal
Action (during data adjustment)
- Press >> button (8) to adjust data forward
- Press << button (7) to adjust data backward
- Keep pressed << or >> button for 2 seconds to enable auto forward

Display showing Setting Alarm 1 Hour
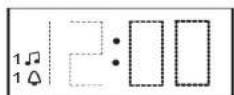
Display showing Setting Alarm 1 Min
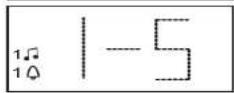
Display showing Setting Alarm 1 Weekend Alarm - Mon to Fri
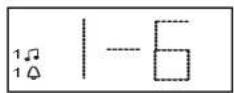
Display showing Setting Alarm 1 Weekend Alarm - Mon to Sat
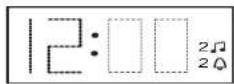
Display showing Setting Alarm 2 Hour
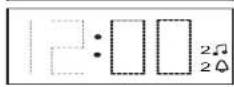
Display showing Setting Alarm 2 Min
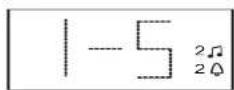
Display showing Setting Alarm 2 Weekend Alarm - Mon to Fri
5
6
EnglishEn
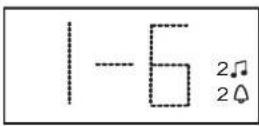
Display showing Setting Alarm 2 Weekend Alarm - Mon to Sat
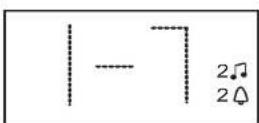
Display showing Setting Alarm 2 Weekend Alarm - Mon to Sun
2. SETTING ALARM OUTPUT AND ALARMON/OFF
A. Change the alarm Output
Press AL1 (3) / AL2 (4) button to Music position to select wake up by Radio, set to Buzzer position to select wake up by Buzzer, set to Alarm Off position to disable all alarm.
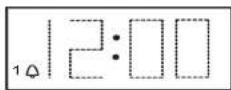
Display showing Alarm 1 wake up by Buzzer
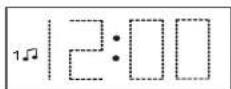
Display showing Alarm 1 wake up by Radio
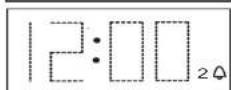
Display showing Alarm 2 wake up by Buzzer
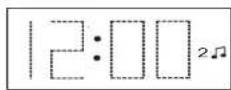
Display showing Alarm 2 wake up by Radio
B. Buzzer Pattern
1st 8 seconds output 1 beep, 2nd second output 2 beep, 3rd 8 second output 4 beep, after that continue output beep tone, the same pattern repeat at next minute again.
3. ALARM DURATION AND SNOOZE FUNCTION
Alarm Duration - Buzzer Alarm or Radio Alarm will continue output for 30 minutes if no key is pressed, then it will stop automatically and wait for same alarm time on the next day.
Action for Snooze :
- During alarming, press SNOOZE button (10) to enable snooze function, Buzzer Alarm or Radio Alarm will stop.
- Snooze Interval is 9 minutse (not included second offset)
- Snooze will continue unless Power On/Off (Alarm Off) button(9) is pressed to Alarm Off or Buzzer Alarm or Radio Alarm stop automatically after 30 minutes
4.CHANGEDIPLAYCONTENT
Press >> button (8) during normal function to switch to display Year, after 5 seconds timeout and return back to display date and month.
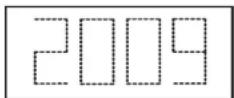
Display showing Year
5.CHANGEDIPLAYCONTENT
Press << button (7) two times during normal function to switch to display Month and day, after 5 seconds timeout and return back to display time.
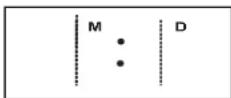
Display showing Month and Day
6.SLEEP FUNCTION
During Radio On mode, press Snooze/Sleep button (10) to turn on Sleep mode, the Sleep time will keep flashing by 5 seconds, within 5 second and press Sleep button to change the duration from 90 min - 10 min. Press Power button (9) to cancel sleep function.
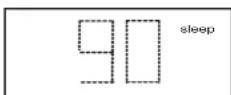
Display showing Setting Sleep Duration
8
EnglishEn
NIGHTILLUMINATION
Press the ON / OFF Light button (24) to switch the night illumination ON or OFF.
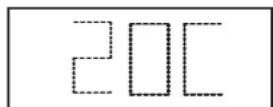
7.THERMOMETERFUNCTION
Press Temp Button (
Remark: Temperature Range for Indoor: 0 to +50°C or 32 to 122°F.
RADIO
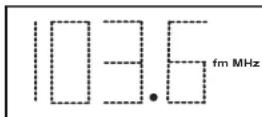
RADIOOPERATION
- Press the Power On/Off button (9) to turn the radio on.
- Select AM or FM band using the wave band switch (15).
- Select the Station using the tuning control (16).
- Turn the volume control (14) to adjust volume as required.
- Press the power On/Off button (9) to turn the radio off.
Note :
- The AM band uses an internal directional aerial. Rotate the radio for best reception.
- Ensure that the FM cord antenna (20) is completely unrolled and extended for best FM reception.
RESET
- The Reset button (17) is located on the back of unit. Use a ballpoint pen to press it whenever you change the batteries, or if the unit is not performing as expected. This will return all settings to default value, and you will lose any stored data (alarm and clock settings).
CAUTION
- No naked flame sources, such as lighted candles, should be placed on the apparatus.
- The unit should not be exposed to direct sunlight, very high or low temperature, moisture, vibrations or placed in a dusty environment.


- Do not use abrasive, benzene, thinner or other solvents to clean the surfaces of the unit. To clean, wipe it will mild non-abrasive detergent solution and clean soft cloth.
- Never attempt to insert wires, pins or other such objects into the vents or opening of the unit.
- Do not place the unit near the light on table lamp. The light will affect the reception of the infrared sensor function.
WARNING
NOTE: Do not connect FM antenna to external antenna.
Dripping warning : The product shall not be exposed to dripping or splashing and that no objects filled with liquids, such as vases, shall be placed on the product.
Ventilation warning : The normal ventilation of the product shall not be impeded for intended use.
Disconnect device warning : Main plug is used as the connection, so is should always 3. The alarm on mode, use the infrared sensor to turn Snooze function onremain ready operate.
INFRARED SENSOR FUNCTION
- When the radio is in Off mode, the infrared display time or temperature.

-
When the radio is in On mode, use the infrared sensor to turn Sleep function on
-
Hand on top of sensor (6) within 2 seconds to turn the sleep on, the word "Slp" showing on the LED display. Sleep time from 10-90 minutes. (Refer to "Sleep function" for sleep time adjustment). Press (9) to cancel Sleep function.

EnglishEn
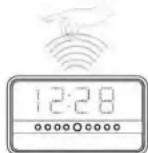
- Hand on top of sensor (6) within 1 second for Snooze off for 9 mintues.
AUDIO IN FUNCTION
Sound will come out automatically if an external audio device is plugged in the AUDIO IN jack.
SPECIFICATIONS
Frequency Range: AM 540 - 1611 kHz
FM87.5-108MHz
Output Power : 350 mW
Speaker Impedance: 8 ohm
Battery Backup : 3V (1 x 3V CR3032 Flat Lithium battery) (for clock)
Power Source: AC230V ~ 50 Hz, 5 Watts
Specifications subject to change without notice. Correct Disposal of This Product (Waste Electrical & Electronic Equipment)

This marking shown on the product or its literature, indicates that it should not be disposed with other household wastes at the end of its working life. To prevent possible harm to the environment or human health from uncontrolled waste disposal, please separate this from other types of wastes and recycle it responsibly to promote the sustainable reuse of material resources.
Household users should contact either the retailer where they purchased this product, or their local government office, for details of where and how they can take this item for environmentally safe recycling. Business users should contact their supplier and check the terms and conditions of the purchase contract. This product should not be mixed with other commercial wastes for disposal.
SICHERHEITSHINWEISE

Alimentation: AC230V ~ 50 Hz, 5 Watts
FUNCAOILUMINACAO NOCTURNA
Speaker Impedance: 8 ohm
Battery Backup : 3V ( 1 x 3V CR3032 Bateria plana de litio (para o relógio))
Power Source: AC230V ~ 50 Hz, 5 Watts
As specifications o desenhopodemseralteradossempre-aviso.
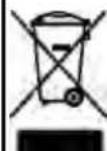
Correct Disposal of This Product (Waste Electrical & Electronic Equipr)
This marking shown on the product or its literature, indicates that it should not be disposed with other household wastes at the end of its working life. To prevent possible harm to the environment or human health from uncontrolled waste disposal, please separate this from other types of wastes and recycle it responsibly to promote the sustainable reuse of material resources.
Household users should contact either the retailer where they purchased this product, or their local government office, for details of where and how they can take this item for environmentally safe recycling. Business users should contact their supplier and check the terms and conditions of the purchase contract. This product should not be mixed with other commercial wastes for disposal.

- 230v~
- 2
- EnglishEn
- LOCATION OF CONTROLS
- POWER SUPPLY
- Battery Back-up Power Failure Protection
- GETTING STARTED
- TIME AND CALENDAR SETTING
- SETTING ALARM OUTPUT AND ALARMON/OFF
- Change the alarm Output
- Buzzer Pattern
- ALARM DURATION AND SNOOZE FUNCTION
- Action for Snooze :
- 4.CHANGEDIPLAYCONTENT
- 5.CHANGEDIPLAYCONTENT
- 6.SLEEP FUNCTION
- NIGHTILLUMINATION
- 7.THERMOMETERFUNCTION
- RADIO
- RADIOOPERATION
- Note :
- RESET
- CAUTION
- WARNING
- INFRARED SENSOR FUNCTION
- AUDIO IN FUNCTION
- SPECIFICATIONS
- SICHERHEITSHINWEISE
- FUNCAOILUMINACAO NOCTURNA
- Correct Disposal of This Product (Waste Electrical & Electronic Equipr)
Brand : ROADSTAR
Model : CLR2619
Category : Radio